
Creamy, Dreamy, NoBake: Easy Recipes for Beginners

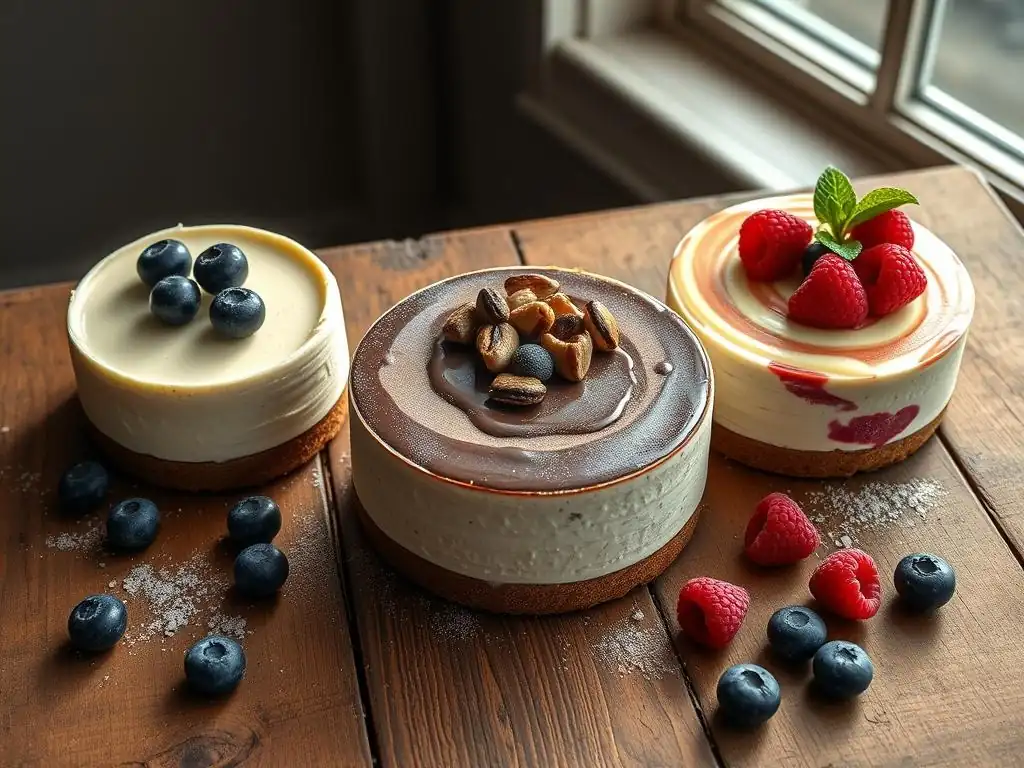
Welcome to BakeWithEase, your kitchen companion for all things baking! Ever dreamed of a decadent dessert without the fuss of an oven? Get ready to dive into the world of effortless indulgence with our guide to No Bake Cheesecake Recipes. Discover how to create creamy, dreamy cheesecakes with surprisingly simple ingredients and techniques. Intrigued? Let's unlock the secrets to these no-bake wonders together!
- Decadent No-Bake Desserts: Effortless Recipes for Beginners
- Introduction to No-Bake Desserts: Simplicity and Deliciousness
- Mastering No-Bake Chocolate Dessert Recipes
- Recipe 1: No-Bake Chocolate Peanut Butter Bars - A Step-by-Step Guide
- Recipe 2: No-Bake Chocolate Avocado Mousse
- Recipe 3: No-Bake Chocolate Raspberry Truffles
- No-Bake Dessert Variations: Beyond Chocolate
- Tips and Tricks for No-Bake Success
- Conclusion: Enjoy the Simplicity of No-Bake Baking
-
Frequently Asked Questions
- What makes a "no-bake cheesecake" different from a traditional cheesecake?
- What are the essential ingredients for a basic no-bake cheesecake recipe?
- Can I substitute ingredients in a no-bake cheesecake recipe?
- How long does a no-bake cheesecake need to chill in the refrigerator?
- What are some common toppings or variations for no-bake cheesecake?
- Final Reflection: The Sweet Simplicity of No-Bake Baking
- Unleash Your Inner Baker: Simple Sweets Await!
Decadent No-Bake Desserts: Effortless Recipes for Beginners
Introduction to No-Bake Desserts: Simplicity and Deliciousness
Why Choose No-Bake Desserts? Convenience and Flavor
No-bake desserts offer a fantastic entry point into the world of sweet treats, especially for those new to baking. The primary appeal lies in their incredible convenience. You don't need to worry about oven temperatures, baking times, or achieving that perfect golden crust. This eliminates many common pitfalls faced by beginners, such as uneven baking or burnt edges. Plus, they are perfect for hot weather when turning on the oven is the last thing you want to do.
Beyond convenience, no-bake desserts deliver exceptional flavor. Relying on ingredients like melted chocolate, rich cream cheese, crushed cookies, and fresh fruit, they often boast intense, pure tastes. Think of the lusciousness of a chilled chocolate mousse or the bright tang of a fruit tart with a simple crumb base. These desserts prove that you don't need complex techniques to achieve delicious results, making them incredibly rewarding for novice bakers. They often require just a few key ingredients and simple assembly steps.
Effortless Elegance: Discover Delicious No-Bake Options
One of the wonderful aspects of no-bake desserts is their versatility and surprising elegance. From layered parfaits and creamy puddings to impressive tarts and individual treats like truffles, there's a no-bake option for almost any occasion. Many of these recipes can be assembled relatively quickly, requiring only chilling time to set. This means you can prepare them ahead of time, freeing you up to focus on other things before serving.
Exploring delicious no-bake options opens up a world of textures and flavors. You can create smooth, velvety mousses, rich, dense fudge, light and airy parfaits, or classic treats like easy no bake cheesecake recipes. The assembly process often involves simple steps like mixing, layering, and chilling, making them very approachable. The visual appeal is also high; layers of different colors and textures look beautiful in glasses or on platters, giving your creations an effortlessly elegant look.
Mastering No-Bake Chocolate Dessert Recipes
Understanding Chocolate Ganache and Mousse
Chocolate ganache is a fundamental building block in many no-bake chocolate dessert recipes. It's a simple yet incredibly versatile mixture typically made from just two ingredients: chocolate and hot cream. The ratio of chocolate to cream determines its consistency – a higher chocolate ratio results in a thicker ganache suitable for truffles or firm fillings, while more cream creates a pourable sauce or a softer base for mousse.
Understanding this ratio is key to mastering many chocolate creations. When the hot cream is poured over finely chopped chocolate and whisked until smooth, it creates a glossy, rich emulsion that forms the backbone of countless desserts.
Chocolate mousse, on the other hand, is known for its light, airy texture. While some mousse recipes use eggs and require cooking, many no-bake versions rely on whipped cream or whipped egg whites folded into a chocolate base, often made from ganache or melted chocolate mixed with other ingredients. The key is the gentle folding technique, which incorporates air and gives the mousse its characteristic lightness. A simple no-bake chocolate mousse might combine cooled ganache with freshly whipped cream, resulting in a dessert that is both rich and delightfully airy, perfect for individual servings or as a pie filling.
Essential Ingredients for No-Bake Chocolate Creations
Creating delicious no-bake chocolate desserts doesn't require a pantry full of exotic items. The essential ingredients are often staples you might already have. High-quality chocolate is paramount – whether you prefer dark, milk, or white, choose a chocolate you enjoy eating, as its flavor will be prominent. Heavy cream is crucial for ganache and whipping into a light base for mousses and fillings. Sweeteners like granulated sugar, powdered sugar, or condensed milk provide sweetness and structure.
Other common ingredients include butter, often used in crumb crusts for richness and binding, and various extracts like vanilla or peppermint for added flavor. Cocoa powder can intensify the chocolate flavor or be used as a dusting. For structure and thickening in some recipes, you might use gelatin (though many no-bake recipes avoid it) or ingredients like cream cheese or mascarpone for richness and stability, commonly found in things like no bake cheesecake recipes. Crushed cookies or graham crackers are essential for easy press-in crusts.
Recipe 1: No-Bake Chocolate Peanut Butter Bars - A Step-by-Step Guide
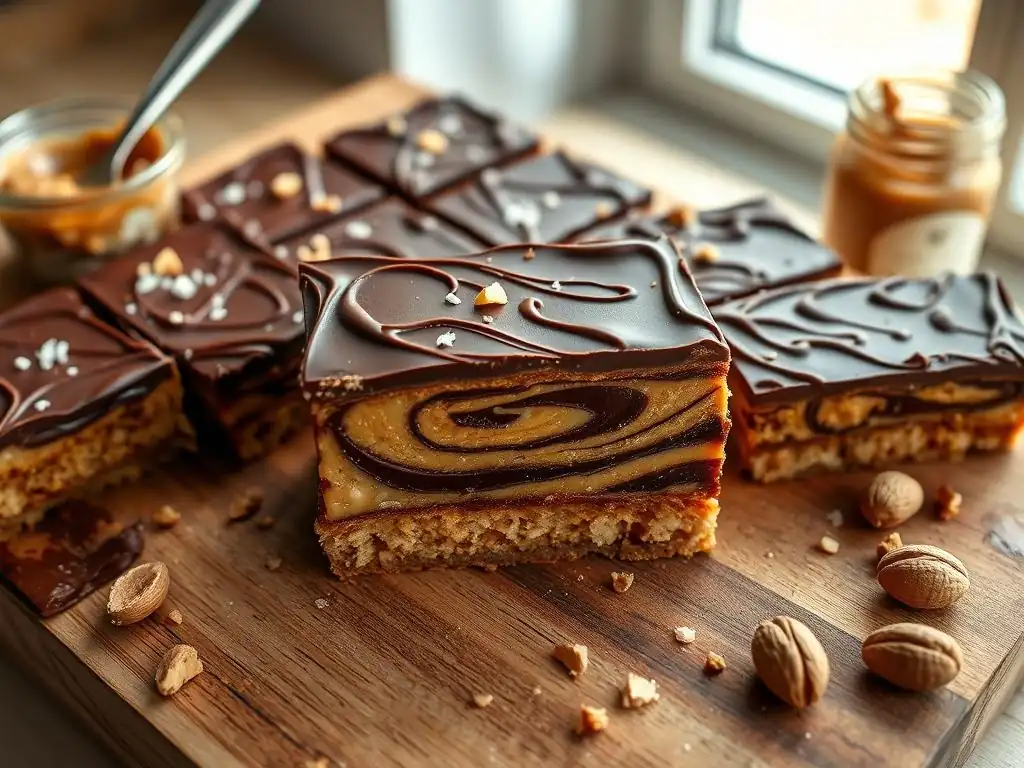
Ingredients for Chocolate Peanut Butter Bars
To make these classic, crowd-pleasing bars, you'll need a few simple ingredients. The base typically consists of crushed graham crackers (about 1 ½ cups), melted unsalted butter (around ½ cup or 1 stick), and a bit of powdered sugar (about ¼ cup) for sweetness and binding. The creamy peanut butter layer requires smooth peanut butter (about 1 cup), more powdered sugar (around 2 cups), and softened butter (about ½ cup or 1 stick).
The top layer is a simple chocolate ganache or melted chocolate topping. This often uses semi-sweet chocolate chips (about 1 cup) and a tablespoon or two of butter or a splash of heavy cream to create a smooth, spreadable consistency. Some variations might add a pinch of salt to balance the sweetness or a splash of vanilla extract to the peanut butter layer. Ensure your butter is softened for the peanut butter layer and fully melted for the crust.
Instructions: Creating the Layers
Start by making the crust. In a medium bowl, combine the crushed graham cracker crumbs, melted butter, and ¼ cup powdered sugar. Mix until the crumbs are evenly moistened. Press this mixture firmly and evenly into the bottom of an 8x8 inch or 9x13 inch pan lined with parchment paper for easy removal. Use the bottom of a glass or a flat measuring cup to get a compact layer. Place this crust in the refrigerator while you prepare the next layer.
Next, make the peanut butter layer. In a separate bowl, beat together the softened butter and peanut butter until smooth and creamy. Gradually add the remaining powdered sugar, mixing until fully incorporated and the mixture is thick but spreadable. Spread this peanut butter mixture evenly over the chilled graham cracker crust. Return the pan to the refrigerator.
Finally, prepare the chocolate topping. Melt the chocolate chips and butter (or cream) gently in a microwave-safe bowl in 30-second intervals, stirring until smooth, or use a double boiler. Pour the melted chocolate evenly over the peanut butter layer and spread quickly. Refrigerate for at least 2-3 hours, or until the chocolate is set, before lifting from the pan and cutting into bars.
Tips for Perfect Chocolate Peanut Butter Bars
Achieving perfect no-bake chocolate peanut butter bars is quite simple with a few helpful tips. Ensure your graham cracker crumbs are very fine; using a food processor works best, but crushing them in a bag with a rolling pin is also effective. Press the crust down very firmly into the pan – this prevents it from crumbling when you cut the bars later. Chilling the crust for at least 15-20 minutes before adding the peanut butter layer helps prevent the layers from mixing.
When making the peanut butter layer, make sure your butter is properly softened, not melted. This allows it to combine with the powdered sugar and peanut butter into a creamy, spreadable consistency. If the mixture seems too stiff, you can add a tiny splash of milk, but be careful not to make it too loose. For the chocolate topping, melt the chocolate slowly to avoid burning it.
If it seems too thick to pour, stir in another teaspoon of butter or cream. Allow the finished bars to chill completely – at least 2-3 hours, but ideally 4 hours or more – before cutting. Using a sharp knife wiped clean between cuts will give you neat edges.
Recipe 2: No-Bake Chocolate Avocado Mousse
Chocolate Avocado Mousse: A Healthy Indulgence
No-bake chocolate avocado mousse might sound unusual, but it's a fantastic way to create a rich, creamy, and surprisingly healthy dessert. Ripe avocados provide a smooth, velvety texture and healthy fats, completely replacing the need for heavy cream or eggs found in traditional mousse recipes. When combined with cocoa powder and sweetener, the avocado flavor is completely masked, leaving behind only a decadent chocolate taste and luxurious mouthfeel. It's an excellent option for those seeking dairy-free or vegan alternatives.
This dessert is not only delicious but also relatively quick to make and packed with nutrients from the avocado. A typical serving (around ½ cup) can contain healthy monounsaturated fats and fiber, offering a more wholesome indulgence compared to desserts made with saturated fats and refined sugars. It's a testament to how versatile ingredients can be when creating simple, no-bake treats.
Ingredients List for Chocolate Avocado Mousse
Gathering the ingredients for this mousse is straightforward. You'll need 2-3 ripe avocados, ensuring they are soft and creamy for the best texture. Unsweetened cocoa powder (about ½ cup) provides the deep chocolate flavor. A liquid sweetener is usually preferred, such as maple syrup, agave nectar, or even date syrup (around ½ cup, adjustable to taste). A splash of liquid, like plant-based milk (almond, soy, or oat) or water (about ¼ cup), helps with blending.
To enhance the flavor, you'll need vanilla extract (about 1 teaspoon) and a pinch of salt, which helps to bring out the chocolate notes. Some recipes might include a tablespoon of melted coconut oil for extra richness and firmness when chilled, or a bit of instant coffee granules to deepen the chocolate flavor. Make sure your avocados are genuinely ripe – they should yield easily to gentle pressure.
Blending Your Chocolate Avocado Masterpiece
Making chocolate avocado mousse is incredibly simple, requiring just a blender or food processor. Start by halving the avocados, removing the pits, and scooping the flesh into the blender or food processor. Add the unsweetened cocoa powder, liquid sweetener (start with less and add more to taste), vanilla extract, and salt. Pour in the liquid (milk or water).
Blend on high speed, scraping down the sides as needed, until the mixture is completely smooth and no avocado lumps remain. This might take a few minutes. Taste and adjust sweetness if necessary. If the mixture is too thick, add another tablespoon of liquid and blend again. Once perfectly smooth and creamy, spoon the mousse into individual serving dishes or a larger bowl. Chill for at least 30-60 minutes to allow it to set slightly and for the flavors to meld. Serve cold, perhaps garnished with berries or a sprinkle of cocoa powder.
Recipe 3: No-Bake Chocolate Raspberry Truffles
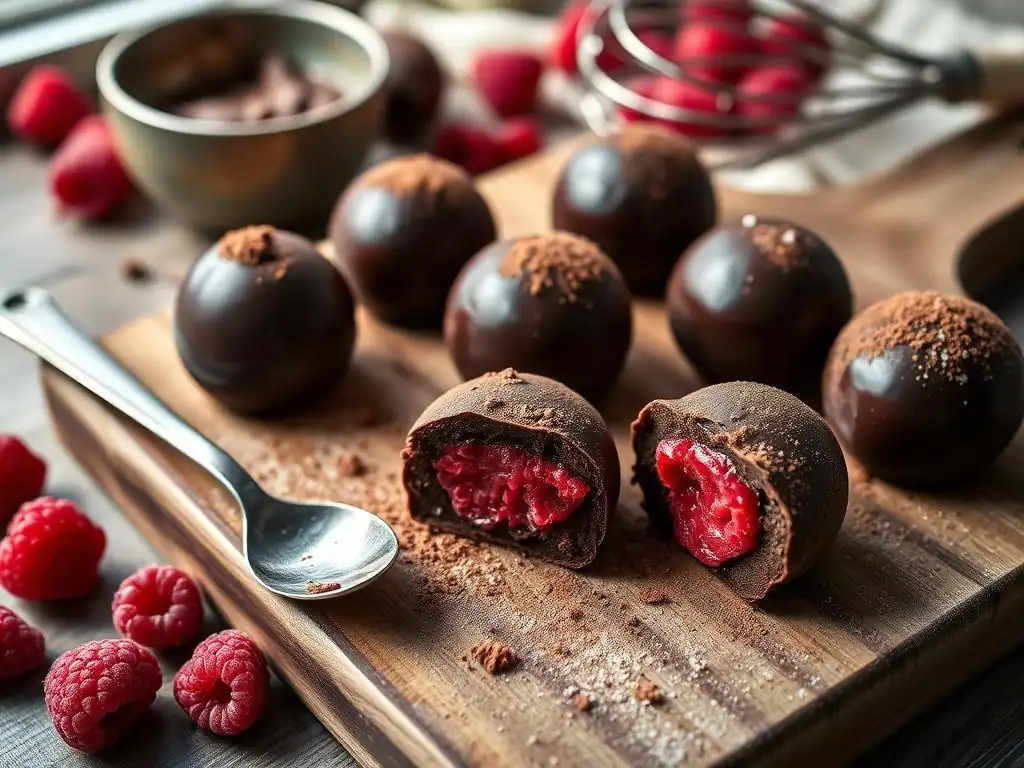
Individual No-Bake Chocolate Truffles: A Quick Treat
No-bake chocolate raspberry truffles are delightful little bites that are surprisingly easy to make and perfect for satisfying a chocolate craving. They offer the rich intensity of chocolate in a small, portion-controlled form. Unlike traditional truffles that might involve tempering chocolate or cooking ganache to a specific temperature, these no-bake versions often use simpler methods, relying on ingredients that firm up nicely when chilled. The addition of raspberry introduces a bright, slightly tart contrast to the rich chocolate, creating a balanced and flavorful treat.
These individual truffles are ideal for making ahead of time and are great for sharing or gifting. They require minimal equipment – usually just a bowl, a spoon, and your hands for rolling. The process is forgiving, making them perfect for beginners looking to try their hand at making confections. A batch of 20-30 truffles can often be prepared in under 30 minutes of active time, plus chilling.
Raspberry Preparation and Key Ingredients
The key ingredients for no-bake chocolate raspberry truffles typically include finely crushed cookies or cake crumbs (about 1 ½ cups), which provide the base and texture. These could be chocolate cookies, graham crackers, or even leftover cake. Unsweetened cocoa powder (about ¼ cup) adds extra chocolate depth. A binder is needed, often condensed milk (about ½ cup) or a mixture of melted chocolate and a liquid like milk or cream.
For the raspberry element, you can use seedless raspberry jam or preserves (about ¼ cup) for ease and concentrated flavor, or finely chopped freeze-dried raspberries (about 2-3 tablespoons) for intense flavor and a slight tang without added moisture. Some recipes might call for a tiny amount of raspberry extract. You'll also need coating material, such as more cocoa powder, powdered sugar, shredded coconut, or finely chopped nuts, for rolling the finished truffles.
Rolling Your No-Bake Raspberry Truffles
Once your truffle mixture is prepared and chilled until firm enough to handle (usually 30-60 minutes), it's time to roll them. Have your chosen coating material ready on a plate or shallow dish. Take small portions of the truffle mixture, about a teaspoon or a tablespoon depending on your desired size.
Roll the mixture between the palms of your hands to form smooth balls. If the mixture is sticky, you can lightly moisten your hands or dust them with cocoa powder. Immediately drop each rolled truffle into the coating material and gently roll it around until fully coated. Place the finished truffles on a plate or baking sheet lined with parchment paper. Once all truffles are rolled and coated, return them to the refrigerator for at least another 30 minutes to firm up completely before serving. Store them in an airtight container in the refrigerator.
No-Bake Dessert Variations: Beyond Chocolate
Exploring Other Easy No-Bake Dessert Ideas
While chocolate is a popular choice, the world of easy no-bake dessert ideas extends far beyond it. This category includes a vast array of creamy, fruity, and refreshing options that require no oven time. Think about simple puddings and parfaits made with layers of yogurt, granola, and fruit, or classic icebox cakes assembled from layers of cookies and whipped cream that soften into a cake-like texture when chilled. These desserts are not only simple but also highly adaptable to different flavor preferences and seasonal ingredients.
Other fantastic no-bake options include fruit tarts with press-in cookie crusts filled with pastry cream or yogurt and topped with fresh berries, or variations of easy no bake cheesecake recipes, which are incredibly popular for their creamy texture and tangy flavor without the fuss of a water bath. Mousse can be made in flavors like vanilla, lemon, or coffee. These variations prove that you can create a wide range of delicious desserts using just a few steps and the power of refrigeration.
No-Bake Fruit-Based Desserts for Beginners
Fruit-based no-bake desserts are often vibrant, refreshing, and perfect for beginners. They capitalize on the natural sweetness and flavor of fresh or preserved fruits.
A simple fruit parfait layered with yogurt or whipped cream and granola is perhaps one of the easiest desserts imaginable. Another popular option is a fruit tart with a simple crust made from crushed cookies or nuts mixed with melted butter; this crust is pressed into a tart pan and chilled, then filled with a no-bake filling like a simple custard, whipped cream cheese, or even just piled high with fresh berries and glazed with melted jam.
Jellies and panna cottas, while requiring gentle heating of liquids, set without baking and can be infused with fruit flavors or layered with fruit pieces. Consider a strawberry mousse made with pureed strawberries, whipped cream, and a little gelatin (if using). Even simple compotes served over vanilla pudding or ice cream count as easy, fruit-forward no-bake treats. These recipes highlight the fresh taste of fruit and are generally lighter than their baked counterparts.
No-Bake Coffee Infused Treats
For coffee lovers, no-bake desserts offer numerous opportunities to incorporate rich, aromatic coffee flavors. Tiramisu is a classic no-bake dessert that heavily relies on coffee-soaked ladyfingers layered with a creamy mascarpone mixture. While traditional tiramisu involves raw eggs, many beginner-friendly no-bake versions use whipped cream and cream cheese or a custard base thickened without cooking. The key is the strong coffee (often espresso) used to dip the cookies.
Other coffee-infused no-bake treats include coffee-flavored mousses, puddings, or parfaits. You can add instant espresso powder or strong brewed coffee cooled to room temperature to whipped cream, cream cheese fillings (like those in no bake cheesecake recipes), or even chocolate ganache to create mocha-flavored delights. A simple coffee mousse can be made by folding cooled, strong coffee mixed with a little sugar into whipped cream. These desserts provide a sophisticated flavor profile with minimal effort.
Tips and Tricks for No-Bake Success
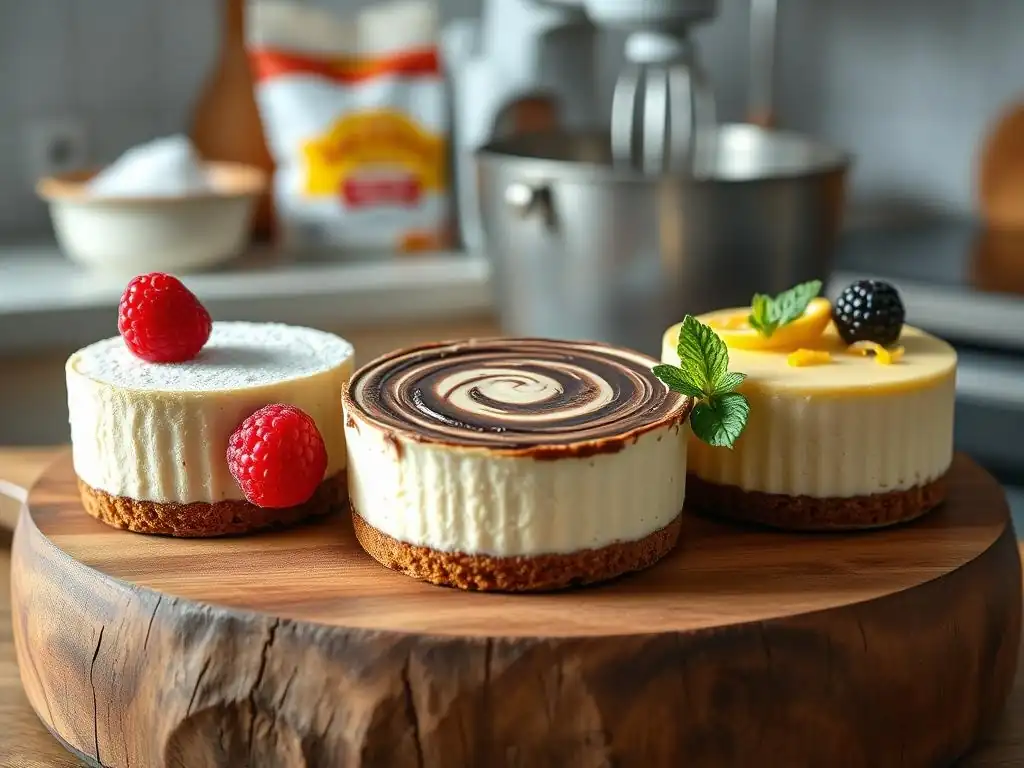
Avoiding Common No-Bake Mistakes
Even with no-bake recipes, a few common mistakes can hinder your success. One frequent issue is not allowing enough chilling time. No-bake desserts rely on refrigeration to set properly, so rushing this step can result in a runny or unstable dessert. Most recipes require at least 2-4 hours, and some, like many no bake cheesecake recipes, benefit from chilling overnight to achieve the desired firmness and texture.
Another mistake is not properly compacting crumb crusts. If the crust isn't pressed firmly into the pan, it will crumble when you try to cut or serve the dessert. Using the bottom of a glass or a flat object helps create a solid base. For creamy fillings, ensure ingredients like cream cheese or butter are properly softened before mixing to avoid lumps. When folding in whipped cream or egg whites for a mousse, do so gently to maintain the airy texture. Finally, always use high-quality ingredients, as their flavors are often more pronounced in no-bake preparations.
Storing Your No-Bake Desserts Properly
Proper storage is crucial for maintaining the texture, flavor, and safety of your no-bake creations. Most no-bake desserts, especially those containing dairy like cream cheese or whipped cream (common in no bake cheesecake recipes), need to be stored in the refrigerator. They should be kept in an airtight container to prevent them from drying out, absorbing odors from other foods, and to protect them from bacteria.
Depending on the ingredients, no-bake desserts typically last 3-5 days in the refrigerator. Desserts with fresh fruit might have a slightly shorter shelf life. Some no-bake desserts, like fudge or truffles, can often be stored at cool room temperature if they don't contain dairy or other perishable ingredients, but refrigeration is generally safer and extends their freshness. Layered desserts or those with whipped toppings are best kept chilled until just before serving. If freezing is an option for a specific recipe (like some bars or firm cheesecakes), ensure they are wrapped tightly to prevent freezer burn.
Customizing Your No-Bake Recipes: Adding Flavors and Textures
One of the joys of making no-bake desserts is how easy they are to customize. Once you have a basic recipe down, you can easily add your personal touch. For example, to a simple chocolate mousse, you could add a pinch of chili powder for a Mexican chocolate twist, a swirl of caramel sauce, or a shot of espresso for a mocha flavor. Cream cheese fillings, like those used in easy no bake cheesecake recipes, are perfect canvases for adding citrus zest, different extracts (almond, coconut), or even melted white chocolate.
Adding textures is another great way to customize. Stir in chopped nuts, mini chocolate chips, or shredded coconut into a filling or mousse. Top parfaits or puddings with crunchy granola, crushed cookies, or toasted nuts. A simple crumb crust can be made with different types of cookies – Oreos, shortbread, or even gingersnaps for a spicy kick. Don't be afraid to experiment with flavor combinations and textures to create your signature no-bake treats!
Conclusion: Enjoy the Simplicity of No-Bake Baking
Delicious Desserts Made Easy
As we've explored, creating delicious desserts doesn't have to involve hot ovens or complicated techniques. No-bake recipes offer a straightforward path to satisfying your sweet tooth and impressing friends and family. From rich chocolate bars and creamy mousses to refreshing fruit parfaits and classic no bake cheesecake recipes, the options are vast and accessible to everyone, regardless of their baking experience. The ease of assembly, combined with minimal cleanup, makes these desserts a truly enjoyable project.
Embracing no-bake means embracing simplicity without sacrificing flavor or elegance. These recipes rely on the quality of their ingredients and the magic of chilling to transform simple mixtures into delightful treats. Whether you're short on time, looking for a fun project with kids, or simply want a foolproof way to make dessert, no-bake is the answer. So go ahead, pick a recipe, gather your ingredients, and experience the effortless joy of creating something truly delicious without ever turning on the oven.
Further Resources for Beginner Bakers
Embarking on your baking journey, whether no-bake or traditional, is an exciting step! To continue building your skills and exploring new recipes, there are many excellent resources available. Look for reputable baking websites and blogs specifically tailored to beginners; BakeWithEase.com is a great place to start for simple, clear instructions and helpful tips. Many cookbooks are also dedicated entirely to no-bake desserts or beginner-friendly baking.
Consider joining online baking communities or forums where you can ask questions, share your successes, and learn from others. Watching video tutorials can also be incredibly helpful for visualizing techniques like crushing crusts, whipping cream, or assembling layers. Don't be discouraged if a recipe doesn't turn out perfectly the first time; baking is a skill that improves with practice. Keep experimenting with different easy no bake dessert ideas, try variations like simple no bake cheesecake recipes, and most importantly, have fun in the kitchen!
Frequently Asked Questions
What makes a "no-bake cheesecake" different from a traditional cheesecake?
A no-bake cheesecake doesn't require oven baking. Instead, it relies on refrigeration to set the filling, often using ingredients like gelatin or condensed milk for stability.
What are the essential ingredients for a basic no-bake cheesecake recipe?
Typically, a no-bake cheesecake needs a crust (graham crackers are popular), a creamy filling (cream cheese is a must), and a sweetener (sugar or condensed milk).
Can I substitute ingredients in a no-bake cheesecake recipe?
Yes, some substitutions are possible. You can often swap out graham crackers for other cookies in the crust. However, altering the cream cheese to sweetener ratio can affect the final texture and sweetness.
How long does a no-bake cheesecake need to chill in the refrigerator?
Generally, a no-bake cheesecake needs to chill for at least 4-6 hours, but preferably overnight, to ensure it sets completely.
What are some common toppings or variations for no-bake cheesecake?
Popular toppings include fresh fruit, chocolate ganache, caramel sauce, or whipped cream. Variations can involve adding flavorings like vanilla extract, lemon zest, or chocolate chips to the filling.
Final Reflection: The Sweet Simplicity of No-Bake Baking
The accessibility of no-bake recipes, particularly cheesecakes, has democratized dessert creation, empowering even the most novice bakers to experience the joy of culinary accomplishment. It's no longer a skill reserved for the experienced; anyone can whip up a delicious, creamy treat with minimal effort and readily available ingredients. This simple act of baking, or rather, assembling, opens up a world of culinary creativity for everyone.
The enduring appeal of no-bake cheesecakes lies not just in their ease, but in their adaptability. The basic recipe serves as a blank canvas, inviting experimentation with different flavor combinations and toppings. The best things in life are simple,
a sentiment perfectly encapsulates the charm of these effortless desserts. From classic variations to inventive twists, the possibilities are endless, fostering a sense of personal expression and culinary exploration that transcends the mere act of following a recipe. This resonates deeply with me, as I've witnessed firsthand the joy on people's faces when they successfully create something delicious without the intimidation of an oven.
So, what will you create? Don't let the fear of baking hold you back from exploring the delightful world of no-bake desserts. Choose a recipe, gather your ingredients, and embark on your own culinary adventure. The creamy, dreamy result will be a testament to your newfound confidence and a sweet reward for your efforts. Embrace the simplicity, savor the taste, and share the joy of creation with those you love. The possibilities are as limitless as your imagination.
Unleash Your Inner Baker: Simple Sweets Await!
Thanks for joining us on this delicious journey into the world of no-bake treats! We hope you've discovered some new favorite recipes and gained the confidence to create amazing desserts without turning on the oven. Ready to take your baking skills to the next level?
- Try out one of the recipes today! Pick your favorite and gather the ingredients. Let us know how it turns out in the comments below!
- Share your baking creations on social media using #BakeWithEase – let's inspire each other!
- Challenge a friend to bake along with you. Double the fun (and the deliciousness!)
What incredible no-bake dessert will you create next?