
Your First Baking Tool: Which to Choose Stone or Dutch Oven?

Welcome to BakeWithEase, your trusted guide to the delicious world of baking!
Ever wondered which is the ultimate baking tool: a baking stone or a Dutch oven? Choosing the right equipment can be the key to achieving that perfectly crisp crust or evenly baked loaf. Dive in as we break down the pros and cons of each, helping you decide which should be your first investment. Ready to unlock baking success? Let's explore!
- Your First Baking Tool: Baking Steel vs. Dutch Oven
- BakeWithEase: Understanding Baking Tools for Beginners
- Baking Steel vs. Dutch Oven: A Detailed Comparison for Home Bakers
- Baking Steel or Dutch Oven: Choosing Based on Your Baking Needs
- Mastering Your Baking Steel or Dutch Oven: Tips and Tricks
- Conclusion: Selecting the Right Baking Tool for Your Baking Journey
-
Frequently Asked Questions
- What is the main difference between a stone oven and a Dutch oven?
- Which baking tool is more suitable for beginners?
- Can I use a stone oven for baking pastries or cakes?
- What are the advantages of using a Dutch oven for baking bread?
- Are the ingredients different when baking with a stone oven versus a Dutch oven?
- Final Reflection: The Humble Oven's Transformative Power
- Unleash Your Inner Baker: Start Your Baking Journey Today!
Your First Baking Tool: Baking Steel vs. Dutch Oven
BakeWithEase: Understanding Baking Tools for Beginners
Introduction to Baking Essentials: Baking Steel vs. Dutch Oven
Embarking on your baking journey is exciting, and one of the first decisions you might face is choosing the right equipment. Two popular tools often recommended for achieving professional-level results at home, especially for bread and pizza, are the baking steel and the Dutch oven. While a traditional baking stone has long been a staple, the baking steel has gained significant popularity due to its superior heat properties. Understanding the fundamental differences between a baking steel and a Dutch oven is crucial for selecting the tool that best aligns with your initial baking goals.
Both tools leverage high heat to improve the baking process, but they do so in distinctly different ways, leading to varied outcomes for your baked goods. A baking steel, much like its predecessor the baking stone, is designed to transfer intense heat directly to the base of your dough, promoting rapid rise and a crispy crust.
A Dutch oven, on the other hand, creates a contained, steamy environment that is particularly beneficial for loaves of bread, helping the crust develop slowly and evenly before crisping up. Deciding between them depends largely on what you plan to bake most often and what kind of results you're aiming for.
Why Choose the Right Baking Tool?
Selecting the appropriate baking tool goes beyond just having something to put your dough on or in; it significantly impacts the texture, rise, and overall quality of your baked goods. Using the wrong tool can lead to disappointing results, such as a pale, soft pizza crust when you desired crispness, or a dense, unevenly baked loaf of bread that lacks structure. The right equipment complements your ingredients and technique, amplifying their effectiveness.
For instance, achieving a perfectly puffed-up pizza crust with a charred bottom requires intense, direct heat transfer, which a preheated baking steel excels at providing. Conversely, a loaf of sourdough often benefits from a humid environment in the initial stages of baking to allow for maximum oven spring before the crust sets, a condition a Dutch oven masterfully creates. Investing in the right tool from the start can save you frustration and help you achieve your desired baking outcomes more consistently, making your baking journey more rewarding.
Baking Steel vs. Dutch Oven: A Detailed Comparison for Home Bakers
What is a Baking Steel and When to Use It?
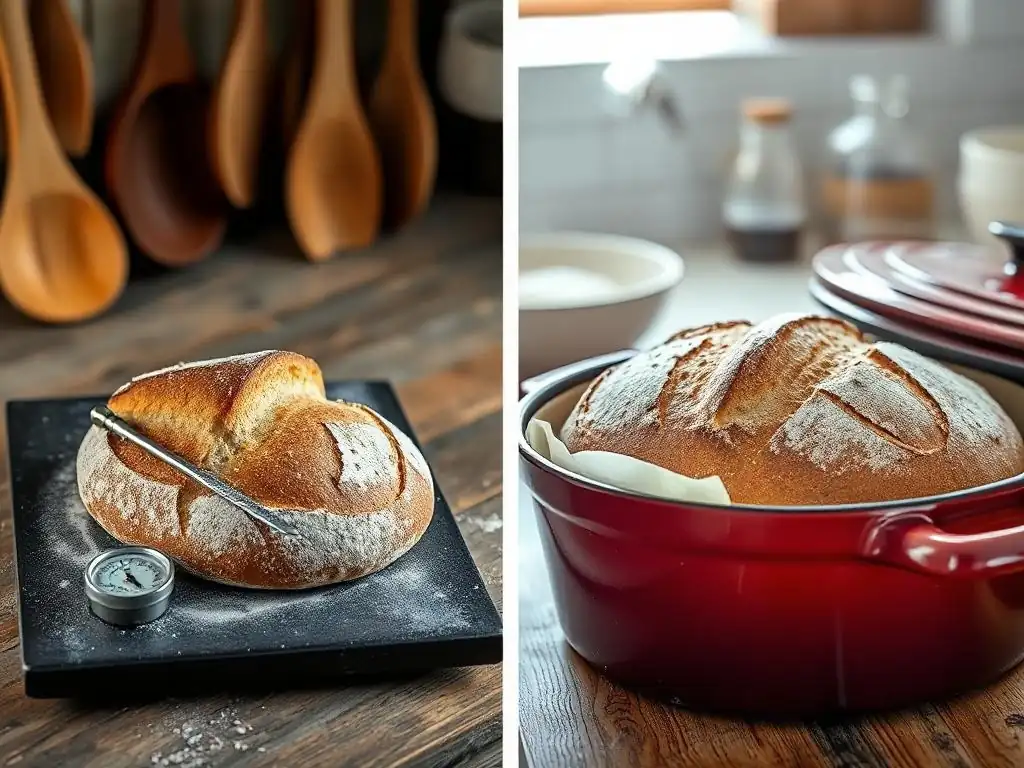
A baking steel is essentially a thick plate of steel designed to be heated in an oven. Its primary function is to store and efficiently transfer thermal energy to whatever is placed on it. Unlike a baking stone, which is typically made from ceramic or cordierite, steel is significantly more conductive and durable. This means it heats up faster, retains heat longer, and transfers it more effectively to your dough, resulting in a powerful "thermal shock" that encourages rapid rise and crisping.
You should reach for a baking steel when you need intense, direct heat applied to the bottom of your baked item. This makes it the tool of choice for items like pizza, flatbreads, certain types of rustic bread, and even achieving a crispy bottom on cookies or pastries. Its ability to maintain high temperatures even when cold dough is placed on it is its key advantage for these applications.
Types of Baking Steels: [Thickness, Material, Size]
Baking steels come in various specifications, primarily differing in thickness, material composition, and size. Thickness is a critical factor, as a thicker steel (e.g., 1/4 inch to 1/2 inch) will store more heat and provide a more powerful thermal boost than a thinner one. While most are made from high-quality carbon steel or low-carbon steel, the specific alloy can affect heat retention and durability.
Sizes vary widely to fit different ovens, from standard rectangular sizes (roughly 14x16 inches, fitting most home ovens) to smaller or larger custom shapes. A common size might be around 15x15 inches and 3/8 inch thick, weighing approximately 15-20 pounds. This size and thickness offer a good balance of heat capacity and manageability for a standard home oven.
Ideal Uses for a Baking Steel: Achieving Crispy Crusts
The baking steel shines brightest when the goal is a very crispy or charred crust, particularly on the bottom. Its high conductivity ensures that the base of your dough cooks rapidly, setting the structure and developing desirable textures and flavors.
Baking Pizza with a Steel: The Authentic Experience
Using a baking steel for pizza is arguably its most celebrated application. Preheated to a high temperature, often 500°F (260°C) or even higher, the steel mimics the intense heat of a professional pizza oven floor. When a pizza is slid onto the hot steel, the base receives an immediate and powerful heat transfer.
This intense heat causes the dough to puff up rapidly, creating a light, airy crust edge (cornicione) while ensuring the bottom is perfectly cooked and blistered in just 5 to 8 minutes, far faster than baking on a standard baking sheet or a less conductive stone. The result is a pizza with a crispy, often slightly charred base and a well-risen crust, similar to what you'd find in a pizzeria.
Baking Bread on a Steel: Crust and Oven Spring
While a Dutch oven is often preferred for many bread types, a baking steel can be excellent for certain loaves, especially those baked directly on a surface rather than in a pot. Artisan loaves, baguettes, or ciabatta can benefit from the steel's intense bottom heat.
Placing dough directly onto a preheated steel provides a significant thermal boost to the base, aiding in oven spring – the final burst of rising that occurs when the dough hits the hot environment. This contributes to a better overall rise and helps develop a sturdy, crispy bottom crust. For loaves that don't require the contained steam of a Dutch oven, or when baking multiple loaves simultaneously on a single surface, a baking steel is a fantastic tool.
Advantages of Using a Baking Steel
Using a baking steel offers several distinct advantages for home bakers, primarily related to its material properties and the results it helps achieve.
Superior Heat Retention and Conductivity
The most significant advantage of a baking steel is its exceptional heat retention and conductivity compared to ceramic baking stones or standard bakeware. Steel conducts heat about 18 times more efficiently than ceramic. This means it not only heats up quickly but also holds onto that heat tenaciously, preventing significant temperature drops when cold dough is introduced. This powerful heat transfer is what enables rapid cooking and superior crust development.
For example, placing a room-temperature pizza onto a 500°F (260°C) baking steel might only drop the surface temperature by 50-70°F (10-20°C) momentarily, while a ceramic stone might see a drop of 100°F (38°C) or more. This stability ensures consistent, high-intensity cooking from the bottom.
Durability and Longevity
Baking steels are incredibly durable. Unlike ceramic baking stones, which are prone to cracking if subjected to sudden temperature changes (thermal shock) or accidental drops, a baking steel is virtually indestructible under normal baking conditions. You can move it from a cold oven to a hot oven (though preheating is recommended) or drop it without fear of it breaking.
With proper care, which mainly involves seasoning to prevent rust, a baking steel can last a lifetime, making it a one-time investment for avid bakers. Its robust nature means you don't have to worry about replacing it like you might a more fragile baking stone.
Disadvantages of Using a Baking Steel
Despite its many benefits, a baking steel also has a few drawbacks that might make it less suitable depending on your needs and kitchen setup.
Weight and Handling
Baking steels are heavy, significantly heavier than baking stones or Dutch ovens of comparable surface area. A typical 15x15 inch, 3/8 inch thick steel can weigh upwards of 15-20 pounds (7-9 kg). This weight makes it cumbersome to move in and out of the oven, especially when hot.
Handling a hot, heavy steel requires caution and strength. Cleaning can also be slightly more challenging due to the weight. This can be a significant consideration for bakers with limited physical strength or those who need to frequently rearrange their oven setup.
Potential for Over-Browning
Because of its intense heat transfer, a baking steel can sometimes lead to over-browning or burning of the bottom crust if not used carefully or if the recipe isn't adjusted. Doughs with high sugar content are particularly susceptible to burning on a steel's surface.
Achieving the perfect balance requires monitoring and potentially reducing oven temperature or bake time compared to recipes designed for baking sheets or less conductive surfaces. While great for achieving a super-crispy base, it demands attention to prevent charring becoming burning.
What is a Dutch Oven and When to Use It?
A Dutch oven is a heavy cooking pot, typically made of cast iron, with a tight-fitting lid. While versatile for stews, soups, and braising, it has become an indispensable tool for many home bread bakers, particularly for rustic, freeform loaves like sourdough and no-knead bread. The key to its success in baking lies in its ability to create and trap steam within the pot during the initial phase of baking.
You should use a Dutch oven when baking bread that benefits from a steamy environment to achieve maximum rise and a beautiful, crackly crust. The contained steam keeps the surface of the dough moist, allowing it to expand fully before the crust sets. Once the lid is removed, the dry heat of the oven finishes the bake, crisping the crust beautifully.
Types of Dutch Ovens: [Cast Iron (Enameled and Uncoated)]
Dutch ovens are most commonly made from cast iron, which comes in two main forms relevant to baking: enameled and uncoated (raw) cast iron. Enameled cast iron is coated with a layer of porcelain enamel, making it non-reactive and easier to clean. Popular brands like Le Creuset or Staub are well-known examples.
Uncoated cast iron requires seasoning – a layer of polymerized oil – to prevent rust and create a non-stick surface. While both types can be used for baking bread, enameled cast iron is often preferred by beginners due to its low maintenance. Uncoated cast iron, if well-seasoned, can offer slightly better heat transfer but requires more care. Sizes for bread baking typically range from 4 to 7 quarts, with a 5 or 6-quart round Dutch oven being a popular choice for baking a standard loaf.
Ideal Uses for a Dutch Oven: Versatile Baking and Cooking
The Dutch oven's strength lies in its versatility, but in baking, its primary role is creating a controlled, high-heat environment with trapped moisture.
Baking Bread in a Dutch Oven: Creating a Steamy Environment
For many artisan bread recipes, especially those with high hydration like sourdough or no-knead doughs, a Dutch oven is the preferred baking vessel. The pot is typically preheated in the oven to a high temperature, often 450-500°F (230-260°C).
When the dough is placed inside the hot Dutch oven and the lid is quickly replaced, the moisture evaporating from the dough is trapped within the pot. This steam keeps the surface of the loaf pliable during the critical first 15-25 minutes of baking, allowing the dough to achieve its full oven spring before the crust hardens. Removing the lid later allows the crust to brown and crisp up in the dry heat. This method consistently produces loaves with excellent volume and a desirable crust texture.
Roasting and Braising in a Dutch Oven: Beyond Baking
Beyond bread, the Dutch oven is a kitchen workhorse. Its heavy construction and tight lid make it ideal for slow-cooking methods like braising meats or simmering stews. The even heat distribution is perfect for searing on the stovetop before transferring to the oven to finish.
This versatility means that an investment in a Dutch oven serves multiple purposes in the kitchen, not just baking. You can use it to make pot roasts, chili, soups, or even fry chicken, making it a valuable piece of cookware for a wide range of culinary tasks.
Advantages of Using a Dutch Oven
The Dutch oven offers unique benefits, particularly for specific types of bread and overall kitchen utility.
Excellent Heat Retention and Even Cooking
Like baking steel, cast iron is excellent at retaining heat. A preheated Dutch oven maintains a stable temperature throughout the baking process, ensuring even cooking. The thick walls and lid distribute heat uniformly, preventing hot spots that can lead to unevenly baked goods.
This consistent, even heat is crucial for baking bread thoroughly from edge to center. A typical 5-quart enameled Dutch oven can weigh around 13-15 pounds (6-7 kg) and preheat evenly, providing a stable thermal environment for your loaf.
Versatility for Baking and Other Cooking Methods
Perhaps the greatest advantage of a Dutch oven is its multi-functionality. While a baking steel is primarily for baking flat items or items placed directly on it, a Dutch oven is suitable for baking loaves of bread (contained within), roasting, braising, frying, and simmering.
For a home cook who enjoys both baking and general cooking, a Dutch oven provides excellent value as it can be used daily for various recipes, not just occasional baking projects. It's a true kitchen staple.
Disadvantages of Using a Dutch Oven
The Dutch oven also has its limitations and potential drawbacks.
Heavy Weight and Handling
Similar to a baking steel, Dutch ovens, especially those made of cast iron, are very heavy. A standard 5-quart pot can weigh 12-15 pounds (5.5-7 kg), and larger ones even more. Lifting a hot Dutch oven in and out of a hot oven requires significant care and strength.
Maneuvering a heavy, hot pot can be challenging and poses a safety risk. This is a practical consideration for storage and use, particularly for individuals who may struggle with lifting heavy objects.
Potential for Uneven Browning
While the Dutch oven creates an excellent steamy environment for oven spring, the base of the loaf doesn't receive the same direct, intense heat transfer as it would on a baking steel. This can sometimes result in a base crust that is less crispy or less browned than the sides or top, especially if the pot wasn't adequately preheated or if the baking time is too short after the lid is removed.
Achieving a uniformly dark and crispy crust often requires adjusting baking times, temperatures, or even finishing the loaf directly on the oven rack for the last few minutes after removing it from the pot, which adds an extra step.
Baking Steel or Dutch Oven: Choosing Based on Your Baking Needs
Baking Steel for Pizza Lovers: Achieving Authentic Results
If your primary baking passion is crafting homemade pizzas with a crispy, slightly charred crust reminiscent of a wood-fired oven, a baking steel is likely your best first tool. Its ability to store and rapidly transfer intense heat directly to the base of the pizza dough is unmatched by a standard oven rack or even a baking stone.
Imagine sliding your carefully topped pizza onto a steel preheated to 500°F (260°C). The immediate thermal shock causes the crust to spring up dramatically and the bottom to cook at an incredibly fast rate, often resulting in a finished pizza in under 8 minutes. This rapid cooking time is crucial for preventing toppings from drying out while ensuring the crust is perfectly done. For dedicated pizza enthusiasts, a baking steel is a game-changer.
Dutch Oven for Bread Bakers: The No-Knead Method Champion
For those drawn to the world of artisan bread, particularly rustic loaves, sourdough, or popular no-knead recipes, a Dutch oven is often the recommended starting point. The enclosed environment it creates is ideal for replicating the conditions of a commercial bakery oven, specifically the introduction of steam.
Consider baking a high-hydration sourdough loaf. Placing it in a preheated Dutch oven with the lid on traps steam released from the dough, allowing the crust to remain soft and elastic as the loaf expands during the initial rise (oven spring). After about 20-25 minutes at high heat (say, 450°F or 230°C), the lid is removed, allowing the dry heat to caramelize the crust to a deep golden brown. This technique is particularly forgiving for beginners and consistently yields loaves with excellent volume and a beautiful, crackly crust – a hallmark of many successful home bread bakers.
Budget Considerations: Steel vs. Dutch Oven Price Points
When considering your first major baking tool investment, budget is often a key factor. The cost of both baking steels and Dutch ovens can vary significantly based on brand, material quality, and size.
Entry-level baking steels (e.g., 1/4 inch thick) can start around $50-$80, while thicker, premium steels (3/8 inch or 1/2 inch) from well-known manufacturers might cost upwards of $100-$150 or even more. Similarly, uncoated cast iron Dutch ovens are relatively affordable, often available for $40-$80 for a standard size.
However, high-end enameled cast iron Dutch ovens from premium brands can be a substantial investment, frequently costing $150-$400 or even higher, depending on size and brand prestige. Generally, a good quality baking steel might be a slightly lower initial investment than a premium enameled Dutch oven, but both are durable tools offering long-term value.
Storage Space: Which Tool Fits Your Kitchen Better?
Kitchen storage is a precious commodity, and the size and shape of your baking tools matter. Both baking steels and Dutch ovens are heavy and take up significant space, but in different ways.
A baking steel is a flat, heavy plate. While it can potentially be stored vertically (with caution due to weight) or slid under other items, its weight means it needs sturdy support. A typical 15x15 inch steel fits neatly on an oven rack but needs a dedicated spot when not in use. A Dutch oven, being a pot with a lid, requires cabinet space.
A 5-quart Dutch oven might be roughly 10-12 inches in diameter and 6-8 inches tall (including the lid). If you have limited cabinet space but ample oven space where the steel can live permanently (many bakers leave their steel in the oven), this might influence your choice. Conversely, if you have vertical cabinet space but prefer to keep your oven clear, a Dutch oven might be more suitable.
Mastering Your Baking Steel or Dutch Oven: Tips and Tricks
Preheating Your Baking Steel for Optimal Results
Proper preheating is paramount when using a baking steel to harness its full potential for intense heat transfer. Simply placing the steel in the oven and turning it on isn't enough; it needs time to absorb and store heat.
For best results, place the baking steel on a rack positioned in the upper half of your oven, typically 6-8 inches from the top element for pizza. Preheat your oven to the desired temperature, often 500°F (260°C) or higher, and allow the steel to heat up with the oven for at least 45 minutes to a full hour after the oven indicates it has reached temperature.
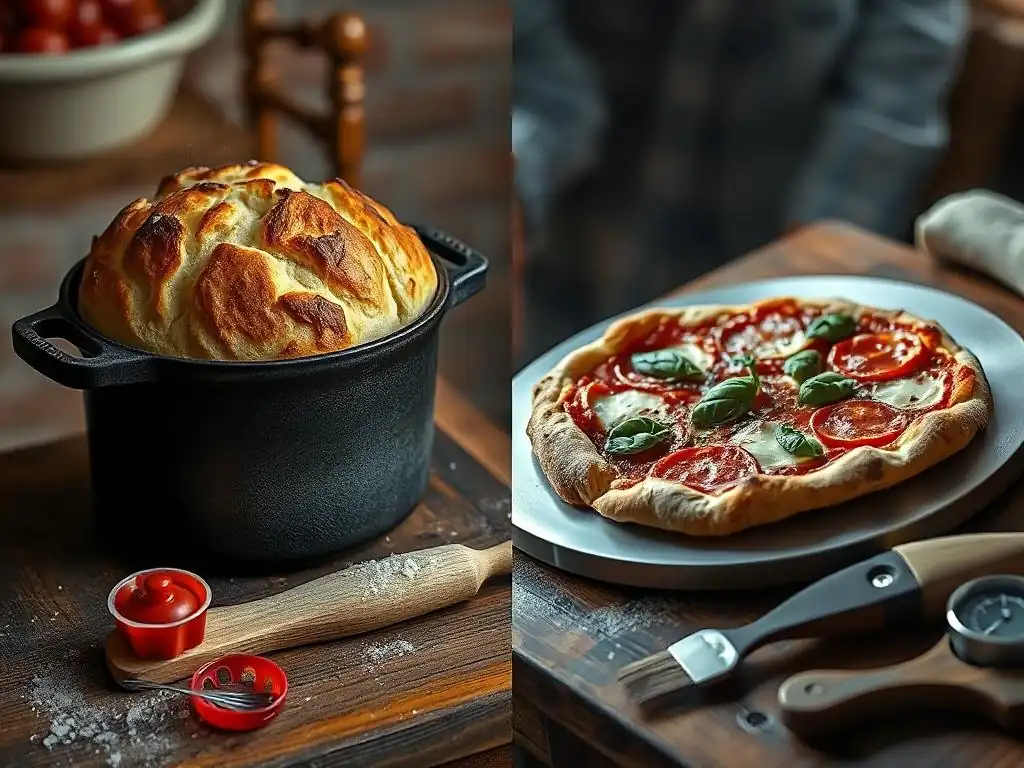
This extended preheat time ensures the steel is saturated with heat, ready to deliver that crucial thermal shock to your dough. Pro tip: Use an infrared thermometer to check the surface temperature of the steel; aim for close to the oven set temperature.
Dutch Oven Baking Techniques: Temperature and Timing
Baking bread in a Dutch oven involves specific temperature and timing considerations, often split into two phases: lid on and lid off. Most recipes call for preheating the Dutch oven inside the oven to a high temperature, typically between 450°F and 500°F (230°C - 260°C), for 30-60 minutes.
Once preheated, carefully transfer the dough into the hot pot, replace the lid, and bake for the first phase (e.g., 20-25 minutes) at the high temperature. This phase generates and traps steam for oven spring. Then, carefully remove the lid (watch out for escaping steam!) and continue baking for the second phase (e.g., 20-30 minutes) at a potentially slightly reduced temperature (e.g., 425-450°F or 220-230°C) to allow the crust to brown and crisp. The total baking time for a standard loaf is often around 40-55 minutes.
Cleaning and Maintaining Your Baking Tools for Longevity
Proper care ensures your baking steel or Dutch oven remains in excellent condition for years of baking enjoyment. Both require specific cleaning routines.
Caring for Your Baking Steel: Preventing Rust and Damage
Cleaning a baking steel is usually quite simple. Avoid using soap, especially on uncoated steels, as it can strip the seasoning. For most messes, scrape off any baked-on bits with a metal spatula or bench scraper while the steel is still warm (but handle with caution!). Once cooled, you can wipe it down with a damp cloth and immediately dry it thoroughly.
To prevent rust, especially in humid environments, lightly oil the surface with a food-grade oil (like flaxseed or grapeseed oil) after drying. Wipe off any excess. If rust appears, scrub it off with steel wool, dry completely, and re-season by applying a thin layer of oil and heating it in the oven until it smokes slightly.
Cleaning Your Dutch Oven: Removing Burnt Food and Rust
Cleaning a Dutch oven depends on whether it's enameled or uncoated cast iron. Enameled Dutch ovens are easier; for most food residue, hot water and dish soap work well. For stubborn burnt-on food, fill the pot with water, add a tablespoon or two of baking soda, bring to a simmer, and gently scrape with a wooden or silicone utensil. Avoid abrasive pads that can scratch the enamel.
Uncoated cast iron Dutch ovens are cleaned similarly to baking steels: scrape, rinse with hot water (no soap usually needed unless absolutely necessary), dry thoroughly, and apply a light layer of seasoning oil. If rust occurs on uncoated iron, scrub it off, dry, and re-season. Always ensure both types are completely dry before storing to prevent rust (on uncoated) or damage to seasoning/enamel.
Conclusion: Selecting the Right Baking Tool for Your Baking Journey
Recap: Steel vs. Dutch Oven - Key Differences and Benefits
Choosing between a baking steel and a Dutch oven comes down to understanding their core strengths and how they align with your baking aspirations. A baking steel excels at delivering intense, direct heat for rapid cooking and achieving incredibly crispy bottom crusts, making it ideal for pizza, flatbreads, and certain types of bread baked directly on a surface. Its durability and superior conductivity are major advantages.
Conversely, a Dutch oven creates a humid, high-heat environment perfect for baking rustic loaves of bread, promoting maximum oven spring and a beautiful, crackly crust through trapped steam. Its versatility extends beyond baking to a wide range of cooking methods. Both tools are heavy and require careful handling and specific maintenance routines, but they offer distinct paths to improving your home baking results.
Further Exploration: Expanding Your Baking Equipment Collection
Selecting your first key baking tool is just the beginning of exploring the exciting world of baking equipment. As you become more comfortable and perhaps diversify your baking interests, you might consider adding the other tool to your collection. Many experienced home bakers own both a baking steel and a Dutch oven, utilizing the steel for pizzas and hearth-style bread and the Dutch oven for high-hydration loaves.
Beyond these, other valuable tools include digital scales for accurate ingredient measurement, proofing baskets (bannetons) for shaping bread, pizza peels for transferring dough, and various types of bakeware like loaf pans and sheet pans. Expanding your equipment gradually based on the types of baking you enjoy will enhance your capabilities and make new recipes more accessible.
BakeWithEase Recommendation: Choosing the Best Tool for Beginners.
For beginners just starting their baking journey, the best tool depends heavily on what they are most excited to bake first. If the dream is to make perfect homemade pizza with a crispy base that rivals your favorite pizzeria, start with a quality baking steel. It provides an immediate and significant upgrade over baking sheets for this specific task.
However, if you are captivated by the idea of baking beautiful, rustic loaves of bread, particularly no-knead or sourdough, a Dutch oven is likely the more impactful first purchase. It simplifies the process of creating a steamy environment needed for excellent bread rise and crust development. Consider which type of baked good you'll make most frequently and let that guide your decision. Regardless of which you choose, mastering either a baking steel or a Dutch oven will elevate your home baking to new heights.
Frequently Asked Questions
What is the main difference between a stone oven and a Dutch oven?
A stone oven is designed for baking bread with a crispy crust, while a Dutch oven is a versatile pot perfect for slow-cooking and baking various dishes, including bread.
Which baking tool is more suitable for beginners?
For beginners, a Dutch oven is often recommended due to its versatility and ease of use in various recipes, including bread, stews, and casseroles.
Can I use a stone oven for baking pastries or cakes?
Yes, you can use a stone oven for pastries and cakes, but it is primarily optimized for bread baking. Using it for other baked goods might require adjustments in time and temperature.
What are the advantages of using a Dutch oven for baking bread?
A Dutch oven creates a steam environment that helps achieve a crispy crust and chewy interior, making it ideal for baking artisan-style bread at home.
Are the ingredients different when baking with a stone oven versus a Dutch oven?
No, the ingredients remain the same. The difference lies in the baking method and the tool's ability to retain heat and moisture during the baking process.
Final Reflection: The Humble Oven's Transformative Power
The choice between a baking stone and a Dutch oven isn't merely about acquiring a kitchen tool; it's about unlocking a deeper connection with the art of baking. The seemingly simple decision reflects a broader consideration of baking style, desired results, and ultimately, personal culinary philosophy. This article explored the nuances of each, highlighting their unique strengths and weaknesses to help you make an informed choice.
The enduring appeal of both baking stones and Dutch ovens speaks volumes about our ongoing fascination with traditional cooking methods and the pursuit of perfectly crafted bread and pastries. Their presence in kitchens across the globe transcends mere functionality; they represent a connection to heritage, a commitment to quality, and a desire for authentic flavors. The best bread is made with simple ingredients and a lot of love.
This sentiment, though simple, encapsulates the heart of what both tools represent: a dedication to the process and the resulting reward of delicious, homemade goodness.
Now, consider your own baking journey. Which tool resonates most with your aspirations? Do you envision yourself crafting rustic loaves with a crisp crust, or perhaps perfecting delicate pastries with even browning? The answer, my friend, lies within you. Take the insights from this article, reflect on your baking style, and choose the tool that will empower you to create culinary magic in your own kitchen. The journey of a thousand loaves begins with a single, well-chosen oven.
Unleash Your Inner Baker: Start Your Baking Journey Today!
Thanks for taking the time to explore the world of stone and Dutch oven baking! We hope you now feel confident in choosing the perfect tool to kickstart your baking adventures. Ready to take the next step?
- Begin your baking journey: Choose your first oven – stone or Dutch oven – and order it today! Imagine the delicious aroma filling your kitchen.
- Share your choice: Tell us which oven you selected and why! We love hearing from our community and seeing your baking creations.
- Explore delicious recipes: Find inspiring recipes tailored to your chosen oven on BakeWithEase.com – let's bake something amazing together!
What delicious treat will you bake first with your new oven?