
Whole Wheat Wonder: A Deliciously Simple Bread Machine Recipe

Welcome to BakeWithEase!
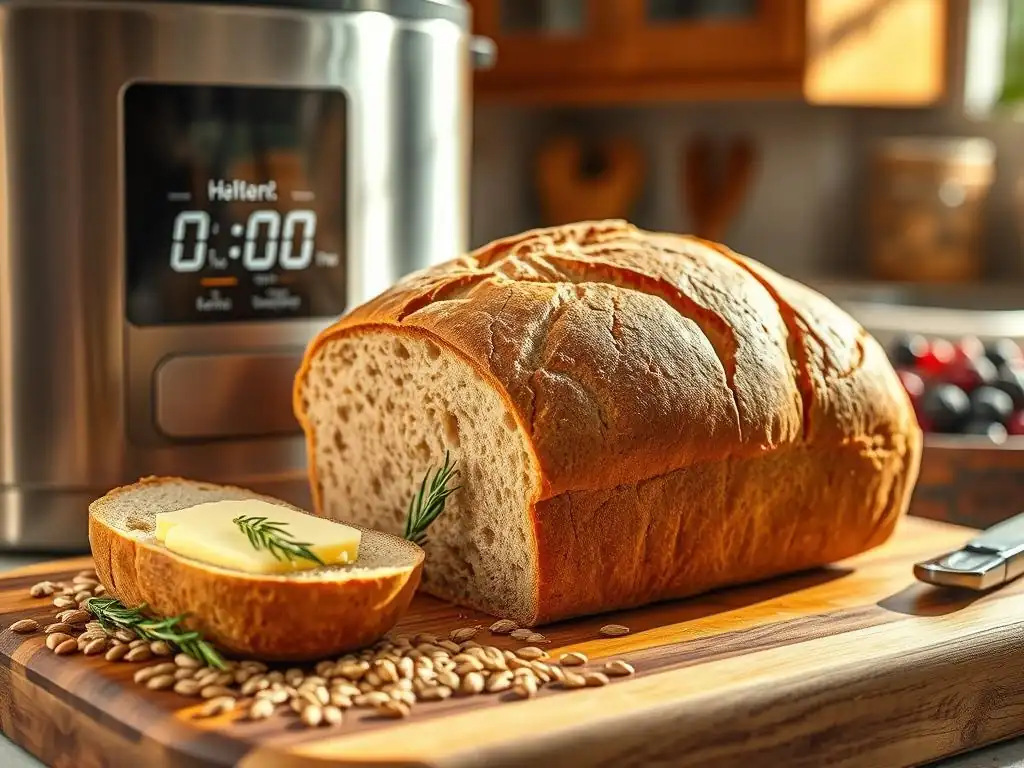
Unlocking the secrets to perfect homemade bread has never been easier. Ever wondered if you could achieve bakery-quality whole wheat bread without the fuss? Our guide dives deep into the world of bread machines, offering a simple, foolproof recipe to get you started. Discover how to create a Whole Wheat Wonder that's both nutritious and delicious, and learn why mastering this recipe is the perfect gateway to exploring even more baking possibilities. Intrigued? Let's get baking!
- Hearty Multigrain: A Foolproof Bread Machine Recipe
- Bake Perfect Multigrain Bread with Your Bread Machine
- Why Use a Bread Machine for Multigrain Bread?
-
Essential Ingredients for a Delicious Multigrain Bread Machine Loaf
- Bread Flour: Providing Structure and Gluten Strength
- King Arthur vs. Bob's Red Mill: Choosing Quality Bread Flour
- Water: Achieving Optimal Dough Consistency
- Active Dry Yeast: Ensuring a Proper Rise
- Honey: Adding Sweetness and Moisture
- Salt: Balancing Flavors and Controlling Yeast
- Multigrain Cereal: Boosting Texture and Nutritional Value
- Step-by-Step: Multigrain Bread Machine Recipe for BakeWithEase
- Troubleshooting Common Multigrain Bread Machine Issues
- Tips for Baking the Best Multigrain Bread Machine Loaf
- Enjoy Your Homemade Multigrain Bread: Serving Ideas
- Is Multigrain Bread Machine Baking Right For You?
- Other Bread Machine Recipes to Explore on BakeWithEase
-
Frequently Asked Questions
- What makes this whole wheat bread machine recipe from BakeWithEase.com "simple"?
- Can I substitute other flours for whole wheat in this BakeWithEase.com recipe?
- What kind of bread machine is recommended for this recipe from BakeWithEase.com?
- How does this whole wheat bread machine recipe from BakeWithEase.com ensure a "delicious" taste?
- What if my whole wheat bread from this BakeWithEase.com recipe comes out dense?
- Final Reflection: The Enduring Appeal of Homemade Whole Wheat
- Unleash Your Inner Baker: Knead to Know More?
Hearty Multigrain: A Foolproof Bread Machine Recipe
Bake Perfect Multigrain Bread with Your Bread Machine
There's nothing quite like the aroma of freshly baked bread filling your home, and making delicious multigrain bread has never been easier thanks to the humble bread machine. This countertop appliance takes the guesswork out of kneading, rising, and baking, allowing you to achieve consistently excellent results with minimal effort. Whether you're new to baking or a seasoned pro looking for convenience, a bread machine makes homemade multigrain loaves accessible and enjoyable.
This guide will walk you through a simple yet effective recipe for a hearty multigrain loaf using your bread machine. We'll cover everything from selecting the right ingredients to troubleshooting common issues, ensuring your baking experience is smooth and successful. Get ready to enjoy the satisfaction and health benefits of baking your own wholesome multigrain bread right in your kitchen.
Why Use a Bread Machine for Multigrain Bread?
Hands-Off Baking for Busy Schedules
One of the primary advantages of using a bread machine for multigrain bread is the incredible convenience it offers, especially for those with busy schedules. Instead of dedicating significant time to kneading dough by hand, waiting for it to rise, and monitoring oven baking, the bread machine handles the entire process from start to finish. You simply add the ingredients, select the appropriate cycle, and walk away, freeing up your time for other tasks or simply relaxing.
This "set it and forget it" functionality is a game-changer. For example, you can load the ingredients into the machine before bed and wake up to a warm, ready-to-eat loaf for breakfast, thanks to delayed timer functions available on many models. This automation saves hours of active work each week compared to traditional methods, making homemade multigrain bread a realistic option even on hectic days.
Reliable and Repeatable Results
Achieving consistent results can be challenging when baking bread manually, as factors like room temperature, kneading technique, and proofing times all play a significant role. A bread machine provides a controlled environment for the entire process, leading to reliable and repeatable outcomes every time you bake your multigrain loaf. The machine's internal thermostat maintains optimal temperatures for rising, and its programmed cycles ensure consistent kneading duration and intensity.
This consistency is particularly beneficial when working with multigrain doughs, which can sometimes be denser or less predictable than white bread. The bread machine's powerful motor handles the extra weight of grains and seeds efficiently, developing the gluten structure needed for a good rise and texture. Beginners especially benefit from this reliability, reducing common errors like under-kneading or improper proofing that can lead to dense or collapsed loaves.
Unlocking the Advantages of Homemade Multigrain Bread
Baking multigrain bread at home using a bread machine offers numerous advantages over store-bought options, extending beyond just convenience. One significant benefit is the ability to control every ingredient that goes into your loaf. You can choose high-quality flours, specific types of grains and seeds, and avoid artificial preservatives, dough conditioners, or excessive added sugars often found in commercially produced breads. This results in a fresher, more wholesome product.
Furthermore, baking your own multigrain bread is often more cost-effective in the long run. While the initial investment in a bread machine exists, the cost of ingredients per loaf is typically significantly lower than purchasing specialty multigrain bread from a bakery or grocery store. A loaf that might cost $4-6 or more at the store can often be made at home for around $1-2 in ingredients, depending on the cost of your grains and flour. This represents substantial savings over time, allowing you to enjoy delicious, healthy bread without breaking the bank.
Essential Ingredients for a Delicious Multigrain Bread Machine Loaf
Bread Flour: Providing Structure and Gluten Strength
Bread flour is a critical component in this multigrain bread machine recipe, specifically chosen for its higher protein content compared to all-purpose flour. This higher protein level, typically ranging from 12% to 14%, is essential for developing a strong gluten network when kneaded. Gluten is the protein structure that provides elasticity and strength to dough, allowing it to trap the gases produced by yeast and rise properly.
Using bread flour ensures that your multigrain loaf has the necessary structure to support the added weight and texture of the grains and seeds. It helps create a chewy crumb and a well-formed loaf that doesn't collapse during baking. While you can sometimes substitute with all-purpose flour in a pinch, the resulting loaf will likely be less voluminous and have a softer, less satisfying texture.
King Arthur vs. Bob's Red Mill: Choosing Quality Bread Flour
When selecting bread flour, quality matters, and brands like King Arthur Baking Company and Bob's Red Mill are popular choices known for their reliability. King Arthur Bread Flour is often cited for its consistent high protein content (around 12.7%), which provides excellent gluten development and reliable results for bread making. It's a favorite among many bakers for its performance.
Bob's Red Mill also offers high-quality bread flour, often available in organic or unbleached varieties. While protein content can vary slightly by specific product, their bread flour is generally suitable for bread machines and produces good results. Choosing a reputable brand ensures that the flour is milled correctly and has the expected protein level, contributing significantly to the success of your multigrain bread machine bake. Using a quality flour is a foundational step towards a great loaf.
Water: Achieving Optimal Dough Consistency
Water plays a vital role in activating the yeast and hydrating the flour and other dry ingredients to form the dough. The temperature of the water is important; lukewarm water, typically between 80°F and 90°F (27°C-32°C), is ideal for dissolving active dry yeast and encouraging it to start working. Water that is too hot can kill the yeast, while water that is too cold will slow down its activity significantly, resulting in a poor rise.
The quantity of water determines the hydration level of the dough, which directly impacts the texture of the finished bread. Too little water will result in a dry, dense loaf, while too much water can make the dough too sticky to handle (though less critical in a bread machine) and potentially lead to a collapsed loaf. Achieving the correct hydration, as specified in the recipe, is key to a moist, tender crumb in your multigrain bread machine loaf.
Active Dry Yeast: Ensuring a Proper Rise
Active dry yeast is the leavening agent in this recipe, responsible for producing the carbon dioxide gas that makes the bread rise. These tiny living organisms consume sugars in the dough and release gas, which gets trapped by the gluten network, causing the dough to expand. Using fresh, active yeast is non-negotiable for a successful bread machine bake. If your yeast is old or improperly stored, it may be inactive, and your bread will not rise.
To ensure your active dry yeast is viable, especially if you don't bake frequently, you can "proof" it before adding it to the machine. Dissolve the specified amount of yeast in a small amount of warm water (around 105°F-115°F or 40°C-46°C, slightly warmer than lukewarm for activating) with a pinch of sugar. After 5-10 minutes, it should become foamy and bubbly; if it doesn't, your yeast is likely dead and needs to be replaced. Always store active dry yeast in an airtight container in the refrigerator or freezer to maintain its potency.
Honey: Adding Sweetness and Moisture
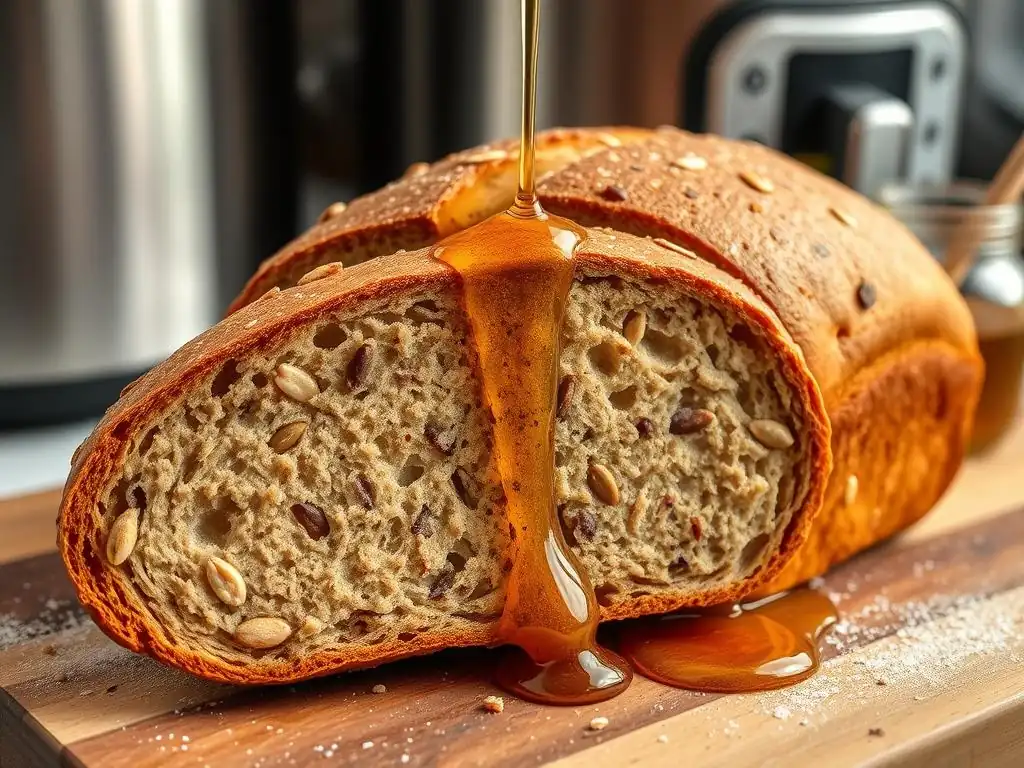
Honey serves multiple purposes in this multigrain bread machine recipe beyond just providing a touch of sweetness. It acts as food for the yeast, helping to fuel the fermentation process and ensuring a robust rise. The natural sugars in honey also contribute to the b browning of the crust during baking, giving your loaf an appealing golden-brown color.
Furthermore, honey is a humectant, meaning it helps the bread retain moisture. This contributes to a softer crumb and can extend the shelf life of your homemade multigrain loaf, keeping it fresh and palatable for longer. While other sweeteners like sugar or maple syrup could technically be used, honey imparts a unique subtle flavor that complements the earthy notes of the multigrains beautifully.
Salt: Balancing Flavors and Controlling Yeast
Salt is a crucial ingredient in bread making, serving two primary functions: enhancing flavor and regulating yeast activity. Without salt, bread can taste bland and flat. It helps to bring out the natural flavors of the flour, grains, and honey, creating a more balanced and enjoyable taste profile. It also tightens the gluten structure, which contributes to a better crumb texture.
Equally important, salt controls the rate at which yeast ferments. Yeast works very quickly without salt, potentially causing the dough to over-proof and collapse before baking. Salt slows down the yeast activity, allowing for a more controlled and even rise. It's typically added to the bread machine pan separately from the yeast initially (often with the flour) to prevent direct contact before mixing begins, as high concentrations of salt can inhibit yeast.
Multigrain Cereal: Boosting Texture and Nutritional Value
The "multigrain cereal" component is what gives this bread its characteristic texture, flavor, and nutritional boost. This can refer to a pre-packaged mix specifically for bread, or a combination of grains and seeds you assemble yourself, such as rolled oats, flax seeds, sunflower seeds, pumpkin seeds, millet, or cracked wheat. These additions provide fiber, healthy fats, vitamins, and minerals, making the bread more nutritious than a simple white loaf.
The quantity and type of multigrain cereal can be adjusted based on preference, but it's important not to add too much, as excessive grains can weigh down the dough and prevent it from rising properly. Some recipes for denser multigrain breads suggest soaking tougher grains like cracked wheat or rye berries before adding them to the dough to soften them, but for a simple bread machine recipe, using readily mixable grains like oats and seeds is easiest and works well.
Step-by-Step: Multigrain Bread Machine Recipe for BakeWithEase
Preparing Your Bread Machine Pan
Before adding any ingredients, ensure your bread machine pan is clean and dry. Most modern bread machine pans have a non-stick coating, so greasing is often unnecessary, but you should consult your machine's manual to be sure. Locate the kneading paddle and make sure it is securely attached to the shaft at the bottom of the pan. A loose paddle can cause the dough not to knead properly.
Once the pan is ready, place it securely back inside the bread machine unit. Ensure it clicks into place according to your machine's design. Having the pan prepped and in the machine before adding ingredients helps prevent spills and makes the process smoother.
Adding Ingredients in the Recommended Order
The order in which you add ingredients to your bread machine pan is crucial for optimal results, especially with active dry yeast. Most bread machine manufacturers recommend adding liquids first (water, honey), followed by the dry ingredients (flour, salt, multigrain cereal), and finally the yeast on top. This order helps keep the yeast separate from the salt and water initially, preventing premature activation or inhibition until the mixing cycle begins.
Consult your specific bread machine's manual, as some older models or specific brands might recommend a different order. However, the general principle is to create layers that protect the yeast until mixing. Carefully measure each ingredient using the method specified in the recipe (preferably a kitchen scale for dry ingredients like flour and grains) and add them to the pan one by one, ensuring accuracy for the best outcome.
Selecting the Appropriate Bread Machine Cycle
Choosing the correct cycle on your bread machine is vital for baking successful multigrain bread. While some machines have a specific "Multigrain" cycle, a standard "Basic" or "Whole Wheat" cycle is often suitable. The "Basic" cycle usually includes kneading, rising, and baking phases designed for standard yeast breads.
A "Whole Wheat" cycle, if available, might have a longer kneading time or a warmer rise cycle, which can be beneficial for doughs containing denser grains like multigrain. Read your machine's manual to understand what each cycle does. For this recipe, start with the "Basic" or "Whole Wheat" cycle and adjust in future bakes if you feel the bread needs more kneading or a different rise time based on the results.
Checking Dough Consistency After Initial Mixing
After the initial mixing cycle begins (usually within the first 5-10 minutes), it's a good idea to check the dough's consistency. Open the lid briefly and observe the dough ball as it kneads. It should be forming a smooth, elastic ball that is pulling cleanly away from the sides of the pan. It might make a slight slapping sound against the sides.
If the dough looks too wet and sticky, sticking excessively to the sides, add flour one tablespoon at a time until it forms a proper ball. If it looks too dry and crumbly, not coming together into a cohesive ball, add water one teaspoon at a time. This check is a critical opportunity to correct the hydration and ensure proper gluten development, leading to a better final loaf. Close the lid quickly to maintain temperature.
The Baking Cycle: Allowing the Bread to Fully Bake
Once the kneading and rising cycles are complete, your bread machine will automatically transition to the baking cycle. During this phase, the heating element bakes the dough into a finished loaf. The machine controls the temperature and baking time according to the selected cycle. Avoid opening the lid during the baking cycle, as this can cause a drop in temperature that may affect the final rise and crust formation.
The baking time for a standard loaf is typically between 50 and 70 minutes, depending on the machine and cycle. You can often select a crust color setting (light, medium, dark) before starting the cycle to customize the crispness and color of your crust. For added assurance of doneness, you can check the internal temperature of the loaf after the cycle finishes; it should register between 200°F and 210°F (93°C-99°C) using an instant-read thermometer.
Cooling Your Freshly Baked Multigrain Bread
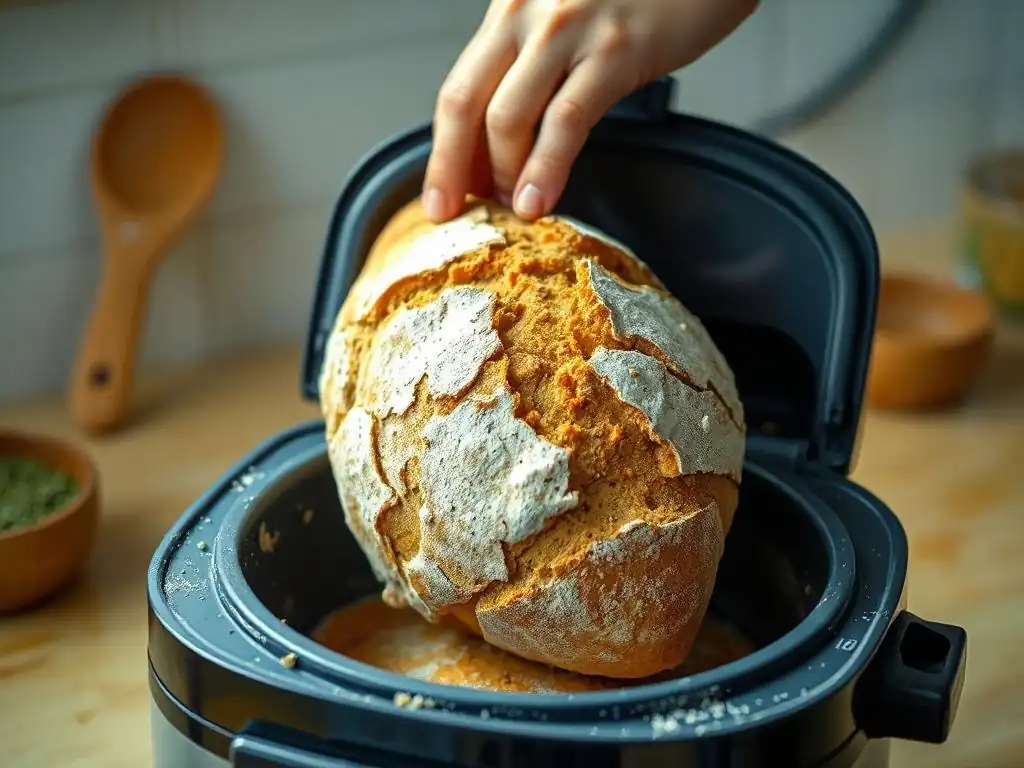
Once the bread machine cycle is complete and the machine beeps, it's crucial to remove the loaf from the pan promptly. Leaving the bread in the pan for too long can cause the crust to become soggy due to trapped steam. Carefully remove the pan from the machine (use oven mitts, as it will be hot) and invert it onto a wire cooling rack.
The loaf should slide out easily, though you might need to gently shake it or use a heatproof spatula around the edges. Don't forget to remove the kneading paddle if it's stuck in the bottom of the loaf.
Allow the multigrain bread to cool completely on the wire rack before slicing. This cooling period, typically at least one hour, is essential. As the bread cools, steam escapes, and the internal structure (the crumb) sets properly. Slicing hot bread can result in a gummy, dense texture and makes it difficult to get clean slices. Patience during this cooling phase is rewarded with the best possible texture.
Troubleshooting Common Multigrain Bread Machine Issues
Bread Collapsing: Over-Proofing and Too Much Yeast
One frustrating issue is when your beautifully risen multigrain loaf collapses during or shortly after the baking cycle begins. This is most commonly caused by over-proofing, meaning the dough rose too much and too quickly, often due to using too much yeast or the dough getting too warm during the rise cycle. The gluten structure stretches too thin and can't support the weight, leading to a collapse.
To address this, ensure you are accurately measuring your yeast, ideally using a kitchen scale for precision (1 teaspoon of active dry yeast is roughly 3 grams). If you consistently experience collapsing, try slightly reducing the amount of yeast by about a quarter teaspoon in your next bake. Also, ensure the machine is not in a drafty or overly warm spot, as this can affect rise temperature.
Uneven Texture: Inadequate Mixing and Ingredient Distribution
If your baked multigrain bread has an uneven texture, with dense spots or areas where ingredients aren't well distributed, it could indicate issues with mixing. Sometimes, ingredients, especially heavier grains or seeds, can stick to the sides of the pan during the initial kneading phase, preventing them from being fully incorporated into the dough.
Most bread machines have a pause function or a short break in kneading where you can open the lid (briefly!) and use a rubber spatula to scrape down the sides of the pan, ensuring all ingredients are drawn into the main dough ball. Also, double-check that you are adding ingredients in the order recommended by your machine's manual, as this can impact how well everything mixes initially.
Pale Crust: Insufficient Sugar or Baking Time
A pale crust on your multigrain bread machine loaf can be disappointing, lacking the appealing golden-brown color and slight crispness desired. This issue is often related to insufficient sugar content in the recipe or an issue with the baking phase. Sugar plays a key role in the Maillard reaction during baking, which is responsible for crust browning.
Ensure you haven't accidentally omitted the honey or sugar from your recipe. If the recipe calls for a specific amount and your crust is still pale, check if your bread machine has a "Dark Crust" setting and try using that. Also, ensure the machine's lid is clean and the vent isn't blocked, allowing heat to circulate properly. While less common, a faulty heating element could also be a cause.
Adjusting for Altitude
Baking at higher altitudes presents unique challenges that can affect bread machine results, including multigrain loaves. Lower atmospheric pressure at higher elevations causes dough to rise faster and moisture to evaporate more quickly. This can lead to over-proofing and a drier loaf.
To compensate for altitude, you may need to make slight adjustments to your recipe. Common solutions include slightly decreasing the amount of yeast (by perhaps 1/4 teaspoon per loaf), slightly increasing the amount of liquid (by 1-2 teaspoons), or adding a small amount of vital wheat gluten (1-2 teaspoons) to strengthen the dough structure. Experimentation is often needed to find the perfect balance for your specific location.
Tips for Baking the Best Multigrain Bread Machine Loaf
Using a Kitchen Scale for Accurate Measurements
For consistently excellent results when baking your multigrain bread machine loaf, transitioning from volume measurements (cups and spoons) to weight measurements using a kitchen scale is highly recommended. Flour, especially, can vary significantly in weight depending on how it's scooped and whether it's sifted or compacted. Using a scale eliminates this variability.
Weighing ensures you are using the precise amount of each ingredient specified in the recipe, leading to more predictable and repeatable outcomes. For example, a cup of flour can range from 120g to 150g or more. Using the weight specified in grams (e.g., 400g of flour) guarantees you have the correct ratio of flour to liquid and other ingredients every time, which is critical for proper dough development.
Ensuring Yeast Activity Before Use
As mentioned earlier, the activity of your yeast is paramount to a successful rise. While instant yeast can often be added directly to the machine, active dry yeast sometimes benefits from being proofed, especially if you are unsure of its age or storage conditions. This simple step only takes a few minutes but can save you the disappointment of a flat loaf.
To proof active dry yeast, combine the required amount of yeast with a small amount of warm water (around 105°F-115°F) and a pinch of sugar in a small bowl. Stir gently and let it sit for 5-10 minutes. If the mixture becomes foamy and bubbly, your yeast is active and ready to use. If it remains flat, your yeast is likely dead and you'll need to use a fresh packet or jar.
Adapting the Recipe for Different Loaf Sizes
Most bread machine recipes are designed for a specific loaf size, commonly 1.5lb or 2lb. However, many machines can bake different sizes. If your machine bakes 1lb, 1.5lb, and 2lb loaves, you can often scale recipes up or down, but it's crucial to maintain the correct ingredient ratios. For example, a 1lb loaf recipe might use roughly half the ingredients of a 2lb loaf.
Always consult your bread machine manual for guidance on scaling recipes and recommended ingredient quantities for each loaf size. Ensure your machine is rated for the loaf size you intend to bake; attempting a 2lb recipe in a machine designed only for 1lb loaves can overflow the pan and damage the unit. Scaling correctly ensures the dough fits the pan and bakes properly.
Incorporating Seeds and Grains for Added Flavor
Beyond the basic multigrain cereal mix, you can customize your loaf by incorporating additional seeds and grains to enhance flavor and texture. Flax seeds, chia seeds, sesame seeds, poppy seeds, or additional rolled oats can be added to the dough. Some recipes also suggest adding a small amount of nuts like walnuts or pecans.
Most bread machines have an "add-in" beep that signals when to add extra ingredients like seeds, nuts, or dried fruit. This usually happens during the last few minutes of the kneading cycle. Adding them at this stage prevents them from being completely pulverized during the initial, more vigorous mixing. If your machine doesn't have an add-in beep, you can manually add them during the final kneading phase.
Storing Bread to Maintain Freshness
Proper storage is key to keeping your homemade multigrain bread machine loaf fresh and enjoyable for as long as possible. Once the bread is completely cooled, store it at room temperature in an airtight container, a bread box, or a resealable plastic bag. Stored this way, it will typically stay fresh for 2-4 days.
For longer storage, slicing the cooled loaf and freezing the slices in a freezer-safe bag or container is an excellent option. Frozen bread slices can be easily toasted or thawed as needed, retaining much of their original freshness and texture for several months. Avoid storing homemade bread in the refrigerator, as it can actually cause it to dry out faster due to a process called retrogradation of starch.
Enjoy Your Homemade Multigrain Bread: Serving Ideas
Toasted with Avocado and Everything Bagel Seasoning
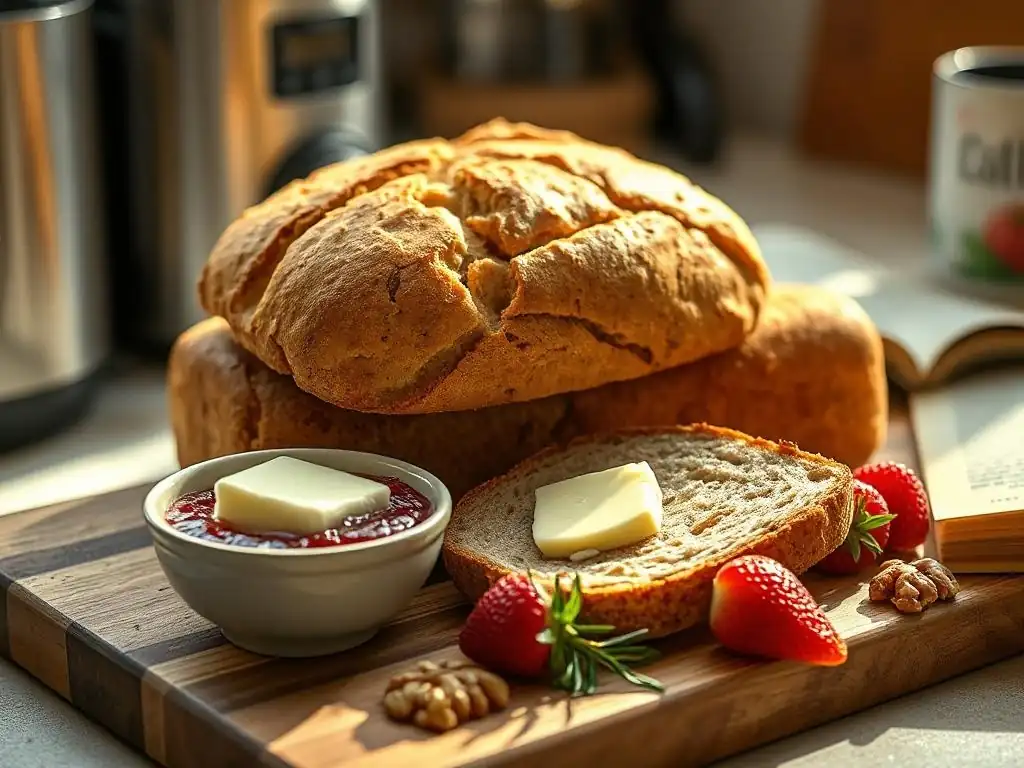
One incredibly popular and delicious way to enjoy your homemade multigrain bread machine loaf is toasting slices and topping them with creamy avocado and a sprinkle of everything bagel seasoning. The hearty, slightly chewy texture of the toasted multigrain bread provides a perfect base for the smooth, rich avocado.
The everything bagel seasoning, a blend typically including sesame seeds, poppy seeds, dried garlic, dried onion, and salt, adds layers of savory flavor and satisfying crunch that complement the mildness of the avocado. This combination makes for a quick, healthy, and incredibly satisfying breakfast, snack, or light meal, showcasing the wonderful texture and taste of your freshly baked loaf.
Served with Cheese and Charcuterie
Homemade multigrain bread makes an excellent addition to a cheese and charcuterie board. Its robust structure and nutty flavor profile pair wonderfully with a variety of cheeses, from sharp cheddar and tangy goat cheese to creamy brie. The different textures and flavors of the grains and seeds in the bread add an extra dimension when contrasted with smooth cheeses or savory cured meats.
Arrange slices of your multigrain bread alongside your favorite cheeses, prosciutto, salami, olives, pickles, and perhaps some fruit or nuts. The bread serves as a delightful vehicle for enjoying these different components, providing a satisfying bite that is both flavorful and texturally interesting. It elevates a simple snack or appetizer into a more substantial and enjoyable experience.
Used for Grilled Cheese Sandwiches and Paninis
The sturdy nature of multigrain bread makes it an ideal choice for grilled cheese sandwiches and paninis. Unlike softer white breads that can become soggy or fall apart under heat and pressure, a hearty multigrain loaf holds up beautifully, resulting in a satisfyingly crispy exterior and a well-contained cheesy interior.
For a grilled cheese, butter the outside of the slices generously and fill with your favorite cheese blend before grilling until golden brown and the cheese is melted and gooey. For a panini, stack fillings like cheese, meats, and vegetables between slices and press in a panini maker until heated through and the bread is marked and crisp. The textures and flavors of the multigrain bread add depth to these classic comfort foods.
Is Multigrain Bread Machine Baking Right For You?
Convenience and Cost Savings of Homemade Bread
Baking multigrain bread with a bread machine offers significant convenience, transforming a multi-step process into a simple "add ingredients and press start" task. This hands-off approach is perfect for busy individuals or families who want fresh, homemade bread without the time commitment of traditional baking. The ability to schedule baking with a timer means you can wake up to or come home to a warm loaf.
Beyond the ease, making your own multigrain bread is also notably more economical than regularly purchasing comparable loaves from stores or bakeries. The cost of flour, grains, yeast, and other basic ingredients is typically much lower than the retail price of specialty breads. Over time, these cost savings can add up, making the initial investment in a bread machine well worth it.
Time Investment and Learning Curve
While bread machine baking is largely automated, it still requires some time investment for measuring ingredients accurately and cleaning the pan afterward. It's not entirely zero effort, but the active time required is minimal compared to manual baking. Gathering and measuring ingredients might take 10-15 minutes, and cleanup is usually just washing the pan and paddle.
The learning curve for using a bread machine, especially for a straightforward multigrain recipe like this, is very low. Most machines are intuitive to operate, and following a reliable recipe and a few basic tips (like checking dough consistency) quickly leads to successful results. It's a much less intimidating entry point into bread baking than tackling manual techniques, making it highly accessible for beginners.
Health Benefits of Homemade Multigrain Bread
One of the most compelling reasons to bake your own multigrain bread is the control you have over its nutritional content. By choosing whole grains, seeds, and avoiding artificial additives, you create a healthier product. Multigrain bread is typically higher in dietary fiber than white bread, which aids digestion and helps maintain stable blood sugar levels.
The various grains and seeds incorporated provide a range of essential nutrients, including B vitamins, minerals like magnesium and zinc, and healthy fats from seeds. Baking at home means you know exactly what you're consuming, allowing you to tailor ingredients to dietary needs or preferences, such as reducing salt or sugar if desired. It's a nutritious foundation for countless meals and snacks.
Other Bread Machine Recipes to Explore on BakeWithEase
Sourdough Bread Machine Recipe
For those who enjoy the tangy flavor and unique texture of sourdough but want the convenience of a bread machine, exploring a sourdough bread machine recipe is a great next step. While achieving a true, deeply flavored sourdough typically involves maintaining a live starter and traditional fermentation, many bread machine recipes simulate the sourdough experience.
These recipes often use a combination of commercial yeast and a small amount of sourdough starter or even specific sourdough flavorings or dried starter products. The bread machine handles the kneading and baking, simplifying the process significantly compared to manual sourdough baking, which involves multiple long fermentation periods. It's a good way to get a taste of sourdough with less effort.
Cinnamon Raisin Bread Machine Recipe
If you're looking for a sweeter loaf perfect for breakfast or snacking, a cinnamon raisin bread machine recipe is a popular and delicious option. This type of bread combines the warmth of cinnamon with the sweetness and chewiness of raisins within a soft, tender crumb.
Making cinnamon raisin bread in a bread machine typically involves adding cinnamon with the dry ingredients and incorporating the raisins later in the kneading cycle. Many machines have a specific "sweet bread" cycle or an "add-in" beep that's perfect for introducing the raisins without them being completely broken down during initial mixing. It's a comforting and versatile loaf.
Gluten-Free Bread Machine Recipe
Baking gluten-free bread can be notoriously challenging due to the absence of gluten's structure-building properties. However, a bread machine can greatly simplify the process by providing controlled mixing and baking environments. Gluten-free bread machine recipes use alternative flours like rice flour, tapioca starch, and potato starch, often combined with binders like xanthan gum.
These recipes typically follow a different method than traditional wheat bread, often involving adding ingredients in a specific order and using a dedicated "Gluten-Free" cycle if available on the machine. The machine's consistent mixing and baking temperature help achieve a better rise and texture than might be possible with manual methods, making gluten-free baking more accessible and reliable for those with dietary restrictions.
Frequently Asked Questions
What makes this whole wheat bread machine recipe from BakeWithEase.com "simple"?
The recipe is designed for ease of use, prioritizing easy-to-find ingredients and a straightforward process suitable for bread machines. It reduces complexity without sacrificing flavor.
Can I substitute other flours for whole wheat in this BakeWithEase.com recipe?
While possible, substituting significantly will alter the texture and taste. We recommend sticking to whole wheat flour for the best results and adjusting hydration as needed.
What kind of bread machine is recommended for this recipe from BakeWithEase.com?
The recipe is designed to work with most standard bread machines. Ensure your machine can handle a 1.5 to 2-pound loaf and follow its manufacturer's instructions.
How does this whole wheat bread machine recipe from BakeWithEase.com ensure a "delicious" taste?
The recipe emphasizes the use of high-quality ingredients and a balanced combination of flavors, resulting in a satisfying and wholesome loaf. Careful measurements ensure proper texture.
What if my whole wheat bread from this BakeWithEase.com recipe comes out dense?
Density can be caused by too little yeast, too much flour, or not enough water. Ensure your yeast is fresh and measure ingredients accurately. Consider adding a bit more water.
Final Reflection: The Enduring Appeal of Homemade Whole Wheat
The ease and deliciousness of homemade whole wheat bread, once a laborious task, is now readily accessible thanks to modern bread machines. This simple recipe empowers anyone to experience the unparalleled satisfaction of warm, crusty, wholesome bread, a comfort food that transcends generations. The ability to control ingredients and avoid unnecessary additives makes this more than just a recipe; it's a pathway to healthier eating and mindful food preparation.
The impact of readily available, processed foods on our diets is undeniable, yet the desire for wholesome, homemade meals persists. This recipe, in its simplicity, offers a powerful counterpoint to the convenience of pre-packaged goods. It's a small act of rebellion against the fast-paced modern world, a reclaiming of culinary control. The best things in life are simple,
a sentiment that rings particularly true when savoring a loaf of freshly baked whole wheat bread.
Now, consider your own kitchen. Imagine the aroma of baking bread filling your home, the satisfying thud of the kneading cycle, and the pure joy of slicing into a warm, golden loaf. This isn't just about a recipe; it's about connecting with a fundamental human experience – the creation of food, the sharing of sustenance, and the simple pleasure of nourishing yourself and your loved ones with something wholesome and delicious. Try the recipe, adapt it to your preferences, and experience the wonder of whole wheat bread for yourself.
Unleash Your Inner Baker: Knead to Know More?
Thanks for joining us on this bread-baking adventure! We hope you now feel confident enough to tackle delicious, homemade whole wheat bread. Ready to take the next step?
- Bake your own loaf today! Use the recipe provided to create a warm, crusty, and incredibly satisfying whole wheat bread.
- Share your baking triumph! Post a picture of your creation on social media using #BakeWithEaseWholeWheat.
- Try experimenting! What other grains or seeds could you add to this recipe to elevate it to your own signature loaf?
What unique twist will you add to your next homemade whole wheat bread? Let us know in the comments below!