
Shaping Success: Tools for Baguettes, Boules, and Batards

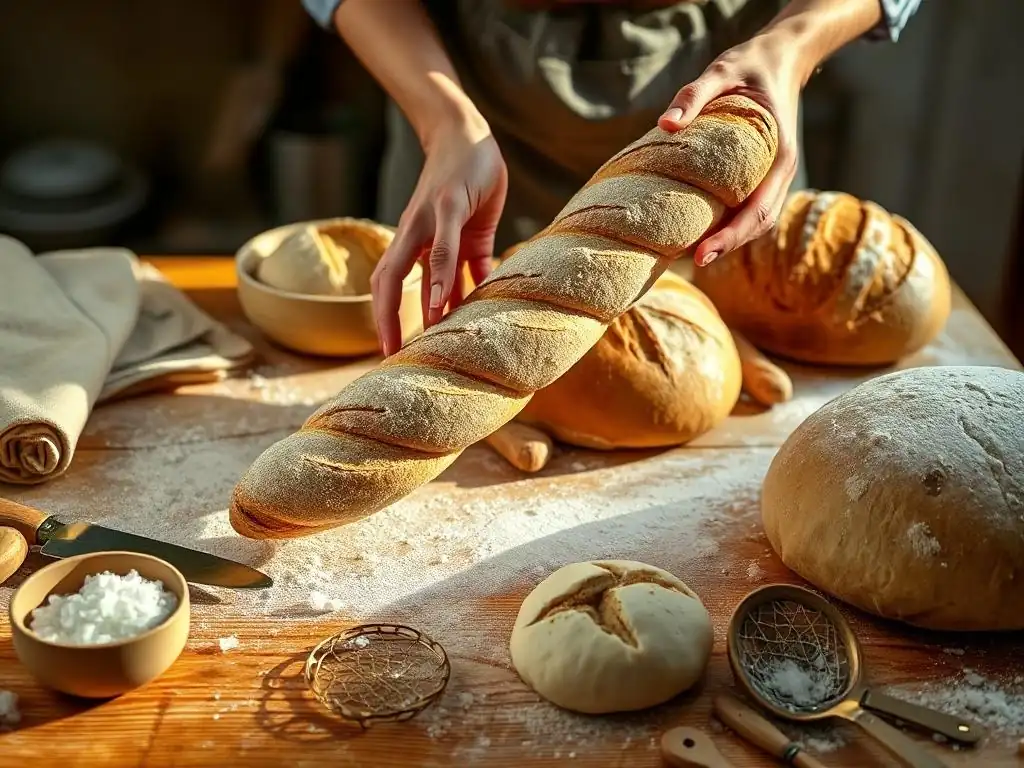
Welcome to BakeWithEase, your companion on the path to baking brilliance! Ever wondered if perfectly shaped baguettes are achievable at home? Unlocking the secrets to baguette shaping techniques is easier than you think. We're diving deep into the tools and methods that transform humble dough into bakery-worthy loaves. Ready to elevate your baking game? Let's explore the essentials for crafting stunning baguettes, boules, and batards!
- Mastering Baguette Shaping Techniques: A Guide for Home Bakers
- Essential Tools for Easy Baguette Shaping
- Baguette Shaping Techniques: A Step-by-Step Tutorial
- Boule and Batard Shaping: Alternatives and Techniques
- Beyond the Basics: Advanced Baguette Shaping Tips
- Troubleshooting Common Baguette Shaping Problems
- Elevate Your Baking: Recommended Resources and Recipes
-
Frequently Asked Questions
- How important is the dough's initial preparation for successful baguette shaping?
- What are some common mistakes beginners make when shaping baguettes?
- What type of surface is best for shaping baguettes?
- What are the essential tools mentioned by BakeWithEase for shaping baguettes, boules, and batards?
- How does shaping affect the final texture and crumb of a baguette?
- Final Reflection: The Enduring Art of Bread Shaping
- Unleash Your Inner Boulanger!
Mastering Baguette Shaping Techniques: A Guide for Home Bakers
Baking a beautiful, crusty baguette at home can feel like reaching the pinnacle of bread making. While the ingredients are simple – flour, water, yeast, and salt – the magic often lies in the technique, particularly in shaping. Mastering baguette shaping techniques easy isn't just about aesthetics; it profoundly impacts the final texture and structure of your bread. Getting the shape right ensures even baking, a beautiful crust, and that coveted open, airy crumb.
Many home bakers find shaping the most intimidating part of the process. Dough can be sticky, elastic, and sometimes uncooperative. However, with the right approach and a few essential tools, simplifying baguette shaping techniques is entirely achievable. This guide will break down the process, highlighting why proper shaping is crucial and introducing the tools that make it easier, ultimately helping you achieve those bakery-quality loaves in your own kitchen.
Why Proper Baguette Shaping Matters for Perfect Bread
The way you shape your dough directly influences how it behaves during proofing and baking. A well-shaped baguette has uniform tension across its surface, which helps it hold its form and encourages predictable oven spring. Conversely, poor shaping can lead to uneven loaves, dense spots, or a collapsed structure. Think of shaping as preparing the dough for its final performance in the oven.
Proper shaping also helps manage the dough's hydration. Baguette dough is often high-hydration, meaning it has a relatively large amount of water compared to flour (often 70-80% hydration or even higher). This makes it sticky but contributes to a moist, open crumb. Effective shaping techniques, like using gentle handling and building surface tension, allow you to work with this wet dough without incorporating excessive flour, preserving hydration and improving the final crumb structure.
Achieving the Ideal Crust and Crumb Structure: The Role of Shaping
Shaping plays a critical role in developing the internal structure, or crumb, of your baguette. The goal is often an open, irregular crumb with large air pockets interspersed with smaller ones. This is achieved by gently handling the dough to preserve the gas bubbles created during fermentation and by building sufficient surface tension during shaping. The tension acts like a skin, containing the expanding gases during oven spring and forcing the loaf to expand vertically and horizontally in a controlled manner.
Furthermore, the surface tension created during shaping contributes significantly to the development of the crust. A taut surface allows for even heat distribution and promotes the Maillard reaction and caramelization, resulting in a deep golden-brown color and that desirable crispy, crackly texture. Without adequate tension, the dough might spread too much, leading to a flatter loaf with a less impressive crust.
Avoiding Common Baguette Shaping Mistakes: A Baker's Checklist
Several common pitfalls can derail your efforts when learning baguette shaping techniques easy. One frequent mistake is using too much flour during the process. While a little flour can help manage sticky dough, excessive amounts get incorporated into the dough, altering the hydration and potentially leading to a dry, tight crumb. Aim for just enough flour to prevent sticking to your hands or the work surface.
Another common error is handling the dough too roughly. Aggressive kneading or pressing during shaping can deflate the precious gas bubbles you've worked hard to create during fermentation. Always handle the dough with a light, firm touch, folding and rolling rather than punching or squeezing. Finally, inconsistent tension is a major issue; one end of the baguette might be tight and the other loose, resulting in uneven expansion and a lopsided loaf. Practice building even tension from end to end.
- [ ] Use minimal flour during shaping.
- [ ] Handle dough gently to preserve gas bubbles.
- [ ] Build consistent surface tension.
- [ ] Ensure uniform thickness along the loaf.
- [ ] Avoid overworking the dough during shaping.
Essential Tools for Easy Baguette Shaping
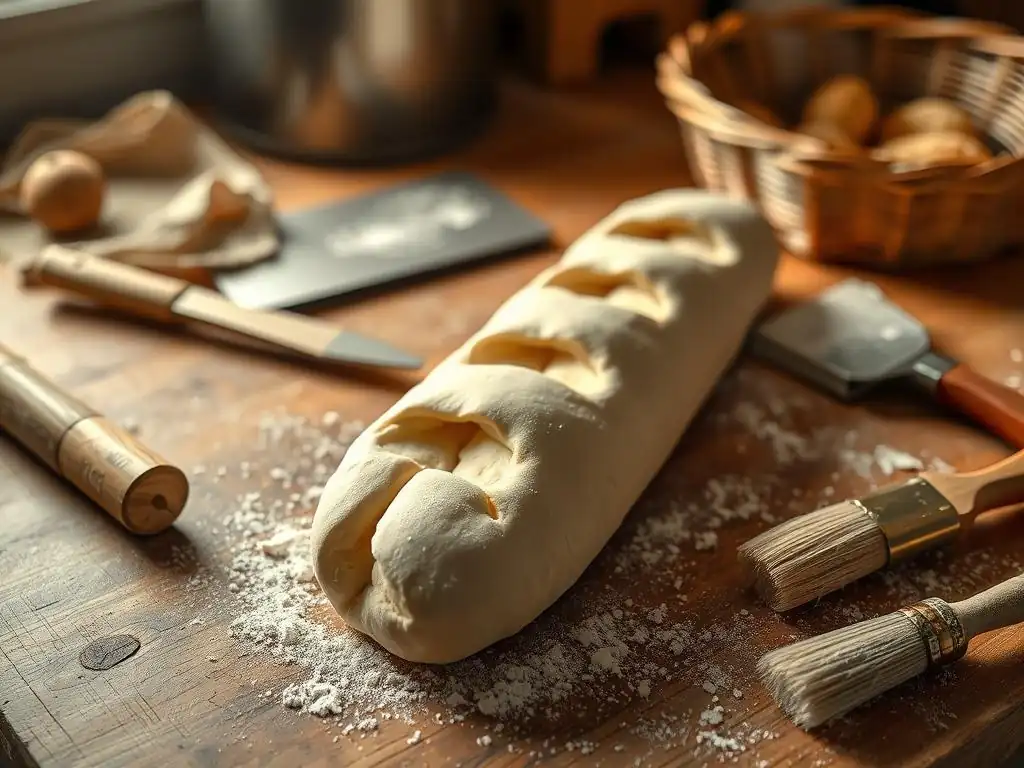
While skilled hands are fundamental, certain tools can significantly simplify baguette shaping techniques and improve consistency, especially for beginners. These aren't necessarily expensive or specialized items, but they are designed to make working with often-sticky dough more manageable and help maintain the delicate structure you've developed during fermentation. Having the right equipment can turn frustrating shaping attempts into a much smoother and more successful process.
Investing in a few key pieces can dramatically elevate your bread baking game. From dividing the dough cleanly to proofing and baking, each tool serves a specific purpose that contributes to achieving that perfect baguette shape and structure. Let's look at the must-haves that help make mastering baguette shaping techniques easy and enjoyable.
The Right Dough Scraper: The Importance of a Quality Dough Scraper
A good dough scraper is arguably one of the most versatile and essential tools in a baker's arsenal, especially when working with high-hydration doughs common in baguette recipes. It's not just for scraping dough off surfaces; it's crucial for dividing, handling, and even initial shaping. A sturdy, comfortable dough scraper provides control and precision that your hands alone cannot, minimizing sticking and making the process cleaner and more efficient.
Whether metal or plastic, a quality dough scraper should have a firm blade and a comfortable handle. Metal scrapers, often stainless steel, are excellent for scraping sticky dough from work surfaces and cutting through dough cleanly. Plastic scrapers are more flexible and great for scooping dough or cleaning out bowls. Having both can be beneficial, but a good metal scraper is a priority for precise cutting and handling wet dough.
Benefits of a Sharp, Sturdy Dough Scraper for Dividing Dough
Dividing your dough into equal portions is the crucial first step before shaping individual loaves. Using a sharp, sturdy dough scraper allows you to make clean cuts through the dough without tearing or stretching it excessively. Tearing the dough can damage the gluten structure and disrupt the delicate network of air bubbles, leading to a less open crumb. A clean cut preserves this structure.
For example, if you have a 1000-gram batch of dough and want to make four baguettes, a scraper lets you divide it accurately into roughly 250-gram pieces with minimal fuss. Trying to pull or tear the dough by hand would be messy and imprecise. The scraper allows you to work quickly and efficiently, minimizing handling time, which is particularly important for sticky, high-hydration doughs.
How to Use a Dough Scraper for Consistent Baguette Portions
To use a dough scraper effectively for dividing, turn your proofed dough out onto a lightly floured surface. Using the scraper, gently square up the mass of dough into a rough rectangle. Then, position the scraper blade vertically and press down firmly and swiftly to cut through the dough. For baguettes, aim for portions of a consistent weight, often between 250g and 350g depending on your desired loaf size and oven capacity.
After cutting, the scraper is also invaluable for scooping up the sticky portions without them adhering completely to your hands. Slide the scraper under a dough portion, using your other hand to guide it if necessary, and transfer it to your workspace for pre-shaping. This technique keeps your hands cleaner and minimizes stress on the dough.
Couche Cloth for Proofing Baguettes: Using a Linen Couche
Once your baguettes are shaped, they need a final proofing period before baking. A baker's couche, traditionally made of linen, is the ideal surface for this crucial step. A couche is a piece of heavy linen fabric dusted with flour, into which shaped loaves are nestled in folds. This provides support, preventing the loaves from spreading sideways and helping them maintain their elongated shape as they proof.
The structure provided by the couche is vital for baguettes, which are long and relatively thin. Without support, they would flatten out during proofing, resulting in wide, thin loaves instead of the desired round cross-section. Using a couche is a simple yet incredibly effective technique that contributes significantly to achieving the classic baguette form and making baguette shaping techniques easy to manage right through to the oven.
Why Linen is Superior for Proofing: Preventing Sticking and Maintaining Shape
Linen is the preferred material for couches due to its unique properties. Unlike cotton or other fabrics, linen fibers are hollow and wick away moisture from the surface of the dough. This prevents the dough from sticking to the cloth during the often-humid proofing environment. A sticky dough that adheres to the couche is difficult to transfer to the baking surface without deflating it.
Furthermore, the stiffness of the heavy linen fabric provides firm support for the delicate shaped loaves. The folds created in the couche cradle each baguette, maintaining separation and preventing them from merging as they expand during proofing. This structural support is key to ensuring your carefully shaped baguettes hold their form beautifully until they are ready to bake.
Setting Up Your Couche for Perfect Baguette Proofing
Setting up a couche is straightforward. Lay the linen fabric flat on a counter or baking sheet. Dust the surface generously and evenly with flour, typically rice flour because its fine texture is less likely to be absorbed by the dough. Place your first shaped baguette seam-side up (or down, depending on your preference for scoring) near one edge of the cloth.
Then, lift a fold of the cloth to create a ridge right next to the baguette. This ridge will support the loaf. Place the next baguette in the trough created by this fold, and repeat, creating folds between each loaf. Ensure there's enough space between loaves to allow for expansion during proofing. The couche can then be covered with a light cloth or plastic wrap to prevent the dough from drying out while it proofs.
Banneton Baskets for Boules and Batards: Round and Oval Options
While couches are ideal for baguettes, banneton baskets (also called proofing baskets) are the standard tool for proofing free-form loaves like boules (round) and batards (oval). Bannetons are typically made from cane, wicker, or sometimes plastic, and are lined with cloth or used bare. They provide structure and support to the dough as it undergoes its final rise, promoting a good shape and contributing to a lovely surface texture.
Using a banneton helps build surface tension and encourages the dough to rise upwards rather than outwards. The basket's shape dictates the final form of the loaf, ensuring a consistent size and height. They are available in various sizes and shapes, accommodating everything from small rolls to large, family-sized loaves.
Choosing the Right Size and Shape Banneton for Your Loaf
Selecting the correct banneton size is important. The dough should fill the basket about 60-75% before proofing, allowing room for expansion. If the basket is too large, the dough might spread too much; if too small, it could overflow. For boules, choose a round basket. For batards, select an oval one. Common sizes might be 8-inch round for a 500g flour recipe (yielding approx. 850g dough) or a 10-inch oval for a similar weight.
Consider the hydration of your dough. Higher hydration doughs benefit from the extra support of a banneton. The material matters too; cane baskets leave rings on the crust, while cloth-lined baskets result in a smoother surface. Choose based on your desired aesthetic and how much support your typical dough hydration requires.
Seasoning and Maintaining Your Banneton for Optimal Results
New bannetons, especially cane ones, often need to be "seasoned" to prevent dough from sticking. This usually involves misting the basket lightly with water and then dusting it heavily with flour, letting it dry completely. This creates a non-stick layer in the crevices. For regular use, a generous dusting of flour (rice flour is excellent here) before placing the dough in is usually sufficient.
Maintenance is simple: after use, let the basket dry completely, then brush out any excess flour. Do not wash cane bannetons with water unless absolutely necessary, as moisture can cause mold. If washing is needed, rinse quickly and dry thoroughly in a warm, airy place. Cloth liners can be laundered as needed. Proper care ensures your banneton remains non-stick and lasts for many uses.
Baking Stone or Steel for Oven Spring: Baking Steel vs. Baking Stone
Achieving maximum oven spring – the rapid expansion of the dough when it first hits the hot oven – is key to a light, airy crumb and a good crust. A preheated baking stone or baking steel is essential for providing the necessary high, consistent heat to the bottom of the loaf. This intense heat transfer causes the moisture in the dough to flash to steam, dramatically expanding the loaf before the crust sets.
Without a hot surface, the bottom crust sets too quickly, restricting upward expansion. While a preheated baking sheet can work, a stone or steel offers superior heat retention and transfer, leading to a more vigorous and sustained oven spring. This results in taller, more open loaves with a better overall structure and crust development.
The Science Behind Oven Spring: Maximizing Rise and Crust Formation
Oven spring occurs primarily in the first 10-15 minutes of baking. During this phase, residual yeast activity is accelerated by the heat, producing more carbon dioxide. More importantly, the water in the dough turns to steam. This steam expands rapidly, inflating the air pockets within the dough. A hot baking surface provides the intense heat needed to maximize this steam production from the bottom up.
Simultaneously, the heat begins to set the gluten structure and initiate crust formation. If the heat is insufficient, the crust sets too early, preventing the full expansion of the dough. A baking stone or steel stores a significant amount of thermal energy and transfers it efficiently to the base of the loaf, pushing it upwards and outwards before the top crust becomes rigid.
How to Use a Baking Stone or Steel for Artisan Bread
To use a baking stone or steel, place it in your oven before preheating. Position it on a rack in the lower or middle third of the oven. Preheat the oven to the desired temperature (often 450-500°F or 230-260°C) for at least 45 minutes to an hour, or even longer for steel, to ensure the stone or steel is fully saturated with heat.
Carefully transfer your proofed loaf onto the hot surface using a peel dusted with cornmeal or parchment paper. For baguettes, you might transfer several at once. For boules or batards proofed in a banneton, gently invert the basket onto the stone/steel. Work quickly and carefully to avoid losing heat. Using a baking stone or steel, combined with steam (often created by placing a tray of water in the oven), provides the ideal environment for maximum oven spring and crust development.
Baguette Shaping Techniques: A Step-by-Step Tutorial
Now that you understand the importance of shaping and the tools that help, let's walk through a step-by-step process for baguette shaping techniques easy enough for home bakers to master. This method focuses on building tension and creating the classic elongated shape while minimizing stress on the dough. Practice is key, but following these steps will set you on the path to success.
Remember to work on a clean, lightly floured surface. Have your dough scraper and prepped couche ready. The goal is to handle the dough efficiently to preserve the gas bubbles and develop a smooth, taut surface. Let's begin the journey to simplifying baguette shaping techniques.
Step 1: Dividing the Dough with Precision
The first step after the bulk fermentation is dividing your dough into individual portions for each baguette. Precision here helps ensure all your loaves bake evenly and have a consistent size and appearance. While not strictly necessary for flavor, uniform loaves look more professional and are easier to manage on your baking surface.
This is where your dough scraper becomes indispensable. Instead of tearing the dough, which can damage the gluten structure, a clean cut with a sharp scraper maintains the integrity of the dough, preserving the internal structure developed during fermentation.
Using a Dough Scraper for Equal Portions
Turn your dough out onto a lightly floured surface. Use your hands or the dough scraper to gently form it into a rough rectangle or square. Decide how many baguettes you want to make based on the total dough weight and your desired loaf size (e.g., 250g, 300g, 350g per baguette).
Using a scale, measure out each portion, cutting cleanly with the dough scraper. For example, if you have 1000g of dough and want four baguettes, cut four portions of approximately 250g each. Use the scraper to lift and move the cut portions.
Achieving Consistent Weight and Shape for Uniform Baking
Consistent weight is crucial for even baking times. Loaves of the same weight, baked at the same time, will cook through at a similar rate. While some variation is acceptable, aiming for portions within 10-20 grams of each other is a good practice.
Beyond weight, try to cut the portions into roughly similar shapes (e.g., rough squares or rectangles). This makes the subsequent pre-shaping step more uniform and predictable, contributing to overall consistency in your final baguettes.
Step 2: Pre-Shaping the Baguette
Pre-shaping is a brief intermediate step after dividing the dough and before the final shaping. Its purpose is to give the dough portions some initial structure and, more importantly, to build a little surface tension and prepare the dough for the final shaping step. This step is often followed by a short rest period.
Pre-shaping helps make the final shaping easier and more effective. It also allows the gluten to relax slightly after being handled and divided, preventing it from being too tight or springy during the final shaping, which could lead to misshapen loaves.
Creating a Loose Cylinder: The First Step to Shaping
Take one portion of dough and gently pat it into a rough rectangle. Then, fold one side in about a third of the way, pressing lightly to seal. Fold the other side over the first fold, creating a seam. Gently roll this cylinder to seal the seam further and create a little tension on the surface. Avoid pressing too hard or degassing the dough excessively.
The goal is not a tight shape yet, but rather a loose cylinder or log. This initial structure helps align the gluten strands and makes the final elongation much simpler. Repeat this process for all dough portions.
Resting the Dough: Allowing Gluten to Relax
After pre-shaping, cover the dough portions loosely and let them rest for 15-20 minutes. This rest period is called "bench rest." It allows the gluten, which became slightly tightened during dividing and pre-shaping, to relax.
A relaxed dough is much easier to shape into a long, thin baguette without tearing or resisting. If you try to shape dough that hasn't rested sufficiently, it will spring back, making it difficult to achieve the desired length and tapering. You'll notice the dough feels more pliable and extensible after this brief rest.
Step 3: Final Baguette Shaping: The Tapering Technique
This is the main event – transforming the pre-shaped cylinders into the classic baguette form with tapered ends. This step requires a gentle but firm touch to build significant surface tension while elongating the dough evenly. Mastering this step is key to achieving beautiful, classic baguettes.
The tapering technique involves rolling and stretching the dough progressively from the center outwards, ensuring the ends become thinner than the middle. This creates the iconic shape and helps the ends bake up crisp.
Using Your Hands to Create the Classic Baguette Shape
Take a pre-shaped, rested dough portion. Gently flatten it into a rectangle again. Fold the dough in half lengthwise and seal the seam firmly with the heel of your hand. Then, fold the dough in half lengthwise again and seal the seam meticulously. This double fold builds significant tension.
Now, using the palms of your hands, start rolling the dough back and forth on your lightly floured surface, starting from the center and moving outwards towards the ends. Apply gentle, even pressure, allowing the dough to elongate. As you reach the ends, lighten the pressure to allow them to taper. Keep rolling until the baguette reaches your desired length, typically 15-20 inches for standard home ovens.
Achieving Consistent Thickness and Taper for Even Baking
Consistency is vital here. Aim for a relatively uniform thickness along the main body of the baguette before the taper begins. Uneven thickness can lead to some parts of the loaf being overcooked while others are still pale.
Ensure the taper at both ends is gradual and symmetrical. Abrupt tapers or very thin points can burn during baking. The final shape should be a smooth, taut cylinder with gently pointed ends. The surface should feel tight and smooth, indicating good tension has been built.
Step 4: Proofing Your Baguettes in the Couche
Once shaped, the baguettes undergo their final proofing period. This is where the couche comes into play, providing the necessary support. Proper proofing allows the dough to expand and become light and airy before hitting the oven.
Proofing time varies depending on temperature and dough activity, but typically ranges from 60 to 90 minutes at room temperature, or longer if cold proofing in the refrigerator. You're looking for the dough to be visibly expanded and feel light and airy when gently poked (the indentation should spring back slowly).
Placing Baguettes in the Couche: Preventing Sticking
Generously flour your linen couche, preferably with rice flour. Carefully transfer each shaped baguette to the couche. If you shaped seam-side down, place it seam-side down in the couche. If you shaped seam-side up (less common for baguettes), place it seam-side up.
Create a fold in the linen next to the first baguette to support it. Place the next baguette in the trough created by the fold, and repeat. Ensure sufficient space (about 2-3 inches) between the loaves to prevent them from sticking together as they expand during proofing.
Maintaining Proper Humidity for Optimal Proofing
While the couche wicks away moisture from the surface of the dough to prevent sticking, the overall proofing environment shouldn't be dry, or the baguettes will form a skin, restricting expansion. Cover the couche and baguettes loosely with a light plastic sheet, a large plastic bag, or another piece of cloth.
Avoid airtight sealing, which can cause the dough to stick to the cover. The goal is to create a slightly humid microclimate around the dough. This allows the surface to remain pliable, facilitating even expansion during proofing and promoting better oven spring.
Boule and Batard Shaping: Alternatives and Techniques
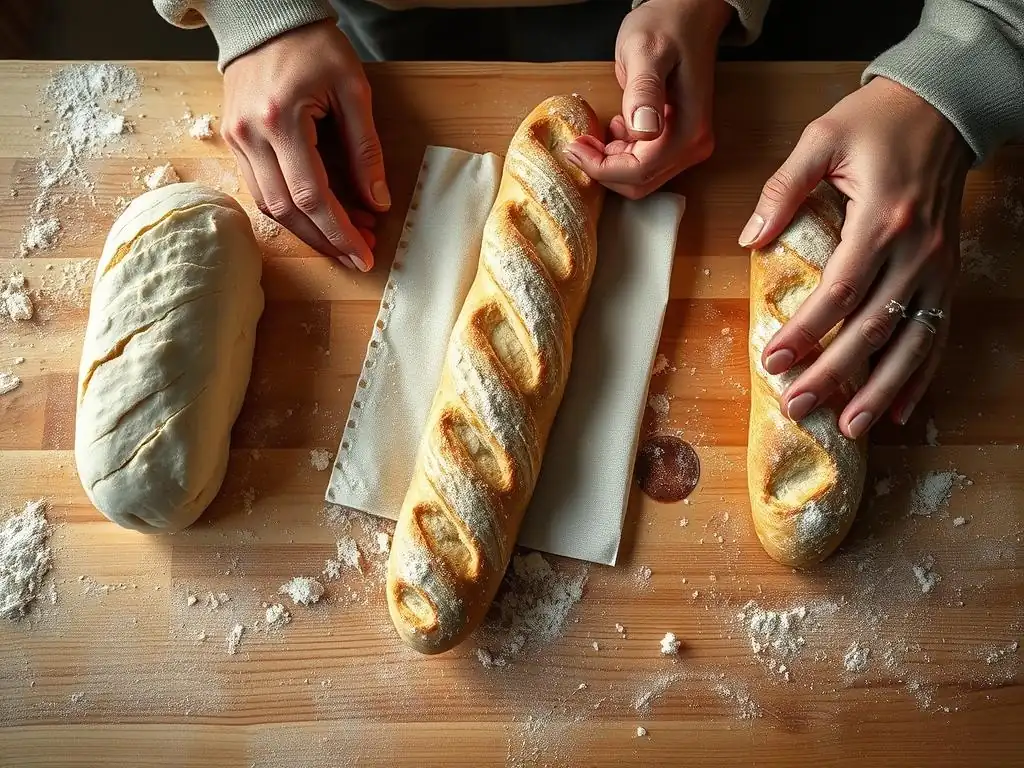
While baguettes are long and thin, boules and batards represent other classic free-form bread shapes. Boules are round loaves, and batards are oval. The shaping techniques for these differ from baguettes, focusing more on creating a tight, smooth surface ball or oval that will hold its shape and rise upwards during baking. These shapes are often proofed in banneton baskets.
Mastering these shapes expands your bread baking repertoire beyond baguettes. The principles of building surface tension and handling the dough gently remain the same, but the specific movements differ. Let's explore how to shape these equally delicious loaves.
Shaping a Boule: The Round Loaf
Shaping a boule aims to create a smooth, taut ball of dough. This tension on the surface is what helps the loaf maintain its round shape and encourages a beautiful, even rise. Boules are typically proofed seam-side up in a round banneton basket.
The technique involves folding the edges of the dough into the center repeatedly to build layers and tension, then rounding the dough against the work surface.
Using the Banneton for Round Loaf Shaping
After pre-shaping your dough portion into a rough round and letting it rest, it's time for the final boule shape. Flatten the dough gently. Fold the top edge down to the center, then the bottom edge up to overlap the first fold. Then, fold the left and right edges into the center. You should have a roughly square package.
Flip the dough over so the seam is underneath. Now, using your hands, gently cup the dough and rotate it against the work surface, using friction to pull the surface taut and create a smooth, round ball. Once shaped, place it seam-side up (the smooth side will be down) into a well-floured round banneton basket for proofing.
Tension and Surface: The Key to a Well-Shaped Boule
The taut surface created during shaping is crucial for a good boule. As the dough proofs and expands, this tension resists the outward spread, forcing the loaf to expand upwards. A slackly shaped boule will flatten out during proofing and baking, resulting in a wide, flat disc rather than a tall, rounded loaf.
The final surface should feel smooth and tight, like a balloon. Any wrinkles or loose spots indicate insufficient tension. Practice the rounding motion, using just enough pressure to create friction and tension without tearing the dough.
Shaping a Batard: The Oval Loaf
A batard is an oval loaf, combining aspects of both the baguette's elongation and the boule's tension. It's a versatile shape, easier to manage in a home oven than a long baguette and often yielding a slightly different crumb structure. Batards are typically proofed seam-side up in an oval banneton.
Shaping a batard involves creating layers and tension similar to a boule, but finishing with a rolling motion to achieve the oval shape.
Creating an Elongated Shape: Batard Shaping Techniques
Start with a pre-shaped, rested dough portion (often a rough rectangle or oval). Flatten it gently. Fold the top edge down to the center and press to seal. Fold the bottom edge up to meet the top edge, creating a seam along the bottom. Seal this seam firmly with the heel of your hand. You now have a log shape.
Now, using your palms, gently roll the log back and forth on your lightly floured surface, applying even pressure to elongate it into an oval shape. Focus on creating tension on the surface as you roll. The ends should be slightly rounded, not tapered like a baguette.
Proofing and Baking Batards: Considerations for Oven Spring
Once shaped, place the batard seam-side up into a well-floured oval banneton basket for proofing. Just like with boules, the banneton supports the dough and helps it hold its oval shape as it expands.
When proofed, carefully invert the batard onto your hot baking stone or steel. Scoring is essential for batards to control oven spring; a single slash down the length or several angled slashes are common. The tension built during shaping, combined with the support of the banneton and the heat of the baking surface, will contribute to excellent oven spring, resulting in a well-risen, beautifully shaped oval loaf.
Beyond the Basics: Advanced Baguette Shaping Tips
Once you've mastered the fundamental baguette shaping techniques easy steps outlined above, you might want to explore techniques for more challenging doughs or add decorative elements like scoring. Working with very wet doughs requires a slightly different approach, and scoring isn't just for looks – it serves a vital function during baking.
These advanced tips build upon your foundational knowledge, helping you refine your skills and achieve even better results, closer to those of professional artisan bakeries. They address common challenges like handling sticky dough and maximizing the visual appeal and structure of your loaves.
Working with High-Hydration Dough: Techniques for Sticky Doughs
High-hydration doughs (75% water or more relative to flour weight) are often very sticky and can be challenging to handle, especially during shaping. However, they typically yield a more open and tender crumb. Learning to work with these wetter doughs is a significant step in mastering artisan bread.
The key is to minimize contact with the dough and use tools and techniques that prevent sticking without incorporating excessive flour. A light touch and confidence are your best allies here.
Using Rice Flour for Easier Handling
Rice flour is a baker's secret weapon when working with sticky doughs, particularly for dusting proofing baskets and couches. Unlike wheat flour, rice flour doesn't contain gluten and isn't readily absorbed by the wet dough.
Dusting your work surface, hands, dough scraper, couche, or banneton with rice flour creates a barrier that prevents the sticky dough from adhering. A light dusting is usually sufficient. This allows you to shape the dough more cleanly and efficiently, simplifying baguette shaping techniques even with very wet doughs.
The Importance of a Light Touch
When handling high-hydration dough, a light, confident touch is crucial. Hesitation or rough handling will cause the dough to stick to everything. Use your dough scraper to help lift and fold the dough rather than relying solely on your hands.
During shaping, use the minimal amount of tension needed to create the desired form. Overworking the dough will deflate the precious air bubbles. Think of guiding and coaxing the dough into shape rather than forcing it. A quick, fluid motion is often better than slow, tentative movements.
Scoring Your Baguettes for a Professional Finish
Scoring, or slashing, the surface of your shaped dough just before baking is not merely decorative; it's functional. As the loaf experiences oven spring, the crust quickly sets. Without scoring, the expanding gases would burst through the weakest point, often resulting in an uncontrolled, ragged split.
Scoring provides controlled vents for the steam and gases to escape, allowing the loaf to expand predictably and evenly. This results in a better shape, contributes to oven spring, and creates those beautiful "ears" or ridges along the slashes, a hallmark of artisan bread.
Choosing the Right Lame: Using a Bread Lame
The best tool for scoring bread is a lame (pronounced "lahm"), which is essentially a razor blade attached to a handle. A sharp blade is essential for making clean cuts without dragging or tearing the dough, which can impede oven spring.
Lames come in various styles, some with straight blades (good for baguettes and single slashes) and others curved (ideal for creating ears on boules). While you can use a very sharp knife or razor blade carefully held, a purpose-built lame offers better control and safety, making precise scoring easier.
Scoring Techniques for Different Patterns
For baguettes, the classic scoring pattern consists of several overlapping diagonal slashes along the length of the loaf. Each slash should overlap the previous one by about a third. The depth of the slash is also important, typically about 1/4 to 1/2 inch deep.
Hold the lame at a shallow angle (around 20-30 degrees) to the surface of the dough and make confident, swift cuts. The angle helps create the "ear" as the dough expands. Practice different patterns on scrap dough or even paper to get a feel for the blade angle and pressure. Different patterns can affect the loaf's expansion and appearance, allowing for creative expression.
Troubleshooting Common Baguette Shaping Problems
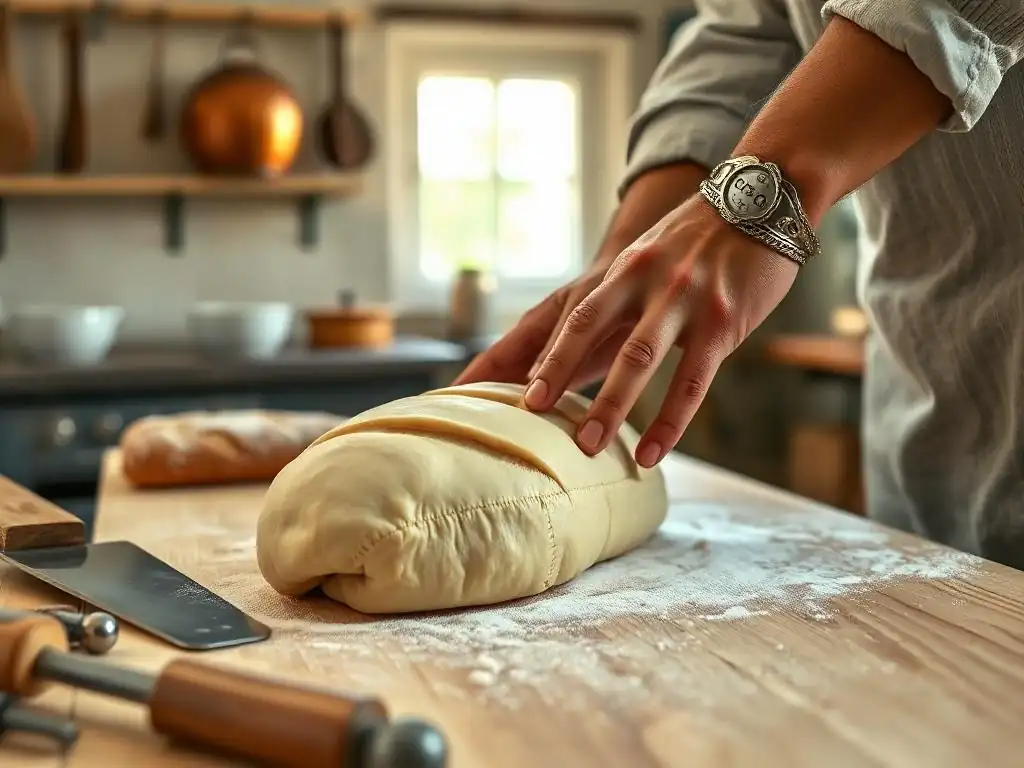
Even with the right tools and techniques, you might encounter challenges when learning baguette shaping techniques easy methods. Dough can be unpredictable, and tiny variations in temperature, hydration, or handling can affect the outcome. Recognizing common problems and knowing how to address them will save you frustration and improve your results over time.
Don't be discouraged by less-than-perfect loaves initially. Every bake is a learning opportunity. Understanding why a problem occurred is the first step to fixing it for your next batch. Let's look at some frequent issues home bakers face during shaping and proofing.
Dough Too Sticky: Solutions and Prevention
Problem: Your dough is excessively sticky, making it difficult to handle, shape, or transfer.
Solutions:
- Use minimal flour on your hands and work surface. Too much can dry out the dough, but too little makes it unmanageable. Rice flour is your friend here.
- Use a dough scraper extensively to lift and move the dough instead of your hands.
- Ensure your bulk fermentation hasn't gone too long; over-fermented dough can become very slack and sticky.
- Try a slightly lower hydration level in your next batch if you are consistently struggling.
- Work quickly and confidently; hesitation makes sticky dough worse.
Prevention: Accurate measurement of ingredients, especially water, is key. Pay attention to your bulk fermentation times and temperatures. Develop a feel for the dough at different hydration levels.
Uneven Shaping: Tips for Consistency
Problem: Your baguettes are different lengths, thicknesses, or have inconsistent tension, leading to lopsided loaves.
Solutions:
- Ensure your dough portions are of equal weight after dividing. Use a scale!
- During pre-shaping, try to create similarly sized and shaped cylinders.
- During final shaping, apply even pressure along the length of the dough as you roll. Focus on building tension from the center outwards.
- Practice the rolling motion, ensuring both hands are applying similar pressure and moving at the same rate.
- Use the folds in the couche to help support and maintain the straight shape during proofing.
Prevention: Pay attention to detail during dividing and shaping. Consistent technique is built through practice. Watch videos of experienced bakers shaping to refine your movements.
Poor Oven Spring: Identifying and Correcting Issues
Problem: Your loaves don't expand much in the oven, resulting in dense or flat bread.
Solutions:
- Ensure your oven and baking stone/steel are fully preheated for at least 45-60 minutes at a high temperature (e.g., 450-500°F).
- Make sure your dough is not under-proofed or over-proofed. Under-proofed dough is dense; over-proofed dough can collapse. A gentle poke test (slow spring back) is a good indicator.
- Ensure you have sufficient steam in the oven during the initial baking phase (e.g., using a steam pan or Dutch oven).
- Check that you built sufficient surface tension during shaping. A slack loaf won't rise well.
- Ensure your scoring is deep enough (1/4 to 1/2 inch) to allow for controlled expansion.
Prevention: Understand the signs of proper fermentation and proofing. Invest in a good oven thermometer to verify your oven temperature. Practice shaping techniques to build adequate tension.
Elevate Your Baking: Recommended Resources and Recipes
Mastering baguette shaping techniques easy steps is a rewarding process that significantly improves the quality of your homemade bread. The tools and techniques discussed here provide a solid foundation. Continuing to learn and experiment is key to becoming a confident bread baker.
There are many excellent resources available to help you further develop your skills, explore new recipes, and troubleshoot issues. Don't hesitate to seek out additional guidance and inspiration as you continue your baking journey.
BakeWithEase.com: More Bread Baking Tutorials
You've taken a great step by exploring this guide on BakeWithEase.com. Our website is dedicated to making baking accessible and enjoyable for everyone, from beginners to experienced home bakers. You can find many more resources here to help you improve your bread making skills.
Explore our collection of recipes for various types of bread, from rustic loaves to enriched doughs. We also offer tutorials on other essential techniques like kneading, fermentation, and understanding flour. Look for our guides on maintaining sourdough starters or exploring different types of grains.
Recommended Baking Books
For those who love to delve deeper, a few classic and contemporary baking books offer invaluable knowledge on bread making techniques. These books often provide detailed explanations, step-by-step photos, and a wide range of recipes.
Look for titles by renowned bakers like Ken Forkish (e.g., Flour Water Salt Yeast), Chad Robertson ( Tartine Bread), or Jeffrey Hamelman ( Bread: A Baker's Book of Techniques and Recipes). These authors provide comprehensive guides that can take your understanding and practice of bread making, including advanced baguette shaping techniques easy or complex, to the next level. Investing in a good baking book can be a valuable addition to your kitchen library.
Frequently Asked Questions
How important is the dough's initial preparation for successful baguette shaping?
The initial preparation, especially the dough's gluten development and first rise, is crucial. Poorly developed gluten results in a dough that's difficult to handle and won't hold its shape during baking.
What are some common mistakes beginners make when shaping baguettes?
Common mistakes include overworking the dough, which can make it tough, and not creating enough surface tension, resulting in a flat, shapeless baguette. Also, not properly sealing the seam can lead to the baguette splitting unevenly.
What type of surface is best for shaping baguettes?
A lightly floured surface is ideal. Too much flour can prevent proper grip, while not enough will cause the dough to stick, making it difficult to shape.
What are the essential tools mentioned by BakeWithEase for shaping baguettes, boules, and batards?
While tools are not always required, a bench scraper can be helpful for dividing the dough and a proofing basket (banneton) can assist in maintaining shape during the final rise. Careful hand technique is still the most important tool.
How does shaping affect the final texture and crumb of a baguette?
Proper shaping ensures even gas distribution, leading to a desirable open crumb and a light, airy texture. Inconsistent shaping can result in uneven air pockets and a denser loaf.
Final Reflection: The Enduring Art of Bread Shaping
The seemingly simple act of shaping a baguette, boule, or batard is far more than just a culinary technique; it's a gateway to understanding the fundamental principles of bread baking and a testament to the enduring power of craftsmanship. Mastering these techniques, as explored throughout this article, isn't just about achieving a beautiful loaf; it's about connecting with a tradition that spans centuries and finding satisfaction in the tangible results of your own skill and patience.
The impact of artisanal bread making extends far beyond the kitchen. It represents a return to mindful creation, a rejection of mass-produced uniformity, and a celebration of the simple pleasures found in handcrafted goods. Bread is the staff of life,
a phrase often repeated, speaks to its fundamental importance, but it also hints at the deeper satisfaction of creating something nourishing and beautiful with your own hands. This connection to the process, to the feel of the dough, and to the final product, is a powerful and rewarding experience that transcends mere sustenance.
Now, consider your own journey. Perhaps you've already tried your hand at shaping a baguette, or maybe this article has inspired you to give it a try. Regardless of your experience level, remember that the process of learning is as important as the final result.
Don't be afraid to experiment, to embrace imperfections, and to find joy in the journey of mastering these techniques. The next time you knead dough, take a moment to appreciate the artistry involved, and the satisfaction of creating something delicious and beautiful from simple ingredients. Embrace the challenge, and discover the enduring magic of bread shaping.
Unleash Your Inner Boulanger!
Thanks for joining us on this baking journey! We hope you've gained valuable insights and inspiration for crafting perfect baguettes, boules, and batards. Now it's time to put your newfound knowledge into action.
- Master your first perfect baguette: Grab your ingredients, follow your favorite recipe (or try one of ours! ), and enjoy the process of creating a delicious, crusty loaf. This is your time to shine!
- Share your baking triumph: Post a photo of your creation on social media using #BakeWithEase and tag us! Let's celebrate your success together.
- Explore new flour blends: Experiment with different types of flour to discover unique textures and flavors in your next bake. What exciting combinations will you create?
Ready to transform your kitchen into a French bakery? What exciting flavor profiles will you experiment with next?