
Splurge or Save? HighEnd Equipment for Serious Bread Makers

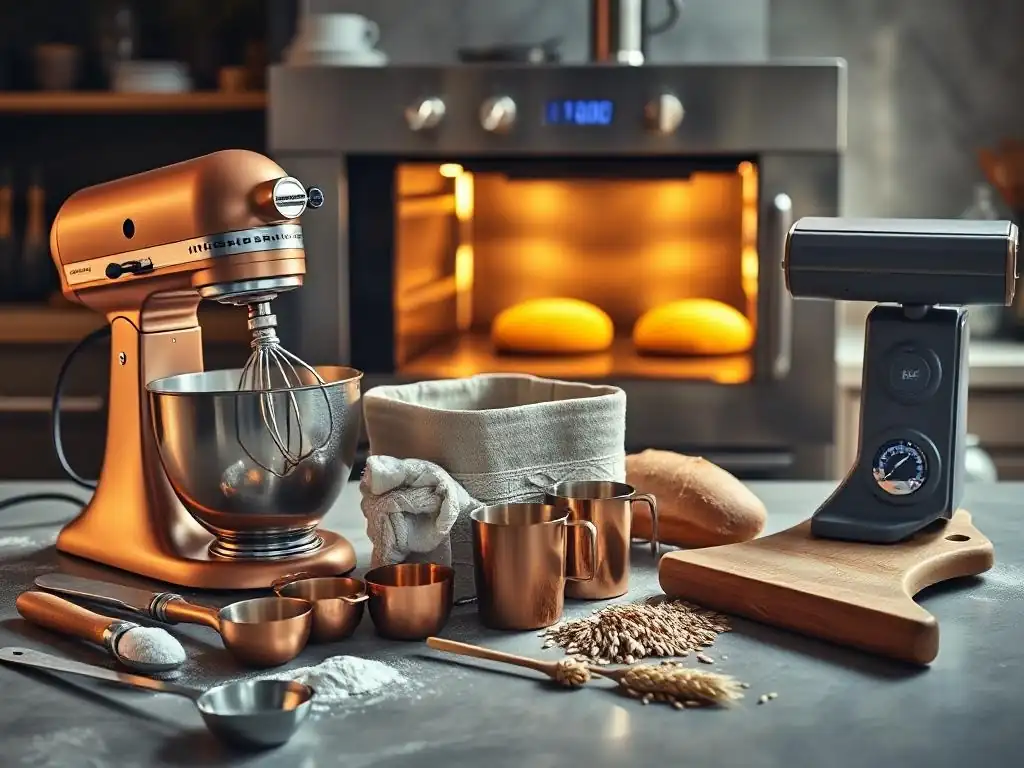
Welcome to BakeWithEase, where baking dreams become delicious realities! Are you ready to elevate your bread making from hobby to art form? This week, we're diving deep into the world of highend bread making equipment. But before you reach for your wallet, let's explore whether these premium tools are a worthwhile investment, or if you can achieve artisan results without breaking the bank. Intrigued? Let's get baking!
- Introduction: Elevating Your Bread Baking with Premium Tools
- The Stand Mixer Showdown: High-End vs. Budget Options
- Ovens for Artisan Bread: Achieving the Perfect Crust and Crumb
- Baking Stones and Dutch Ovens: Essential Tools for Home Bakers
- Bread Proofing Baskets (Bannetons): Shaping and Developing Flavor
-
Precision Scales and Thermometers: Accuracy for Consistent Results
- The Importance of Precise Measurements in Bread Baking
- Escali Primo Digital Scale vs. Ozeri ZK14-S Digital Kitchen Scale: A Precision Comparison
- Using a Digital Thermometer for Perfect Dough Temperature
- Ensuring Consistent Results: Eliminating Guesswork in Your Recipes
- Affiliate Link: Escali Primo Digital Scale
- Bread Knives: Slicing Your Masterpiece with Ease
- Conclusion: Making the Right Investment for Your Bread Baking Journey
-
Frequently Asked Questions
- What is considered high-end bread making equipment according to BakeWithEase?
- Is high-end bread making equipment necessary for beginners?
- What are the benefits of investing in high-end bread making equipment?
- What specific types of equipment fall under the category of "high-end" for bread making?
- Where can I find reviews and recommendations for high-end bread making equipment on BakeWithEase.com?
- Final Reflection: The Flour Power of Informed Choice
- Unleash Your Inner Artisan Baker!
Baking bread at home is a rewarding journey, and while you can start with minimal tools, serious bread makers often consider upgrading their arsenal. The pursuit of the perfect loaf – with its crackling crust, airy crumb, and deep flavor – can lead you down a path exploring more specialized and often more expensive equipment. This isn't just about having fancy gadgets; it's about consistency, efficiency, and achieving results that might be difficult with basic tools.
Deciding when and where to invest in high-end bread making equipment can feel daunting. Is a professional-grade stand mixer truly necessary? Will a specialized oven make that much difference? This article delves into some key pieces of equipment serious bakers consider, examining the benefits of splurging versus saving, and helping you understand where your money can make the most impact on your bread baking journey. We'll look at how quality tools can transform your process and the final product.
Why Invest in High-End Bread Making Equipment?
Investing in high-end bread making equipment goes beyond mere convenience; it's often about achieving a level of precision and performance that standard tools cannot match. For instance, a powerful stand mixer designed for dough can handle large batches of stiff, low-hydration dough or very wet, high-hydration doughs (like ciabatta, sometimes over 80% hydration) with ease, kneading them consistently for the optimal gluten development required for structure and texture. A less powerful machine might overheat, struggle, or fail to develop the gluten network properly, leading to dense loaves.
Furthermore, specialized equipment can significantly improve consistency, which is crucial for replicating successful bakes. An oven with precise temperature control and even heat distribution ensures your bread bakes uniformly, preventing burnt bottoms or pale tops. Similarly, a high-quality digital scale accurate to 0.1 grams is essential for measuring small but critical ingredients like salt or yeast, especially when scaling recipes or working with preferments where small errors can have a big impact. This level of control allows serious bread makers to fine-tune their process and consistently produce high-quality loaves.
Understanding the ROI on Professional Baking Gear
Evaluating the return on investment (ROI) for high-end bread making equipment involves considering durability, performance, and the satisfaction derived from consistent, high-quality results. While a budget stand mixer might cost $100-$200 and last a few years under heavy dough-kneading load, a high-end model like a KitchenAid Pro Line or Ankarsrum might cost $600-$1000 but could last a decade or more with proper care, even with frequent use (several times a week). Over time, the cost per use can be lower, and you avoid the frustration and expense of replacing a less durable machine.
Beyond just lifespan, the performance benefits contribute to ROI. A powerful mixer saves time and effort on kneading, allowing you to bake more frequently or tackle more challenging recipes. A reliable oven reduces the number of failed bakes (sunken loaves, tough crusts), saving on ingredient costs and wasted time. While the initial outlay for high-end bread making equipment is significant, the long-term savings in durability, improved efficiency, and consistent success can justify the expense for dedicated bread makers who bake regularly and are committed to mastering their craft.
The Stand Mixer Showdown: High-End vs. Budget Options
The stand mixer is often the first major investment serious home bakers consider. For bread making, its primary function is kneading dough, a task that requires significant power and endurance, especially for large or stiff doughs. Budget mixers, typically costing under $200, often have less powerful motors (e.g., 300-450 watts) and lighter construction, making them suitable for occasional use or lighter doughs like brioche or enriched rolls. However, they may struggle with larger batches of lean dough (like sourdough or baguette dough, often 500g+ flour) or very stiff doughs, potentially overheating or vibrating excessively.
High-end stand mixers, conversely, are built with more robust motors (500+ watts, sometimes even 800+ watts in professional-style models) and heavier-duty components. They are designed to handle the strain of kneading large volumes of dense dough for extended periods without overheating.
Brands like KitchenAid (especially their Pro Line or Commercial models) or specialized mixers like Ankarsrum Original are renowned for their durability and power, making them the preferred choice for serious bread makers who bake frequently or in larger quantities. The difference in performance is often immediately noticeable when attempting to knead a kilogram of sturdy rye dough or a high-hydration sourdough.
KitchenAid Pro Line vs. Cuisinart SM-50: A Feature-by-Feature Comparison
Comparing specific models highlights the differences. The KitchenAid Pro Line series (e.g., 7-quart model) typically features a powerful DC motor (around 500 watts effective power, often compared favorably to higher wattage AC motors) and a bowl-lift design, which provides stability when mixing heavy loads. It often includes durable, all-metal attachments. This model is engineered for heavy-duty use and larger batches, handling up to 14 cups of all-purpose flour or 12 dozen cookies. Its robust construction and motor make it a staple in many serious home baking kitchens.
In contrast, the Cuisinart SM-50 (5.5 quart) uses a 500-watt AC motor and a tilt-head design, common in many home mixers. While capable of handling standard baking tasks and moderate bread dough (up to about 6 cups of flour), its motor and gearing are generally not designed for the continuous, high-stress demands of kneading large quantities of stiff bread dough multiple times a week.
The tilt-head can also be less stable than a bowl-lift under heavy load. While it's a versatile mixer for general baking, the difference in build quality and motor design makes the KitchenAid Pro Line a more suitable choice for dedicated, high-volume bread making.
Power and Performance: Does a High-End Stand Mixer Justify the Cost?
For serious bread makers, the power and performance of a high-end stand mixer are often key justifications for the higher cost. Kneading dough correctly is fundamental to bread structure. A powerful mixer ensures thorough and consistent gluten development, even with challenging doughs like those used for bagels or dense whole wheat loaves, which can be incredibly taxing on a motor.
This leads to better oven spring and crumb structure in the final loaf. A less powerful mixer might require longer kneading times, which can lead to overheating or simply fail to achieve the necessary dough development, resulting in a subpar loaf.
Consider the time saved and physical effort avoided. Hand kneading a large, stiff dough to full development can take 20-30 minutes of strenuous work. A high-end mixer can often achieve the same result in 8-12 minutes with minimal effort from the baker. For someone baking multiple loaves each week, this time and energy saving adds up significantly. Furthermore, the ability to confidently handle diverse dough types and larger batch sizes opens up new possibilities for the serious bread maker, making the investment worthwhile for those committed to expanding their repertoire and baking volume.
Durability and Longevity: Investing in a Stand Mixer That Lasts
One of the most compelling arguments for investing in high-end bread making equipment, particularly a stand mixer, is its superior durability and longevity. These machines are built with heavy-duty materials, often featuring metal gears and more robust housing compared to the plastic components sometimes found in budget models. This construction is designed to withstand the significant torque and stress involved in kneading dense doughs repeatedly over many years.
While a budget mixer might show signs of strain or failure after a few years of regular bread baking (e.g., motor burning out, gears stripping), a high-end model from a reputable brand is expected to perform reliably for a decade or even longer. Think of it as a long-term investment.
The initial cost is higher, perhaps $600-$1000 or more, but if the mixer lasts 15 years, the annual cost is significantly lower than replacing a $150 mixer every three years. For serious bread makers who plan to bake for years to come, the peace of mind and consistent performance offered by a durable, high-end machine makes it a wise long-term investment.
Affiliate Link: KitchenAid Pro Line Stand Mixer (with special BakeWithEase discount!)
Ovens for Artisan Bread: Achieving the Perfect Crust and Crumb
The oven is arguably the most critical piece of equipment for achieving artisan-quality bread. While any oven can bake bread, a truly great loaf requires specific conditions: high, consistent temperature, and often, steam during the initial phase of baking. Standard home ovens can struggle with temperature fluctuations (sometimes varying by 25-50°F from the set temperature), uneven heat distribution, and typically lack a built-in steam injection system. This can lead to loaves with thick, tough crusts, poor oven spring, and inconsistent browning.
High-end oven options for the home baker range from specialized countertop ovens designed for baking to full-sized professional-style ranges. What sets them apart for bread making is their ability to maintain stable, high temperatures (often 450°F to 500°F or higher), provide even heat through convection or radiant heat, and sometimes offer features like steam assist. Achieving a consistent baking environment is paramount for developing a beautiful crust and maximizing oven spring, leading to that desirable light and airy crumb structure that defines artisan bread.
The Importance of a Reliable Oven for Sourdough Success
Sourdough baking, in particular, heavily relies on a reliable oven capable of reaching and maintaining high temperatures. The high hydration and often large size of sourdough loaves require intense heat in the first 15-20 minutes of baking to trigger maximum oven spring. This rapid expansion is what creates the airy crumb and helps set the structure before the crust hardens. If the oven temperature drops significantly when the dough is loaded or fluctuates during baking, the potential for oven spring is reduced, leading to a denser loaf.
Beyond temperature stability, even heat distribution is vital. A hot spot in the oven can cause one side of the loaf to brown too quickly or even burn, while another part remains underbaked. A reliable oven ensures that heat is distributed evenly throughout the chamber, whether through well-placed heating elements or effective convection fan placement, resulting in a uniformly baked loaf with a consistently golden-brown crust. For serious sourdough bakers striving for repeatable results, a dependable oven is non-negotiable.
Comparing Convection Ovens: Breville Smart Oven vs. Cuisinart TOA-60
Countertop convection ovens offer a more accessible step up for serious bread makers who may not be ready for a full professional range. The Breville Smart Oven series (like the Smart Oven Air Fryer Pro) is often lauded by bakers for its precise temperature control, multiple heating elements (some above, some below, some in the back with the fan), and powerful convection fan. These features help maintain a stable temperature and ensure even heat distribution, crucial for consistent baking. Some models also have dedicated settings that approximate conditions needed for bread.
The Cuisinart TOA-60, while a popular countertop oven, is often more focused on air frying and general toasting/baking. While it includes convection, its temperature accuracy and stability at high bread-baking temperatures might not match the precision engineered into models more geared towards serious baking tasks like the Breville. For a serious bread maker, the Breville's attention to heating element placement and fan performance for even baking at high heat often provides a noticeable advantage in crust development and overall bake quality compared to general-purpose countertop ovens.
Temperature Control and Consistency: Crucial for Baking Perfection
Precise temperature control and consistency are foundational to successful bread baking. Most artisan bread recipes call for baking at temperatures between 400°F (200°C) and 500°F (260°C). An oven that accurately reaches and holds the set temperature is vital. Significant temperature swings – perhaps dropping 50°F or more when the oven door is opened to load the bread and then struggling to recover quickly – can negatively impact oven spring and crust formation.
High-end ovens often feature more sensitive thermostats, better insulation, and more powerful heating elements that recover temperature faster. Some even have internal temperature probes for verification. This ensures that the dough is exposed to the intended temperature profile throughout the bake. Consistent heat distribution, free from hot spots, prevents uneven baking and allows the baker to predict how the loaf will brown and set every time, leading to more reliable and higher-quality results batch after batch.
Steam Injection: A Game-Changer for Crusty Bread
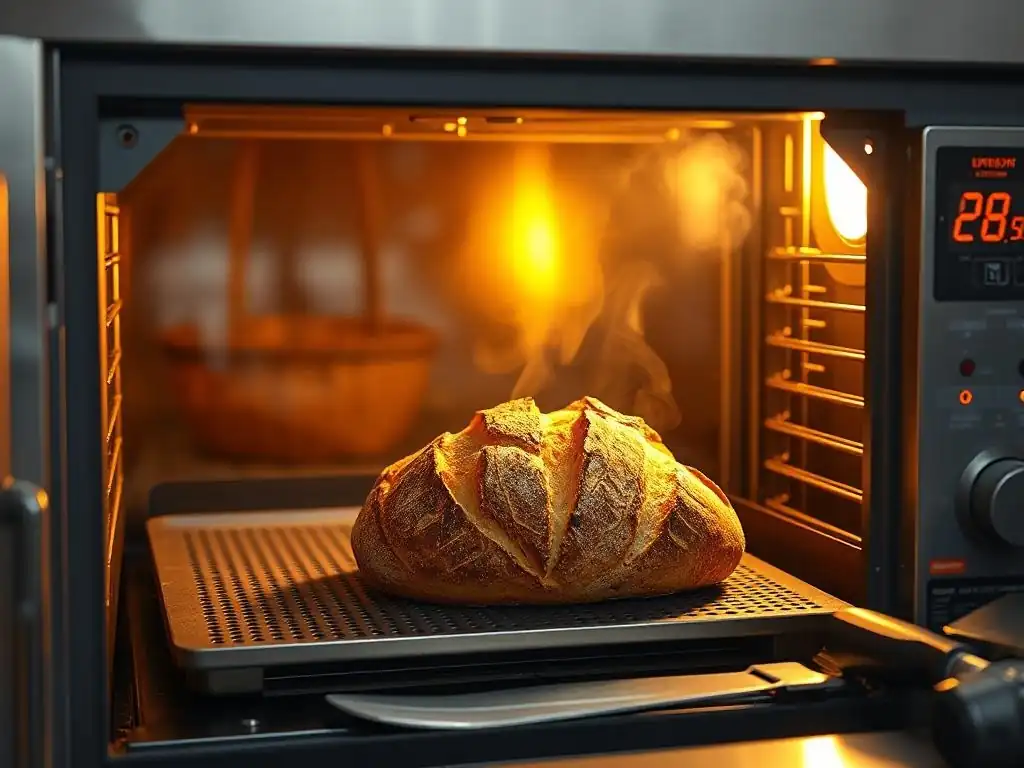
Steam is a critical element in achieving the thin, crispy crust characteristic of artisan bread like baguettes and sourdough. Introducing steam into the oven during the first part of the bake keeps the surface of the dough moist and pliable. This prevents the crust from hardening too quickly, allowing the loaf to expand fully (oven spring) before the crust sets. Without steam, the crust forms rapidly, restricting expansion and resulting in a denser loaf with a thicker, sometimes tougher crust.
While home bakers often create steam manually using methods like placing a tray of hot water or ice cubes at the bottom of the oven, or baking in a Dutch oven, some high-end ovens offer built-in steam injection features. These systems automatically release a controlled amount of steam at the beginning of the bake cycle. This provides a consistent, high-humidity environment that is difficult to replicate manually, leading to superior crust development and oven spring. For serious bread makers focused on achieving professional-level crusts, a steam-capable oven is a significant advantage.
Affiliate Link: Breville Smart Oven Air Fryer Pro
Baking Stones and Dutch Ovens: Essential Tools for Home Bakers
Even without a high-end oven, serious bread makers can significantly improve their results using baking stones or Dutch ovens. These tools serve a similar purpose: they act as a thermal mass, storing and radiating intense heat directly to the dough. This mimics the effect of a professional hearth oven, providing a burst of heat from below or surrounding the loaf, which is crucial for maximizing oven spring and developing a good crust. They are often considered essential equipment for home bread bakers, regardless of the oven type.
A baking stone (made of ceramic, cordierite, or steel) is preheated in the oven and the dough is placed directly on it. The hot stone immediately transfers heat to the base of the loaf. A Dutch oven (typically cast iron or ceramic) is also preheated, and the dough is placed inside and baked with the lid on for the first part of the bake.
The lidded environment traps the moisture released by the dough as it bakes, creating a self-steaming effect that is highly beneficial for crust development. Both methods are highly effective ways to improve results in a standard home oven.
The Science Behind Baking Stones and Dutch Ovens
The effectiveness of baking stones and Dutch ovens lies in their high thermal mass. Materials like ceramic, cordierite, steel, and cast iron can absorb and retain a significant amount of heat from the oven. When the relatively cool dough is placed on a preheated stone or inside a preheated Dutch oven, this stored heat is rapidly transferred to the dough. This intense initial heat helps the dough rise quickly and prevents the bottom crust from forming too soon, allowing for better oven spring.
Furthermore, the Dutch oven's lidded environment plays a crucial scientific role. As the dough heats up, it releases moisture in the form of steam. With the lid on, this steam is trapped inside the pot, creating a very humid micro-environment around the loaf. This high humidity keeps the surface of the dough moist and elastic, preventing the crust from hardening prematurely. This allows the dough to expand fully in the hot environment before the lid is removed (typically halfway through the bake), at which point the moist surface dries out and forms a thin, crisp crust.
Emile Henry Bread Cloche vs. Lodge Cast Iron Dutch Oven
For serious bread makers, comparing specific tools like the Emile Henry Bread Cloche and a Lodge Cast Iron Dutch Oven highlights different approaches to achieving similar results. The Emile Henry cloche is a ceramic baker designed specifically for bread. It consists of a base and a dome. The ceramic material heats up well and radiates heat evenly. The dome effectively traps steam released by the dough, creating a humid environment. It's often praised for being relatively lightweight compared to cast iron and producing excellent crusts.
A Lodge Cast Iron Dutch Oven, on the other hand, is a versatile piece of cookware that also excels at baking bread. Cast iron has exceptional thermal mass and retains heat incredibly well. When preheated to 450-500°F, it provides intense radiant heat. The heavy lid creates a very tight seal, trapping steam effectively. While heavier and requiring more careful handling (seasoning, avoiding rust), a quality cast iron Dutch oven like those from Lodge is incredibly durable and provides a consistently excellent baking environment, often preferred for its robust heat retention, especially for larger or wetter loaves.
Heat Retention and Distribution: Maximizing Your Oven's Potential
Both baking stones and Dutch ovens significantly enhance heat retention and distribution within a standard home oven, maximizing its potential for bread baking. A baking stone, once fully preheated (often for 45-60 minutes or more), acts as a heat battery. When the dough is loaded, it absorbs the initial shock of the cooler dough and continues to radiate consistent heat upwards, ensuring the bottom of the loaf bakes thoroughly and develops a good crust without becoming pale or undercooked.
A preheated Dutch oven surrounds the loaf with intense, even heat from all sides. The thick walls and base of cast iron or ceramic retain heat exceptionally well, providing a stable baking temperature inside the pot, often more stable than the ambient temperature in the oven itself. This even heat distribution ensures the loaf bakes uniformly. By utilizing the thermal mass of these tools, serious bread makers can overcome the limitations of less consistent home ovens and achieve results that are much closer to those from professional baking equipment.
Achieving Oven Spring: The Key to a Light and Airy Loaf
Oven spring – the rapid expansion of the dough during the first 10-20 minutes of baking – is crucial for achieving a light, airy crumb structure and a well-shaped loaf. This phenomenon is driven by the sudden increase in temperature, which causes trapped gases (carbon dioxide from fermentation and water turning to steam) to expand rapidly before the dough's structure sets. To maximize oven spring, the dough needs intense, even heat from the moment it enters the oven and a moist environment to keep the crust pliable.
Baking stones and Dutch ovens are invaluable tools for maximizing oven spring in a home setting. A preheated baking stone delivers immediate, intense heat to the base of the loaf, initiating rapid expansion from below. A preheated Dutch oven provides intense heat from all directions and, critically, traps steam. This steam keeps the surface of the dough soft and elastic, allowing the loaf to expand freely upwards and outwards before the crust hardens. This combination of high heat and steam is the secret to achieving that impressive rise and open crumb structure serious bread makers strive for.
Affiliate Link: Emile Henry Bread Cloche
Bread Proofing Baskets (Bannetons): Shaping and Developing Flavor
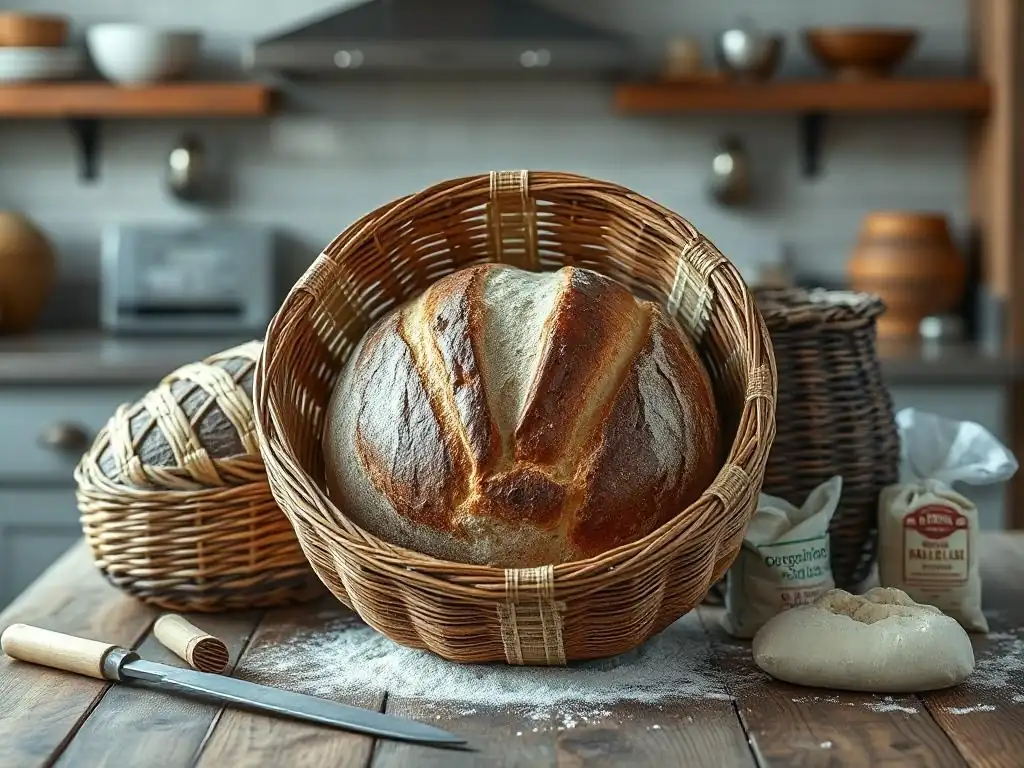
Bread proofing baskets, commonly known as bannetons, are essential tools for serious bread makers working with higher hydration doughs, particularly sourdough. While not directly involved in the baking process itself, they play a critical role in shaping the final loaf and contributing to its structure and crust texture. Bannetons provide support to the dough during its final proofing stage, preventing it from spreading outwards and encouraging it to hold a defined shape as it develops strength and volume.
Beyond shaping, bannetons can influence the dough's surface. Traditional bannetons made from cane or wood pulp wick away a small amount of moisture from the dough's surface, creating a slightly drier skin. This drier surface is easier to score cleanly and helps develop a crispier crust during baking. The coiled pattern of cane bannetons also imparts a classic spiral design onto the loaf's surface, a hallmark of artisan bread. For serious bread makers aiming for beautifully shaped loaves with excellent crusts, a good banneton is indispensable.
Different Types of Bannetons: Round, Oval, and More
Bannetons come in various shapes and sizes to accommodate different loaf styles. The most common shapes are round (for boules) and oval (for bâtards). Within these shapes, they are available in different sizes to hold varying weights of dough, typically ranging from 500g up to 1.5kg or more. Choosing the right size is important; the dough should fill the banneton comfortably when proofed, providing support without being overly constricted or having too much space to spread.
Less common but still used by serious bread makers are specialized shapes like long, narrow baskets for baguettes or shallow, wide baskets for flatter loaves like ciabatta (though ciabatta is often proofed without a basket). The material also varies: traditional cane (rattan) is most common, but wood pulp bannetons (like Brotforms) offer a smoother finish and are easier to clean, while some modern options are made from plastic. Each type offers slightly different properties in terms of moisture wicking and dough release.
High-End Bannetons from Brotform vs. Standard Options
When considering bannetons, serious bread makers might look at differences between standard cane baskets and those marketed as high-end, such as authentic Brotforms made from wood pulp. Standard cane bannetons are widely available and effective. They are relatively inexpensive and, when properly floured, release dough well and impart the classic spiral pattern. Their porous nature helps wick away moisture.
Brotforms, originally from Germany, are made from compressed spruce wood pulp. They offer a smoother, more uniform surface than cane, leaving the dough surface smooth or with a fine texture depending on the specific model. Proponents claim they wick moisture more evenly and are easier to clean as dough is less likely to stick. While perhaps costing slightly more than basic cane baskets, Brotforms are considered a high-end option for their durability, ease of use, and the consistent, smooth surface they provide for the dough, which can be advantageous for precise scoring.
Material and Craftsmanship: How It Affects Your Dough
The material and craftsmanship of a banneton directly impact how it interacts with your dough during proofing. Traditional cane bannetons, made from coiled rattan, are breathable and absorbent. The natural fibers wick moisture from the surface of the dough, which helps in developing a skin that is easier to score and contributes to a crispier crust. The quality of a cane banneton depends on the tightness of the weave and the smoothness of the cane; poorly made ones can have splinters or gaps that snag the dough.
Wood pulp bannetons (Brotforms) offer a different interaction. Their surface is less porous than cane, wicking less moisture, which can be beneficial for very high-hydration doughs or in very dry environments. They are pressed into shape, resulting in a consistent, smooth surface. Plastic bannetons are non-absorbent and primarily offer shaping support; they are often used with a linen liner. For serious bread makers, understanding how each material affects moisture and surface tension allows them to choose the best tool for their specific dough type and desired crust texture.
Developing a Strong Gluten Structure During Proofing
While kneading develops the initial gluten network, proofing in a banneton supports the dough as it continues to ferment and develop strength. As the yeast produces gas, the dough expands. The banneton provides external support, forcing the dough to expand upwards rather than outwards. This upward expansion helps build vertical structure and tension within the dough, which is crucial for achieving good oven spring.
The gentle support of the banneton allows the gluten network to relax slightly while the dough gains volume and the flavors deepen. For high-hydration doughs that would otherwise spread into a flat disc, the banneton is essential for maintaining a cohesive shape. The tension created by proofing in a restricted space helps the dough hold its form when it is inverted onto the baking surface, ensuring a well-rounded or elongated loaf shape. This structural support during the final proof is a key benefit of using a banneton for serious bread makers.
Affiliate Link: Brotform Banneton Set
Precision Scales and Thermometers: Accuracy for Consistent Results
In bread baking, precision is paramount, and nowhere is this more evident than in measuring ingredients. Unlike cooking, where approximations often suffice, baking is a science that relies on precise ratios. The hydration level (water as a percentage of flour weight), salt percentage, and yeast or starter quantity must be accurate to ensure the desired dough consistency, fermentation rate, and flavor development. Relying on volume measurements (cups and spoons) can lead to significant inconsistencies due to variations in how ingredients are scooped and packed.
This is where high-quality digital scales become essential for serious bread makers. A scale that measures accurately in grams (ideally to 0.1g increments for small amounts of yeast or salt) allows for exact replication of recipes and precise adjustments. Similarly, a digital thermometer is crucial for monitoring dough temperature during mixing and proofing, as temperature significantly impacts fermentation speed. Investing in accurate measuring tools is perhaps one of the most impactful steps a serious home baker can take to improve consistency.
The Importance of Precise Measurements in Bread Baking
Precise measurements, particularly by weight, are fundamental to consistent bread baking results. Flour density can vary based on type, humidity, and how it's stored, meaning a "cup" of flour can weigh anywhere from 120g to 150g. This variation can drastically alter the hydration percentage of a dough. For example, in a recipe calling for 500g of flour and 350g of water (70% hydration), an extra 30g of flour (due to volume measurement error) changes the hydration to effectively 64%, resulting in a much stiffer dough that behaves differently during kneading, proofing, and baking.
Measuring by weight eliminates this variability. Using a digital scale ensures that 500g of flour is always 500g of flour, regardless of how it's scooped. This accuracy extends to water, salt, yeast, and other ingredients. For serious bread makers developing their own recipes or scaling existing ones, precise weight measurements are non-negotiable for understanding and controlling the dough's behavior and ensuring repeatable success batch after batch.
Escali Primo Digital Scale vs. Ozeri ZK14-S Digital Kitchen Scale: A Precision Comparison
Comparing digital scales like the Escali Primo and the Ozeri ZK14-S highlights features important for serious bread makers. The Escali Primo is a widely recommended kitchen scale known for its accuracy (often to 1g, though some models offer 0.1g), ease of use, and durability. It has a simple interface, a tare function (to zero out container weight), and a decent capacity (usually up to 11 lbs or 5 kg). Its reliable performance makes it a standard tool for many bakers.
The Ozeri ZK14-S is another popular kitchen scale, often praised for its slim design and backlit display. It also offers a tare function and measures in various units. However, some users report less reliability or accuracy compared to the Escali Primo over time or with very small measurements (under 5-10g). For a serious bread maker needing to measure tiny amounts of instant yeast (perhaps 2-3g) or starter (5-10g) with confidence, the consistent accuracy and build quality of a scale like the Escali Primo can be a worthwhile investment, ensuring crucial small percentages are correct.
Using a Digital Thermometer for Perfect Dough Temperature
Dough temperature is a critical, yet often overlooked, variable in bread baking. Yeast activity is highly dependent on temperature. Dough that is too cold will ferment slowly, potentially resulting in underdeveloped flavor. Dough that is too warm will ferment too quickly, leading to poor structure and a less complex flavor profile. Serious bread makers often aim for a target dough temperature (often between 75°F and 80°F, or 24-27°C) after mixing, using the desired dough temperature (DDT) formula to adjust water temperature based on flour and ambient temperature.
A digital thermometer allows you to accurately measure the dough temperature after mixing and monitor it during bulk fermentation and proofing. This enables you to make informed decisions about where to proof the dough (e.g., in a warmer or cooler spot) to control the fermentation rate. Using a reliable digital thermometer eliminates the guesswork and ensures your dough is developing at the optimal speed, leading to better flavor, texture, and overall consistency in your final loaves.
Ensuring Consistent Results: Eliminating Guesswork in Your Recipes
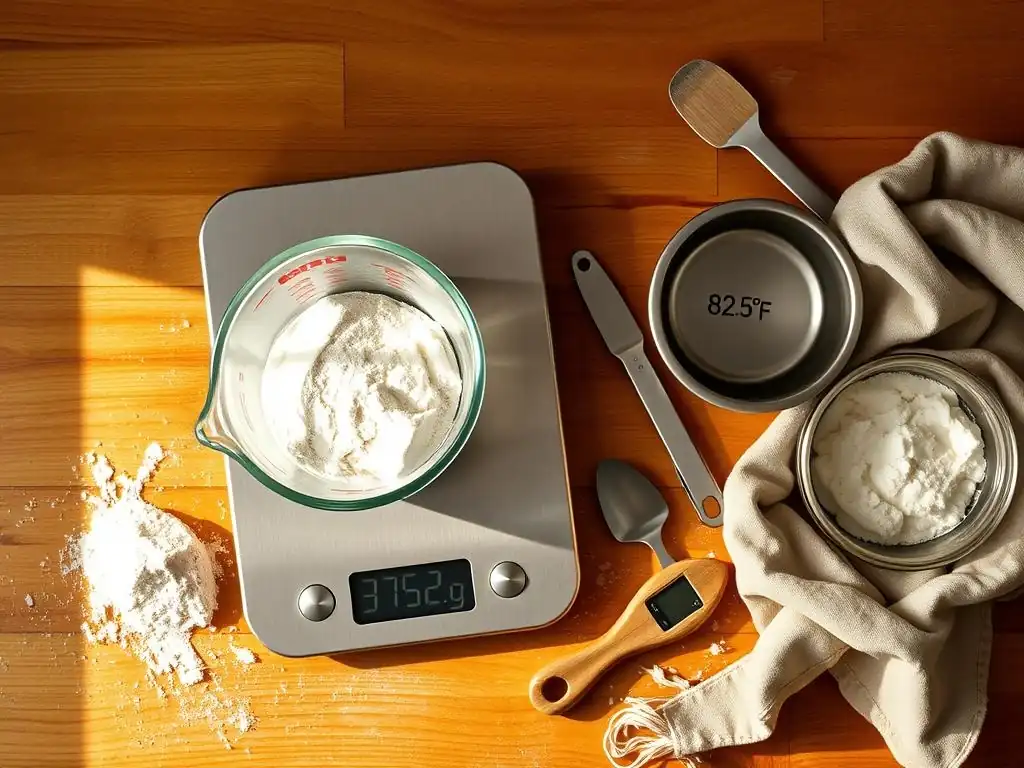
Ultimately, investing in precision tools like a high-quality digital scale and thermometer is about eliminating guesswork and achieving consistent results. When you measure ingredients accurately by weight, you remove a major source of variability in your dough. When you monitor dough temperature, you gain control over the fermentation process. These precise inputs lead to predictable outcomes.
For serious bread makers who want to understand why a recipe worked or failed, and how to replicate successful loaves, this level of control is invaluable. It allows you to troubleshoot effectively – if a bake is off, you can be confident that your measurements and temperatures were correct and look for other variables. This foundation of accuracy built by using reliable scales and thermometers is essential for anyone dedicated to mastering the art and science of bread baking.
Affiliate Link: Escali Primo Digital Scale
Bread Knives: Slicing Your Masterpiece with Ease
After hours of mixing, kneading, proofing, and baking, the final step is slicing into your beautiful loaf. This seemingly simple act can be frustratingly difficult with the wrong tool. A standard chef's knife or utility knife, even if sharp, can struggle to cut through a thick, crusty bread without crushing the delicate crumb within. The result is often a mangled slice that doesn't do justice to the effort put into the bake.
A specialized bread knife is designed precisely for this task. Its long, serrated blade glides through tough crusts and soft interiors with minimal pressure, creating clean, even slices without compressing the loaf. For serious bread makers who take pride in their finished product, having a high-quality bread knife is essential for presenting and enjoying their loaves at their best. It's the final piece of equipment that ensures the experience of eating the bread is as satisfying as the process of making it.
Wüsthof Classic Bread Knife vs. Mercer Culinary Millennia Bread Knife: A Slice Above the Rest
Comparing a high-end bread knife like the Wüsthof Classic to a popular, more budget-friendly option like the Mercer Culinary Millennia illustrates the differences serious bread makers might consider. The Wüsthof Classic bread knife is part of a premium line, typically featuring high-carbon stainless steel, precision forging, and a full tang for balance and durability. Its serrations are often sharp and well-defined, designed to maintain their edge for a long time. These knives are built to last and perform exceptionally well.
The Mercer Culinary Millennia bread knife is a favorite in professional kitchens and among home bakers for its excellent performance relative to its affordable price point. It features a sharp, wavy serrated edge and a comfortable ergonomic handle. While it cuts exceptionally well out of the box, its blade material and construction may not offer the same long-term edge retention or overall durability as a premium forged knife like the Wüsthof. For a serious bread maker who slices bread frequently, the Wüsthof offers superior craftsmanship and longevity, though the Mercer provides outstanding value.
Serrated Blades: The Key to Slicing Through Crusty Bread
The defining feature of a bread knife is its serrated blade. Unlike a straight edge which can snag and tear a crust, serrations work like tiny saws, gripping the surface of the bread and cutting through the hard crust with a back-and-forth motion. The points of the serrations initiate the cut, while the valleys allow the blade to move freely without getting stuck or compressing the softer interior.
The design and sharpness of the serrations vary between knives. Wavy serrations are common and effective. Some high-end knives feature pointed or offset serrations designed for specific cutting performance or longer edge life. Regardless of the specific pattern, a sharp, well-designed serrated blade is crucial for making clean cuts through both the tough exterior and the delicate, airy crumb of artisan bread without crushing the loaf.
Ergonomics and Comfort: Choosing a Knife That Feels Right
For serious bread makers who bake and slice frequently, the ergonomics and comfort of a bread knife are important considerations. A well-designed handle provides a secure grip and feels balanced in the hand, reducing fatigue during slicing. Materials range from traditional wood or synthetic composites on high-end knives to textured plastic or rubber on more budget-friendly options.
The length of the blade is also key. A standard bread knife blade is typically 8 to 10 inches long. A longer blade is often preferred by serious bakers as it allows for slicing through wider loaves with a single, smooth stroke, minimizing the back-and-forth sawing motion that can sometimes compress the crumb. Choosing a knife that feels comfortable, balanced, and has an adequate blade length for the types of loaves you bake makes the final step of enjoying your bread a pleasure.
Maintaining the Sharpness of Your Bread Knife
While serrated knives are known for holding their edge longer than straight-edge knives, they do eventually become dull. Unlike straight blades which can be easily sharpened at home with a stone or steel, sharpening serrated knives requires specialized tools or professional service. Some serious bread makers opt for knives with simpler, wider serrations which can sometimes be sharpened using a conical ceramic rod or sent out for professional sharpening.
Proper maintenance is crucial for extending the life and sharpness of a bread knife. This includes:
- Using a cutting board (avoiding hard surfaces like glass or ceramic).
- Washing and drying the knife immediately after use (especially important for high-carbon steel to prevent rust).
- Storing the knife safely in a block, on a magnetic strip, or with a blade guard to protect the edge from nicks.
Taking care of your high-end bread knife ensures it continues to slice cleanly for years to come, preserving the integrity of your beautifully baked loaves.
Affiliate Link: Wüsthof Classic Bread Knife
Conclusion: Making the Right Investment for Your Bread Baking Journey
Navigating the world of high-end bread making equipment can feel overwhelming, but for serious home bakers, strategic investments can truly elevate their craft. We've explored how tools like powerful stand mixers, reliable ovens or baking vessels, proofing baskets, precision scales and thermometers, and quality bread knives contribute significantly to consistency, efficiency, and the overall quality of the final loaf. While not every piece of equipment is necessary for every baker, understanding the role each plays helps in deciding where to splurge versus save.
Ultimately, the "right" investment is subjective and depends on your baking frequency, the types of bread you make, your budget, and your goals. For some, a powerful mixer is paramount due to physical limitations or high baking volume. For others, achieving the perfect crust might prioritize a Dutch oven or a better oven setup. The joy of bread baking comes from the process as much as the result, and having tools that make the process smoother and the results more reliable enhances that enjoyment.
Balancing Cost and Performance: What's Right for You?
Deciding whether to invest in high-end bread making equipment requires balancing the initial cost against the long-term performance benefits, durability, and how frequently you'll use the tool. A $700 stand mixer is a significant expense, but if you bake multiple loaves weekly for many years, its per-use cost might be lower than a $150 mixer that needs replacing every few years.
Consider your passion level and commitment to the craft. If you're a serious bread maker who bakes consistently, the durability and superior performance of high-end equipment can be a worthwhile investment that pays off over time in both quality and reliability.
However, it's also important to be realistic about your needs. If you bake only occasionally, a budget or mid-range option might provide sufficient performance. For example, a standard home oven combined with a quality baking stone or Dutch oven can produce excellent results without the need for a professional-grade range. Assess which aspects of your current process are limiting your results or causing frustration, and prioritize investments that address those specific challenges.
Building Your High-End Bread Making Arsenal Gradually
You don't need to acquire all the high-end bread making equipment at once. Many serious bread makers build their arsenal gradually, adding tools as their skills develop and their needs evolve. Starting with a few key pieces that address your biggest baking challenges is a smart approach. Perhaps a precise digital scale is your first upgrade to ensure consistent hydration, followed by a quality Dutch oven to improve your crust and oven spring.
As you bake more and gain experience, you'll better understand which equipment upgrades would make the most significant difference for your specific baking style and goals. This gradual approach allows you to spread out the cost and ensure that each piece of high-end bread making equipment you acquire is truly valuable to your journey. Read reviews, talk to other bakers, and consider how a tool fits into your existing setup before making a significant purchase.
BakeWithEase Recommendation: Prioritize Essential Equipment First
At BakeWithEase, we believe that while high-end bread making equipment can certainly elevate your baking, it's essential to prioritize tools that provide the most fundamental improvements for your specific needs. For most serious home bread makers, we recommend starting with these foundational items if you don't already have reliable versions:
- A precise digital scale (accurate to 1g or 0.1g): Consistency in measurements is key to success.
- A reliable baking vessel (Dutch oven or baking stone): This is often the single biggest factor in improving oven spring and crust in a standard home oven.
- A good quality bread knife: Because slicing your beautiful loaf should be a pleasure, not a struggle.
Once these essentials are covered, consider investing in a powerful stand mixer if you bake large quantities or stiff doughs often, or specialized proofing baskets if you work with high-hydration doughs frequently. Building your collection of high-end bread making equipment thoughtfully will ensure you're investing wisely in tools that truly enhance your passion for baking.
Frequently Asked Questions
What is considered high-end bread making equipment according to BakeWithEase?
High-end equipment generally refers to items that offer superior performance and durability, often at a higher price point. This includes things like professional-grade ovens, stand mixers, and specialized proofing cabinets for consistent results.
Is high-end bread making equipment necessary for beginners?
No, it's generally not necessary. Beginners can achieve excellent results with basic, affordable tools. Focus on mastering fundamental techniques first before investing in expensive equipment.
What are the benefits of investing in high-end bread making equipment?
The primary benefits include improved consistency, increased efficiency, and longer lifespan compared to cheaper alternatives. It can also unlock capabilities for more complex recipes.
What specific types of equipment fall under the category of "high-end" for bread making?
Examples include commercial-grade stand mixers with powerful motors, steam-injected ovens for crusty breads, and temperature-controlled proofing boxes for optimal fermentation.
Where can I find reviews and recommendations for high-end bread making equipment on BakeWithEase.com?
BakeWithEase.com regularly publishes articles and guides comparing different brands and models of equipment. Look for sections dedicated to equipment reviews and expert recommendations for serious bread makers.
Final Reflection: The Flour Power of Informed Choice
The pursuit of the perfect loaf transcends mere culinary skill; it's a journey of mindful investment. Choosing high-end bread making equipment isn't about extravagance; it's about understanding the tools that elevate the craft and, ultimately, the experience. This exploration of premium bread making equipment reveals a clear trend: quality significantly impacts the final product, and the investment pays off in both tangible results and lasting satisfaction.
The impact of high-quality equipment extends beyond the kitchen; it speaks to a broader cultural shift towards appreciating craftsmanship and mindful consumption. We're seeing a resurgence of interest in traditional skills, a desire to connect with the process of food creation, and a willingness to invest in tools that support this passion. The best things in life are not things,
a common adage, yet ironically, the right tools can unlock a deeper appreciation for the simple act of baking bread, transforming it from a chore into a meditative practice.
Consider the implications of your choices. Will you opt for the convenience of less expensive equipment, accepting compromises in quality and longevity? Or will you embrace the potential of high-end tools, investing in a journey of culinary exploration and self-discovery? The choice, ultimately, is yours. But remember this: the flour you use, the time you invest, and the equipment you choose all contribute to the story of your loaf. Embrace the journey, and savor the results.
Unleash Your Inner Artisan Baker!
Thanks for joining us on this journey into the world of high-end bread-making equipment! We hope you gained valuable insights into choosing the perfect tools to elevate your baking game. Ready to take the next step?
- Invest in your baking passion: Carefully consider which piece of equipment from our review best suits your needs and budget. Think about the type of bread you love to make most, and how each tool could enhance your process.
- Share your baking journey: Tell us about your favorite bread-making tools in the comments below! We love to hear from our community. What piece of equipment has revolutionized your baking?
- Challenge yourself: Try a new bread recipe this week, incorporating a new tool or technique you learned today. Then, share your results with us!
What amazing bread will you create with your newfound knowledge?