
Simple Steps to Layered Frosting on Celebration Cupcakes

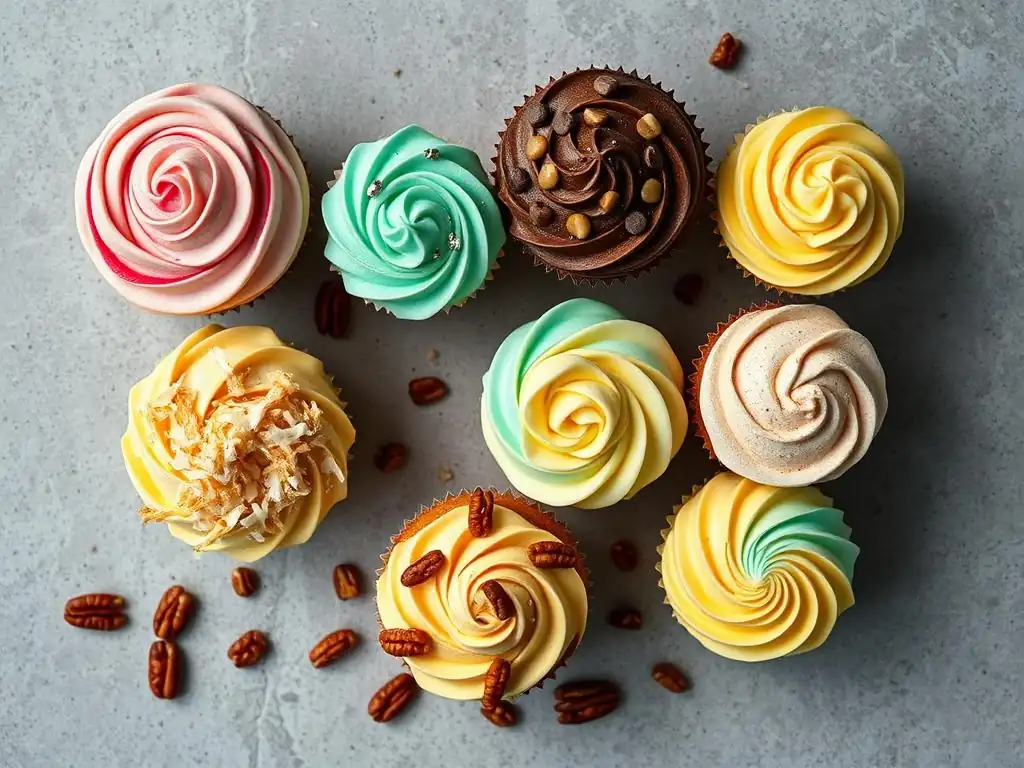
Welcome to BakeWithEase, your kitchen companion for all things baking!
Ready to transform ordinary cupcakes into stunning edible art? Discover the secrets to creating irresistible, perfectly layered frosting with our Easy Layered Frosting Cupcakes Recipe. Whether you're baking for a special occasion or simply craving a sweet treat, we'll guide you through each simple step. Curious how to achieve that professional finish without the fuss? Let's unlock the delicious possibilities together!
- Mastering Ombre Rosette Cupcakes: A Step-by-Step Guide
- Introduction: Elevate Your Cupcakes with Ombre Rosette Frosting
- Getting Started: Essential Ingredients and Tools
- Step-by-Step Guide: Mastering the Ombre Rosette Technique
- Buttercream Recipe Options
- Troubleshooting: Common Piping Problems and Solutions
- Tips and Tricks for Perfect Ombre Rosettes Every Time
- Conclusion: Enjoy Your Beautifully Decorated Cupcakes
- Frequently Asked Questions
- Final Reflection: The Sweet Symphony of Layered Frosting
- Unleash Your Inner Cake Artist: Master Layered Frosting!
Mastering Ombre Rosette Cupcakes: A Step-by-Step Guide
Introduction: Elevate Your Cupcakes with Ombre Rosette Frosting
Why Ombre Rosettes Make Your Cupcakes Special
Ombre rosette frosting transforms simple cupcakes into stunning edible art, perfect for any celebration. This technique creates a beautiful gradient effect using different shades of buttercream, piped in elegant rosettes that cover the entire surface. Unlike a flat swirl, the layered rosettes add significant texture and visual depth, making each cupcake look sophisticated and professionally finished. It's a fantastic way to match your baked goods to a party theme or color scheme, adding a personalized touch that store-bought treats can't replicate.
Beyond aesthetics, mastering the ombre rosette technique enhances your piping skills and confidence. While it looks intricate, the process is surprisingly approachable for bakers of all levels. Following a clear guide for an easy layered frosting cupcakes recipe demystifies the steps, allowing you to achieve impressive results with practice. The payoff is significant – guests are always wowed by the detailed, beautiful appearance of cupcakes decorated this way, making them the centerpiece of dessert tables at birthdays, weddings, or baby showers.
Creating Stunning Cupcakes: A Comprehensive Guide
Achieving stunning ombre rosette cupcakes involves more than just piping; it requires attention to detail from baking the perfect cupcake base to preparing the buttercream and executing the piping technique precisely. This guide breaks down the entire process, ensuring you have the knowledge and confidence to succeed. We'll cover selecting the right ingredients for both the cake and the frosting, essential tools that make piping easier, and a step-by-step method for creating the beautiful ombre effect with rosettes.
Whether you're aiming for a vibrant transition from dark to light blue or a subtle shift from coral to peach, this comprehensive approach ensures you understand each phase. From the initial mixing of colors to the final delicate swirls of frosting, you'll learn how to create an easy layered frosting cupcakes recipe that is not only visually spectacular but also delicious. We'll also touch upon common troubleshooting tips to help you navigate any challenges you might encounter along the way, ensuring your journey to mastering this decorative style is smooth and rewarding.
Getting Started: Essential Ingredients and Tools
Ingredients for Moist Vanilla Cupcakes
A light and moist vanilla cupcake provides the perfect canvas for rich buttercream. For approximately 12-15 standard cupcakes, you'll typically need about 1 ½ cups (190g) all-purpose flour, 1 ¼ teaspoons baking powder, and a pinch of salt for structure and lift. Essential wet ingredients include ½ cup (113g) unsalted butter, softened, 1 cup (200g) granulated sugar, 2 large eggs at room temperature, 1 teaspoon pure vanilla extract, and ½ cup (120ml) milk (whole milk often yields the best moisture). Using room temperature ingredients is crucial for creating a smooth batter that bakes evenly.
The quality of your ingredients directly impacts the final taste and texture. Opt for good quality vanilla extract, preferably pure rather than imitation, for a richer flavor. Ensure your baking powder is fresh – you can test this by adding a teaspoon to hot water; it should bubble vigorously. Sifting dry ingredients together before combining with wet helps distribute the leavening agents and prevents lumps, contributing to a tender crumb that holds up well under the weight of the beautiful layered frosting.
Key Ingredients for Swiss Meringue Buttercream
Swiss Meringue Buttercream (SMBC) is often preferred for detailed piping like rosettes due to its smooth, stable texture and less intensely sweet flavor compared to American buttercream. The core ingredients are egg whites (typically from 4-5 large eggs), granulated sugar (around 1 cup or 200g), unsalted butter (about 1 ½ cups or 340g, softened but still cool), and vanilla extract (1-2 teaspoons). The process involves gently heating egg whites and sugar over a double boiler until the sugar is dissolved, then whipping this mixture into a stiff, glossy meringue before gradually adding the butter.
Accuracy in measurements and temperature control are vital for successful SMBC. Heating the egg whites and sugar to about 160°F (71°C) ensures food safety and helps dissolve the sugar completely, resulting in a smooth, non-gritty frosting. Whipping the meringue until it's cool and stiff peaks form is also essential before adding the butter, which should be incorporated gradually in small cubes. This technique creates a light, airy, yet stable frosting that holds its shape beautifully when piped, making an easy layered frosting cupcakes recipe truly achievable.
Must-Have Tools for Perfect Rosette Piping
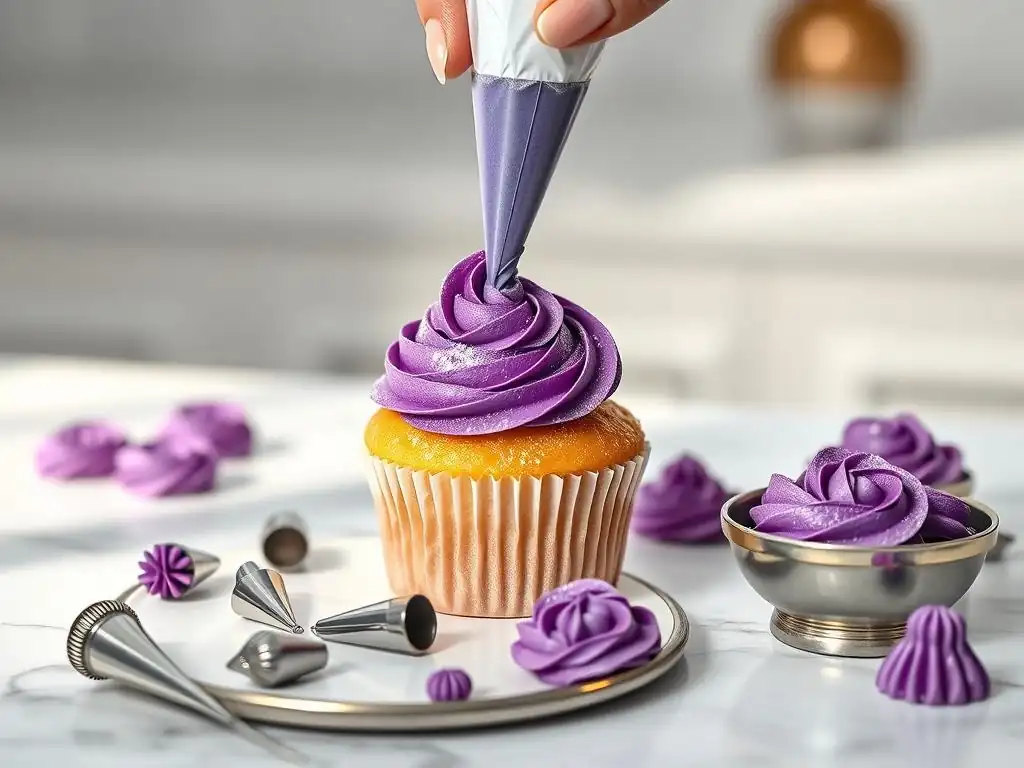
Having the right tools simplifies the process and helps achieve professional-looking results for your easy layered frosting cupcakes recipe. Piping bags are essential – disposable bags are convenient for color changes, or you can use reusable silicone bags. You'll need a piping tip specifically designed for rosettes, commonly a large open star tip like the Ateco 826, 827, or 828, or a closed star tip like the Wilton 1M. A large tip is best for covering the cupcake surface quickly and creating substantial rosettes.
Other helpful tools include a rubber spatula for filling piping bags, small bowls for dividing and coloring buttercream, gel food coloring (paste or gel colors are concentrated and won't thin your frosting like liquid colors), and potentially a rotating cake stand or turntable, which isn't strictly necessary but makes rotating the cupcake while piping much easier for consistent application. Using tip couplers can allow you to switch between tips without changing piping bags, although for a single rosette tip, it's not essential.
Step-by-Step Guide: Mastering the Ombre Rosette Technique
Step 1: Preparing Your Cupcakes and Buttercream
Ensuring Cupcakes are Cool for Optimal Frosting Adhesion
The first critical step for any easy layered frosting cupcakes recipe is ensuring your cupcakes are completely cooled before you even think about frosting them. Warm or hot cupcakes will melt the buttercream on contact, leading to a messy, sliding disaster instead of beautiful, defined rosettes. After baking, remove cupcakes from the oven and let them cool in the muffin tin for about 10-15 minutes before transferring them to a wire rack to cool completely. This can take anywhere from 30 minutes to over an hour, depending on room temperature.
Patience here is key. Rushing this step is the most common reason for frosting mishaps. The exterior of the cupcake might feel cool, but the interior can still retain significant heat. A good rule of thumb is that the cupcake should feel cool to the touch all the way through, not just on the surface. Aim for room temperature, ideally around 70-75°F (21-24°C). Cooling on a wire rack allows air circulation around the entire cupcake, speeding up the process and preventing condensation.
Achieving the Right Buttercream Consistency for Piping
The consistency of your buttercream is paramount for successful piping, especially for detailed work like rosettes in an easy layered frosting cupcakes recipe. Swiss Meringue Buttercream should be smooth, creamy, and hold its shape when piped, but not be so stiff that it's difficult to squeeze through the tip. If it's too soft (often due to being too warm), the rosettes will slump and lose definition. If it's too stiff (perhaps too cold or overworked), it will be hard to pipe and might tear or look rough.
To adjust consistency, if it's too soft, try chilling it in the refrigerator for 10-15 minute intervals, stirring between chilling sessions, until it reaches the desired stiffness. If it's too stiff, let it sit at room temperature for a bit, or beat it with a paddle attachment on low speed for a few minutes; the friction can warm it slightly. For Swiss Meringue Buttercream, sometimes it can look curdled; continue beating it on medium speed, and it will often come together into a smooth consistency within several minutes.
Step 2: Creating Your Ombre Buttercream Effect
Complementary Color Combinations for Visually Stunning Cupcakes
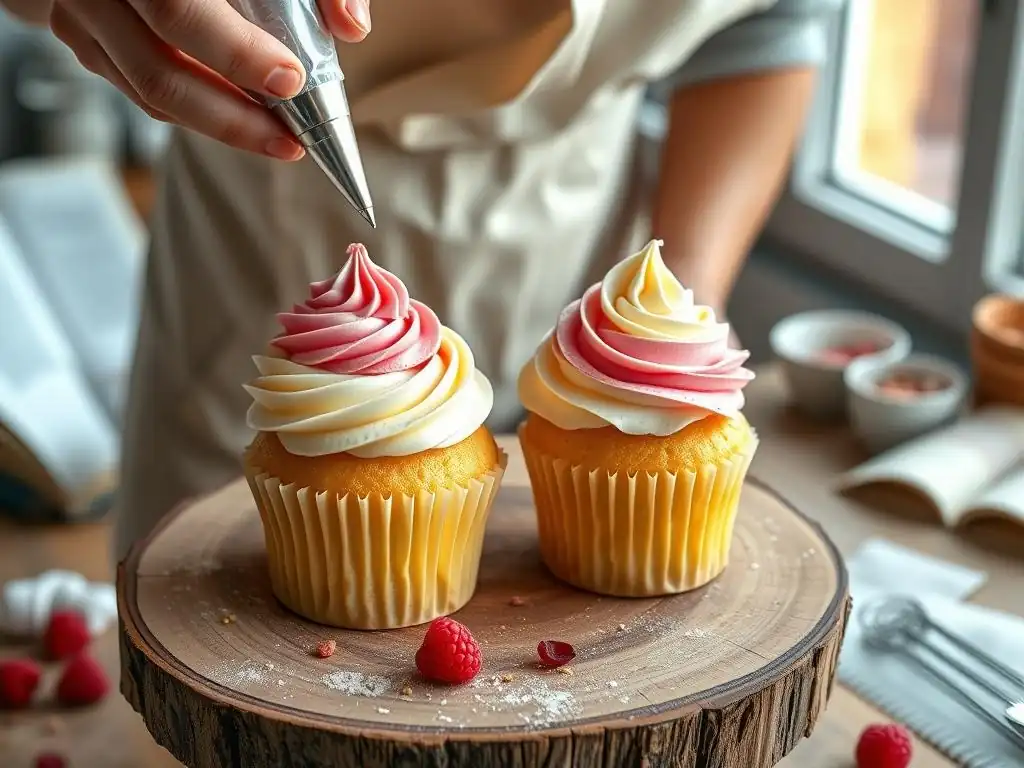
Selecting the right color palette is crucial for a striking ombre effect in your easy layered frosting cupcakes recipe. Choose colors that blend harmoniously or create a pleasing contrast. Popular choices include shades of a single color (e.g., light blue to dark blue), analogous colors (colors next to each other on the color wheel, like yellow, orange, and red), or a transition from white or a pale shade to a vibrant color. Consider the occasion and theme – pastels for baby showers, bold colors for birthdays, or seasonal hues.
Using gel or paste food coloring is recommended as they are concentrated and won't add excess liquid to your buttercream, preserving its piping consistency. Start with a small amount of coloring, as a little goes a long way, especially with gel colors. Divide your buttercream into bowls based on the number of color shades you want (typically 3-4 shades for a noticeable ombre). Gradually add more coloring to each subsequent bowl to create the gradient, from the lightest shade to the darkest. Mix thoroughly until the color is uniform in each batch.
Achieving a Smooth Gradient in Your Buttercream
Creating the smooth color transition within the piping bag is the key to the ombre effect. Take your prepared buttercream colors, starting with the darkest shade. Using an offset spatula or knife, spread a stripe of the darkest color vertically along the inside wall of your piping bag, starting from the tip end and going up about one-third of the way. Repeat with the next lighter shade, placing a stripe right next to the darkest color, covering the middle third of the bag wall. Finally, spread the lightest shade along the remaining inside wall, up to the top.
Alternatively, you can layer spoonfuls of each color into the bag, starting with the darkest at the bottom (closest to the tip), then the next shade, and so on, ending with the lightest on top. Gently push the buttercream down towards the tip, being careful not to swirl the colors too much inside the bag before piping. The magic happens as you pipe; the different colors are squeezed out simultaneously through the tip, naturally blending at the edges to create the beautiful layered gradient effect as you form each rosette on your easy layered frosting cupcakes recipe.
Step 3: Piping the First Row of Rosettes: The Base
Techniques for Consistent Rosette Size and Shape
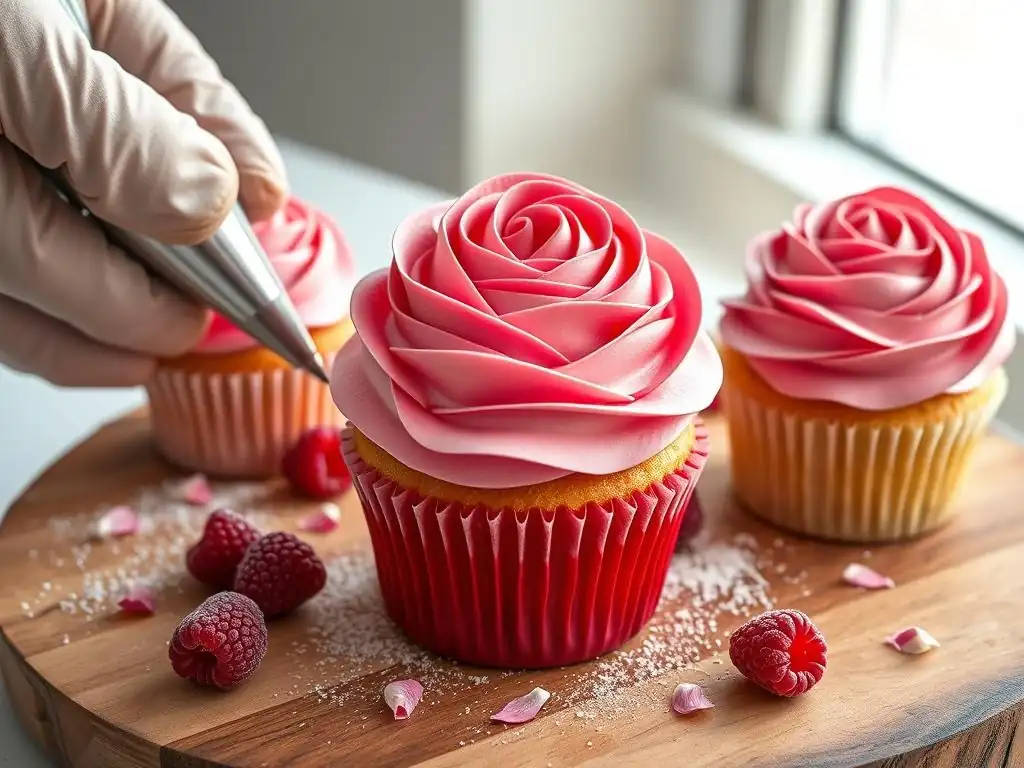
Piping the first row of rosettes is the foundation for your layered design on your easy layered frosting cupcakes recipe. Start from the outer edge of the cupcake. Hold the piping bag with the tip (like a Wilton 1M) perpendicular to the cupcake surface, slightly above it. Apply steady, even pressure to the bag. Begin piping from the outside edge, moving inwards in a circular motion. Release pressure as you reach the center and pull the tip away quickly to create a clean finish.
Consistency in pressure and motion is key to uniform rosettes. Try practicing on parchment paper first to get a feel for it. Each rosette should ideally be roughly the same size and height. For this layered technique, the first row of rosettes will form a ring around the outer edge of the cupcake, leaving a circular space in the center for subsequent layers. Ensure the rosettes in this first row are close together, almost touching, to create a solid base for the next layer and prevent gaps.
Step 4: Adding Subsequent Rows: Building the Ombre Effect
Maintaining Color Gradation with Each Row
As you pipe subsequent rows, the colors emerging from your piping bag will naturally transition due to how you loaded the bag in Step 2. The first rosettes might show more of the darkest color, while later ones will feature the lighter shades. To build the layered effect on your easy layered frosting cupcakes recipe, pipe the second row of rosettes inside the first row, overlapping the edges slightly. Hold the tip perpendicular again and pipe from the outer edge of this inner ring inwards.
Continue piping rows, spiraling inwards towards the center of the cupcake. Each new row should sit slightly on top of and inside the previous row, creating height and the layered appearance. As you move towards the center, the buttercream being dispensed will gradually shift to the lighter colors you placed higher up in the piping bag. This gradual transition from the outer, darker rosettes to the inner, lighter ones creates the beautiful ombre effect.
Tips for Preventing Smudging and Uneven Layers
Preventing smudging and ensuring even layers requires a steady hand and careful technique. Avoid touching previously piped rosettes with the piping tip or your hands. If you need to pause, stop applying pressure before pulling the tip away. Use consistent pressure throughout piping each rosette and each row. Uneven pressure can result in some rosettes being larger or flatter than others, disrupting the layered look.
If using a rotating stand, rotate the stand smoothly as you pipe the circular rows. This helps maintain a consistent angle and distance from the cupcake. If you notice the buttercream softening as you work (especially in a warm environment), pop the piping bag into the refrigerator for a few minutes to firm it up. Work efficiently but without rushing. If a rosette isn't perfect, you can often gently scrape it off with a spatula and try again, especially if the frosting is still fresh.
Step 5: Finishing Touches: Adding Final Flourishes
Sprinkles and Edible Glitter for a Festive Touch
Once all your rosettes are piped, adding sprinkles or edible glitter can enhance the festive feel of your easy layered frosting cupcakes recipe. Sprinkles can be applied immediately after piping while the buttercream is still soft and slightly tacky. You can gently press the tops of the rosettes into a bowl of sprinkles, or sprinkle them over the top. Consider the color of your sprinkles – coordinating them with your ombre colors can tie the design together beautifully.
Edible glitter or dusting powders can add a touch of sparkle. These are usually applied with a small, dry brush after the frosting has had a few minutes to set slightly. A light dusting over the entire frosted surface or concentrating glitter on the lighter, inner rosettes can create different effects. Ensure the glitter is specifically labeled as "edible." These final touches aren't strictly necessary but can elevate the visual appeal for special occasions.
Creating a Clean and Professional Finish
A professional finish on your easy layered frosting cupcakes recipe involves attention to detail even after piping. Ensure the base of the cupcake liner is clean and free of any smudges of frosting. If any buttercream squeezed out between the liner and the cupcake during baking, you can gently trim it away before frosting. The goal is for the beautiful rosettes to be the sole focus on top of a neat, clean base.
Check the uniformity of your rosettes one last time. If any look particularly out of place, you might be able to gently reshape them slightly with a clean fingertip or small spatula if the buttercream is still pliable. Store the finished cupcakes appropriately (details below) to maintain the integrity of the rosettes and keep them looking their best until they are ready to be served. A clean presentation is the final step in mastering this decorative technique.
Buttercream Recipe Options
Swiss Meringue Buttercream Recipe
Here is a standard recipe for Swiss Meringue Buttercream, ideal for piping rosettes:
Ingredients:
- 5 large egg whites (about 150g)
- 1 cup (200g) granulated sugar
- 1 ½ cups (340g) unsalted butter, softened but still cool, cut into cubes
- 1 ½ teaspoons vanilla extract
- Pinch of salt (optional)
Instructions:
- Combine egg whites and sugar in a heatproof bowl set over a pot of simmering water (double boiler). Ensure the water doesn't touch the bottom of the bowl.
- Whisk constantly until the sugar is completely dissolved and the mixture reaches 160°F (71°C) on an instant-read thermometer. Rub a small amount between your fingers; it should feel smooth, not gritty.
- Carefully remove the bowl from the heat. Using a stand mixer fitted with the whisk attachment, beat the egg white mixture on high speed.
- Beat until stiff, glossy peaks form and the meringue is completely cool to the touch (this can take 10-15 minutes). The bowl should no longer feel warm.
- Switch to the paddle attachment. With the mixer on low speed, add the butter cubes one at a time, waiting until each cube is mostly incorporated before adding the next.
- The mixture may look curdled or separated at this stage – this is normal! Keep mixing on medium speed. It will eventually transform into a smooth, silky buttercream (this can take another 5-10 minutes).
- Once smooth, beat in the vanilla extract and salt (if using). Mix until just combined. Do not overmix.
- If the buttercream is too soft, chill it for a bit and re-beat. If too stiff, let it warm slightly at room temperature and re-beat.
American Buttercream Recipe (Adaptable for Rosettes)
American Buttercream is simpler to make and sweeter than SMBC, and can also be used for an easy layered frosting cupcakes recipe, though it's generally softer and less stable in warm conditions.
Ingredients:
- 1 cup (227g) unsalted butter, softened
- 3-4 cups (360-480g) confectioners' sugar, sifted
- ¼ cup (60ml) milk or heavy cream
- 1-2 teaspoons vanilla extract
- Pinch of salt (optional)
Instructions:
- In a large bowl or stand mixer with the paddle attachment, beat the softened butter until creamy.
- Gradually add the sifted confectioners' sugar, one cup at a time, mixing on low speed until combined before adding more. Scrape down the sides of the bowl as needed.
- Once all the sugar is added, the mixture will be very thick and crumbly.
- Slowly add the milk or cream, one tablespoon at a time, while mixing on low speed.
- Increase speed to medium and beat for 3-5 minutes until the buttercream is light and fluffy.
- Beat in the vanilla extract and salt until just combined.
- If the buttercream is too thick, add a little more milk (½ teaspoon at a time). If too thin, add a little more sifted confectioners' sugar (1-2 tablespoons at a time).
- This buttercream is ready for coloring and piping.
Troubleshooting: Common Piping Problems and Solutions
Preventing Buttercream from Separating
Buttercream separation, particularly in Swiss Meringue Buttercream, can be frustrating. It often looks curdled or greasy. For SMBC, this usually happens if the butter is added when the meringue isn't completely cool, or if the butter is too cold or too warm. The solution is often to just keep beating! Continue mixing on medium speed for several minutes. The friction from the mixer can sometimes bring it back together.
If persistent, try warming a small portion of the separated buttercream over a double boiler or in the microwave for just a few seconds until slightly melty, then adding it back to the main batch while beating. This can help emulsify the mixture. For American buttercream, separation is less common but can occur if ingredients aren't at the right temperature or are added too quickly. Ensure butter is properly softened (not melted) and add sugar gradually.
Achieving Sharp Rosette Definition
Sharp definition in your rosettes on your easy layered frosting cupcakes recipe relies on several factors: the right buttercream consistency, the correct piping tip, and steady technique. If your rosettes are slumping or the edges are fuzzy, the buttercream is likely too soft. Chill it for 15-20 minutes in the refrigerator, then stir or re-beat briefly before attempting to pipe again.
Ensure you are using a proper star tip designed for rosettes and holding the bag correctly (perpendicular to the surface). Applying consistent, firm pressure and stopping the pressure before pulling the tip away cleanly will also contribute to sharper edges. A quick, clean lift-off at the end of piping each rosette prevents tails or smudges that can ruin the definition.
Fixing Buttercream That is Too Soft or Too Stiff
Buttercream consistency is key for an easy layered frosting cupcakes recipe. If your buttercream is too soft, it won't hold its shape when piped. This is often due to being too warm. Place the bowl of buttercream (or the piping bag) in the refrigerator for 10-20 minutes. For SMBC, you might need to re-beat it after chilling. For American buttercream, a simple chill is often enough. Adding a tablespoon or two of sifted confectioners' sugar can also help stiffen American buttercream.
If your buttercream is too stiff, it will be hard to pipe and might tear. For SMBC, it might be too cold. Let it sit at room temperature for 15-30 minutes, then re-beat it until smooth and pliable. For American buttercream, add milk or cream, ½ teaspoon at a time, beating until the desired consistency is reached. Be careful not to add too much liquid at once, as it's easier to add more than to take away.
Tips and Tricks for Perfect Ombre Rosettes Every Time
The Importance of Consistent Piping Pressure
Maintaining consistent pressure on your piping bag is arguably the most important technique for achieving uniform rosettes in your easy layered frosting cupcakes recipe. Uneven pressure results in rosettes that are larger or smaller, fatter or skinnier, disrupting the visual harmony of the layered effect. Practice squeezing the bag with steady pressure on a piece of parchment paper until you can create consistent swirls.
Think of it like squeezing toothpaste – you want a steady stream, not bursts and pauses. The pressure should come from the hand holding the top of the bag, twisting it down to push the buttercream towards the tip, while your other hand guides the tip. This controlled pressure ensures that the same amount of buttercream is released for each rosette, resulting in a neat and even pattern across your cupcake tops.
Using a Rotating Cake Stand for Even Application
While not strictly necessary, a rotating cake stand or turntable can significantly simplify the process of piping circular rows of rosettes for your easy layered frosting cupcakes recipe. Instead of awkwardly rotating the cupcake by hand, you can simply spin the stand smoothly as you pipe. This allows you to maintain a consistent angle and distance from the cupcake surface while focusing solely on applying steady pressure and guiding the tip in a smooth circle.
Placing your cupcake on a small, non-slip mat or a dab of frosting on the turntable can help keep it stable as you rotate and pipe. This tool is particularly helpful when piping multiple rows or working on a large batch of cupcakes, reducing strain and improving the overall neatness and uniformity of your layered frosting design.
Storing Rosette Cupcakes to Maintain Freshness
Proper storage is essential to keep your beautifully decorated easy layered frosting cupcakes recipe looking and tasting fresh. Cupcakes frosted with buttercream (especially American buttercream) are best stored at room temperature in an airtight container for 2-3 days. Place them in a single layer if possible, or use a container with dividers to prevent the rosettes from being smushed.
If using Swiss Meringue Buttercream or if your environment is warm, refrigeration might be necessary. Place the cupcakes in an airtight container and refrigerate. Allow them to come back to room temperature for about 20-30 minutes before serving for the best texture and flavor of both the cake and the buttercream. Freezing is also an option for longer storage; freeze unfrosted cupcakes or frosted ones (on a tray until firm, then wrap individually) for up to 2-3 months, thawing at room temperature.
Conclusion: Enjoy Your Beautifully Decorated Cupcakes
Congratulations! By following these steps, you've mastered the art of creating an easy layered frosting cupcakes recipe featuring stunning ombre rosettes. These cupcakes are not just delicious treats; they are edible centerpieces perfect for sharing at birthdays, anniversaries, holidays, or any gathering that calls for a touch of sweetness and beauty. The visual impact of the layered, gradient frosting is sure to impress your friends and family.
Present them on a tiered stand or arranged artfully on a platter. The effort you put into creating the smooth ombre effect and the perfectly formed rosettes will be evident and appreciated. Sharing your baking creations is one of the joys of being in the kitchen, and these visually spectacular cupcakes are designed to be shown off and enjoyed by everyone.
Inspiring Your Baking Journey
Creating an easy layered frosting cupcakes recipe with an ombre rosette finish is a rewarding step in your baking journey. It demonstrates skill, creativity, and attention to detail. This technique can be adapted to various color palettes and even different piping tips once you feel comfortable. Consider experimenting with different color transitions, using multiple tips on different cupcakes, or even applying the technique to larger cakes.
Let this success inspire you to try new decorating challenges. Whether it's exploring other piping techniques, working with different types of frosting, or trying more complex cake designs, each new skill builds your confidence and expands your baking repertoire. Keep practicing, keep creating, and most importantly, keep enjoying the process of bringing delicious and beautiful baked goods to life.
Frequently Asked Questions
What makes this cupcake frosting technique "easy"?
The easy layered frosting technique utilizes simple piping methods and readily available tools, making it achievable even for beginner bakers. We focus on creating visually appealing results without complex maneuvers.
What kind of frosting is recommended for layered frosting on cupcakes?
We recommend a stable frosting like buttercream or cream cheese frosting. These hold their shape well and allow for distinct, defined layers without collapsing.
Can I use different colors of frosting for each layer?
Absolutely! Using different colors is a great way to add visual appeal and personalize your cupcakes for any celebration. Experiment with contrasting or complementary shades.
What tools do I need to achieve the layered frosting effect?
You'll typically need a piping bag, a large round piping tip (or a star tip for a different effect), and a steady hand. A turntable can also be helpful for even frosting distribution.
How can I prevent the frosting layers from mixing together?
Ensure each layer of frosting is slightly chilled before adding the next. This helps maintain separation and prevents the colors from bleeding into each other.
Final Reflection: The Sweet Symphony of Layered Frosting
The art of perfectly layered frosting isn't just about aesthetics; it's about elevating the everyday into a celebration. This simple technique, once mastered, transforms ordinary cupcakes into miniature masterpieces, adding a touch of elegance and joy to any occasion. The ease of the process, detailed in this guide, makes it accessible to even the most novice bakers, proving that impressive results don't require hours of complicated techniques.
The impact of beautifully decorated treats extends far beyond the simple act of eating. It's about creating memories, expressing love, and adding a touch of whimsy to life's moments. Baking is at once child's play and adult joy. And love, of course.
This quote perfectly captures the essence of what layered frosting represents – a simple act imbued with care and intention, capable of bringing immense happiness. The visual appeal alone can brighten someone's day, and the effort involved speaks volumes about the thoughtfulness behind the gesture.
Now, I invite you to take what you've learned and create your own sweet symphony. Don't be afraid to experiment with colors, flavors, and designs. Let your creativity flow, and remember that the most important ingredient in any recipe is the love you put into it. The next time you're looking to add a special touch to a gathering, or simply want to treat yourself, remember these simple steps and unleash your inner pastry artist. The joy of creating, and the joy of sharing, awaits.
Unleash Your Inner Cake Artist: Master Layered Frosting!
Thanks for taking the time to learn about creating stunning layered frosting on your cupcakes! We hope you gained valuable tips and tricks to elevate your baking game. Now it's time to put your new skills into action!
- Create your masterpiece: Use today's techniques to frost your next batch of cupcakes. Don't be afraid to experiment with colors and designs!
- Share your creations: Show us your beautifully frosted cupcakes on social media using #BakeWithEaseLayeredFrosting – we'd love to see them!
- Challenge yourself: Try a new frosting flavor or piping technique you learned today – push your baking boundaries!
What innovative frosting design will you try next?