
Monitoring Fermentation: Simple Techniques for Bakers


Welcome to BakeWithEase, your trusted guide to the delicious world of baking! Curious about unlocking the secrets to perfectly risen sourdough? This Baking Science Deep Dive explores vital sourdough fermentation monitoring techniques that can transform your baking. Discover how simple adjustments can lead to extraordinary results, and let's demystify the art of sourdough together. Intrigued? Keep reading to learn more!
- BakeWithEase: Mastering Sourdough Fermentation Monitoring Techniques
- Understanding Yeast Fermentation in Sourdough Baking
- Simple Sourdough Fermentation Monitoring Techniques for Home Bakers
- Advanced Sourdough Fermentation Monitoring Methods
- Troubleshooting Common Sourdough Fermentation Issues
- Tips for Consistent Sourdough Fermentation Monitoring
- Conclusion: Embrace the Art of Sourdough Fermentation Monitoring
-
Frequently Asked Questions
- What is fermentation and why is it important in sourdough baking?
- What are some simple visual cues I can use to monitor sourdough fermentation?
- How can I use a dough thermometer to monitor fermentation?
- What is the float test, and how reliable is it for sourdough?
- What are some advanced techniques for monitoring sourdough fermentation that BakeWithEase might recommend for experienced bakers?
- Final Reflection: Embracing the Art of Sourdough Fermentation Monitoring
- Unlock Your Baking Potential: Master Fermentation Today!
BakeWithEase: Mastering Sourdough Fermentation Monitoring Techniques
Welcome to the fascinating world of sourdough baking! While the ingredients are simple – flour, water, and salt – the magic truly lies in the fermentation process driven by your sourdough starter. Understanding and effectively implementing sourdough fermentation monitoring techniques is paramount to achieving that perfect loaf with a beautiful crumb and tangy flavor.
It's the difference between a dense, gummy loaf and a light, airy masterpiece. Think of monitoring as listening to your dough; it tells you when it's happy, hungry, or ready for the oven. Mastering these techniques will empower you to bake consistently delicious sourdough bread, regardless of environmental factors like temperature or humidity.
This guide will walk you through simple yet effective sourdough fermentation monitoring techniques you can use right in your home kitchen. We'll explore visual cues, temperature control, and even touch upon some more advanced methods. By the end, you'll feel confident in your ability to judge the readiness of your dough, ensuring baking success every time you fire up your oven. Let's dive into the science and art of checking sourdough fermentation.
Understanding Yeast Fermentation in Sourdough Baking
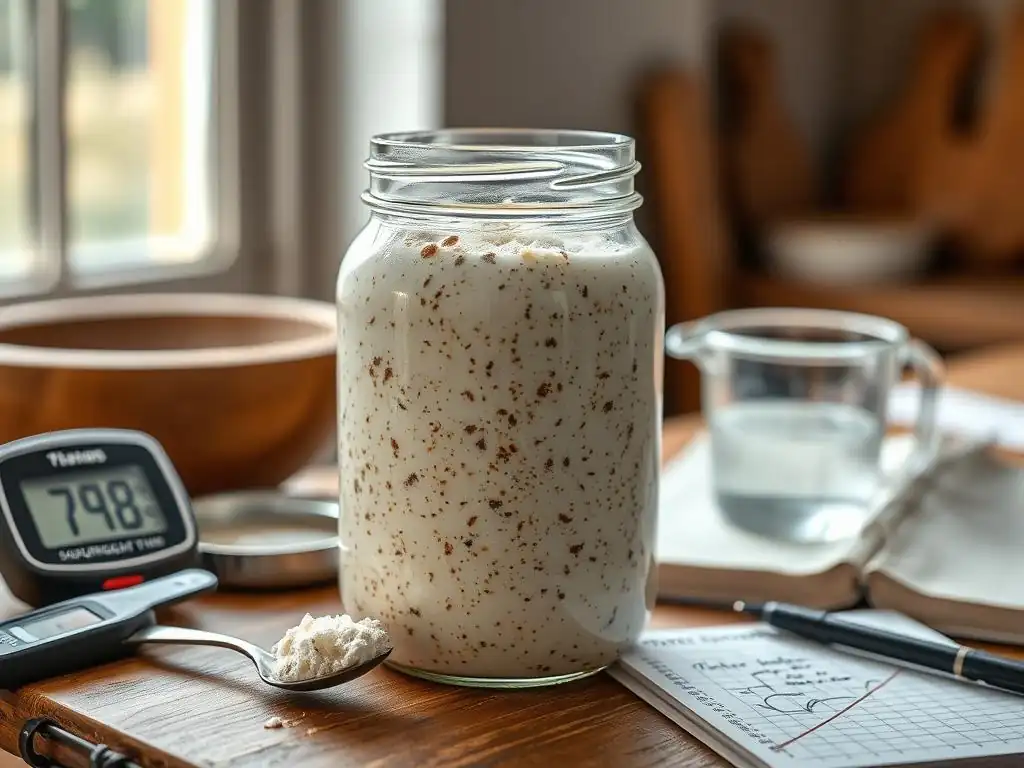
Sourdough fermentation is a complex biological process driven by a symbiotic community of wild yeasts and lactic acid bacteria (LAB) residing in your starter. When you mix your starter with flour and water to create dough, these microorganisms get to work. The yeasts consume sugars in the flour, producing carbon dioxide gas (which makes the dough rise) and alcohol. The LAB convert sugars into lactic and acetic acids, which contribute to the characteristic tangy flavor and help condition the gluten structure. This intricate dance of activity is what transforms a simple mixture into a vibrant, living dough.
The rate of fermentation is influenced by several factors, including temperature, hydration level, the strength and maturity of your starter, and the type of flour used. Warmer temperatures generally accelerate fermentation, while colder temperatures slow it down. Higher hydration doughs often ferment faster than lower hydration ones, partly due to enzymatic activity. A healthy, active starter is crucial, as it provides the necessary microbial population to kickstart the process. Monitoring fermentation allows you to navigate these variables and guide the dough towards its optimal state before baking.
The Importance of Monitoring Sourdough Fermentation for Optimal Results
Precise sourdough fermentation monitoring is perhaps the most critical factor in achieving consistently excellent sourdough bread. Baking sourdough isn't just about following a recipe; it's about understanding and responding to the dough's state. Under-fermented dough results in a dense loaf with a tight crumb, poor oven spring, and a less complex flavor.
The acids haven't had enough time to develop fully, and the gluten structure might not be adequately conditioned. Over-fermented dough, on the other hand, can collapse in the oven, leading to a gummy texture and potentially an overly sour or even alcoholic taste. The gluten structure can degrade from excessive acid production.
Effective sourdough fermentation monitoring techniques help you pinpoint the 'sweet spot' – when the dough has developed sufficient gas for leavening, built a strong yet extensible gluten network, and accumulated the right balance of acids for flavor. This optimal state ensures maximum oven spring, a beautiful open crumb structure, and that signature sourdough tang. Without careful monitoring, hitting this target consistently becomes a matter of luck rather than skill.
Key Indicators of Successful Fermentation in Sourdough
As your sourdough dough ferments, several visible and tactile changes occur that serve as key indicators of its progress. The most obvious sign is an increase in volume as the yeast produces carbon dioxide gas. However, volume alone isn't the only factor; the texture of the dough changes significantly. It becomes lighter, more airy, and often develops visible gas bubbles just beneath the surface. The dough will also feel softer and more pliable compared to when you first mixed it.
Another important indicator is the development of acidity. While you can't visually see acidity increase, you can often smell the pleasant, slightly sour aroma developing as the LAB produce organic acids. For those using more precise sourdough fermentation monitoring techniques, a pH measurement will show a clear drop in acidity over time. These combined changes – volume increase, textural development, bubble formation, aromatic changes, and pH decrease – paint a comprehensive picture of the fermentation progress and help you determine when the dough is ready for the next step, whether that's shaping or baking.
Simple Sourdough Fermentation Monitoring Techniques for Home Bakers
For the home baker, mastering sourdough fermentation monitoring techniques doesn't require fancy equipment. Many effective methods rely on simple observation and touch. These techniques are accessible, reliable, and build your intuition about your dough's behavior. They allow you to make informed decisions about timing, adapting to the unique conditions of your kitchen and the specific characteristics of your starter and ingredients.
Focusing on these basic sourdough fermentation monitoring techniques first will build a strong foundation. You'll learn what 'right' looks and feels like, making it easier to spot when things are going off track. Consistency in your approach to checking sourdough fermentation is key; always try to evaluate your dough in the same way each time to better track its progress.
Visual Assessment: Observing Dough Volume and Texture
Visual assessment is one of the most fundamental sourdough fermentation monitoring techniques. As your dough ferments, it will expand significantly due to the production of carbon dioxide gas. Placing your dough in a clear container with volume markings is an excellent way to track this increase precisely. Aim for a container that is tall and relatively narrow to make the volume change more apparent. Observing the texture is equally important; look for a surface that becomes smoother and often develops small bubbles or blisters.
The appearance of the dough's interior is also telling. If you gently pull a piece of dough or look through the side of a clear container, you should see a network of air pockets developing. These pockets indicate that the yeast is actively producing gas and the gluten structure is strong enough to trap it. A dough that looks flat and dense after several hours might indicate slow fermentation or an inactive starter. Conversely, a dough with very large, irregular bubbles might be heading towards over-fermentation.
Recognizing Proper Volume Increase During Sourdough Fermentation
A common benchmark for judging primary fermentation (bulk fermentation) readiness through volume is when the dough has increased by a certain percentage from its initial size. For many sourdough recipes, targeting a 50% to 100% increase in volume during bulk fermentation is typical, depending on the recipe, temperature, and desired outcome.
For example, if you start with 1 liter of dough volume, you might aim for it to reach 1.5 to 2 liters before moving to shaping. Using a straight-sided container with measurements makes this visual sourdough fermentation monitoring technique much easier and more accurate than simply estimating volume in a bowl.
It's important to note that "doubling" isn't always the goal, especially with high-hydration or whole-grain doughs, which may show less dramatic volume increase but still be properly fermented. Pay attention to the rate of increase as well. A dough that expands rapidly might be fermenting too quickly due to high temperature, while one that shows little change after several hours is fermenting slowly. Combining volume observation with other sourdough fermentation monitoring techniques provides a more complete picture.
Identifying Desirable Dough Texture and Air Pockets
Beyond volume, the texture of the dough provides crucial clues for sourdough fermentation monitoring. As fermentation progresses, the dough's gluten network relaxes and becomes more extensible. When you gently poke the dough, it should feel soft and airy, not dense. The 'poke test' is a classic method: gently press a floured finger into the dough about half an inch deep. If the indentation slowly springs back only partially, the dough is likely well-fermented and ready. If it springs back immediately, it needs more time. If it leaves a permanent indentation and deflates slightly, it might be over-fermented.
Observing the surface of the dough can also reveal fermentation progress. Look for small bubbles or blisters on the surface, which are signs of active gas production and a well-developed gluten skin. Examining the dough's interior structure by gently pulling a small piece (being careful not to degas the main batch) should show a lacy network of air pockets. These visual and tactile cues are essential sourdough fermentation monitoring techniques that become second nature with practice.
Temperature Monitoring: Maintaining Ideal Fermentation Conditions
Temperature is arguably the single biggest factor influencing the rate of sourdough fermentation. Yeast and bacteria activity is highly dependent on temperature. While fermentation occurs across a range of temperatures, finding the sweet spot for your starter and desired outcome is key. Most sourdough recipes assume a standard room temperature, often cited around 70-78°F (21-25°C), for bulk fermentation. However, temperatures outside this range will significantly alter fermentation speed. For example, at 65°F (18°C), fermentation will be much slower than at 80°F (27°C).
Monitoring the ambient temperature where your dough is fermenting, as well as the dough temperature itself, is a vital sourdough fermentation monitoring technique. A simple kitchen thermometer or an infrared thermometer can be used. If your kitchen is cold, you might need to find a warmer spot, like inside a turned-off oven with the light on, or use a proofing box. If it's too warm, you might need to ferment in a cooler part of the house or even partially in the refrigerator (cold fermentation).
The Impact of Temperature on Sourdough Yeast Activity
Yeast activity in sourdough is highly sensitive to temperature. Wild yeasts typically thrive in a range from about 70°F to 85°F (21°C to 30°C), with activity slowing down significantly below 65°F (18°C) and above 90°F (32°C). While higher temperatures speed up fermentation, they can also favor the production of acetic acid by LAB, leading to a sharper, more vinegary tang. Cooler temperatures slow down yeast activity but often promote lactic acid production, resulting in a milder, creamier sourness.
Understanding this relationship is key to using temperature as a sourdough fermentation monitoring technique. If your dough isn't rising as expected, checking the temperature is the first step. If it's too cold, simply warming it up will increase yeast activity. If it's rising too fast, cooling it down will slow the process. Experienced bakers often manipulate temperature intentionally through techniques like cold bulk fermentation in the refrigerator (often at 38-45°F / 3-7°C) to develop flavor over a longer period, sometimes 12-48 hours or more.
Best Practices for Temperature Control During Sourdough Fermentation
Maintaining a consistent temperature is crucial for predictable sourdough fermentation monitoring. Avoid placing your dough in drafty areas or spots with fluctuating temperatures. If your kitchen temperature varies significantly throughout the day or season, consider using a dedicated proofing environment. This could be as simple as an insulated cooler with a warm water bottle or a more sophisticated temperature-controlled proofing box.
Using a thermometer to check the dough's core temperature, not just the ambient air, provides the most accurate information for sourdough fermentation monitoring. Dough temperature will lag behind air temperature, especially in larger batches. Aiming for a consistent dough temperature throughout the bulk fermentation period, typically between 75-80°F (24-27°C) for many recipes aiming for a faster bulk ferment, allows you to better predict timing and rely on other indicators like volume increase. Documenting the temperature alongside fermentation time in your baking journal is a valuable practice.
pH Measurement: Assessing Acidity Levels in Sourdough Starter and Dough
While not strictly necessary for every home baker, measuring pH offers a more precise way to perform sourdough fermentation monitoring, particularly regarding the activity of lactic acid bacteria and the development of flavor. pH is a scale that measures acidity, with lower numbers indicating higher acidity. As LAB consume sugars and produce lactic and acetic acids, the pH of your starter and dough decreases over time. This decrease in pH is a direct indicator of fermentation progress and acid development.
Monitoring pH allows you to track the metabolic activity of your starter and dough with greater accuracy than just relying on visual cues or smell. A healthy, mature sourdough starter typically reaches a peak acidity (lowest pH) around 3.5-4.0 pH within 6-12 hours after feeding, depending on temperature and hydration. Dough pH provides insight into gluten development and flavor; dough is often considered optimally fermented and ready for baking when its pH drops to around 4.0-4.5 pH.
Understanding the Role of pH in Sourdough Flavor Development
The pH level directly influences the flavor profile of your sourdough bread. Lactic acid bacteria produce both lactic acid (which contributes a milder, creamy tang) and acetic acid (which provides a sharper, vinegary bite). The ratio of these acids produced is influenced by temperature and hydration; lower temperatures and higher hydration tend to favor lactic acid, while warmer temperatures and lower hydration can favor acetic acid.
As the pH drops during fermentation, the acidity also impacts the dough's gluten structure. A moderate decrease in pH helps condition the gluten, making the dough more extensible and easier to handle. However, if the pH drops too low (becomes too acidic), particularly below 3.8 pH in the final dough, the gluten can start to degrade, leading to a gummy or sticky texture and poor oven spring. Using pH measurement as a sourdough fermentation monitoring technique helps you ensure the dough reaches the optimal acidity range for both flavor and structure before baking.
Using pH Strips or Meters for Accurate Sourdough Monitoring
There are two primary tools for measuring pH in sourdough: pH strips and digital pH meters. pH strips are inexpensive and easy to use; you simply dip a strip into a small sample of wet dough or starter and compare the color change to a chart. While convenient, they are generally less accurate than digital meters, typically providing a range rather than a precise number. They can be sufficient for getting a general idea of acidity levels.
Digital pH meters offer greater accuracy and precision, often measuring to one or two decimal places. They require calibration and careful maintenance (keeping the probe hydrated), but provide more reliable data for sourdough fermentation monitoring. To measure dough pH, you can either take a small sample and mix it with a little water to create a slurry for testing, or use a specialized pH meter with a probe designed for semi-solid substances like dough. While more of an investment, a pH meter can be invaluable for serious bakers looking to deeply understand and control their sourdough fermentation process.
Float Test: A Quick Method to Gauge Fermentation Readiness
The float test is a classic, simple sourdough fermentation monitoring technique specifically used to check the activity and readiness of your sourdough starter before mixing your dough. It gives you an indication of whether your starter is producing enough gas to leaven your bread effectively. It's not a perfect indicator of dough fermentation itself, but a well-performing starter is the foundation for successful dough fermentation.
To perform the float test, you take a small spoonful of your active, peak starter (typically 6-12 hours after feeding when it's bubbly and doubled or tripled in size) and gently drop it into a glass of water. If the starter floats on the surface, it's considered active and ready to be used in your dough mix. If it sinks to the bottom, it might not be active enough yet, suggesting it needs more time or perhaps a different feeding routine.
How to Perform the Sourdough Float Test Correctly
Performing the float test correctly is key to getting a reliable result for your sourdough fermentation monitoring. First, ensure your starter is at its peak activity – it should have risen significantly in its jar, showing lots of bubbles on the surface and throughout the culture. Gently scoop a very small amount, perhaps half a teaspoon, using a spoon or spatula. Avoid degassing the starter when scooping.
Carefully drop this small amount into a glass of room-temperature water, ideally not too cold or too warm. Observe what happens. A starter that is ready should be full of gas bubbles, making it less dense than water, causing it to float. If it sinks immediately or after only a moment, it indicates that there aren't enough trapped gas bubbles, meaning the yeast activity might be insufficient for immediate use in dough. This simple test offers a quick check for effective sourdough fermentation monitoring of your starter's vigor.
Interpreting Float Test Results for Baking Success
Interpreting the float test results is straightforward: a floating starter indicates sufficient gas production and activity for baking. This means the yeast population is robust and ready to leaven your dough. Using a starter that passes the float test increases your chances of achieving good oven spring and a well-risen loaf.
However, it's important to understand the float test's limitations as a sourdough fermentation monitoring technique. A starter that floats is active, but it doesn't guarantee successful dough fermentation, which is influenced by many other factors like temperature, dough hydration, and mixing technique. Furthermore, a very mature or slightly past-peak starter might also float briefly before sinking.
Some bakers argue that the float test isn't always necessary if you understand your starter's feeding cycle and can visually confirm its peak. Use the float test as one of several checks, particularly if you're unsure about your starter's readiness or are troubleshooting issues.
Advanced Sourdough Fermentation Monitoring Methods
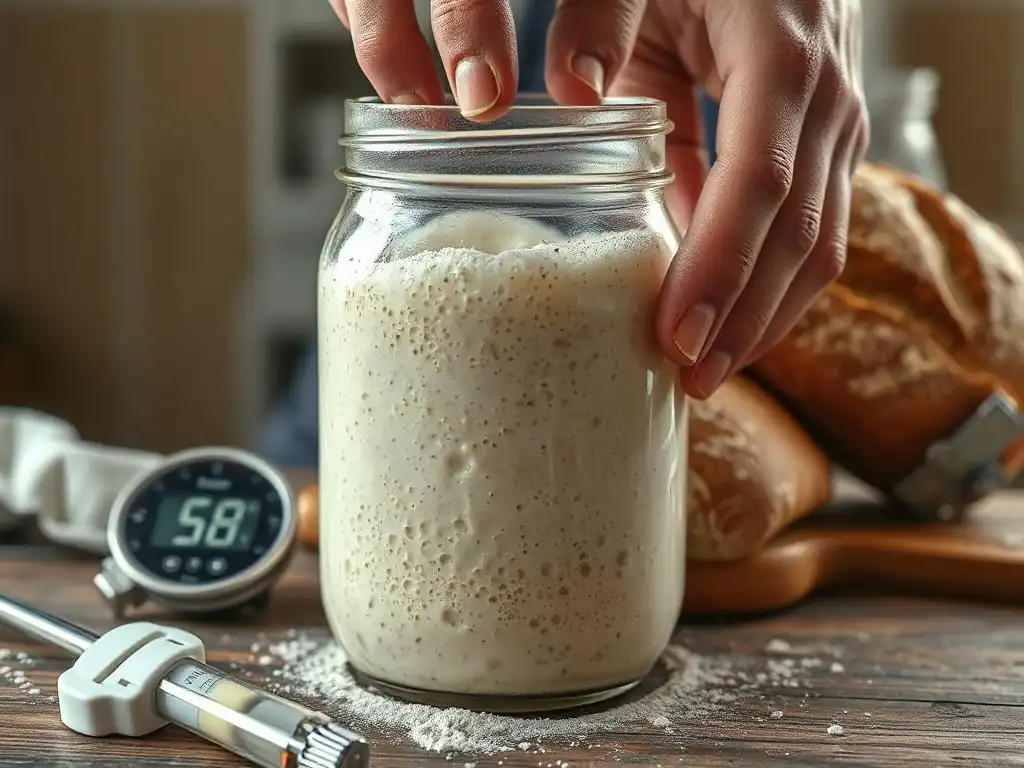
While visual cues, temperature, and the float test are excellent starting points, some advanced sourdough fermentation monitoring techniques can provide deeper insights into the process. These methods often require more attention to detail or specialized tools but can help troubleshoot persistent issues or simply deepen your understanding of how your dough behaves. They allow for more precise control and analysis, moving beyond qualitative assessment to more quantitative data.
Exploring these advanced techniques can be particularly helpful if you're trying to replicate specific results consistently, bake challenging recipes, or understand the subtle differences that variables like hydration or flour type introduce. They complement the basic methods and offer a more comprehensive approach to checking sourdough fermentation progress.
Hydration Levels and their Impact on Fermentation Times
Hydration refers to the ratio of water to flour in your dough. It's expressed as a percentage of the flour weight (e.g., 70% hydration means the water weighs 70% of the flour weight). Hydration significantly impacts dough consistency and, consequently, fermentation speed and characteristics. Higher hydration doughs (e.g., 80% or more) are wetter and stickier, while lower hydration doughs (e.g., 60-65%) are stiffer.
As an advanced sourdough fermentation monitoring technique, understanding how hydration affects timing is crucial. Higher hydration generally speeds up fermentation because the increased water makes starches more accessible to enzymes and provides a better medium for microbial activity. A 70% hydration dough will typically ferment faster than a 60% hydration dough at the same temperature and with the same starter. Conversely, lower hydration slows fermentation but can lead to easier handling for beginners. Tracking hydration alongside fermentation time and results in a journal helps you predict fermentation duration based on this key variable.
Tracking Sourdough Starter Activity with a Baking Journal
Keeping a detailed baking journal is an invaluable, albeit low-tech, advanced sourdough fermentation monitoring technique. Documenting your starter's feeding schedule, the type of flour used, the temperature of your kitchen, and how the starter responds (how much it rises, how quickly, its texture and smell) builds a historical record. This record helps you understand your starter's typical behavior and identify when it's performing optimally or when something is off.
Extend this journal practice to your dough fermentation. Note the recipe details, the time you mixed the dough, the ambient temperature, the dough temperature, the starting volume, and observations at regular intervals (e.g., every hour): volume increase, texture changes, bubble formation, smell. Also, record the final outcome of the bake (oven spring, crumb structure, flavor). Over time, this data allows you to correlate fermentation conditions and monitoring observations with results, helping you refine your process and predict future fermentation times based on specific variables. It's a powerful tool for consistent sourdough fermentation monitoring.
Utilizing a Tilt Hydrometer for Fermentation Progress
While more commonly used in brewing or winemaking, a tilt hydrometer is a specialized tool that can, in principle, be adapted for monitoring the specific gravity change in a liquid sourdough starter or a very wet preferment (like a poolish or levain). It measures the density of a liquid relative to water. As yeast consumes sugars and produces alcohol and CO2, the density of the liquid decreases (specific gravity drops).
For monitoring dough fermentation directly, a standard tilt hydrometer is less practical due to the dough's viscosity. However, the principle of measuring density change as an indicator of fermentation progress is relevant. Some specialized equipment exists for measuring gas production or volume increase more precisely, but these are typically beyond the scope of home baking. For home bakers, focusing on visual cues, temperature, pH (if desired), and meticulous journaling provides the most accessible and effective advanced sourdough fermentation monitoring techniques.
Troubleshooting Common Sourdough Fermentation Issues
Even with careful sourdough fermentation monitoring, you might encounter issues. Sourdough is a living system, and its behavior can sometimes be unpredictable. Recognizing common problems and knowing how to address them is part of the learning process. Don't get discouraged if a bake doesn't turn out perfectly; view it as an opportunity to learn and refine your sourdough fermentation monitoring techniques for next time.
Most fermentation issues stem from temperature, starter activity, or misjudging the fermentation endpoint. By systematically evaluating these factors using the monitoring techniques discussed, you can diagnose the problem and adjust your approach for future bakes. Consistency in your process makes troubleshooting much easier.
Slow Fermentation: Identifying and Addressing Potential Causes
Slow fermentation is a common issue, often resulting in dough that doesn't rise sufficiently, leading to a dense loaf. The most frequent cause is low temperature. If your kitchen is cold (below 68°F / 20°C), fermentation will be sluggish. Check the ambient and dough temperatures using a thermometer.
Another major culprit for slow fermentation is an inactive or weak starter. Has your starter been neglected? Was it fed recently? Did it double or triple in size after its last feeding? If the starter isn't vigorous, it won't effectively leaven the dough.
Ensure your starter is active and at its peak before mixing. Using cold water or a high percentage of certain flours (like rye) can also slow fermentation initially. To address slow fermentation, try moving the dough to a warmer spot (aiming for 75-80°F / 24-27°C), ensuring your starter is active, and being patient – sometimes it just needs more time, especially in cooler conditions. Proper sourdough fermentation monitoring techniques help you confirm if temperature or starter activity is the root cause.
Over-Fermentation: Recognizing the Signs and Preventing Spoilage
Over-fermentation occurs when the dough ferments for too long or too quickly, often at warm temperatures. The dough might rise dramatically and then start to collapse or become very slack and difficult to handle. Visually, it might look overly bubbly on the surface, and the poke test will likely show an indentation that doesn't spring back at all, potentially with a slight deflation. The smell can become strongly alcoholic or excessively sour, sometimes even acetone-like.
Over-fermented dough has a weakened gluten structure, making it hard to shape and resulting in poor oven spring and a gummy, dense crumb. To prevent over-fermentation, pay close attention to your sourdough fermentation monitoring techniques, especially volume increase, texture, and time relative to temperature. If fermenting at room temperature, check the dough frequently as it approaches the expected fermentation time.
If you need to slow things down, especially in warm conditions, consider using cooler water, reducing the amount of starter slightly, or transferring the dough to the refrigerator for part of the bulk fermentation. Recognizing the signs early through careful checking sourdough fermentation is key to avoiding this issue.
Inconsistent Sourdough Results: Achieving Predictable Fermentation
Inconsistent results are frustrating but often indicate variability in your process or a lack of precise sourdough fermentation monitoring. If one week you get a perfect loaf and the next it's dense or flat, consider what variables might have changed. Was the temperature different? Was your starter at the same level of activity? Did you use a different type of flour? Was the bulk fermentation time the same, or did you rely purely on the clock rather than the dough's indicators?
To achieve predictable fermentation, strive for consistency in your inputs and rely on your sourdough fermentation monitoring techniques rather than just a timer. Use a consistent feeding schedule for your starter. Measure ingredients accurately (preferably by weight). Control the dough temperature as much as possible. Most importantly, use visual cues (volume, texture, bubbles), the poke test, and potentially temperature/pH measurements to judge the dough's readiness, not just the elapsed time. Documenting your process in a journal helps identify which variables are causing inconsistency and allows you to refine your sourdough fermentation monitoring approach.
Tips for Consistent Sourdough Fermentation Monitoring

Developing consistent sourdough fermentation monitoring practices is the pathway to reliable baking results. It's about building habits and learning to read your dough. These tips will help you establish routines that make checking sourdough fermentation a natural part of your baking workflow.
Remember that every starter and every kitchen is unique. What works perfectly for one baker might need slight adjustments for another. The goal of consistent sourdough fermentation monitoring is to understand your specific conditions and how your dough responds, allowing you to make informed decisions every time you bake.
Creating a Consistent Sourdough Baking Schedule
Establishing a consistent baking schedule helps you integrate sourdough fermentation monitoring into your routine. If you bake on the same day(s) each week, you can plan your starter feeding accordingly, ensuring it's active and ready when you need it. For example, if you plan to mix dough on Saturday morning, you'll know to feed your starter Friday night.
A predictable schedule also makes it easier to manage bulk fermentation and proofing times. You'll start to learn how long fermentation typically takes in your kitchen conditions. While you should always rely on dough indicators over the clock, having a general timeframe based on your schedule helps you know when to start paying closer attention and begin actively using your sourdough fermentation monitoring techniques. Consistency in timing reduces variables and makes troubleshooting easier when issues arise.
Documenting Your Sourdough Fermentation Process with Detailed Notes
As mentioned earlier, keeping a detailed baking journal is one of the most effective advanced sourdough fermentation monitoring techniques. Make it a habit to record key information for each bake. This includes:
- Date and recipe name/details
- Starter feeding time and peak activity observation
- Mixing time and dough temperature after mixing
- Ambient temperature during bulk fermentation
- Observations during bulk fermentation (volume at intervals, texture, bubbles, poke test results)
- Shaping time
- Proofing temperature and duration
- Bake time, temperature, and method (Dutch oven, stone, etc.)
- Outcome (oven spring, crumb photo/description, flavor notes)
This rigorous documentation elevates sourdough fermentation monitoring from guesswork to a data-driven practice. Reviewing past entries allows you to see patterns, understand what worked well, and pinpoint potential causes for less successful bakes. It's like building a personal database of your dough's behavior.
Regularly Evaluating and Adjusting Your Techniques
The art of sourdough baking involves continuous learning and refinement. Regularly evaluate your sourdough fermentation monitoring techniques and adjust them based on your results. Did relying solely on volume lead to over-fermentation? Perhaps incorporate the poke test more consistently. Is your fermentation time wildly inconsistent? Start monitoring dough temperature more closely.
Don't be afraid to experiment slightly and see how your dough responds, always documenting the changes and outcomes. Maybe try fermenting for a slightly shorter or longer time based on your visual cues and see the impact on the final loaf. By actively engaging with your sourdough fermentation monitoring process and being willing to adapt, you'll deepen your understanding and improve your consistency over time.
Conclusion: Embrace the Art of Sourdough Fermentation Monitoring
Mastering sourdough fermentation monitoring techniques is the key to unlocking your best sourdough bread. It's a skill that develops with practice, patience, and observation. By learning to read the subtle cues your dough provides – its volume, texture, feel, and even smell – you gain the ability to guide the fermentation process towards the optimal point for baking.
Whether you rely on simple visual assessment and the poke test or incorporate temperature checks and pH monitoring, the fundamental principle remains the same: listen to your dough. These sourdough fermentation monitoring techniques aren't rigid rules but tools to help you understand the living process happening in your bowl. Embrace the journey of learning, document your experiences, and enjoy the rewarding process of baking beautiful, delicious sourdough bread consistently. Happy baking!
Frequently Asked Questions
What is fermentation and why is it important in sourdough baking?
Fermentation is the process where yeast and bacteria consume sugars in the dough, producing carbon dioxide and organic acids. This is crucial for flavor development, texture, and rise in sourdough.
What are some simple visual cues I can use to monitor sourdough fermentation?
Observe the dough's volume increase, the presence of bubbles, and the overall texture. Changes in surface appearance like the formation of a skin can also indicate fermentation progress.
How can I use a dough thermometer to monitor fermentation?
A thermometer helps track the dough's temperature, which directly impacts yeast activity. Optimal fermentation temperatures usually range between 70-75°F (21-24°C).
What is the float test, and how reliable is it for sourdough?
The float test involves placing a small piece of dough in water. If it floats, it suggests sufficient gas production, but it's not always a reliable indicator of complete fermentation, as factors like gluten strength can influence results.
What are some advanced techniques for monitoring sourdough fermentation that BakeWithEase might recommend for experienced bakers?
While BakeWithEase focuses on simplicity, advanced techniques can involve measuring pH levels using a pH meter or monitoring gas production with specialized equipment. These offer more precise control but require technical expertise.
Final Reflection: Embracing the Art of Sourdough Fermentation Monitoring
In today's world, where the art of baking has seen a resurgence, the importance of sourdough fermentation monitoring techniques cannot be overstated. As bakers, we are not just creating bread; we are engaging in a delicate dance of science and art that requires our attention and understanding. The techniques discussed in this article empower bakers to take control of their fermentation process, ensuring that each loaf is a testament to their skill and passion.
Culture and community thrive on the shared experience of baking, and the nuances of fermentation play a pivotal role in this journey. The ability to monitor and adjust fermentation not only enhances the quality of our bread but also fosters a deeper connection to the ingredients and the process itself. As we embrace these techniques, we are reminded of the wisdom of those who came before us. Baking is both an art and a science, and understanding the science makes the art even more beautiful.
This ongoing influence of fermentation monitoring techniques enriches our baking community, encouraging collaboration and innovation.
As you reflect on your own baking journey, consider how you can incorporate these monitoring techniques into your practice. Take a moment to appreciate the transformation that occurs during fermentation, and let it inspire you to experiment and explore. Whether you are a seasoned baker or just starting, remember that each loaf is an opportunity to learn and grow. Embrace the process, and let your passion for baking flourish as you master the art of sourdough fermentation.
Unlock Your Baking Potential: Master Fermentation Today!
Thanks for diving into the world of fermentation with us! We hope you now feel more confident in monitoring this crucial baking process. Ready to elevate your bread game?
- Dive deeper: Explore our advanced fermentation techniques guide (available soon on BakeWithEase.com)! This will unlock the secrets to even more consistent and flavorful results.
- Share your sourdough journey: Post a picture of your latest bake on social media using #BakeWithEaseFermentation and inspire others!
- Try a new recipe: Challenge yourself to bake something completely new using your newly acquired fermentation knowledge. What exciting flavor combinations will you create?
Ready to transform your baking from good to extraordinary? What unique fermentation experiment are you planning next?