
Avoid Tough Scones: Easy Beginner Advice

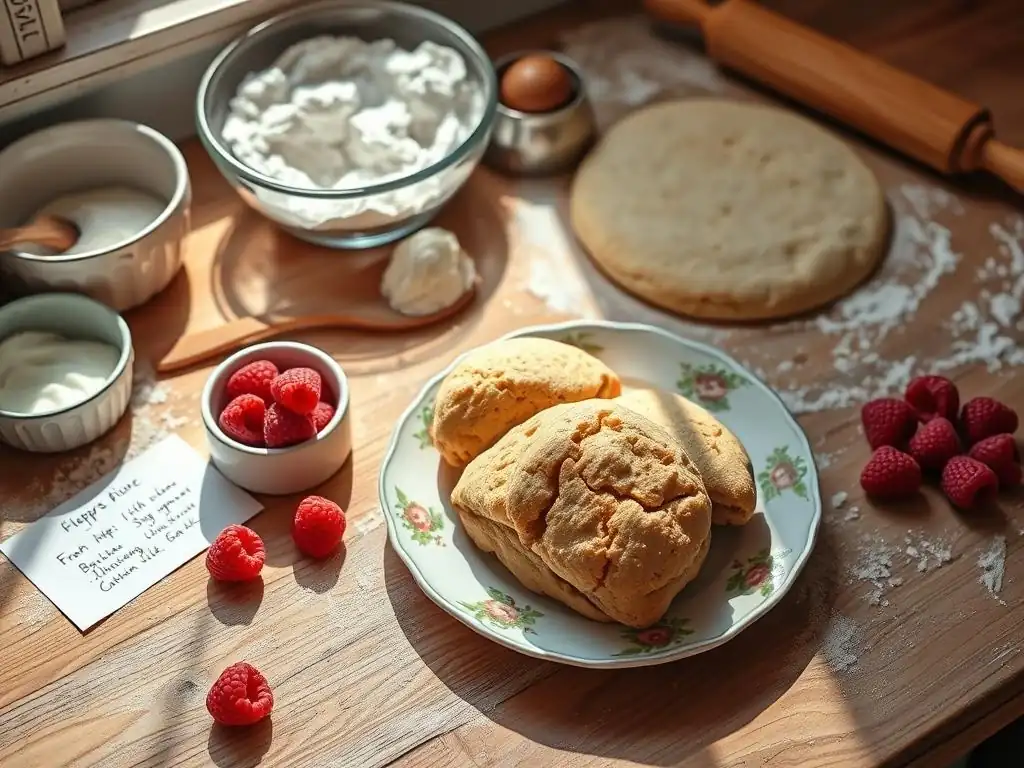
Welcome to BakeWithEase, your guide to conquering the kitchen, one delicious creation at a time! Ever dream of flaky, buttery scones but always end up with hockey pucks? You're not alone! This article dives deep into easy beginner scone recipes, debunking myths and unveiling the secrets to perfect scones every time. Ready to banish tough scones forever? Let's get baking and discover the surprisingly simple steps that will transform your scone game!
- Introduction to Easy Scone Baking for Beginners
- Understanding the Key Ingredients for Light and Fluffy Scones
- Step-by-Step Guide to Avoiding Tough Scones: Beginner-Friendly Instructions
- Common Mistakes to Avoid When Making Scones (and How to Fix Them)
- Delicious Variations on Easy Beginner Scone Recipes
- Serving and Storing Your Homemade Scones
- Troubleshooting Your Scone Baking: Addressing Common Issues
- Conclusion: Mastering Easy Beginner Scone Recipes with BakeWithEase
-
Frequently Asked Questions
- What makes scones tough, and how can BakeWithEase help me avoid that?
- Where can I find BakeWithEase's easy beginner scone recipes?
- What kind of ingredients will I need for BakeWithEase's easy beginner scone recipes?
- Are there step-by-step guides on BakeWithEase for making scones, even for someone who has never baked before?
- What if I have questions while baking BakeWithEase's easy beginner scone recipes?
- Final Reflection: The Humble Scone, A Gateway to Baking Joy
- Unleash Your Inner Baker: Scone Success Starts Now!
Introduction to Easy Scone Baking for Beginners
Welcome to BakeWithEase: Your Scone-Making Journey Begins
Welcome, budding bakers, to BakeWithEase, your friendly guide to delicious homemade treats! If you've ever felt intimidated by baking or perhaps had a less-than-perfect experience with scones before, you're in the right place. We believe that everyone can master the art of baking, and starting with easy beginner scone recipes is a fantastic way to build confidence and create something truly delightful right in your own kitchen.
Scones are a classic baked good, beloved for their tender crumb and versatility. They can be enjoyed sweet or savory, plain or studded with additions like berries or cheese. Our goal here is to walk you through the simple steps and essential tips that will ensure your easy beginner scone recipes result in light, fluffy perfection every single time. Forget tough, hockey-puck-like results; let's bake some wonderful scones together!
Why Scones Sometimes Turn Out Tough (and How to Prevent It)
So, you've tried making scones, perhaps following an easy beginner scone recipe, and they ended up dense or tough? You're definitely not alone! This is one of the most common frustrations for new bakers. The primary culprit behind tough scones is often the overdevelopment of gluten. Gluten is a protein network that forms when flour and liquid are mixed and worked together. While essential for the structure of bread, too much gluten development in scones leads to a chewy, tough texture, which is the opposite of the desired tender crumb.
Preventing tough scones boils down to a few key principles: using cold ingredients, handling the dough minimally, and precise baking. Think of it like this: you want to just coax the ingredients together, not wrestle them into submission. We'll delve into the specifics of how cold butter, gentle mixing, and proper shaping techniques work together to inhibit excessive gluten formation and encourage a light, flaky texture, making your easy beginner scone recipes successful and enjoyable.
Understanding the Key Ingredients for Light and Fluffy Scones
Flour Power: Choosing the Right Flour for Tender Scones
For most easy beginner scone recipes, all-purpose flour is your best friend. It has a moderate protein content, typically ranging from 10% to 12%, which provides enough structure to hold the scone's shape without promoting excessive gluten development when handled correctly. Using standard all-purpose flour means you don't need special ingredients, keeping your beginner baking simple and accessible.
While other flours exist – like bread flour with its higher protein (around 12-14%) which is great for chewy bread but terrible for tender scones, or cake flour with lower protein (around 7-9%) which can yield a very tender but sometimes crumbly scone – sticking to all-purpose is the most reliable path for consistent results in easy beginner scone recipes.
Always measure your flour correctly, preferably using the spoon-and-level method (spoon flour into the measuring cup and level off the top with a straight edge) to avoid packing it in, which can add too much flour and lead to a dry, tough dough.
The Role of Fat: Butter vs. Other Options in Scone Recipes
Cold, solid fat is arguably the most critical ingredient for achieving flaky, tender scones. Butter is the traditional choice and offers unparalleled flavor. When cold butter is cut into the dry ingredients, it creates small pockets of fat. As the scones bake, this butter melts, creating steam that pushes apart the layers of dough, resulting in that desirable flaky texture. Using cold butter is essential; warm or melted butter will simply incorporate into the dough, leading to a denser, less flaky result.
While shortening or a combination of butter and shortening can also be used and offer flakiness (shortening has a higher melting point, creating more steam), butter provides superior flavor. For easy beginner scone recipes, mastering the technique with cold butter is the best starting point. A typical recipe might call for around 6 to 8 tablespoons (approximately 3/4 to 1 stick) of cold butter per 2 cups of flour. Ensure your butter is very cold, straight from the refrigerator, and cut into small pieces or grated before incorporating it into the dry ingredients.
Liquid Assets: Selecting the Best Liquid for Your Scone Dough
The liquid component in easy beginner scone recipes plays a vital role in bringing the dough together and contributing to tenderness. Buttermilk is often considered ideal. Its acidity reacts with baking soda (a common leavening agent in scones) to produce carbon dioxide gas, which aids in leavening and contributes to a softer crumb. The acidity also helps to tenderize the gluten in the flour.
If you don't have buttermilk, whole milk or heavy cream can also be used, though the texture might be slightly different. Using cream tends to produce a richer, more tender scone due to its higher fat content. Whatever liquid you choose, ensure it is very cold. Just like butter, cold liquid helps keep the fat solid and prevents premature gluten development. A standard recipe might use between 1/2 cup and 3/4 cup of cold liquid per 2 cups of flour, but always follow your specific easy beginner scone recipe's instructions precisely.
Sweetness Matters: Sugar and Other Sweeteners in Easy Scone Recipes
Sugar in scone recipes does more than just add sweetness; it also contributes to the scone's tenderness and helps with browning during baking. Granulated sugar is the most common choice for easy beginner scone recipes. It distributes evenly throughout the dough and helps create a tender crumb by interfering with gluten development.
Brown sugar can also be used, adding a touch of molasses flavor and moisture, which can result in a slightly softer scone. The amount of sugar varies depending on the recipe and whether it's a sweet or savory scone, but a typical sweet scone recipe might contain anywhere from 1/4 cup to 1/2 cup of sugar per 2 cups of flour. For savory scones, the sugar amount is significantly reduced, often just a teaspoon or two to balance the flavors and aid in browning.
Step-by-Step Guide to Avoiding Tough Scones: Beginner-Friendly Instructions
Step 1: Measuring Ingredients Accurately for Perfect Scones
Accurate measurement is foundational to successful baking, especially when following easy beginner scone recipes. Unlike cooking, where you can often adjust ingredients as you go, baking relies on precise ratios for chemical reactions (like leavening) and structural integrity. Using too much flour, for example, is a common cause of dry, tough scones.
Always use dry measuring cups for dry ingredients like flour, sugar, and baking powder, and liquid measuring cups for liquids like milk or buttermilk. For flour, use the spoon-and-level method: gently spoon flour into the measuring cup until it overflows, then sweep off the excess with a straight edge (like a knife or spatula). Do not scoop directly from the bag, as this compacts the flour and results in using too much.
For leavening agents like baking powder and baking soda, measure precisely using measuring spoons and level them off. This attention to detail is a simple yet crucial step in making easy beginner scone recipes turn out perfectly.
Step 2: Mastering the Art of Cold Butter Incorporation
Why Cold Butter is Crucial for Flaky Scones
As mentioned earlier, cold butter is non-negotiable for flaky scones. When cold butter pieces are distributed throughout the dry ingredients, they remain solid during the initial stages of mixing and shaping. As the scones bake in a hot oven, these cold butter pieces melt and release steam. This steam creates air pockets within the dough, pushing the layers apart and resulting in a light, airy, and flaky texture. If the butter is warm or melted, it simply mixes into the dough, leading to a dense, cake-like or tough scone without those wonderful layers.
Imagine tiny layers of dough separated by pockets where butter once was – that's the goal! Keeping the butter cold ensures these pockets form effectively during baking. This technique is fundamental to many easy beginner scone recipes and mastering it will elevate your results significantly.
How to Cut Butter into Flour (Without Overworking the Dough)
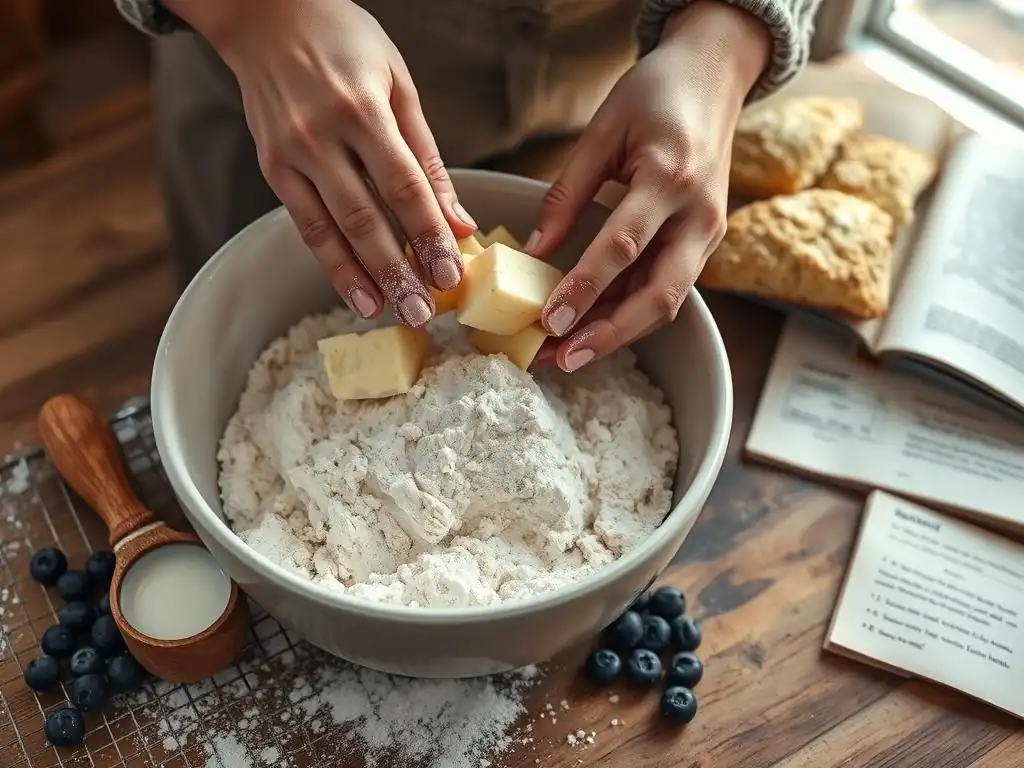
Incorporating cold butter into the flour mixture is a key technique. The goal is to break the cold butter into small pieces, roughly the size of peas or even smaller, and distribute them evenly throughout the dry ingredients. There are several beginner-friendly methods for this. You can use a pastry blender (a tool with wire blades), two forks, or even your fingertips. If using your fingertips, work quickly to avoid melting the butter with the heat of your hands.
Another excellent method, especially for beginners, is to grate frozen butter directly into the flour using a box grater. This creates very small, evenly sized pieces that are easy to distribute and keep cold. Whichever method you choose, work until the mixture resembles coarse meal with some pea-sized pieces of butter still visible. Avoid overmixing at this stage; you are just incorporating the butter, not creating a smooth dough. This step is vital for achieving the desired texture in easy beginner scone recipes.
Step 3: Gentle Mixing: The Key to Tender Scones
Avoid Overmixing: Understanding Gluten Development
This is perhaps the most critical step for preventing tough scones. Once the cold liquid is added to the dry ingredients and butter mixture, gluten development begins. The more you mix and work the dough, the more the gluten strands connect and strengthen. For bread, this is good; for scones, it's disastrous. Overmixing activates too much gluten, resulting in a dense, chewy texture that is the hallmark of a tough scone.
The goal when mixing scone dough is simply to bring the ingredients together until just combined. This usually takes only a minute or two of gentle mixing. You should stop mixing as soon as there are no dry pockets of flour visible. The dough will look shaggy and perhaps a little sticky, which is exactly what you want for easy beginner scone recipes. Resist the urge to keep mixing until it looks smooth and uniform like bread dough or cookie dough.
The "Shaggy Dough" Principle: What It Is and Why It's Important
The "shaggy dough" principle is your visual cue that you've mixed your scone dough correctly. After adding the liquid and mixing gently, the dough should not form a smooth, cohesive ball. Instead, it should look rough, lumpy, and like loose clumps held together, with some dry bits potentially still visible around the edges of the bowl. This uneven texture is a sign that you haven't overmixed and haven't significantly developed the gluten.
This shaggy state is important because it indicates minimal handling and minimal gluten development. A dough that looks perfectly smooth has been overworked. When you turn this shaggy dough out onto your work surface, you'll gently pat it together just enough to shape it, further minimizing handling. Embracing the shaggy dough is a hallmark of successful easy beginner scone recipes and a clear indicator that you're on your way to tender, flaky results.
Step 4: Shaping and Cutting Scones for Even Baking
Tips for Cutting Scones Without Twisting (Preserving Fluffiness)
Once your shaggy dough is gently patted into your desired shape (a circle or rectangle, typically about 1/2 to 3/4 inch thick), the way you cut the scones matters. Whether you're using a round cutter or a knife to cut wedges or squares, the key is to make clean, straight cuts without twisting the cutter or knife. Twisting can seal the edges of the scone layers that you worked so hard to create with the cold butter technique, inhibiting their ability to rise and flake properly in the oven.
For round scones, press the cutter straight down firmly, then lift straight up. Do not twist. For wedges or squares, use a sharp knife or bench scraper and press straight down. Wipe the cutter or knife clean periodically if dough starts to stick. Place the cut scones onto your prepared baking sheet, leaving some space between them. This simple technique helps ensure your easy beginner scone recipes yield scones that rise beautifully and have lovely flaky layers.
Ensuring Consistent Size for Even Baking
Cutting your scones into pieces of roughly equal size is important for even baking. If you have some scones that are much larger or smaller than others on the same baking sheet, the smaller ones will likely burn before the larger ones are cooked through. Aim for consistency in thickness and shape.
Whether you get 6 large scones, 8 medium ones, or 12 smaller ones from your easy beginner scone recipe, making them uniform in size ensures that when the timer goes off, they are all perfectly baked – golden brown on the outside and cooked through on the inside. Using a ruler to check the thickness of your flattened dough or a consistent cutter size can help achieve this uniformity.
Step 5: Baking Scones to Golden Perfection
Optimal Oven Temperature for Easy Beginner Scone Recipes
Scones bake best at a relatively hot oven temperature, typically between 375°F and 425°F (190°C to 220°C). A hot oven helps the cold butter melt quickly and create steam, promoting a good rise and flaky texture before the gluten has a chance to fully set in a tough structure. It also helps the exterior brown nicely.
Preheating your oven fully is crucial. Use an oven thermometer to verify the actual temperature, as oven thermostats can sometimes be inaccurate by 25°F or more. Baking at the correct temperature ensures your easy beginner scone recipes achieve that coveted golden-brown crust and fully cooked interior within the expected baking time, usually between 12 and 20 minutes depending on size and temperature.
Monitoring Doneness: The Toothpick Test and Visual Cues
Knowing when your scones are perfectly baked is a skill that comes with practice. Visually, baked scones should be risen, golden brown on the tops and bottoms, and perhaps lightly cracked on the surface. The edges should look set and slightly firm.
For easy beginner scone recipes, you can also use the toothpick test, similar to testing a cake, though it's less common for scones. Insert a toothpick into the thickest part of a scone; it should come out clean or with just a few moist crumbs attached, not wet batter. A more reliable method is to gently lift a scone and check the bottom; it should be golden brown.
Another sign of doneness is that the surface springs back slightly when gently pressed. Don't be afraid to take one out and break it open to check if it's fully cooked inside, especially the first time you make a new recipe.
Common Mistakes to Avoid When Making Scones (and How to Fix Them)

Overmixing the Dough: Solutions and Prevention
Mistake: Overmixing the dough after adding liquid. Cause: Too much handling develops gluten, leading to tough scones. Prevention: Mix just until the dry ingredients are incorporated and no flour pockets remain. The dough should be shaggy. Solution: If you realize you've overmixed slightly, handle the dough as little as possible when shaping and cutting. Next time, set a timer for mixing after adding liquid (often less than 60 seconds of gentle stirring is enough).
Using Warm Ingredients: The Importance of Cold
Mistake: Using butter or liquid that isn't cold. Cause: Warm ingredients cause the butter to melt prematurely, preventing the formation of steam pockets needed for flakiness. Prevention: Ensure butter and liquid (like milk or buttermilk) are straight from the refrigerator. Some bakers even chill their flour and mixing bowl for 15-20 minutes before starting. Solution: If your butter softened while you were working, pop the bowl of dry ingredients and butter back into the fridge or freezer for 10-15 minutes before adding the liquid. Always use very cold liquid.
Overcrowding the Baking Sheet: Space for Even Baking
Mistake: Placing scones too close together on the baking sheet. Cause: Scones need space for hot air to circulate around them, ensuring they rise properly and brown evenly on all sides. Prevention: Leave at least 1-2 inches of space between scones on the baking sheet. Use two baking sheets if necessary. Solution: If you've already placed them too close, gently rearrange them before baking if possible. If not, accept that they might not brown evenly where they touch. This is an easy fix for future batches of easy beginner scone recipes.
Overbaking: Achieving the Perfect Golden-Brown Hue
Mistake: Baking scones for too long. Cause: Overbaking dries out the scones and can make them tough and crumbly. Prevention: Start checking for doneness at the lower end of the recipe's suggested baking time. Use visual cues (golden brown color) and potentially the toothpick test or checking the bottom. Solution: If you've overbaked, they can sometimes be salvaged by serving immediately with plenty of butter, jam, or cream to add moisture. For future easy beginner scone recipes, note the exact time and appearance of a perfectly baked batch in your oven.
Delicious Variations on Easy Beginner Scone Recipes
Classic Buttermilk Scones: A Simple and Flavorful Start
Classic buttermilk scones are the perfect starting point for anyone exploring easy beginner scone recipes. They typically involve just flour, sugar, baking powder, salt, cold butter, and cold buttermilk. The simplicity of the ingredients allows you to focus on mastering the technique of gentle mixing and proper butter incorporation.
Buttermilk provides a subtle tang and reacts wonderfully with baking soda, resulting in a tender, slightly risen scone with a clean flavor profile. These scones are fantastic served warm with just butter, or elevated with jam and clotted cream for a traditional treat. Mastering this basic version provides a solid foundation for trying more complex variations later.
Fruity Scones: Adding Berries, Dried Fruits, or Citrus Zest
Once you're comfortable with a basic recipe, adding fruit is an easy next step in your easy beginner scone recipes journey. Fresh or frozen berries (like blueberries or raspberries), dried cranberries, currants, or chopped apricots add bursts of flavor and moisture. Citrus zest (lemon, orange, or lime) adds a bright, fragrant note.
When adding fruit, especially fresh or frozen berries, handle the dough even more gently to avoid crushing the fruit and turning the dough purple or mushy. Gently fold them in during the final mixing stage. For dried fruits, you might soak them briefly in hot water and drain them to plump them up before adding. A typical recipe might call for 1/2 to 1 cup of additions per 2 cups of flour.
Savory Scones: Exploring Cheese, Herbs, and Other Savory Flavors
Scones aren't just for sweet occasions! Savory scones are incredibly versatile and make a wonderful accompaniment to soups, stews, or simply enjoyed with a meal. Easy beginner scone recipes can easily be adapted to savory versions by reducing or omitting the sugar and adding ingredients like grated cheese (cheddar, Parmesan), fresh or dried herbs (chives, rosemary, thyme), black pepper, or even finely chopped cooked bacon or ham.
For cheese scones, you might add 1/2 cup to 1 cup of grated cheese per 2 cups of flour, incorporating it with the dry ingredients or gently folding it in at the end. Herbs can be added with the dry ingredients. Savory scones often benefit from a brush of egg wash and a sprinkle of extra cheese or herbs on top before baking for extra flavor and visual appeal.
Chocolate Chip Scones: A Sweet Treat for Any Occasion
For those with a sweet tooth, adding chocolate chips is a simple and satisfying variation on easy beginner scone recipes. Mini chocolate chips work particularly well as they distribute more evenly without creating large pockets that might cause the scones to break apart.
You can add anywhere from 1/2 cup to 1 cup of chocolate chips to a standard 2-cup flour recipe. Fold them in gently at the very end of the mixing process, just until they are evenly distributed. Chocolate chip scones are delightful served warm, perhaps with a drizzle of melted chocolate for extra indulgence.
Serving and Storing Your Homemade Scones
Best Ways to Enjoy Freshly Baked Scones
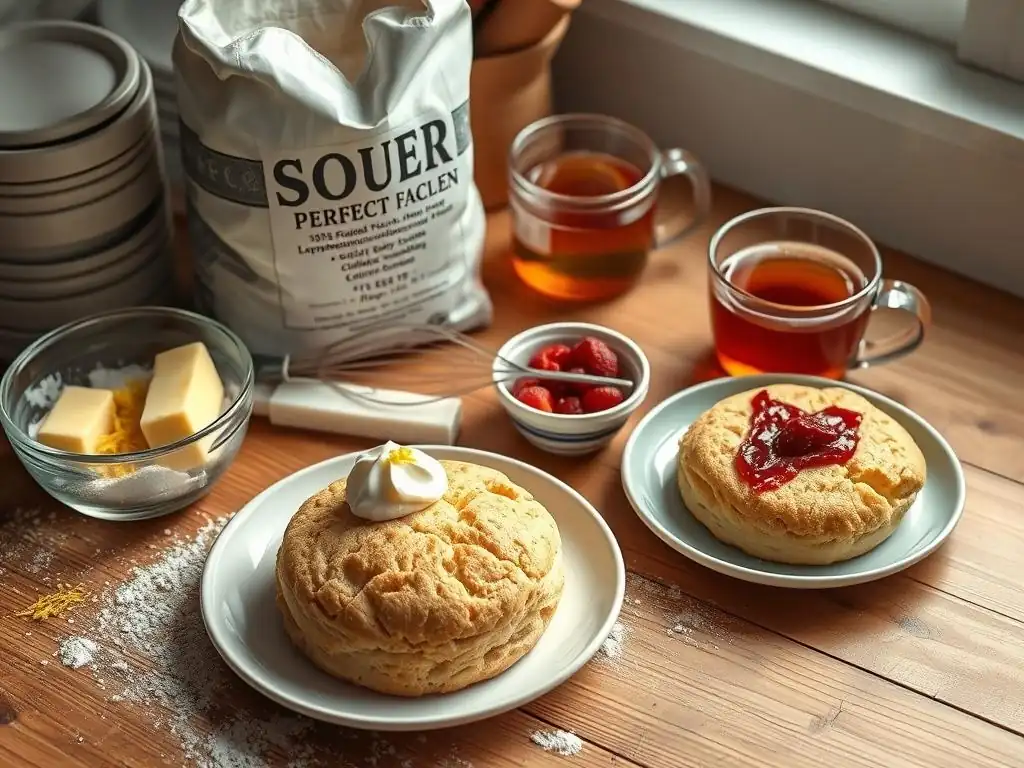
There's nothing quite like a warm, freshly baked scone straight from the oven. The heat enhances their aroma and tenderness. The simplest way to enjoy them is split open and spread generously with butter, which melts into the warm crumb.
For a traditional experience, particularly with classic or fruity easy beginner scone recipes, serve them with jam and clotted cream (or whipped cream as a stand-in). Savory scones are delicious with extra butter, cream cheese, or alongside a meal. Enjoy them with a cup of tea or coffee for a perfect moment.
Proper Storage Techniques for Maintaining Scone Freshness
Scones are definitely best enjoyed the day they are baked, ideally within a few hours. However, if you have leftovers, proper storage can help maintain their quality for a short time. Once completely cooled, store scones in an airtight container at room temperature.
Avoid refrigerating scones, as this can dry them out and make them tough. Stored properly at room temperature, they will typically keep for 1-2 days. For longer storage, scones freeze exceptionally well. Wrap cooled scones individually in plastic wrap, then place them in a freezer-safe bag or container for up to 2-3 months. This is a great tip for making batches of easy beginner scone recipes ahead of time.
Reheating Scones for Optimal Flavor and Texture
Reheating is the key to reviving leftover scones and bringing back some of that fresh-baked tenderness. The best method is usually in a preheated oven or toaster oven.
Preheat your oven to around 300-325°F (150-160°C). Place the scones directly on the oven rack or on a baking sheet and heat for 5-10 minutes, or until warmed through. For frozen scones, you can often reheat them directly from frozen, adding a few extra minutes to the baking time. The microwave can also be used for a quick warm-up, but be cautious as it can make them chewy if overheated – usually 20-30 seconds is sufficient for a single scone.
Troubleshooting Your Scone Baking: Addressing Common Issues
Dry Scones: Causes and Solutions
Issue: Scones turn out dry and crumbly. Causes: This is often due to using too much flour (usually from incorrect measuring, like scooping instead of spooning and leveling) or overbaking. Insufficient liquid in the dough can also be a factor. Solutions:
- Always measure flour using the spoon-and-level method.
- Ensure you are using the correct amount of liquid specified in your easy beginner scone recipe.
- Avoid overbaking; check for doneness at the minimum time.
- Next time, consider adding a tablespoon or two more liquid if the dough feels excessively dry when mixing.
Flat Scones: Preventing Spread and Encouraging Rise
Issue: Scones spread too much and don't rise well. Causes: This can happen if the butter wasn't cold enough when going into the oven, the dough was overmixed (which develops gluten and makes the dough less likely to rise upwards), or if the baking powder/soda isn't fresh. Overhandling the dough during shaping can also contribute. Solutions:
- Ensure all ingredients, especially butter and liquid, are very cold.
- Handle the dough minimally; remember the shaggy dough principle.
- Use fresh leavening agents (baking powder and soda lose potency over time; check the expiration date).
- Chill the cut scones on the baking sheet for 10-15 minutes in the refrigerator before baking; this helps the butter stay solid longer in the hot oven.
Unevenly Baked Scones: Tips for Consistent Results
Issue: Some scones are perfectly baked, while others are under or overdone on the same sheet. Causes: This is usually due to inconsistent scone size or uneven heat distribution in the oven. Solutions:
- Ensure scones are cut to a consistent size and thickness.
- Avoid overcrowding the baking sheet; leave adequate space for air circulation.
- If your oven has hot spots, try rotating the baking sheet halfway through the baking time.
- Consider using an oven thermometer to verify your oven's actual temperature.
Conclusion: Mastering Easy Beginner Scone Recipes with BakeWithEase
Enjoy the Journey of Scone Baking!
Congratulations! By understanding the role of key ingredients and mastering a few simple techniques – keeping ingredients cold, measuring accurately, mixing gently, and handling minimally – you are well on your way to avoiding tough scones and creating perfectly tender ones with your easy beginner scone recipes. Baking is a journey of learning and delicious discovery. Don't be discouraged by imperfections; each batch is a chance to learn and improve.
Making scones from scratch, especially following easy beginner scone recipes, is a rewarding experience. The aroma filling your kitchen and the taste of a warm, homemade scone are truly special. Embrace the process, have fun experimenting with variations, and share your delicious creations with others.
Further Resources for Beginner Bakers on BakeWithEase.com
This guide is just the beginning! BakeWithEase.com is packed with resources designed specifically for beginners. You'll find a variety of easy beginner scone recipes to try, along with step-by-step guides for other simple baked goods like muffins, cookies, and quick breads.
Explore our collection of easy beginner scone recipes that put these principles into practice. We have recipes for classic plain scones, simple fruit additions, and basic savory options. Continue practicing these techniques, and soon you'll be baking tender, flaky scones with confidence every time! Happy baking!
Frequently Asked Questions
What makes scones tough, and how can BakeWithEase help me avoid that?
Tough scones are often the result of overmixing the dough, leading to gluten development. BakeWithEase provides gentle mixing techniques and clear instructions to prevent this.
Where can I find BakeWithEase's easy beginner scone recipes?
You can find them directly on BakeWithEase.com under the "Scones" category or by searching for "easy beginner scone recipes" in the recipe index.
What kind of ingredients will I need for BakeWithEase's easy beginner scone recipes?
BakeWithEase focuses on easily accessible ingredients like flour, butter, sugar, baking powder, and milk or cream, making it convenient for beginners.
Are there step-by-step guides on BakeWithEase for making scones, even for someone who has never baked before?
Yes, BakeWithEase provides detailed, step-by-step guides with photos and videos, making it easy for even complete beginners to follow along and successfully bake scones.
What if I have questions while baking BakeWithEase's easy beginner scone recipes?
BakeWithEase usually has a comment section where you can ask questions, and they also offer baking tips and troubleshooting advice on their website.
Final Reflection: The Humble Scone, A Gateway to Baking Joy
The seemingly simple scone, a cornerstone of baking, offers more than just a delicious treat; it's a gateway to culinary confidence. Mastering the art of the perfect scone, as explored in this article, isn't just about following a recipe; it's about understanding fundamental baking techniques that can be applied to countless other recipes. This accessible entry point into the world of baking empowers beginners to explore their creativity and find joy in the process.
The impact of simple, achievable recipes like these extends far beyond the kitchen. Baking, especially when approached with a beginner-friendly mindset, fosters a sense of accomplishment and connection. It's a mindful activity that allows for creativity and self-expression, offering a welcome respite from the demands of daily life. Baking is at once child's play and adult joy. And love, of course.
– This sentiment perfectly captures the essence of what a simple scone recipe can represent: a moment of pure, unadulterated joy.
Now, it's your turn. Don't be intimidated by the seemingly complex world of baking. Take the leap, try one of the easy scone recipes outlined in this article, and experience the satisfaction of creating something delicious with your own hands. Embrace the imperfections, learn from the process, and most importantly, enjoy the journey. The perfectly golden-brown, crumbly scone is just the delicious beginning.
Unleash Your Inner Baker: Scone Success Starts Now!
Thanks for joining us on this delicious journey into the world of scones! We hope you gained some valuable tips and tricks to bake perfect, melt-in-your-mouth scones every time. Now it's time to put your new knowledge into action!
- Bake your first batch today! Use the techniques you learned to create a batch of scones—don't be afraid to experiment!
- Share your scone creations! Post a picture on social media and tag #BakeWithEaseScones – we'd love to see your baking triumphs (and even your delightful failures! ).
- Explore more beginner-friendly recipes on our website (bakewithease.com) for even more baking adventures.
What delicious flavor will your first perfect scone be?