
Why Your First Batch Might Not Be Perfect (And How to Learn)


Welcome to BakeWithEase, your friendly guide to the wonderful world of baking! Ever wondered why your first batch sometimes looks less like a masterpiece and more...unique? Don't worry, you're not alone. This article tackles those common " First batch baking problems" head-on, offering practical advice and insights to help you learn from every bake. Intrigued? Let's turn those baking blunders into baking brilliance!
- Understanding Sourdough Baking for Beginners
- Identifying the Root Causes of Sourdough Imperfections
- Troubleshooting Common First Sourdough Baking Issues
- Learning from Your Sourdough Mistakes: A Step-by-Step Guide
- Essential Sourdough Techniques to Master for Better Results
- Building Confidence Through Practice and Patience
- Advanced Sourdough Tips for Avoiding Future Problems
-
Frequently Asked Questions
- Why did my first batch of cookies spread too thin?
- My cake sank in the middle after baking. What went wrong?
- How can I prevent my bread from being too dense?
- What are some common ingredient measurement mistakes that beginners make?
- Why do my pastries sometimes burn on the bottom before they're fully cooked?
- Final Reflection: The Sweetness of Imperfection in Baking (and Life)
- Unleash Your Inner Baker: Take the Next Step!
Understanding Sourdough Baking for Beginners
Common Challenges in Your First Sourdough Attempt
Embarking on your sourdough journey is exciting, but it often comes with a unique set of first batch baking problems. Many beginners find their initial loaves don't quite match the airy, open-crumbed bread they see online. Perhaps the dough didn't rise much, resulting in a dense, brick-like texture, or the crust was tough rather than delightfully crisp. These outcomes are incredibly common and should not be discouraging; think of them as essential learning opportunities in the complex world of wild yeast fermentation.
Other frequent issues in early baking attempts include a lack of the characteristic tangy sourdough flavor, a loaf that spreads wide instead of holding its shape, or a crust that burns before the interior is cooked through. Identifying these specific beginner sourdough issues is the crucial first step. For instance, a loaf that didn't rise might point to a weak starter or improper fermentation timing, while excessive spread could indicate insufficient dough strength or over-proofing. Each problem offers a clue about what needs adjustment in your process.
Setting Realistic Expectations for Sourdough Starters
It's vital to understand that your sourdough starter, especially in its early life, is a living, evolving culture. It needs time to mature and develop the robust community of wild yeasts and bacteria necessary for effective leavening and flavor. Expecting a brand-new, one-week-old starter to perform miracles in your first batch baking is often unrealistic. A young starter might show some bubbling activity, but it may not yet have the strength to consistently lift a heavy dough.
A mature, reliable starter typically takes at least 2-4 weeks to develop, sometimes longer depending on environmental factors and feeding consistency. When attempting your first batch baking with sourdough, acknowledge that the primary goal is often just getting through the process and seeing any kind of rise and bake. Don't measure success solely by the perfect crumb structure you see in advanced tutorials. A slightly dense but edible loaf is a significant achievement for a first try! Focus on learning the feel of the dough, understanding the steps, and observing how your starter behaves.
Identifying the Root Causes of Sourdough Imperfections
Starter Inactivity: The Heart of the Problem
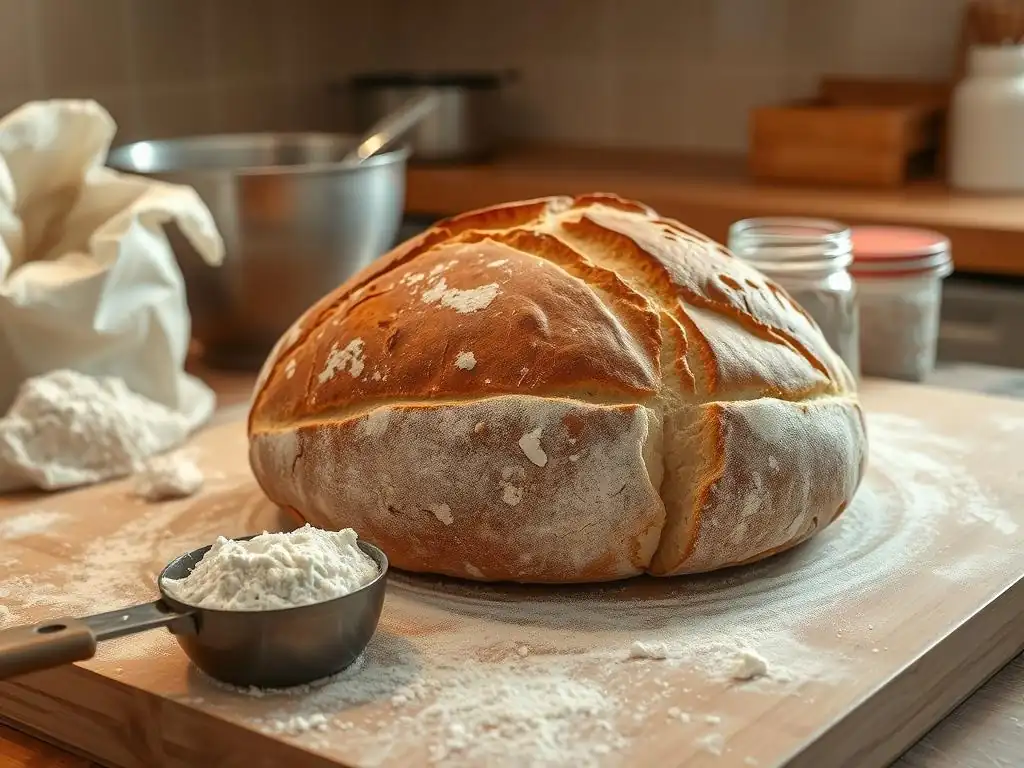
A sluggish or inactive starter is arguably the most frequent culprit behind first batch baking problems. Your starter is the sole leavening agent in traditional sourdough; if it's not strong enough to produce sufficient carbon dioxide gas, your dough simply won't rise properly. A healthy starter should show predictable activity, typically doubling or even tripling in volume within 4-8 hours after feeding when kept at a warm room temperature (around 75-80°F or 24-27°C).
If your starter shows minimal bubbles, little to no rise after feeding, or doesn't pass the "float test" (a small spoonful floats in water), it's likely not ready to leaven bread dough effectively. This is a very common scenario in early sourdough attempts. Factors like inconsistent feeding schedules, using chlorinated water, incorrect flour types, or unfavorable temperatures can all contribute to a weak starter, directly impacting the outcome of your first batch baking.
Importance of a Healthy and Active Sourdough Starter
Common Starter Problems and How to Revive Them
Hydration Levels: Too Wet or Too Dry Dough
Dough hydration, the ratio of water to flour by weight, significantly impacts the dough's handling characteristics, fermentation speed, and the final crumb structure. Recipes often specify hydration percentages, ranging from around 60% for stiffer doughs to 80% or even higher for very wet doughs. Using too little water results in a stiff, difficult-to-work dough that may not expand well during fermentation and baking, leading to a dense crumb – a common first batch baking problem.
Conversely, using too much water can make the dough a sticky, unmanageable mess that struggles to hold its shape, often resulting in a flat, wide loaf. While higher hydration can contribute to a more open crumb, it requires more developed dough strength (through mixing and folding) to support the structure. For your first batch baking attempts, starting with a moderate hydration dough (perhaps 65-70%) is often recommended as it's easier to handle while still offering a good chance at a decent crumb.
How to Determine the Ideal Hydration for Your Dough
Understanding the Impact of Water on Dough Consistency
Fermentation Time: Under-Proofing vs. Over-Proofing
Fermentation is a critical stage where the starter works its magic, developing flavor and structure. This process involves both bulk fermentation (the first rise of the dough) and proofing (the final rise before baking). Getting the timing and temperature right is crucial, and errors here are major contributors to first batch baking problems. Under-proofing means the dough hasn't had enough time to develop sufficient gas or strength, leading to a dense, gummy interior and poor oven spring.
Over-proofing, on the other hand, occurs when the dough ferments for too long. The gluten structure can break down, and the yeast can exhaust its food supply. An over-proofed dough might look bubbly and airy but often collapses when handled, resulting in a flat loaf with an uneven, sometimes dense, crumb. Finding the sweet spot requires practice and observation, as fermentation time is heavily influenced by ambient temperature and starter activity – variables that can be tricky to control in your first batch baking.
The Impact of Time and Temperature on Fermentation
Proper Fermentation Techniques for Sourdough Bread
Troubleshooting Common First Sourdough Baking Issues
Dense Loaves: Achieving an Open and Airy Crumb
A dense loaf is perhaps the most disappointing outcome of first batch baking problems. This usually stems from insufficient leavening power or poor dough development. Common causes include using an inactive starter, under-proofing the dough (not allowing it enough time to rise significantly, perhaps only a 20-30% increase instead of the target 50-100% during bulk ferment), or insufficient gluten development through kneading or folding.
To combat density, first ensure your starter is active and bubbly. Extend your bulk fermentation time if your kitchen is cool, aiming for a visible increase in volume and the appearance of small bubbles on the surface. Practice gentle but effective folding techniques to build dough strength without degassing it completely. Remember, patience is key; rushing the fermentation process almost guarantees a dense result in your early baking attempts.
Common Causes of Dense Sourdough and Solutions
Lack of Sour Flavor: Enhancing Tanginess
If your first batch baking sourdough tastes more like regular bread than the tangy loaf you anticipated, it's likely related to the balance of yeast and bacteria activity in your starter and dough. The characteristic sourness comes from lactic and acetic acids produced by the bacteria (Lactobacillus) in your starter. Different fermentation conditions favor different acids.
To increase tanginess, try incorporating a longer, cooler fermentation period, such as a cold retard in the refrigerator (8-12 hours or even longer). Colder temperatures slow down yeast activity more than bacterial activity, allowing the bacteria to produce more acids. Using a starter that is fed less frequently or kept at slightly cooler room temperatures can also encourage more bacterial development, contributing to a tangier flavor in your subsequent loaves after addressing initial first batch baking problems.
Tips for Increasing Sourness in Sourdough Bread
Tough Crust: Achieving a Crisp and Chewy Texture
A tough crust, rather than a pleasantly crisp and chewy one, can also be one of your first batch baking problems. This is often related to how the dough is baked, particularly the management of steam in the oven. Sourdough needs steam during the initial phase of baking to keep the crust soft and pliable, allowing the loaf to expand fully (oven spring) before the crust sets. Without sufficient steam, the crust forms too early and becomes hard and thick.
Baking in a Dutch oven is a popular and effective method for trapping steam around the loaf. If you're not using a Dutch oven, try placing a tray of hot water or ice cubes in the bottom of your oven just before loading the bread. Also, ensure your oven is fully preheated to a high temperature (often 450-500°F or 230-260°C) before baking. Baking at too low a temperature or for too long can also contribute to a tough crust.
Controlling Crust Thickness and Texture
Learning from Your Sourdough Mistakes: A Step-by-Step Guide
Analyzing Your Sourdough Results: Taste, Texture, and Appearance
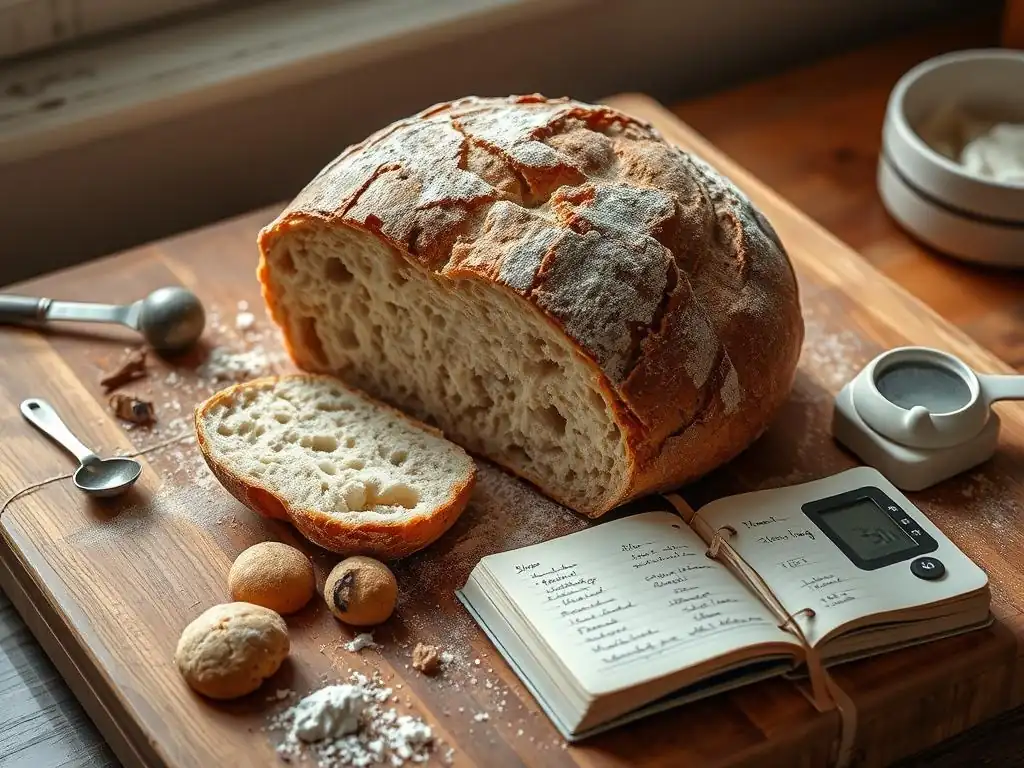
After your first batch baking attempt, take the time to carefully evaluate the outcome. Don't just look at it; taste it, feel it. How was the crust – was it thick, thin, crisp, or tough? Examine the crumb structure – is it dense and uniform, or does it have irregular holes? What about the flavor – is it bland, slightly sour, or very tangy? These observations are invaluable clues to understanding what went right or wrong.
Consider the rise: Did the dough expand significantly during bulk fermentation and proofing? Did it get good oven spring? Even if your loaf isn't perfect, identifying specific issues like a gummy crumb (possibly underbaked or under-proofed) or a flat profile (weak starter, over-proofed, or insufficient strength) provides concrete points for improvement in your next bake. Treating your initial sourdough challenges as data points for future success is key.
Detailed Sensory Evaluation for Sourdough Bakers
Documenting Your Process: Baking Journals and Starter Feeding Schedules
One of the most effective ways to overcome first batch baking problems and improve consistently is to keep detailed records. A baking journal doesn't need to be fancy; a simple notebook or spreadsheet will do. For each bake, note the date, temperature of your kitchen, starter feeding time and ratio, ingredients used (including flour types and hydration percentage), bulk fermentation start/end times, proofing details (time and temperature), and baking time and temperature.
Equally important is tracking your starter's feeding schedule and behavior. Note when you feed it, with what ratio of flour and water (e.g., 1:1:1 starter:flour:water), and how long it takes to reach its peak. This helps you understand your starter's rhythm and predict its readiness for baking. By correlating your baking results with these variables, you can start to pinpoint the causes of your early baking attempts' shortcomings and make informed adjustments.
The Benefits of Keeping a Sourdough Journal
Adjusting Your Recipe: Making Small Changes for Big Results
Based on your analysis and journal entries, you can begin to make targeted adjustments to your process. Avoid changing too many variables at once after experiencing first batch baking problems; this makes it difficult to isolate the impact of each change. For example, if your loaf was dense, first focus on ensuring your starter is vigorous. If it is, perhaps try extending the bulk fermentation time by an hour or two in your next bake.
Experimenting with starter ratios can also influence fermentation speed and flavor. A lower inoculation (using less starter relative to flour) slows fermentation, potentially increasing sourness. Adjusting hydration slightly can impact dough handling and crumb. Each small change, documented in your journal, helps you refine your technique and recipe over time, gradually moving past first batch baking problems towards more consistent, successful loaves.
Experimenting with Starter Ratios and Fermentation Times
Essential Sourdough Techniques to Master for Better Results
Mastering the Art of the Autolyse
The autolyse is a simple yet powerful technique that can significantly improve your dough's structure and make it easier to handle, helping to mitigate first batch baking problems. It involves mixing just the flour and water from your recipe and letting it rest for 20 minutes to an hour or more before adding the starter and salt. During this rest, the flour absorbs the water, and enzymes naturally present in the flour begin to break down proteins.
This process helps the gluten network start to form without any mechanical work (like kneading). It makes the dough more extensible and less sticky, often reducing the total kneading or folding time required later. Incorporating an autolyse into your routine can lead to a smoother dough and potentially a more open crumb in your later baking attempts, building on the lessons learned from your first batch baking.
Perfecting the Folding Technique for Dough Strength
Developing sufficient dough strength is crucial for sourdough, especially for higher hydration doughs. Unlike traditional kneading, sourdough often relies on a series of "stretch and folds" or "coil folds" performed during the bulk fermentation period. These gentle manipulations build tension and align the gluten strands, providing the structure needed to support the gas produced by the starter.
Insufficient folding is a common reason for dough spreading wide during proofing or baking, contributing to first batch baking problems. Aim for 3-5 sets of folds during the first 2-3 hours of bulk fermentation, depending on the dough's hydration and temperature. Observe how the dough changes – it should become progressively smoother, tighter, and more elastic with each set of folds.
Understanding the Importance of Scoring
Scoring, the act of cutting the surface of the dough just before baking, serves several important purposes. Primarily, it provides controlled vents for the expanding gases inside the loaf during oven spring. Without scoring, the crust will rupture unpredictably at its weakest points, often resulting in a less attractive shape and potentially restricted rise.
Proper scoring allows the baker to direct the expansion, influencing the final shape and appearance of the loaf. It also contributes to crust development. While mastering intricate scoring patterns comes with practice, even a simple score helps ensure a better rise and can prevent some first batch baking problems related to oven spring. Use a sharp blade (like a razor or lame) and make confident, decisive cuts.
Building Confidence Through Practice and Patience

Embracing the Learning Curve in Sourdough Baking
It's absolutely normal for your first batch baking experiences to be less than perfect. Sourdough baking involves mastering a living culture and responding to variables like temperature and humidity, which takes time and intuition. Think of each bake, regardless of the outcome, as a valuable lesson. Did the dough feel right? Was the starter active? Did it rise as expected?
Don't get discouraged by initial setbacks. Every experienced sourdough baker has a story about their early, less-than-stellar loaves. The journey is about learning to read your dough, understand your starter, and adapt your process. Patience is your most important ingredient. Keep baking, keep observing, and celebrate the small improvements you see with each subsequent loaf.
Simple Sourdough Recipes Perfect for Beginners
To build confidence after tackling your first batch baking problems, start with recipes designed for simplicity. Avoid overly complex shapes or techniques initially. Focusing on a basic formula allows you to concentrate on the fundamental steps: feeding your starter, mixing, fermenting, shaping, and baking.
Start with a Basic Country Loaf
A straightforward country loaf recipe, often using a mix of white and whole wheat flour at moderate hydration (e.g., 70%), is an excellent starting point. These recipes typically involve basic stretch and folds and are forgiving enough to still yield a decent loaf even if some steps aren't executed perfectly.
Try Sourdough Discard Crackers
Using sourdough discard (the portion of your starter you remove before feeding) is a fantastic way to bake something simple and delicious without worrying about leavening power. Sourdough discard crackers are quick, require minimal technique, and offer a chance to use your starter discard constructively while you perfect your bread-baking skills, providing positive baking experiences after potential first batch baking problems.
Advanced Sourdough Tips for Avoiding Future Problems
Using a Banneton for Shape and Structure
A banneton, or proofing basket, is a baker's tool used for the final rise of the dough before baking. Typically made of rattan or cane, it's floured and the shaped dough is placed inside. The banneton helps the dough maintain its shape during proofing, especially for wetter doughs that might otherwise spread.
Using a banneton contributes to a better-structured loaf with less risk of it flattening out before hitting the oven. It can significantly improve the appearance and height of your bread compared to proofing on a flat surface or in a bowl without support, helping you avoid certain structural first batch baking problems in the future.
Understanding the Role of Different Flours in Sourdough
The type of flour you use for both your starter and your dough plays a significant role. Different flours have varying protein levels, which affect gluten development, and different nutrient profiles, which impact starter activity and flavor. Using a mix of strong bread flour and whole wheat flour is common and beneficial.
Whole wheat or rye flour often contains more nutrients that wild yeasts and bacteria thrive on, making them excellent for feeding a starter to boost its activity. Bread flour, with its higher protein content (typically 12-14%), contributes to a stronger gluten network in the dough, essential for trapping gases and achieving a good rise and open crumb. Experimenting with different flours can help you refine your process after initial first batch baking problems.
Mastering the Art of Oven Spring
Oven spring is the rapid expansion of the dough during the first 10-15 minutes of baking. It's a crucial factor in achieving a well-risen loaf with a good crumb. Several factors influence oven spring: the strength and activity of your starter, sufficient fermentation and proofing, proper dough strength, effective scoring, and adequate heat and steam in the oven.
Achieving great oven spring is often a goal after overcoming first batch baking problems. It's a sign that all the preparatory steps – from starter health to fermentation timing – have aligned. Baking at a high initial temperature (like 450-500°F) in a preheated Dutch oven or with added steam helps maximize oven spring by delaying crust formation and allowing the internal gases to expand rapidly.
Frequently Asked Questions
This is a common first batch baking problem. It often happens because the butter was too soft or the oven temperature wasn't quite right. Chill your dough before baking for better results.
My cake sank in the middle after baking. What went wrong?
A sunken cake usually indicates a lack of structure or improper leavening. It can also be caused by opening the oven door too early during baking.
How can I prevent my bread from being too dense?
Dense bread is frequently caused by insufficient kneading or not allowing enough time for the dough to rise. Make sure your yeast is active and follow the recipe's rising instructions carefully.
What are some common ingredient measurement mistakes that beginners make?
Many beginners struggle with accurate measurements, especially with flour. Using too much flour can lead to dry and crumbly baked goods. Always spoon and level your dry ingredients.
Why do my pastries sometimes burn on the bottom before they're fully cooked?
This often indicates that your oven rack is too low. Try moving the rack to the middle position to ensure more even heat distribution and prevent the bottom from burning prematurely.
Final Reflection: The Sweetness of Imperfection in Baking (and Life)
The pursuit of the perfect first batch is a recipe for disappointment; embracing the imperfections is where the true learning begins. Many aspiring bakers, overwhelmed by the seemingly precise world of recipes and techniques, become discouraged when their initial attempts fall short. This article highlighted the common pitfalls of first-time baking, from inaccurate measurements to unforeseen oven variations, but ultimately emphasized the crucial role of iterative learning and experimentation. This isn't just about baking; it's a universal truth applicable to any skill we strive to master.
The journey of learning to bake, much like navigating life's challenges, is rarely linear. It's a process of trial and error, of celebrating small victories and learning from inevitable setbacks. The only way to do great work is to love what you do.
- Steve Jobs. This quote resonates deeply because the passion for baking, for the process of creation itself, transcends the outcome of any single attempt. The joy lies in the continuous improvement, the subtle adjustments, and the gradual refinement of technique that comes with each new batch. The imperfections become stepping stones, guiding us towards a deeper understanding of the craft.
So, reader, I urge you to embrace the inevitable imperfections of your first (and subsequent) baking attempts. Don't be disheartened by a slightly dense cake or a less-than-perfect loaf. Instead, analyze what went wrong, adjust your approach, and try again. This iterative process, this willingness to learn from mistakes, is the key not only to baking mastery but also to achieving success and fulfillment in any area of life. Your next batch will be better, and the journey itself will be far more rewarding than any single perfect result.
Unleash Your Inner Baker: Take the Next Step!
Thanks for joining us on this baking journey! We hope you gained valuable insights into why your first attempts might not always be picture-perfect and the importance of learning from each experience. Now it's time to put that knowledge into action!
- Bake something new! Challenge yourself with a recipe you've been eyeing – even if it seems intimidating. Remember, every bake is a learning opportunity.
- Share your baking journey! Snap a photo of your creation (even if it's a little wonky!) and share it with our community on social media – we'd love to see your progress!
- Explore our recipe archive: Dive deeper into our collection of tried-and-true recipes, tips, and techniques to further refine your baking skills.
So, what delicious challenge will you tackle next? Let's hear about it in the comments!