
Get Perfect Cookies Every Time: Essential SliceandBake Tips for Beginners

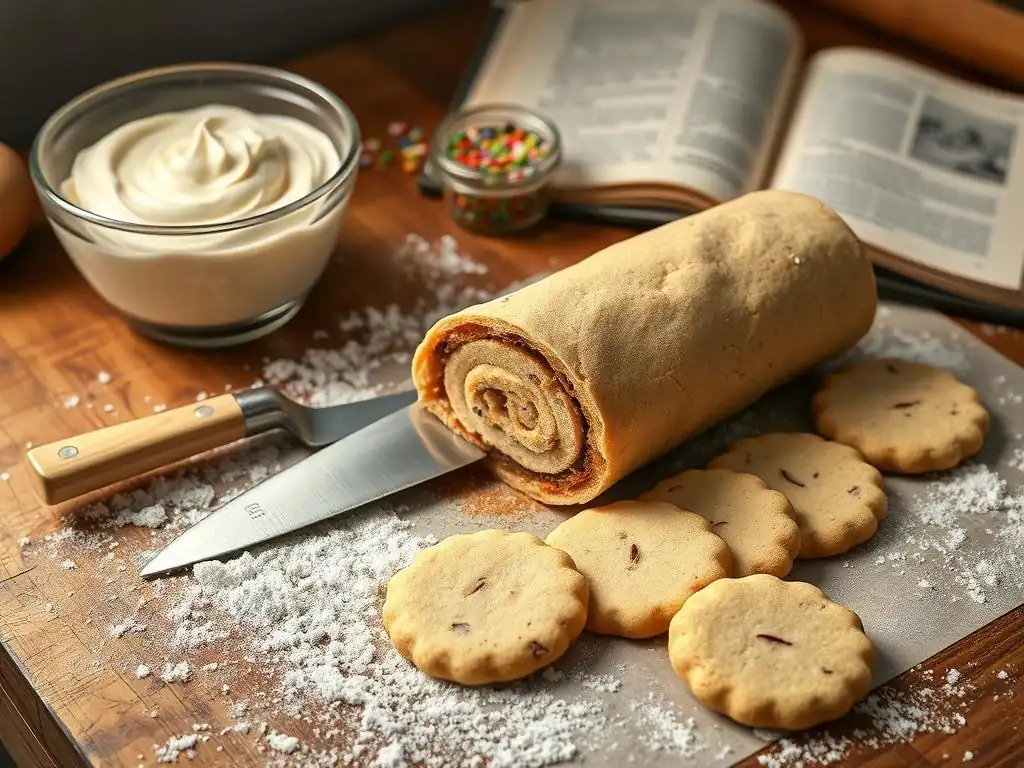
Welcome to BakeWithEase, where the delightful world of baking is made accessible for everyone! Whether you're just stepping into the kitchen or looking to refine your skills, our resources are designed to help you master the art of baking. In our featured article, "Get Perfect Cookies Every Time: Essential Slice-and-Bake Tips for Beginners," you'll uncover the secrets to creating mouthwatering cookies that will impress family and friends alike. Ready to turn those ingredients into golden perfection? Dive in and discover how easy baking can be!
- BakeWithEase Presents: Mastering Slice-and-Bake Cookies for Beginners
- What are Slice-and-Bake Cookies and Why They're Perfect for Baking Beginners
-
Essential Tips for Perfect Slice-and-Bake Cookies: A Beginner's Guide
- Tip #1: Choosing the Right Slice-and-Bake Cookie Dough: Store-Bought vs. Homemade
- Tip #2: Preparing the Dough for Slicing: Achieving the Ideal Consistency
- Tip #3: Slicing Techniques for Uniform Slice-and-Bake Cookies
- Tip #4: Baking Slice-and-Bake Cookies to Perfection: Temperature and Timing
- Tip #5: Preventing Common Slice-and-Bake Cookie Problems: Troubleshooting Tips
- Tip #6: Enhancing Your Slice-and-Bake Cookies: Flavor Variations and Add-ins
- Advanced Slice-and-Bake Techniques for Baking Beginners
- Storing Your Perfect Slice-and-Bake Cookies: Keeping Them Fresh
- From Beginner to Baker: Achieving Perfect Cookies Every Time
-
Frequently Asked Questions
- How can BakeWithEase help me, a beginner, bake perfect cookies?
- What are some common mistakes beginners make when baking slice-and-bake cookies?
- What kind of cookie recipes can I find on BakeWithEase that are suitable for beginners?
- What are the essential techniques I need to master to bake perfect cookies, according to BakeWithEase?
- Where can I find a comprehensive guide with tips and tricks for baking perfect cookies every time?
- Final Reflection: The Sweet Science of Perfect Cookies
- Unlock Your Inner Pastry Chef: Bake Perfect Cookies Today!
Welcome to the wonderful world of baking with BakeWithEase! If you're just starting your baking journey, achieving perfect cookies every time might seem like a challenge. But don't worry, we're here to guide you. Slice-and-bake cookies are an absolute game-changer for beginners, offering a straightforward path to delicious results with minimal fuss. They are the perfect introduction to understanding basic cookie chemistry and oven dynamics.
Our goal is to empower you to bake with confidence, starting with simple, reliable techniques. This guide focuses on slice-and-bake cookies because they simplify the process significantly – no scooping, no rolling, just slice and bake! By mastering these essential tips, you'll be well on your way to baking perfect cookies every beginner dreams of, building a foundation for more complex recipes down the line. Let's get started on making your first batch of perfect cookies!
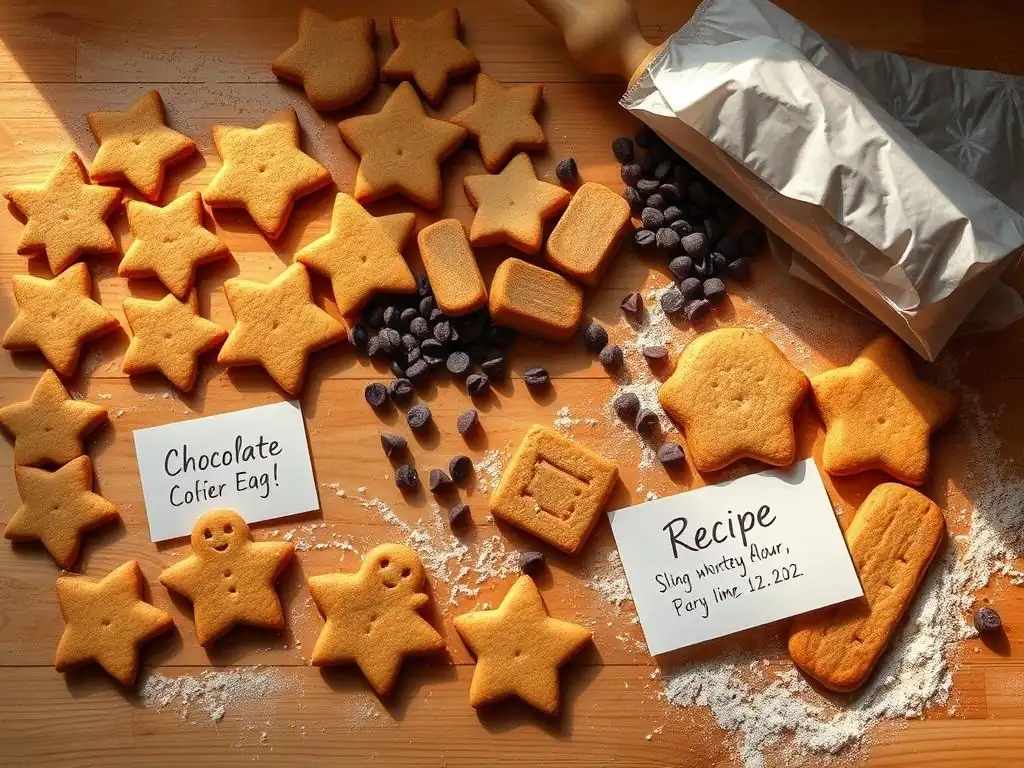
Slice-and-bake cookies, often called refrigerator cookies or icebox cookies, are made from dough that is shaped into a log, chilled until firm, and then simply sliced into rounds before baking. This method eliminates steps like rolling out dough and using cookie cutters, which can sometimes be tricky for newcomers. The chilling process is crucial as it solidifies the fats in the dough, making it easy to slice cleanly and helping the cookies hold their shape better during baking.
These cookies are ideal for baking beginners because they offer incredible convenience and consistency. The prep work can be done ahead of time, allowing you to bake fresh cookies whenever the craving strikes. This reduces the pressure of completing everything in one go and makes baking a more relaxed and enjoyable activity. Learning to bake perfect cookies every beginner style starts with understanding simple, reliable processes like this.
The Simplicity of Slice-and-Bake: An Easy Baking Introduction
The slice-and-bake method is perhaps one of the most accessible ways to start baking cookies. It involves preparing a single batch of dough, shaping it into one or more logs, and then refrigerating it. This contrasts with drop cookies, which require scooping consistent portions, or cut-out cookies, which involve rolling and precise cutting. The simplicity lies in the minimal handling required once the dough is made.
Consider a standard sugar cookie recipe adapted for slice-and-bake. Instead of chilling the dough and rolling it out to 1/4 inch thickness, you simply form a log about 2 inches in diameter. After chilling, you just slice off 1/4 inch thick rounds. This streamlined process drastically reduces the chance of overworking the dough (which can lead to tough cookies) and simplifies portioning, helping you achieve more uniform results right from your very first attempt at baking perfect cookies.
Why Choose Slice-and-Bake for Your First Baking Project?
Choosing slice-and-bake cookies for your initial foray into baking offers several distinct advantages. Firstly, it breaks down the baking process into manageable steps: mix the dough, shape the log, chill, slice, and bake. This modular approach is less intimidating than recipes that require continuous attention. Secondly, the chilling step is forgiving; you can chill the dough for a few hours or even a few days (check specific recipe guidelines, but often up to a week is fine), giving you flexibility.
Furthermore, learning to make perfect cookies every beginner can tackle with slice-and-bake teaches fundamental skills like creaming butter and sugar, incorporating dry ingredients, and understanding the importance of chilling. For instance, creaming butter and sugar properly incorporates air, which is vital for cookie texture. Using a recipe that calls for chilling for at least 2 hours solidifies the butter, preventing excessive spread in the oven. These foundational concepts are easily grasped within the simple framework of a slice-and-bake recipe.
Achieving perfect cookies every time, especially when you're new to baking, is all about following a few key steps. Slice-and-bake cookies are forgiving, but paying attention to detail will elevate your results from good to truly great. These tips cover everything from selecting your dough to troubleshooting common issues, setting you up for consistent success.
Mastering slice-and-bake isn't just about convenience; it's about understanding the science behind these simple cookies. For example, the temperature of your dough before slicing dramatically impacts the cookie's final shape and texture. Baking time and temperature are also critical for achieving that ideal balance of crisp edges and a slightly chewy center. By focusing on these essential tips, you'll consistently bake perfect cookies every beginner can be proud of.
Your cookie journey begins with the dough itself. Beginners have two main paths: purchasing pre-made store-bought dough or making dough from scratch at home. Both have their merits, and the "right" choice depends on your goals, time constraints, and desired level of involvement in the process. Understanding the differences helps you set realistic expectations for your perfect cookies.
Store-bought dough offers unparalleled convenience – simply unwrap, slice, and bake. It's designed for ease and consistency, making it a very low-barrier entry point for baking perfect cookies every beginner can manage immediately. However, homemade dough allows for greater control over ingredients, flavor, and texture, often resulting in a richer, more nuanced cookie. It also provides a more complete baking experience, teaching you the foundational steps of dough preparation.
Understanding Store-Bought Dough: Options and Considerations
Store-bought slice-and-bake dough comes in various flavors, from classic chocolate chip and sugar cookie to seasonal options. They are formulated for stability and convenience, typically using ingredients like vegetable oils or hydrogenated fats which contribute to a longer shelf life and predictable spread. A standard log of store-bought dough, often weighing around 16 ounces, typically yields about 24 cookies when sliced according to package directions.
While convenient, it's worth noting that the flavor and texture of store-bought dough can differ significantly from homemade. They often contain preservatives and artificial flavors. For the absolute beginner focused solely on the slicing and baking steps, they are fantastic. However, if your goal is to understand ingredient interaction and achieve a more "homemade" taste, making your own dough is the next logical step towards baking perfect cookies every time.
Exploring Homemade Slice-and-Bake Dough: Recipes and Benefits
Making slice-and-bake dough from scratch opens up a world of possibilities. You can control the quality of ingredients, such as using high-quality butter for better flavor and texture. Common homemade slice-and-bake recipes include simple butter cookies, shortbread variations, or even chocolate doughs. A basic butter cookie dough might require about 1 cup (2 sticks) of butter, 1/2 cup of sugar, 1 egg, and 2 cups of flour, plus flavorings.
The primary benefit of homemade dough is the superior flavor and texture it often yields. Because you're using fresh butter, the cookies tend to be richer and crispier. Making the dough yourself also teaches you the fundamental techniques of creaming, mixing, and chilling, which are transferable skills for countless other baking projects. It's a rewarding step for any beginner aiming to bake truly perfect cookies from start to finish.
Tip #2: Preparing the Dough for Slicing: Achieving the Ideal Consistency
Once your dough is mixed (whether homemade or store-bought), proper preparation before slicing is paramount. The dough needs to be firm enough to hold its shape when cut, but not so hard that it crumbles. This "just right" consistency is achieved primarily through chilling, which solidifies the fats and makes the dough manageable.
Shaping the dough log correctly is also part of this preparation. Aim for a uniform diameter along the entire length of the log. This ensures that when you slice, each cookie is roughly the same size, which is critical for even baking. An uneven log will result in some cookies being done while others are still raw in the center or burnt around the edges.
Chilling the Dough: The Key to Clean Slices
Chilling is arguably the most critical step for successful slice-and-bake cookies. When the dough is chilled, the butter (or other fat) hardens. This firmness allows you to slice through the dough cleanly without it squishing or deforming. Cold dough also spreads less in the oven, helping your cookies maintain a nice, round shape and a desirable thickness.
Think of it like slicing cheese; soft cheese is difficult to slice neatly, while firm, cold cheese cuts beautifully. The same principle applies here. Dough chilled for the appropriate time will yield crisp, clean slices, which translate into well-formed, perfect cookies every beginner can consistently achieve. Skipping or shortening the chilling time is a common mistake that leads to misshapen, overly-spread cookies.
How Long to Chill Slice-and-Bake Dough for Optimal Results
The required chilling time depends on the recipe and the dough's initial temperature, but a general guideline is at least 2 to 4 hours in the refrigerator. For thicker logs (say, over 2.5 inches in diameter), or if your kitchen is warm, longer chilling might be necessary – perhaps 3-4 hours. Some recipes recommend chilling overnight, up to 24 hours, for maximum firmness and flavor development.
If you're in a hurry, you can speed up the process slightly by placing the dough log in the freezer for 30 to 45 minutes. However, be careful not to freeze it solid unless the recipe specifically instructs you to; dough that is too hard is difficult to slice without cracking. The goal is firm, not frozen stiff. Achieving the right chill time is a key skill for baking perfect cookies every time.
Once the dough is perfectly chilled, the slicing begins. The goal here is consistency. Each slice should be roughly the same thickness to ensure all cookies on the baking sheet bake at the same rate. Uniform cookies are not only aesthetically pleasing but also essential for predictable baking results.
Using the right tool and technique makes a significant difference. A sharp knife is crucial, as is a steady hand. Avoid sawing back and forth, which can distort the shape of the dough log. Instead, aim for a single, clean downward press or a smooth rock-and-slice motion.
Using the Right Knife: Tips for Clean Cuts
A sharp, thin-bladed knife is your best friend when slicing chilled cookie dough. A chef's knife, a sharp utility knife, or even a serrated knife can work, though a straight blade often provides the cleanest cut. Ensure your knife is clean and dry before starting. If the dough starts to stick to the knife, you can periodically wipe the blade clean with a damp cloth or rinse it under cold water and dry thoroughly.
For instance, when slicing a 2-inch diameter log, aim for a 1/4 inch thickness per slice. A sharp knife allows you to achieve this precise thickness with minimal effort and dough distortion. If you notice the dough squishing significantly as you cut, it might need another 30 minutes to an hour in the refrigerator to firm up further. Clean cuts are fundamental to baking perfect cookies every beginner should strive for.
Maintaining Consistent Thickness for Even Baking
Consistency is key to preventing some cookies from burning while others are underbaked. Aim for each slice to be as close in thickness as possible, ideally between 1/4 inch and 1/2 inch, depending on the recipe and your preference for cookie thickness. Thicker slices will result in chewier cookies and require a slightly longer baking time, while thinner slices will yield crispier cookies and bake faster.
One simple trick is to mark the dough log lightly with a ruler or even use the width of your finger as a guide before you start slicing. For example, if you want 1/4 inch slices, make small indentations every 1/4 inch along the top of the log before you begin cutting. This visual guide helps maintain uniformity and ensures that each cookie receives the same amount of heat in the oven, leading to perfect cookies every time.

Baking is where the magic happens, but it requires precision. The correct oven temperature and baking time are crucial for achieving the desired texture and doneness without burning your cookies. Even slight variations can impact whether you get perfectly golden edges or disappointingly charred bottoms.
Understanding your oven is just as important as understanding your dough. Ovens can vary significantly in temperature, sometimes by as much as 25°F (about 14°C) from the setting. Using an oven thermometer is a simple step that provides invaluable accuracy for baking perfect cookies every beginner should consider.
Oven Temperature Calibration: Ensuring Accurate Baking
Most cookie recipes call for baking temperatures between 325°F (160°C) and 375°F (190°C). Slice-and-bake cookies often bake well at 350°F (175°C). However, relying solely on your oven's dial can be misleading. An inexpensive oven thermometer placed inside your oven will show you the true temperature, allowing you to adjust your oven setting accordingly. For example, if your oven thermometer reads 325°F when the dial is set to 350°F, you know to set the dial higher, perhaps to 375°F, to reach the target temperature.
Preheating your oven properly is also vital. Always allow your oven to preheat for at least 15-20 minutes after it indicates it has reached the set temperature. This ensures the oven walls and racks are fully heated, providing consistent radiant heat for even baking. Proper oven temperature is non-negotiable for achieving perfect cookies every time.
Determining the Perfect Baking Time for Your Slice-and-Bake Cookies
Baking time varies depending on the cookie's thickness, your oven's accuracy, and your desired level of doneness (chewy vs. crispy). For average 1/4-inch thick slice-and-bake cookies baked at 350°F, the baking time is typically between 8 and 12 minutes. The key is to watch the cookies, not just the clock.
Look for visual cues: the edges should be set and lightly golden brown, while the centers may still look slightly soft or pale. For example, a sugar cookie might be done when the edges turn a pale gold, around 10 minutes. A chocolate chip slice-and-bake might take 11-12 minutes until the edges are firm and the chips look melty.
Remove the cookies from the oven when they are almost done, as they will continue to cook slightly on the hot baking sheet. This residual heat cooking is called "carryover baking" and is crucial for preventing overbaked cookies. This careful timing helps produce perfect cookies every beginner will love.
Even with simple recipes, beginners can encounter hiccups. The most common issues with slice-and-bake cookies involve dough spread and uneven baking. Understanding why these happen and how to prevent them will save you from disappointment and help you consistently bake perfect cookies.
Troubleshooting is a natural part of the learning process in baking. Don't be discouraged if your first batch isn't picture-perfect. Analyzing what went wrong (too much spread? burnt bottoms?) allows you to adjust your technique for the next batch.
Avoiding Flat Cookies: Solutions for Dough Spread
Excessive dough spread is a common issue that results in thin, flat cookies instead of nicely shaped rounds. The primary culprit is often insufficient chilling time. If the butter in the dough is too soft when it hits the hot oven, it melts too quickly, causing the cookie to flatten out rapidly before the structure can set.
Ensure your dough log is thoroughly chilled, preferably for at least 2-4 hours, until it is quite firm. Baking on a cool baking sheet (not one that's still warm from a previous batch) also helps. If you're still experiencing spread even after chilling, your kitchen might be warm, or the dough's fat content might be high; try chilling for an extra hour or freezing the sliced cookies on the baking sheet for 10 minutes before baking.
Using parchment paper can also help prevent sticking and promote even baking. These steps are vital for achieving perfect cookies every time, preventing the dreaded pancake effect.
Preventing Burnt Edges: Tips for Even Baking
Burnt edges with pale centers indicate uneven heat distribution or over-baking. As mentioned, oven temperature accuracy is key; verify your oven temperature with a thermometer. Baking sheets also play a role. Dark metal pans absorb more heat than lighter ones, potentially leading to darker bottoms and edges. Using a light-colored, heavy-gauge baking sheet is recommended for more even heat distribution.
Positioning the baking sheet in the oven matters too. For most ovens, the middle rack provides the most consistent heat. Avoid overcrowding the baking sheet; leave about 1-2 inches between cookies to allow hot air to circulate. If you notice certain areas of your oven consistently bake faster (e.g., the back corners), rotate your baking sheet halfway through the baking time (around 4-6 minutes into baking) to ensure all cookies bake evenly. This attention to detail helps deliver perfect cookies every beginner can make without scorching.
While classic slice-and-bake cookies are delicious on their own, one of the joys of baking is customization. Once you've mastered the basic technique for baking perfect cookies, you can easily elevate your slice-and-bake creations with simple flavor variations and tasty add-ins. This allows you to experiment and personalize your cookies without altering the fundamental slice-and-bake process.
Adding extracts or incorporating small mix-ins are easy ways to change the character of your cookies. These modifications are typically made during the dough preparation stage, before shaping and chilling the log, making them simple additions to the standard recipe.
Adding Extracts and Zest for Unique Flavors
Extracts are concentrated flavorings that can dramatically change a cookie's profile. Vanilla extract is standard, but try adding almond extract for a nutty note (start with 1/4 to 1/2 teaspoon per batch), or peppermint extract for a festive touch (use sparingly, perhaps 1/4 teaspoon). Citrus zest, like lemon or orange zest, adds a bright, fresh flavor. The oils in the zest are potent, so just a teaspoon or two per batch can make a big difference.
For example, adding 1 teaspoon of lemon zest and 1/4 teaspoon of lemon extract to a standard sugar cookie dough before chilling creates a delightful lemon cookie. Or, swapping vanilla for 1 teaspoon of almond extract transforms the cookie into an almond shortbread style. These simple additions are excellent ways for beginners to explore flavor combinations and bake unique, perfect cookies.
Incorporating Chocolate Chips, Nuts, and Sprinkles
Add-ins like chocolate chips, nuts, and sprinkles can be mixed directly into the dough before shaping the log. However, be mindful of their size and distribution when slicing. For a standard 2-inch diameter log, mini chocolate chips or finely chopped nuts (like pecans or walnuts) work best, typically around 1/2 cup to 1 cup per batch, depending on preference. Larger chunks or whole nuts can make slicing difficult and cause the log to crumble.
Sprinkles can be mixed into the dough for a fun, colorful look, or they can be rolled onto the outside of the dough log before chilling. Rolling the log in sprinkles or coarse sugar is a classic technique that adds both visual appeal and a pleasant texture. For instance, rolling a sugar cookie log in rainbow sprinkles makes "funfetti" style cookies, while rolling it in turbinado sugar adds a delightful crunch. These simple additions help make perfect cookies every beginner can customize and enjoy.
Advanced Slice-and-Bake Techniques for Baking Beginners
Once you feel comfortable with the basic slice-and-bake method, you can explore slightly more advanced techniques. These don't necessarily make the process complicated but add layers of creativity and flavor to your cookies. These steps are great for beginners looking to expand their skills without jumping into complex pastry work.
Exploring different dough types and shaping techniques allows you to create a wider variety of perfect cookies. These methods build upon the foundational skills you've already learned, encouraging experimentation and boosting your baking confidence.
Exploring Different Dough Flavors and Textures
Beyond basic sugar or butter cookie dough, you can experiment with doughs based on different fat ratios or flavor profiles. For example, a shortbread-style slice-and-bake dough uses a higher ratio of butter to flour and often no egg, resulting in a more crumbly, tender cookie. Adding cocoa powder to a basic dough creates a chocolate slice-and-bake cookie.
Consider making a chocolate dough log and a vanilla dough log. You could then slice rounds from both and combine them on the baking sheet for contrasting flavors. Or, try incorporating spices like cinnamon, ginger, or nutmeg into a dough for spiced holiday cookies. Some recipes even incorporate ground nuts into the dough itself for added richness and texture. These explorations help beginners understand how ingredient changes impact the final cookie.
Slice-and-bake cookies aren't limited to simple rounds! With a little creativity when shaping the dough log, you can create impressive patterns. A classic technique is the checkerboard cookie: make a log of chocolate dough and a log of vanilla dough, then cut them into squares. Assemble the squares alternating colors to form a checkerboard pattern, press together, and chill as a new log before slicing.
Another simple design involves rolling two different colored doughs into thin sheets, layering them, rolling them up jelly-roll style, and chilling before slicing. This creates a swirl pattern. You can also press ingredients like nuts or sprinkles into the outside of the dough log before chilling, so they are visible on the edges of the finished cookie slices. These techniques allow beginners to add a decorative touch to their perfect cookies.

You've successfully baked perfect cookies – congratulations! Now, how do you keep them tasting fresh? Proper storage ensures your hard work pays off and you can enjoy your delicious creations for as long as possible. Storage methods differ slightly depending on whether the cookies are baked or the dough is still raw.
Knowing how to store both baked cookies and unbaked dough is practical. It allows you to bake a large batch and enjoy it over time, or prepare dough ahead for impromptu baking sessions.
Baked slice-and-bake cookies should be stored in an airtight container at room temperature once they have cooled completely. Placing warm cookies directly into a container will create condensation, leading to soggy cookies. A cookie tin or a plastic container with a tight-fitting lid works well.
For optimal freshness, store different cookie flavors separately, as strong flavors can transfer. Most baked cookies stored this way will remain fresh and delicious for 3-5 days. If you need to store them longer, they can be frozen in an airtight container or freezer bag for up to 3-4 weeks. Thaw frozen cookies at room temperature before serving. Proper storage is essential to maintain the texture and flavor of your perfect cookies.
Storing Unbaked Slice-and-Bake Dough for Later
One of the biggest advantages of slice-and-bake dough is its make-ahead potential. After shaping the log, wrap it tightly in plastic wrap, then place it in a resealable plastic bag or another layer of plastic wrap. The dough can be stored in the refrigerator for up to 5-7 days before slicing and baking.
For longer storage, the dough log can be frozen. Wrap the log tightly in plastic wrap, then in aluminum foil or place it in a freezer-safe bag. Label with the date.
Frozen dough is best used within 1-2 months. To bake from frozen, you can often slice the log while still frozen (it requires a very sharp knife and careful handling) and add an extra minute or two to the baking time, or let the log sit at room temperature for 15-30 minutes to soften slightly before slicing. This flexibility makes it easy to have perfect cookies ready whenever you want.
Starting with slice-and-bake cookies is an excellent way to step into the world of baking. They provide a simple, reliable framework for learning basic techniques and understanding how ingredients and processes affect the final result. By focusing on consistency in chilling, slicing, and baking, you can consistently produce perfect cookies every beginner can be proud to share.
Baking is a skill that improves with practice. Each batch of slice-and-bake cookies is an opportunity to refine your technique, whether it's getting your slices perfectly uniform or learning how your specific oven behaves. Don't be afraid to experiment with flavors or try simple decorative techniques as your confidence grows.
Building Confidence with Simple Baking Techniques
Mastering simple techniques like those used in slice-and-bake cookies builds a strong foundation for more complex baking projects. You learn the importance of accurate measurements, the function of chilling, and how to recognize when a cookie is perfectly baked. These are fundamental skills applicable to countless other recipes, from muffins to cakes.
Successfully baking batch after batch of perfect cookies instills confidence. You gain a better understanding of dough consistency, how different add-ins behave, and the subtle signs of doneness. This practical experience is invaluable and makes venturing into new baking territories less intimidating. Remember, even experienced bakers started with simple recipes, and slice-and-bake is a fantastic starting point.
Ultimately, the most rewarding part of baking is enjoying the delicious results of your effort. There's a unique satisfaction in taking simple ingredients and transforming them into warm, comforting cookies. Sharing your perfect cookies with friends and family is a wonderful way to celebrate your newfound baking skills.
Whether you stick to classic flavors or experiment with variations, the process of making and sharing perfect cookies every beginner makes is a joyful experience. So, grab your ingredients, follow these tips, and get ready to bake some delightful slice-and-bake cookies. Happy baking!
Frequently Asked Questions
BakeWithEase provides simple recipes and step-by-step guides specifically designed for beginners. We focus on easy-to-find ingredients and clear instructions to ensure your success.
Common mistakes include overbaking, using expired ingredients, and not chilling the dough properly. Following our tips will help you avoid these pitfalls.
We offer a variety of beginner-friendly cookie recipes, including classic chocolate chip cookies, simple sugar cookies, and easy peanut butter cookies.
Mastering techniques like proper measuring, understanding oven temperature, and knowing when cookies are done are crucial. Our guides provide detailed explanations.
You can find our comprehensive guide, "Get Perfect Cookies Every Time: Essential SliceandBake Tips for Beginners," right here on BakeWithEase. It covers everything from ingredient selection to baking time.
The pursuit of the perfect cookie is more than just a culinary quest; it's a journey of mastering technique and understanding the subtle science behind baking. Achieving consistently delicious cookies, even as a beginner, is entirely within reach, as this article has demonstrated. The seemingly simple act of baking transforms into a rewarding experience when armed with the right knowledge and a little patience.
This exploration into the world of slice-and-bake cookies has underscored for me the importance of precision and attention to detail in baking. It's a process that mirrors life in many ways – the careful measuring, the precise chilling, the gentle handling – all contribute to a final product that is far greater than the sum of its parts. The best things in life are worth waiting for,
and this certainly rings true when it comes to perfectly baked cookies. The satisfaction of biting into a crisp, perfectly golden cookie, knowing you created it from scratch, is truly unparalleled.
Now, it's your turn. Don't be intimidated by the prospect of baking perfect cookies. Take the tips and techniques outlined in this article, experiment with different flavors and variations, and most importantly, enjoy the process. Embrace the occasional imperfection – they're part of the learning journey – and savor the sweet rewards of your efforts. The perfect cookie awaits, and you have the power to bake it.
Thanks for taking the time to explore our essential slice-and-bake cookie tips! We hope you're feeling more confident about creating delicious, perfectly baked cookies. Ready to put your new skills to the test?
- Bake a batch of your favorite slice-and-bake cookies today! Use the techniques you've learned to achieve that golden-brown perfection.
- Share your baking triumphs (or even your bloopers!) on social media using #BakeWithEase. Let's inspire each other!
- Experiment with different flavors and fillings to create your signature slice-and-bake cookie. What unique combination will you try?
So, what amazing cookie creations will you be whipping up next?