
How to Cream Butter & Sugar Perfectly for Beginner Cookies

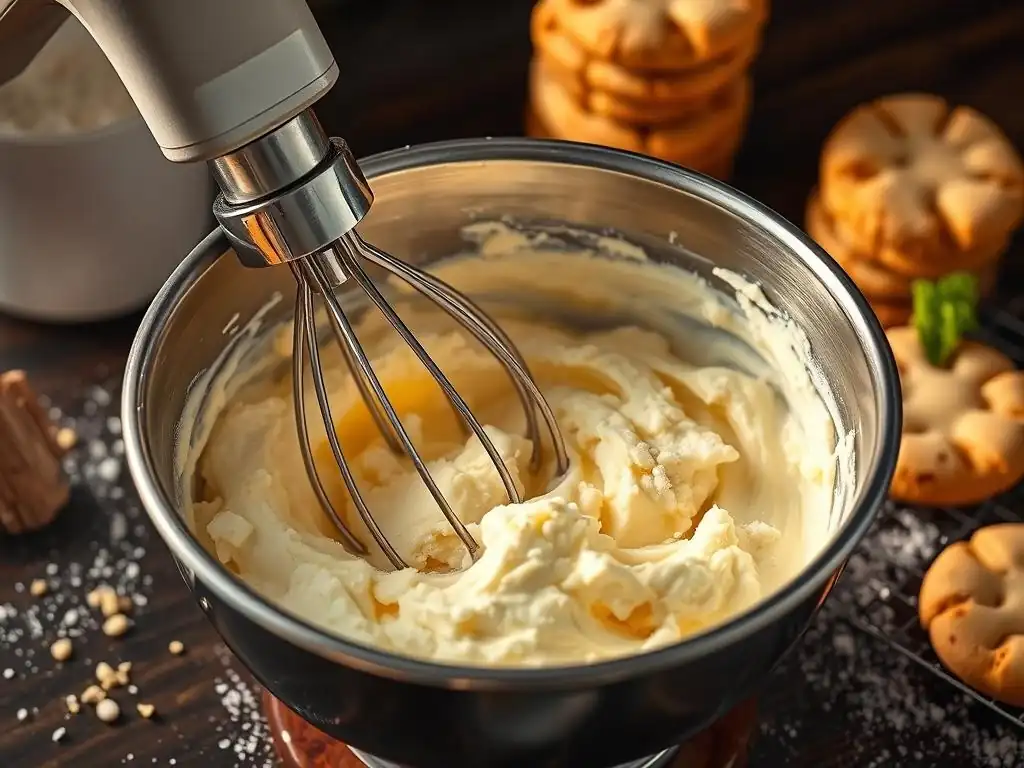
Welcome to BakeWithEase, your kitchen companion for all things baking!
Ever wondered what the secret is to those perfectly golden, melt-in-your-mouth cookies? The answer is simpler than you think. Today, we unlock the key to perfectly creamed butter and sugar, the foundation for our delicious beginner-friendly sugar cookie recipe. Discover how this simple technique can elevate your baking and create cookies that are truly irresistible. Ready to learn more and bake the perfect treat?
- Understanding the Importance of Perfectly Creamed Butter Sugar Cookies for Beginner Bakers
- Essential Ingredients and Equipment for Creaming Butter and Sugar Perfectly
- Step-by-Step Guide to Cream Butter and Sugar for Beginners’ Classic Cookies
- Common Mistakes to Avoid When Creaming Butter and Sugar for Cookies
- Advanced Tips to Enhance Your Butter and Sugar Creaming Process for Better Cookies
- Troubleshooting and FAQs About Creaming Butter and Sugar for Perfect Cookies
- Conclusion: Mastering the Art of Creaming Butter and Sugar for Perfectly Creamed Butter Sugar Cookies
- Frequently Asked Questions
- Final Reflection: The Sweet Science of Perfectly Creamed Butter and Sugar
- Unlock Your Baking Potential: Perfectly Creamy Cookies Await!
Baking cookies might seem straightforward, but achieving that classic chewy-on-the-inside, slightly crisp-on-the-outside texture hinges on a few fundamental techniques. One of the most critical steps, especially for beginner bakers tackling classic recipes like chocolate chip or sugar cookies, is the process of creaming butter and sugar. This isn't just about mixing; it's a foundational technique that builds the very structure of your cookie. Mastering this step is key to moving beyond basic dough and creating truly delightful, perfectly creamed butter sugar cookies that impress.
For beginners, understanding the 'why' behind each baking step is as important as the 'how'. Properly creaming butter and sugar is where the magic begins for many cookie recipes. It's the phase where air is incorporated into the fat, creating tiny pockets that expand during baking. Without sufficient creaming, your cookies can turn out dense, flat, or greasy. Taking the time to learn and practice this technique will dramatically improve the outcome of your baked goods, making the difference between an acceptable cookie and a truly delicious one.
The creaming process fundamentally alters the composition of your butter and sugar mixture. As the sugar crystals are beaten against the softened butter, they cut tiny air pockets into the fat. Think of it like microscopic aeration. This isn't just random mixing; it's a deliberate action that incorporates air, which is a critical leavening agent alongside baking soda or powder. This incorporated air is what gives classic cookies their desirable lift and contributes significantly to a tender crumb structure. A well-creamed mixture can see its volume increase by 50% or even 100% compared to the initial stage.
Furthermore, this aeration process helps distribute the fat evenly throughout the dough. When fat is properly dispersed, it prevents the formation of long gluten strands, resulting in a more tender cookie. If the butter and sugar aren't adequately creamed, the air pockets won't form sufficiently, leading to a denser, sometimes tougher cookie. For perfectly creamed butter sugar cookies, aim for a pale yellow, fluffy texture that holds peaks, indicating that enough air has been incorporated to achieve that signature texture.
The amount of air incorporated during creaming has a direct impact on how your cookies spread and rise in the oven. More air pockets mean more structure that expands when heated. As the butter melts in the oven, the trapped air pockets expand, causing the cookie to rise and puff up slightly. This lift contributes to a thicker, chewier cookie. Simultaneously, the melting butter allows the cookie to spread. The balance between the internal structure (from creaming) and the melting fat dictates the final diameter and thickness of your cookie.
Insufficient creaming, on the other hand, results in fewer air pockets. When these cookies bake, there's less internal structure to support the dough as the butter melts. This often leads to excessive spread, resulting in thin, flat, and sometimes crispy cookies. While some recipes intentionally call for minimal creaming for a specific result, for classic, slightly thicker, chewy cookies, achieving perfectly creamed butter and sugar is paramount. It provides the necessary lift to prevent the cookie from becoming a greasy puddle on the baking sheet.
Essential Ingredients and Equipment for Creaming Butter and Sugar Perfectly
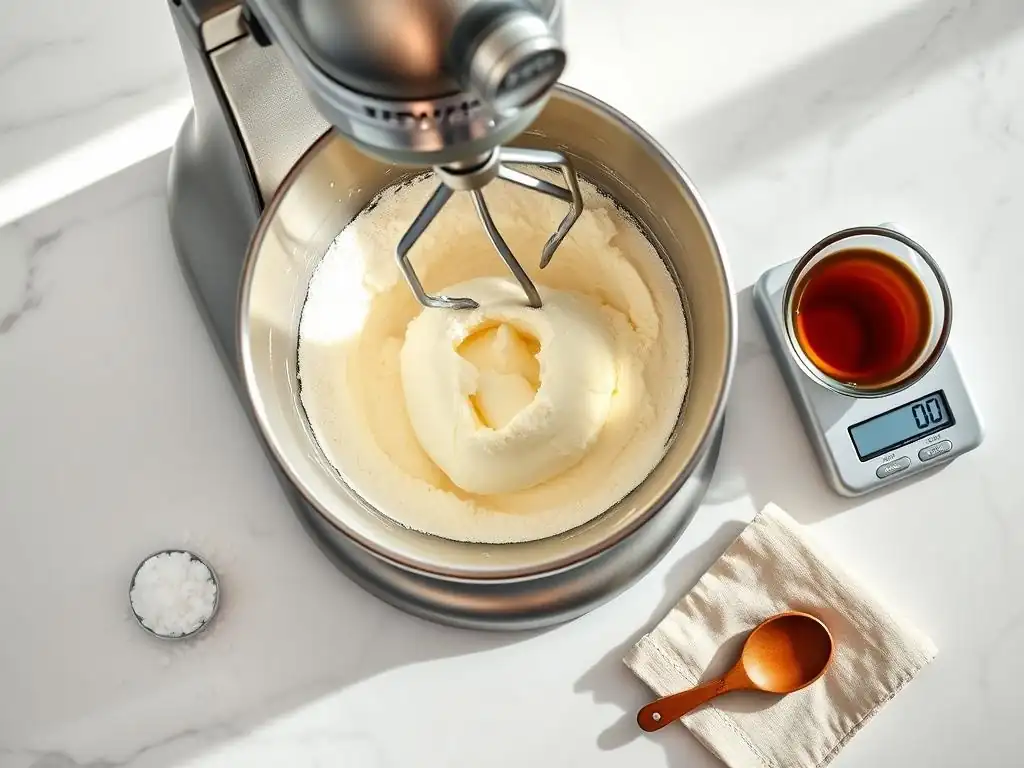
Before you even turn on your mixer, having the right ingredients at the correct state and the proper tools ready is crucial for successful creaming. Using cold butter or the wrong type of sugar, or trying to cream with an inadequate tool, can make the process frustrating and yield subpar results. Paying attention to these details sets the stage for achieving perfectly creamed butter sugar cookies right from the start.
Gathering your ingredients and equipment before you begin is also a good habit for beginner bakers. This mise en place ensures you aren't scrambling mid-recipe and can focus on the technique itself. Having everything measured out and at the correct temperature simplifies the process and increases your chances of success with your classic cookie recipe.
The type and temperature of your butter are perhaps the most critical factors in the creaming process. Unsalted butter is generally preferred for baking as it gives you control over the saltiness of the final product. More importantly, the butter must be softened, not melted or hard. Butter straight from the refrigerator is too cold; its fat molecules are too rigid for the sugar crystals to cut into and create air pockets effectively. Trying to cream cold butter will result in a lumpy, dense mixture that won't aerate properly, no matter how long you mix.
Conversely, melted or overly soft butter is also detrimental. If the butter is too soft or greasy, the sugar crystals will dissolve or slide around rather than cut into the fat. This prevents the formation of stable air pockets, leading to poor structure and excessive spread in your cookies. The ideal temperature for creaming butter is typically between 65°F and 68°F ( 18°C to 20°C). At this temperature, the butter is pliable but still holds its shape. You should be able to press a finger into it and leave an indentation without your finger going straight through or the butter feeling greasy.
The type of sugar used alongside butter significantly impacts both the creaming process and the final cookie. Granulated sugar, with its sharp, distinct crystals, is excellent at cutting into softened butter to create those vital air pockets. This is why it's a staple in recipes aiming for light, airy, and slightly crisp cookies. The size and shape of granulated sugar crystals are optimized for mechanical aeration during creaming, contributing directly to the rise and spread control needed for perfectly creamed butter sugar cookies.
Brown sugar, whether light or dark, contains molasses, which adds moisture and a chewy texture to cookies. The molasses also coats the sugar crystals, making them softer and less effective at cutting into the butter compared to granulated sugar. While brown sugar still contributes some aeration, it's primarily used for its flavor and moisture-retaining properties. Many classic cookie recipes use a combination of both granulated and brown sugar to balance crispness, chewiness, flavor, and spread. Understanding the role of each sugar type helps you predict and control the outcome of your perfectly creamed butter sugar cookies.
Must-Have Tools: Mixers, Bowls, and Measuring Equipment for Creaming Butter and Sugar
Having the right tools makes the creaming process much easier and more effective, especially for beginners. A sturdy electric mixer is the most recommended tool for achieving perfectly creamed butter and sugar.
- A stand mixer with the paddle attachment is ideal because it provides consistent power and allows you to scrape down the bowl easily while mixing.
- A handheld electric mixer is also effective, though it requires more effort to move around the bowl and ensure even creaming.
- While it is possible to cream butter and sugar by hand with a whisk or wooden spoon, it requires significant effort and time to incorporate enough air, making it less practical for beginners aiming for consistent results.
You will also need appropriately sized mixing bowls. Metal or glass bowls are good choices, but plastic bowls can sometimes retain grease, which might slightly affect the mixture. Ensure the bowl is large enough to accommodate the ingredients and allow for the mixture to increase in volume. Accurate measuring cups and spoons are non-negotiable; precise ratios of butter and sugar are essential for the chemistry of the creaming process to work correctly and lead to perfectly creamed butter sugar cookies.
Now that you understand the 'why' and have your ingredients and tools ready, let's walk through the process of creaming butter and sugar. This step-by-step guide is designed for beginners to achieve that ideal fluffy texture necessary for perfectly creamed butter sugar cookies. Patience and observation are key here; don't rush the process.
Following these steps diligently will help you build good baking habits and ensure a consistent base for your cookie dough. Remember, the goal is to incorporate air and create a homogeneous mixture, not just to combine the ingredients.
Preparing Butter and Sugar: Tips for Accurate Measurement and Temperature
Start by accurately measuring your butter and sugar according to your recipe. For butter, if your recipe calls for a specific weight (like grams or ounces), using a kitchen scale is the most accurate method. If it calls for sticks or cups, ensure you measure correctly. For sugar, use dry measuring cups and level off the excess with a straight edge for accuracy.
Crucially, confirm your butter is at the correct softened temperature (around 65-68°F or 18-20°C). If it's too cold, cut it into smaller pieces (about 1-inch cubes) and let it sit for another 10-15 minutes. Avoid microwaving to soften butter, as this often melts portions unevenly. If you're in a hurry, you can gently beat the cold butter with a rolling pin to help it soften slightly faster, or cut it into very small pieces and mix it on low speed for a minute before adding the sugar. Ensure your sugar is free-flowing and hasn't clumped together, especially brown sugar.
Mixing Techniques: How to Cream Butter and Sugar Until Light and Fluffy
Place the softened butter and measured sugar into your mixing bowl. If using a stand mixer, attach the paddle attachment. If using a hand mixer, use the standard beaters. Start mixing on a low speed for about 30 seconds to a minute. This initial mixing helps to combine the butter and sugar slightly and prevents the sugar from flying out of the bowl when you increase the speed.
After the initial low-speed mix, increase the mixer speed to medium (typically speed 4-6 on a stand mixer, or medium on a hand mixer). Let the mixture beat. This is where the magic happens. As it mixes, the mixture will transform from a yellowish, grainy consistency to a paler, much fluffier texture.
You will need to stop the mixer periodically (every 30-60 seconds) to scrape down the sides and bottom of the bowl with a rubber spatula. This ensures all the butter and sugar are evenly mixed and aerated. Continue mixing and scraping until the mixture is significantly lighter in color and has noticeably increased in volume. This process can take anywhere from 3 to 7 minutes, depending on the mixer and the butter's temperature.
Knowing when to stop mixing is key to achieving perfectly creamed butter sugar cookies. Overmixing can sometimes incorporate too much air or start to warm the butter too much, while undermixing leaves you with a dense base. Look for these specific visual cues:
- Color: The mixture should have changed from a deep yellow to a pale yellow or even almost off-white color.
- Texture: It should be light, fluffy, and airy, not dense or greasy. It should look whipped.
- Volume: The mixture should have visibly increased in volume, often doubling in size.
- Consistency: When you stop the mixer, the mixture should hold soft peaks, similar to slightly whipped cream. The sugar crystals should no longer be distinctly visible or feel gritty when rubbed between your fingers (a small amount of grit is okay, but it shouldn't feel like pure sugar crystals).
Once you see these signs, your butter and sugar are perfectly creamed and ready for the next steps in your cookie recipe. This stage is critical for the success of your perfectly creamed butter sugar cookies.
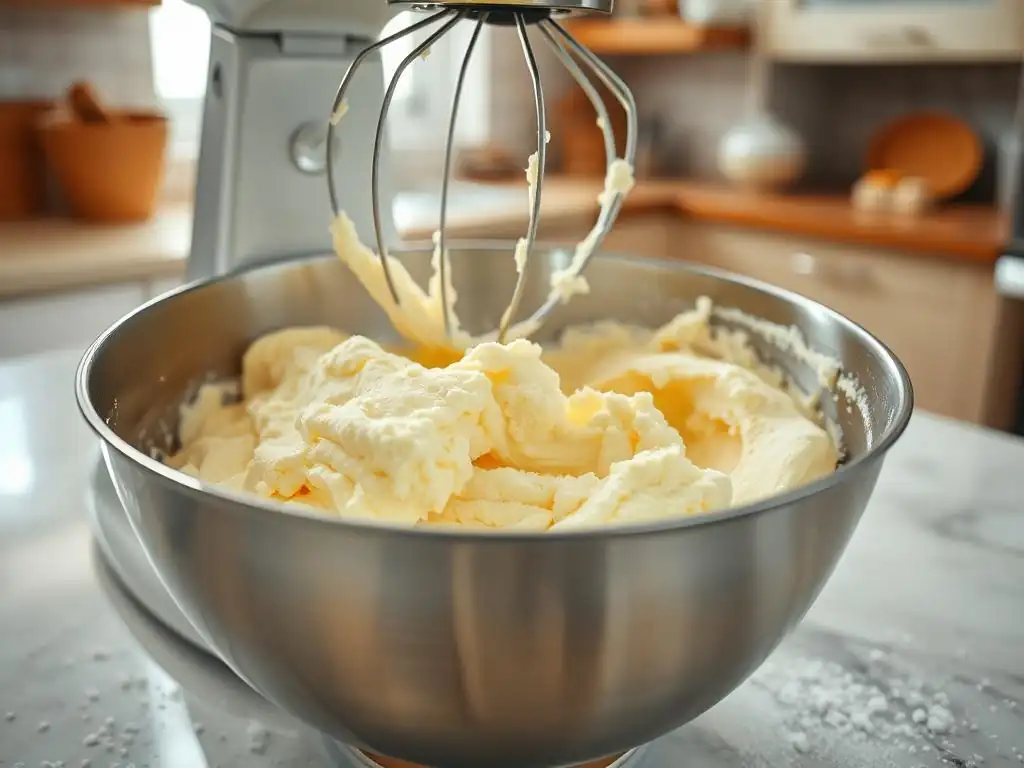
Even with a step-by-step guide, it's easy to fall into common pitfalls when learning to cream butter and sugar. Recognizing these mistakes and knowing how to avoid them will save you frustration and help you consistently produce beautifully textured cookies. For beginners, being aware of these issues is just as important as knowing the correct technique for perfectly creamed butter sugar cookies.
These errors often relate to temperature, mixing time, or simply not paying close enough attention to the texture of the mixture. Avoiding them will significantly improve your baking success rate.
- Undermixing: This is the most common mistake for beginners. If you don't cream the butter and sugar long enough, insufficient air is incorporated. This results in a mixture that remains dense and yellowish. When baked, cookies made from undermixed dough tend to be flat, dense, and can spread excessively because they lack the internal structure provided by trapped air. They might also have a slightly greasy texture. Achieving perfectly creamed butter sugar cookies requires patience and mixing until the visual cues are met.
- Overmixing: While less common, overmixing can also cause problems. Beating the mixture for too long, especially at high speed or if the butter is too warm, can cause the butter to heat up and the air pockets to collapse slightly. In some cases, extreme overmixing can even start to develop gluten in the small amount of flour often coating the butter and sugar, though this is rare at this stage. Overmixed dough might produce cookies that rise too much initially and then fall, or have a slightly tough texture. The goal is light and fluffy, not airy to the point of separation. Typically, 5-7 minutes on medium speed is sufficient for most recipes to achieve perfectly creamed butter and sugar; exceeding 10 minutes is often unnecessary and potentially harmful.
Using Cold or Melted Butter: Why Temperature Control Matters
As discussed earlier, butter temperature is paramount. Using butter that is too cold (straight from the fridge, typically below 50°F or 10°C) makes it impossible for the sugar crystals to effectively cut into the fat and create air pockets. The mixture will remain stubbornly lumpy and dense, no matter how long you mix it. Cookies made with cold butter will be flat, dense, and often crack on the surface due to poor structure.
Using butter that is too warm or melted (above 75°F or 24°C) is equally problematic. The butter is too soft to hold the shape of the air pockets created by the sugar. The sugar may also start to dissolve into the fat rather than cutting into it. This results in a greasy, runny mixture that won't aerate properly. Cookies baked from dough made with melted butter will spread excessively, be very thin, and have a uniform, sometimes greasy texture. Achieving perfectly creamed butter sugar cookies absolutely relies on starting with butter at the correct, softened temperature.
How to Fix Butter and Sugar Mixture if It’s Not Creamed Correctly
If you realize your butter and sugar mixture isn't creamed correctly, don't panic! There are potential fixes, though success depends on the severity of the issue.
- If it's too cold and lumpy: Stop mixing. If you have time, let the mixture sit at room temperature for another 15-30 minutes to allow the butter to soften further. Then, resume mixing, ensuring you scrape the bowl frequently. If you're in a hurry, you can try gently warming the bowl slightly (e.g., placing it briefly near a warm oven or in a bowl of slightly warm water for just a few seconds, being very careful not to melt the butter), then continue mixing.
- If it looks greasy or separated (likely too warm): This is harder to fix perfectly. You can try placing the bowl in the refrigerator for 10-15 minutes to firm up the butter slightly. Once it's slightly chilled but not hard, return it to the mixer and beat on medium-low speed, scraping frequently, to try and bring it back together and re-incorporate air. It may not reach the ideal fluffy state, but it can often be salvaged enough to make acceptable cookies, even if they aren't perfectly creamed butter sugar cookies. Avoid adding more ingredients until you've attempted a fix.
Once you've mastered the basics of creaming butter and sugar, there are a few advanced tips that can help you achieve even better results and truly perfect your perfectly creamed butter sugar cookies. These techniques focus on maximizing aeration and adapting your method based on ingredients and equipment.
These tips are particularly useful as you move beyond basic recipes and want to fine-tune the texture and structure of your cookies. They build upon the fundamental principles you've already learned.
The primary goal of creaming is air incorporation. To maximize fluffiness, ensure your butter is at the perfect temperature – soft enough to indent easily but not greasy. Cutting the butter into smaller cubes before adding the sugar can sometimes help the process start more efficiently. Using a stand mixer with a paddle attachment and letting it run on medium speed (not high, which can warm the butter too quickly) for the full recommended time (often 5-7 minutes) is the most effective method for incorporating significant air.
Regularly scraping down the sides and bottom of the bowl is crucial. Butter and sugar can stick to the bowl, preventing them from being properly aerated. A thorough scrape every minute or so ensures that all the mixture is subjected to the beating action, leading to uniformly perfectly creamed butter and sugar throughout the batch. Some bakers even tilt the stand mixer head back and use the paddle to scrape down the paddle itself during mixing.
Adjusting Creaming Time Based on Sugar Type and Butter Consistency
The recommended creaming time (e.g., 3-7 minutes) is a guideline. You should always rely more on the visual cues (pale color, fluffy texture, increased volume) than the clock, as factors like mixer power, room temperature, and the exact butter consistency can vary.
- If using only granulated sugar, the mixture might become fluffy relatively quickly due to the sharp crystals. You might reach the desired state in 4-6 minutes.
- If using a significant amount of brown sugar, the mixture might not become as pale or increase in volume quite as dramatically as with granulated sugar alone. The molasses adds color and moisture, inhibiting some aeration. You might need to mix for the longer end of the range (6-8 minutes) to incorporate sufficient air, but focus on achieving a light, fluffy texture relative to the ingredients, even if it remains slightly darker.
- If your kitchen is a little cool and your butter is on the firmer side of 'softened', you might need to cream for an extra minute or two to achieve the same level of aeration as in a warmer kitchen. Always prioritize the visual indicators of perfectly creamed butter sugar cookies.
Using Handheld vs. Stand Mixers: Pros and Cons for Creaming Butter and Sugar
Both handheld and stand mixers can achieve perfectly creamed butter and sugar, but they have different characteristics:
- Stand Mixer:
- Pros: Consistent power, hands-free operation, easier to scrape bowl, generally more efficient at incorporating air due to consistent motion. Ideal for larger batches. Provides the most consistent results for perfectly creamed butter sugar cookies.
- Cons: More expensive, takes up counter space, harder to use for very small batches.
- Handheld Mixer:
- Pros: More affordable, easier to store, good for smaller batches.
- Cons: Requires more effort to move the mixer around the bowl to ensure even mixing, power can be less consistent, might take slightly longer to achieve the same level of aeration compared to a powerful stand mixer. Requires more manual scraping.
Regardless of the type, use the medium speed setting. High speed can sometimes warm the butter too quickly, while low speed may not provide enough power for adequate aeration. Whichever mixer you use, the key is patient mixing and frequent scraping until the mixture is pale, fluffy, and has increased significantly in volume.
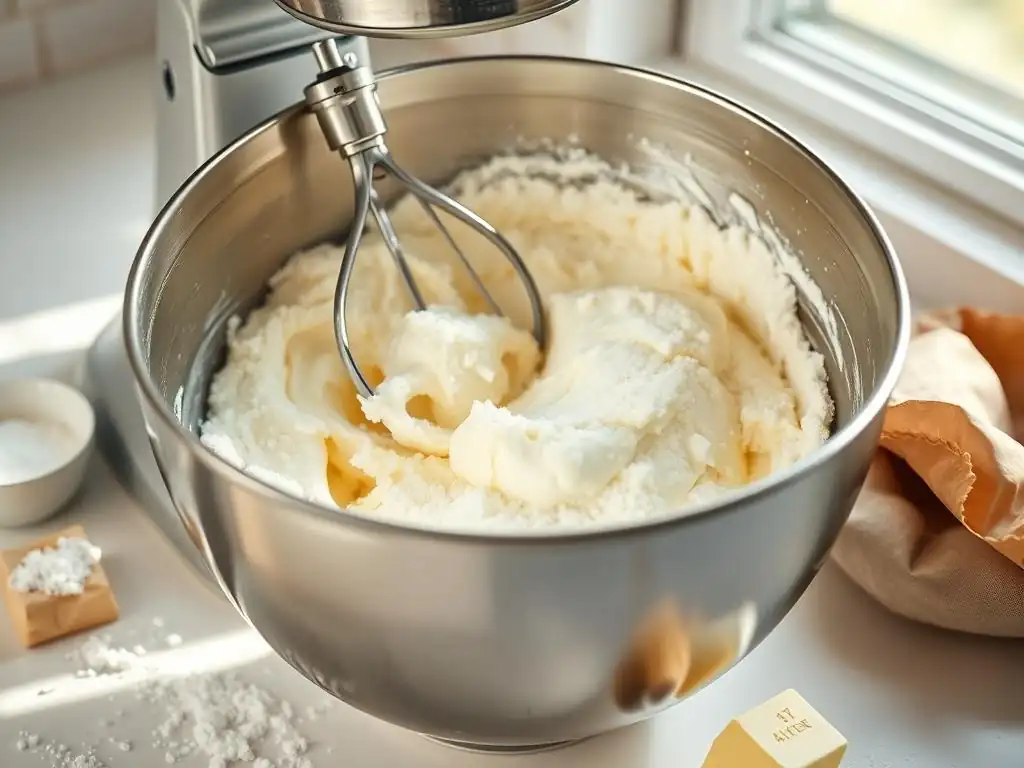
Even with the best intentions and techniques, sometimes things don't go exactly as planned. Here are some common questions and troubleshooting tips specifically related to achieving perfectly creamed butter sugar cookies.
Knowing how to identify problems and potential causes can help you adjust your technique in the moment or for future baking sessions.
How to Tell If Butter and Sugar Are Creamed Enough Without Overmixing
The best way to tell if your butter and sugar are perfectly creamed is by observing the visual cues:
- Is the mixture significantly lighter in color (pale yellow to almost white)?
- Does it look light and fluffy, like whipped frosting?
- Has its volume clearly increased, looking airy rather than dense?
- Does it hold soft peaks when you stop the mixer?
If you've mixed for 5-7 minutes on medium speed, scraped the bowl frequently, and see these signs, you've likely achieved perfectly creamed butter and sugar. Avoid the temptation to keep mixing just because a recipe says "cream for 5-7 minutes"; if it looks right at 4 minutes, it might be done. Conversely, if after 7 minutes it still looks dense and dark yellow, continue mixing and scraping until it lightens and fluffs up, checking every minute. Stop once it looks like airy whipped butter.
Yes, it is possible to cream butter and sugar by hand, but it requires considerably more physical effort and time than using an electric mixer. Using a sturdy whisk or a wooden spoon, you need to vigorously beat the softened butter and sugar together. The process is the same in principle: beat, scrape, beat, scrape.
However, it is much harder to incorporate the same amount of air as an electric mixer. You'll need to beat for 10-15 minutes or even longer to achieve a noticeable change in color and texture. While it's a good workout and can teach you to recognize the texture changes, for consistent, perfectly creamed butter sugar cookies, especially as a beginner, an electric mixer is highly recommended for its efficiency and effectiveness in incorporating sufficient air.
Impact of Room Temperature and Humidity on Creaming Butter and Sugar
Environmental factors like room temperature and humidity can definitely affect the creaming process.
- Warm Room Temperature: If your kitchen is very warm (above
75°For24°C), your softened butter can become too soft or even start to melt during the extended mixing time. This makes it harder to incorporate and hold air, potentially leading to a greasy mixture and flat cookies. If baking in a warm environment, ensure your butter is on the cooler side of the "softened" range (65°F) and consider chilling the mixing bowl briefly before starting. Creaming might also take slightly less time before the butter gets too warm. - Cold Room Temperature: In a cold kitchen (below
65°For18°C), your butter might not soften sufficiently even after sitting out. This will make creaming difficult, resulting in a dense, lumpy mixture and poor aeration. If your kitchen is cold, you may need to find a slightly warmer spot for your butter to soften or gently warm your mixing bowl as mentioned earlier. Creaming might take longer to achieve the desired fluffiness. - Humidity: High humidity can sometimes make sugar feel slightly sticky, although its impact on the creaming process itself is less significant than temperature. It's more likely to affect the final cookie texture after baking.
Being aware of your kitchen's environment helps you anticipate potential issues and adjust your approach to achieve perfectly creamed butter sugar cookies.
Creaming butter and sugar is more than just mixing; it's a fundamental aeration technique that forms the backbone of many classic cookie recipes. For beginner bakers, mastering this step is perhaps the single most impactful thing you can do to improve your cookie results. It directly influences the texture, rise, and spread, transforming simple ingredients into delightful, perfectly creamed butter sugar cookies.
Remember that achieving perfectly creamed butter and sugar isn't just about following a timer; it's about understanding the process and recognizing the visual cues. The pale, fluffy, increased-volume mixture is your indicator that enough air has been incorporated to give your cookies that desirable lift and tender crumb.
Recap of Key Steps to Cream Butter and Sugar Flawlessly for Beginners
To summarize the path to perfectly creamed butter sugar cookies:
- Start with the Right Butter: Use unsalted butter softened to the ideal temperature (
65-68°For18-20°C). - Measure Accurately: Use precise measurements for both butter and sugar.
- Use the Right Tool: An electric mixer (stand or handheld) is recommended for efficient aeration.
- Begin Slowly: Start mixing on low speed to combine before increasing speed.
- Mix on Medium Speed: Beat on medium speed for 3-7 minutes.
- Scrape Frequently: Stop and scrape down the bowl sides and bottom often (every 30-60 seconds).
- Look for the Cues: Cream until the mixture is pale, fluffy, and has significantly increased in volume.
- Avoid Extremes: Do not use cold or melted butter, and avoid significant overmixing or undermixing.
By focusing on these steps, you'll build a solid foundation for creating consistently wonderful cookies.
Don't be discouraged if your first attempt isn't absolutely perfect. Baking is a skill that improves with practice. The more you cream butter and sugar, the better you'll become at recognizing the correct texture and consistency. Try making a simple batch of classic sugar cookies or chocolate chip cookies, focusing solely on the creaming step. Pay close attention to how the mixture changes over time.
Experiment with different mixing times within the recommended range, observing how it affects your final cookies. Compare a batch where you creamed for 3 minutes versus one where you creamed for 6 minutes (assuming the butter temperature was consistent). This hands-on experience is invaluable. Embrace the process, and soon you'll be effortlessly creating perfectly creamed butter sugar cookies that are light, airy, and delicious every time! Happy baking!
Frequently Asked Questions
Creaming butter and sugar is crucial for achieving the desired texture. It incorporates air, creating a light and fluffy base for your cookies. Poor creaming results in dense or flat cookies.
What does "creamed" butter and sugar look like?
It should be light in color and fluffy in texture. The mixture will appear smooth and almost whipped, not grainy. This process ensures the sugar dissolves into the butter.
Can I use melted butter for creaming?
No, melted butter is not suitable for creaming. Creaming requires softened, but not melted, butter to trap air. Melted butter will result in flat, greasy cookies.
How long should I cream the butter and sugar together?
Generally, cream for 3-5 minutes using an electric mixer. The exact time depends on the mixer speed and butter temperature. Look for the light and fluffy texture.
What happens if I over-cream the butter and sugar?
Over-creaming can cause the structure of the sugar and butter to collapse, leading to flat cookies. Stop mixing when the mixture is light, fluffy, and pale in color.
Final Reflection: The Sweet Science of Perfectly Creamed Butter and Sugar
The seemingly simple act of creaming butter and sugar is the cornerstone of countless delicious cookies, yet its mastery unlocks a world of texture and flavor often overlooked. Perfectly creamed butter and sugar isn't just about following a recipe; it's about understanding the science behind creating light, airy, and perfectly textured cookies that will delight both the baker and the eater. This understanding elevates baking from a task to a craft.
The impact of this seemingly small step in the baking process is profound. It's the difference between a dense, heavy cookie and one that melts in your mouth with a delicate crumb. Baking is a labor of love, and the reward is immeasurable.
This quote resonates deeply because achieving that perfect creaminess is a testament to patience and attention to detail, mirroring the dedication required in many aspects of life. The subtle changes in texture and flavor resulting from perfectly creamed butter and sugar are a constant reminder of the power of precision in even the simplest tasks.
Now, it's your turn. Don't just follow recipes; understand them. Experiment with different techniques, observe the changes in your batter, and savor the unique texture of your perfectly creamed cookies. The next time you bake, remember the subtle science behind this seemingly simple step, and let the joy of creating something delicious fill your kitchen. Embrace the process, and you'll discover a new level of satisfaction in your baking journey.
Thanks for taking the time to learn the secrets to perfectly creamy cookie dough! We hope you now feel confident in tackling even the most delicate baking projects. Ready to put your new skills to the test?
- Bake a batch of your favorite cookies using your newfound butter-creaming expertise. Share a picture with us on social media using #BakeWithEaseCreamyCookies – we'd love to see your creations!
- Explore our other baking tutorials for even more tips and tricks. We've got a whole library of recipes waiting for you!
- Share this article with a friend who also loves to bake (or wants to learn!) – spreading the baking love is always a good thing.
What delicious cookie recipe will you conquer first?