
FAQs About SliceandBake Cookies for Beginner Bakers

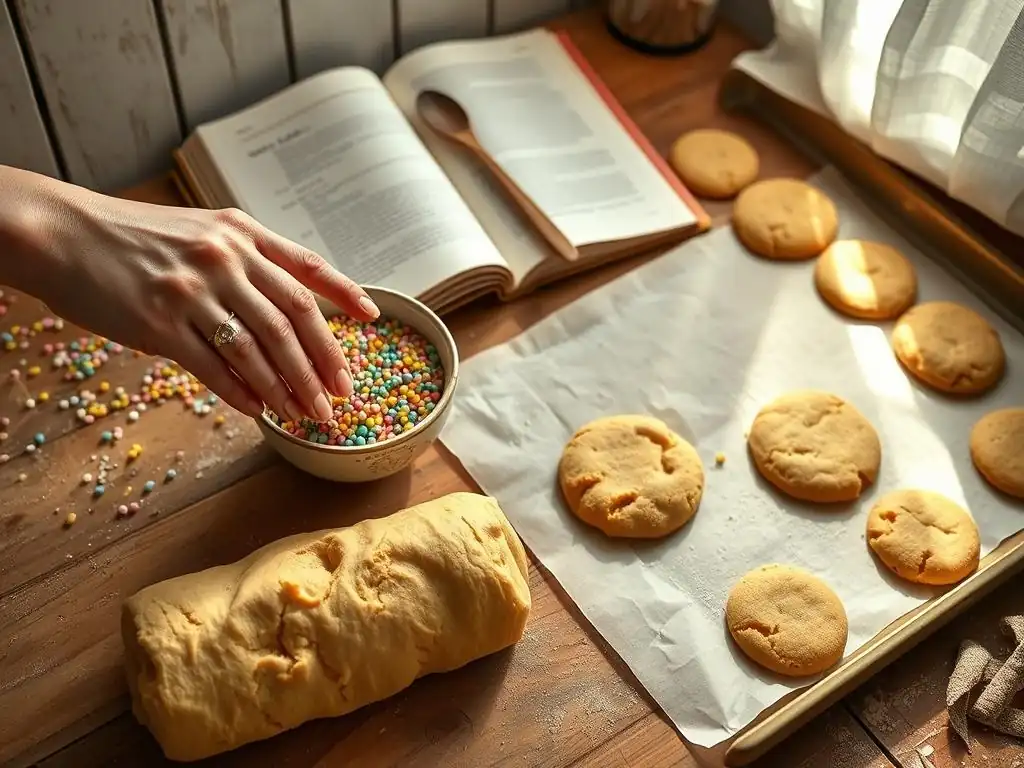
Welcome to BakeWithEase, your haven for baking mastery! Are you ready to unlock the secrets to effortlessly delicious treats? This week, we're diving into the wonderful world of slice and bake cookies. Discover how you can create perfectly portioned, incredibly flavorful cookies with minimal fuss. Intrigued? Keep reading to find the answers to all your FAQs about slice and bake cookies and start baking with ease today!
- Chocolate Chip Slice and Bake Cookies: A Beginner's Guide
- Understanding Slice and Bake Cookies: Essential FAQs
-
Ingredients & Preparation: Chocolate Chip Cookie FAQs
- What Ingredients Do I Need for Chocolate Chip Slice and Bake Cookies? A Simple Checklist
- Can I Use Gluten-Free Flour in Chocolate Chip Slice and Bake Cookie Dough? Baking with Alternatives
- How Do I Prepare the Dough for Chocolate Chip Slice and Bake Cookies? Step-by-Step Guide
- How Long Does Chocolate Chip Slice and Bake Cookie Dough Last in the Fridge? Storage Tips
- Can I Freeze Chocolate Chip Slice and Bake Cookie Dough? Long-Term Storage Solutions
-
Baking & Troubleshooting: Chocolate Chip Cookie FAQs
- What Temperature Should I Bake Chocolate Chip Slice and Bake Cookies? Oven Settings Explained
- How Long Do I Bake Chocolate Chip Slice and Bake Cookies? Achieving Perfect Doneness
- Why Are My Chocolate Chip Slice and Bake Cookies Spreading Too Thin? Troubleshooting Tips
- Why Are My Chocolate Chip Slice and Bake Cookies Not Spreading Enough? Dough Consistency Solutions
- How Can I Prevent My Chocolate Chip Slice and Bake Cookies From Burning? Baking Time Management
- What's the Best Way to Slice Chocolate Chip Slice and Bake Cookie Dough? Achieving Uniform Cookies
-
Flavor & Customization: Chocolate Chip Cookie FAQs
- What Variations Can I Make with Chocolate Chip Slice and Bake Cookies? Exploring Options
- Can I Add Nuts or Different Types of Chocolate to Chocolate Chip Slice and Bake Dough? Customization Guide
- How Can I Make Vegan Chocolate Chip Slice and Bake Cookies? Plant-Based Baking
- How can I make Healthier Chocolate Chip Slice and Bake Cookies? Using Whole Wheat Flour and Less Sugar
- Mastering Slice and Bake Cookies: Advanced Tips & Tricks
- Chocolate Chip Slice and Bake Cookies: Your Gateway to Confident Baking
- Frequently Asked Questions
- Final Reflection: The Sweet Simplicity of Slice-and-Bake Success
- Ready to Roll Out Your Own Perfect Cookies?
Embarking on your baking journey can feel daunting, but with the right recipes and techniques, you'll be whipping up delicious treats in no time. One of the most forgiving and rewarding types of cookies for newcomers is the slice and bake cookie, particularly the classic chocolate chip variety. These cookies simplify the process significantly, allowing you to focus on enjoying the act of baking without the stress of complex steps or finicky doughs.
Chocolate chip slice and bake cookies are a fantastic starting point because they require minimal hands-on time right before baking. You prepare the dough, shape it into logs, chill it, and then simply slice and bake as needed. This makes them perfect for spontaneous baking sessions or having fresh cookies ready at a moment's notice. It's a brilliant way to build confidence and experience the joy of warm, homemade chocolate chip goodness straight from your oven.
Slice and bake cookies are a category of cookies where the dough is prepared, typically shaped into cylindrical logs, chilled until firm, and then sliced into individual cookie portions before baking. This method contrasts with drop cookies, where spoonfuls of dough are placed directly onto a baking sheet, or rolled cookies, which require rolling out dough and cutting shapes. The key characteristic is the chilling and subsequent slicing of the hardened dough log.
This technique is incredibly convenient because the chilling step allows the dough to firm up, making it easy to handle and slice into uniform shapes. It also gives the flavors time to meld and can contribute to a better cookie texture. Essentially, you're creating a ready-to-bake log of cookie dough that can be stored in the refrigerator for days, or even the freezer for months, making homemade cookies remarkably accessible whenever the craving strikes.
Yes, the terms "slice and bake cookies" and "refrigerator cookies" are generally used interchangeably. Both refer to cookie dough that is formed into a log or shape and chilled in the refrigerator before being sliced and baked. The chilling process is the defining characteristic for both terms, allowing the dough to firm up enough to be easily sliced into consistent pieces.
While some might draw subtle distinctions based on specific dough types or intended uses, for most home bakers, these terms describe the same convenient method. So, whether you hear them called refrigerator cookies or slice and bake cookies, you can expect a process that involves chilling dough logs and then slicing them before baking. It's a versatile approach applicable to many cookie recipes, including the ever-popular chocolate chip slice and bake variety.
Slice and bake cookies offer several distinct advantages, making them ideal for beginner bakers. Firstly, the make-ahead aspect is a huge plus. You can prepare the dough when you have time, chill it, and then bake fresh cookies whenever you want, without needing to mix up a batch from scratch every time. This flexibility reduces pressure and makes baking feel less like a chore and more like a treat.
Secondly, portion control is much easier with slice and bake cookies. Since the dough is chilled into a log, slicing uniform pieces is straightforward, leading to cookies that bake evenly and look consistent. This is often harder to achieve with drop cookies for beginners. Finally, the chilling process itself can improve the cookie's texture and flavor, allowing the fats to solidify and the sugars to absorb moisture, which can result in a more tender and flavorful cookie compared to baking the dough immediately.

Making classic chocolate chip slice and bake cookies requires common pantry staples. You'll typically need all-purpose flour, granulated sugar, brown sugar (light or dark), unsalted butter (softened), eggs, vanilla extract, baking soda, salt, and of course, chocolate chips! Using softened butter is crucial as it creams properly with the sugars, creating the necessary structure and texture for the dough.
Regarding quantities, a standard recipe for about 2-3 dozen cookies might call for approximately 2 ¼ cups of flour, 1 cup of butter, ¾ cup of granulated sugar, ¾ cup of packed brown sugar, 2 eggs, 1 teaspoon of vanilla, 1 teaspoon of baking soda, ½ teaspoon of salt, and about 1-2 cups of chocolate chips. Having these ingredients measured out and ready before you begin mixing will make the process smoother and more enjoyable.
Yes, you can absolutely use gluten-free flour blends to make chocolate chip slice and bake cookie dough. Many commercially available gluten-free all-purpose flour blends are designed as a 1:1 substitute for wheat flour in recipes like cookies. However, results can vary depending on the specific blend used, as some absorb liquid differently than others.
When substituting, start with the same volume of gluten-free flour as the recipe calls for wheat flour. You might find the dough feels slightly different; it could be drier or more crumbly. If it seems too dry to form a cohesive log, you might need to add a tiny bit more softened butter or even a tablespoon of milk, but add liquid very gradually to avoid making the dough too wet. Baking time might also need slight adjustments, so keep a close eye on your gluten-free slice and bake cookies as they bake.
Preparing the dough for chocolate chip slice and bake cookies is straightforward.
- Start by creaming together the softened butter with both the granulated and brown sugars until the mixture is light and fluffy. This step incorporates air, which is important for the cookie's texture.
- Beat in the eggs one at a time, followed by the vanilla extract. Scrape down the sides of the bowl to ensure everything is well combined.
- In a separate bowl, whisk together the dry ingredients: flour, baking soda, and salt.
- Gradually add the dry ingredients to the wet ingredients, mixing on low speed until just combined. Be careful not to overmix, as this can result in tough cookies.
- Finally, stir in the chocolate chips using a spoon or spatula.
- Turn the dough out onto a piece of plastic wrap or parchment paper. Shape the dough into one or two logs, roughly 1 ½ to 2 inches in diameter. Wrap them tightly and chill for at least 2-3 hours, or until firm enough to slice easily. This chilling is essential for creating perfect slice and bake cookies.
Properly wrapped chocolate chip slice and bake cookie dough can last quite a while in the refrigerator, typically for up to 3 to 5 days. Ensure the log is tightly wrapped in plastic wrap, and ideally, placed inside an airtight container or a zip-top bag to prevent it from drying out or absorbing odors from other foods in the fridge.
Storing the dough allows the flavors to deepen and makes the dough much easier to slice cleanly. If you plan to bake the cookies within a few days, the fridge is the perfect spot. Just remove the log about 10-15 minutes before slicing if it's very hard, to make cutting easier without cracking. This flexibility is a core benefit of making slice and bake cookies.
Absolutely! Freezing chocolate chip slice and bake cookie dough is an excellent way to extend its shelf life and have homemade cookies ready to bake for months. Once you've formed and tightly wrapped the dough log in plastic wrap, wrap it again in aluminum foil or place it in a freezer-safe zip-top bag. This double layer of protection helps prevent freezer burn.
Frozen slice and bake cookie dough can last in the freezer for up to 2 to 3 months. When you're ready to bake, you have a couple of options. You can transfer the log to the refrigerator to thaw overnight before slicing and baking as usual. Alternatively, you can often slice the frozen dough directly (this requires a sharp, sturdy knife and careful handling) and add a minute or two to the baking time. Having a log of frozen slice and bake cookie dough is like having a little bit of baked happiness waiting for you!

For most chocolate chip slice and bake cookie recipes, a standard baking temperature is 350°F (175°C). This temperature is hot enough to bake the cookies relatively quickly, allowing the edges to set and become slightly crisp while the centers remain soft and chewy. However, oven temperatures can vary, so it's always a good idea to use an oven thermometer to ensure your oven is heating accurately.
Preheating your oven fully is also critical. Placing cookies into an oven that hasn't reached the correct temperature can lead to inconsistent baking and excessive spreading. Aim for the oven to be at temperature for at least 10-15 minutes before you put the cookie sheets in. Baking at 350°F is a reliable starting point for achieving beautifully golden-brown slice and bake cookies.
Baking time for chocolate chip slice and bake cookies typically ranges from 8 to 12 minutes. The exact time will depend on several factors: the thickness of your cookie slices, your oven's accuracy, and how you like your cookies (softer or crispier). A 1/2-inch thick slice might take closer to 8-10 minutes, while a thicker 3/4-inch slice could take 10-12 minutes or even slightly longer.
You'll know the cookies are done when the edges appear set and lightly golden brown, but the centers still look slightly soft or underbaked. The cookies will continue to set as they cool on the baking sheet for a few minutes after coming out of the oven. Baking them until the centers look fully set in the oven will likely result in a crispier cookie once cooled. It's helpful to bake a test batch of one or two cookies first to dial in the perfect time for your oven and preferred doneness.
If your chocolate chip slice and bake cookies are spreading excessively thin, several factors could be at play. One common culprit is butter that is too soft or even slightly melted when preparing the dough. Butter should be softened but still cool to the touch, not greasy. Using too much butter or not enough flour can also lead to excessive spread.
Another reason could be that the dough wasn't chilled sufficiently. Cold dough holds its shape better in the initial stages of baking. Baking on warm cookie sheets or placing too many cookies too close together can also contribute to spreading. Ensure your dough is well-chilled (at least 2-3 hours in the fridge), use parchment paper or silicone mats, and space cookies about 2 inches apart on cool baking sheets. If the problem persists, try adding a tablespoon or two more flour to the dough batch before chilling the log.
Conversely, if your chocolate chip slice and bake cookies aren't spreading enough, the dough might be too dry or cold. Using too much flour, not enough butter, or packing the flour too tightly when measuring can result in a dry dough that resists spreading. The temperature of your ingredients also matters; if the butter was too cold when creamed, or if the dough was chilled for an extremely long time, it might spread less.
Ensure you are measuring flour correctly (spoon it into the measuring cup and level off, don't scoop directly). If the dough felt very stiff when you made it, that could be the issue. When baking, try letting the sliced cookies sit at room temperature for 5-10 minutes before putting them in the oven. If the dough log was frozen, thawing it in the fridge overnight is usually best for optimal spread. You could also try gently flattening the sliced dough rounds slightly with the palm of your hand before baking.
Preventing your chocolate chip slice and bake cookies from burning is primarily about managing your baking time and oven temperature. Always preheat your oven and consider using an oven thermometer to verify its accuracy. If your oven runs hot, you might need to slightly reduce the temperature (e.g., to 325°F or 160°C) or shorten the baking time.
Start checking the cookies a minute or two before the recipe's minimum recommended time (e.g., at 7 minutes if the range is 8-12). Look for the visual cues of doneness: lightly golden edges and still slightly soft centers. If you notice the bottoms are browning too quickly while the tops are still pale, your baking sheet might be too low in the oven, or the sheet itself might be darkening too much heat. Using parchment paper helps prevent sticking and can offer a slight buffer against over-browning on the bottom.
Achieving uniform chocolate chip slice and bake cookies starts with a well-chilled, firm dough log. The colder and firmer the log, the cleaner your slices will be. Use a sharp, non-serrated knife. A chef's knife or a good quality utility knife works well. Position the log on a stable cutting board.
Use a steady, downward slicing motion rather than a sawing motion, which can distort the shape. Aim for slices that are consistently between 1/2 inch and 3/4 inch thick. Thicker slices will result in chewier cookies that take a bit longer to bake, while thinner slices will be crispier and bake faster. Wiping the knife blade clean between slices can help, especially if the dough is slightly sticky. This simple step ensures each of your slice and bake cookies looks just as appealing as the last.

The beauty of chocolate chip slice and bake cookies is how easily they can be customized! While the classic is beloved, you can easily swap out or add ingredients to create exciting variations. Consider using different types of chocolate chips – milk, dark, white, or even a mix. Butterscotch chips, peanut butter chips, or toffee bits can also be stirred into the dough along with or instead of chocolate chips.
For a little extra crunch, add chopped nuts like walnuts or pecans. Dried cranberries, raisins, or even chopped dried apricots can introduce a chewy, fruity element. Spices like cinnamon, a pinch of nutmeg, or even a dash of espresso powder can add depth to the classic flavor profile. The foundation of slice and bake cookie dough is incredibly versatile, inviting you to experiment and discover your favorite combinations.
Can I Add Nuts or Different Types of Chocolate to Chocolate Chip Slice and Bake Dough? Customization Guide
Absolutely! Adding nuts or different types of chocolate is one of the easiest ways to customize your chocolate chip slice and bake cookies. When incorporating nuts, aim for about ½ to 1 cup of chopped nuts (like walnuts, pecans, or almonds) per batch of dough. Stir them in at the same time you add the chocolate chips. Toasting the nuts lightly before adding them can enhance their flavor significantly.
For chocolate variations, swap out all or a portion of the semi-sweet chocolate chips for milk chocolate, dark chocolate, white chocolate, or even chunks of a chopped chocolate bar. A mix of different chocolates adds complexity. You can use the same quantity as the original recipe calls for chocolate chips, typically 1 to 2 cups. Experimenting with these additions is a fun way to put your spin on classic slice and bake cookies.
Making vegan chocolate chip slice and bake cookies involves substituting the dairy and eggs with plant-based alternatives. Replace the butter with a good quality vegan butter stick or solid coconut oil (not liquid). Use an egg substitute; common options include flax eggs (1 tablespoon flaxseed meal + 3 tablespoons water, let sit for 5 minutes), applesauce (about ¼ cup per egg), mashed banana, or commercial egg replacers.
Ensure you use vegan chocolate chips, as traditional chocolate chips often contain dairy. The rest of the ingredients (flour, sugars, vanilla, baking soda, salt) are typically vegan. The dough consistency might be slightly different depending on the substitutes used, possibly a bit softer. You'll still follow the same process: mixing, shaping into a log, chilling, slicing, and baking. Baking time might need slight adjustment, so watch them closely. With these swaps, you can enjoy delicious slice and bake cookies that are entirely plant-based.
Making healthier chocolate chip slice and bake cookies is definitely possible with a few thoughtful substitutions. One common approach is to replace a portion of the all-purpose flour with whole wheat flour. Start by substituting about half the all-purpose flour (e.g., use 1 cup whole wheat and 1 ¼ cups all-purpose instead of 2 ¼ cups all-purpose). This adds fiber and nutrients. Be aware that whole wheat flour can make cookies denser and absorb more liquid, so you might need a tiny splash of milk if the dough seems too dry.
Reducing the sugar content is another way to make them healthier. You can often reduce the amount of granulated and brown sugar by 1/4 to 1/3 without drastically affecting the cookie's structure, though the texture and spread might change slightly. Using mini chocolate chips or chopping a dark chocolate bar allows you to get chocolate flavor distribution with potentially less sugar overall. While they won't be health food, these modifications can make your slice and bake cookies a slightly more nutritious treat.
Getting perfectly round chocolate chip slice and bake cookies starts with how you shape the dough log. After mixing the dough and turning it out onto plastic wrap, gather it loosely. Then, gently compress the dough into a log shape. For a truly round log, you can use a sushi mat or a ruler to help guide the shape as you roll and compress it.
Another technique is to place the dough log on a flat surface and use a bench scraper or the side of your hands to gently push inwards along the length of the log, rotating it as you go. This helps create a uniform diameter and a smooth, round shape. Wrapping the log tightly in plastic wrap and then gently rolling it back and forth on the counter can also help refine the circular shape before chilling. A well-shaped log leads to well-shaped slice and bake cookies.
While delicious plain, you can easily elevate your chocolate chip slice and bake cookies with simple decorations after they've baked and cooled. A popular method is drizzling melted chocolate over the cooled cookies. Melt about half a cup of chocolate chips (same type or contrasting) in a microwave-safe bowl in 30-second intervals, stirring until smooth. Spoon the melted chocolate into a small zip-top bag, snip off a tiny corner, and drizzle back and forth over the cookies.
Sprinkles can also add a festive touch. While the cookies are still slightly warm (but set enough to handle), you can gently press sprinkles onto the tops. For better adherence, you can brush the tops with a little corn syrup or melted chocolate first before sprinkling. Simple decorations like these take your basic slice and bake cookies from everyday treats to special occasion delights with minimal effort.
Take your chocolate chip slice and bake cookies to the next level by incorporating more complex flavors. One fantastic technique is browning the butter before adding it to the dough. This process involves melting the butter and cooking it gently until the milk solids turn golden brown and nutty. Cool the browned butter slightly before creaming it with the sugars as you would regular softened butter. Brown butter adds an incredible depth of flavor that complements the chocolate chips beautifully.
Another simple yet impactful addition is flaky sea salt. After slicing the chilled dough logs and placing the rounds on the baking sheet, sprinkle a few flakes of sea salt onto the top of each cookie before baking. The salt crystals provide a lovely contrast to the sweetness of the cookie and chocolate, enhancing all the flavors. These small tweaks can transform your standard slice and bake cookies into gourmet-tasting treats.
You've learned the fundamentals of making chocolate chip slice and bake cookies, from understanding what they are and why they're perfect for beginners, to mastering ingredients, preparation, and troubleshooting common issues. This method provides a forgiving and flexible entry point into the world of baking. The ability to prepare dough ahead of time and bake fresh cookies on demand is a game-changer for anyone starting out.
Now that you're equipped with this knowledge, it's time to put it into practice! Gather your ingredients, follow the steps to create your first batch of chocolate chip slice and bake cookie dough, and experience the satisfaction of pulling warm, delicious cookies from your own oven. Don't be afraid to start simple, and as you gain confidence, experiment with the variations discussed. Happy baking!
Frequently Asked Questions
Slice and bake cookies, also known as refrigerator cookies, are cookies made from dough that is chilled into a log shape. You simply slice the dough and bake the slices for easy cookies.
While slice and bake cookies are excellent for beginners due to their simplicity, they are enjoyed by bakers of all skill levels. They are a convenient and time-saving option for anyone.
Typically, slice and bake cookie dough can be stored in the refrigerator for up to 3-5 days. Make sure to wrap it tightly to prevent it from drying out.
Yes, absolutely! Freezing slice and bake cookie dough is a great way to have cookies ready whenever you want them. Wrap the dough tightly in plastic wrap and then in foil or a freezer bag. It can be stored for up to 2-3 months in the freezer.
If your slice and bake cookie dough is too hard, let it sit at room temperature for a few minutes to soften slightly. Avoid letting it get too soft, as it will be difficult to handle.
Final Reflection: The Sweet Simplicity of Slice-and-Bake Success
The ease and deliciousness of slice-and-bake cookies make them the perfect entry point for aspiring bakers, and their enduring popularity speaks volumes about their timeless appeal. These aren't just simple treats; they're a gateway to the joy of baking, accessible to everyone regardless of skill level. The straightforward nature of the process allows for experimentation and creativity, fostering a love for baking that can last a lifetime.
The enduring charm of slice-and-bake cookies lies not just in their convenience, but in the shared experiences they create. From childhood memories of helping Grandma in the kitchen to the modern-day satisfaction of gifting homemade treats, these cookies represent a connection to something comforting and familiar. Baking is at once child's play and adult joy. And love, of course.
This quote perfectly encapsulates the magic of slice-and-bake cookies – they bridge the gap between simple preparation and profound satisfaction.
Now, it's your turn. Don't let the fear of failure hold you back from exploring the world of baking. Grab your favorite cookie recipe, gather your ingredients, and experience the joy of creating something delicious and shareable. Remember the simplicity, embrace the process, and savor the sweet rewards of your efforts. You might just surprise yourself with your newfound baking talent!
Thanks for taking the time to explore the world of Slice-and-Bake cookies! We hope you now feel confident and excited to tackle this fun and rewarding baking project. Ready to get started?
- Bake a batch of your own delicious cookies: Use the tips and tricks from this article to create a batch of perfectly sized, evenly baked cookies. Remember to adjust baking times based on your oven!
- Share your cookie creations: Show off your baking skills on social media! Use #BakeWithEase and tag us – we'd love to see your results.
- Experiment with different flavors and fillings: Don’t be afraid to get creative! Try adding different extracts, spices, or even unique fillings to personalize your cookies.
What unique flavor combination will you try first? Let us know in the comments below!