
BeginnerFriendly Fruit Tart

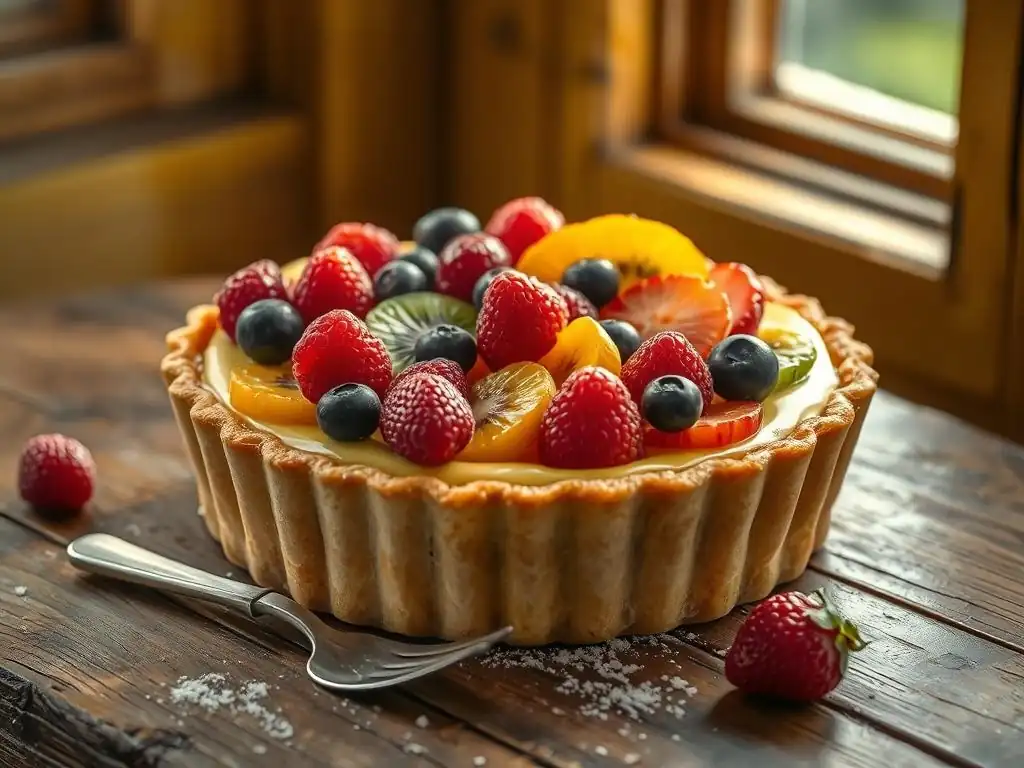
Welcome to BakeWithEase, your passport to a world of delicious possibilities! Ever dreamt of creating a stunning fruit tart that looks like it came straight from a Parisian patisserie, but felt intimidated? Dream no more! This week, we're demystifying the art of pastry with our easy beginner fruit tart recipe. Prepare to be amazed at how simple it is to craft this elegant dessert, and unlock the secrets to baking success. Intrigued? Let's get started and transform those baking dreams into a delectable reality!
- Easy Beginner Fruit Tart Recipe: BakeWithEase's Guide
- Introduction to Easy Fruit Tarts for Beginners
- Understanding the Key Components of a Fruit Tart
- Step-by-Step Guide to Making Your First Fruit Tart
- Tips and Tricks for a Perfect Beginner Fruit Tart
- Variations and Adaptations for Your Fruit Tart
- Storing and Serving Your Homemade Fruit Tart
- Troubleshooting Common Fruit Tart Problems
- Conclusion: Enjoy Your Delicious Beginner-Friendly Fruit Tart!
- Frequently Asked Questions
- Final Reflection: The Sweetness of Success, One Tart at a Time
- Unleash Your Inner Pastry Chef!
Easy Beginner Fruit Tart Recipe: BakeWithEase's Guide
Introduction to Easy Fruit Tarts for Beginners
Why This Beginner Fruit Tart Recipe is Perfect for New Bakers
Learning to bake can feel daunting, but some recipes are specifically designed to build confidence and deliver delicious results without complex techniques. This easy beginner fruit tart recipe is precisely one of those. It breaks down the process into manageable steps, focusing on foundational skills like making a simple press-in or roll-out crust, preparing a no-cook creamy filling, and assembling the final product with fresh fruit.
Unlike multi-layered cakes or intricate pastries, a fruit tart offers a relatively forgiving structure, allowing beginners to achieve a beautiful and tasty dessert with minimal stress. For instance, the tart crust uses standard pantry ingredients and requires only basic mixing, eliminating the need for advanced pastry techniques often found in more complex recipes.
Furthermore, this easy fruit tart recipe introduces core baking concepts like blind baking (partially baking the crust before adding filling) in a straightforward manner, explaining why each step is important for the final outcome. This educational approach is key for new bakers. The filling is typically a simple mix of cream cheese, mascarpone, or pastry cream that doesn't require tempering eggs or achieving precise temperatures, reducing the risk of common issues like curdling.
Using fresh fruit for decoration is also a forgiving process, allowing for creative expression without needing professional-level decorating skills. It's a recipe designed to be a first success, encouraging beginners to explore the world of baking further.
BakeWithEase's Commitment to Simple Baking Recipes
At BakeWithEase, our mission is to demystify baking and make it accessible to everyone, regardless of prior experience. We believe that baking should be a joyful and rewarding activity, not a source of frustration. Our commitment lies in providing clear, step-by-step instructions and helpful tips that anticipate the challenges beginners might face. Every recipe, including this easy beginner fruit tart, is tested and refined to ensure it's genuinely simple and achievable with basic kitchen equipment. We focus on using readily available ingredients and explaining techniques in plain language, avoiding jargon where possible.
Our platform, BakeWithEase.com, is built around the principle of empowering new bakers. We offer not just recipes but also guides on fundamental techniques, ingredient explanations, and troubleshooting tips, all aimed at building confidence. For example, our guides on understanding flour types or the function of baking powder are designed to support beginners as they tackle recipes like this easy fruit tart.
We strive to create a supportive environment where learning is fun and mistakes are seen as opportunities to learn. This easy beginner fruit tart recipe is a perfect example of how we translate this commitment into practice, offering a delicious entry point into the world of tarts and pastries.
Understanding the Key Components of a Fruit Tart
The Tart Crust: A Beginner-Friendly Approach
The foundation of any great tart is its crust, and for an easy beginner fruit tart, simplicity is key. A classic tart crust, or pâte sablée, is often made with flour, sugar, cold butter, and sometimes an egg yolk, mixed until just combined. For beginners, recipes often simplify this further, perhaps using a food processor or a method that requires less handling, which helps prevent gluten development and keeps the crust tender.
The goal is a flaky or crumbly base that provides structure and a buttery flavor counterpoint to the sweet filling and fresh fruit. A common ratio for a simple tart crust might involve roughly 2 parts flour to 1 part cold butter by weight, plus sugar and a binder like egg or water.
Achieving a good texture relies on keeping the butter cold and not overworking the dough. Cold butter creates steam pockets during baking, resulting in flakiness. Overworking the dough develops gluten, leading to a tough crust.
For a beginner-friendly fruit tart, some recipes even use a simple press-in crust made from crushed cookies mixed with butter, which requires no rolling at all. Whichever method is used, the dough typically needs chilling for at least 30 minutes to allow the butter to firm up and the gluten to relax, making it easier to handle and ensuring a better texture after baking. Proper execution of the crust is a critical step in mastering this easy beginner fruit tart recipe.
Preparing the Creamy Filling: Simple and Delicious
The filling is what gives a fruit tart its rich, smooth texture and often a hint of sweetness or tanginess to complement the fruit. For an easy beginner fruit tart, the filling is usually designed to be simple to prepare, often requiring no cooking on the stovetop. Common choices include a mixture based on cream cheese, mascarpone cheese, or a simple pastry cream. A cream cheese filling might involve simply whipping softened cream cheese with powdered sugar and a touch of vanilla extract until smooth. This creates a tangy, stable base that pairs wonderfully with sweet fruit.
Alternatively, a filling based on pastry cream (crème pâtissière) can be used, though a beginner version might simplify the traditional stovetop method or use a pre-made mix. A very easy option is a no-bake cream cheese or mascarpone filling, often stabilized with a bit of whipped cream or powdered sugar.
The key is to achieve a smooth, thick consistency that holds its shape when sliced but remains creamy in the mouth. This filling provides a soft contrast to the crisp crust and the vibrant, fresh fruit on top, making the middle layer a delightful component of the easy beginner fruit tart.
Selecting Your Fresh Fruits: A Seasonal Guide
The beauty of a fruit tart lies in its vibrant topping of fresh fruit, and choosing the right fruits is both a matter of taste and seasonality. Using seasonal fruits often means they are at their peak flavor, sweetness, and ripeness, which translates directly into a more delicious tart. In spring, consider strawberries, raspberries, or kiwis. Summer offers an abundance of berries like blueberries and blackberries, peaches, plums, and cherries. Fall brings apples, pears, and figs, while winter might feature citrus fruits like mandarins or segments of oranges, though tropical fruits like mango and pineapple are often available year-round.
A good mix of colors and textures makes the tart visually appealing. Think about combining sweet fruits like strawberries with slightly tart ones like raspberries or kiwis. Ensure the fruits are ripe but firm enough to hold their shape when sliced or arranged.
Washing and gently drying the fruit is essential before placing it on the filling. For fruits that brown quickly, like apples or bananas, they should be added just before serving or lightly coated with a glaze containing lemon juice. Selecting a variety of fresh, colorful fruits is the final step in creating a stunning and easy beginner fruit tart.
Step-by-Step Guide to Making Your First Fruit Tart
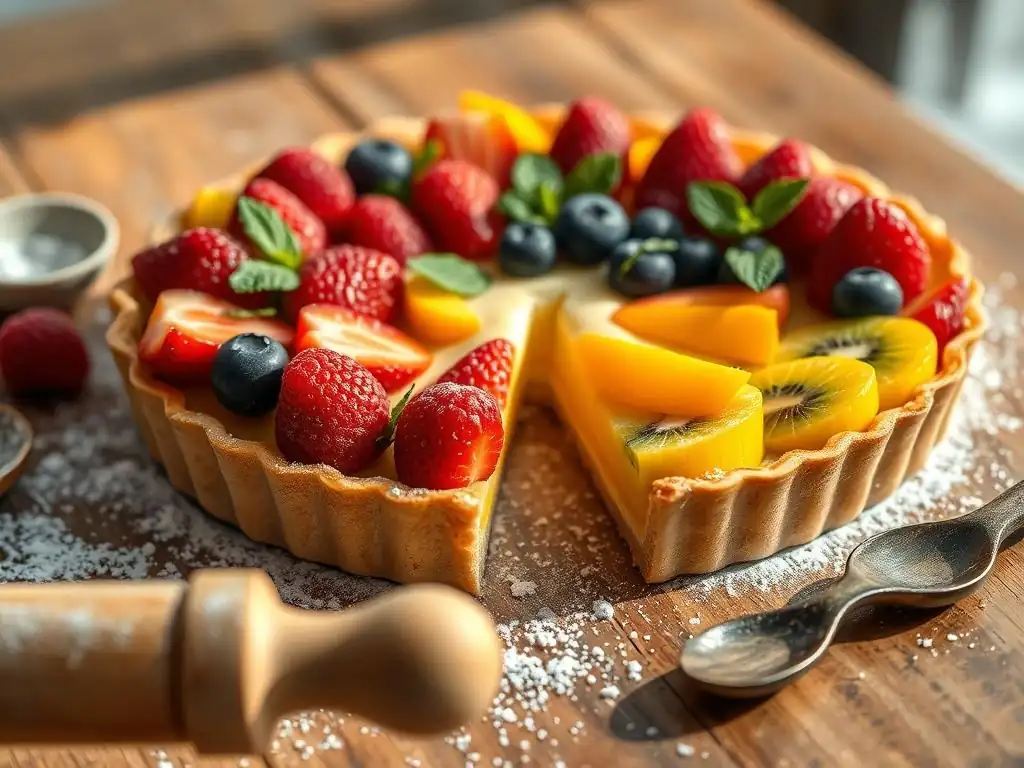
Step 1: Preparing the Easy Tart Crust Dough
Ingredients for the Basic Tart Dough
A basic tart dough for an easy beginner fruit tart typically requires minimal ingredients:
- 1 ½ cups all-purpose flour (about 180-190 grams)
- ½ cup granulated sugar (about 100 grams)
- ½ teaspoon salt
- ½ cup (1 stick) unsalted butter, very cold and cut into small cubes (about 113 grams)
- 1 large egg yolk
- 2-3 tablespoons ice water
These simple ingredients, when combined correctly, form the foundation for a delicious and crisp tart shell. Using cold butter is crucial for creating a tender, flaky texture, a hallmark of a great tart crust. The egg yolk adds richness and helps bind the dough, while the ice water brings it together without developing too much gluten. This combination ensures your easy beginner fruit tart starts with a solid base.
Mixing and Chilling the Dough: Important Tips
Mixing the dough can be done by hand or with a food processor, both methods suitable for an easy beginner fruit tart recipe. If using a food processor, pulse the flour, sugar, and salt a few times. Add the cold butter cubes and pulse until the mixture resembles coarse meal with some pea-sized pieces of butter remaining. Add the egg yolk and pulse briefly, then add ice water, one tablespoon at a time, pulsing just until the dough starts to come together.
Be careful not to overmix. If mixing by hand, cut the cold butter into the dry ingredients using a pastry blender or your fingertips until it resembles coarse crumbs. Stir in the egg yolk, then add ice water gradually, mixing with a fork or your hands until a shaggy dough forms.
Once the dough comes together, turn it out onto a clean surface, gather it into a disk (avoid kneading), wrap it tightly in plastic wrap, and chill in the refrigerator for at least 30-60 minutes. Chilling is a vital step for an easy beginner fruit tart crust; it allows the gluten to relax, prevents shrinking during baking, and makes the dough much easier to roll out or press into the tart pan. A well-chilled dough is less sticky and more manageable, setting you up for success in the next steps.
Rolling and Shaping the Tart Crust
After chilling, the dough for your easy beginner fruit tart crust is ready to be shaped. If your recipe uses a roll-out dough, lightly flour a clean surface and your rolling pin.
Roll the dough disk from the center outwards, rotating it frequently and adding minimal flour to prevent sticking, until it's about 1/8 to 1/4 inch thick and large enough to fit your tart pan (typically 9 or 10 inches in diameter). Carefully transfer the dough to the tart pan, either by rolling it loosely around the rolling pin and unrolling it over the pan, or gently folding it in quarters and unfolding it into the pan.
Press the dough gently into the bottom and up the sides of the fluted tart pan, ensuring it fits snugly into the corners. Trim any excess dough from the edges using a sharp knife or by rolling the rolling pin over the top of the pan. For a clean edge, you can press the dough slightly above the rim and then trim.
If the dough tears, simply patch it with a piece of trimmed dough. Once shaped, place the tart shell back in the refrigerator or freezer for another 20-30 minutes before blind baking. This second chill is crucial for maintaining the shape of the crust during baking and is a key tip for a perfect easy beginner fruit tart base.
Step 2: Blind Baking the Tart Crust
Why Blind Baking is Essential for a Crisp Crust
Blind baking, or pre-baking the tart crust before adding the filling, is a critical step for many tart recipes, especially those with wet fillings like the one used in an easy beginner fruit tart. The primary reason for blind baking is to ensure the crust is fully cooked and crisp on the bottom. If a wet filling is added to an uncooked crust, the moisture from the filling can soak into the dough during baking, resulting in a soggy, unpleasant bottom layer. Blind baking creates a barrier, setting the crust's structure and preventing this issue.
Furthermore, blind baking helps to prevent the sides of the tart shell from slumping down during baking and ensures the crust holds its shape. It also gives the crust a head start in cooking, as many tart fillings, particularly no-bake or lightly cooked ones, require less baking time than the crust itself. For an easy beginner fruit tart, achieving a crisp crust is key to the overall texture contrast, and blind baking is the most effective method to guarantee this. It's a simple technique that makes a significant difference in the final quality of your tart.
How to Blind Bake: A Detailed Explanation
To blind bake your easy beginner fruit tart crust, first ensure the shaped and trimmed dough shell is well-chilled (at least 20-30 minutes). Preheat your oven to the temperature specified in the recipe, typically around 375°F to 400°F (190°C to 200°C). Lightly prick the bottom of the tart shell all over with a fork; this allows steam to escape and prevents the crust from puffing up unevenly. Line the chilled crust with parchment paper or aluminum foil, pressing it gently into the corners and up the sides.
Fill the lined shell with pie weights, dried beans, or uncooked rice, distributing them evenly to weigh down the bottom and sides. Bake for the initial phase of blind baking, usually about 15-20 minutes, or until the edges are set and lightly colored. Carefully remove the weights and parchment/foil. Return the tart shell to the oven and bake for another 10-15 minutes, or until the bottom is golden brown and appears fully cooked.
This second phase ensures the base is thoroughly baked. The exact timing will vary depending on your oven and the thickness of your crust, so keep a close eye on it. This process ensures a perfectly crisp base for your easy beginner fruit tart.
Troubleshooting Common Blind Baking Issues
Even with a simple recipe, beginners might encounter issues during blind baking their easy fruit tart crust. One common problem is the crust shrinking down the sides of the pan. This is usually caused by insufficient chilling before baking or not using enough pie weights to hold the sides up.
Ensuring the dough is thoroughly chilled before the first bake and filling the liner generously with weights can help prevent this. If shrinkage still occurs, gently press the dough back up the sides immediately after removing the weights (while it's still warm and pliable), though this is best avoided by proper chilling and weighting.
Another issue can be the bottom of the crust puffing up despite pricking and using weights. This might happen if the pricks weren't sufficient or if the dough wasn't chilled enough. If it happens, you can gently press the puffed area down with the back of a spoon immediately after removing the weights.
If the crust cracks during blind baking, small cracks can often be patched by pressing a tiny piece of reserved raw dough or a crumb from the baked edge into the crack while the crust is still warm. While troubleshooting can be part of the learning process, proper technique (chilling, weighting, pricking) minimizes these issues for your easy beginner fruit tart.
Step 3: Making the Creamy Tart Filling
Ingredients for the Easy Cream Filling
For an easy beginner fruit tart, the filling ingredients are usually straightforward and require no complex cooking. A typical simple cream filling might include:
- 8 ounces cream cheese, softened (about 225 grams)
- ½ cup powdered sugar (about 60 grams)
- ¼ cup granulated sugar (about 50 grams)
- 1 teaspoon vanilla extract
- ¼ cup heavy cream (about 60 ml)
Sometimes, recipes might substitute or add mascarpone cheese for extra richness, or use a simple cooked pastry cream base. The key is using softened cream cheese or mascarpone, which whips up smoothly without lumps. Powdered sugar helps create a smooth texture and dissolves easily, while granulated sugar adds sweetness and structure. Vanilla extract enhances the flavor, and a touch of heavy cream can make the filling lighter and easier to spread. These components combine to create the perfect simple, creamy layer for your easy beginner fruit tart.
Preparing the Filling: Step-by-Step Instructions
Preparing the creamy filling for your easy beginner fruit tart is remarkably simple. Start by ensuring your cream cheese (or mascarpone) is softened to room temperature; this is crucial for a smooth result. In a medium bowl, beat the softened cream cheese with an electric mixer (or by hand with a whisk) until it is light and fluffy, about 1-2 minutes. Gradually add the powdered sugar and granulated sugar, beating until well combined and smooth, scraping down the sides of the bowl as needed.
Next, beat in the vanilla extract. Finally, pour in the heavy cream and continue beating until the mixture is smooth, creamy, and has a spreadable consistency. Be careful not to overbeat, especially if using heavy cream, as it can become too thick. The filling should be thick enough to hold its shape slightly but easy to spread evenly into the baked tart shell. This straightforward process makes the filling component of the easy beginner fruit tart recipe very approachable for new bakers.
Achieving the Perfect Filling Consistency
The ideal consistency for an easy beginner fruit tart filling is smooth, creamy, and thick enough to support the weight of the fruit without oozing out the sides when sliced. If your filling seems too thin after adding all the ingredients, it might be because the cream cheese wasn't soft enough or the heavy cream was over-whipped initially before combining. You can try chilling the filling for 15-30 minutes in the refrigerator; cold helps to firm up cream cheese and mascarpone mixtures.
If the filling is too thick or lumpy, it's likely due to using cold cream cheese or not beating it sufficiently at the start. You can try beating it again for another minute or two, ensuring it's fully softened and smooth before adding other ingredients. Adding another tablespoon of heavy cream or milk very gradually while beating can also help loosen a too-thick mixture, but be cautious not to add too much. Achieving the right consistency is key to a professional-looking and delicious easy beginner fruit tart.
Step 4: Assembling Your Beautiful Fruit Tart
Preparing the Fresh Fruit for Decoration
Once your blind-baked tart shell is cooled and your creamy filling is ready, it's time to prepare the fresh fruit for the star decoration of your easy beginner fruit tart. Wash all fruits thoroughly under cool water. Gently dry them with paper towels or a clean kitchen towel; excess moisture can make the filling watery or the fruit glaze slide off. Hull strawberries and slice them if they are large. Hull raspberries and blueberries. Pit and slice peaches or plums. Peel and slice kiwi. Segment citrus fruits, removing as much white pith as possible.
For fruits that might brown, like sliced apples or bananas, prepare them just before assembling or gently toss them in a little lemon juice diluted with water (about 1 tablespoon lemon juice to ½ cup water). Consider the shapes and colors of the fruits. Slicing fruits uniformly or into visually appealing shapes (like fanned strawberries or kiwi slices) will make the final tart look stunning. Having all your fruit prepared and ready before you start arranging makes the assembly process smooth and enjoyable for your easy beginner fruit tart.
Arranging the Fruit: Creative and Easy Ideas
Arranging the fruit on your easy beginner fruit tart is where you can get creative! First, spread the creamy filling evenly into the cooled, blind-baked tart shell, smoothing the top with an offset spatula or the back of a spoon. Then, begin arranging your prepared fresh fruit on top of the filling. There's no single right way to do this, allowing for personal touch, which is great for a beginner tart recipe. A simple approach is to start from the outside edge and work your way towards the center, overlapping slices slightly or creating concentric circles.
You can group similar fruits together or mix and match for a colorful mosaic. Consider using larger slices on the outside and smaller berries or pieces towards the center. For a very easy approach, simply scatter a mix of berries evenly over the filling. Don't be afraid to experiment with patterns. The goal is to cover the filling completely or mostly, creating a visually appealing display of fresh fruit. This step is often the most fun part of making an easy beginner fruit tart.
Glazing the Tart: Optional for Added Shine and Flavor
Glazing the fruit on your easy beginner fruit tart is an optional step, but it adds a beautiful shine, enhances the colors of the fruit, and can add a little extra flavor while helping to protect the fruit from drying out. A simple glaze can be made by warming a few tablespoons of apricot jam or red currant jelly with a teaspoon or two of water or lemon juice until melted and smooth. Strain the mixture if the jam has large pieces of fruit.
Once the fruit is arranged on the tart, gently brush or spoon the warm glaze over the fruit using a pastry brush. Ensure all the fruit surfaces are lightly coated. The glaze will set as it cools, creating a lovely, glossy finish. Alternatively, some recipes use a simple mixture of cornstarch, sugar, and fruit juice cooked until thickened. Whichever glaze you choose, it adds a professional touch to your easy beginner fruit tart and makes the fruit look even more vibrant.
Tips and Tricks for a Perfect Beginner Fruit Tart
Ensuring a Crisp Tart Crust Every Time
Achieving a reliably crisp tart crust is a hallmark of a well-made tart. For your easy beginner fruit tart, several factors contribute to this. Firstly, use cold butter and handle the dough as little as possible to prevent gluten development, which leads to toughness rather than crispness. Secondly, ensure the dough is well-chilled before rolling or pressing and again before blind baking. This prevents shrinkage and helps the butter create flakiness.
Crucially, blind baking is essential. Make sure to prick the bottom of the crust adequately and use enough pie weights to hold the crust down and prevent puffing during the initial bake. After removing the weights, continue baking the crust until the bottom is golden brown and looks dry, not just the edges. This ensures the base is fully cooked through. Baking at the correct temperature, typically around 375-400°F (190-200°C), is also important for proper browning and crisping. Following these steps consistently will help you achieve a perfect, crisp crust for your easy beginner fruit tart.
Preventing a Soggy Bottom: Key Strategies
A soggy bottom is a common pitfall, especially when making an easy beginner fruit tart with a creamy, moist filling. The most effective strategy to prevent this is thorough blind baking. As detailed earlier, ensure the crust is fully baked and golden brown on the bottom after removing the pie weights. This creates a barrier that moisture struggles to penetrate.
Another strategy is to add a thin layer of something moisture-resistant between the baked crust and the filling. This could be a very thin layer of melted white chocolate or a sprinkle of finely ground nuts (like almond flour) brushed onto the bottom of the hot crust right after baking. The heat helps them adhere and form a slight barrier. Also, avoid filling the tart shell until it is completely cooled.
Adding a wet filling to a warm crust can create condensation, leading to sogginess. Finally, don't assemble the tart too far in advance of serving, especially if using very juicy fruits, as their moisture can eventually seep into the filling and crust. These techniques are key to ensuring your easy beginner fruit tart stays crisp.
Choosing the Right Fruits for Optimal Flavor and Appearance
Selecting the best fruits is vital for both the taste and visual appeal of your easy beginner fruit tart. Aim for a variety of colors and textures. Think about the balance of sweetness and tartness; combining sweet strawberries with slightly tart raspberries or kiwi can create a more complex flavor profile. Ensure the fruits are ripe for the best flavor, but not overly soft, as they need to hold their shape.
Consider how the fruit will be prepared and arranged. Fruits that can be sliced neatly (like strawberries, kiwis, peaches) are great for creating patterns. Berries are perfect for filling in gaps or scattering. Avoid fruits that release excessive amounts of liquid when cut, or drain them well if used. For example, if using canned pineapple, drain it thoroughly. Using seasonal fruits generally guarantees the best flavor. A classic combination for an easy beginner fruit tart is strawberries, blueberries, raspberries, and kiwi, offering a beautiful mix of red, blue, and green/gold colors and varied textures.
Variations and Adaptations for Your Fruit Tart
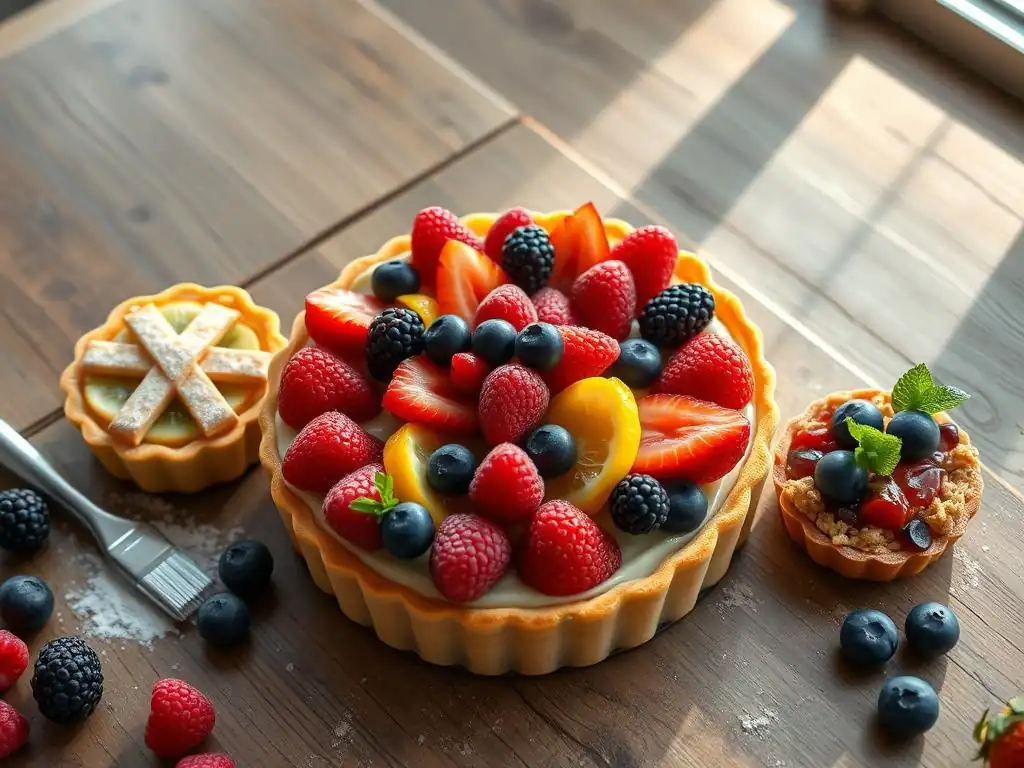
Different Crust Options: Gluten-Free and Chocolate
While the basic butter crust is standard for an easy beginner fruit tart, you can easily adapt it. For those avoiding gluten, a gluten-free tart crust can be made using a blend of gluten-free flours or by substituting the wheat flour with a gluten-free all-purpose blend designed for baking.
Many successful gluten-free tart crust recipes follow a similar method of cutting cold butter into the dry ingredients and chilling the dough. Another easy gluten-free option is a press-in crust made from crushed gluten-free cookies (like shortbread or graham crackers) mixed with melted butter, which requires no rolling or blind baking in some cases.
For a different flavor profile, a chocolate tart crust is a delicious variation. This is typically made by replacing a small portion of the all-purpose flour with unsweetened cocoa powder (e.g., for 1 ½ cups flour, use 1 ¼ cups flour and ¼ cup cocoa powder) and potentially increasing the sugar slightly to balance the bitterness of the cocoa. The method remains similar: cut in cold butter, add liquid, chill, and blind bake. These simple adaptations allow you to customize your easy beginner fruit tart.
Exploring Filling Flavors: Lemon, Vanilla, and More
The creamy filling in an easy beginner fruit tart is also highly adaptable. While a classic cream cheese or mascarpone filling is simple and delicious, you can easily introduce different flavors. For a zesty twist, add lemon zest and a tablespoon or two of fresh lemon juice to the cream cheese filling for a bright, lemon-cream flavor. This pairs exceptionally well with berries.
A simple vanilla pastry cream is another popular filling, though it involves cooking. However, beginner-friendly recipes for pastry cream exist, often using fewer egg yolks or simplified cooking methods. You could also flavor the basic cream cheese filling with other extracts like almond extract or orange extract. For a richer filling, consider a no-bake chocolate ganache (melted chocolate mixed with warm heavy cream) or a simple mix of whipped cream and melted white chocolate. Exploring these filling options allows you to create a range of easy fruit tarts.
Seasonal Fruit Combinations: Inspiration for Year-Round Baking
One of the joys of making an easy beginner fruit tart is adapting it to the seasons. Instead of sticking to the classic berry mix, get inspired by what's fresh and abundant throughout the year. In the late spring and early summer, combine sliced strawberries with rhubarb (lightly cooked and sweetened) or use a mix of cherries (pitted and halved) and red currants.
Late summer and early fall are perfect for stone fruits; arrange slices of ripe peaches, plums, or nectarines on the filling, perhaps drizzled with a little honey. As autumn progresses, consider using sliced, lightly sautéed or roasted apples or pears spiced with cinnamon, combined with cranberries. In winter, brighten things up with segments of oranges, grapefruit, or mandarins, perhaps with a sprinkle of pomegranate seeds. These seasonal combinations keep your easy beginner fruit tart recipe fresh and exciting throughout the year.
Storing and Serving Your Homemade Fruit Tart
How to Store Your Fruit Tart Properly
Proper storage is key to keeping your easy beginner fruit tart fresh and delicious. Because the tart contains fresh fruit and a dairy-based filling, it must be stored in the refrigerator. Cover the tart loosely with plastic wrap or aluminum foil, or place it in an airtight container designed for pies or cakes. This helps prevent it from drying out or absorbing odors from the refrigerator.
A finished fruit tart is best enjoyed within 1-2 days of assembly. The crust may start to soften after the first day due to the moisture from the filling and fruit, although a well-blind-baked crust will hold up better.
If you need to store it for longer, it's often better to store the components separately (baked crust, filling, prepared fruit) and assemble just before serving. The tart filling can usually be stored in an airtight container in the fridge for up to 3-4 days, and the blind-baked crust can be stored at room temperature in an airtight container for 1-2 days or frozen for longer.
Serving Suggestions and Garnishes
Serving your easy beginner fruit tart is the culmination of your baking efforts! For the cleanest slices, use a sharp knife dipped in hot water and wiped dry between cuts. This helps prevent the filling from sticking and dragging. Serve slices chilled directly from the refrigerator.
To enhance the presentation and flavor, consider simple garnishes. A dollop of fresh whipped cream or a scoop of vanilla ice cream pairs wonderfully with fruit tart. A sprinkle of powdered sugar over the edge of the tart adds a delicate finish. Fresh mint sprigs or a few edible flowers can add a touch of color. For a more sophisticated touch, you could add a drizzle of fruit coulis (a simple fruit sauce) around the plate. These simple serving suggestions elevate your beautiful easy beginner fruit tart.
Making Ahead: Tips for Preparing in Advance
Making components of your easy beginner fruit tart ahead of time can significantly reduce stress, especially if you're baking for an event. The tart crust dough can be made up to 2-3 days in advance and stored, tightly wrapped, in the refrigerator. It can also be frozen for up to a month; thaw it in the refrigerator overnight before rolling.
The blind-baked tart shell can be baked a day in advance and stored at room temperature in an airtight container once completely cooled. The creamy filling can also be made a day or two ahead and stored in an airtight container in the refrigerator. You might need to whisk it gently before using if it stiffens up too much. The fresh fruit is best prepared just before assembly to ensure it looks its freshest and doesn't brown. By preparing the crust and filling ahead, assembling your easy beginner fruit tart becomes a quick process just before serving.
Troubleshooting Common Fruit Tart Problems
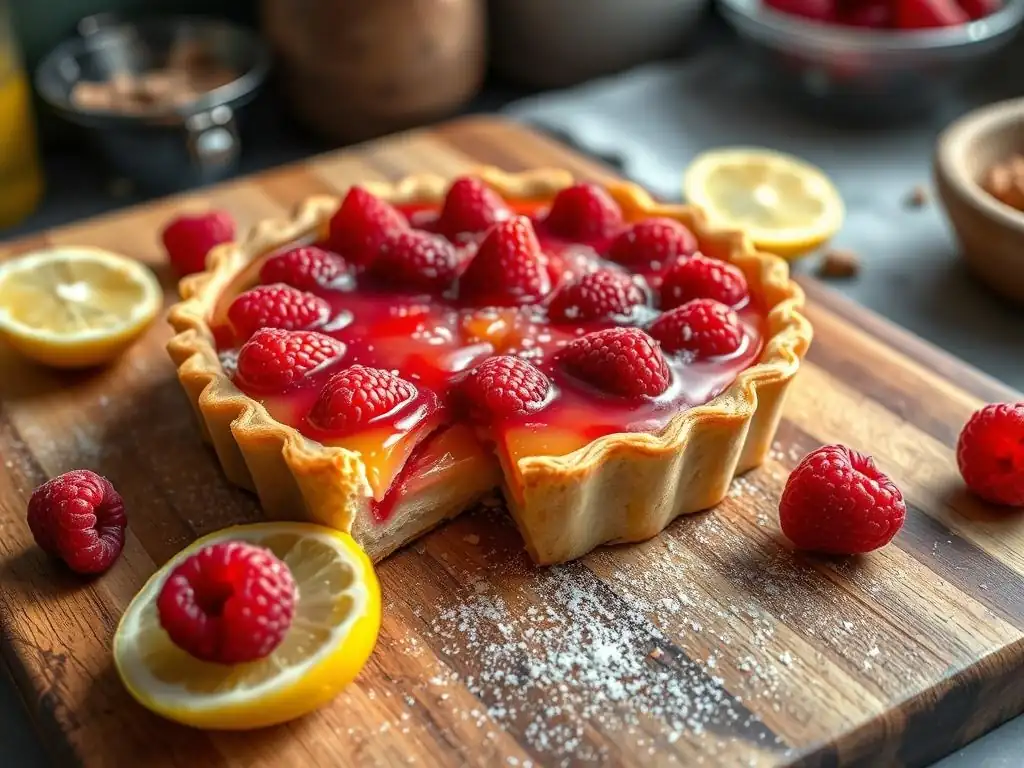
Soggy Crust Solutions
As mentioned earlier, a soggy crust is a common issue, but one that can often be prevented or mitigated in your easy beginner fruit tart. If you find your crust is still getting soggy despite blind baking, ensure you are baking the crust long enough during the second phase of blind baking (after removing weights) until the bottom is truly golden and dry.
Consider using a moisture barrier like a thin brush of melted white chocolate or a sprinkle of finely ground nuts on the hot, blind-baked crust before adding the filling. Ensure the tart shell is completely cooled before adding the filling. If you are using very juicy fruits, try draining them on paper towels for a few minutes before arranging them. And, if possible, assemble the tart closer to serving time. While a slightly softened crust might still be tasty, these steps maximize your chances of a crisp base for your easy beginner fruit tart recipe.
Filling Issues: Too Runny or Too Thick
Sometimes the creamy filling for your easy beginner fruit tart might not turn out with the perfect consistency. If the filling is too runny, it's likely due to the cream cheese or mascarpone not being firm enough, or too much liquid (like heavy cream or fruit juice) being added.
Try chilling the filling for at least 30-60 minutes; often, this is enough to firm it up. If it's still too loose, you can try gently whipping in a tablespoon or two of additional softened cream cheese or, in some cases, a small amount of cornstarch mixed with a tiny bit of cold liquid (though this can alter texture if not cooked).
If the filling is too thick or lumpy, it was likely caused by using cold cream cheese or not beating it sufficiently at the start. Let the filling sit at room temperature for a few minutes to soften slightly, then beat it again until smooth. You can add a tiny amount (a teaspoon at a time) of milk or cream while beating to loosen it, being careful not to add too much. Starting with properly softened ingredients is the best way to avoid these issues with your easy fruit tart filling.
Fruit Browning Prevention Techniques
Some fruits, like apples, pears, bananas, and even some stone fruits, can brown quickly once cut due to oxidation. To keep the fruit on your easy beginner fruit tart looking fresh and vibrant, prepare these fruits just before assembling the tart. If you must prepare them slightly in advance, tossing them gently in a small amount of acidic liquid can slow down the browning process.
A common technique is to dip or brush sliced fruits with a mixture of water and a little lemon juice (about 1 tablespoon lemon juice per ½ cup water). Pineapple juice or a store-bought anti-browning fruit protector can also be used. Ensure the fruit is then patted dry before placing it on the tart filling. Applying a glaze over the fruit after assembly also helps seal the fruit and prevent contact with air, thus reducing browning. By taking these simple steps, the fruit topping on your easy beginner fruit tart will stay beautiful.
Conclusion: Enjoy Your Delicious Beginner-Friendly Fruit Tart!
Celebrating Your Baking Success with BakeWithEase
Congratulations! You've successfully made a beautiful and delicious easy beginner fruit tart using the BakeWithEase guide. Taking on a tart, even a beginner-friendly one, is a significant step in your baking journey. You've learned fundamental techniques like making and shaping dough, blind baking, preparing a simple filling, and artfully arranging fruit. Each step you've mastered builds confidence and skills that you can apply to countless other recipes. At BakeWithEase, we are thrilled to have been part of your success and hope this experience encourages you to keep exploring the wonderful world of baking.
Remember the tips and tricks you've learned – from ensuring a crisp crust to preventing a soggy bottom and making that creamy filling just right. These are valuable lessons that will serve you well in future baking adventures. This easy fruit tart recipe was designed to be a positive and rewarding experience, proving that impressive results are achievable even for those new to the kitchen. Celebrate your accomplishment; you've earned it!
One of the greatest joys of baking is sharing your homemade treats with others. Your easy beginner fruit tart, with its vibrant fresh fruit and creamy filling nestled in a crisp crust, is sure to be a crowd-pleaser. Whether you bring it to a gathering, serve it for dessert after a family meal, or simply share a slice with a friend, the effort and care you put into making it will be appreciated.
Receiving compliments on your baking is incredibly rewarding and further motivates you to bake more. Don't hesitate to tell people it's your first attempt at an easy fruit tart – they'll likely be even more impressed! Sharing your creation is not just about the food; it's about sharing joy, warmth, and a piece of your passion. So go ahead, slice that beautiful tart, and share the delicious results of your easy beginner fruit tart baking success!
Frequently Asked Questions
What makes this fruit tart recipe "beginner-friendly"?
This recipe focuses on simple steps and easy-to-find ingredients, making it perfect for those new to baking. We also provide clear, step-by-step instructions to avoid confusion.
Can I substitute any of the fruits listed in the recipe?
Absolutely! Feel free to use your favorite seasonal fruits. Just ensure they are fresh and ripe for the best flavor and texture in your final fruit tart.
How do I prevent the tart crust from becoming soggy?
Blind baking the crust before adding the filling is crucial. Also, brushing the baked crust with a thin layer of melted chocolate can create a moisture barrier and prevent sogginess.
What kind of pastry cream is best for this tart?
While homemade pastry cream is delicious, you can also use a store-bought vanilla pudding or custard for a quick and easy alternative. This keeps the recipe beginner-friendly.
How long will the finished fruit tart last?
A fruit tart is best enjoyed fresh, but it can be stored in the refrigerator for up to 2-3 days. Keep it covered to prevent the fruit from drying out and the crust from getting soggy.
Final Reflection: The Sweetness of Success, One Tart at a Time
Baking a fruit tart shouldn't be intimidating, and this article proves it. The simple steps outlined, from preparing the crust to arranging the fruit, demonstrate that even novice bakers can create a stunning and delicious dessert. This isn't just about following a recipe; it's about unlocking a newfound confidence in the kitchen.
The joy of baking, particularly when sharing the results with loved ones, is a powerful experience. This recipe transcends the simple act of creating a tart; it's about fostering creativity and connection. The best things in life are the people we love, the places we've been, and the memories we've made along the way.
This sentiment perfectly captures the essence of baking – it's about creating memories and sharing joy, one perfectly arranged slice at a time. The accessibility of this recipe makes that joy attainable for everyone.
So, what are you waiting for? Don't let the fear of failure hold you back from exploring your culinary creativity. Gather your ingredients, put on some music, and embark on this delicious journey. The satisfaction of creating your own beautiful, beginner-friendly fruit tart is a reward in itself. You might surprise yourself with your talent, and you'll certainly delight your taste buds and those of your friends and family. Embrace the process, enjoy the journey, and savor the sweet success!
Unleash Your Inner Pastry Chef!
Thanks for joining us on this delicious journey into the world of fruit tarts! We hope you gained confidence and inspiration to create something truly special. Ready to take the next step?
- Bake your own masterpiece! Use the recipe from the article as a springboard – experiment with different fruits, creams, and crusts to create your unique signature tart.
- Share your creation! Post a picture of your fruit tart on social media and tag #BakeWithEase so we can all admire your baking skills.
- Challenge a friend: See who can create the most stunning (and delicious!) fruit tart. Let the baking competition begin!
What's your favorite fruit to feature in a tart, and what unique twist will you add to your next bake?