
Simple Filling Ideas for Beginner Tarts

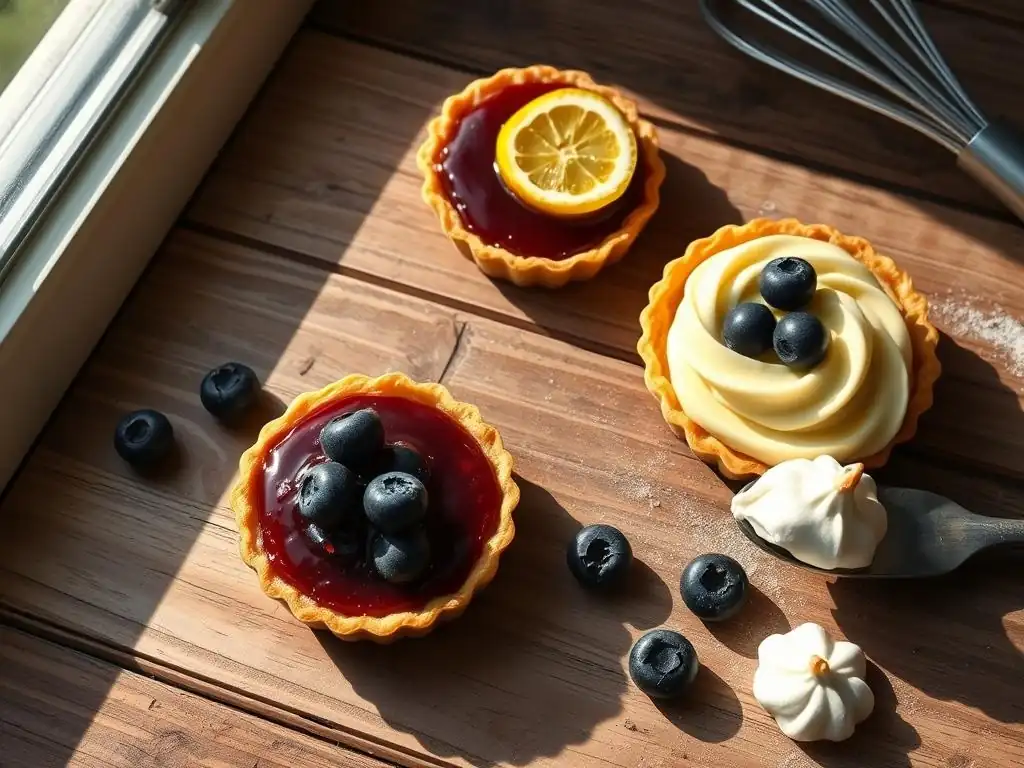
Welcome to BakeWithEase, your ultimate companion in the delightful world of baking! Whether you're just starting out or looking to refine your skills, we are here to guide you through every step of the way. In our latest article, we’ll delve into easy tart filling recipes that will elevate your baking game and impress your friends and family. Curious to discover how simple ingredients can transform into mouthwatering tarts? Join us as we explore these simple filling ideas for beginner tarts and unlock the secrets to baking with confidence. Let your culinary journey begin!
- Simple Filling Ideas for Beginner Tarts - BakeWithEase
- Introduction to Easy Tart Filling Recipes for Beginners
- Understanding Basic Tart Shells: A Quick Recap
- Top 5 Easy Tart Filling Recipes for Beginners
- Tips and Tricks for Perfect Tart Fillings
- Storing and Serving Your Beginner-Friendly Tarts
- Conclusion: Mastering Easy Tart Filling Recipes
-
Frequently Asked Questions
- What are some easy tart filling recipes suitable for beginners?
- Where can I find step-by-step guides for making tart fillings?
- What kind of ingredients do I need for simple tart fillings?
- What are some tips for preventing my tart filling from becoming too runny?
- How can I adapt a recipe on BakeWithEase.com to make a tart filling suited to my own preferences?
- Final Reflection: Unlocking the Joy of Tart-Making
- Unleash Your Inner Pastry Chef: Start Baking Today!
Simple Filling Ideas for Beginner Tarts - BakeWithEase
Introduction to Easy Tart Filling Recipes for Beginners
Welcome to the World of Tarts: Baking Made Easy
Welcome, budding bakers, to the wonderful world of tarts! If you've ever felt intimidated by fancy pastries, tarts are a fantastic starting point. They offer a beautiful canvas for creativity without requiring complex techniques often found in multi-layered cakes or intricate bread shapes. Think of a tart as a simple shell waiting to be filled with delicious possibilities – and mastering those fillings is much easier than you might think!
Embarking on your tart-making journey opens up a delightful path in baking. Unlike some desserts that demand precise timing and delicate handling throughout, many tart components, like the shell and filling, can be prepared separately. This modular approach breaks down the process into manageable steps, making it less daunting for newcomers. Our goal at BakeWithEase is to show you just how accessible and rewarding creating stunning tarts can be, starting with simple yet impressive fillings.
Why Tarts are Perfect for Beginner Bakers
Tarts are incredibly forgiving, offering a generous margin for error compared to some other baked goods. The structure is relatively simple: a crust and a filling. Many beginner tart recipes involve straightforward steps like mixing, chilling, and simple cooking processes on the stovetop or in the oven. For example, a classic shortcrust pastry for a tart shell requires just a few basic ingredients and a simple mixing method before chilling and pressing into the tin.
Moreover, the variety of easy tart filling recipes available means you can start with very basic options and gradually work your way up. From no-bake chocolate ganache that simply requires melting and mixing, to simple fruit fillings that involve simmering fruit with a little sugar, there's a recipe suited to every beginner's comfort level. This gradual learning curve makes tarts an ideal vehicle for building confidence in the kitchen.
This Guide: Simple Tart Fillings for Baking Success
This guide is specifically designed to demystify the filling process and provide you with a collection of easy tart filling recipes perfect for your first few baking attempts. We'll walk you through several popular and approachable filling types, from creamy classics to fruity delights, all chosen for their simplicity and delicious results. Forget complicated techniques and hard-to-find ingredients; we're focusing on straightforward methods that guarantee success.
By the end of this guide, you'll have a repertoire of simple tart fillings that you can whip up with confidence. We'll cover everything from ingredients and step-by-step instructions to handy tips for troubleshooting common issues. Get ready to impress yourself and your friends with beautiful, homemade tarts that taste as good as they look, all thanks to these easy fillings for tarts.
Understanding Basic Tart Shells: A Quick Recap
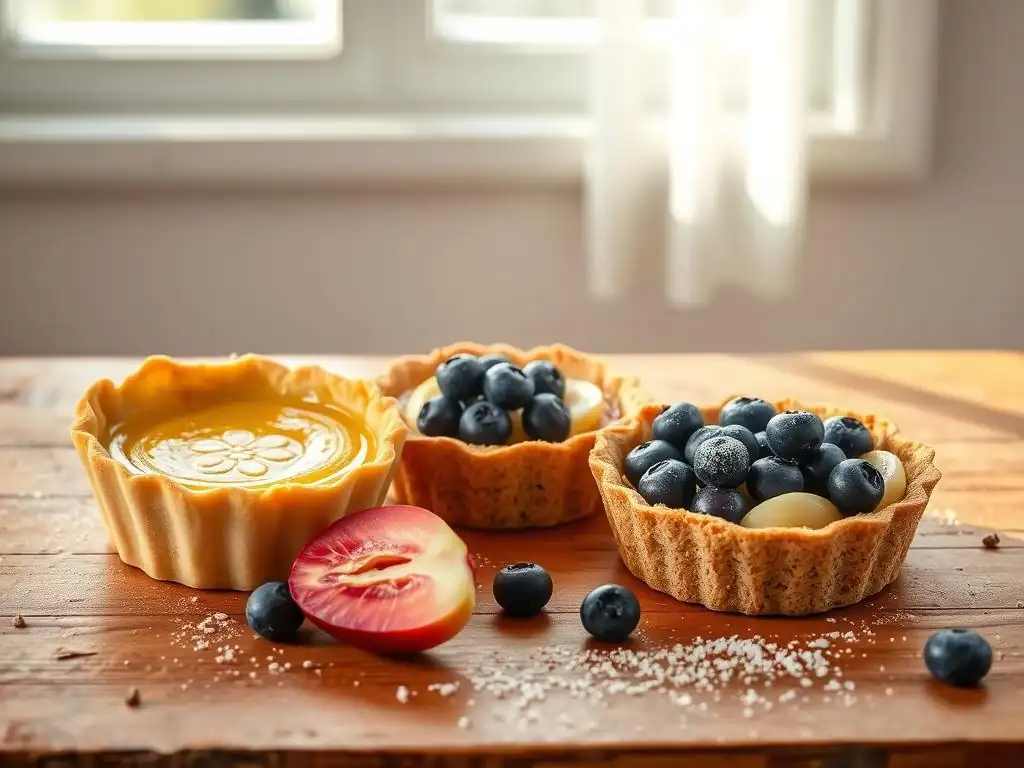
Types of Tart Crusts: Sweet vs. Savory
Tart crusts primarily fall into two categories: sweet and savory. Sweet crusts, often called Pâte Sucrée, typically include sugar and sometimes egg yolks, resulting in a rich, crumbly texture perfect for dessert tarts. They pair wonderfully with easy tart filling recipes like fruit, cream, or chocolate fillings. A common ratio for a sweet crust might involve roughly 2 parts flour, 1 part fat (butter), and 1 part sugar by weight, plus egg yolk for binding.
Savory crusts, or Pâte Brisée, are less sweet or contain no sugar at all. They often use just flour, fat (usually butter or a mix with shortening), salt, and cold water. This creates a flakier or more robust crust that stands up well to savory fillings like quiches, vegetable tarts, or meat pies. While this guide focuses on easy tart filling recipes for desserts, understanding the crust difference is key to choosing the right base for your simple tart fillings.
Essential Tips for a Perfect Tart Crust
Achieving a perfect tart crust, even a simple one, involves a few key techniques. First, keep your ingredients, especially the butter and water, very cold. This helps create flaky layers in the crust as the butter melts during baking. Second, avoid overworking the dough. Too much kneading develops gluten, resulting in a tough crust instead of a tender one. Mix just until the ingredients come together.
Third, chilling the dough is crucial. After mixing and before rolling or pressing into the tin, chill the dough for at least 30 minutes. This allows the gluten to relax and the fat to firm up, making the dough easier to handle and preventing it from shrinking excessively during baking. For most easy tart filling recipes that are baked in the shell, you'll also need to "blind bake" the crust partially or fully first to ensure it's cooked through and doesn't get soggy from the filling.
Pre-Made vs. Homemade Tart Shells: Which is Best for Beginners?
For beginners focusing on mastering easy tart filling recipes, using a good quality pre-made tart shell is absolutely acceptable and often recommended. It removes the variable of making the crust from scratch, allowing you to concentrate on the filling, which is the star of many dessert tarts. Pre-made shells come in various sizes and types (sweet, graham cracker, etc.) and save significant time and effort.
However, making a simple tart crust from scratch is also a valuable skill and not overly difficult for beginners. A basic press-in crust using melted butter or softened butter can be very forgiving. If you choose to make your own, select a simple recipe designed for ease. The best choice depends on your confidence level and how much time you want to dedicate to the project. Either way, you can successfully use these easy fillings for tarts.
Top 5 Easy Tart Filling Recipes for Beginners
Recipe 1: Classic Lemon Tart Filling (Beginner-Friendly)
Lemon tart is a timeless classic, and making the filling is surprisingly simple. This easy tart filling recipe relies on the magic of eggs, sugar, lemon juice, and butter to create a smooth, tangy, and vibrant filling. The key is gentle cooking to thicken it without scrambling the eggs. It's a perfect introduction to stovetop fillings that set beautifully when chilled.
A basic lemon filling recipe often uses a ratio of roughly 4-5 large eggs, 1 cup (about 200g) of sugar, 1/2 cup (about 120ml) of fresh lemon juice, and 1/2 cup (about 115g) of cold butter cut into pieces. These simple ingredients, when combined and heated correctly, transform into a luxurious filling. This specific combination provides a balanced sweet-tart flavor that is universally loved.
Ingredients for Lemon Tart Filling
Here's a typical list of ingredients for a classic lemon tart filling designed for a standard 9-inch tart shell:
- 4 large eggs
- 1 cup (200g) granulated sugar
- 1/2 cup (120ml) fresh lemon juice (from about 3-4 lemons)
- Zest of 1-2 lemons (optional, for extra flavor)
- 1/2 cup (115g) unsalted butter, cold and cut into small cubes
- Pinch of salt
Step-by-Step Instructions for Lemon Tart Filling
Follow these steps for a smooth and tangy result:
- In a medium saucepan, whisk together the eggs, sugar, lemon juice, and lemon zest (if using) until well combined.
- Add the pinch of salt.
- Place the saucepan over medium-low heat. Cook, stirring constantly with a whisk or wooden spoon, ensuring you scrape the bottom and sides of the pan.
- Continue stirring until the mixture thickens enough to coat the back of a spoon (this usually takes 8-12 minutes). Do not let it boil vigorously, as this can curdle the eggs.
- Remove the pan from the heat.
- Add the cold butter cubes, one at a time, whisking until each piece is fully melted and incorporated before adding the next.
- Pour the hot filling through a fine-mesh sieve into your pre-baked tart shell. This removes any potential bits of cooked egg or zest, ensuring a silky smooth texture.
- Chill the tart in the refrigerator for at least 2-3 hours, or until the filling is fully set.
Tips for a Tangy and Smooth Lemon Filling
To ensure your lemon filling is both tangy and smooth, use freshly squeezed lemon juice; bottled juice often lacks the vibrant flavor and acidity needed. Cook the mixture over medium-low heat and stir constantly to prevent the eggs from scrambling. If the mixture seems to be getting too hot or you see any signs of curdling, immediately remove it from the heat and whisk vigorously, or even plunge the bottom of the pan into an ice bath for a few seconds.
Straining the filling through a fine-mesh sieve is a non-negotiable step for achieving that perfect, silky texture. It catches any small lumps or pieces of zest that might detract from the smoothness. Finally, ensure the tart is chilled for sufficient time; chilling is what allows the filling to set firmly, making it easy to slice and serve.
Recipe 2: Simple Chocolate Ganache Tart Filling
Chocolate ganache is one of the most elegant yet incredibly easy tart filling recipes you can make. It requires just two main ingredients: chocolate and cream. The magic happens in their ratio and the simple act of melting and mixing. It sets into a rich, decadent filling that’s perfect for any chocolate lover.
A basic ganache uses a ratio of hot cream poured over chopped chocolate. For a pourable or soft filling, a common ratio is 1 part chocolate to 1 part heavy cream (by weight). For a firmer filling suitable for tarts, a ratio of 1.5 or 2 parts chocolate to 1 part cream is often used. For instance, 8 ounces (about 225g) of chopped chocolate to 4 ounces (about 115g) of hot heavy cream creates a lovely, firm filling.
Achieving the Perfect Chocolate Ganache Consistency
The consistency of your chocolate ganache depends primarily on the ratio of chocolate to cream and the temperature. More chocolate results in a firmer ganache when cooled, while more cream results in a softer, more pourable ganache. For a tart filling that holds its shape when sliced, aim for a ratio of at least 1.5:1 chocolate to cream.
To achieve the perfect texture, chop your chocolate finely to ensure it melts evenly. Heat the heavy cream until it's hot but not boiling vigorously. Pour the hot cream over the chopped chocolate and let it sit for 5-10 minutes to allow the heat to melt the chocolate before stirring. Stir gently from the center outwards until completely smooth and glossy. If any bits of chocolate remain, a quick gentle warming over a double boiler or in short bursts in the microwave (stirring between each) can help, but be careful not to overheat.
Variations: Dark, Milk, and White Chocolate Ganache
You can make ganache with dark, milk, or white chocolate, each offering a different flavor profile. Dark chocolate (55-70% cocoa solids) provides a deep, intense flavor and sets up the firmest due to its higher cocoa butter content. A ratio of 1.5:1 or 2:1 (chocolate to cream) works well for a dark chocolate tart filling.
Milk chocolate is sweeter and softer than dark chocolate. You'll need a higher ratio of milk chocolate to cream, perhaps 2:1 or even 2.5:1, to get a firm set for a tart filling. White chocolate is the sweetest and contains no cocoa solids, only cocoa butter, sugar, and milk solids. It's the softest of the three and requires the highest ratio of chocolate to cream, typically 3:1, to set firmly enough for a tart. Remember that the quality of the chocolate significantly impacts the final taste and texture of these easy fillings for tarts.
Troubleshooting Common Ganache Problems
- Grainy Texture: This often happens if the ganache was overheated or if water got into the mixture. Try gently warming it slightly and whisking vigorously, or try blending it carefully with an immersion blender to emulsify it.
- Separated/Oily: If the ganache looks oily or separated, it means the emulsion has broken. This can also be due to overheating or incorrect temperature. Try adding a tablespoon of room temperature milk or cream and whisking gently from the center outwards until it comes back together. If it's still separated, a tiny pinch of lecithin powder (if you have it) or careful blending with an immersion blender might help.
- Not Setting: The ratio of chocolate to cream is likely too low for the type of chocolate used, or it hasn't been chilled long enough. Ensure you've used enough chocolate for the desired firmness. Chill the tart for several hours, preferably overnight, to allow it to set fully.
Recipe 3: Quick Berry Tart Filling with Pastry Cream
Combining fresh berries with smooth, creamy pastry cream (Crème Pâtissière) makes for a delightful and visually appealing tart. While pastry cream might sound fancy, it's essentially a thickened custard, and making a simple version is well within a beginner's reach. This approach separates the cooked filling (pastry cream) from the fresh element (berries), simplifying the process compared to baking berries directly in a custard.
A basic pastry cream involves heating milk, tempering egg yolks with sugar and a thickener (like cornstarch or flour), then combining and cooking until thick. This cooked cream provides a stable, sweet base for arranging fresh, seasonal berries. The contrast between the cool, smooth cream and the juicy, slightly tart berries is simply wonderful, making this one of the most satisfying easy tart filling recipes.
Making Easy Pastry Cream for Tarts
Here’s a simplified method for beginner pastry cream: Heat 2 cups (about 470ml) of whole milk in a saucepan until it's just simmering. In a separate bowl, whisk together 4-5 large egg yolks, 1/2 cup (100g) of sugar, and 1/4 cup (30g) of cornstarch (or 1/3 cup flour). Gradually whisk about half of the hot milk into the egg mixture to temper it, preventing the eggs from scrambling.
Pour the tempered egg mixture back into the saucepan with the remaining milk. Cook over medium heat, whisking constantly, until the mixture thickens significantly and comes to a gentle boil (boil for 30-60 seconds while whisking to ensure the starch is cooked and the cream is fully thickened). Remove from heat, stir in a tablespoon of butter and a splash of vanilla extract. Pour into a clean bowl, cover the surface directly with plastic wrap to prevent a skin from forming, and chill thoroughly in the refrigerator for at least 2 hours.
Best Berries for Tart Fillings: Combinations and Flavors
Almost any fresh berry works beautifully with pastry cream in a tart! Strawberries, blueberries, raspberries, blackberries, and even sliced kiwi or peaches (technically fruits, but used similarly) are excellent choices. You can use a single type of berry for a simple look or create a colorful medley.
Popular combinations include strawberries and blueberries, raspberries and blackberries, or a mix of all available seasonal berries. Consider the sweetness and tartness of the berries; sweeter berries like strawberries pair well with the creamy base, while slightly tarter ones like raspberries offer a nice contrast. Aim for about 2-3 cups of fresh berries for a standard 9-inch tart, depending on how densely you arrange them.
Assembling the Berry Tart: A Visual Guide
Assembling this tart is straightforward and visually rewarding. Once your pastry cream is fully chilled and firm, gently whisk it to loosen it slightly and make it smooth. Spoon or pipe the pastry cream evenly into your pre-baked and cooled tart shell. Smooth the surface with an offset spatula or the back of a spoon.
Next, arrange your prepared fresh berries on top of the pastry cream. You can place them randomly for a rustic look or create patterns, such as concentric circles with sliced strawberries or alternating rows of different berries, for a more polished finish. The goal is to cover the surface attractively. Some bakers like to brush the berries with a simple glaze (like melted apricot jam or a sugar syrup) for shine, which we'll touch on later.
Recipe 4: Cream Cheese Tart Filling with Fruit Topping
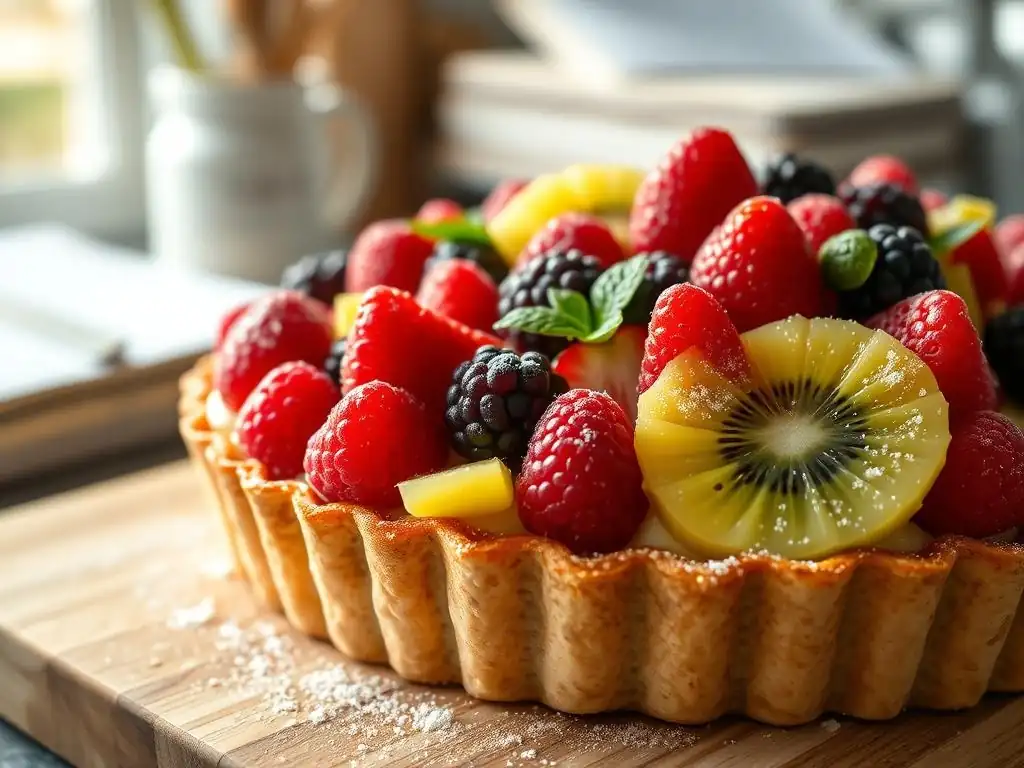
A cream cheese filling provides a rich, tangy, and creamy base that pairs wonderfully with a variety of fruit toppings. Unlike baked cheesecakes, many cream cheese tart fillings are no-bake, making them incredibly simple for beginners. They often involve whipping softened cream cheese with sugar, sometimes a little lemon juice or vanilla, and folding in whipped cream or a stabilizer.
This type of easy tart filling recipe is versatile and forgiving. The tanginess of the cream cheese cuts through the sweetness, creating a balanced flavor profile. A standard recipe for a 9-inch tart might use 8 ounces (about 225g) of full-fat cream cheese, 1/2 cup (100g) of powdered sugar, a teaspoon of vanilla extract, and perhaps the zest of half a lemon for extra brightness. Some recipes also incorporate about 1 cup (240ml) of heavy cream, whipped to soft peaks, for a lighter, airier texture.
Creating a Smooth and Creamy Cheese Filling
The key to a smooth cream cheese filling is starting with softened cream cheese. Take it out of the refrigerator at least an hour before you plan to mix, or gently soften it in the microwave in 10-15 second bursts until pliable but not melted. Beat the softened cream cheese with an electric mixer (or vigorously by hand) until it is completely smooth and free of lumps.
Gradually beat in the powdered sugar until fully incorporated and smooth. Adding other flavorings like vanilla or lemon zest at this stage ensures they are evenly distributed. If using whipped cream, gently fold it in with a spatula until just combined; overmixing can deflate the whipped cream, resulting in a denser filling. Ensure all ingredients are at room temperature (except for the heavy cream if whipping it cold) for easiest blending.
Choosing the Right Fruits for a Cream Cheese Tart
A wide array of fruits complement a tangy cream cheese filling. Fresh berries (strawberries, raspberries, blueberries) are classic choices. Sliced stone fruits like peaches, plums, or nectarines also work well, especially when in season. Tropical fruits like mango or pineapple can add a bright, exotic touch.
Consider the texture and moisture content of the fruit. Fruits that release a lot of liquid (like some berries or cooked fruits) might need a glaze or barrier to prevent the crust from getting soggy. For a no-bake cream cheese filling, fresh, uncooked fruits are usually best. Aim for about 2-3 cups of prepared fruit to cover the top of your tart generously.
Glazing the Fruit Topping for Extra Shine
While optional, glazing the fruit topping adds a beautiful shine and helps to protect the fruit, preventing it from drying out. A simple glaze can be made by warming about 1/4 to 1/2 cup of apricot jam or apple jelly with a tablespoon of water or lemon juice over low heat until melted and smooth. Strain the mixture if desired to remove any fruit pieces.
Once the glaze is slightly cooled but still liquid, gently brush it over the arranged fruit using a pastry brush. This gives the tart a professional, finished look. Alternatively, you can make a simple sugar syrup (equal parts sugar and water, simmered until dissolved) and use that as a lighter glaze. This step elevates the visual appeal of your easy tart filling recipes.
Recipe 5: No-Bake Peanut Butter Tart Filling
For a quick, indulgent, and incredibly simple tart, a no-bake peanut butter filling is a fantastic choice. This easy tart filling recipe often relies on a base of cream cheese or whipped cream, combined with peanut butter and powdered sugar. It sets up firmly in the refrigerator, requiring no oven time beyond potentially pre-baking a crust.
This filling is a dream for beginners because it's nearly foolproof. There's no cooking involved, reducing the risk of curdling or overcooking. The primary steps are mixing and chilling. A typical recipe might combine 8 ounces (225g) of softened cream cheese, 1/2 cup (120g) of smooth or crunchy peanut butter, 1/2 cup (100g) of powdered sugar, and perhaps a splash of vanilla. Some versions use whipped heavy cream instead of cream cheese for a lighter texture.
Peanut Butter Filling: A Simple and Delicious Option
The simplicity of a peanut butter tart filling is its greatest strength. You literally just need to beat together softened cream cheese and peanut butter until smooth, then incorporate powdered sugar until no lumps remain. That's it! The rich, nutty flavor of the peanut butter is naturally appealing, and the texture is wonderfully creamy.
Using full-fat cream cheese yields a richer, more stable filling, while using a mix of cream cheese and whipped cream results in a lighter, mousse-like texture. Ensure your peanut butter is well-stirred if using natural varieties, as the oil can separate. For the smoothest texture, use a creamy, processed peanut butter (like Jif or Skippy), but natural peanut butter works too if you don't mind a slightly different consistency. These easy fillings for tarts prove that simple can be spectacular.
Topping Ideas for Peanut Butter Tarts
Peanut butter pairs well with many different toppings. Chocolate is a classic match; think chocolate shavings, mini chocolate chips, a drizzle of melted chocolate ganache, or even chopped peanut butter cups. A sprinkle of flaky sea salt enhances the peanut butter flavor and adds a touch of sophistication.
Crushed peanuts, chopped roasted peanuts, or candied peanuts add welcome crunch. A swirl of whipped cream or a scattering of mini marshmallows can also make fun and tasty additions. Don't be afraid to get creative with your toppings to make your simple tart fillings stand out!
Storing Your Peanut Butter Tart
A finished no-bake peanut butter tart should be stored in the refrigerator. Because it contains dairy (cream cheese, potentially whipped cream), it needs to be kept cold to maintain its texture and safety. Cover the tart loosely with plastic wrap or store it in an airtight container to prevent it from absorbing odors from the refrigerator.
Properly stored, a peanut butter tart will typically last for 3-4 days in the refrigerator. The crust might soften slightly over time, especially if it's a graham cracker or cookie crust. For the best texture, consume it within the first day or two. This is one of those easy tart filling recipes that's so good, it might not last long anyway!
Tips and Tricks for Perfect Tart Fillings
Achieving the Right Consistency for Your Fillings
Consistency is key to a successful tart filling. For cooked fillings like lemon curd or pastry cream, cooking it long enough to thicken is crucial, but avoid overcooking which can lead to curdling. For no-bake fillings like ganache or cream cheese, the ratio of ingredients and sufficient chilling time are the main factors.
- For custard-based fillings (lemon, pastry cream): Cook over medium-low heat, stirring constantly, until it coats the back of a spoon or reaches a gentle boil for a brief moment. Strain for smoothness.
- For ganache: Use the correct chocolate-to-cream ratio for your desired firmness (more chocolate = firmer). Chill until set.
- For cream cheese fillings: Start with softened cream cheese and beat until completely smooth before adding other ingredients. Chill thoroughly.
Preventing Soggy Tart Crusts
A soggy bottom is a common issue, but easily preventable! The most effective method is blind baking your tart shell before adding the filling. This involves partially or fully baking the empty crust. Line the raw crust with parchment paper, fill with pie weights, dried beans, or rice, and bake until the edges are set. Then, remove the weights and paper and continue baking until the bottom is lightly golden and looks dry.
For very wet fillings or no-bake fillings, you can brush the fully blind-baked crust with a thin layer of melted chocolate or egg wash before adding the filling. This creates a barrier that helps seal the crust and prevent moisture from seeping in. Using a crust specifically designed to be blind-baked (like Pâte Sucrée or Pâte Brisée) also helps.
Flavor Combinations to Elevate Your Tart Fillings
Once you're comfortable with these easy tart filling recipes, start experimenting with flavor combinations! Lemon filling is great with a raspberry coulis swirl. Chocolate ganache can be infused with coffee, a hint of chili powder, or orange zest. Pastry cream pairs wonderfully with different extracts like almond or coconut, or can be flavored with cocoa powder for chocolate pastry cream.
Cream cheese fillings can be spiced with cinnamon or nutmeg, or flavored with different extracts like maple or mint. Peanut butter is fantastic with banana slices or a layer of caramel. Don't be afraid to add a pinch of salt to sweet fillings; it enhances the other flavors. Consider adding liqueurs (like Grand Marnier to lemon or raspberry liqueur to berry fillings) for adult versions.
Decorating Your Tarts Like a Pro
Even simple tart fillings can look stunning with a little decoration. For baked fillings like lemon, a sprinkle of powdered sugar through a stencil, a few fresh berries, or piped whipped cream around the edge adds elegance. Chocolate ganache can be left smooth, topped with chocolate curls, or drizzled with contrasting white chocolate.
For pastry cream and fruit tarts, the arrangement of fruit is the primary decoration. A simple glaze adds shine. Cream cheese tarts can be topped with artfully arranged fruit, a sprinkle of nuts, or a drizzle of sauce. For peanut butter tarts, chocolate shavings, chopped nuts, or piped whipped cream are easy options. Remember, even a simple swirl with a spoon can make your easy fillings for tarts look inviting.
Storing and Serving Your Beginner-Friendly Tarts
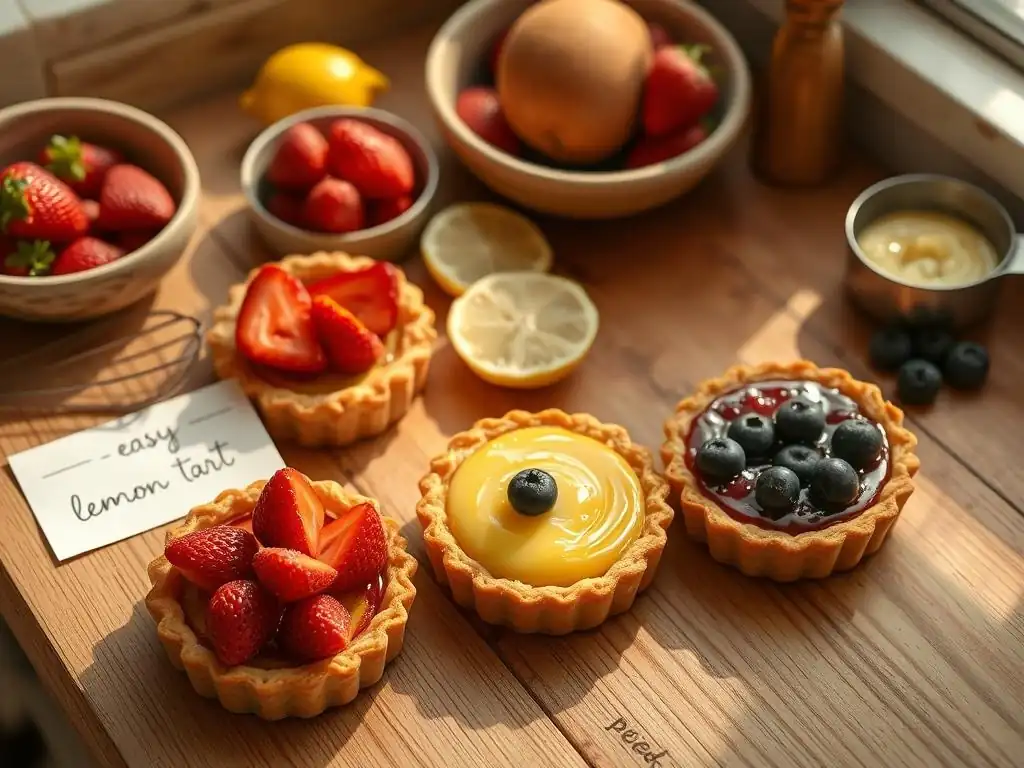
Best Practices for Storing Filled Tarts
Most tarts with these easy tart filling recipes should be stored in the refrigerator, especially those containing dairy, eggs, or fresh fruit. Cover the tart loosely but effectively to prevent it from drying out or absorbing odors. Plastic wrap or aluminum foil works well, or a cake dome or airtight container if you have one that fits.
Store the tart on a flat surface in the refrigerator to keep the filling level. Tarts with baked fillings (like lemon) can sometimes be left at cool room temperature for a short period (a few hours), but refrigeration is always the safest bet, especially in warmer climates. Tarts with pastry cream, cream cheese, or ganache should always be kept chilled.
Serving Suggestions to Impress Your Guests
Serving your homemade tart is the culmination of your baking efforts! For the cleanest slices, ensure the tart is well-chilled, especially those with soft or creamy fillings. Use a sharp knife that has been dipped in hot water and wiped clean between slices.
Serve slices on individual plates. Consider adding a simple garnish like a dollop of whipped cream, a scoop of ice cream (vanilla or a complementary flavor), a sprinkle of zest, or a few fresh berries. A light dusting of powdered sugar can also add a nice touch. Describe your easy tart filling recipes to your guests – they'll be impressed you made it yourself!
Tart Freezing Guide: Extend the Shelf Life of Your Creations
Some tarts, particularly those with stable fillings like baked fruit fillings or some ganaches, can be frozen. For tarts with these easy tart filling recipes:
- Lemon Tart: Generally freezes well. Freeze the whole tart (un-sliced) on a baking sheet until solid, then wrap tightly in plastic wrap and foil. Thaw in the refrigerator.
- Chocolate Ganache Tart: Freezes very well. Wrap tightly once set and frozen. Thaw overnight in the refrigerator.
- Berry Tart with Pastry Cream: Freezing is NOT recommended. Pastry cream can become watery and grainy when thawed, and fresh berries might become mushy.
- Cream Cheese Tart: Freezing is NOT recommended. Cream cheese fillings can change texture and separate upon thawing.
- Peanut Butter Tart: Generally freezes well, especially if cream cheese based. Wrap tightly once set and frozen. Thaw in the refrigerator.
Always freeze the tart before wrapping to protect the filling and crust shape. Thaw frozen tarts slowly in the refrigerator to maintain the best possible texture. Freezing extends the shelf life significantly, often for 1-2 months, but the texture might not be quite as perfect as fresh.
Conclusion: Mastering Easy Tart Filling Recipes
You've Got This: Encouragement for Beginner Bakers
Congratulations on exploring the world of easy tart filling recipes! You've learned about simple yet delicious fillings, how to prepare them, and tips for success. Baking is a journey, and mastering basic tarts is a fantastic step. Don't worry if your first attempt isn't absolutely perfect; every bake is a learning opportunity. The most important thing is to have fun and enjoy the process – and the delicious results!
Remember that these easy fillings for tarts are designed to be approachable. Start with the one that excites you most, follow the steps, and don't be afraid to try again if needed. Baking builds skill and confidence with practice. Soon, you'll be whipping up beautiful tarts with your favorite simple tart fillings without a second thought.
Further Baking Adventures with BakeWithEase: Explore More Recipes
Now that you've got a handle on simple tart fillings, the baking world is your oyster! BakeWithEase.com is packed with more easy recipes and techniques to help you continue your baking journey. Explore our other beginner-friendly recipes for cookies, cakes, and breads.
- Try a simple apple tart next, using sliced apples and cinnamon.
- Experiment with different crust types now that you're more confident with fillings.
- Look for more variations on these easy tart filling recipes, like adding different extracts or spices.
Keep baking, keep learning, and keep sharing your delicious creations! We're here to help you bake with ease every step of the way.
Frequently Asked Questions
What are some easy tart filling recipes suitable for beginners?
Beginner-friendly fillings include simple fruit compotes, like berries cooked with a little sugar and lemon juice. Chocolate ganache is also easy, requiring just chocolate and cream. Lastly, custard-based fillings like vanilla or lemon are relatively straightforward.
Where can I find step-by-step guides for making tart fillings?
BakeWithEase.com provides detailed step-by-step guides for various tart fillings. These guides include clear instructions and photos to help beginners. Look for recipes specifically tagged as "beginner-friendly."
What kind of ingredients do I need for simple tart fillings?
Most easy tart fillings use common ingredients like fruit, sugar, cream, chocolate, eggs, and extracts. BakeWithEase.com prioritizes recipes with easy-to-find ingredients at your local grocery store.
What are some tips for preventing my tart filling from becoming too runny?
Using cornstarch or flour as a thickener can help prevent runny fillings. Also, ensure you cook the filling sufficiently to activate the thickening agent. BakeWithEase.com recipes often include tips for achieving the perfect consistency.
How can I adapt a recipe on BakeWithEase.com to make a tart filling suited to my own preferences?
Feel free to experiment with different flavors and fruits. You can adjust the amount of sugar to control sweetness and add spices like cinnamon or nutmeg. BakeWithEase.com encourages creative baking!
Final Reflection: Unlocking the Joy of Tart-Making
The humble tart, once a culinary challenge, is now within everyone's reach. This article has demonstrated that creating delicious and visually appealing tarts doesn't require years of pastry school or a Michelin-star kitchen. With a few simple, adaptable filling recipes, even the most novice baker can experience the satisfaction of crafting something beautiful and delicious.
The ease of these recipes, I believe, speaks to a larger cultural shift towards accessible and enjoyable home cooking. We're moving away from the intimidating perfectionism often associated with baking, embracing instead the joy of the process and the delicious results. Baking is at its best when it's a form of self-expression, not a competition.
This sentiment perfectly encapsulates the spirit of these simple tart fillings – they are invitations to creativity, not rigid instructions.
Now, I encourage you to take this newfound confidence and experiment! Don't be afraid to tweak the recipes, substitute ingredients, and let your own taste guide you. The beauty of these simple fillings lies in their adaptability. Imagine the possibilities: a summer berry tart bursting with fresh flavors, a comforting autumnal apple tart spiced to perfection, or a decadent chocolate tart rich and intensely satisfying. The journey of tart-making is yours to explore – so roll up your sleeves, gather your ingredients, and discover the joy of creating your own delicious masterpiece.
Unleash Your Inner Pastry Chef: Start Baking Today!
Thanks for joining us on this delicious journey into the world of simple tarts! We hope you've gained some inspiration and confidence to create beautiful and tasty treats. Now it's time to put your newfound knowledge into action.
- Bake your first masterpiece! Choose your favorite filling from the article and get baking. Don't be afraid to experiment with flavors and ingredients – that's where the real fun begins!
- Share your creation: Show us your beautiful tarts on social media! Use #BakeWithEase to connect with our community of bakers.
- Explore more easy recipes: Visit BakeWithEase.com (not a real website) for more beginner-friendly baking guides and recipes to expand your skills.
So, which amazing filling will you try first? Let us know in the comments!