
Easy Pie Crimping Techniques

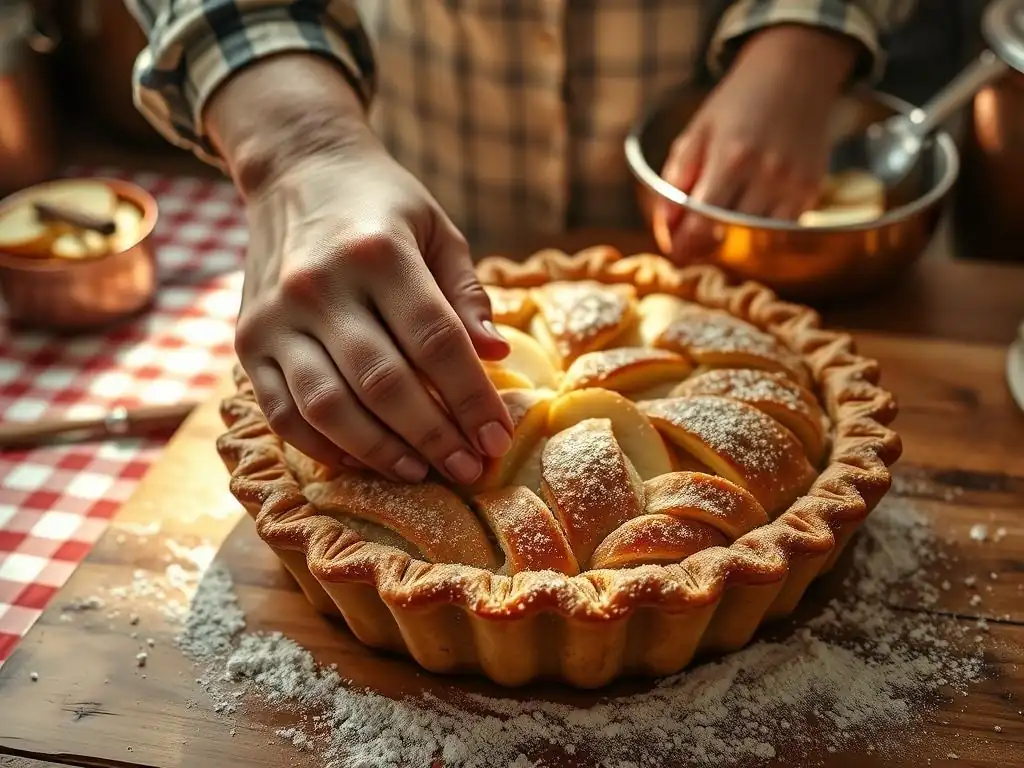
Welcome to BakeWithEase! Are you ready to transform your pies from ordinary to extraordinary? Unlock the secrets to achieving professional-looking edges with our guide to perfecting pie crimping techniques. Discover easy-to-follow methods and expert tips that will elevate your baking game, one beautiful pie crust at a time. Let's get started and create pies that are as stunning as they are delicious!
- Perfecting Pie Crimping Techniques: A BakeWithEase Guide
- Introduction to Easy Pie Crimping for Beginners
- Essential Tools for Achieving Beautiful Pie Crusts
- Step-by-Step Pie Crimping Techniques for Stunning Results
- Creative Pie Crimping Ideas to Elevate Your Baking
- Troubleshooting Common Pie Crimping Problems
- Tips for a Professional-Looking Pie Crimp
- Conclusion: Enjoy the Art of Perfect Pie Crimping with BakeWithEase
-
Frequently Asked Questions
- What are the basic pie crimping techniques for beginners?
- What tools are helpful for achieving more advanced pie crimping designs?
- How can I prevent my pie crust from shrinking during baking, affecting the crimp?
- What are some tips for making a pie crimp that is both beautiful and functional?
- How do I handle pie dough that is too sticky or too dry for crimping?
- Final Reflection: Mastering the Art of the Perfect Pie Crust
- Unleash Your Inner Pie Artist: Master the Crimp!
Perfecting Pie Crimping Techniques: A BakeWithEase Guide
Introduction to Easy Pie Crimping for Beginners
Baking a pie is a rewarding experience, and while the filling often gets the spotlight, the crust is equally important. Not only does a well-made crust contribute significantly to the flavor and texture of your pie, but its edge, or crimp, provides the finishing touch that transforms a simple dessert into a work of art. Mastering easy pie crimping techniques is a skill that adds both beauty and function to your homemade pies, making them look as delicious as they taste.
At BakeWithEase, we believe that even the most intricate-looking baking techniques can be broken down into simple, manageable steps. Perfecting pie crimping techniques doesn't require years of experience; it just takes a little guidance and practice. This guide will walk you through various methods, from the simplest fork crimp perfect for beginners to more decorative options, ensuring you can create stunning and functional pie crust edges every time.
Why Pie Crimping Matters: Aesthetics and Functionality
The crimped edge of a pie crust serves more than just a decorative purpose; it's a crucial element of the pie's structure. Functionally, a properly crimped edge seals the top and bottom crusts together (in a double-crust pie) or seals the single crust to the pie plate rim. This seal is vital for preventing the filling from bubbling over during baking, which can lead to a messy oven and a pie that loses its precious contents. A good crimp ensures your filling stays put, resulting in a cleaner bake and a fuller, more appealing pie.
Beyond its practical role, pie crimping significantly enhances the visual appeal of your baked goods. A beautifully finished edge signals care and attention to detail, elevating a humble pie to something truly special. Imagine a classic apple pie with a perfectly defined fluted edge, or a rustic berry pie with a simple, charming fork crimp.
The edge is the frame for your delicious filling, and taking the time to create an attractive crimp is part of the joy of baking, showcasing your skill and creativity. Perfecting pie crimping techniques allows you to add your personal signature to every pie you bake.
BakeWithEase's Simple Approach to Pie Crust Edges
At BakeWithEase, we understand that tackling new baking techniques can feel intimidating, especially when aiming for that picture-perfect result. Our philosophy is to demystify the process, breaking down complex steps into easy-to-follow instructions suitable for bakers of all levels. When it comes to pie crust edges, we focus on building confidence through simple, achievable techniques that yield beautiful results without unnecessary fuss. We start with the basics, like the fork crimp, and gradually introduce more elaborate designs, ensuring you build a solid foundation before moving on to more advanced methods.
Our simple approach emphasizes understanding the 'why' behind each step, from chilling the dough correctly to applying the right amount of pressure. We provide practical tips and troubleshooting advice to help you navigate common challenges, such as dough tearing or uneven edges. By focusing on foundational skills and offering clear, concise instructions, BakeWithEase empowers you to confidently experiment with various pie crimping techniques, transforming the edge of your pie from an afterthought into a highlight.
Essential Tools for Achieving Beautiful Pie Crusts
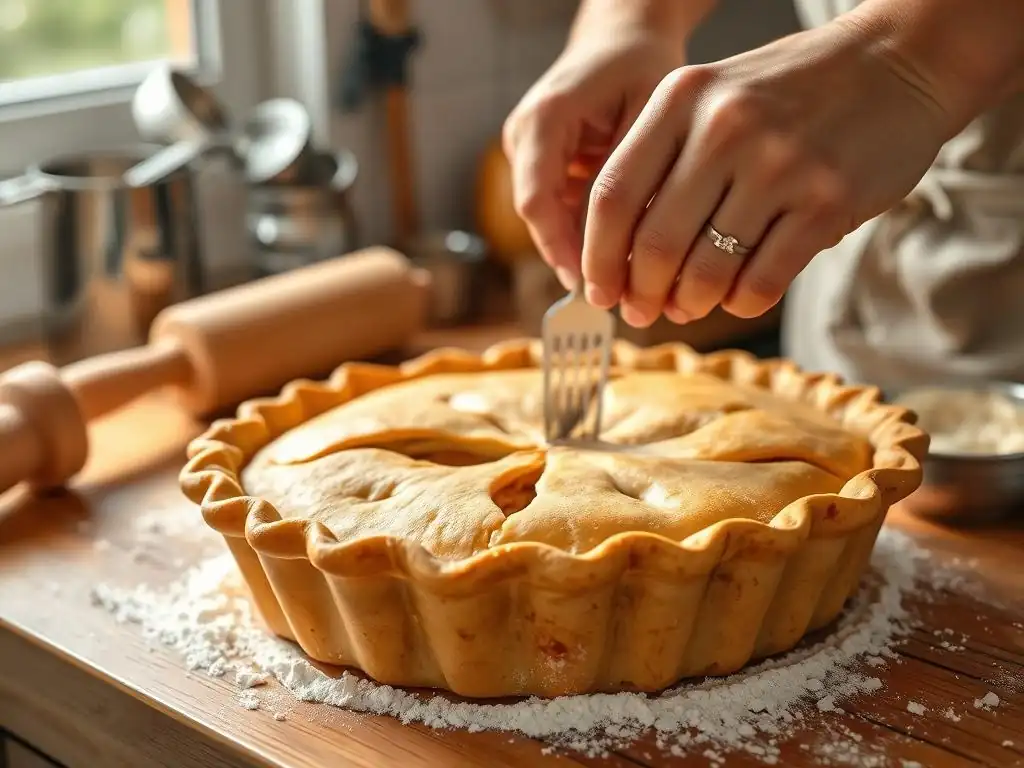
Having the right tools can make a significant difference when you're perfecting pie crimping techniques. While some classic methods require nothing more than your own fingers, others benefit greatly from simple kitchen gadgets that help create uniform and attractive edges. These tools are typically inexpensive and versatile, useful for various baking tasks beyond just pie crusts. Investing in a few key items can elevate your pie-making game considerably and make the process much smoother.
From specialized pastry tools designed specifically for decorative edges to everyday utensils found in any kitchen drawer, understanding how each tool can be used for crimping is essential. We'll explore how simple items like forks and spoons can create traditional looks, while dedicated tools like pastry wheels offer opportunities for more intricate designs. Gathering your crimping toolkit is the first step towards consistently producing professional-looking pie crust edges.
The Right Pastry Wheel for Crimping Designs
A decorative pastry wheel, often called a ravioli cutter or lattice cutter, is an excellent tool for creating unique and consistent edges, especially on double-crust pies or lattice tops. These wheels come in various patterns, such as wavy or zig-zag, and are designed to cut and seal simultaneously. While not used for traditional "crimping" in the sense of pinching, they create a distinctive edge that is both functional for sealing and highly decorative. A common wavy pastry wheel creates a beautiful, uniform scalloped edge along the perimeter of the crust, adding an immediate touch of elegance.
Using a pastry wheel is straightforward: simply roll it along the edge where the top and bottom crusts meet, applying gentle, even pressure. This action trims the excess dough while simultaneously impressing the pattern onto the edge, effectively sealing the two layers.
For a decorative edge on a single crust, you can roll the wheel along the edge of the dough before placing it in the pie plate, then carefully transfer and fit the shaped dough. This tool is fantastic for achieving a consistent, professional-looking finish with minimal effort, perfect for perfecting pie crimping techniques that are neat and tidy.
Using Forks and Spoons for Classic Pie Crust Edges
One of the most accessible and widely used tools for pie crimping is the humble fork. The tines of a fork are perfect for creating a simple, rustic, yet effective crimp. By pressing the tines gently into the edge of the dough all the way around, you create a series of indentations that not only look charming but also help to seal the crust.
This technique is particularly forgiving for beginners and requires no special skills beyond being able to press down evenly. A standard dinner fork with four tines is the most common choice, but forks with different numbers or shapes of tines can produce slightly varied patterns.
Spoons, while less common for traditional crimping, can also be used creatively to shape a pie edge. The back of a spoon can be pressed into the dough to create a smooth, curved indentation, or the edge of the spoon can be used to flute or scallop the rim. For instance, pressing the back of a small spoon into the dough at intervals creates a series of gentle curves. Experimenting with different sizes and shapes of spoons can yield unique and appealing results for your pie crust edges.
Gathering Your Crimping Toolkit: Pastry Blender, Bench Scraper, and Offset Spatula
While not directly used for crimping the edge itself, several other tools are essential for preparing the dough and ensuring it's in the best condition for perfecting pie crimping techniques. A pastry blender, or pastry cutter, is invaluable for cutting cold butter or shortening into the flour when making your pie dough. Properly incorporating the fat is key to developing a flaky crust, which in turn holds its shape better when crimped. The goal is pea-sized pieces of fat distributed throughout the flour.
A bench scraper is another incredibly useful tool. It helps gather dough scraps, divide dough evenly, and transfer delicate dough circles without stretching or tearing them. When working with dough for crimping, being able to cleanly lift and position the edges is important, and a bench scraper assists with this. An offset spatula is useful for gently lifting and maneuvering the pie crust into the plate and ensuring it's seated correctly before you begin crimping. It can also be used to smooth the edge before applying a crimp.
Step-by-Step Pie Crimping Techniques for Stunning Results
Mastering pie crimping techniques involves learning a few basic methods and practicing them until you feel confident. Each technique offers a different look and feel, from the simplicity of a fork crimp to the elegance of a flute. The key to success lies in working with cold, pliable dough and applying consistent pressure. Whether you're making a single-crust pumpkin pie or a double-crust cherry pie, these step-by-step guides will help you create beautiful and functional edges.
We'll walk through the process for several popular techniques, explaining the motions and providing tips for achieving the best possible results. Remember that practice makes perfect; don't be discouraged if your first few attempts aren't flawless. With a little patience and repetition, you'll soon be perfecting pie crimping techniques like a pro, adding that beautiful handmade touch to all your baked goods.
The Basic Fork Crimp: A Beginner-Friendly Technique
The basic fork crimp is perhaps the easiest and most forgiving way to finish a pie crust edge, making it ideal for beginners. It provides a clean, classic look and effectively seals the crust. This technique is perfect for single or double-crust pies and requires only a standard kitchen fork. It's a great starting point for anyone learning how to handle pie dough edges.
To create a fork crimp, first, ensure your dough is properly fitted into the pie plate with any excess trimmed or folded under to create a neat edge resting on the rim. If you're using a double crust, make sure the top and bottom crusts are gently pressed together around the perimeter. Then, take a fork and position it perpendicular to the edge of the dough.
Press the tines firmly but gently into the dough, creating an indentation. Lift the fork and repeat the motion right next to the previous indentation, continuing all the way around the pie's circumference. The goal is a series of overlapping or adjacent indentations forming a decorative edge.
Achieving a Uniform Fork Crimp: Tips and Tricks
Achieving a uniform fork crimp is all about consistency in pressure and spacing. Try to press the fork down with the same amount of force each time to ensure the indentations are equally deep. This prevents some parts of the edge from being too thin or too thick, which can affect how they bake.
Pay attention to the spacing between each press; keeping the distance between indentations consistent will result in a neat, orderly pattern around the entire pie. Some bakers prefer slightly overlapping the previous indentation with the fork tines, while others place them side-by-side. Find the method that gives you the look you prefer and stick with it around the pie.
Keeping your fork clean can also help. If the dough starts sticking to the tines, dip the fork in a little flour or water between presses. Also, ensure your dough is cold. Cold dough holds its shape better when pressure is applied, making it much easier to create sharp, defined indentations. If your kitchen is warm or you've been working with the dough for a while, pop the pie (or just the dough-lined plate) into the refrigerator for 10-15 minutes before crimping. This simple step can make a significant difference in perfecting pie crimping techniques like the fork crimp.
Troubleshooting Fork Crimping Issues: Preventing Dough Tearing and Uneven Marks
One common issue when fork crimping is the dough tearing, especially if it's too warm or overworked. To prevent tearing, make sure your dough is adequately chilled. When pressing with the fork, apply pressure downwards and slightly back towards the center of the pie, rather than pushing outwards, which can stretch and tear the edge. If a small tear occurs, you can often gently pinch it back together with your fingers before continuing.
Uneven marks usually stem from inconsistent pressure or spacing. If your marks are too shallow in some areas, try pressing a little firmer. If they are too deep, apply less pressure. If the spacing is off, you can sometimes gently reshape the edge with your fingers before pressing the next indentation. If a section looks particularly messy, you can often smooth it over with a finger dipped in flour and try again, provided the dough is still cold and pliable. Don't be afraid to gently rework small sections to achieve a more uniform look when perfecting pie crimping techniques.
The Classic Finger Crimp: A Timeless Pie Edge
The classic finger crimp creates a beautiful, elegant, and slightly ruffled edge that is both traditional and visually appealing. It relies solely on your hands, offering a direct connection to the dough. This technique is versatile and can be adapted to create various styles, from tight scallops to gentle waves. Mastering the finger crimp is a fundamental step in perfecting pie crimping techniques by hand.
To perform the classic finger crimp, position the edge of the dough resting on the rim of the pie plate. Place the index finger of one hand on the outside of the dough edge, against the rim of the pie plate. Use the thumb and index finger of your other hand to pinch the dough inward towards the finger on the outside.
This action creates a scallop shape. Lift your pinching fingers and move to the next section of dough, placing your outside index finger where the last scallop ended, and repeat the pinch. Continue this process around the entire circumference of the pie, creating a continuous pattern of scallops.
Mastering the Pinching Technique for Finger Crimping
Mastering the pinching technique for finger crimping is about developing a consistent rhythm and pressure. Use the pads of your fingers, not the tips, for a softer, more natural curve. The amount of dough you gather for each pinch will determine the size of your scallops; pinching a larger amount will create wider scallops, while smaller pinches result in tighter, more numerous ones. Aim for uniform pinch sizes and consistent inward pressure to ensure the scallops are roughly the same size and shape all the way around the pie.
Keeping your fingers lightly floured can help prevent sticking, especially if your dough is slightly warmer. Work relatively quickly but without rushing, as the warmth from your hands can soften the dough. If the dough becomes too soft or sticky, stop and chill the pie for 10-15 minutes before resuming. Perfecting pie crimping techniques like the finger crimp takes practice to find the right balance of speed and pressure.
Variations of the Finger Crimp: Scalloped, Ruffled, and Simple Pinch Styles
The basic finger crimp creates a scalloped edge. By varying the technique slightly, you can achieve different looks. For a tighter, more defined scallop, use smaller pinches and overlap them slightly more. For a softer, more ruffled look, use a gentler touch and perhaps push the dough outward slightly with your outer finger as you pinch inward with the others. This creates a less defined, wavier edge.
A simple pinch style involves just pinching the edge of the dough straight up between your thumb and index finger at regular intervals, creating a series of peaks. This is a very rustic and easy variation. Another style is to use your thumb to press indentations into the raised edge created by folding the dough under, creating a simple, rounded wave pattern. Experimenting with how you position and use your fingers allows for many creative variations on the classic finger crimp, helping you customize your pie crust edges.
The Fluted Edge: An Elegant and Impressive Finish
The fluted edge is a classic and elegant way to finish a pie crust, often seen on professional pies. It creates a series of graceful waves around the perimeter. While it looks sophisticated, the basic fluted edge is quite achievable for home bakers with a little practice. It's a technique that truly enhances the visual appeal of your pie and is a great way to continue perfecting pie crimping techniques beyond the basics.
To create a fluted edge, ensure your dough is fitted into the pie plate with a generous overhang (about 1 inch). Trim excess dough, then fold the overhang under and press it gently against the rim to create a slightly thickened edge resting on the rim. Now, using the thumb and index finger of one hand on the outside of the dough rim, push the dough inward with the index finger of your other hand placed on the inside of the dough rim.
This action creates a 'V' shape or a flute. Lift your fingers and repeat the process right next to the previous flute, continuing this pattern around the entire pie.
Creating a Consistent Fluted Pie Crust: Detailed Instructions
Consistency is key to a beautiful fluted edge. Aim to gather the same amount of dough for each flute and apply consistent pressure with your fingers. The size of the flute is determined by how much dough you push inward with your index finger and the spacing between each flute. For a classic look, aim for flutes that are roughly 1 to 1.5 inches wide. Keep your outside fingers steady as you push inward with your inside finger to maintain a clean, defined shape.
Work systematically around the pie, completing one flute before moving immediately to the next. This helps maintain spacing and ensures you don't miss any spots. If the dough becomes too warm and soft, the flutes will not hold their shape well. Chill the pie as needed throughout the process. A cold, firm dough is essential for creating crisp, defined flutes that will hold their form during baking, a crucial point when perfecting pie crimping techniques like the flute.
Adding Variations to Your Fluted Edge: Tight Flutes, Wide Flutes, and Wave Patterns
Once you've mastered the basic fluted edge, you can experiment with variations. For tighter flutes, simply gather less dough for each flute and make the inward pushes closer together. This creates a more intricate, ruffled look. For wider flutes, gather more dough and space the pushes further apart. This results in a bolder, more pronounced wave pattern.
You can also alter the angle of your inward push or the position of your outside fingers to slightly change the shape of the flute. Some bakers prefer a more rounded flute, while others aim for a sharper point. Experimenting with these subtle differences allows you to develop your own signature fluted edge style. Remember, the goal is a continuous, flowing pattern around the rim, so aim for smooth transitions between each flute as you work your way around.
The Rope Edge: A More Advanced Crimping Technique
The rope edge is a classic, rustic, and visually striking way to finish a pie crust. It creates a twisted, rope-like pattern around the perimeter. While it requires a bit more coordination than the fork or finger crimp, it's a rewarding technique to learn and adds a professional touch. It's considered one of the slightly more advanced methods for perfecting pie crimping techniques.
To create a rope edge, start with a generous dough overhang (about 1 inch) folded under and pressed onto the rim, similar to preparing for a fluted edge. Now, using the thumb and index finger of one hand (say, your dominant hand), pinch a small section of the thickened dough edge. With the index finger of your other hand, push the dough away from you and under the edge of the pinched section.
This creates the beginning of the twist. Release your pinching fingers and move to the next section, positioning your dominant hand's thumb and index finger to pinch the dough where the previous twist ended, and repeat the motion of pushing dough under and away with your other index finger. Continue this twisting and pinching motion all the way around the pie.
Step-by-Step Guide to Achieving a Rope Pie Crust Edge
- Start with a prepared pie shell with the edge dough folded under and pressed onto the rim.
- Position the pie plate so you can work comfortably, perhaps rotating it as you go.
- Using your dominant hand's thumb and index finger, pinch a small section of the thickened dough edge.
- With the index finger of your non-dominant hand, push the dough immediately to the left (or right, depending on your preferred direction) of the pinched section away from you and slightly under the pinched part.
- As you push with the non-dominant finger, slightly roll the pinched section with your dominant hand's fingers to help form the twist.
- Release your dominant hand's pinch and reposition your fingers to pinch the dough right where the previous twist ended.
- Repeat the pushing and rolling motion, continuing the pattern around the entire circumference of the pie.
- Aim for consistent pinch sizes and push angles to create uniform twists that resemble a rope.
Tips for a Perfect Rope Edge: Avoid Overworking Dough and Keep Edges Chill
Achieving a perfect rope edge requires dough that is pliable but firm. Overworked dough becomes elastic and difficult to shape into the distinct twists. Ensure your dough is mixed just until combined and handled minimally before crimping. The dough temperature is also critical; if the dough is too warm, it will be sticky and lose its shape easily. Work quickly and efficiently, and don't hesitate to place the pie back in the refrigerator for 10-15 minutes if the dough starts to soften.
The size of the rope edge is determined by the amount of dough you use for the edge and the size of your pinches/twists. A thicker folded-under edge allows for a more substantial rope. Practice the motion on a strip of dough first to get a feel for the push-and-twist action before attempting it on the actual pie. Consistency in the angle and pressure of your push is key to making the twists look like a continuous rope, essential for perfecting pie crimping techniques like this.
Creative Pie Crimping Ideas to Elevate Your Baking
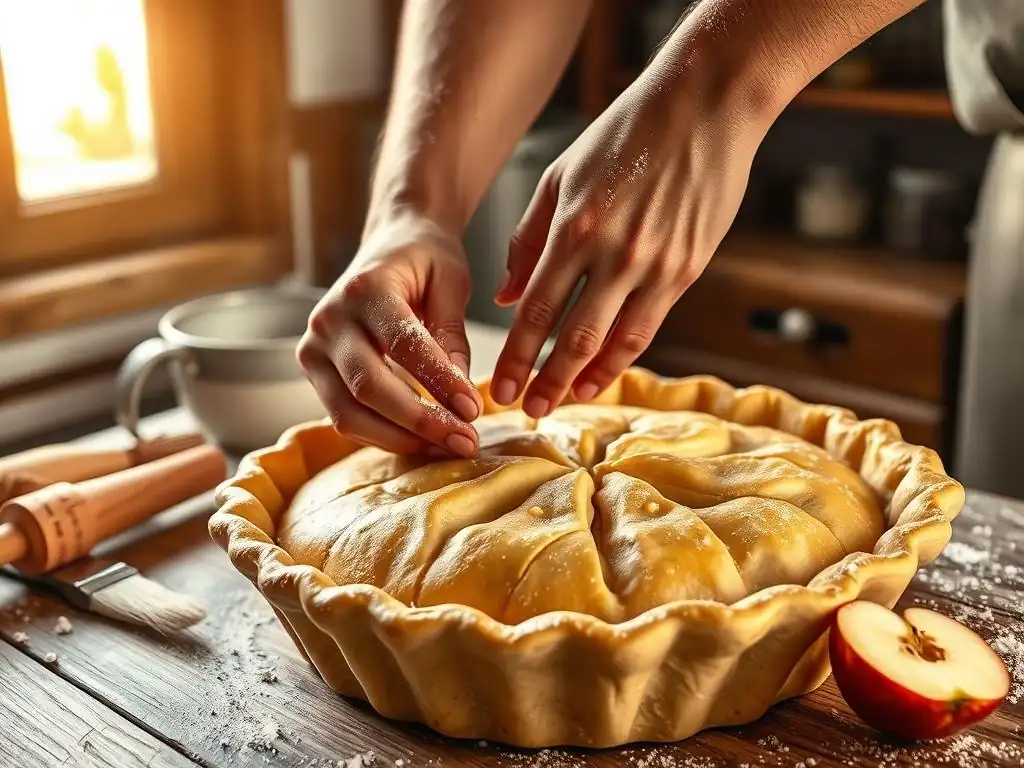
Once you've mastered the basic crimping techniques, you can start exploring more creative ways to decorate your pie crust edges. These ideas go beyond simple sealing and add unique visual elements that can match the theme of your pie or simply showcase your personality. Creative edges are a fantastic way to make your homemade pies stand out, turning them into true conversation starters.
These techniques often involve using tools or adding extra elements to the basic dough edge. They are perfect for special occasions or when you simply want to add an extra touch of flair to your baking. Experimenting with these ideas is part of the fun of perfecting pie crimping techniques and expressing your creativity in the kitchen.
Cookie cutters aren't just for cookies; they can be used to create beautiful decorative elements for your pie crust, especially on double-crust or lattice-top pies. You can use small cookie cutters (like mini stars, hearts, or leaves) to cut shapes from the top crust before placing it on the pie, allowing steam to escape and adding a decorative vent. Alternatively, you can cut shapes from leftover dough scraps and adhere them to the top of the pie or around the crimped edge using a little water or egg wash.
Another way to use cookie cutters is to cut out shapes and place them on the bottom crust before adding the filling, letting them peek through a lattice top. For a single crust, you can cut shapes from the overhang before fitting the dough into the plate, creating a patterned edge. The possibilities are vast and limited only by your collection of cookie cutters and your imagination. Using cutters is a simple yet effective way to add charm and detail when perfecting pie crimping techniques with decorative flair.
Adding Braided Elements to Your Pie Edges
A braided edge is a beautiful and impressive way to finish a pie, adding texture and sophistication. This technique involves braiding strips of pie dough and then attaching the braid around the perimeter of the pie. It requires a bit more dough than a standard crimp, as you'll need extra dough to cut into strips for braiding.
To create a braided edge, roll out some leftover pie dough relatively thinly. Use a pastry wheel or knife to cut strips about 1/2 inch wide. Take three strips and pinch one end together, then braid them just like you would braid hair.
Once you have a braid long enough to go around the pie (you might need multiple braids), gently brush the pie's existing edge with a little water or egg wash and carefully lay the braid on top, pressing gently to adhere it. Trim any excess braid and pinch the ends together neatly. This technique adds a lovely, rustic-yet-refined look, showcasing your skills in perfecting pie crimping techniques.
Stamped Pie Crusts: A Unique and Personalized Touch
Stamping is a creative way to add patterns or messages directly onto your pie crust, offering a highly personalized finish. While not technically a crimping technique for the edge, it's a method for decorating the crust that complements the edge treatment. You can use food-safe stamps (like those used for cookies or fondant) or even textured items from your kitchen, such as the bottom of a glass or a clean, textured rolling pin.
For a stamped edge, you might create a wider, flatter edge by folding the dough under generously and pressing it down onto the rim. Then, gently press a stamp into this thickened edge at intervals around the pie. For the top crust, you can lightly press stamps into the dough before placing it on the pie or after it's on the pie but before baking.
Ensure the dough is cold for crisp impressions. This technique allows you to add intricate patterns or even letters to your pie, making it truly unique and adding another dimension to perfecting pie crimping techniques.
Troubleshooting Common Pie Crimping Problems
Even with careful preparation, you might encounter a few challenges when perfecting pie crimping techniques. Dough can tear, edges can look uneven, or the beautiful crimp you created might over-brown in the oven. Don't worry; these are common issues, and most can be prevented or fixed with a few simple adjustments. Understanding the root cause of the problem is the first step to solving it and ensuring your next pie turns out perfectly.
We'll look at some of the most frequent issues bakers face when working with pie crust edges and provide practical solutions. Addressing these problems will help you achieve more consistent and aesthetically pleasing results, building your confidence with every pie you bake. Troubleshooting is a natural part of the baking process, and learning how to fix problems is just as important as learning the techniques themselves.
Preventing Dough from Tearing During Crimping
Dough tearing is often a sign that the dough is either too warm, too dry, or has been overworked, making it less pliable and more prone to breaking when manipulated. To prevent tearing, always start with well-chilled dough. Cold fat particles in the dough help maintain its structure. If the dough feels stiff or cracks easily when you start crimping, it might be too dry; you can try gently moistening your fingers with a tiny bit of water or milk, but avoid adding too much liquid directly to the dough.
When crimping, apply gentle, steady pressure rather than forcing the dough. If you're doing a finger crimp or flute, guide the dough rather than pushing or pulling it aggressively. For techniques like the fork crimp, ensure the fork tines are clean and the dough is cold so the fork doesn't stick and pull the dough. If a small tear occurs, gently pinch the edges back together with lightly floured fingers. For larger tears, you might need to patch the area with a small piece of leftover dough, blending the edges carefully.
Fixing Uneven or Misshapen Pie Crust Edges
Uneven or misshapen edges usually result from inconsistent technique – applying varying pressure, using different amounts of dough for each section, or inconsistent spacing between crimps. The best way to fix this is to be mindful of consistency as you work your way around the pie. Try to make each crimp look similar to the one before it.
If you notice unevenness as you're crimping, you can often gently reshape the dough with your fingers before it warms up too much. For instance, if a flute is too small, you might be able to gently push a little more dough into it. If a fork crimp is too shallow, press the fork again.
If an area is significantly misshapen, you might need to gently smooth it over (perhaps with a floured finger or the back of a spoon) and try the crimping technique again on that section, provided the dough is still cold enough. Don't be afraid to gently correct mistakes as you go when perfecting pie crimping techniques.
Avoiding Over-Browning of the Pie Crust Crimp
The delicate edges of a pie crust, especially elaborate crimps, can sometimes brown too quickly in the oven before the rest of the pie is done. This is because they are thinner and more exposed. To prevent this, you can shield the edges with a pie crust protector or strips of aluminum foil. You can buy reusable silicone pie shields, which are very effective and easy to use.
Alternatively, you can create your own shield by tearing off a piece of aluminum foil large enough to cover the pie. Fold it into a circle or square, then cut out the center, leaving a ring that will cover just the edge of the pie crust. Place this foil ring over the pie edge about halfway through the baking time, or earlier if you notice the edges are browning rapidly.
This shields the crimp from direct heat, allowing the rest of the pie to finish baking without the edges burning. Using a shield is a simple trick for ensuring your beautifully crimped edges bake to a perfect golden brown when perfecting pie crimping techniques.
Tips for a Professional-Looking Pie Crimp
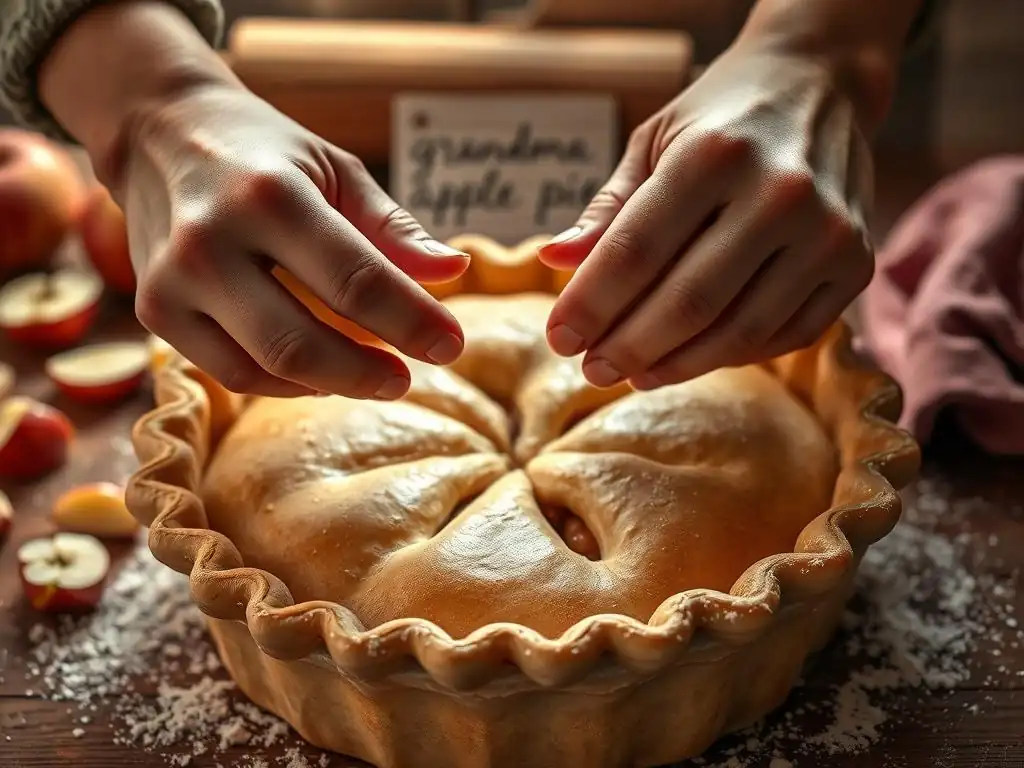
Achieving a professional-looking pie crimp involves more than just mastering the techniques; it also requires attention to detail and understanding how different factors affect the final outcome. From the temperature of your dough to the finish you apply before baking, these tips will help you elevate your pie crust edges from homemade to bakery-worthy. Incorporating these practices will significantly improve your results when perfecting pie crimping techniques.
These final touches and preparatory steps are often what separate a good-looking pie from a truly stunning one. They ensure the crimp holds its shape, bakes evenly, and achieves that desirable golden-brown color. Paying attention to these details will make a noticeable difference in the presentation of your pies.
Chilling Your Dough for Optimal Crimping
This cannot be stressed enough: chilling your pie dough is absolutely critical for successful crimping. Cold dough is firm and holds its shape beautifully when manipulated, allowing you to create crisp, defined edges. Warm dough, on the other hand, is soft, sticky, and prone to stretching and tearing, making it difficult to achieve clean crimps.
After fitting the dough into the pie plate and before you begin crimping, place the pie (or just the dough-lined plate) in the refrigerator for at least 15-30 minutes. For more intricate crimps like the rope or tight flutes, you might even benefit from chilling the dough for 30-60 minutes. If the dough becomes soft while you are crimping, stop and return the pie to the fridge for another 10-15 minutes. Working with cold dough is the single most important factor in perfecting pie crimping techniques that look professional.
Using Egg Wash for a Golden-Brown Finish
Applying an egg wash to your pie crust before baking adds a beautiful sheen and promotes even, golden-brown coloring. While not directly part of the crimping process itself, it significantly impacts the final appearance of your crimped edge. A standard egg wash is made by whisking one large egg with one tablespoon of water or milk.
Gently brush the egg wash over the entire crimped edge using a pastry brush. Be careful not to let the wash pool in the indentations, as this can result in uneven browning. For a richer color and shine, you can sprinkle the washed edge with coarse sugar (like turbinado or sanding sugar). The egg wash not only enhances the color but also gives the crimp a slightly crisp texture. Applying egg wash is a simple step that dramatically improves the visual appeal when perfecting pie crimping techniques.
Practicing Your Crimping Technique for Consistent Results
Like any skill, perfecting pie crimping techniques takes practice. Don't expect your first attempt at a fluted or rope edge to look perfect. The more you practice, the more comfortable you will become with handling the dough and applying the right amount of pressure. Consider practicing a new technique on a strip of leftover dough before attempting it on your actual pie.
Even if you primarily use one technique, practicing it regularly will help you achieve more consistent and uniform results. The muscle memory you develop will make the process faster and easier over time. Baking pies frequently is the best way to hone your crimping skills. Each pie is an opportunity to improve and refine your technique, getting closer to that professional-looking finish every time.
Conclusion: Enjoy the Art of Perfect Pie Crimping with BakeWithEase
Perfecting pie crimping techniques is a rewarding skill that adds both beauty and functionality to your homemade pies. From preventing filling spills to creating stunning visual appeal, the finished edge of your pie is a hallmark of care and craftsmanship. We've explored several accessible techniques, from the simple fork crimp to the elegant flute and the intricate rope, demonstrating that beautiful results are within reach for bakers of all levels.
Remember the key takeaways: start with cold dough, choose the right tools (even if it's just a fork! ), apply consistent pressure, and don't be afraid to practice and experiment. Troubleshooting common issues like tearing or unevenness is part of the process, and with a little patience, you can easily correct them. By paying attention to details like chilling and applying an egg wash, you can achieve truly professional-looking results.
Recap of Essential Techniques for Beautiful Pie Crusts
We've covered the fundamental pie crimping techniques that form the foundation for creating beautiful pie crusts. The basic fork crimp offers simplicity and a rustic charm, perfect for beginners and classic pies. The finger crimp provides a versatile way to create elegant scallops or ruffles using just your hands. The fluted edge adds a touch of sophistication with its graceful waves, requiring consistent finger pressure. Finally, the rope edge introduces a more advanced, textured look, achieved through a careful twisting and pinching motion.
Beyond these core techniques, we touched upon creative ideas like using cookie cutters for decorative vents or shapes, adding braided elements for extra texture, and stamping patterns onto the crust for a personalized touch. Each technique, when executed with care and cold dough, contributes significantly to the overall appeal of your pie. Mastering these methods is key to perfecting pie crimping techniques and making your pies shine.
Further Baking Resources on BakeWithEase.com: How to Blind Bake a Pie Crust, Guide to Flaky Pie Dough, and Creative Pie Decoration Ideas
Enhancing your pie-making skills doesn't stop at perfecting the crimp. BakeWithEase.com offers a wealth of resources to help you master every aspect of pie baking. If you're making a single-crust pie that requires pre-baking, our guide on How to Blind Bake a Pie Crust provides step-by-step instructions to ensure a perfectly baked shell.
For those seeking to improve the very foundation of their pies, our comprehensive Guide to Flaky Pie Dough covers the science and technique behind creating that desirable light and airy texture. And if you're feeling inspired to go beyond the edge, explore our Creative Pie Decoration Ideas for ways to adorn your top crusts and fillings. With these resources, you'll be well-equipped to bake delicious and stunning pies from start to finish.
Frequently Asked Questions
What are the basic pie crimping techniques for beginners?
Beginners can start with the fork crimp, pressing the tines of a fork around the pie edge. Alternatively, a simple finger pinch creates an easy and rustic crimp. These techniques are easy to learn.
What tools are helpful for achieving more advanced pie crimping designs?
While not essential, tools like pie crimpers or decorative pastry wheels can create intricate designs. Using cookie cutters around the edge is another creative option. However, practice is often more effective than tools.
How can I prevent my pie crust from shrinking during baking, affecting the crimp?
Chilling the dough thoroughly before baking is crucial to prevent shrinkage. Blind baking the crust with weights also helps it maintain its shape. Using good quality butter will also help.
What are some tips for making a pie crimp that is both beautiful and functional?
Ensure the crimp is securely sealed to prevent filling leakage. Practice consistency in your crimping technique for a uniform and visually appealing edge. Consider adding an egg wash for a shiny finish.
How do I handle pie dough that is too sticky or too dry for crimping?
If the dough is sticky, chill it further to firm it up. If it's too dry, lightly moisten it with water and knead gently to improve its pliability. Always work with cold ingredients for best results.
Final Reflection: Mastering the Art of the Perfect Pie Crust
The seemingly simple act of crimping a pie crust is far more than just a finishing touch; it's a testament to the baker's dedication and a key element in creating a truly memorable pie. A perfectly crimped edge not only enhances the visual appeal of your creation but also contributes to a superior baking experience, ensuring a beautifully browned crust and a delicious, sealed filling. This article has explored various techniques, from the classic fluted edge to more intricate designs, demonstrating that even the smallest details can elevate a dish from good to extraordinary.
The enduring appeal of pie lies not only in its deliciousness but also in the comforting ritual of its creation. The process of making a pie, from selecting the perfect ingredients to the careful crimping of the crust, is a meditative act, a connection to culinary traditions passed down through generations. The best things in life are homemade.
This sentiment rings especially true when considering the satisfaction derived from mastering a skill like pie crimping, a small act that speaks volumes about attention to detail and a love for the craft.
Now, it's your turn. Don't be afraid to experiment with the techniques outlined in this article. Try your hand at different crimping styles, find the one that resonates with you, and let your creativity flow. Each perfectly crimped pie is a small victory, a testament to your skill and a delicious reward for your efforts. Embrace the process, enjoy the journey, and most importantly, savor the delicious results. The perfect pie crust awaits!
Unleash Your Inner Pie Artist: Master the Crimp!
Thanks for taking the time to explore the world of pie crimping with us! We hope you’ve gained some delicious inspiration and newfound confidence in your baking skills. Now it’s time to put your knowledge into practice!
- Master your favorite crimp: Practice your newly learned techniques on your next pie—whether it's a classic apple or a daring savory creation. Share a picture of your masterpiece on social media using #BakeWithEaseCrimps!
- Experiment with different edges: Try a unique edge design or explore variations on the crimps we discussed. Don't be afraid to get creative!
- Share your pie-making journey: Tell us about your favorite crimp in the comments below! What worked best, and what challenges did you overcome?
Ready to transform your pies from good to GREAT? Let's see those amazing crimps!