
Mastering Basics: Essential Measuring and Mixing Tools for New Bakers

Welcome to BakeWithEase!
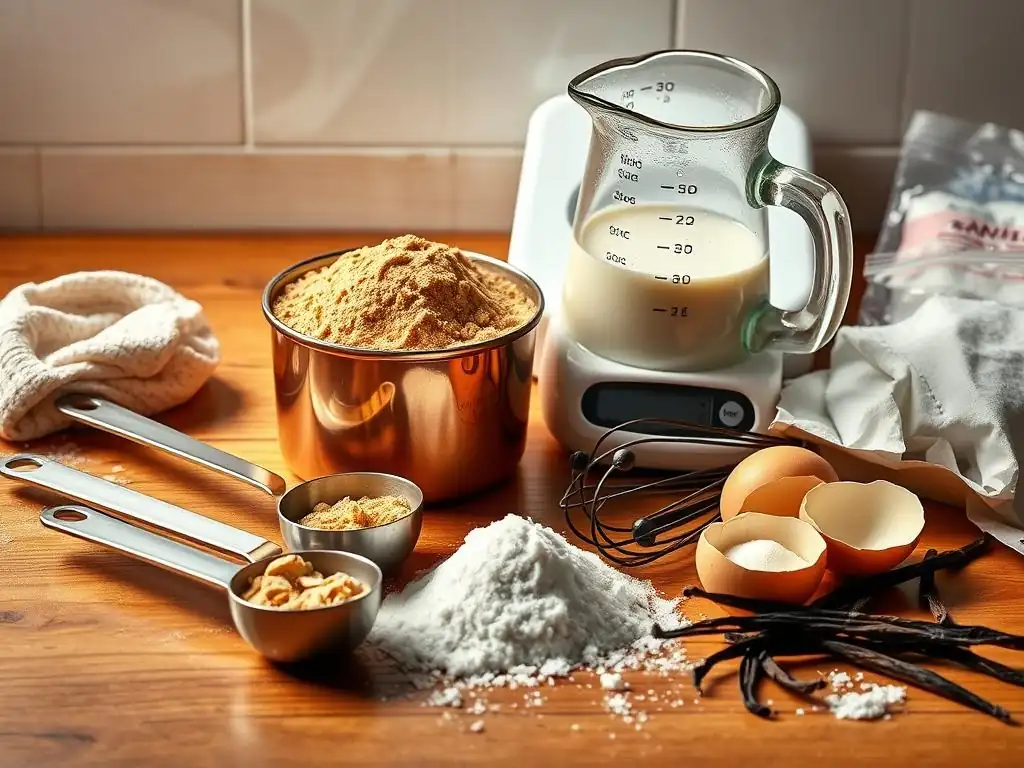
Are you ready to unlock the secrets to consistently perfect baked goods? Precise measuring is the cornerstone of successful baking, and knowing your tools is half the battle. Dive into our guide on Measuring Tools for Beginner Bakers and discover which essential implements will set you up for sweet success. Intrigued? Let's get baking!
- Welcome to BakeWithEase: Your Baking Journey Begins
- Why Accurate Measuring is Crucial for Baking Success
- Essential Measuring Tools for Beginner Bakers: A Comprehensive Guide
- Essential Mixing Tools for New Bakers: Creating the Perfect Batter
- Beyond the Basics: Additional Helpful Tools for Beginner Bakers
- Maintaining Your Baking Tools: Cleaning and Storage Tips
- Getting Started: A Simple Recipe to Practice Your Measuring and Mixing Skills
- Conclusion: Building Your Baking Toolkit with Confidence
- Frequently Asked Questions
- Final Reflection: The Sweet Science of Precision in Baking
- Unlock Your Baking Potential: Level Up Your Kitchen!
Welcome to BakeWithEase: Your Baking Journey Begins
Embarking on your baking adventure is exciting, and here at BakeWithEase, we're thrilled to guide you every step of the way. Whether you dream of perfectly puffed pastries, crusty loaves of bread, or simply crave warm, homemade cookies, starting with the right foundation is key. This means understanding the crucial role of accurate measuring and effective mixing in transforming simple ingredients into delicious creations.
Baking is often described as a science, and like any science, precision matters. Unlike cooking, where you can often adjust ingredients on the fly, baking relies on specific ratios and reactions. Getting these right from the start prevents common pitfalls like sunken cakes, dense cookies, or bread that refuses to rise. That's why having the right measuring tools for beginner bakers is non-negotiable.
Why Accurate Measuring is Crucial for Baking Success
The Science Behind Baking: Precision Matters
Baking is fundamentally a series of chemical reactions. Flour provides structure, sugar adds sweetness and tenderness, leavening agents like baking soda and baking powder create lift, and fats tenderize and add flavor. The interaction between these ingredients, often activated by liquid and heat, is precise. For example, the ratio of flour to liquid dictates the consistency of a batter or dough, which in turn affects the final texture of your baked good. Too much flour can result in a dry, tough cake, while too little might lead to a soggy mess.
Consider the role of leavening agents. Baking soda requires an acid (like buttermilk or brown sugar) to react and produce carbon dioxide gas, while baking powder contains both the acid and base and reacts when wet and again when heated. Using the wrong amount of either can lead to a lack of rise, resulting in a flat, heavy product. Even small deviations from a recipe's specifications can significantly alter the outcome, making accurate measurement the bedrock upon which successful baking is built. Mastering your baking measurement tools is the first step to consistent results.
How Inaccurate Measurements Affect Your Baked Goods
The impact of inaccurate measurements is immediate and often disappointing. If you scoop too much flour using a dry measuring cup, your dough or batter will be too stiff, potentially leading to dry cookies or a dense cake with cracks. Conversely, under-measuring flour can result in a spread-out cookie or a cake that collapses in the center because it lacks sufficient structural support. Sugar measurement also plays a dual role: it adds sweetness and tenderness. Too little sugar makes baked goods tough and less flavorful, while too much can cause excessive spreading or a gummy texture.
Liquid ingredients, like milk or water, affect hydration. Too much liquid results in a slack dough that's hard to handle or a batter that's too thin, leading to poor structure. Too little liquid means ingredients might not fully hydrate, resulting in a dry or crumbly texture.
Even small quantities of potent ingredients like salt or baking powder, typically measured with measuring spoons, can dramatically alter taste and texture if measured incorrectly. Just a quarter teaspoon difference in baking powder can noticeably affect the rise of a small batch of muffins. Getting your measuring tools for beginner bakers sorted is essential to avoid these common pitfalls.
Setting Yourself Up for Success: Essential Tools for Precise Baking
To consistently achieve delicious results, equipping your kitchen with reliable measuring tools is paramount. These aren't necessarily expensive or fancy gadgets; rather, they are fundamental implements designed for accuracy. Think of them as your essential toolkit for translating a recipe from paper into a tangible treat. Having the right set of baking measurement tools simplifies the process and builds confidence.
Beyond just having the tools, understanding how to use them correctly is equally important. Each type of measuring tool has a specific technique associated with it, particularly for dry ingredients like flour versus liquids like water. This section will walk you through the must-have measuring tools for beginner bakers and explain the proper methods for using each one, ensuring you start your baking journey on the right foot with precision and ease.
Essential Measuring Tools for Beginner Bakers: A Comprehensive Guide
Dry Measuring Cups: The Foundation of Accurate Baking
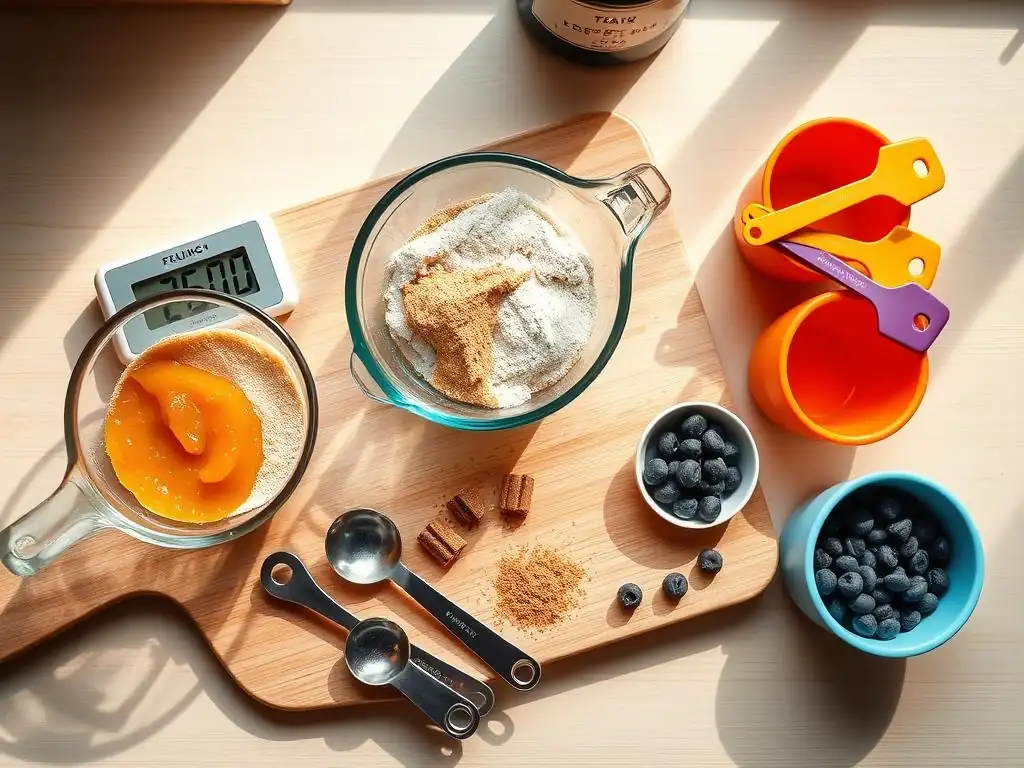
Dry measuring cups are specifically designed to measure ingredients that can be leveled off, such as flour, sugar, oats, and cocoa powder. They typically come in a set with common sizes like 1/4 cup, 1/3 cup, 1/2 cup, and 1 cup. Unlike liquid measuring cups, which have a spout and headspace, dry measuring cups are meant to be filled right to the brim and scraped level. Their design ensures that you get a consistent volume of ingredients like flour or granulated sugar, which are prone to compaction.
A standard set of dry measuring cups is one of the most important measuring tools for beginner bakers. You'll use these frequently in almost every recipe, from cookies and cakes to breads and muffins. While individual cups can be purchased, a nested set is convenient for storage and ensures you have all the common sizes readily available. Look for sets made from durable materials like stainless steel or sturdy plastic, with clearly marked measurements that won't fade over time.
Understanding Dry Measuring Cup Sets: Sizes and Uses
Dry measuring cup sets typically include the most common volumes needed in baking recipes. The standard sizes are 1/4 cup (about 60 ml), 1/3 cup (about 80 ml), 1/2 cup (about 120 ml), and 1 cup (about 240 ml). Some sets may also include a 2/3 cup or 3/4 cup measure. These graduated sizes allow you to measure specific volumes required by a recipe, such as "1 cup flour" or "1/2 cup granulated sugar."
Using the correct cup size for the amount needed is crucial. For example, if a recipe calls for 3/4 cup of sugar, it's more accurate to use a 3/4 cup measure (if you have one) or combine a 1/2 cup and a 1/4 cup measure, rather than trying to estimate or fill a larger cup partially. Understanding the standard sizes is fundamental when using these essential measuring tools for beginner bakers.
How to Properly Measure Dry Ingredients: Flour, Sugar, and More
The technique for measuring dry ingredients like flour is often misunderstood, leading to significant inaccuracies. The most common method recommended by baking experts is the "spoon and level" method. First, gently aerate your flour by stirring it with a spoon.
Then, lightly spoon the flour into the dry measuring cup, overfilling it slightly. Do not pack the flour down or scoop directly from the bag, as this can result in up to 25% more flour than needed for a cup (a packed cup of flour can weigh around 150-160 grams, while a properly spooned and leveled cup is closer to 120-130 grams).
For granulated sugar, you can usually scoop directly from the container, as it doesn't compact as easily as flour. However, for brown sugar, it's important to pack it firmly into the cup so that it holds its shape when inverted. Powders like cocoa or confectioners' sugar should also be spooned and leveled, similar to flour, to avoid over-measuring due to compaction. Mastering these techniques with your measuring tools for beginner bakers ensures consistent results.
Tips for Leveling Dry Ingredients for Consistent Results
Once you've spooned (or scooped) the dry ingredient into the measuring cup, the next crucial step is leveling it off. Use a straight edge, such as the back of a knife or a flat spatula, to scrape away the excess ingredient from the top of the cup. Hold the scraper flat against the rim of the cup and sweep it across. This ensures the ingredient is flush with the top of the cup, providing an accurate volume measurement.
Perform this leveling step over the ingredient container or a bowl to catch any excess. Avoid tapping or shaking the cup before leveling, as this can cause the ingredient to settle and compact, leading to an inaccurate measurement. Consistent leveling is key to repeatable results when using your dry measuring cups, making them reliable measuring tools for beginner bakers.
Liquid Measuring Cups: Mastering Volume
Liquid measuring cups are distinct from dry measuring cups. They are typically made of clear glass or plastic, have a spout for easy pouring, and feature measurement markings along the side. Crucially, they also have headspace above the highest measurement line to prevent spills when filled. They are designed to measure ingredients like water, milk, oil, syrups, and extracts by volume.
These cups are essential for accurately adding wet ingredients to your mixtures. Their clear sides and visible markings allow you to check the liquid level at eye level, which is the correct way to measure liquids. A standard liquid measuring cup usually holds 1 cup (240 ml), 2 cups (480 ml), or 4 cups (960 ml), with smaller increments marked on the side. Having at least one 2-cup liquid measuring cup is highly recommended for any beginner baker.
Choosing the Right Liquid Measuring Cup: Features to Look For
When selecting a liquid measuring cup, consider the material and markings. Glass cups are durable, won't stain or retain odors, and are often microwave-safe, which can be useful for warming liquids like milk. Plastic cups are lightweight and less prone to breaking but can sometimes stain or scratch over time. Look for cups with clear, easy-to-read markings that include both standard (cups, ounces) and metric (milliliters) units, as recipes may use either system.
The spout design is also important for spill-free pouring. Some cups have angled spouts that make it easier to direct the flow of liquid. For measuring larger volumes, a 4-cup cup with a sturdy handle is practical. Having a smaller 1-cup or 2-cup size is also useful for measuring smaller amounts precisely. These are fundamental measuring tools for beginner bakers.
Accurate Liquid Measurement Techniques: Water, Milk, and Oil
Measuring liquids accurately requires a different technique than dry ingredients. Place the liquid measuring cup on a flat, level surface. Pour the liquid into the cup until it appears to reach the desired measurement line. Then, bend down so your eyes are level with the measurement marking on the cup. The bottom of the meniscus (the slight curve of the liquid surface) should align with the desired line.
Pouring liquid while holding the cup in your hand is a common mistake that can lead to inaccurate measurements because the cup may not be perfectly level. This eye-level technique ensures you are measuring the true volume. This method applies to all liquids, from water and milk to oil and honey. Using this correct technique with your liquid measuring cups is vital for consistent baking results.
Avoiding Common Mistakes When Measuring Liquids
One of the most frequent errors when using liquid measuring cups is not checking the measurement at eye level. Looking down into the cup from above can make it seem like you have more liquid than you actually do. Another mistake is using a dry measuring cup for liquids; its design makes it difficult to pour accurately and check the level.
Ensure the cup is clean and dry before measuring, especially if switching between different types of liquids (like oil and water). For thick liquids like honey or syrup, you can lightly coat the cup with cooking spray or oil first to help the ingredient slide out easily, ensuring none is left behind and your measurement is accurate. These tips help maximize the effectiveness of your liquid measuring tools for beginner bakers.
Measuring Spoons: Precision in Small Quantities
Measuring spoons are indispensable for accurately measuring smaller amounts of ingredients, typically less than 1/4 cup. They are used for potent components like baking powder, baking soda, salt, spices, extracts, and vanilla. Even a slight inaccuracy with these powerful flavorings and leavening agents can significantly impact the final taste and texture of your baked goods.
A standard set of measuring spoons usually includes 1/4 teaspoon, 1/2 teaspoon, 1 teaspoon, and 1 tablespoon. Some sets may also include a 1/8 teaspoon or 1/2 tablespoon. They are typically sold on a ring or nested together for convenience. Like measuring cups, look for durable materials like stainless steel or sturdy plastic with clear, permanent markings. These small but mighty tools are essential measuring tools for beginner bakers.
Common Measuring Spoon Sizes: Teaspoons and Tablespoons
The most frequently used measuring spoon sizes are the teaspoon (tsp) and tablespoon (Tbsp). There are 3 teaspoons in 1 tablespoon. Standard sets provide the fractions of a teaspoon (1/4 tsp, 1/2 tsp) and the full teaspoon and tablespoon measures. These sizes cover the vast majority of small-quantity measurements needed in baking recipes.
Having a complete set ensures you don't have to guess or estimate measurements like "1/2 teaspoon baking soda" or "1 tablespoon vanilla extract." Using the correct spoon size prevents over-flavoring, under-leavening, or adding too much salt, which can ruin a recipe. Familiarity with these standard sizes is key when building your collection of measuring tools for beginner bakers.
Measuring Extracts and Spices: Accuracy is Key
Measuring extracts like vanilla, almond, or peppermint is straightforward with measuring spoons. Simply pour the extract into the correct spoon size, filling it to the brim. Do this over the bowl or container the extract came from in case of spills. For spices, which can be potent, accuracy is equally important. Ground spices should be spooned into the measure and leveled off, similar to dry ingredients in cups, to avoid over-measuring due to settling.
Whole spices, like whole peppercorns or cloves, are sometimes measured by volume, though often they are weighed or specified by count. If measuring by volume with a spoon, simply fill the spoon without packing. For sticky extracts like honey or maple syrup in small quantities, you can use a measuring spoon, but be prepared for it to be messy. Ensure the spoon is full but not overflowing.
Leveling Powders and Granular Ingredients with Spoons
For dry, powdery, or granular ingredients measured with spoons (like baking powder, baking soda, salt, or ground spices), the leveling technique is similar to using dry measuring cups. Gently spoon the ingredient into the measuring spoon until it's slightly overfilled. Then, use a straight edge (like the back of a knife or a small spatula) to scrape across the top of the spoon, making the ingredient flush with the rim.
This ensures you get the precise volume needed. Just like with dry cups, avoid tapping or shaking the spoon, as this can compact the ingredient and lead to an over-measurement. Leveling is a simple step that dramatically improves the accuracy of your small-quantity measurements, making your measuring spoons reliable baking measurement tools.
Kitchen Scales: The Gold Standard for Baking Accuracy
For unparalleled accuracy in baking, especially for consistent and professional-level results, a kitchen scale is the preferred tool. Weighing ingredients in grams or ounces is significantly more precise than measuring by volume. This is because the weight of a given volume of an ingredient can vary depending on factors like how it was stored, humidity, or how it was scooped. For example, 1 cup of flour measured by scooping can weigh anywhere from 120 to 160 grams, a substantial difference that will impact your bake. However, 100 grams of flour is always 100 grams of flour.
Many professional bakers and recipe developers now provide ingredient lists by weight, particularly for critical components like flour, sugar, and fat. A digital kitchen scale is relatively inexpensive and offers metric (grams) and imperial (ounces/pounds) units. It's arguably one of the most valuable measuring tools for beginner bakers aiming for consistency.
Why Use a Kitchen Scale for Baking?
The primary reason to use a kitchen scale is accuracy. Weighing ingredients eliminates the variability inherent in volume measurement techniques. This is particularly important for ingredients like flour, where packing can lead to significant errors. Using a scale ensures you're adding the exact amount the recipe developer intended, leading to more reliable and repeatable results.
Beyond accuracy, using a scale can also be faster and less messy. You can often place your mixing bowl directly on the scale and add ingredients one by one, using the tare function (explained below) to reset the scale to zero after each addition. This reduces the number of measuring cups and spoons you need to wash. While dry and liquid measuring cups are essential measuring tools for beginner bakers, a scale elevates your precision.
Understanding Grams and Ounces in Baking Recipes
Baking recipes commonly use metric units (grams) or imperial units (ounces and pounds) when specifying ingredients by weight. Grams (g) are a unit of mass in the metric system and are widely used internationally. Ounces (oz) and pounds (lb) are units of mass in the imperial system, commonly used in the United States. Many digital scales allow you to switch between these units with the press of a button.
One ounce is approximately 28.35 grams, and one pound is 16 ounces (about 454 grams). When a recipe specifies an ingredient by weight, it will clearly indicate the unit (e.g., "250g flour" or "8 oz sugar"). It's important to use the unit specified in the recipe to avoid errors. Becoming comfortable with both grams and ounces is beneficial for any aspiring baker.
Tips for Using a Kitchen Scale Effectively: Tare Function and More
The "tare" or "zero" function is your best friend when using a kitchen scale. Place your empty mixing bowl or container on the scale and press the tare button. The scale will reset to zero, effectively subtracting the weight of the container. You can then add your first ingredient until the scale displays the desired weight. Press tare again before adding the next ingredient. This allows you to measure multiple ingredients into the same bowl, streamlining the process.
Ensure your scale is on a flat, stable surface for accurate readings. Avoid bumping the scale while measuring. For small amounts (like spices or leavening agents), measuring spoons might still be more practical unless your scale is highly sensitive. However, for main ingredients like flour, sugar, butter, or chocolate, a scale is the most accurate way to go. Incorporating a scale into your routine significantly enhances your collection of baking measurement tools.
Essential Mixing Tools for New Bakers: Creating the Perfect Batter
Once your ingredients are accurately measured, the next step is combining them correctly. The right mixing tools are crucial for developing the proper texture in your batters and doughs, ensuring ingredients are evenly distributed, and incorporating air where needed. Just as important as accurate measuring tools for beginner bakers are effective mixing tools.
This section covers the fundamental mixing tools you'll need to get started, from simple bowls and spatulas to whisks and potentially an electric mixer. Understanding the purpose of each tool and how to use it will help you achieve the desired consistency for everything from a light cake batter to a well-developed cookie dough.
Mixing Bowls: Choosing the Right Size and Material
Mixing bowls are perhaps the most basic mixing tool, but having a variety of sizes is essential. You'll need bowls large enough to comfortably mix ingredients without spills, small bowls for whisking eggs or combining dry ingredients, and maybe a medium bowl for melting butter or mixing smaller batches. A set of nested bowls is a space-saving solution.
The material of your mixing bowl can also influence the process. Different materials have different properties regarding temperature retention, weight, and reactivity. Choosing the right bowl for the task is part of setting yourself up for success with your mixing tools.
Different Types of Mixing Bowls: Glass, Stainless Steel, and Plastic
Mixing bowls are commonly made from glass, stainless steel, or plastic.
- Glass bowls are heavy and stable, which is great for vigorous mixing. They are non-reactive, meaning they won't interact with acidic ingredients. Glass is also non-porous, easy to clean, and doesn't retain odors. They are often microwave and oven safe (check manufacturer instructions), useful for melting butter or tempering chocolate. However, they can break if dropped.
- Stainless steel bowls are lightweight, durable, and non-reactive. They are excellent for whipping cream or egg whites because they can be chilled easily, which helps achieve better volume. They are less likely to break than glass but can be noisy during mixing.
- Plastic bowls are the most lightweight and usually the most affordable. They are durable and come in many colors and sizes. However, some plastic can scratch, stain, or retain odors, particularly from strong flavors like garlic or tomato (though this is less common in baking). They can also retain grease, which can hinder whipping tasks.
A good starting set might include one large (around 4-6 quart), one medium (around 2-3 quart), and one small (around 1-1.5 quart) bowl, perhaps a mix of materials based on your preference and budget.
Selecting the Right Bowl Size for Your Recipe
Using a mixing bowl that is too small is a recipe for disaster – ingredients spill over the sides when you start mixing, creating a mess and potentially affecting the final product. As a general rule, choose a bowl that allows you to comfortably mix all ingredients together with plenty of room for expansion and aeration. For instance, when whipping egg whites or cream, you need a bowl that is significantly larger than the volume of the liquid to allow for the massive increase in volume (egg whites can increase up to 8 times their original volume when whipped).
For batters, ensure the bowl is large enough to hold all the ingredients plus room for your mixing tool to move freely. A cookie dough recipe yielding 2-3 dozen cookies might require a medium bowl, while a large cake or double batch might need a large bowl. When in doubt, err on the side of using a slightly larger bowl.
Caring for Your Mixing Bowls: Cleaning and Storage
Proper care extends the life of your mixing bowls. Wash them promptly after use, especially if they contained sticky ingredients like dough or batter. Most mixing bowls are dishwasher safe, but handwashing is also quick and effective. For stubborn residue, a little soak can help. Avoid abrasive scrubbers on plastic bowls to prevent scratching.
Store nested bowls to save space. Ensure they are completely dry before stacking to prevent odors or mildew. Glass bowls should be handled with care to avoid chips or breaks. Stainless steel bowls are quite durable and require little special care beyond washing. Keeping your bowls clean and stored properly ensures they are ready for your next baking project.
Spatulas and Scrapers: Ensuring Thorough Mixing
Spatulas and scrapers are invaluable tools for mixing, folding, and ensuring every bit of batter or dough makes it into your pan. Their flexible heads allow you to effectively scrape down the sides of mixing bowls, ensuring all ingredients are incorporated and none are left unmixed at the bottom. They are also perfect for gently folding delicate ingredients like whipped egg whites or cream into a batter.
These tools come in various shapes and sizes, each suited for slightly different tasks. Having a couple of different spatulas in your kitchen is highly beneficial for any beginner baker. They are simple, yet essential, mixing tools.
Types of Spatulas: Rubber, Silicone, and Offset
The most common types of spatulas used for mixing and scraping are rubber and silicone spatulas.
- Rubber spatulas are flexible and good for scraping, but they can sometimes stain or absorb odors over time.
- Silicone spatulas are more heat-resistant, non-porous (less likely to stain or absorb odors), and generally more durable than rubber. They come in various flexibilities, from very soft and flexible (great for scraping bowls) to firmer (better for mixing stiff batters).
- Offset spatulas (also called palette knives) have a thin, flat blade that is "offset" from the handle. These are less for mixing batter but are essential for spreading frosting or ganache smoothly and evenly on cakes and cookies. While not strictly a mixing tool, they are crucial for finishing many baked goods.
For mixing and scraping, a medium-sized silicone spatula with a comfortable handle is a great starting point.
Using Spatulas for Folding and Scraping
Spatulas excel at two key tasks: scraping bowls and folding ingredients. To scrape a bowl, hold the spatula blade against the side of the bowl and move it in a sweeping motion, pulling the batter or dough towards the center. This ensures all dry pockets are mixed in and you don't leave valuable batter behind.
Folding is a technique used to gently combine ingredients without deflating a mixture that has been aerated (like whipped cream or egg whites). To fold, use the spatula to cut down through the center of the mixture, scoop up material from the bottom, and bring it up and over the top. Rotate the bowl slightly and repeat until just combined. This gentle motion preserves air bubbles, crucial for light and airy results. Mastering this technique with your spatula is key for delicate recipes.
Maintaining Your Spatulas: Longevity Tips
Most rubber and silicone spatulas are easy to clean and dishwasher safe. For stubborn, sticky batter, a quick soak in warm, soapy water before washing can help. Ensure the spatula heads (especially if they are detachable from the handles) are thoroughly dried before storing to prevent mold or mildew.
Silicone spatulas are generally more resistant to heat and staining than rubber ones. Avoid exposing them to extremely high temperatures for prolonged periods unless they are specifically rated for it. With proper care, a good set of silicone spatulas will last for years, serving as reliable mixing tools for beginner bakers.
Whisks: Incorporating Air and Creating Volume
Whisks are designed to aerate mixtures, emulsify liquids, and combine ingredients smoothly, breaking up lumps. The wire loops of a whisk are perfect for beating eggs, whipping cream, making smooth sauces or batters, and incorporating dry ingredients into wet ones without overmixing, particularly in lighter batters like pancakes or waffles.
Different types of whisks exist, but a basic balloon whisk is the most versatile for general baking tasks. Having at least one good whisk is essential among your initial set of mixing tools for beginner bakers.
Types of Whisks: Balloon Whisks and French Whisks
The most common type of whisk is the balloon whisk. It has a wide, bulbous shape with many wires, making it ideal for incorporating air into ingredients like egg whites or heavy cream in a bowl. The shape covers a large surface area, speeding up the whipping process.
A French whisk is narrower and more elongated than a balloon whisk, with fewer, thicker wires. It's better suited for working in smaller, deeper pots or pans, such as making gravies, sauces, or custards on the stovetop, where you need to reach into corners and scrape the bottom effectively. For general baking tasks involving bowls, a balloon whisk is usually the preferred choice.
Whipping Cream and Egg Whites: Techniques for Success
Whipping cream or egg whites to soft or stiff peaks is a common baking task that relies heavily on a whisk (or electric mixer). For best results, ensure your bowl and whisk are spotlessly clean and free of any grease, as fat can prevent egg whites from whipping properly. Chilling the bowl and whisk can also help when whipping cream.
Start whisking slowly, then gradually increase speed. For egg whites, whip until frothy, then gradually add sugar if required by the recipe (like for meringue or macarons). Continue whisking until the desired peak consistency is reached – soft peaks droop slightly when the whisk is lifted, while stiff peaks stand straight up. Consistent, vigorous motion with your whisk is key to incorporating enough air.
Cleaning Your Whisk: Preventing Food Buildup
Cleaning a whisk can sometimes be tricky because batter or cream can get stuck between the wires. The easiest way to clean a whisk is immediately after use, before the residue dries. Rinse it under hot running water while still holding it. For dried-on batter, soak the whisk in warm, soapy water for a few minutes, then use a brush or sponge to clean between the wires.
Some whisks are dishwasher safe, but handwashing can help preserve the handle and wire shape. Ensuring the whisk is thoroughly clean prevents leftover food particles from contaminating your next bake. Proper care keeps your whisk as an effective tool among your baking measurement tools and mixing equipment.
Electric Mixers: A Time-Saving Investment
While hand mixing is possible for many recipes, an electric mixer can significantly reduce effort and time, especially for tasks requiring extended mixing or whipping, like creaming butter and sugar, kneading dough, or whipping large quantities of cream or egg whites. For beginner bakers planning to bake frequently, an electric mixer is a worthwhile investment.
There are two main types: hand mixers and stand mixers. Both serve the purpose of automating the mixing process, but they differ in power, capacity, and price.
Stand Mixers vs. Hand Mixers: Which is Right for You?
- Hand mixers are handheld, lightweight, and more affordable. They are suitable for occasional baking and smaller batches, handling tasks like mixing cake batters, cookie doughs, and whipping cream or egg whites. They require you to hold the mixer and move it around the bowl.
- Stand mixers are larger, more powerful machines with a heavy base and a bowl that locks into place. They are hands-free once operating and come with various attachments (like a whisk, paddle, and dough hook) for different tasks. Stand mixers are ideal for frequent bakers, larger batches, and more demanding tasks like kneading bread dough or mixing stiff batters. They are a significant investment in both cost and counter space.
For a beginner baker, a good quality hand mixer is often sufficient to start. If you find yourself baking large quantities or tackling bread recipes regularly, a stand mixer might be the next step.
Using Your Electric Mixer Effectively: Speed Settings and Attachments
Electric mixers come with various speed settings, from low (for combining dry and wet ingredients without a flour cloud) to high (for whipping air into cream or egg whites). Recipes will often specify the speed setting needed for different stages of mixing. Start on a low speed when initially combining ingredients to prevent splashes of flour or liquid.
Hand mixers typically come with beaters for general mixing and sometimes whisk attachments. Stand mixers come with standard attachments: a paddle attachment for creaming and mixing batters, a whisk attachment for whipping, and a dough hook for kneading yeast doughs. Ensure you use the correct attachment for the task specified in the recipe.
Cleaning and Maintaining Your Electric Mixer
Always unplug your electric mixer before cleaning. For hand mixers, detach the beaters or whisk and wash them separately (most are dishwasher safe). Wipe down the body of the mixer with a damp cloth, avoiding getting water into the motor vents.
For stand mixers, detach the bowl and attachments and wash them. The stand mixer body should also be wiped down with a damp cloth. Ensure all parts are completely dry before reassembling or storing. Refer to your mixer's manual for specific cleaning instructions and maintenance tips. Proper care ensures your electric mixer remains a powerful ally among your baking measurement tools and mixing equipment.
Beyond the Basics: Additional Helpful Tools for Beginner Bakers
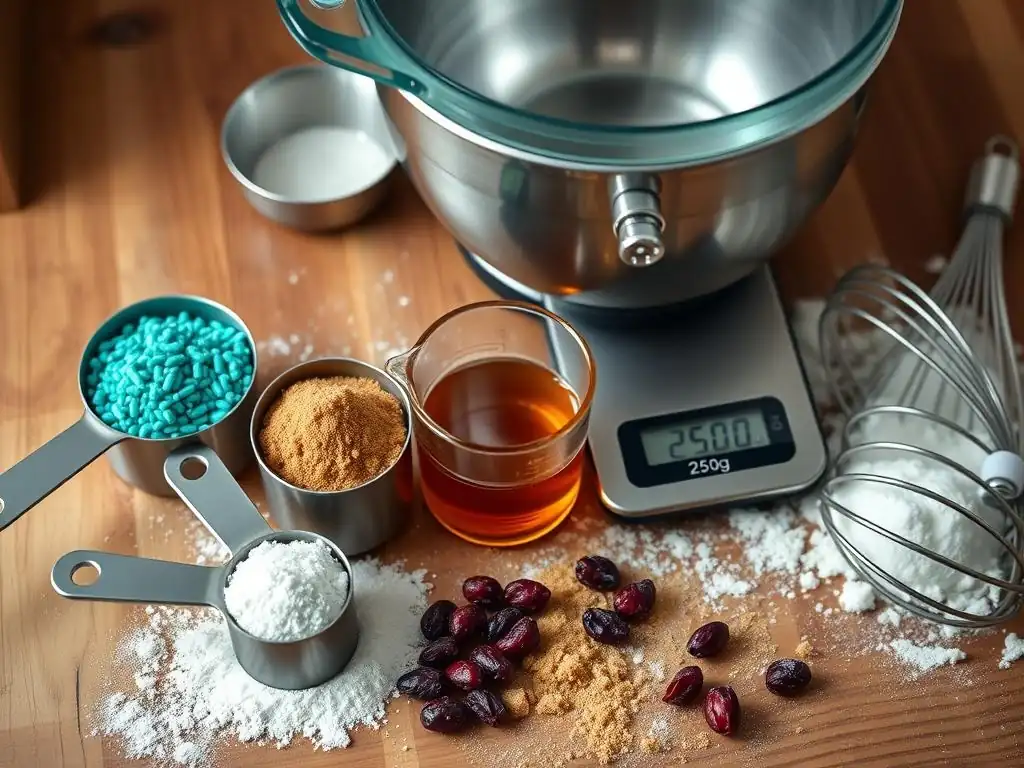
While measuring cups, spoons, a scale, bowls, spatulas, and a whisk form the core toolkit, a few other items can significantly enhance your baking experience and results, even for beginners. These tools aren't strictly necessary for every recipe but are incredibly useful for specific tasks.
Rolling Pins: Achieving Even Dough Thickness
A rolling pin is essential for recipes that require rolling out dough, such as pie crusts, cookies, scones, or pastry. Its primary function is to flatten dough to a uniform thickness, which is crucial for even baking. Dough that is too thick in some spots and too thin in others will bake unevenly.
Rolling pins come in various materials (wood, marble, metal, silicone) and styles (traditional with handles, French style without handles). A basic wooden rolling pin is a great starting point. When rolling dough, use light, even pressure, working from the center outwards, and rotate the dough periodically to prevent sticking and ensure an even shape. Dusting your surface and the pin lightly with flour also helps prevent sticking.
Bench Scrapers: Dividing Dough and Cleaning Surfaces
A bench scraper, also known as a dough scraper, is a simple, flat tool with a handle. It has a surprisingly wide range of uses in baking. Its straight edge is perfect for dividing dough into portions (like rolls or biscuits) without tearing or stretching it excessively. It's also invaluable for scraping up sticky dough from your work surface, making cleanup much easier.
Bench scrapers can also be used to transfer chopped ingredients, lift cookies from a baking sheet, or even smooth frosting on the sides of a cake. They are relatively inexpensive but incredibly versatile, proving their worth quickly in a beginner baker's kitchen.
Pastry Brushes: Applying Washes and Glazes
A pastry brush, typically made with natural bristles or silicone, is used for applying liquids to the surface of baked goods. This could be an egg wash on bread or pastries to give them a golden, shiny crust, melted butter on rolls, or a simple syrup glaze on cakes to keep them moist.
Choose a brush with bristles that won't shed onto your food. Natural bristles hold liquids well but can be harder to clean thoroughly. Silicone brushes are easier to clean and more durable but may not hold as much liquid. A medium-sized brush is versatile for most tasks. Ensure it's cleaned meticulously after each use, especially after contact with raw egg.
Maintaining Your Baking Tools: Cleaning and Storage Tips
Investing in quality measuring tools for beginner bakers and mixing equipment is just the first step. Proper cleaning and storage are essential to keep your tools in good condition, prevent contamination, and ensure they are ready for your next baking session.
General Cleaning Guidelines for Baking Tools
Clean your baking tools as soon as possible after use. This prevents food residue from drying and becoming difficult to remove. For most tools like measuring cups, spoons, spatulas, whisks, and bowls, warm, soapy water is sufficient. Use a sponge or brush to remove any stuck-on bits.
For tools that have come into contact with raw ingredients like eggs or flour, ensure they are washed thoroughly with soap to remove any potential bacteria. Rinse well to remove all soap residue. Pay special attention to crevices, seams, and where handles attach, as these can trap food particles. While many tools are dishwasher safe, handwashing can sometimes be more effective for ensuring every nook and cranny is clean.
Proper Storage to Extend the Life of Your Tools
Storing your baking tools correctly protects them from damage and keeps your kitchen organized. Nesting measuring cups and spoons together on a ring or in a drawer keeps sets complete. Store bowls nested inside each other. Hang spatulas and whisks if you have hooks available, or store them in a utensil crock or drawer.
Ensure all tools are completely dry before storing to prevent rust on metal items or mildew on wood and some plastics. Store sharp items like bench scrapers carefully to avoid accidents. Proper storage not only saves space but also helps maintain the condition and longevity of your essential baking measurement tools and mixing equipment.
Replacing Worn-Out Tools: When to Upgrade
Even with the best care, baking tools don't last forever. Know when to replace worn-out items. Plastic measuring cups and spoons can become scratched, making markings difficult to read, or they might absorb odors. Rubber spatulas can degrade or become sticky. Whisks can lose their shape or have wires come loose. Kitchen scales might lose accuracy or stop working.
Using damaged or inaccurate tools can negatively impact your baking results. If the markings on your measuring tools for beginner bakers are faded, your whisk is bent out of shape, or your scale gives inconsistent readings, it's time to consider replacing them. Upgrading ensures you continue to bake with precision and confidence.
Getting Started: A Simple Recipe to Practice Your Measuring and Mixing Skills
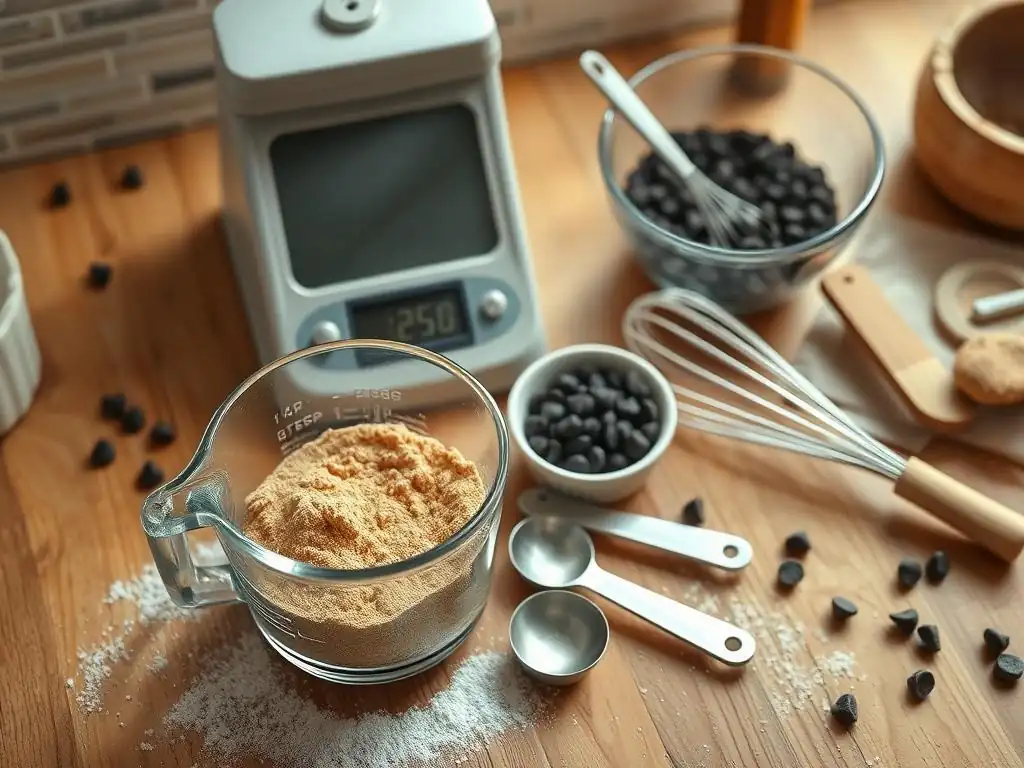
Now that you're familiar with the essential measuring tools for beginner bakers and key mixing equipment, let's put them to use! A classic chocolate chip cookie recipe is perfect for practicing accurate measurement of both dry and wet ingredients, creaming butter and sugar, and mixing in additions.
This recipe will utilize your dry measuring cups, liquid measuring cup, measuring spoons, mixing bowls, spatula, and potentially a hand mixer. Pay close attention to the measuring techniques discussed earlier, especially for the flour and sugar.
This recipe yields approximately 2 dozen delicious cookies. You'll need your measuring tools for beginner bakers – cups, spoons, and maybe a scale – plus mixing bowls, a spatula, and optionally a hand mixer.
Ingredients:
- 1/2 cup (113g) unsalted butter, softened
- 1/2 cup (100g) granulated sugar
- 1/4 cup (50g) packed light brown sugar
- 1 large egg
- 1 teaspoon vanilla extract
- 1 1/4 cups (about 150g) all-purpose flour (spooned & leveled)
- 1/2 teaspoon baking soda
- 1/4 teaspoon salt
- 1 cup (about 170g) chocolate chips
Instructions:
- Preheat oven to 375°F (190°C). Line baking sheets with parchment paper.
- In a large mixing bowl, cream together the softened butter, granulated sugar, and brown sugar using a spatula or electric mixer until light and fluffy (about 2-3 minutes with a mixer). This incorporates air and helps with cookie texture.
- Beat in the egg and vanilla extract until just combined. Remember to measure the vanilla accurately with your measuring spoon!
- In a separate, smaller bowl, whisk together the spooned-and-leveled flour, baking soda, and salt. Using your whisk helps distribute the leavening evenly.
- Gradually add the dry ingredients to the wet ingredients, mixing on low speed or with a spatula until just combined. Do not overmix. Scrape down the sides of the bowl with your spatula to ensure all flour is incorporated.
- Stir in the chocolate chips using your spatula.
- Drop rounded tablespoons of dough onto the prepared baking sheets.
- Bake for 9-11 minutes, or until the edges are golden brown and the centers are still slightly soft.
- Let cool on the baking sheets for a few minutes before transferring to a wire rack to cool completely. Enjoy practicing with your baking measurement tools!
Conclusion: Building Your Baking Toolkit with Confidence
Starting your baking journey with the right essential measuring tools for beginner bakers and basic mixing equipment sets you up for success. Accurate measurement is the cornerstone of baking, ensuring consistent, delicious results every time. From using dry and liquid measuring cups correctly to understanding the precision a kitchen scale offers, mastering these fundamental tools is key.
Equally important are your mixing tools – bowls of various sizes, versatile spatulas, and whisks for aeration. These tools help you combine ingredients effectively and create the right texture for your batters and doughs. While an electric mixer can be a helpful addition, you can achieve wonderful results with just hand tools.
Investing in Quality Tools for Long-Term Baking Success
While you don't need the most expensive gadgets when starting out, investing in good quality, durable measuring tools for beginner bakers and mixing equipment is wise. Tools made from sturdy materials with clear, permanent markings will last longer and maintain their accuracy over time. A reliable set of measuring cups and spoons, a quality liquid measuring cup, and a functional kitchen scale are foundational purchases.
Similarly, durable mixing bowls and heat-resistant silicone spatulas will withstand frequent use. Think of these purchases as building a reliable toolkit that will support your baking endeavors for years to come, allowing you to tackle more complex recipes with confidence as your skills grow.
Mastering the Basics: Setting the Foundation for Advanced Techniques
Focusing on accurate measurement and proper mixing techniques might seem simple, but these basics are fundamental to all baking. Once you consistently achieve good results with foundational recipes like cookies, muffins, or simple cakes, you'll have the confidence and understanding to move on to more advanced techniques.
Understanding how different ingredients interact, how aeration affects texture, and the importance of precise ratios learned through using your essential baking measurement tools will be invaluable as you explore breads, pastries, and other challenging bakes. The skills you build now are the foundation for a lifetime of delicious creations.
Happy Baking from BakeWithEase!
We hope this guide to essential measuring and mixing tools for new bakers empowers you to step into the kitchen with confidence. Remember, every great baker started with the basics. With the right tools and techniques, you're well on your way to mastering the art and science of baking. Keep practicing, keep exploring, and most importantly, have fun creating delicious treats!
Frequently Asked Questions
What are the most essential measuring tools for beginner bakers?
The most essential tools are a set of measuring cups and spoons for accurate ingredient proportions, along with a kitchen scale for consistent results, especially when baking by weight.
Why is precise measurement so important in baking?
Precise measurement is crucial because baking relies on chemical reactions. Even slight inaccuracies can significantly affect the texture and outcome of your baked goods.
What type of measuring cups should a beginner baker purchase?
Beginner bakers should prioritize purchasing a set of dry measuring cups (usually metal or plastic) and a liquid measuring cup (often glass or clear plastic) for accurate volume measurement.
How can a kitchen scale improve my baking results?
A kitchen scale allows for accurate measurement by weight, eliminating inconsistencies that can occur when using volume measurements, leading to more reliable and repeatable results.
Are there any measuring tools specifically designed to help beginners?
Yes, some measuring cups and spoons have easy-to-read markings and levelers to ensure accurate and consistent measurements, which are particularly helpful for beginners learning the basics.
Final Reflection: The Sweet Science of Precision in Baking
Mastering the fundamentals of baking isn't just about following a recipe; it's about understanding the delicate dance between ingredients, and that dance requires precision. A perfectly risen loaf or a flawlessly textured cake hinges on accurate measurements and the right tools. This article has highlighted the importance of these seemingly simple elements, demonstrating how even small discrepancies can significantly impact the final product. The journey to becoming a confident baker begins with a commitment to accuracy.
The impact of proper measuring techniques extends far beyond the kitchen. It cultivates a deeper appreciation for the scientific nature of baking, transforming it from a mere hobby into a creative pursuit grounded in understanding. Baking is a science, but it's also an art. The more you understand the science, the more you can express your art.
This sentiment perfectly encapsulates the journey of a baker, and the tools discussed here are the essential instruments in that journey. The satisfaction of a perfectly executed recipe, born from careful measurement and the right tools, is a testament to the power of precision.
Now, it's your turn. Consider the tools you currently use and reflect on their accuracy. Are you ready to elevate your baking game? Invest in a few high-quality measuring tools, and commit to mastering their use. Embrace the science, explore the art, and savor the sweet rewards of precision. The journey to baking mastery begins with a single, accurate measurement.
Unlock Your Baking Potential: Level Up Your Kitchen!
Thanks for taking the time to explore the essential tools for baking success! You've just unlocked the secrets to more consistent, delicious results. Now it's time to put your newfound knowledge into action.
- Invest in your dream measuring cups and spoons: Don't settle for inaccurate tools – precision is key! This is your single most important next step for baking improvement.
- Share this article with a fellow baking enthusiast – spread the knowledge!
- Try a new recipe this week incorporating your newly acquired knowledge – and let us know how it goes in the comments below!
Ready to create your baking masterpiece? What's the first recipe you'll tackle with your upgraded tools?