
Quick Breads: Your Gateway to the World of Baking

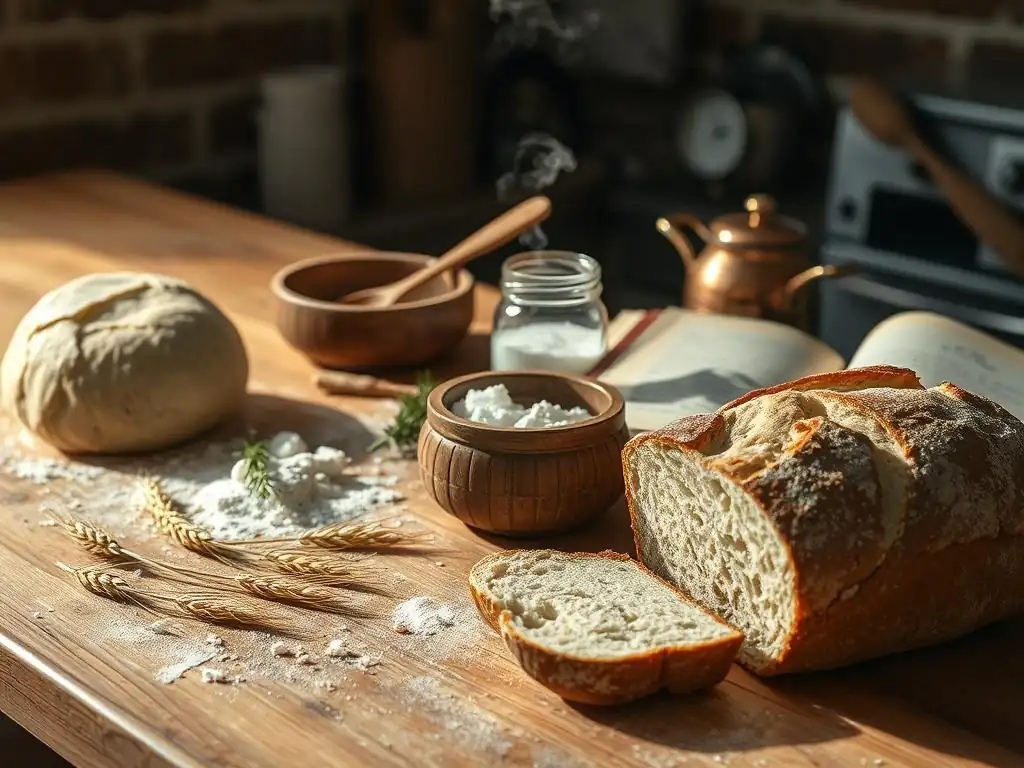
Welcome to BakeWithEase, where baking becomes a delightful adventure! Ready to unlock the secrets of creating mouthwatering treats in your own kitchen? Dive in and discover how simple it can be to bake delicious goodies, even if you're just starting out. Speaking of simple, ever dreamed of baking your own artisan bread? This week, we're demystifying the process with our easy sourdough bread recipe. Curious to learn how to achieve that perfect crust and airy crumb with minimal effort? Let's get baking!
- BakeWithEase Presents: Mastering Quick Breads for Beginners
- What are Quick Breads and Why Start Here?
- Essential Ingredients for Easy Quick Bread Recipes
- Essential Equipment for Baking Quick Breads
- Our Top 5 Easy Quick Bread Recipes for Beginners
- Troubleshooting Common Quick Bread Baking Issues
- Storing and Enjoying Your Homemade Quick Breads
- Taking Your Quick Bread Baking to the Next Level
- Conclusion: Embrace the Joy of Quick Bread Baking.
-
Frequently Asked Questions
- What exactly are quick breads, and how do they differ from other types of bread?
- Can I really make sourdough bread easily, even as a beginner?
- What ingredients are commonly used in quick bread recipes?
- What kind of equipment do I need to start baking quick breads?
- Where can I find an easy sourdough bread recipe specifically on BakeWithEase?
- Final Reflection: The Humble Quick Bread – A Sourdough Springboard
- Unlock Your Inner Baker: Start Baking Today!
BakeWithEase Presents: Mastering Quick Breads for Beginners
Welcome to the wonderful world of baking! If you're just starting out, the vast array of recipes and techniques can seem a little daunting. Yeast, kneading, proofing – it might feel like there's a lot to learn. But what if we told you there's a whole category of delicious baked goods that skips most of that complexity? That's where quick breads come in! They live up to their name, offering a faster, more forgiving path to warm, homemade goodness.
At BakeWithEase, our goal is to make baking accessible and enjoyable for everyone. Quick breads are the perfect starting point because they rely on chemical leavening agents like baking powder and baking soda, rather than yeast. This means no lengthy rising times, less hands-on work, and much quicker results.
You can mix, bake, and enjoy a fresh loaf or batch of muffins in under an hour or two, making them ideal for busy schedules or spontaneous baking urges. Think of them as your friendly introduction before tackling more complex projects, perhaps even working your way up to an easy sourdough bread recipe.
What are Quick Breads and Why Start Here?
Understanding the Simplicity of Quick Breads
Quick breads are a category of baked goods that do not use yeast as a leavening agent. Instead, they rely on chemical leaveners such as baking powder, baking soda, or sometimes air incorporated through whipping. This fundamental difference is what makes them so much faster and simpler to prepare compared to traditional yeast-leavened breads. The leavening action happens primarily during the mixing and baking process itself, meaning you don't need to wait for dough to rise.
This simplicity translates directly into a more beginner-friendly experience. The techniques involved are generally straightforward: typically, dry ingredients are mixed in one bowl, wet ingredients in another, and then the two are gently combined. Overmixing is a common pitfall, but even slight mistakes often yield edible, if not perfect, results, making them much more forgiving than delicate pastries or temperamental yeast doughs. From muffins and scones to banana bread and cornbread, quick breads offer a wide variety of textures and flavors achievable with minimal fuss.
Quick Breads vs. Yeast Breads: A Beginner-Friendly Choice
The primary distinction between quick breads and yeast breads lies in their leavening method. Yeast breads, like a classic loaf of sandwich bread or even an easy sourdough bread recipe, rely on live yeast cultures that produce carbon dioxide gas as they feed on sugars in the dough. This process requires time – often hours of rising (or "proofing") – and specific temperature conditions for the yeast to work effectively. Developing gluten structure through kneading is also often crucial for yeast breads to achieve their characteristic chewy texture and airy crumb.
Quick breads, on the other hand, use chemical reactions to create lift. Baking powder contains an acid and a base that react when wet and heated, producing CO2 bubbles. Baking soda is a base that requires an acidic ingredient (like buttermilk, yogurt, or brown sugar) to react and produce CO2.
This reaction is almost instantaneous once the wet and dry ingredients are combined, meaning the mixture goes straight into the oven after mixing. This eliminates the waiting time associated with yeast and reduces the need for extensive kneading, as gluten development is less critical for the desired tender crumb of most quick breads. For someone just starting out, skipping the steps of proofing and kneading makes quick breads a much less intimidating entry point than even trying to master an easy sourdough bread recipe.
BakeWithEase Tip: Why Quick Breads are Perfect for New Bakers
Quick breads offer a fantastic entry point into baking because they provide relatively instant gratification and a high success rate, building confidence quickly. Unlike yeast breads where under-proofing, over-proofing, or improper kneading can lead to dense, heavy results, quick breads are far more forgiving of minor errors in mixing or timing. The chemical leaveners work reliably as long as they are fresh and the recipe is followed reasonably well. This means that even if your technique isn't perfect, you're very likely to end up with a delicious, edible product on your first few tries.
Furthermore, the ingredient lists for most quick breads are simple and often use pantry staples you likely already have on hand. Basic flour, sugar, eggs, milk, and a leavener are the foundation of countless recipes.
This accessibility, combined with the short timeline from mixing bowl to finished baked good, makes quick breads ideal for experimenting and learning fundamental baking principles without a significant time commitment or investment in specialized ingredients. They teach you about ingredient ratios, the importance of gentle mixing, and oven temperatures – skills that are transferable to many other baking projects, including eventually tackling that easy sourdough bread recipe you might aspire to make.
Essential Ingredients for Easy Quick Bread Recipes
The Core Four: Flour, Leavening, Liquid, and Fat
Every quick bread recipe, at its heart, relies on a combination of four fundamental ingredient categories: flour, leavening, liquid, and fat. Flour provides the structure of the baked good. Leavening agents create the lift and airiness, making the bread rise. Liquid hydrates the dry ingredients, activates the leaveners, and helps bind everything together. Fat adds moisture, tenderness, and flavor, preventing the bread from becoming dry and tough.
Understanding the role each of these plays is key to successful quick bread baking. Variations within these categories are what create the vast diversity of quick breads we enjoy, from light and fluffy muffins to moist, dense loaves. Mastering how these core four interact in simple recipes lays a solid foundation for understanding more complex baking chemistry, setting you up for success in future endeavors, perhaps even when you decide to bake an easy sourdough bread recipe.
Exploring Different Types of Flour for Quick Breads
The type of flour you choose significantly impacts the texture of your quick bread. While many recipes call for a standard all-purpose flour, understanding how different flours behave can help you achieve desired results or substitute when needed. Flour provides the protein (gluten) that forms the structure of the bread.
Different flours have varying protein contents. This protein develops gluten when mixed with liquid, which is what gives baked goods structure. In quick breads, we generally want less gluten development than in yeast breads to maintain a tender crumb. Choosing the right flour is therefore important for achieving the characteristic soft texture of quick breads.
All-Purpose Flour: Your Reliable Base
All-purpose flour, often simply labeled "AP flour," is the most common choice for quick bread recipes, and for good reason. It has a moderate protein content, typically ranging from 10% to 12%. This level provides enough structure to hold the bread's shape without developing excessive gluten, which would make the quick bread tough. It's versatile, widely available, and performs reliably in a vast majority of quick bread recipes, making it the perfect starting point for beginners.
Using all-purpose flour allows for a tender, relatively fine crumb, which is desirable in muffins, loaf cakes, and scones. Its balanced protein content means that as long as you avoid overmixing, you'll achieve a pleasant texture. It's the standard against which other flours are often compared for quick bread applications and is the go-to flour when you're following an easy quick bread recipe or substituting for flours like pastry or cake flour if those aren't available.
Bread Flour: Creating a Chewier Texture
Bread flour has a higher protein content than all-purpose flour, usually between 12% and 14%. This higher protein is ideal for yeast breads because it allows for significant gluten development, resulting in a chewy texture and strong structure needed to support the long fermentation process of loaves like baguettes or even a hearty easy sourdough bread recipe.
While less common in standard quick bread recipes, bread flour can be used, though it will result in a chewier, slightly tougher texture compared to using all-purpose flour. This might be desirable in certain recipes, like some types of scones or biscuits, where a bit more structure is wanted. However, for most quick breads, especially those aiming for a tender, cake-like crumb, bread flour is typically avoided or used in combination with lower-protein flours.
Leavening Agents: Baking Powder vs. Baking Soda
Chemical leaveners are the stars of quick breads, providing the necessary lift without the waiting required for yeast. The two most common are baking powder and baking soda. Understanding how they work and when to use each is crucial for successful quick bread baking.
These leaveners react with liquids and/or acids to produce carbon dioxide gas, which gets trapped in the batter or dough and expands when heated in the oven, causing the quick bread to rise. Using the correct type and amount of leavener specified in a recipe is vital, as too little will result in a dense product, and too much can cause rapid rising followed by collapse, or leave a bitter, soapy taste.
Understanding the Role of Each Leavening Agent
Baking soda (sodium bicarbonate) is a single-acting leavener, meaning it requires an acidic ingredient to react and produce carbon dioxide. Common acidic ingredients in quick breads include buttermilk, yogurt, sour cream, molasses, brown sugar, honey, cocoa powder, vinegar, and citrus juice. Recipes using baking soda often rely on these acidic components for flavor and tenderness as well as leavening.
Baking powder, on the other hand, is typically double-acting. It contains both an acid and a base, plus a starch (like cornstarch) to keep them separate. The first reaction happens when it gets wet, producing some CO2. The second, more significant reaction occurs when it's heated in the oven.
This double action provides a more sustained lift. Recipes that don't contain acidic ingredients often rely solely on baking powder for leavening. Many recipes use a combination of both baking soda and baking powder to achieve optimal lift and texture, balancing the immediate reaction of soda with the sustained lift of powder, and reacting with any acidic ingredients present.
Adjusting Leavening for Altitude
Baking at high altitudes presents unique challenges because atmospheric pressure is lower. This lower pressure means that gases expand more readily. In baking, the CO2 gas produced by leaveners expands faster and to a greater extent than at sea level. This can cause quick breads to rise too quickly and then collapse, resulting in a coarse, crumbly texture or a sunken center.
To counteract this, quick bread recipes often need adjustments at altitudes above approximately 3,000 feet (about 900 meters). The most common adjustments involve slightly reducing the amount of baking powder and/or baking soda, increasing the amount of liquid, and sometimes slightly increasing the flour or egg to strengthen the structure. For example, a recipe calling for 2 teaspoons of baking powder at sea level might be reduced to 1.5 or 1.75 teaspoons at high altitude. Experimentation is often necessary to find the perfect balance for your specific location.
Liquids: Milk, Buttermilk, and More

Liquids play several critical roles in quick bread recipes. They hydrate the flour, allowing gluten to develop (though minimally in quick breads), dissolve sugar and salt, and activate the chemical leaveners. The type of liquid used also significantly impacts the flavor, moisture, and tenderness of the final product.
Common liquids include milk, buttermilk, water, yogurt, sour cream, and fruit juices or purees (like mashed banana or applesauce). Each brings its own characteristics to the quick bread. Using the specified liquid is important because it affects not only hydration but also the chemical reactions of the leaveners, particularly if using baking soda which requires an acid.
The Impact of Different Liquids on Moisture and Flavor
Whole milk is a common liquid, providing richness and contributing to browning due to its fat and sugar content. Using lower-fat milk will result in a slightly less rich product. Water can be used but provides no added flavor or richness. Buttermilk is a favorite in many quick bread recipes, especially those using baking soda. Its acidity reacts with the soda to provide lift and also tenderizes the crumb, resulting in a very moist and fine-textured bread with a slight tang.
Yogurt and sour cream function similarly to buttermilk, adding acidity, richness, and moisture, often resulting in a denser, more cake-like texture. Fruit purees like mashed banana (as in classic banana bread) or zucchini (though technically a vegetable, it functions as a liquid/moisture source) add flavor, sweetness, and significant moisture. Using the right liquid, as specified in your easy quick bread recipe, is key to achieving the intended texture and taste profile.
Fats: Butter, Oil, and Shortening
Fats are essential components in quick breads, contributing to tenderness, moisture, flavor, and sometimes structure. Fat coats the flour particles, inhibiting gluten development, which is why fats help create a tender crumb in quick breads. They also help retain moisture, keeping the quick bread from drying out quickly.
Different types of fat behave differently in quick breads, affecting both texture and flavor. The method of incorporating the fat (melted, softened, or cold) also plays a role in the final outcome.
Choosing the Right Fat for Your Quick Bread
Butter, especially unsalted butter, is a popular choice for its rich flavor. When used softened and creamed with sugar, it incorporates air, contributing to a lighter texture (the creaming method). When used melted, as is common in many muffin or loaf recipes, it primarily adds moisture and richness. Butter also promotes browning and contributes to a desirable crisp crust.
Vegetable oils (like canola, sunflower, or vegetable oil) are liquid at room temperature and distribute easily throughout the batter, resulting in a very moist and tender crumb. Oils are particularly effective at keeping quick breads moist over time. They have a neutral flavor, allowing other ingredients to shine.
Shortening (a solid fat) creates a tender and slightly crumbly texture, often used in biscuits or scones. The specific fat chosen in an easy quick bread recipe is usually selected to achieve a particular texture and flavor profile. For instance, banana bread often uses oil for maximum moisture, while scones might use cold butter cut into the flour for flakiness.
Essential Equipment for Baking Quick Breads
Must-Have Tools for Beginner Bakers
You don't need a professional kitchen to bake delicious quick breads. Many essential tools are common kitchen items. Having the right equipment, however, can make the process smoother, more accurate, and more enjoyable. Investing in a few basic, reliable tools is a good idea when you start baking.
These tools ensure you can accurately measure ingredients, mix them properly, and bake your quick bread evenly. Starting with the basics allows you to get comfortable with the process before adding more specialized gadgets to your collection. They are fundamental for any baking project, whether it's a simple muffin recipe or attempting an easy sourdough bread recipe down the line.
Mixing Bowls and Utensils
You'll need at least two mixing bowls: one for dry ingredients and one for wet ingredients. Using separate bowls for the initial mixing steps is crucial in the standard quick bread method (muffin method) where wet and dry ingredients are combined only at the very end. Having bowls of different sizes can be helpful, perhaps a medium-sized one for wet ingredients and a larger one for combining everything.
Essential utensils include a whisk for aerating dry ingredients and mixing wet ones, and a spatula or wooden spoon for combining the wet and dry mixtures. A rubber spatula is particularly useful for scraping down the sides of the bowl and ensuring all ingredients are incorporated without overmixing. A sturdy whisk helps break up any clumps in the flour and distribute the leaveners evenly.
Measuring Cups and Spoons: Accuracy is Key
Accurate measurement is perhaps the single most important factor for consistent baking results. Unlike cooking, where a pinch of this or a dash of that is often fine, baking is chemistry, and ratios matter. You will need a set of dry measuring cups (usually 1 cup, 1/2 cup, 1/3 cup, 1/4 cup) and a set of measuring spoons (1 tablespoon, 1 teaspoon, 1/2 teaspoon, 1/4 teaspoon).
For liquids, you'll need a liquid measuring cup, which is typically clear with markings on the side and a spout for pouring. Liquid measuring cups should be placed on a flat surface, and you should read the measurement at eye level. Using dry measuring cups for liquids or vice versa can lead to inaccurate amounts and affect the outcome of your quick bread.
For example, using a dry cup for flour and scooping directly from the bag can result in up to 25% more flour than intended, leading to a dry, dense quick bread. Using the "spoon and level" method for dry ingredients (gently spooning flour into the cup and leveling off with a straight edge) provides much greater accuracy.
Baking Pans: Choosing the Right Size and Shape
The type and size of your baking pan will depend on the specific quick bread recipe you choose. Loaf pans are standard for banana bread, zucchini bread, and other loaf-style quick breads. Common sizes are 9x5 inches or 8x4 inches. Muffin tins (standard 12-cup size) are needed for muffins and cupcakes. Square or rectangular pans (like 8x8 or 9x13 inches) can be used for some quick breads, like cornbread or some coffee cakes.
Using the pan size specified in the recipe is important because it affects baking time and how the quick bread rises and cooks through. If a pan is too large, the quick bread will be thin and potentially dry. If it's too small, it might overflow or be undercooked in the center. Material also matters; metal pans conduct heat efficiently and are common, while glass or ceramic pans heat more slowly and can require slightly longer baking times or reduced oven temperatures.
Parchment Paper: Preventing Sticking
Parchment paper is a baker's best friend, especially for quick breads baked in loaf pans. Lining the pan with parchment paper prevents the quick bread from sticking to the bottom and sides, making it much easier to remove the finished loaf intact. You can cut a sling of parchment paper that fits the bottom and extends up the long sides of a loaf pan, leaving overhang to use as handles to lift the baked bread out easily.
While not strictly necessary if you grease and flour your pan thoroughly, parchment paper offers extra insurance against sticking, particularly for moist or delicate quick breads. It also makes cleanup significantly easier. For muffins, paper liners serve a similar purpose and also add a decorative touch, though you can grease the muffin tin cavities directly if you don't have liners.
Our Top 5 Easy Quick Bread Recipes for Beginners
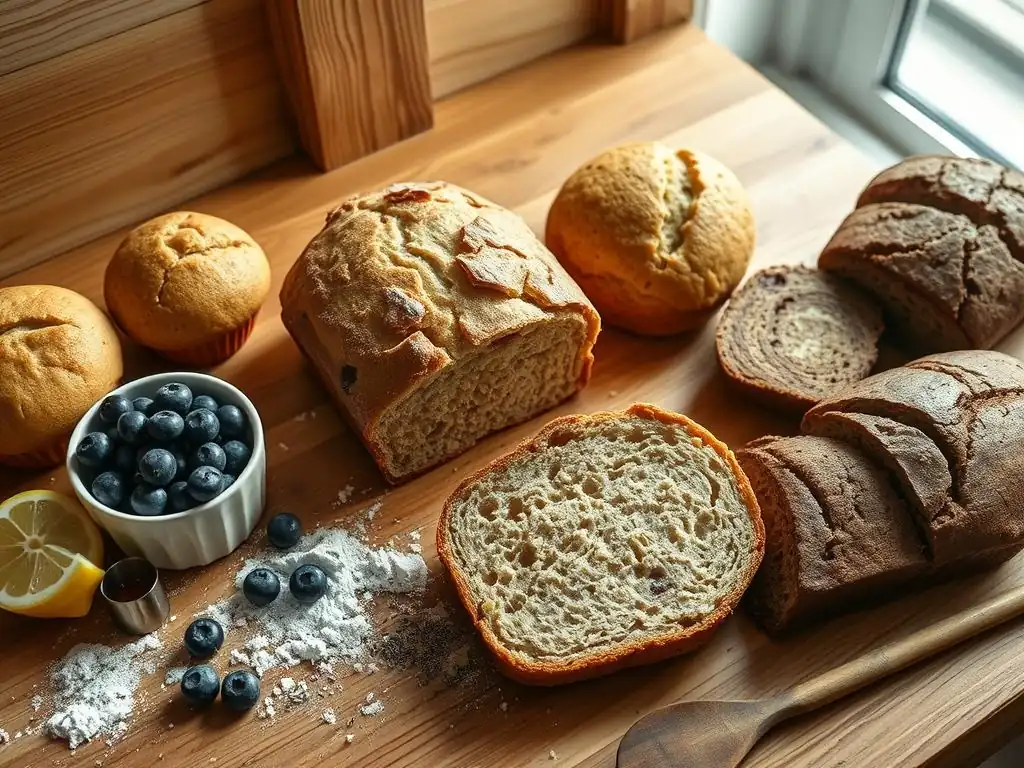
Ready to get baking? Here are five simple and delicious quick bread recipes perfect for those just starting out. These recipes use common ingredients and straightforward methods, offering a taste of different quick bread styles. While they aren't an easy sourdough bread recipe, they are fantastic stepping stones into the joy of baking from scratch.
These recipes cover a range of flavors and textures, from moist fruit loaves to savory cornbread and versatile muffins. Each one is designed to be forgiving and provide a successful outcome, boosting your confidence in the kitchen. Let's dive into these beginner-friendly favorites!
Recipe 1: Classic Banana Bread - An Easy Sourdough Bread Recipe Alternative
Classic Banana Bread is arguably the most popular quick bread for beginners, and for good reason. It's incredibly moist, flavorful, and a perfect way to use up overripe bananas. Its simplicity makes it a great alternative to more complex recipes, like attempting your first easy sourdough bread recipe. The natural sweetness and moisture from the bananas help ensure a tender crumb.
This recipe follows the standard muffin method, making it easy to execute. It's very forgiving, and even slight variations in banana ripeness or mixing won't ruin the final product. It's a comforting, crowd-pleasing treat that's hard to get wrong.
Detailed Instructions for Classic Banana Bread
Here's a straightforward guide to making a classic loaf:
Ingredients:
- 2-3 very ripe bananas, mashed (~1 to 1.5 cups)
- 1/3 cup melted butter
- 1/2 teaspoon baking soda
- 1 pinch salt
- 1 teaspoon vanilla extract
- 3/4 cup granulated sugar
- 1 large egg, beaten
- 1.5 cups all-purpose flour
Equipment:
- Two mixing bowls
- Whisk or fork
- Spatula
- 9x5 inch loaf pan
- Parchment paper (optional)
Instructions:
- Preheat your oven to 350°F (175°C). Grease a 9x5 inch loaf pan, or line it with parchment paper.
- In a medium bowl, mash the ripe bananas with a fork until mostly smooth but with a few small lumps remaining.
- Stir the melted butter into the mashed bananas.
- Mix in the baking soda, salt, vanilla extract, sugar, and beaten egg. Stir until well combined.
- In a separate larger bowl, measure out the flour.
- Add the wet ingredients from the banana mixture bowl to the dry ingredients in the flour bowl.
- Stir gently with a spatula or wooden spoon just until the dry ingredients are incorporated. A few streaks of flour are okay; do not overmix!
- Pour the batter into the prepared loaf pan.
- Bake for 50-60 minutes, or until a toothpick inserted into the center comes out clean.
- Let the banana bread cool in the pan for 10 minutes before transferring it to a wire rack to cool completely before slicing.
Tips and Tricks for Perfect Banana Bread
- Use very ripe bananas: The more brown spots, the better! Overripe bananas are sweeter and softer, making them easier to mash and contributing more moisture and intense banana flavor to the bread. Yellow bananas with just a few spots aren't ripe enough.
- Don't overmix: This is the most common mistake in quick bread baking. Overmixing develops gluten, resulting in a tough, dense loaf. Mix only until the flour streaks disappear. Lumps are fine.
- Check for doneness: Use a toothpick inserted into the deepest part of the loaf. If it comes out clean or with a few moist crumbs attached, it's done. If there is wet batter, continue baking for 5-10 minute intervals.
- Cool properly: Letting the bread cool in the pan for a short time allows it to set slightly before you move it. Cooling completely on a wire rack is essential before slicing to prevent it from becoming gummy or falling apart.
- Add-ins: Feel free to stir in 1/2 cup of chocolate chips, chopped nuts (like walnuts or pecans), or blueberries with the wet ingredients before combining with the dry.
Recipe 2: Simple Soda Bread - A Taste of Ireland
Irish Soda Bread is a unique quick bread that traditionally uses just four ingredients: flour, baking soda, salt, and buttermilk. The acidity of the buttermilk reacts with the baking soda to provide the leavening. It's incredibly simple and fast to make, requiring minimal mixing and no kneading. It offers a denser, more rustic texture compared to loaf-style quick breads.
While traditional versions are plain, modern variations sometimes include a little sugar, butter, or even dried fruit or seeds. It's often served with soup or stew, or simply with butter. Its straightforward process makes it an excellent quick win for beginner bakers.
Detailed Instructions for Simple Soda Bread
Here's how to make a basic, traditional loaf:
Ingredients:
- 4 cups all-purpose flour
- 1 teaspoon baking soda
- 1 teaspoon salt
- 1.5 cups buttermilk, plus extra for brushing
Equipment:
- Large mixing bowl
- Whisk or fork
- Measuring cups and spoons
- Baking sheet
- Parchment paper (optional)
Instructions:
- Preheat your oven to 425°F (220°C). Line a baking sheet with parchment paper or lightly flour it.
- In the large mixing bowl, whisk together the flour, baking soda, and salt.
- Make a well in the center of the dry ingredients.
- Pour the buttermilk into the well.
- Using your hands or a spatula, quickly mix the ingredients until they just come together into a shaggy dough. Be careful not to overmix – the dough should be soft and slightly sticky.
- Turn the dough out onto a lightly floured surface. Gently shape it into a round loaf, about 7-8 inches in diameter and 2 inches high. Handle the dough as little as possible.
- Place the loaf on the prepared baking sheet.
- Using a sharp knife or a bench scraper, cut a deep "X" into the top of the loaf, about half an inch deep. This helps the bread bake evenly and is traditional.
- Brush the top of the loaf with a little extra buttermilk (optional, for a softer crust).
- Bake for 15 minutes, then reduce the oven temperature to 375°F (190°C) and bake for another 30-35 minutes, or until the crust is golden brown and the bottom sounds hollow when tapped.
- Let the soda bread cool on a wire rack. It's best served warm.
Tips and Tricks for Perfect Soda Bread
- Use real buttermilk: The acidity is essential for reacting with the baking soda. A homemade substitute (milk + vinegar/lemon juice) can work in a pinch but may not give the same result.
- Don't overmix or knead: Unlike yeast doughs, soda bread should be mixed minimally. Overworking the dough will develop gluten and result in a tough, heavy loaf. Just mix until combined.
- Handle gently: Shape the loaf lightly. The less you handle the dough, the more tender the bread will be.
- Cut the "X": This isn't just for looks; it helps the heat penetrate the center of the dense dough, ensuring it cooks through evenly. Some traditions say it also lets the fairies out!
- Check for doneness by tapping: A properly baked loaf of soda bread will sound hollow when you tap the bottom crust.
Recipe 3: Delicious Cornbread - A Southern Staple
Cornbread is a beloved quick bread, particularly in the Southern United States. It's typically made with cornmeal in addition to or instead of some of the wheat flour, giving it a distinct texture and flavor. Cornbread can range from slightly sweet and cake-like to savory and crumbly, often depending on the ratio of cornmeal to flour, the amount of sugar used, and the fat (butter, oil, or bacon grease).
This recipe is straightforward and provides a moist, tender crumb. It's often baked in a cast-iron skillet, which gives it a wonderfully crispy crust, but a regular baking pan works well too. It's a fantastic accompaniment to chili, stews, or BBQ.
Detailed Instructions for Delicious Cornbread
Here's a recipe for a slightly sweet, moist cornbread:
Ingredients:
- 1 cup all-purpose flour
- 1 cup yellow cornmeal
- 1/2 cup granulated sugar (adjust to your preference for sweetness)
- 1 tablespoon baking powder
- 1/2 teaspoon salt
- 1 cup milk
- 1/2 cup vegetable oil or melted butter
- 2 large eggs
Equipment:
- Two mixing bowls
- Whisk
- Spatula
- 8x8 inch baking pan or 9 or 10 inch cast iron skillet
Instructions:
- Preheat your oven to 400°F (200°C). Grease an 8x8 inch baking pan, or if using a cast iron skillet, add 1-2 tablespoons of oil or butter to the skillet and place it in the oven while it preheats to get the pan hot (this helps create a crispy crust).
- In a large mixing bowl, whisk together the flour, cornmeal, sugar, baking powder, and salt.
- In a separate medium bowl, whisk together the milk, oil (or melted butter), and eggs.
- Pour the wet ingredients into the dry ingredients.
- Stir with a spatula or wooden spoon just until combined. Do not overmix. The batter will be slightly lumpy.
- Carefully pour the batter into the hot, greased pan or skillet.
- Bake for 20-25 minutes, or until the top is golden brown and a toothpick inserted into the center comes out clean.
- Let the cornbread cool slightly in the pan before slicing and serving warm, often with butter or honey.
Tips and Tricks for Perfect Cornbread
- Don't overmix: Just like other quick breads, overmixing develops gluten and can make cornbread tough. Mix until ingredients are just incorporated.
- Use a hot skillet for crust: If using a cast iron skillet, preheating it with the fat creates an amazing crispy bottom and edge crust, which is a hallmark of great cornbread.
- Adjust sweetness: The sugar amount in cornbread is a matter of personal preference. Some prefer it more savory, others sweeter. Adjust the sugar from 1/4 cup up to 1/2 cup or more.
- Quality cornmeal: Using a good quality cornmeal will improve the flavor and texture. Fine or medium grind yellow cornmeal is standard.
- Serve warm: Cornbread is best enjoyed fresh and warm, perhaps with a pat of butter that melts right in.
Recipe 4: Easy Zucchini Bread - Using Summer's Bounty
Zucchini bread is another moist and flavorful quick bread, perfect for using up that abundance of zucchini that often appears in gardens during the summer. Don't worry, you can't taste the zucchini! It primarily adds moisture and tenderness to the bread, similar to how bananas function in banana bread. It's a great way to sneak some vegetables into a delicious treat.
This recipe is very similar in method to banana bread, making it familiar ground if you've already tried that. It relies on the moisture from the grated zucchini for its incredibly tender crumb.
Detailed Instructions for Easy Zucchini Bread
Here's a simple recipe for a moist zucchini loaf:
Ingredients:
- 2 cups all-purpose flour
- 1 teaspoon baking soda
- 1 teaspoon baking powder
- 1/2 teaspoon salt
- 1 teaspoon ground cinnamon
- 1/4 teaspoon ground nutmeg (optional)
- 1.5 cups granulated sugar
- 1/2 cup vegetable oil or melted butter
- 2 large eggs
- 1 teaspoon vanilla extract
- 1.5 to 2 cups grated zucchini (about 1-2 medium zucchini), excess moisture squeezed out
Equipment:
- Two mixing bowls
- Whisk
- Spatula
- Box grater or food processor
- Clean kitchen towel or paper towels
- 9x5 inch loaf pan
- Parchment paper (optional)
Instructions:
- Preheat your oven to 350°F (175°C). Grease a 9x5 inch loaf pan, or line it with parchment paper.
- Grate the zucchini using the large holes of a box grater or a food processor. Place the grated zucchini in a clean kitchen towel or several layers of paper towels and squeeze firmly to remove as much excess liquid as possible. This step is crucial for preventing a soggy bread.
- In a large mixing bowl, whisk together the flour, baking soda, baking powder, salt, cinnamon, and nutmeg (if using).
- In a separate medium bowl, whisk together the sugar, oil (or melted butter), eggs, and vanilla extract.
- Stir the squeezed grated zucchini into the wet ingredients.
- Pour the wet ingredients into the dry ingredients.
- Stir gently with a spatula or wooden spoon just until the dry ingredients are incorporated. Do not overmix.
- Pour the batter into the prepared loaf pan.
- Bake for 50-65 minutes, or until a toothpick inserted into the center comes out clean. If the top browns too quickly, you can loosely tent it with foil during the last 15-20 minutes of baking.
- Let the zucchini bread cool in the pan for 10 minutes before transferring it to a wire rack to cool completely before slicing.
Tips and Tricks for Perfect Zucchini Bread
- Squeeze that zucchini: This is the most critical step. Zucchini contains a lot of water. Removing excess moisture prevents the bread from being dense and gummy. Squeeze firmly!
- Don't overmix: As with all quick breads, mix just until combined. Overmixing leads to toughness.
- Adjust spices: Feel free to adjust cinnamon and nutmeg to your liking, or add other spices like ginger or cardamom.
- Add-ins: Chocolate chips (1/2 to 1 cup), chopped nuts, or raisins are popular additions. Stir them in with the wet ingredients before combining with the dry.
- Check for doneness carefully: Because zucchini adds so much moisture, it can be tricky to tell when the center is fully baked. Rely on the toothpick test inserted into the very center of the loaf.
Recipe 5: Muffins - Versatile and Fun
Muffins are essentially mini quick breads baked in individual portions. They follow the same basic principles and mixing method (the muffin method) as loaf-style quick breads, making them a perfect beginner project. Their smaller size means they bake much faster than a loaf, offering quicker results and the chance to bake multiple flavors at once.
The versatility of muffins is endless. You can make sweet muffins with fruit, chocolate, or spices, or savory muffins with cheese, herbs, or vegetables. The basic batter is a fantastic canvas for experimentation once you get comfortable with the core technique.
Detailed Instructions for Basic Muffin Recipe
Here's a simple base recipe you can customize:
Ingredients:
- 1.5 cups all-purpose flour
- 1/3 cup granulated sugar
- 2 teaspoons baking powder
- 1/4 teaspoon salt
- 1 large egg
- 1 cup milk
- 1/4 cup melted butter or vegetable oil
- 1 teaspoon vanilla extract
- Optional add-ins: 1 cup blueberries, chocolate chips, or other desired additions
Equipment:
- Two mixing bowls
- Whisk
- Spatula
- 12-cup muffin tin
- Paper muffin liners (optional)
Instructions:
- Preheat your oven to 400°F (200°C). Line a 12-cup muffin tin with paper liners or grease the cups thoroughly.
- In a large mixing bowl, whisk together the flour, sugar, baking powder, and salt.
- In a separate medium bowl, whisk together the egg, milk, melted butter (or oil), and vanilla extract.
- If using add-ins (like blueberries or chocolate chips), gently stir them into the dry ingredients to coat them lightly with flour. This helps prevent them from sinking to the bottom.
- Pour the wet ingredients into the bowl with the dry ingredients.
- Stir with a spatula or wooden spoon just until combined. The batter will be lumpy; do not overmix. A few dry streaks are acceptable.
- Divide the batter evenly among the prepared muffin cups, filling each about two-thirds full.
- Bake for 18-22 minutes, or until the tops are golden brown and a toothpick inserted into the center of a muffin comes out clean.
- Let the muffins cool in the tin for a few minutes before transferring them to a wire rack to cool slightly before serving. Muffins are often best enjoyed warm.
Tips and Tricks for Perfect Muffins
- Don't overmix: This is the golden rule for muffins. Lumpy batter is good batter. Overmixing results in tough, peaked muffins.
- Fill cups appropriately: Filling cups about two-thirds full results in nicely domed muffins. Filling too full can cause them to spill over.
- High initial temperature (optional): Some muffin recipes start with a few minutes at a higher temperature (e.g., 425°F / 220°C) before reducing it. This provides a quick burst of heat that helps the muffins rise rapidly and form a good dome. The recipe above uses a consistent temperature for simplicity, but it's a technique to explore later.
- Add-ins: Coating add-ins like fruit or chocolate chips in a little flour before adding them to the dry ingredients helps suspend them in the batter so they don't all sink to the bottom during baking.
- Check for doneness: Muffins bake relatively quickly. Check them around the 18-minute mark. A toothpick should come out clean.
Troubleshooting Common Quick Bread Baking Issues
Even with simple quick breads, you might encounter issues. Don't be discouraged! Understanding the common problems and their causes will help you identify what went wrong and improve your results next time. Baking is a learning process, and troubleshooting is part of the journey.
Most issues with quick breads stem from improper mixing, incorrect ingredient ratios, or oven temperature problems. By recognizing the symptoms, you can adjust your technique or recipe slightly to achieve better results.
Dry Quick Bread: Causes and Solutions
A dry quick bread is often the result of too much flour, not enough liquid or fat, or overbaking. Flour measurement is a common culprit; scooping flour directly from the bag instead of spooning it lightly into the cup and leveling can add significantly more flour than intended, sometimes up to 25% extra volume by weight. This excess dry ingredient absorbs too much liquid, leading to a dry crumb.
To prevent dry quick bread, ensure you are measuring your flour accurately, ideally using the spoon and level method or, even better, using a kitchen scale to measure by weight (e.g., 1 cup of all-purpose flour is typically around 120-125 grams). Double-check that you added the correct amount of liquid and fat as specified in the recipe. Also, avoid overbaking; check for doneness using the toothpick test at the minimum baking time specified in the recipe. If your oven runs hot, consider using an oven thermometer and adjusting the temperature down slightly.
Dense or Heavy Quick Bread: Identifying the Problem
A dense or heavy quick bread lacks the desired lift and airy texture. The most frequent cause is overmixing the batter. When you overmix, you develop the gluten in the flour too much, creating a tough structure that inhibits the leaveners from properly lifting the bread. The batter should be mixed just until the dry ingredients are incorporated, even if it looks lumpy.
Other causes can include using stale or expired leavening agents (baking powder or baking soda lose their potency over time), using the wrong type or amount of leavener, or the batter sitting too long before baking after the wet and dry ingredients are combined (the leavening reaction starts immediately, and if the batter sits, some of the lift is lost before it hits the oven). Ensure your leaveners are fresh (you can test baking powder by adding a teaspoon to hot water – it should fizz vigorously) and get the batter into the preheated oven promptly after mixing.
Uneven Baking: Achieving a Golden Crust
Uneven baking means parts of your quick bread are overdone (dark crust, dry edges) while other parts (often the center) are undercooked. This can be caused by an inaccurate oven temperature, a hot spot in your oven, or the quick bread being placed too close to a heating element. Ovens are notoriously inaccurate; a thermostat might say 350°F (175°C), but the actual temperature inside could be 25-50°F (15-30°C) higher or lower.
Using an oven thermometer is the best way to verify your oven's true temperature. If you notice hot spots, try rotating your quick bread halfway through the baking time. Ensure the quick bread pan is placed in the center of the oven rack, away from the top and bottom heating elements. If the top is browning too quickly before the inside is cooked, loosely tent the pan with aluminum foil for the remainder of the baking time.
Preventing a Soggy Center in Your Quick Breads
A soggy or wet center is a frustrating problem, usually indicating that the quick bread did not bake through completely. This is often related to oven temperature being too high (causing the outside to set and brown before the inside cooks), incorrect baking time, or excessive moisture in the batter. For quick breads with high moisture ingredients like zucchini or bananas, not removing enough excess liquid can contribute to this issue.
To prevent a soggy center, first ensure your oven temperature is accurate using an oven thermometer. If the outside is browning too quickly, reduce the oven temperature slightly (e.g., by 25°F or 15°C) and extend the baking time. Always use the toothpick test inserted into the deepest part of the center to confirm doneness; if it comes out with wet batter, it needs more time, even if the outside looks done. For zucchini or similar quick breads, make sure you squeeze out as much moisture as possible from the grated ingredient before adding it to the batter.
Storing and Enjoying Your Homemade Quick Breads
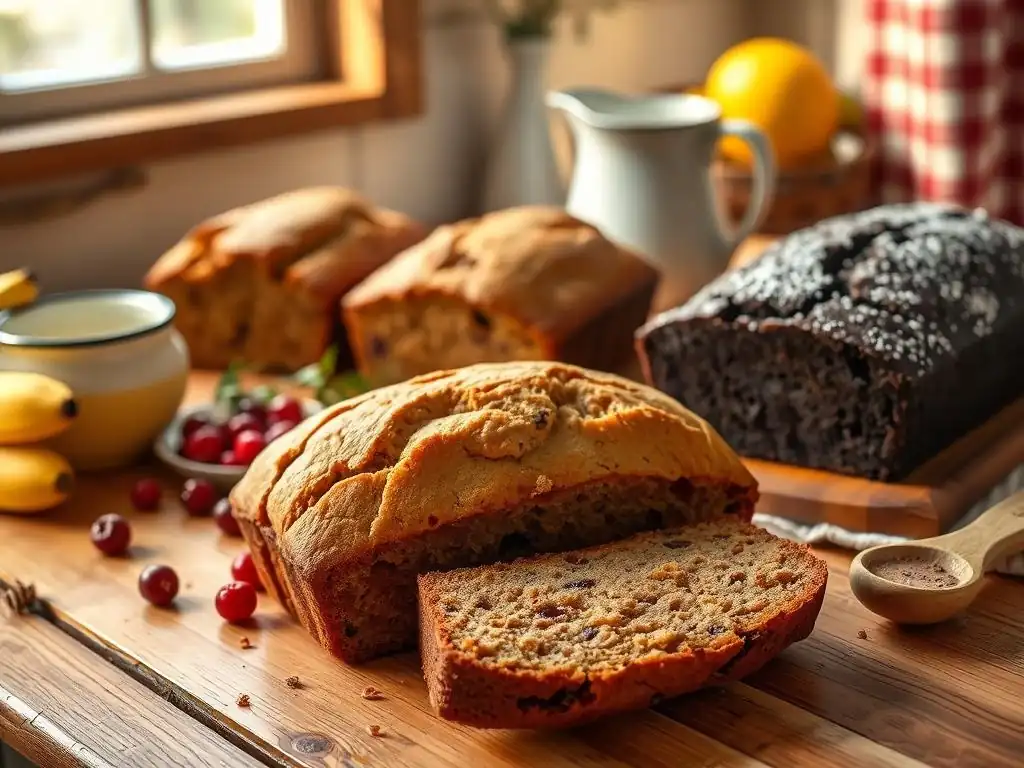
You've successfully baked a delicious quick bread – congratulations! Now, how do you keep it fresh and enjoy it to the fullest? Proper storage is key to maintaining moisture and flavor, extending the life of your homemade treat.
Whether it's a loaf of banana bread or a batch of muffins, knowing how to store your quick breads correctly will ensure they stay delicious for as long as possible, allowing you to savor your baking success.
Best Practices for Storing Quick Breads
Once your quick bread has cooled completely on a wire rack, it's ready for storage. Storing it before it's fully cool can trap steam, making the crust soggy and potentially leading to mold. For loaf-style quick breads, wrapping the cooled loaf tightly in plastic wrap is generally the best method for keeping it moist at room temperature. An extra layer of aluminum foil or placing the wrapped loaf in an airtight container provides even better protection against drying out.
Muffins and scones are also best stored in an airtight container at room temperature. Placing a paper towel in the bottom of the container and sometimes another on top can help absorb excess moisture and prevent the tops from getting sticky. Most quick breads stored this way will stay fresh and moist for 2-3 days. For longer storage, refrigeration or freezing is recommended.
Serving Suggestions and Creative Ideas
Quick breads are wonderfully versatile in how they can be enjoyed. A slice of banana bread is perfect on its own with a cup of coffee or tea. Cornbread is a classic accompaniment to savory dishes like chili, soup, or barbecue. Muffins are ideal for breakfast or a snack on the go.
Get creative with how you serve them! Toasting slices of quick bread can revive their texture and flavor, especially if they're a day or two old. Serve slices warm with a spread of butter, cream cheese, or jam. Leftover cornbread can be crumbled into soups or used to make cornbread stuffing. Muffins can be split and grilled or used as a base for dessert toppings like whipped cream and berries. Don't be afraid to experiment with different pairings!
Freezing Quick Breads for Later Enjoyment
Quick breads freeze exceptionally well, making them perfect for baking ahead or preserving leftovers. Freezing allows you to enjoy your homemade quick breads weeks or even months after baking, offering convenience comparable to having a ready-to-go easy sourdough bread recipe starter in your fridge.
To freeze a loaf, ensure it is completely cooled. Wrap the loaf tightly in plastic wrap, then wrap it again in aluminum foil or place it in a freezer-safe bag. This double layer of protection helps prevent freezer burn. For muffins, arrange cooled muffins in a single layer in a freezer bag or airtight container.
Frozen quick breads can last for 2-3 months. Thaw wrapped loaves at room temperature for several hours or overnight. Muffins thaw faster, often in an hour or two at room temperature. You can also gently reheat thawed slices or muffins in a microwave or oven.
Taking Your Quick Bread Baking to the Next Level
Once you're comfortable with basic quick bread recipes, you can start experimenting and customizing to create your own unique variations. Quick breads are a fantastic platform for culinary creativity, allowing you to play with flavors, textures, and ingredients.
From adding spices and extracts to incorporating fruits, nuts, or even vegetables, the possibilities are vast. You can also start thinking about adapting recipes to fit dietary needs or preferences, deepening your understanding of ingredient functions.
Experimenting with Flavors and Add-Ins
The basic quick bread batter is a blank canvas. You can easily change the flavor profile by adding spices like cinnamon, nutmeg, cardamom, or ginger. Extracts like almond, lemon, or maple can introduce new dimensions. Citrus zest is another great way to add bright flavor.
Incorporating add-ins is also simple. As noted in the muffin recipe tips, coating things like chocolate chips, fresh or dried fruit (berries, cranberries, raisins, chopped apples), or nuts in a little flour helps them distribute evenly. Don't overload the batter, though; adding too many heavy items can prevent the quick bread from rising properly. A good rule of thumb is typically no more than 1 to 1.5 cups of total add-ins per standard loaf or batch of 12 muffins. Consider combinations like lemon-poppy seed, apple-cinnamon, or chocolate-raspberry.
Adapting Recipes to Your Dietary Needs
Quick bread recipes can often be adapted to suit various dietary restrictions, though some substitutions might slightly alter the texture or flavor. For example, you can often substitute dairy milk with non-dairy alternatives like almond, soy, or oat milk. If a recipe calls for buttermilk, you can replicate its acidity by adding a tablespoon of vinegar or lemon juice to a cup of regular milk (dairy or non-dairy) and letting it sit for 5-10 minutes before using.
For gluten-free quick breads, you'll need to use a gluten-free flour blend. These blends often contain a mix of rice flour, potato starch, tapioca starch, and sometimes xanthan gum to help with structure. Substituting gluten-free flour requires careful measurement and sometimes minor adjustments to liquid. For vegan quick breads, you'll need to replace eggs (often with mashed banana, applesauce, flax egg, or commercial egg replacers) and dairy products (with plant-based alternatives and oil or vegan butter). Each substitution can affect the outcome, so it's often best to start with recipes specifically developed for these adaptations.
BakeWithEase Challenge: Creating Your Own Quick Bread Recipe
Once you've baked several different quick breads and feel comfortable with the basic methods and ingredients, why not try creating your own simple recipe? Start by taking a basic muffin or loaf recipe and making small changes. For instance, take the basic muffin recipe and swap the milk for buttermilk, reduce the baking powder slightly, and add blueberries. Or take the banana bread recipe and add different spices like cardamom and ginger, or swap half the flour for whole wheat.
Keep notes on your experiments: what changes did you make, and what was the result? Did the texture change? Was the flavor enhanced? This process of tinkering and observing is how you truly master baking. It's a creative and rewarding step that builds on the foundational skills learned from following an easy quick bread recipe and prepares you for tackling more complex baking projects in the future.
Conclusion: Embrace the Joy of Quick Bread Baking.
Frequently Asked Questions
What exactly are quick breads, and how do they differ from other types of bread?
Quick breads are leavened with chemical agents like baking powder or baking soda, unlike traditional breads that use yeast. This means they require no proofing time and are, as the name suggests, quicker to make.
Can I really make sourdough bread easily, even as a beginner?
While traditional sourdough can be complex, BakeWithEase focuses on simplified, easy sourdough bread recipes perfect for beginners. These recipes often use faster methods and readily available ingredients to minimize intimidation.
What ingredients are commonly used in quick bread recipes?
Common ingredients include flour, sugar, baking powder or baking soda, salt, eggs, milk or other liquid, and butter or oil. BakeWithEase emphasizes using easy-to-find ingredients in all our recipes.
What kind of equipment do I need to start baking quick breads?
Generally, you'll need basic equipment like mixing bowls, measuring cups and spoons, a whisk, a spatula, and a baking pan. More complex recipes may require specialized equipment, but most quick bread recipes are simple and don't need much.
Where can I find an easy sourdough bread recipe specifically on BakeWithEase?
BakeWithEase.com offers a variety of easy sourdough bread recipes. Look for recipes labeled "beginner-friendly" or those highlighting a simplified process for achieving sourdough success.
Final Reflection: The Humble Quick Bread – A Sourdough Springboard
The ease and accessibility of quick breads offer a surprisingly potent gateway to the world of baking, shattering the myth that bread making is an exclusive, time-consuming endeavor. This is particularly relevant today, as more and more people seek fulfilling hobbies and stress-relieving activities within the confines of their homes. The satisfaction derived from creating something delicious and nourishing from simple ingredients is undeniable, and quick breads provide the perfect entry point.
The journey from a simple biscuit to a more complex sourdough loaf is a testament to the power of incremental learning and the joy of culinary exploration. The techniques learned while mastering quick breads – understanding dough consistency, mastering oven temperatures, and appreciating the nuances of different flours – directly translate to more advanced baking projects. This gradual progression fosters confidence and a deeper appreciation for the craft. The best way to find yourself is to lose yourself in the service of others.
While not directly about baking, this quote speaks to the transformative power of dedicating oneself to a skill, a sentiment perfectly mirrored in the journey from quick bread novice to sourdough enthusiast.
Now, consider your own kitchen. What simple quick bread will you bake next? Will it be a comforting cornbread, a delicate scone, or perhaps a savory focaccia? The possibilities are endless, and the rewards – both culinary and personal – are immeasurable. Embrace the simplicity, savor the process, and let the humble quick bread be your stepping stone to a world of baking adventures. Don't be afraid to experiment, to fail, and to learn. The most delicious loaves are often born from the most unexpected journeys.
Unlock Your Inner Baker: Start Baking Today!
Thanks for joining us on this delicious journey into the world of quick breads! We hope you've discovered some new favorite recipes and gained the confidence to tackle baking with ease. Ready to take the next step?
- Bake your first quick bread this week! Choose a recipe from the article that excites you and get baking. Don't be afraid to experiment with flavors and ingredients.
- Share your baking triumph on social media! Use #BakeWithEase and tag us – we’d love to see your creations.
- Try a new variation on a classic: How about adding some unexpected spices or fruits to a familiar recipe?
What unexpected flavor combination will you experiment with next?