
Quick Start Scones: No Complicated Steps


Welcome to BakeWithEase, where creating delicious treats is simpler than you think! Ever dreamed of effortlessly whipping up warm, buttery scones? Our Easy No-Fuss Scones Recipe unveils the secrets to baking success, even if you're just starting out. Discover how to achieve perfect scones with minimal effort and maximum flavor – are you ready to unlock the joy of baking?
- Quick Start Scones: No Complicated Steps - BakeWithEase.com
- Introduction to Easy No-Fuss Scones
- The Easiest Scones Recipe You'll Ever Make
-
Step-by-Step Guide to Baking Easy Scones
- Step 1: Preparing Your Ingredients for Effortless Scones
- Step 2: Combining the Dry Ingredients for the Scone Dough
- Step 3: Adding the Butter for Flaky Scones
- Step 4: Incorporating the Wet Ingredients into the Dough
- Step 5: Shaping and Cutting Your Scones
- Step 6: Baking Your Scones to Golden Perfection
- Flavor Variations for Your Easy Scones
- Tips for Baking the Perfect Easy Scones
- Storing Your Homemade Scones
- Troubleshooting Common Scone Baking Issues
- More Easy Baking Recipes from BakeWithEase
- Conclusion: Enjoy Your Deliciously Simple Scones!
- Frequently Asked Questions
- Final Reflection: The Simple Joy of Baking
- Unleash Your Inner Baker: Scone Success Awaits!
Quick Start Scones: No Complicated Steps - BakeWithEase.com
Introduction to Easy No-Fuss Scones
Why This Easy Scones Recipe is Perfect for Beginners
Many people shy away from baking, imagining complex techniques and hours spent in the kitchen. This easy nofuss scones recipe is designed to demystify baking and prove that delicious results are achievable with minimal effort. Unlike some traditional methods that require intricate folding or chilling processes, this simple approach focuses on speed and simplicity, making it ideal for anyone new to baking or those short on time. We've streamlined the steps so you can get from ingredients to warm, fresh scones in roughly 30 minutes.
This method doesn't compromise on taste or texture. You'll still achieve that delightful, slightly crumbly interior and a beautiful golden crust that is characteristic of great scones. By focusing on key techniques, like handling the dough gently and ensuring your butter is cold, even beginners can master the basics. Think of this as your gateway to baking success – a rewarding experience that builds confidence for tackling more recipes down the line.
BakeWithEase's Promise: Simple Baking, Delicious Results
At BakeWithEase.com, our core mission is to make baking accessible and enjoyable for everyone, regardless of their experience level. We believe that the joy of creating something delicious from scratch shouldn't be reserved for experts. This easy nofuss scones recipe embodies that promise. We break down each step into clear, actionable instructions, ensuring you understand why certain techniques are used, not just how to do them.
We test our recipes rigorously to ensure they work consistently in home kitchens using standard equipment. Our goal is to eliminate guesswork and frustration, guiding you towards successful bakes every time. This quick scones recipe is a prime example of how we simplify classic baked goods, allowing you to spend less time worrying and more time enjoying the process and the delicious outcome. You can trust that our easy scones recipe will deliver on its promise of simple steps and mouth-watering results.
The Easiest Scones Recipe You'll Ever Make
Key Ingredients for Simple Scones
Creating delicious, easy scones starts with a few basic pantry staples. You'll need 2 cups (about 250g) of all-purpose flour, which provides the main structure for the scones. For leavening, we'll use 1 tablespoon of baking powder, ensuring a good rise and a light texture. A pinch of salt, typically about 1/2 teaspoon, enhances the overall flavor, balancing the sweetness if you add any.
The fat component is crucial for flakiness. This recipe calls for 1/2 cup (about 113g) of cold, unsalted butter, cut into small cubes. Cold butter is key because as it melts in the oven, it creates steam pockets, resulting in those desirable flaky layers. Finally, you'll need about 3/4 cup (180ml) of milk or buttermilk. Buttermilk adds a slight tang and helps create a tender crumb, but whole milk works perfectly well too. A tablespoon or two of sugar is optional but recommended for a touch of sweetness, especially for traditional sweet scones.
Equipment Needed for Quick Scones
You don't need a professional kitchen setup to bake these quick scones. The necessary equipment is likely already in your home. A large mixing bowl is essential for combining your ingredients. You'll also need a pastry blender, a fork, or even just your fingertips to cut the cold butter into the dry ingredients.
For shaping and cutting, a rolling pin (or even a clean bottle) can be helpful, and a round biscuit cutter (about 2-3 inches in diameter) or a sharp knife will be needed to portion the dough. Lastly, you'll need a baking sheet lined with parchment paper to prevent sticking and ensure even baking. That's it – simple tools for a simple scones recipe!
Step-by-Step Guide to Baking Easy Scones
Step 1: Preparing Your Ingredients for Effortless Scones
Before you begin mixing, it's crucial to have everything ready. Preheat your oven to 400°F (200°C). This ensures the oven is at the correct temperature when your scones are ready to bake, which is vital for a good rise. Line a baking sheet with parchment paper. This makes cleanup a breeze and prevents the scones from sticking.
Measure out all your dry ingredients – flour, baking powder, salt, and optional sugar – into your large mixing bowl. Give them a quick whisk to combine and aerate the flour. Make sure your butter is cold and cut into small, pea-sized cubes. Measure your milk or buttermilk and set it aside. Having everything prepped beforehand makes the mixing process much smoother and quicker, contributing to the 'no-fuss' nature of this easy scones recipe.
Step 2: Combining the Dry Ingredients for the Scone Dough
In your large mixing bowl, combine the 2 cups of all-purpose flour, 1 tablespoon of baking powder, 1/2 teaspoon of salt, and the optional 1-2 tablespoons of sugar. Use a whisk or a fork to thoroughly mix these dry ingredients together. This step is important because it evenly distributes the leavening agent (baking powder) and salt throughout the flour.
Ensuring the dry ingredients are well combined prevents pockets of unmixed baking powder, which could lead to uneven rising. It also helps to aerate the flour slightly, contributing to a lighter texture in the final easy scones. A quick 30-second whisk is usually sufficient to achieve this.
Step 3: Adding the Butter for Flaky Scones
Now comes the crucial step for achieving flaky scones: incorporating the cold butter into the dry ingredients. Add your 1/2 cup of cold butter cubes to the bowl of dry ingredients. Using a pastry blender, two forks, or your fingertips, work the butter into the flour mixture. The goal is to break down the butter until it resembles coarse crumbs, with some pieces about the size of small peas.
The cold butter is what creates steam as it melts in the hot oven, pushing the dough layers apart and resulting in flakiness. Avoid overworking the mixture; you don't want a smooth dough at this stage. The process should take only a few minutes. If using your fingers, work quickly to prevent the butter from warming up too much.
Step 4: Incorporating the Wet Ingredients into the Dough
Make a well in the center of the dry ingredients with the butter mixture. Pour in the 3/4 cup of cold milk or buttermilk. Use a fork or a rubber spatula to gently mix the wet ingredients into the dry until the mixture just comes together to form a shaggy dough. Do not overmix!
Overmixing develops the gluten in the flour, which can result in tough, dense scones instead of the desired tender texture. Stir only until there are no pockets of dry flour visible. The dough will look a bit sticky and shaggy – this is perfectly normal for an easy nofuss scones recipe and indicates you've handled it minimally.
Step 5: Shaping and Cutting Your Scones
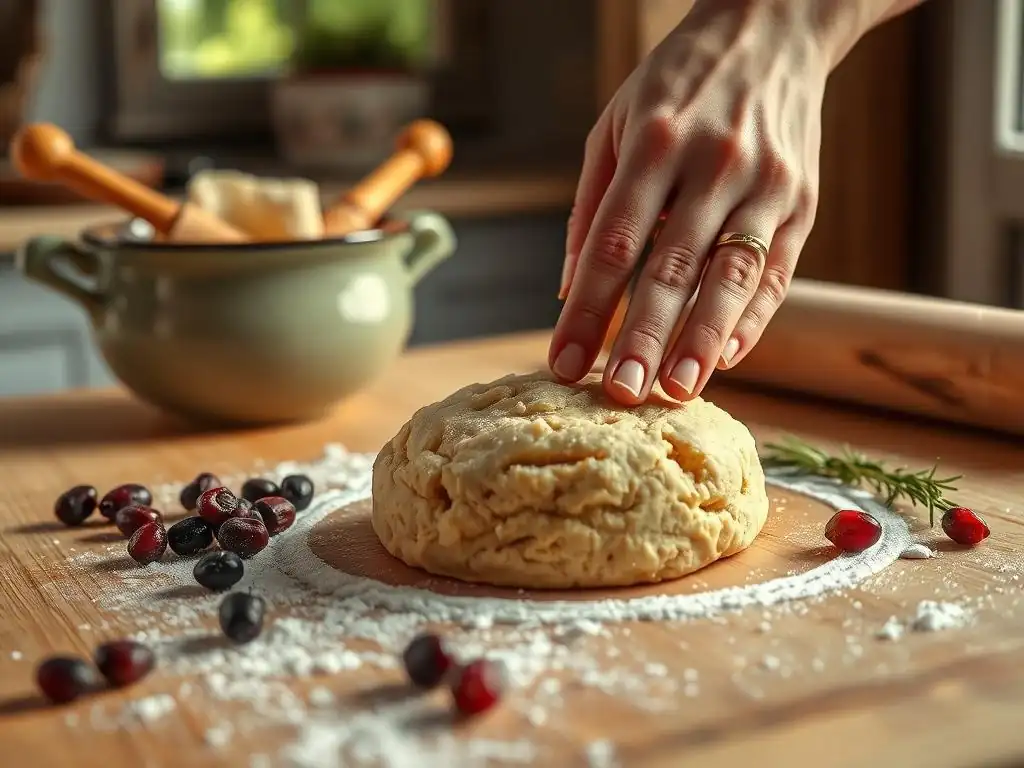
Turn the shaggy dough out onto a lightly floured surface. Gently bring the dough together with your hands a couple of times, but avoid kneading. You want to handle the dough as little as possible. Pat or gently roll the dough into a circle or rectangle about 3/4 inch (about 2 cm) thick.
Using a sharp knife or a biscuit cutter, cut the dough into scones. If using a cutter, press straight down without twisting to ensure clean edges, which helps the scones rise evenly. If using a knife, cut the rectangle into squares or triangles. This amount of dough typically yields 6-8 scones, depending on the size of your cutter or how you slice them. Place the cut scones onto your prepared baking sheet.
Step 6: Baking Your Scones to Golden Perfection
Place the baking sheet with your shaped scones into the preheated oven at 400°F (200°C). Bake for 12 to 15 minutes, or until the scones have risen, are golden brown on top, and a skewer inserted into the center comes out clean. The baking time can vary slightly depending on your oven and the size of your scones.
Keep an eye on them after 10 minutes to prevent over-baking. The tops should feel firm when gently pressed. Once baked, remove the scones from the oven and let them cool slightly on the baking sheet before transferring them to a wire rack. Serve these easy nofuss scones warm with your favorite toppings like butter, jam, or clotted cream.
Flavor Variations for Your Easy Scones
Adding Berries for Fruity Scones
Adding fresh or frozen berries is a wonderful way to introduce bursts of flavor and moisture to your easy scones. Blueberries, raspberries, or chopped strawberries work beautifully. For 2 cups of flour, you can typically add about 1/2 cup of berries. If using frozen berries, do not thaw them; add them directly to the dry ingredients before adding the butter, or gently fold them in with the milk in Step 4.
Tossing fresh berries with a tablespoon of flour before adding them to the dough can help prevent them from sinking to the bottom. Gently fold the berries into the dough just until they are distributed. Overmixing will crush the berries and tint the dough purple or red. The baking time might increase by a minute or two with the added moisture from the fruit.
Chocolate Chip Scones: A Simple Twist
For a sweet treat, transform your easy scones into delicious chocolate chip scones. Simply fold in about 1/2 cup of chocolate chips (milk, dark, or white) into the dry ingredients along with the butter. This adds pockets of melted chocolate throughout the scone as it bakes.
Ensure the chocolate chips are evenly distributed but again, avoid overmixing. The warmth of the dough can start to melt the chocolate, so work relatively quickly. The baking process remains the same, resulting in warm, chocolatey easy scones perfect for a snack or dessert.
Savory Scones: Cheese and Herb Ideas
Scones aren't just for sweet occasions! This easy nofuss scones recipe can easily be adapted into a savory version. Omit the sugar from the dry ingredients. Instead, add about 1/2 cup of grated cheese, such as sharp cheddar, parmesan, or a mix. You can also incorporate 1-2 tablespoons of chopped fresh herbs like chives, rosemary, or thyme.
Fold the cheese and herbs into the dry ingredients or with the wet ingredients in Step 4. Savory scones are wonderful served warm with soup, stew, or simply butter. You can brush the tops with a little milk or an egg wash and sprinkle with extra cheese or herbs before baking for an extra layer of flavor and a nice finish.
Tips for Baking the Perfect Easy Scones

Ensuring a Tender Scone Crumb
The secret to a tender crumb in your easy scones lies primarily in two things: using cold ingredients and minimal handling of the dough. Cold butter is essential, as discussed, but also try to use cold milk or buttermilk. Cold fat creates steam during baking, preventing the dough from becoming dense.
Equally important is how you handle the dough. Overworking the dough develops gluten, making it tough and bread-like rather than light and crumbly. Mix only until the ingredients are just combined and pat or gently roll the dough instead of kneading. The less you touch the dough, the more tender your final easy nofuss scones will be.
Avoiding Overmixing the Dough
Overmixing is perhaps the most common pitfall when baking scones, especially for beginners. When combining the wet and dry ingredients, stop mixing as soon as the dry flour disappears and the dough just comes together. It will look shaggy and not perfectly smooth – this is correct.
Similarly, when shaping the dough, resist the urge to knead it repeatedly. A couple of gentle folds or presses are enough to bring it together before shaping. Overmixing develops gluten, leading to a tough texture. By handling the dough minimally, you ensure a light, tender crumb that is the hallmark of a great easy scones recipe.
Achieving a Golden-Brown Crust
A beautiful golden-brown crust adds flavor and visual appeal to your easy scones. This is primarily achieved by baking at the correct temperature (400°F or 200°C in this recipe) and for the right amount of time (typically 12-15 minutes). The hot oven helps the scones rise quickly and encourages the Maillard reaction, which browns the surface.
For an even richer color and a slightly softer top crust, you can brush the tops of the scones with a little milk, cream, or an egg wash (one egg beaten with a tablespoon of milk or water) before baking. This step is optional but enhances the golden finish. Ensure your oven is fully preheated before putting the scones in; a cold oven will result in a poor rise and pale scones.
Storing Your Homemade Scones
Keeping Scones Fresh for Longer
Homemade easy scones are best enjoyed fresh, preferably warm from the oven. However, if you have leftovers, they can be stored to maintain their quality for a day or two. Allow the scones to cool completely on a wire rack before storing. Warm scones will create condensation, making them soggy.
Store cooled scones in an airtight container at room temperature. This will keep them fresh for about 1-2 days. Avoid storing them in the refrigerator, as this can dry them out quickly. For longer storage, scones can be frozen.
Reheating Scones for Optimal Taste
To enjoy leftover easy scones with a texture close to freshly baked, reheating is recommended. The best way to reheat scones is in a preheated oven or toaster oven. Place the scones directly on the oven rack or on a baking sheet.
Reheat at a moderate temperature, around 300°F (150°C), for about 5-10 minutes, or until they are warmed through. This method helps to crisp up the exterior again while warming the interior. Microwaving is quicker (30-60 seconds), but it can sometimes make the scones slightly chewy rather than tender.
Troubleshooting Common Scone Baking Issues

Dry Scones: What Went Wrong?
If your easy scones turned out dry, there are a few potential culprits. The most common reason is adding too much flour. Measure your flour correctly, ideally by weight (250g) or by spooning it lightly into the measuring cup and leveling it off, rather than scooping directly from the bag, which compacts it.
Another cause of dryness is overmixing the dough or handling it too much. This develops gluten and dries out the crumb. Also, ensure you used the correct amount of liquid (3/4 cup milk/buttermilk). Using cold ingredients helps maintain moisture. Baking for too long or at too high a temperature can also lead to dry scones; check for doneness around the 12-minute mark.
Flat Scones: How to Get a Good Rise
Flat easy scones usually indicate an issue with the leavening or oven temperature. Ensure your baking powder is fresh and hasn't expired; old baking powder loses its potency. Using the correct amount (1 tablespoon for this recipe) is also vital.
Make sure your oven is fully preheated to 400°F (200°C). A hot oven provides the initial burst of heat needed for the baking powder to react effectively and lift the scones. Also, avoid twisting the biscuit cutter when cutting, as this can seal the edges and inhibit the rise. Gentle handling and not overworking the dough also contribute to a better rise.
Unevenly Baked Scones: Solutions
Unevenly baked easy scones can be frustrating, with some parts underdone and others potentially burnt. This is often due to hot spots in your oven or overcrowding the baking sheet. Most ovens have slight temperature variations; rotating the baking sheet halfway through the baking time (around the 6-8 minute mark) can help ensure more even browning.
Avoid placing scones too close together on the baking sheet; leave about an inch between them to allow hot air to circulate freely around each one. Also, ensure your oven rack is positioned in the center of the oven for the most consistent heat distribution.
More Easy Baking Recipes from BakeWithEase
Explore Our Beginner Baking Recipe Collection
This easy nofuss scones recipe is just the beginning of your baking journey with BakeWithEase! Our Beginner Baking Recipe collection is curated specifically for those new to the kitchen or looking for simple, reliable recipes. You'll find straightforward guides to classic baked goods that build fundamental skills.
From simple chocolate chip cookies that require no chilling to basic vanilla cupcakes with an easy buttercream frosting, our collection covers a range of sweet and savory treats. Each recipe comes with detailed instructions, troubleshooting tips, and ingredient explanations, just like this easy scones guide. Dive in and discover how enjoyable baking can be!
Discover Easy Muffins and Scones Recipes
If you loved making these quick scones, you'll find plenty more to explore in our Easy Muffins & Scones subcategory. This section is dedicated to quick bread recipes that typically don't require yeast or extensive proofing, making them perfect for spontaneous baking sessions.
You'll find variations on this easy scones recipe, as well as a wide array of muffin flavors, from classic blueberry and banana nut to more adventurous combinations. These recipes follow our BakeWithEase philosophy: minimal fuss, maximum flavor, and guaranteed success for bakers of all levels. Expand your repertoire beyond this easy nofuss scones recipe!
Conclusion: Enjoy Your Deliciously Simple Scones!
You've done it! You've successfully baked a batch of delicious, easy scones using our simple no-fuss method. This recipe proves that baking doesn't have to be intimidating and that incredibly tasty results are within everyone's reach. Whether you enjoy them plain with butter, loaded with jam and cream, or as a savory treat, these quick scones are sure to become a favorite.
Remember the key principles: cold ingredients, minimal handling, and the right oven temperature. Master these, and you'll be making perfect easy scones every time. We hope this experience encourages you to keep baking and exploring more recipes on BakeWithEase.com. Happy baking!
We love seeing what our community bakes! If you made this easy nofuss scones recipe, we'd be thrilled to hear about it. How did they turn out? Did you try any flavor variations? Sharing your experiences inspires other bakers and helps us understand what you enjoy most.
Let us know how this simple scones recipe worked for you. Did you find the step-by-step guide clear and helpful? Your feedback is invaluable as we continue to develop more easy baking recipes. Celebrate your baking success and maybe even share a photo of your beautiful quick scones!
Frequently Asked Questions
What makes this scone recipe "easy nofuss"?
This recipe emphasizes simple ingredients and minimal steps, avoiding complicated techniques that can intimidate beginner bakers. It's designed for quick preparation and delicious results without the fuss.
How long does it take to make these scones from start to finish?
From gathering ingredients to enjoying a warm scone, this recipe is designed to be completed in under 30 minutes. This makes it perfect for a quick breakfast or afternoon treat.
What are the key ingredients for an "easy nofuss scones recipe"?
The core ingredients are usually flour, butter, sugar, baking powder, and milk or cream. Variations can include additions like fruit or chocolate chips, but the base remains simple.
Can I customize this scone recipe with different flavors?
Absolutely! While the recipe focuses on simplicity, you can easily add chocolate chips, dried fruit, or citrus zest to create your own unique flavor combinations.
What are some common mistakes to avoid when making scones?
Overmixing the dough is a common pitfall, leading to tough scones. Focus on gently combining the ingredients until just moistened to ensure a light and tender final product.
Final Reflection: The Simple Joy of Baking
The humble scone, often overlooked in the whirlwind of complex baking, offers a surprisingly profound lesson in simplicity and satisfaction. Mastering a quick and easy recipe, like the one detailed above, isn't just about producing delicious treats; it's about reclaiming the joy of baking without the intimidation of lengthy processes. This accessibility opens up a world of culinary creativity to everyone, regardless of experience.
The enduring appeal of the scone lies not only in its taste but in its ability to connect us to a simpler time, a time when baking was less about precision and more about sharing and enjoyment. Baking is at once child's play and adult joy. And love, of course.
This quote perfectly captures the essence of this easy scone recipe – it's a delightful activity that can be shared with loved ones, fostering connection and creating lasting memories around a warm, buttery treat. The ease of the recipe allows for spontaneous baking, transforming a simple afternoon into a moment of shared pleasure.
Now, I invite you to consider your own relationship with baking. Is it a source of stress or a source of joy? This recipe is a gentle nudge to embrace the latter. Try it out! Don't be afraid to experiment with different additions, to share your creations with others, and to rediscover the simple, unadulterated pleasure of creating something delicious with your own hands. The world needs more moments of simple joy, and a perfectly baked scone might just be the perfect start.
Unleash Your Inner Baker: Scone Success Awaits!
Thanks for taking the time to explore the world of quick-start scones! We hope you've gained the confidence to bake delicious treats with minimal fuss. Now, let's put that knowledge into action:
- Bake your first batch today! Grab your ingredients and let's get baking. Follow the recipe and experience the joy of freshly baked scones.
- Share your scone creations! Snap a picture and post it on social media using #BakeWithEaseScones – we'd love to see your baking journey!
- Experiment with different flavors! What unique ingredients will you add to your next batch? Let us know in the comments below!
Ready to transform your kitchen into a scone haven?