
HandKneading Vegan Bread: Tips & Techniques

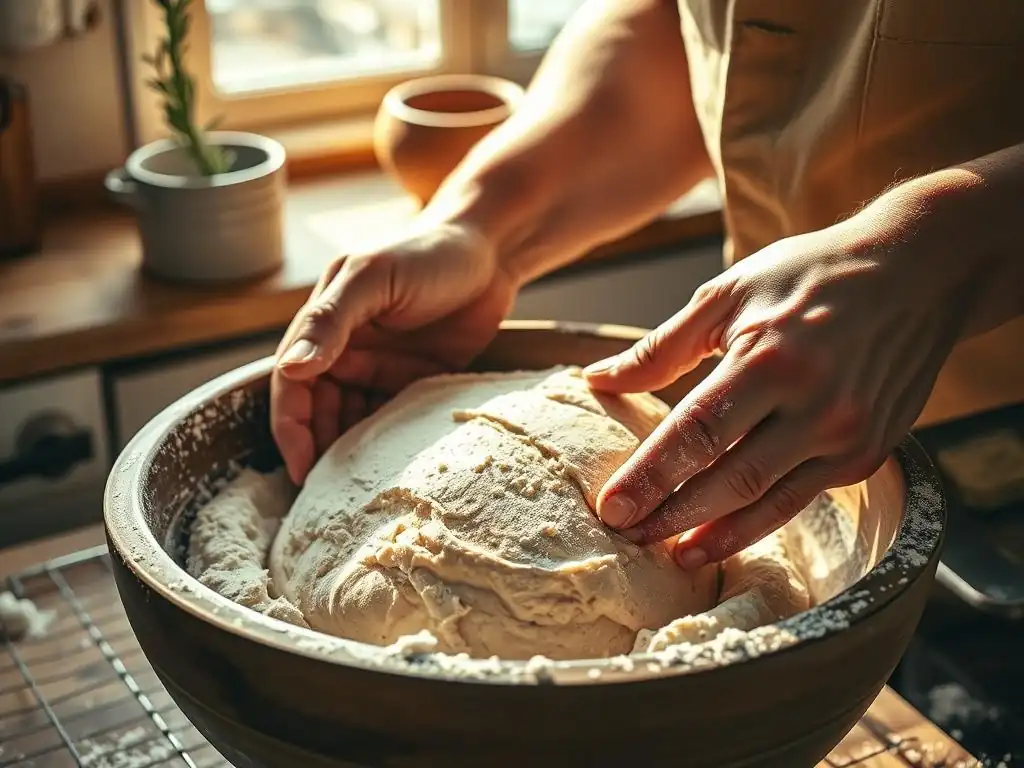
Welcome to BakeWithEase, your trusted guide to the delightful world of baking! Ever wondered if achieving that perfect, airy loaf of vegan bread through handkneading is truly possible? Prepare to unlock the secrets! This article dives into proven techniques and tips that will empower you to create delicious, plant-based bread using just your own two hands. Curious to learn how? Let's get started!
- Hand-Kneading Vegan Bread: Tips & Techniques for BakeWithEase
- Introduction to Vegan Bread Hand-Kneading
- Essential Equipment for Hand-Kneading Vegan Bread
- Mastering the Vegan Bread Dough: Ingredients and Preparation
-
The Art of Vegan Bread Hand-Kneading: Step-by-Step Guide
- Step 1: Combining Ingredients for Vegan Bread Dough
- Step 2: The Initial Knead: Bringing the Dough Together
- Step 3: Developing Gluten: The Core of Hand-Kneading Technique for Vegan Bread
- Step 4: The Rest Period: Autolyse and its Benefits for Vegan Dough
- Step 5: Continuing the Knead: Achieving a Smooth and Elastic Dough
- Step 6: The Windowpane Test: Knowing When Your Vegan Dough is Ready
- Troubleshooting Common Hand-Kneading Vegan Bread Issues
- Advanced Vegan Bread Hand-Kneading Techniques
- Baking Your Hand-Kneaded Vegan Bread: Achieving the Perfect Crust and Crumb
- Vegan Bread Hand-Kneading Recipe: A BakeWithEase Special
- Conclusion: Elevating Your Vegan Bread Baking with Hand-Kneading
-
Frequently Asked Questions
- How does hand-kneading vegan bread differ from kneading bread with animal products?
- What are some essential hand-kneading techniques for vegan bread?
- What are some common mistakes people make when hand-kneading vegan bread?
- How do I know when my vegan bread dough is properly kneaded by hand?
- Can I use a stand mixer for vegan bread, or is hand-kneading always better?
- Final Reflection: The Humble Art of Hand-Kneaded Vegan Bread
- Unleash Your Inner Baker: Knead to Know More!
Hand-Kneading Vegan Bread: Tips & Techniques for BakeWithEase
Introduction to Vegan Bread Hand-Kneading
Why Hand-Kneading Vegan Bread is a Rewarding Experience
There's a unique satisfaction that comes from transforming simple ingredients like flour, water, and yeast into a beautiful loaf of vegan bread using just your hands. This tactile process connects you directly to the dough, allowing you to feel its texture change as gluten develops. Unlike machine mixing, hand-kneading provides instant feedback, teaching you to understand the dough's needs through touch. It's a meditative practice, often taking between 10 to 15 minutes of focused effort, which many bakers find incredibly relaxing and rewarding. The physical act of kneading helps build upper body strength, too!
Beyond the personal satisfaction, hand-kneading often results in a bread with a slightly different crumb structure compared to machine-kneaded dough. Some bakers find that the slower, gentler action of hands creates a more open, airy crumb. This traditional method has been used for centuries, long before electric mixers existed, proving its efficacy and enduring appeal. Mastering the art of hand-kneading vegan bread is not just about making bread; it's about embracing a craft and creating something truly homemade from start to finish.
The Importance of Technique in Vegan Bread Baking
Baking vegan bread presents unique challenges, particularly when it comes to developing structure without the aid of eggs or dairy fats. This is where proper technique becomes paramount, especially during the kneading process. The goal of kneading is to develop gluten, the protein network that gives bread its elasticity and strength, allowing it to trap gases produced by the yeast and rise properly. Without sufficient gluten development, your vegan loaf can turn out dense and heavy, rather than light and airy.
Understanding and applying effective vegan bread hand-kneading techniques is the key to achieving a successful bake. It's not just about pushing and pulling the dough; it involves a series of motions designed to align the gluten strands. Different doughs require slightly different approaches, and learning to read your dough – recognizing when it's sticky, when it's smooth, and when it's sufficiently developed – is a skill honed through practice. At BakeWithEase, we believe that mastering these fundamental techniques is the foundation for consistently excellent vegan bread.
BakeWithEase: Your Guide to Perfect Hand-Kneaded Vegan Bread
At BakeWithEase, we're passionate about making baking accessible and enjoyable for everyone, including those exploring the world of vegan bread. We understand that hand-kneading can seem intimidating at first, perhaps conjuring images of sticky messes and endless effort. However, with the right guidance and a few simple tips, it's a technique that anyone can master. Our goal is to demystify the process and empower you to create delicious vegan loaves from scratch, using nothing but your hands and basic kitchen tools.
This guide is designed to walk you through every step, from choosing your ingredients to understanding the subtle signs that your dough is ready for proofing. We'll share our best vegan bread handkneading techniques, offering insights gleaned from years of baking experience. Think of us as your friendly baking coach, here to support you on your journey to baking success. Let's get our hands floury and discover the joy of truly homemade vegan bread together!
Essential Equipment for Hand-Kneading Vegan Bread
Minimalist Approach: What You Really Need
One of the most appealing aspects of hand-kneading is its simplicity when it comes to equipment. At its core, all you truly need is a bowl to mix your ingredients and a clean, sturdy surface for kneading. A large mixing bowl, preferably non-reactive like glass or stainless steel, is essential for the initial combining of ingredients and the first rise. For the kneading surface, a kitchen counter, a large wooden cutting board, or even a clean tabletop works perfectly.
Beyond the basics, a few inexpensive items can make the process smoother. A kitchen scale is invaluable for accurate ingredient measurements, especially flour and water, which significantly impact dough hydration. Measuring cups and spoons are also necessary for smaller quantities. A rubber spatula or dough scraper is incredibly useful for scraping down the bowl and handling sticky dough without getting it all over your hands initially. That's really it for the absolute essentials – just a handful of items you likely already own.
Recommended Tools for Easier Vegan Dough Hand-Kneading
While you can get by with just the basics, a few additional tools can significantly enhance your hand-kneading experience. A bench scraper, sometimes called a dough knife, is arguably the most useful accessory. It helps you scrape dough off the counter, divide dough into portions, and even helps with scooping and folding during the kneading process. It makes handling stickier doughs much less frustrating. A simple plastic bowl scraper is also excellent for getting every last bit of dough out of your mixing bowl.
Consider a large, clear container or bowl with straight sides for proofing your dough. This allows you to easily see how much the dough has risen. A clean kitchen towel or plastic wrap is needed to cover the dough during rising periods to prevent it from drying out. Finally, a kitchen timer is crucial for monitoring kneading times and proofing periods accurately. These few extra tools, costing perhaps $20-$30 in total, can make your vegan bread hand-kneading techniques much more efficient and enjoyable.
Preparing Your Workspace for Hand-Kneading
A well-prepared workspace is key to a smooth hand-kneading session. Start by cleaning your kneading surface thoroughly. Any lingering food particles or grease can interfere with the dough's texture and prevent it from sticking properly to the surface (in a good way!). If you're using a countertop, ensure it's dry. Some bakers lightly flour their surface, while others prefer a damp surface for certain doughs – we'll discuss this later. For beginners, a lightly floured surface is generally easiest.
Gather all your measured ingredients and necessary tools within easy reach before you begin mixing. This includes your flour, liquids, yeast mixture, salt, bowl scraper, and bench scraper if you have one. Having everything ready prevents frantic searching with floury hands. Ensure you have enough clear space around your kneading area to move freely. A typical batch of dough for a standard loaf might require a kneading area of about 2 feet by 2 feet to allow for comfortable stretching and folding motions.
Mastering the Vegan Bread Dough: Ingredients and Preparation
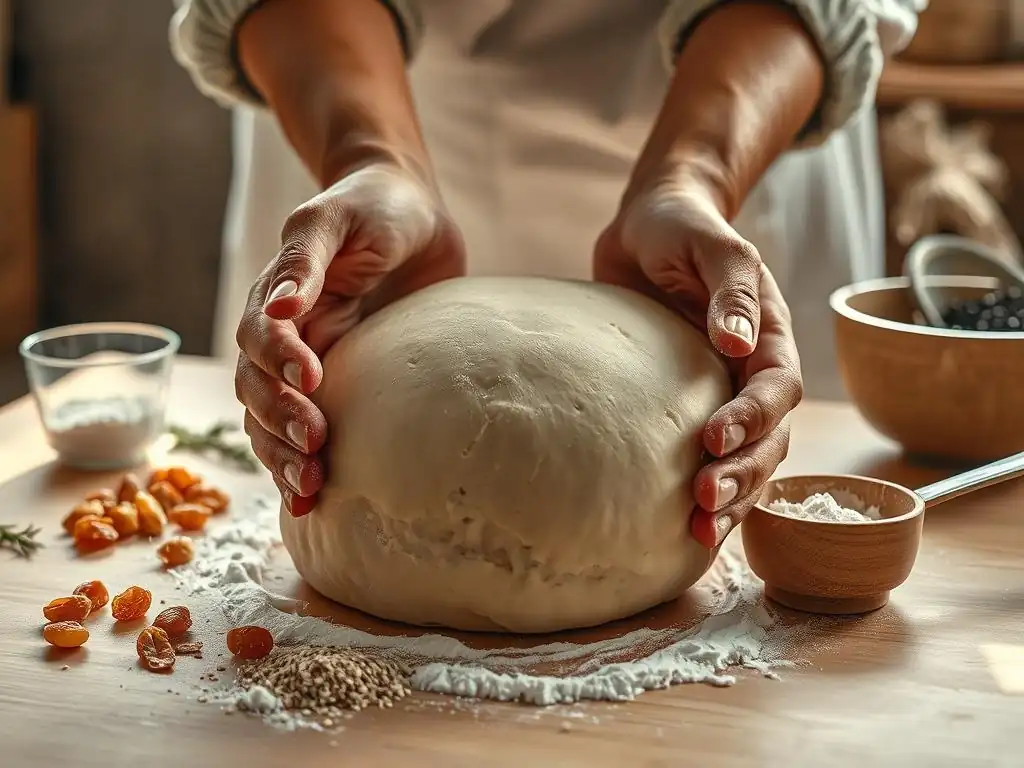
Selecting the Right Flour for Vegan Bread Hand-Kneading
The type of flour you choose profoundly impacts the final texture and handling of your vegan bread dough. For most classic loaves, a high-protein bread flour is ideal. Bread flour typically contains 12-14% protein, providing ample gluten-forming proteins necessary for a strong, elastic dough that can withstand rigorous hand-kneading and produce a good rise. All-purpose flour (around 10-12% protein) can work, but it will require a bit more careful handling as the gluten structure won't be quite as robust.
Whole wheat flour adds nutrition and flavor but contains bran and germ particles that can interfere with gluten development. When using whole wheat, you might need to knead slightly longer, or combine it with bread flour (e.g., a 50/50 blend) to get a dough that's easier to handle and knead by hand.
Rye flour is low in gluten and behaves very differently; it's often used in combination with wheat flour, and rye doughs require less kneading. Always measure flour by weight (grams) for accuracy, as a cup of flour can vary significantly depending on how it's scooped, sometimes by as much as 20-30 grams.
Liquid Choices: Water, Plant-Based Milks, and Their Impact
The liquid component in vegan bread serves several vital functions: it hydrates the flour to activate gluten development, dissolves the salt and sugar, and provides the necessary environment for yeast activity. Water is the most common liquid, and its temperature is important – warm water (around 95-105°F or 35-40°C) is typically used to activate yeast quickly, while cooler water can be used for slower fermentation.
The amount of water (hydration level) significantly affects dough consistency and handling during hand-kneading techniques. A dough with 65% hydration (65g water per 100g flour) is relatively easy to handle, while a 75% hydration dough will be much stickier and require more advanced techniques.
Plant-based milks like soy, almond, or oat milk can be used instead of water, adding richness, subtle flavor, and contributing to browning due to their sugars and fats. However, ensure the milk is unsweetened and unflavored unless that's your desired outcome. Like water, the temperature of the milk should be warm for yeast activation.
Keep in mind that the fat content in plant milks can sometimes slightly inhibit gluten development compared to water-based doughs, but this is usually minimal unless using a very high-fat option like canned coconut milk. Always warm liquids gently; too hot (above 130°F or 54°C) can kill the yeast.
Sweeteners, Fats, and Other Additives in Vegan Bread
Sweeteners like sugar, maple syrup, or agave nectar provide food for the yeast, helping with fermentation and contributing to crust browning. They also add a touch of flavor. A typical lean bread recipe might use just 1-2% sugar relative to the flour weight (e.g., 5-10 grams for 500 grams of flour). While yeast doesn't need added sugar to ferment (it can break down starch in the flour), a little sugar gives it a quick start. Too much sugar, however, can slow down yeast activity.
Fats, such as olive oil, melted vegan butter, or vegetable oil, are often added to vegan bread doughs to tenderize the crumb, improve keeping quality, and add flavor. Fat coats the gluten strands, preventing them from forming a rigid network, which results in a softer bread. A recipe might call for 3-5% fat (e.g., 15-25 grams of oil for 500 grams of flour).
While fat makes the dough softer and potentially easier to handle during hand-kneading, excessive fat can hinder gluten development. Other additives might include salt (essential for flavor and controlling yeast), herbs, spices, or seeds, which are usually incorporated after initial kneading.
Activating the Yeast: A Crucial First Step for Vegan Dough
Yeast is the magical ingredient that makes bread rise by producing carbon dioxide gas. For many recipes, especially those using active dry yeast, activating the yeast in a warm liquid with a pinch of sugar is a crucial first step. This process, sometimes called "proofing" the yeast, ensures the yeast is alive and active before you add it to the bulk of your flour. To do this, dissolve the specified amount of sugar (if using) in the warm liquid (typically 95-105°F / 35-40°C), then sprinkle the yeast over the top.
Let the mixture sit for 5-10 minutes. If the yeast is active, it will foam up and create a frothy layer on the surface, often doubling the volume. This indicates the yeast is healthy and ready to work. If there is no activity, your yeast may be old or the liquid was too hot or too cold, and you'll need to start this step again with fresh yeast. Instant yeast can often be mixed directly with the dry ingredients, but activating it first is still a good habit to confirm its viability, especially if you're unsure about its freshness.
The Art of Vegan Bread Hand-Kneading: Step-by-Step Guide
Step 1: Combining Ingredients for Vegan Bread Dough
The first step in hand-kneading vegan bread is bringing all your measured ingredients together. In a large mixing bowl, combine your flour, salt, and any other dry ingredients like sugar or herbs. Whisk them briefly to distribute evenly. Then, add your activated yeast mixture (or liquid if using instant yeast mixed with flour) and any fats or other wet ingredients.
Using a sturdy spoon or a bowl scraper, begin mixing the ingredients until they come together into a shaggy, cohesive mass. It will look rough and uneven at this stage, with some dry patches of flour remaining. Don't worry about getting it perfectly smooth yet; the goal is just to hydrate all the flour. Once most of the dry flour is incorporated, you can turn the dough out onto your prepared kneading surface.
Step 2: The Initial Knead: Bringing the Dough Together
Once the shaggy dough is on your lightly floured surface, the initial kneading begins. This phase is about bringing the rough mass into a more uniform ball. You can use the heel of your hand to push the dough away from you, then fold it back onto itself. Rotate the dough and repeat. It will be sticky at first, and you might be tempted to add a lot of extra flour. Resist this urge! Adding too much flour can result in a dry, dense bread.
Instead, use a bench scraper to help manage the stickiness, scraping the dough off the surface and your hands as needed. Continue pushing, folding, and rotating for about 5-7 minutes. The dough will gradually become less shaggy and start to form a more cohesive, albeit still rough, ball. This initial work starts the process of aligning the gluten proteins.
Step 3: Developing Gluten: The Core of Hand-Kneading Technique for Vegan Bread
This is where the main work of hand-kneading vegan bread happens. The goal is to develop a strong gluten network. A common technique involves pushing the dough away from you with the heel of one hand, stretching it out. Then, fold the stretched dough back onto itself, rotate it 90 degrees, and repeat the push-fold-rotate motion. This rhythmic action helps align the gluten strands, creating elasticity.
Another effective method, especially for stickier doughs, is the stretch-and-fold technique. Instead of pushing on the surface, you pick up the dough from one side, stretch it upwards, and fold it back over the rest of the dough. Rotate the bowl or dough and repeat this action around the entire mass. Both methods are effective vegan bread handkneading techniques; choose the one that feels most comfortable and effective for the specific dough you're working with.
Step 4: The Rest Period: Autolyse and its Benefits for Vegan Dough
Sometimes, recipes incorporate a rest period after the initial mixing of flour and water (and sometimes yeast). This technique is called autolyse. It involves letting the shaggy dough rest for 20-30 minutes before adding salt and fat and beginning the main kneading. During this rest, the flour absorbs the water more fully, and enzymatic activity begins to break down proteins, making the dough more extensible and easier to knead.
For vegan dough, an autolyse can be particularly beneficial as it allows gluten development to start passively, reducing the overall hand-kneading time needed later. It also makes the dough less sticky and more pliable right from the start of the active kneading phase. If your recipe calls for salt or fat, remember not to add them during the autolyse; they can interfere with the enzymatic process that makes the dough easier to work with.
Step 5: Continuing the Knead: Achieving a Smooth and Elastic Dough
After the initial knead or autolyse, continue the push-fold-rotate or stretch-and-fold technique. As you knead, you'll notice the dough changing texture. It will become smoother, less sticky (though it might still be slightly tacky), and more elastic. When you push it, it will resist and slowly spring back. This process typically takes 10-15 minutes of continuous kneading, though the exact time depends on the flour used and the dough's hydration level.
Pay attention to how the dough feels under your hands. It should feel alive and responsive, not stiff or tearing easily. You might hear a slight slapping sound against the counter as you work it. This sustained effort is crucial for building the strong gluten network needed for a good rise and structure in your finished vegan bread. Don't rush this step; it's where the magic happens!
Step 6: The Windowpane Test: Knowing When Your Vegan Dough is Ready
The ultimate test for determining if your vegan dough has been sufficiently hand-kneaded is the windowpane test. This test checks the strength and elasticity of the gluten network. Carefully pinch off a small piece of dough, about the size of a golf ball. Gently stretch and pull it between your fingers, rotating it as you go.
If the dough is properly kneaded, you should be able to stretch it into a thin membrane that is translucent enough for light to pass through, like a windowpane, without tearing. If it tears easily before becoming thin, it needs more kneading. If it passes the test, congratulations! Your dough has developed enough gluten and is ready for the first rise (bulk fermentation). If it's very sticky and hard to test, you might need to lightly flour your hands first.
Troubleshooting Common Hand-Kneading Vegan Bread Issues
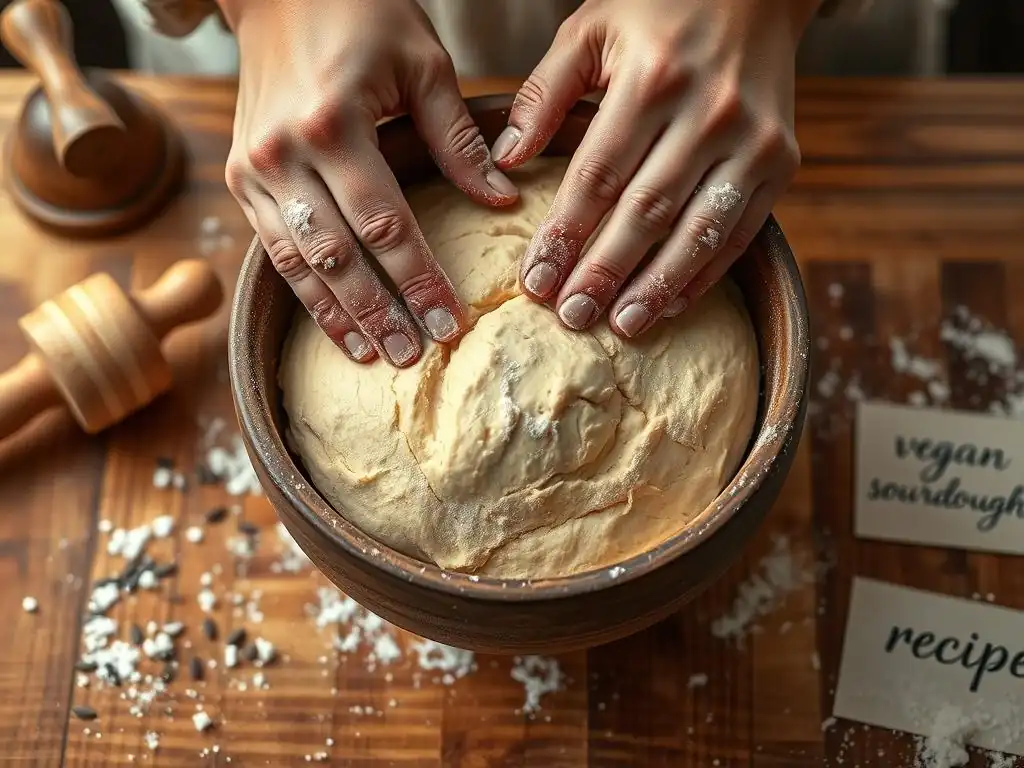
Sticky Dough: Causes and Solutions for Easier Handling
Sticky dough is perhaps the most common frustration when hand-kneading, especially high-hydration vegan doughs. The primary cause is often simply the hydration level of the dough itself – more water means stickier dough. Other factors include insufficient kneading time (the gluten hasn't developed enough to absorb the liquid fully) or too much liquid added to the recipe.
To manage sticky dough during hand-kneading, first, resist the urge to add large amounts of extra flour to the surface or the dough itself. A light dusting on your hands and the counter is acceptable, but too much flour will alter the dough's hydration and can result in a dry loaf. Use a bench scraper frequently to scrape the dough off the surface and gather it back together.
Keep kneading; often, sticky dough becomes less sticky as the gluten develops and absorbs the moisture better over 10-15 minutes of work. If after significant kneading it remains impossibly sticky, you might need to knead in a tablespoon or two of flour gradually until it becomes manageable, but view this as a last resort.
Dry Dough: How to Add Moisture Without Ruining the Texture
If your dough feels stiff, dense, and resists stretching from the start, it's likely too dry. This can happen if you accidentally added too much flour, not enough liquid, or if your flour is particularly absorbent. Dry dough is difficult to knead effectively because the gluten cannot hydrate and develop properly, leading to a tough, crumbly texture in the final bread.
To remedy dry dough during hand-kneading, you need to gradually incorporate more liquid. Dip your hands in water and continue kneading, allowing the dough to absorb the moisture from your wet hands. Alternatively, sprinkle a tablespoon of water over the dough, fold it in, and continue kneading.
Repeat this process one tablespoon at a time until the dough feels more pliable and less stiff. It's crucial to add liquid slowly and incrementally, as adding too much at once can turn your dough into a sticky mess that's even harder to fix. Aim for a dough that is soft and slightly tacky, but not wet.
Dense Bread: Avoiding Common Mistakes in the Kneading Process
Dense bread in a hand-kneaded loaf can often be traced back to issues during the kneading phase. The most frequent culprit is insufficient gluten development. If the dough wasn't kneaded long enough or with the correct technique, the gluten network won't be strong enough to support the rise, and the bread will be heavy and compact. Not passing the windowpane test is a clear indicator of this problem.
Another mistake is over-kneading, although this is much harder to do by hand than with a machine. Over-kneaded dough can become tight and difficult to work with, and the resulting bread might be tough. However, for most home bakers hand-kneading, under-kneading is the more common issue leading to dense bread.
Ensure you are using proper hand-kneading techniques, kneading for the recommended time (usually 10-15 minutes for a standard loaf), and checking for the windowpane test to confirm adequate gluten development. Also, make sure your yeast is active and your proofing times are sufficient – these also impact the final crumb structure.
Understanding the Impact of Temperature on Vegan Dough
Temperature plays a significant role throughout the bread-making process, from yeast activation to proofing and even hand-kneading. Warmth encourages yeast activity; liquids between 95-105°F (35-40°C) are ideal for activating yeast, and a warm room temperature (around 75-80°F or 24-27°C) is best for bulk fermentation (the first rise). Too cold, and the yeast will be sluggish; too hot, and it can die.
During hand-kneading, the friction from your hands and the surface can slightly increase the dough's temperature. This isn't usually a major issue unless you are in a very warm environment or kneading for an exceptionally long time. If your dough feels like it's getting too warm, you can rest it briefly in a cooler spot for 5-10 minutes. Conversely, if your kitchen is cold, the dough will be stiffer and less pliable, potentially requiring slightly longer kneading time or a warmer spot for proofing. Being mindful of ambient temperature helps you adjust your hand-kneading techniques and timing accordingly.
Advanced Vegan Bread Hand-Kneading Techniques
Incorporating Seeds, Nuts, and Dried Fruits into Hand-Kneaded Vegan Bread
Adding inclusions like seeds, nuts, or dried fruits can elevate your vegan bread's flavor and texture. However, incorporating them effectively during hand-kneading requires careful timing. If added too early, sharp nuts or seeds can cut the developing gluten strands, weakening the dough structure. Dried fruits can also make the dough sticky.
The best approach is usually to add these inclusions towards the end of the kneading process, after the gluten has already developed significantly (perhaps after about 8-10 minutes of kneading, or just before the windowpane test). Flatten the dough slightly, spread the inclusions over the surface, and then fold the dough over itself repeatedly, kneading gently until they are evenly distributed. This might take an extra minute or two of careful work. Aim for even distribution without overworking the dough or tearing the gluten network you've built.
Using Different Flour Blends for Unique Vegan Bread Flavors
Experimenting with different flour blends opens up a world of flavor possibilities for your hand-kneaded vegan bread. While bread flour provides a reliable base for strong gluten development, combining it with other flours can add complexity. For instance, adding 10-20% whole wheat flour increases fiber and gives a nutty note. A mix of bread flour and rye flour (up to 30% rye is manageable for hand-kneading) yields a denser loaf with a distinctive tangy flavor.
When working with blends, be aware that flours like rye or spelt absorb water differently and have weaker gluten structures than bread flour. This means the dough might feel different during hand-kneading – potentially stickier or less elastic. Adjust your hydration carefully and be mindful that the kneading time might vary. The windowpane test might not be as clear with high percentages of non-wheat flours. It's a journey of delicious discovery to find your favorite flour combinations using these vegan bread handkneading techniques.
Experimenting with Hydration Levels in Vegan Bread Dough
Hydration level, the ratio of water to flour by weight, is a key factor influencing dough handling and the final crumb. Standard bread doughs often range from 60% to 70% hydration. Lower hydration doughs (e.g., 60-63%) are stiffer, easier to handle and knead by hand, and result in a tighter crumb. Higher hydration doughs (e.g., 70-75% or even higher) are much wetter and stickier, requiring more advanced hand-kneading techniques like stretch-and-folds or slap-and-fold methods, but they produce a more open, airy crumb.
Experimenting with hydration can significantly change your hand-kneading experience and the resulting bread. Start with a familiar recipe at a moderate hydration (around 65-68%) to master the basic vegan bread handkneading techniques. Once comfortable, try incrementally increasing the hydration by 2-3% in subsequent batches. You'll quickly learn how the dough feels different and adapt your handling. Using a bench scraper becomes indispensable with higher hydration doughs.
Baking Your Hand-Kneaded Vegan Bread: Achieving the Perfect Crust and Crumb
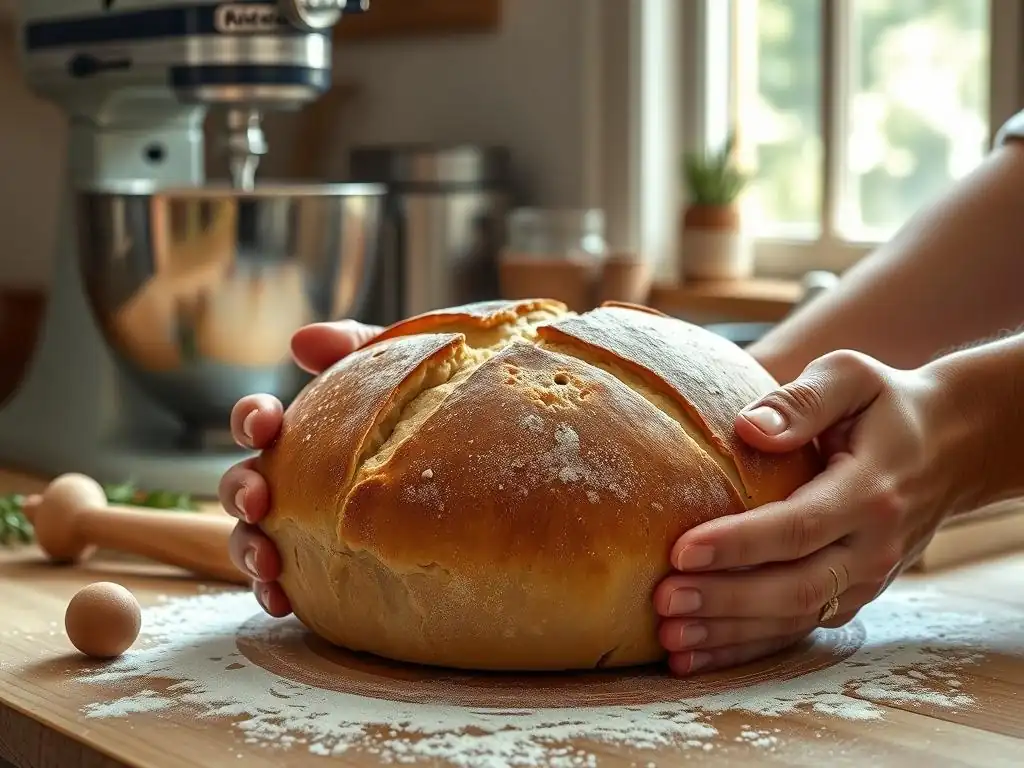
Shaping Techniques for Hand-Kneaded Vegan Bread
Once your hand-kneaded vegan dough has completed its first rise (bulk fermentation), it's time to shape it. Proper shaping is crucial for creating tension on the dough's surface, which helps the loaf hold its form during the second rise (proofing) and oven spring. There are various shaping techniques depending on the desired loaf type – a round boule, an oval bâtard, or a loaf pan shape.
For a boule, gently deflate the dough, then pull the edges into the center to form a rough ball. Flip it over so the seam is underneath, and use the palms of your hands to gently cup the dough and rotate it on the counter, creating surface tension. For a bâtard or loaf pan shape, gently flatten the dough into a rectangle, fold the top third down, then the bottom third up, and finally fold it in half lengthwise, sealing the seam.
Roll or gently pull the ends to create an even shape. Practice makes perfect with shaping; aim for a taut surface without tearing the dough.
Proofing Your Vegan Bread: Ensuring a Light and Airy Texture
Proofing, the final rise before baking, is where your hand-kneaded vegan dough expands significantly due to the yeast producing more gas. This step is critical for achieving a light and airy crumb. Place your shaped dough in a proofing basket (banneton), on a baking sheet, or in a loaf pan, depending on the shape. Cover it loosely with plastic wrap or a damp towel to prevent a skin from forming.
The proofing time varies greatly depending on the temperature of your kitchen and the dough. It can take anywhere from 45 minutes to 2 hours at room temperature (around 70-75°F / 21-24°C). The dough is ready when it has increased significantly in volume (often doubled or nearly doubled) and passes the "poke test": gently poke the dough with a floured finger; if the indentation springs back slowly and doesn't fully disappear, it's ready. If it springs back immediately, it needs more time. If it collapses, it's over-proofed.
Baking Temperatures and Times for Optimal Results
Baking temperature and time are key to developing a beautiful crust and fully cooked interior in your hand-kneaded vegan bread. Most lean bread recipes bake at high temperatures, often between 400°F and 475°F (200°C and 245°C). High initial heat provides a strong oven spring, causing the dough to expand rapidly before the crust sets. Baking on a preheated baking stone or in a Dutch oven helps achieve this by transferring heat efficiently to the dough.
The total baking time for a standard 1.5 to 2-pound loaf is typically 30-45 minutes. Often, the bread is baked at a higher temperature for the first 15-20 minutes (sometimes with steam added to the oven for a better crust), then the temperature is lowered slightly for the remaining time. The bread is done when it is deeply golden brown and sounds hollow when tapped on the bottom. An internal temperature of 200-210°F (93-99°C) confirms it's fully baked.
Cooling and Storing Your Hand-Kneaded Vegan Bread for Freshness
Once your beautiful hand-kneaded vegan loaf comes out of the oven, the hardest part is waiting! However, proper cooling is essential. Transfer the bread immediately to a wire rack and let it cool completely, which can take 1-2 hours depending on the size of the loaf. Cutting into hot bread can result in a gummy, dense texture inside because the internal starches haven't fully set.
Allowing the bread to cool on a rack ensures air circulates around it, preventing the bottom crust from becoming soggy. Once completely cool, store the bread at room temperature. For optimal freshness on the first day or two, store it cut-side down on a cutting board or in a paper bag to maintain crust crispness. For longer storage (3-4 days), a bread box or a clean kitchen towel works well. For longer periods, slice the cooled loaf and freeze portions in airtight bags or containers for future enjoyment.
Vegan Bread Hand-Kneading Recipe: A BakeWithEase Special
Ingredients List
Here's a simple, reliable recipe to practice your vegan bread hand-kneading techniques.
- 500 grams (approx 4 cups) Bread Flour
- 350 grams (approx 1 ½ cups) Warm Water (95-105°F / 35-40°C)
- 10 grams (approx 2 tsp) Salt
- 7 grams (approx 2 ¼ tsp) Active Dry Yeast
- 10 grams (approx 2 tsp) Sugar (Optional, for yeast activation)
- 15 grams (approx 1 tbsp) Olive Oil (Optional, for softer crumb)
Step-by-Step Baking Instructions
Follow these steps, applying the hand-kneading techniques we've discussed:
- In a small bowl, combine the warm water, yeast, and sugar (if using). Let stand for 5-10 minutes until frothy.
- In a large mixing bowl, whisk together the flour and salt.
- Pour the yeast mixture and olive oil (if using) into the bowl with the dry ingredients.
- Using a spoon or bowl scraper, mix until a shaggy dough forms and most of the dry flour is incorporated.
- Turn the dough out onto a lightly floured surface.
- Begin hand-kneading using the push-fold-rotate or stretch-and-fold method. Knead for 10-15 minutes.
- Perform the windowpane test to check for sufficient gluten development.
- Lightly grease the mixing bowl with a little oil. Place the dough in the bowl, turning to coat.
- Cover the bowl with plastic wrap or a damp towel and let it rise in a warm place until doubled in size (bulk fermentation), usually 1-1.5 hours at 75°F (24°C).
- Gently punch down the dough to release air. Turn it out onto a lightly floured surface.
- Shape the dough into your desired form (boule, bâtard, or loaf pan).
- Place the shaped dough in a proofing basket, on a baking sheet, or in a greased loaf pan. Cover and let rise (proofing) until it passes the poke test, usually 45-75 minutes.
- Preheat your oven to 450°F (230°C) with a baking stone or Dutch oven inside.
- Carefully transfer the dough to the hot baking stone or Dutch oven. Score the top of the loaf with a sharp knife or razor.
- Bake for 20 minutes, then reduce the oven temperature to 400°F (200°C) and bake for another 20-25 minutes, or until deeply golden brown and internal temperature is 200-210°F (93-99°C).
- Remove from oven and transfer immediately to a wire rack to cool completely before slicing.
Tips for Success from BakeWithEase Baking Experts
- Measure by weight: For consistent results, always use a kitchen scale, especially for flour and water. This is one of the most impactful tips for improving your vegan bread handkneading techniques.
- Be patient: Hand-kneading takes time. Don't rush the process. The full 10-15 minutes are often needed to develop the necessary gluten structure.
- Learn to read your dough: Pay attention to how the dough feels. Is it sticky? Stiff? Smooth? Learning these tactile cues is key to knowing how to adjust your technique or if it needs more kneading.
- Don't add too much flour: Excessive flour during kneading is a common mistake that leads to dry, dense bread. Use just enough to prevent sticking.
- Warm environment: Ensure your kitchen isn't too cold, especially during proofing. A slightly warmer spot helps the yeast work efficiently.
Conclusion: Elevating Your Vegan Bread Baking with Hand-Kneading
The Joy of Creating Hand-Kneaded Vegan Bread
There's an undeniable magic in transforming simple ingredients into a nourishing, delicious loaf of vegan bread using just your hands. It's a process that engages your senses – the feel of the dough changing under your palms, the earthy smell of yeast and flour, the visual transformation from a shaggy mass to a smooth, elastic ball. Mastering vegan bread handkneading techniques connects you to a timeless craft, offering a sense of accomplishment that store-bought bread simply can't replicate.
Every loaf you hand-knead is a testament to your effort and growing skill. It's not just about the final product, but the rewarding journey of creation. The slightly irregular shape, the unique texture forged by your touch, the incredible aroma filling your kitchen as it bakes – these are the hallmarks of truly homemade bread. Embrace the process, enjoy the tactile experience, and savor the satisfaction of pulling a warm, crusty loaf from your oven that you crafted entirely by hand.
Continue Your Baking Journey with BakeWithEase
We hope this guide has inspired you to get your hands dirty and explore the wonderful world of hand-kneaded vegan bread. Mastering these fundamental vegan bread handkneading techniques is a skill that will serve you well in countless future baking adventures. Whether you're aiming for a rustic country loaf, soft sandwich bread, or enriched vegan brioche, the ability to properly knead dough by hand is an invaluable asset.
BakeWithEase is here to support you every step of the way. We offer a wealth of resources, from beginner recipes to advanced techniques, covering everything from sourdough to pastries. Keep practicing, keep experimenting, and don't be discouraged by imperfect loaves – every bake is a learning opportunity. We encourage you to try different flours, adjust hydration, and personalize recipes as you become more confident with your hand-kneading skills.
We love seeing what our BakeWithEase community is baking! Your hand-kneaded vegan bread creations are a source of inspiration for us and for fellow bakers. Did you achieve a perfect windowpane? Get a fantastic oven spring? Bake a loaf that filled your home with an irresistible aroma? We want to hear about it!
Sharing your successes, and even your learning moments, helps everyone grow. Don't hesitate to document your journey. Your experience with specific vegan bread handkneading techniques, flour types, or troubleshooting sticky dough could be exactly what another baker needs to read. Let's build a supportive community where we celebrate every loaf, big or small, perfectly shaped or wonderfully rustic. Happy hand-kneading!
Frequently Asked Questions
How does hand-kneading vegan bread differ from kneading bread with animal products?
Vegan bread often lacks the natural gluten-enhancing properties of dairy or eggs, so hand-kneading is crucial to develop the gluten structure. More attention may be needed to achieve the desired elasticity.
What are some essential hand-kneading techniques for vegan bread?
Techniques include the push-turn-fold method, ensuring the dough is properly hydrated and the use of a bench scraper to manage sticky dough. These help develop strength without overworking the dough.
What are some common mistakes people make when hand-kneading vegan bread?
Under-kneading is a frequent issue, resulting in a dense, flat loaf. Over-kneading can also happen, causing a tough, crumbly texture. Ensuring proper hydration is key.
How do I know when my vegan bread dough is properly kneaded by hand?
The dough should feel smooth and elastic, and pass the windowpane test. It should stretch thin without tearing, indicating sufficient gluten development.
Can I use a stand mixer for vegan bread, or is hand-kneading always better?
While a stand mixer can be used, hand-kneading allows for greater control and a better feel for the dough's development. It also helps avoid over-kneading, which can be a problem with mixers.
Final Reflection: The Humble Art of Hand-Kneaded Vegan Bread
The resurgence of homemade bread, particularly vegan varieties, speaks volumes about our growing desire for connection—a connection to our food, our heritage, and ourselves. This simple act of kneading dough, once a commonplace task, is now a powerful symbol of mindful consumption and a return to slower, more deliberate living. The techniques explored in this article, while focused on vegan bread, offer a pathway to a richer, more satisfying culinary experience for everyone.
The journey of hand-kneading vegan bread is more than just a recipe; it's a tactile meditation. It's about feeling the dough yield under your fingertips, witnessing the transformation from a simple mixture of ingredients into something beautiful and nourishing. This process connects us to a long tradition of bread-making, reminding us of the fundamental human need for sustenance and the artistry involved in its creation. Bread is the staff of life,
a simple phrase, yet it encapsulates the profound significance of this humble food. This act of creation, even in its simplest form, fosters a sense of accomplishment and pride.
Now, I invite you to take what you've learned and apply it to your own kitchen. Don't be afraid to experiment, to adjust the techniques to your own preferences, and to embrace the imperfections. The true reward lies not in a perfectly risen loaf (though that's certainly satisfying! ), but in the process itself—the mindful engagement, the connection to tradition, and the joy of sharing the fruits of your labor. So, gather your ingredients, roll up your sleeves, and experience the transformative power of hand-kneading your own vegan bread. The journey awaits.
Unleash Your Inner Baker: Knead to Know More!
Thanks for joining us on this delicious journey into the world of hand-kneaded vegan bread! You've now unlocked the secrets to creating truly amazing loaves from scratch. Ready to put your new skills to the test?
- Bake your first vegan masterpiece! Try out the recipe from the article and experience the joy of hand-kneading. Note down any adjustments you make for future bakes!
- Share your baking triumphs (or even your floury mishaps!) Let’s build a community of vegan bread lovers—we’d love to see your creations!
- Explore more vegan baking adventures on BakeWithEase.com (we have tons of exciting recipes waiting! ).
What unique ingredient will you add to your next loaf to elevate the flavor?