
Huge Holes in Your Bread? Understanding Overproofing

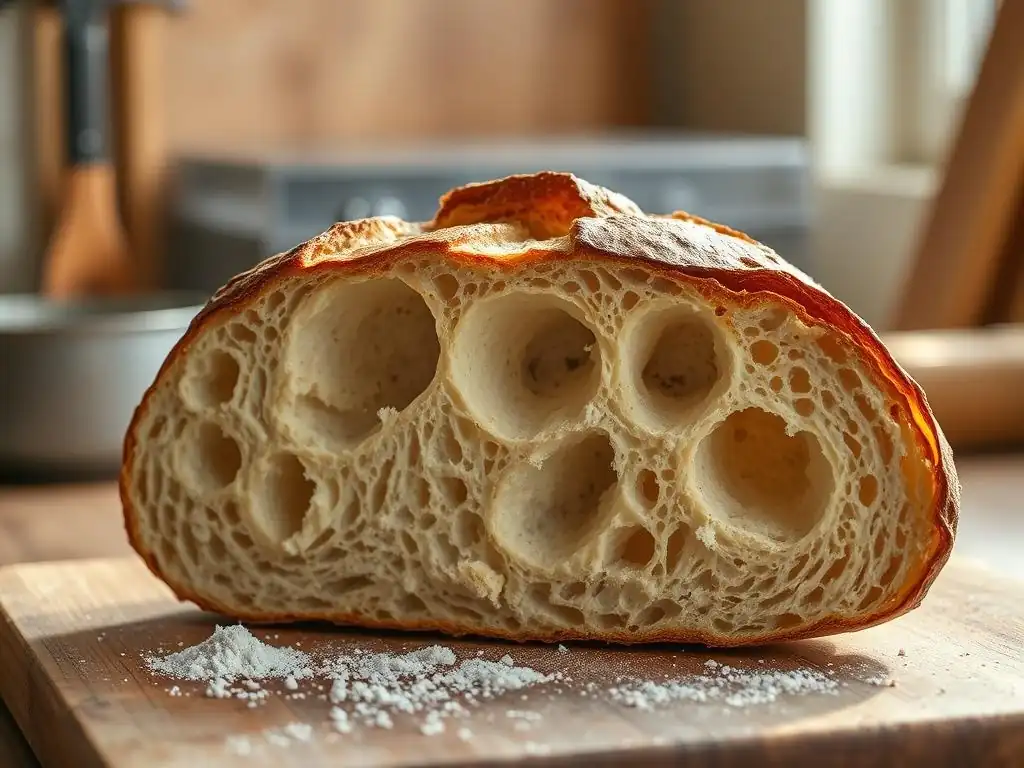
Welcome to BakeWithEase, your secret ingredient to baking success! Ever wondered why your bread dough deflates instead of rising majestically? Or perhaps you've ended up with those frustratingly huge holes in your loaf? Let's unlock the secrets to overproofing bread dough easily and transform your baking woes into wonderfully airy, flavorful bread. Ready to bake with confidence? Dive in and discover the simple techniques that will revolutionize your bread baking journey.
- Huge Holes in Your Bread? Understanding Overproofing: Bake With Ease
- Introduction to Overproofing Bread Dough
- Identifying Overproofed Bread Dough
- The Science Behind Overproofing
- Causes of Overproofing Bread Dough Easily
- Preventing Overproofing: Tips and Techniques
- Recovering Slightly Overproofed Dough
- Baking Overproofed Bread: What to Expect
- Troubleshooting Common Bread Baking Problems
- Conclusion: Mastering Bread Proofing for Perfect Loaves
- Frequently Asked Questions
- Final Reflection: The Humble Loaf and the Art of Patience
- Unlock Perfectly Pillowy Bread: Mastering the Art of Proofing
Huge Holes in Your Bread? Understanding Overproofing: Bake With Ease
Introduction to Overproofing Bread Dough
Why is My Bread Full of Large Holes? Overproofing Explained
One common frustration for home bakers is slicing into a beautifully baked loaf only to find large, irregular holes or tunnels instead of a consistent crumb structure. While some breads, like ciabatta, are designed to have an open crumb, excessively large and uneven holes often point to a problem during the fermentation process. This issue is frequently caused by overproofing bread dough easily, a stage where the dough has risen too much or for too long before baking. Understanding overproofing is crucial for achieving a desirable texture in your homemade loaves.
Overproofing occurs when the yeast in your dough consumes too much sugar and produces too much gas before the dough is baked. This excessive gas production stretches the gluten network beyond its capacity to hold structure. Imagine a balloon being overinflated – it becomes thin and weak, eventually popping. Similarly, the gluten strands in overproofed dough become weak and unable to support the gas bubbles effectively. When baked, these weakened structures collapse, leading to the signature large holes and often a dense, gummy texture around them.
BakeWithEase: Your Guide to Perfect Bread Baking
At BakeWithEase, we understand the nuances of bread baking, from selecting the right flour to mastering the proofing stage. Our goal is to demystify common baking challenges, including how to avoid overproofing bread dough easily. We provide step-by-step guides and insights rooted in baking science to help you achieve consistent, delicious results every time you bake. Whether you're tackling a simple loaf or experimenting with sourdough, understanding the signs and causes of overproofing is a fundamental skill that will elevate your bread-making game.
This guide will walk you through identifying overproofed dough, exploring the science behind it, pinpointing common causes, and most importantly, offering practical tips to prevent overproofing bread dough easily in the future. We'll also touch upon how to potentially salvage slightly overproofed dough and what to expect if you bake it as is. By the end of this article, you'll have the knowledge to better control your dough's fermentation and bake loaves with the perfect crumb structure you've been aiming for.
Identifying Overproofed Bread Dough
Recognizing the Signs of Overproofing
Spotting overproofing bread dough easily before it's too late is key to preventing disappointing results. There are several visual and tactile cues that signal your dough has gone past its prime proofing stage. Learning to recognize these signs will allow you to intervene or adjust your baking plan, potentially saving your loaf from an undesirable outcome. Pay close attention to how your dough looks, feels, and responds to gentle tests.
One of the most obvious signs is the dough's appearance. It will look significantly larger than it should, often appearing bloated or puffy. The surface might look stretched and very smooth, possibly with visible large bubbles just beneath the surface. In severe cases, the dough may even begin to sag or collapse in on itself, losing the rounded shape it had at the peak of its rise. This collapse indicates that the gluten structure has been stretched too thin and can no longer support the volume of gas produced by the yeast.
Visual Cues: Excessive Rise and Collapsed Structure
As dough proofing progresses, it doubles or even triples in volume depending on the recipe and environment. However, with overproofing bread dough easily, the rise becomes excessive, sometimes seeming almost too perfect and light. This hyper-inflated state is a warning sign. For example, if a recipe calls for the dough to double in size, an overproofed dough might have more than tripled or quadrupled. This rapid or excessive expansion often occurs faster than anticipated if the kitchen is warmer than usual or if the yeast amount is slightly high.
Following the peak rise, an overproofed dough can start to deflate. You might notice the top surface beginning to flatten or sink slightly in the center. This collapse is a clear indication that the gluten network, which is responsible for holding the dough's structure, has been weakened beyond its limit. The internal gas pressure, which was initially lifting the dough, now causes the weakened structure to buckle. This stage is particularly difficult to recover from, as the damage to the gluten is significant.
The Poke Test: How to Check for Overproofing
The poke test is a reliable method used by bakers to determine if dough is properly proofed. To perform the test, lightly flour your finger and gently press it about half an inch into the side of the dough. A perfectly proofed dough will spring back slowly, leaving a small indentation that doesn't completely disappear. This indicates that the gluten structure is strong enough to hold its shape but relaxed enough to expand further in the oven (oven spring).
When checking for overproofing bread dough easily with the poke test, the result is different. If the indentation remains completely or mostly without springing back, it's a strong sign of overproofing. The dough has become so relaxed and the gluten so stretched that it lacks the elasticity to bounce back. It's like pressing into a deflated balloon. If the dough collapses significantly when you poke it, it is severely overproofed.
Overproofed Dough Texture: Sticky and Difficult to Handle
The texture of overproofed dough changes noticeably. It tends to become very soft, often feeling slack or loose rather than having a firm, elastic structure. It might also feel unusually sticky, even stickier than it was after the initial mix and knead. This increased stickiness can make the dough difficult to handle, shape, or transfer to a baking vessel.
The stickiness and lack of structure are direct results of the over-fermentation process. The excessive enzymatic activity breaks down some of the flour's starches and proteins, leading to a gooier consistency. Trying to shape or work with overproofed bread dough easily can be frustrating; it might tear easily, resist holding its shape, and feel heavy or dense despite looking voluminous.
The Science Behind Overproofing
Yeast Activity and Bread Dough Fermentation
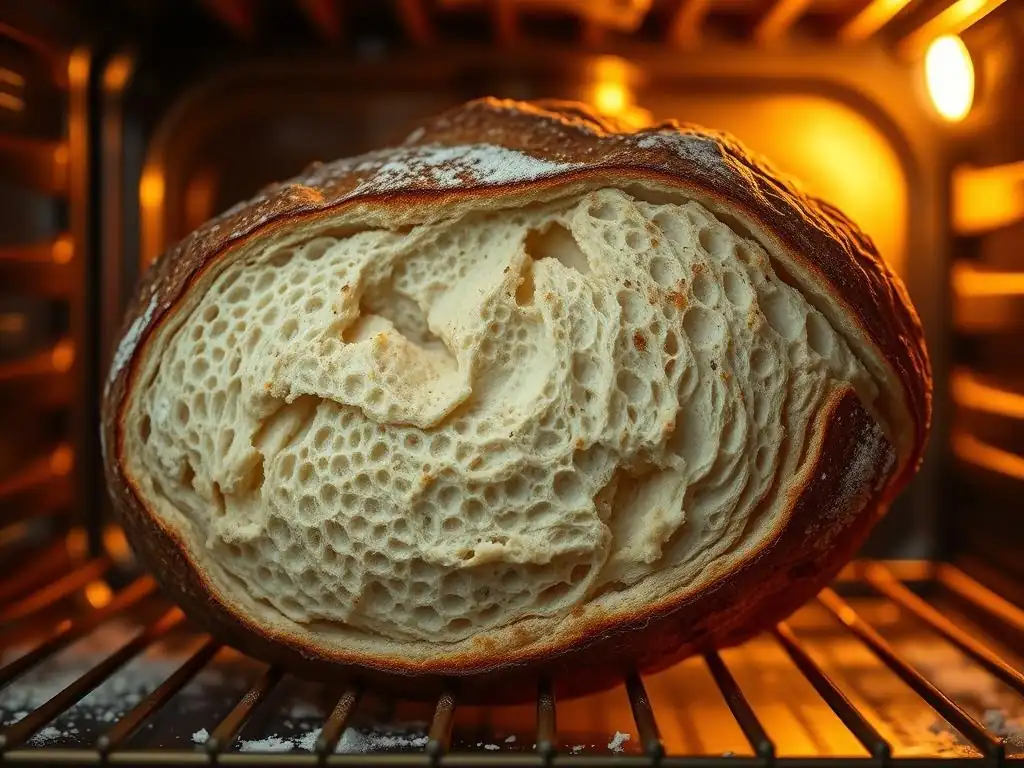
Bread dough fermentation is a biological process driven primarily by yeast, a single-celled microorganism. When yeast is combined with water, flour, and warmth, it becomes active. Yeast feeds on the simple sugars present in the flour (or those converted from complex starches by enzymes) and produces two main byproducts: carbon dioxide gas and alcohol. The carbon dioxide gas is trapped within the elastic network of gluten proteins developed during kneading, causing the dough to rise.
The rate of fermentation is influenced by several factors, including the amount of yeast used, the temperature of the dough and the environment, and the availability of food (sugars) for the yeast. A warmer environment, for instance, significantly speeds up yeast activity. If left unchecked, this activity continues, producing more and more gas. Proper proofing allows just enough gas to develop to create a light texture, but overproofing bread dough easily allows the process to go too far.
How Over-Fermentation Leads to Large Air Pockets
During optimal proofing, the gas bubbles produced by the yeast are relatively small and evenly distributed throughout the dough, supported by the strong gluten network. As the dough rises, these bubbles expand. When the dough is baked, the heat causes the gas within these bubbles to expand further, leading to "oven spring," the final burst of rise in the oven. This results in a fine, consistent crumb structure.
However, when dough is overproofed, the yeast produces an excessive amount of gas. This forces the existing bubbles to grow much larger than intended. The vigorous gas production stretches the gluten network thinner and thinner. Instead of many small, strong bubbles, you end up with fewer, very large, and fragile bubbles. When the dough is handled or baked, these large, unstable bubbles are prone to merging or collapsing, resulting in the characteristic large, irregular holes and surrounding dense areas seen in overproofed bread dough easily.
The Impact of Overproofing on Gluten Development
Gluten development is crucial for trapping the gas produced by yeast and giving bread its structure. Kneading develops the gluten network, creating elastic strands that can stretch and hold gas bubbles. Proper proofing allows this network to relax and become pliable, ready for oven spring.
Overproofing bread dough easily has a detrimental effect on this carefully developed gluten structure. The prolonged fermentation and excessive stretching weaken the gluten strands. Think of over-kneading, which can break down the gluten; prolonged over-fermentation can have a similar effect. The dough loses its elasticity and tenacity, becoming slack and unable to maintain its shape or support the internal gas pressure. When baked, this weakened structure cannot hold its shape, leading to a loaf that may collapse or spread sideways, and exhibit the large holes discussed earlier.
Causes of Overproofing Bread Dough Easily
Common Mistakes That Lead to Overproofing
Understanding the common culprits behind overproofing bread dough easily is the first step in preventing it. While yeast activity is the engine, certain environmental factors and user errors can accelerate this process beyond the desired point. Being aware of these potential pitfalls allows bakers to take proactive measures and maintain better control over their dough's fermentation. It's often a combination of factors that leads to an overproofed state, rather than a single issue in isolation.
One of the most frequent reasons for overproofing is simply misjudging the time required for the dough to rise. Recipes often provide time estimates, but these are highly variable depending on the ambient temperature and other factors. Relying solely on a clock without observing the dough's actual state is a common mistake. For example, if a recipe says "proof for 1-2 hours," and your kitchen is significantly warmer than the recipe assumed (e.g., 78°F instead of 70°F), the dough might be perfectly proofed in 45 minutes, not 2 hours.
Excessive Proofing Time: A Primary Culprit
As mentioned, the most straightforward cause of overproofing bread dough easily is leaving it to rise for too long. Yeast doesn't stop working just because the recommended time has passed. It continues to ferment sugars and produce gas as long as conditions are favorable. If you get distracted, forget about the dough, or misjudge the timing based on visual cues, you risk overproofing.
For example, many recipes call for a "double in size" target. If you wait until the dough has tripled or even quadrupled in size before baking, you've likely gone too far. The gluten structure, designed to support a doubling, is now stretched thin trying to contain three or four times the volume of gas. A typical white bread dough might need 60-90 minutes at 75°F to double. If left for 3 hours at the same temperature, it would almost certainly be severely overproofed.
High Temperatures and Accelerated Fermentation
Temperature is a critical factor influencing the rate of yeast activity. Warmer temperatures significantly speed up fermentation. Yeast is most active in the range of 75°F to 85°F (24°C to 30°C). Proofing dough in a warm spot, like near a sunny window or on top of a warm oven, will cause it to rise much faster than at cooler room temperature (around 70°F or 21°C).
If a recipe assumes a standard room temperature proofing time (say, 2 hours at 70°F), and you proof the dough in a warmer environment (say, 80°F), the dough might reach its peak proof in just 1 hour. Failing to adjust the proofing time based on the actual temperature is a common way to overproof bread dough easily. Conversely, cooler temperatures slow down yeast activity, which is why refrigeration is often used for slow, overnight fermentation.
Too Much Yeast in Your Bread Recipe
Using too much yeast for the amount of flour and liquid in your recipe is another direct route to overproofing bread dough easily. A higher concentration of yeast means more microorganisms are producing gas simultaneously, leading to a much faster rise. While some recipes might call for slightly more yeast for a quicker rise, significantly exceeding the recommended amount can make the dough race through the proofing stage.
For instance, a standard loaf using 500g of flour might use around 7g (or 2.25 teaspoons) of active dry yeast. Doubling the yeast amount to 14g would drastically cut down the proofing time needed. If you follow the original proofing time, the dough will undoubtedly be overproofed. Always measure your yeast accurately, preferably by weight using a scale, as scooping can be inconsistent.
Preventing Overproofing: Tips and Techniques
Controlling Proofing Time for Perfect Bread
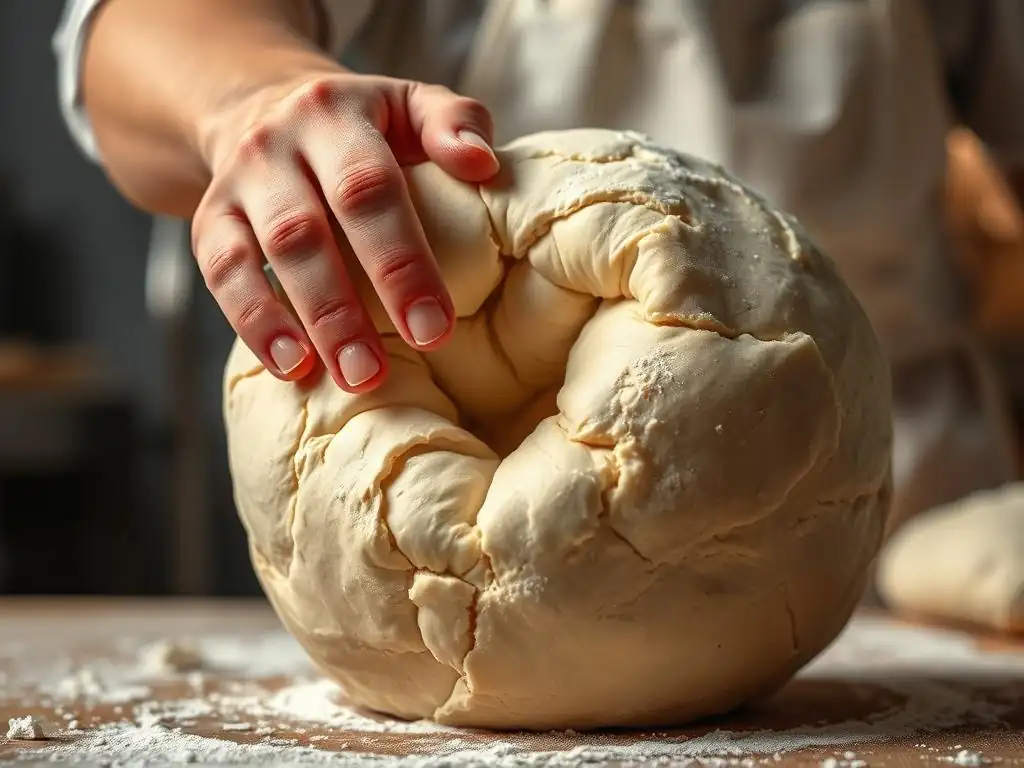
Preventing overproofing bread dough easily boils down to controlling the rate and duration of fermentation. The most effective way to do this is by actively monitoring the dough's progress rather than strictly adhering to time estimates in a recipe. Learn to use the poke test and observe the visual cues discussed earlier. Proofing is done when the dough has achieved the right amount of rise and elasticity, not just when the timer goes off.
Keep a close eye on the dough, especially if you are baking in a warmer-than-usual environment or using a new recipe. Check the dough's progress every 15-30 minutes once it has significantly increased in volume. Use a clear container or bowl so you can see the dough rising without disturbing it too much. Jotting down notes about proofing times and temperatures in your kitchen can help you learn what works best for your specific environment and recipes.
Adjusting Proofing Time Based on Temperature
Since temperature is such a significant factor, consciously adjusting your proofing time based on your kitchen's warmth is essential to avoid overproofing bread dough easily. If your kitchen is warmer than the ideal 70-75°F range, expect the dough to proof faster. You might need to shorten the proofing time by 25-50% or more for every few degrees Fahrenheit above this range.
Conversely, if your kitchen is cooler, the dough will rise more slowly. You will need to extend the proofing time. Don't rush the process; let the dough tell you when it's ready using the poke test and visual cues. Proofing in a slightly cooler environment (say, 68°F) might take 50-100% longer than at 75°F, but it often results in a more flavorful loaf due to the slower fermentation.
Using the Refrigerator for Slow Fermentation
One of the best techniques to prevent overproofing bread dough easily, especially for busy schedules or when you want to develop deeper flavor, is using the refrigerator for a slow, cold fermentation. Yeast activity slows down dramatically at refrigeration temperatures (around 35-40°F or 2-4°C). This allows you to proof the dough over many hours, typically 8 to 48 hours, depending on the recipe and desired outcome.
Cold proofing offers significant benefits: it makes the dough easier to handle, develops more complex flavors, and provides a much wider window for baking, reducing the risk of overproofing if you're not ready to bake immediately. Dough that might overproof in 2-3 hours at room temperature can often sit in the fridge for 12-24 hours without issue. Just remember to factor in time for the dough to warm up slightly before shaping and baking after it comes out of the fridge.
Accurate Yeast Measurement for Consistent Results
Precise ingredient measurement is fundamental to successful baking, and yeast is no exception. Using too much yeast is a common cause of overproofing bread dough easily. Relying on volume measurements (teaspoons, tablespoons) for yeast can be inaccurate due to variations in how tightly the yeast is packed.
For the most consistent results, especially with active dry or instant yeast, measure it by weight using a digital kitchen scale. Most recipes provide yeast amounts in grams, which is far more accurate than volume. If a recipe only provides a volume measurement, consider converting it to weight (e.g., 1 teaspoon of instant yeast is roughly 3 grams, 1 teaspoon of active dry yeast is roughly 3.5 grams, 1/4 oz packet is about 7 grams). This small step can make a big difference in controlling your dough's rise and avoiding overproofing bread dough easily.
Strengthening Gluten for Better Dough Structure
While controlling fermentation is key, having a strong gluten network provides a buffer against slight over-fermentation and helps the dough maintain its structure. Well-developed gluten can better support the expanding gas bubbles.
The Importance of Kneading
Proper kneading is crucial for developing the gluten network. Whether you knead by hand or with a stand mixer, the process aligns the gluten proteins and builds elasticity and strength. Dough that is insufficiently kneaded will have a weak gluten structure, making it more susceptible to collapsing or developing large, irregular holes even with only moderate overproofing.
Knead your dough until it passes the windowpane test: take a small piece of dough and gently stretch it. If you can stretch it thin enough to see light through it without tearing, the gluten is well-developed. Under-kneaded dough will tear before reaching this stage. Ensuring adequate kneading provides a robust framework that is less likely to be compromised by slightly overproofing bread dough easily.
Using Bread Flour for Higher Gluten Content
The type of flour you use also impacts gluten development. Bread flour typically has a higher protein content (around 12-14%) compared to all-purpose flour (around 10-12%). This higher protein content means more gluten can be developed during kneading.
Using bread flour can give your dough a stronger structure, making it more resilient and better able to hold its shape and the gas produced during fermentation. While you can bake successfully with all-purpose flour, especially for softer loaves, switching to bread flour might provide an extra layer of security against structural issues like those caused by overproofing bread dough easily, resulting in a more consistent crumb.
Recovering Slightly Overproofed Dough
Techniques for Rescuing Overproofed Dough
Finding out your dough is overproofed can be disheartening, but depending on the severity, you might be able to salvage it. These techniques are most effective for dough that is slightly overproofed – meaning it's very puffy and passes the poke test slowly, but hasn't completely collapsed or become excessively sticky and slack. Severely overproofed dough (collapsed, extremely sticky, smells strongly of alcohol) is much harder to save, but you can still try.
The goal of rescuing slightly overproofed dough is to redistribute the gas, strengthen the gluten structure slightly, and give the yeast a new supply of sugars to work with if possible. While you won't achieve the perfect crumb structure you would have with properly proofed dough, you can often bake a decent loaf rather than discarding the dough entirely. It requires gentle handling and quick action.
Punching Down and Re-shaping
The most common technique for slightly overproofing bread dough easily is to gently punch it down. This involves carefully pressing the air out of the dough. Don't be too rough, as you don't want to tear the weakened gluten network. Once deflated, you can try to gently reshape the dough.
This process helps to redistribute the gas bubbles and can give the gluten a chance to reorganize slightly. After punching down and reshaping, you'll need to give the dough a second, much shorter proofing period (often called a "re-proof" or "second rise"). Since the yeast is still very active and the sugars are depleted, this re-proof will be very fast. Watch it very closely and bake as soon as it looks adequately risen again (it likely won't double a second time). This method is best for dough that hasn't fully collapsed.
Adding Flour to Improve Dough Structure
For dough that is quite sticky and slack due to overproofing bread dough easily, you might consider gently incorporating a small amount of additional flour. This can help absorb some of the excess moisture released during prolonged fermentation and provide more structure.
Add the flour cautiously, perhaps a tablespoon at a time, kneading it gently into the dough until it becomes slightly less sticky and more manageable. Be careful not to add too much, as this can make the dough tough. After incorporating the flour, give the dough a very brief rest (5-10 minutes) and then attempt a quick re-shape and a very short second proof before baking. This method is a bit more drastic and works best for dough that is noticeably slack.
Baking Overproofed Bread: What to Expect
Understanding the Outcome of Baking Overproofed Dough
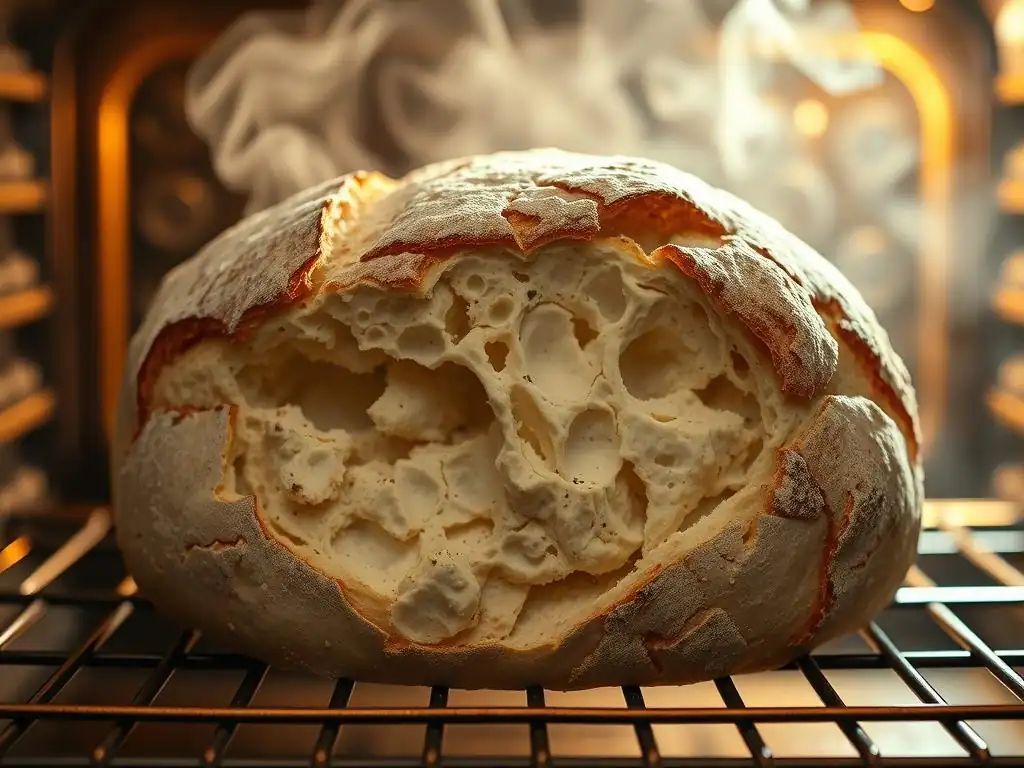
Even if you don't attempt to rescue overproofed dough, or if your rescue attempts aren't fully successful, you can still bake it. It's important to manage your expectations, though. Baking overproofed bread dough easily will result in a loaf with distinct characteristics that differ significantly from a properly proofed loaf. The final product might not be ideal, but it's usually still edible.
Expect a loaf that is often wider and flatter than intended, as the weakened gluten structure struggles to hold its shape during oven spring. The crust might be paler and less well-formed. Inside, the crumb will likely be irregular, featuring large, cavernous holes interspersed with dense, gummy areas. The flavor might also be affected, sometimes tasting slightly more acidic due to the prolonged fermentation, or potentially bland if the yeast has consumed all available sugars.
Adjusting Baking Time and Temperature
When baking overproofed bread dough easily, you might need to make minor adjustments to your baking process. Because the dough has already expanded significantly and the structure is compromised, you will likely experience less oven spring than usual.
Consider baking the loaf in a preheated oven at a slightly lower temperature than usual, perhaps 25°F (around 15°C) less, to prevent the crust from setting too quickly before the interior has a chance to bake through. You might also need to slightly shorten the baking time, as the dough structure is weaker and can dry out faster. Monitor the loaf closely using visual cues (crust color, internal temperature) rather than relying solely on the recipe's time estimate. A digital thermometer inserted into the center of the loaf should read around 200-210°F (93-99°C) when fully baked.
Troubleshooting Common Bread Baking Problems
Other Reasons for Holes in Bread (Besides Overproofing)
While overproofing bread dough easily is a frequent cause of large holes, it's not the only one. If your bread has large, irregular holes but doesn't show the other signs of overproofing (like excessive rise followed by collapse, or extreme stickiness), the problem might lie elsewhere in your process. Understanding these other potential issues is key to refining your bread baking skills and consistently achieving the desired crumb structure.
Identifying the root cause requires reviewing your entire baking process, from mixing and kneading to shaping and baking. Was the dough handled properly? Was enough tension built during shaping? Was the oven environment correct? Pinpointing the exact issue helps you make targeted adjustments for your next bake.
Insufficient Kneading
Under-kneading is another common cause of large, irregular holes and a dense crumb around them. As discussed earlier, kneading develops the gluten network necessary to trap gas bubbles evenly. If the dough is not kneaded enough, the gluten is weak and underdeveloped.
A weak gluten structure cannot effectively hold the gas produced by the yeast. The gas bubbles grow large and unevenly, often merging into cavernous pockets, while other areas remain dense because the gluten wasn't strong enough to expand there. This can sometimes look superficially similar to overproofing bread dough easily in terms of the holes, but the dough itself would likely have felt less elastic and more easily torn before proofing.
Incorrect Shaping Techniques
The way you shape your dough significantly impacts the final crumb structure. Proper shaping builds tension on the surface of the dough, creating a "skin" that helps the loaf hold its shape and provides resistance for the oven spring. This tension also helps distribute the gas bubbles more evenly within the loaf.
If the dough is shaped too loosely, it lacks the necessary surface tension. During proofing and baking, the gas will expand without resistance, leading to uncontrolled expansion and large, irregular holes, particularly towards the top of the loaf. This is often seen in artisan breads where a very open crumb is desired, but if you're aiming for a more uniform crumb, sloppy shaping can mimic the effects of overproofing bread dough easily in terms of hole size and distribution.
Steam Issues During Baking
Steam in the oven during the initial phase of baking is crucial for achieving good oven spring and a well-formed crust. Steam keeps the surface of the dough moist and pliable, allowing it to expand fully before the crust sets.
If there is insufficient steam in the oven, the crust forms too quickly and becomes rigid. This prevents the dough from expanding properly during oven spring. The internal pressure builds, and the gas is forced to escape through the path of least resistance, often resulting in large, irregular tears or blowouts on the crust and large, uneven holes inside, sometimes resembling the effects of overproofing bread dough easily or under-kneading. Using a Dutch oven, baking stone with a steam tray, or spritzing the oven walls are common methods to generate steam.
Conclusion: Mastering Bread Proofing for Perfect Loaves
Achieve Baking Success with Proper Proofing Techniques
Mastering the art of proofing is arguably one of the most critical steps in achieving consistently excellent bread. It's the stage where the dough develops its volume, texture, and much of its flavor. While overproofing bread dough easily can lead to disappointing results like large holes and a poor crumb, understanding the signs, science, and causes empowers you to take control of the process. By paying close attention to your dough's visual cues, using the poke test, managing temperature, accurately measuring ingredients, and ensuring good gluten development, you significantly reduce the risk of overproofing.
Remember that proofing times are always estimates. The dough itself will tell you when it's ready. Be patient, observe, and adjust based on your environment. Utilizing techniques like cold fermentation can offer greater flexibility and flavor development while also acting as a safeguard against accidental overproofing bread dough easily. Every bake is a learning opportunity, and slight imperfections are part of the journey. Don't be discouraged by an overproofed loaf; instead, use it as a chance to refine your timing and technique for the next one.
BakeWithEase: Continuing Your Bread Baking Journey
At BakeWithEase, we are dedicated to helping you navigate the wonderful world of bread baking with confidence and success. Understanding how to prevent and identify overproofing bread dough easily is just one piece of the puzzle. We offer a wealth of resources, from beginner recipes to advanced techniques, all designed to simplify the process and help you bake delicious bread right in your own kitchen.
Continue exploring our site for more troubleshooting tips, detailed recipe guides, and insights into the science of baking. We believe that anyone can bake great bread with the right knowledge and practice. Keep baking, keep learning, and enjoy the incredibly rewarding process of transforming simple ingredients into a beautiful, flavorful loaf. With BakeWithEase, your journey to perfect bread is well underway!
Frequently Asked Questions
How can I tell if my bread dough is overproofed?
Overproofed dough will often collapse easily when touched. It may also have a sour or alcoholic smell due to excessive fermentation.
What causes bread dough to become overproofed?
The most common cause is allowing the dough to rise for too long, especially in a warm environment. Too much yeast can also contribute.
Can I save overproofed bread dough?
Sometimes! You can try kneading it again to redistribute the yeast and then reshape it. However, the resulting bread may be dense.
Does overproofing only affect the size of the holes in bread?
No, overproofing affects more than just hole size. It can also impact the flavor and texture of the bread, making it gummy or sour.
What are some tips to avoid overproofing my bread dough?
Keep a close eye on your dough, and test it frequently during the proofing process. Reduce proofing time in warmer environments, and use the recommended amount of yeast in your recipe.
Final Reflection: The Humble Loaf and the Art of Patience
Overproofing bread dough, a seemingly minor baking mishap, reveals a profound truth about the process of creation: patience and precision are paramount. A perfectly risen loaf isn't just about achieving the right texture; it's a testament to understanding the delicate balance between time, temperature, and the living organism that is yeast. Ignoring the subtle signs of overproofing can lead to disappointing results, but recognizing them allows for a deeper appreciation of the craft.
The impact of understanding overproofing extends beyond the kitchen. It's a microcosm of life itself, where rushing the process often leads to flawed outcomes. The best things in life are worth waiting for,
a cliché perhaps, but one that rings profoundly true when considering the artistry of baking bread. The subtle nuances of dough development, the careful observation of its rise, these are lessons that translate to other aspects of life, reminding us to slow down and appreciate the journey.
So, the next time you're kneading dough, remember the lessons learned here. Don't rush the process. Observe your dough carefully. Learn to recognize the signs of overproofing, and embrace the opportunity to learn from any mistakes. The perfectly risen loaf, the one that embodies patience and precision, is a reward worth waiting for. It's a testament to your dedication, your understanding, and your ability to find beauty in the details. Now, go forth and bake!
Unlock Perfectly Pillowy Bread: Mastering the Art of Proofing
Thanks for taking the time to learn about overproofing! We hope this guide helped you understand the science behind those pesky holes in your loaves. Now it's time to put your newfound knowledge into practice.
- Bake a test loaf today! Use a smaller batch of your favorite recipe and pay close attention to the proofing stage. Note the timing and the dough's texture – this is your key to mastering perfect proofing.
- Experiment with different proofing methods: Try proofing in a warm oven, using a proofing basket, or even changing your dough's hydration. Every detail matters!
- Share your baking journey with us! Tell us about your successes (and even your mishaps!) – we'd love to hear how you're putting this knowledge into action.
What proofing technique will you try first to create your dream loaf?