
Sourdough Starter Weak? Revive Your Culture

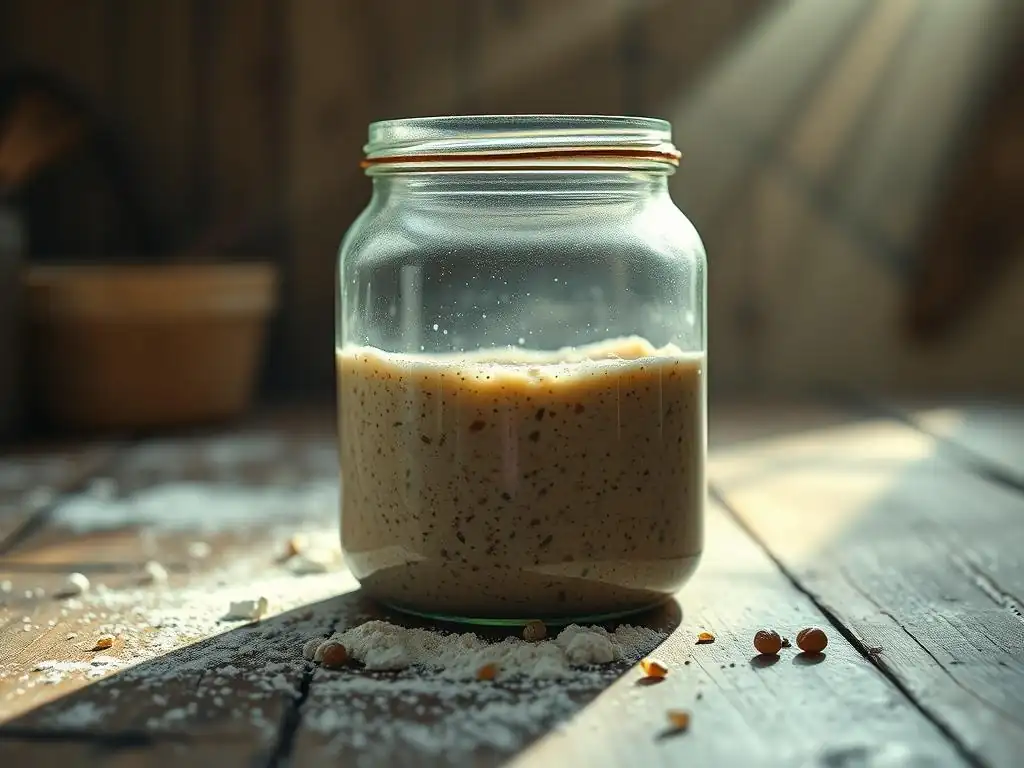
Welcome to BakeWithEase, your haven for all things baking! Ever stared at a sluggish sourdough starter and wondered where you went wrong? Don't despair! This guide reveals proven methods to revive your weak sourdough starter, transforming it back into a bubbling, baking powerhouse. Discover the secrets to unlocking its full potential and elevate your bread baking game. Curious to learn more? Let's get started!
- Reviving a Weak Sourdough Starter: A Comprehensive Guide
- Identifying a Weak Sourdough Starter
- Step-by-Step Guide to Reviving Your Starter
- Troubleshooting Common Starter Problems
- Maintaining a Healthy and Active Starter
- Advanced Techniques for Revival
- Expert Tips for a Thriving Culture
-
Frequently Asked Questions
- What are the main signs of a weak sourdough starter?
- How often should I feed my sourdough starter to revive it?
- What kind of flour is best for reviving a weak sourdough starter?
- Can I use a different water source to improve my starter's activity?
- How long does it typically take to revive a weak sourdough starter?
- Final Reflection: The Enduring Power of a Simple Starter
- Rediscover Your Bubbly Baker's Best Friend!
Reviving a Weak Sourdough Starter: A Comprehensive Guide
Is your sourdough starter looking a little sad? Maybe it's not rising like it used to, or the bubbles are few and far between. Don't worry, a weak sourdough starter is a common issue, and in most cases, you can bring it back to its bubbly, active glory. Learning how to revive weak sourdough starter is a fundamental skill for any sourdough baker.
Identifying a Weak Sourdough Starter
Before you can revive weak sourdough starter, you need to recognize the signs that it's struggling. A healthy starter is a vibrant ecosystem of wild yeast and bacteria, and its behavior tells you a lot about its health.
Recognizing Signs of Inactivity
A primary sign of a weak starter is a lack of significant rise after feeding. While a healthy starter might double or even triple in size within 4-8 hours at room temperature (around 70-80°F or 21-27°C), a sluggish one will show minimal or no growth. You might see some tiny bubbles, but not the robust, frothy activity you expect. The time it takes to peak is also much longer, often exceeding 12-18 hours before any slight rise occurs.
Another indicator is the consistency and smell. A healthy starter often has a pleasant, slightly tangy, or even yeasty aroma. A weak starter might smell very acidic, like strong vinegar, or have a less complex, almost bland smell. The texture might also be thinner than usual, especially after separating, without the characteristic web-like structure when stirred gently. Look for a distinct line on the jar indicating how much it has risen; if this line is absent or barely noticeable over many hours, your starter is likely weak.
Common Causes of a Sluggish Starter
Several factors can contribute to a weak sourdough starter. One of the most frequent culprits is inconsistent or infrequent feeding. If a starter isn't fed regularly, the yeast and bacteria run out of food (flour) and their activity levels drop significantly. This is especially true if storing the starter at room temperature; daily feeding is typically required to keep it vigorous.
Temperature plays a crucial role as well. Sourdough starters thrive in warmer environments, generally between 75°F and 80°F (24°C - 27°C). Temperatures significantly below this range slow down fermentation dramatically, leading to a sluggish or inactive starter. Conversely, extremely high temperatures can kill the yeast and bacteria. The type and quality of flour used can also impact starter health; bleached or heavily processed flours may not provide the necessary nutrients compared to unbleached or whole-grain options.
Step-by-Step Guide to Reviving Your Starter

Once you've identified that you have a weak sourdough starter, it's time to take action. Reviving it requires patience and a systematic approach to address the underlying issues.
Assessing Your Starter's Condition
The first step in bringing a weak sourdough starter back to life is a thorough assessment. Observe its current state: smell, consistency, presence of hooch (the liquid on top), and any signs of mold (which, if present, means you must discard the starter). Note how long it's been since its last feeding and what the ambient temperature has been like. This initial observation helps you understand why it might be weak and guides your revival strategy.
Take a small amount of your starter and perform a float test, although this isn't definitive for a weak starter. More importantly, try feeding a small portion (say, 20g starter) with a standard ratio (e.g., 40g warm water and 40g flour) and observe its activity over the next 12-24 hours in a warm spot. Does it show any signs of life – even tiny bubbles? This test helps determine if the culture is still viable or if you're starting from scratch is necessary.
Adjusting the Feeding Schedule for Optimal Activity
One of the most effective ways to revive weak sourdough starter is to increase the frequency of feeding. Instead of feeding once every 24 hours, try feeding every 12 hours, or even every 8 hours if you can commit to it. Use a feeding ratio that provides plenty of food for the microorganisms.
A common ratio for revival is 1:2:2 or 1:3:3 (starter:water:flour). For example, feed 20g of starter with 40g of warm water and 40g of flour. This higher ratio of fresh flour and water gives the yeast and bacteria ample food to multiply and become more active quickly.
Consistent, frequent feeding with a higher ratio helps build up the population of active microorganisms. Discard a significant portion before each feeding (keeping only the amount needed for the next feeding based on your ratio) to ensure you're not diluting the fresh food among too many inactive microbes. Continue this frequent feeding schedule until the starter consistently doubles in size within 6-8 hours after feeding. This might take anywhere from a few days to over a week, depending on how weak the starter was initially.
Optimizing Temperature for Fermentation
Temperature is a critical factor in yeast and bacteria activity. To revive weak sourdough starter, find the warmest consistent spot in your home, ideally between 75°F and 80°F (24°C - 27°C). This temperature range significantly speeds up fermentation compared to cooler temperatures, encouraging the microorganisms to become more active and prolific. Avoid placing the starter in direct sunlight, which can overheat it, or near drafts from windows or air conditioning.
Consider using a proofing box, an oven with the light on (ensure the temperature doesn't get too high, ideally using an oven thermometer), or even placing the starter in a microwave or unheated oven with a bowl of hot water to create a warm, stable environment. Monitoring the temperature is key; a consistent warm temperature is far more beneficial than fluctuating temperatures. Once the starter shows signs of consistent, strong activity, you can gradually transition it back to a slightly cooler room temperature if desired, but maintaining warmth during the revival phase is crucial.
Experimenting with Different Flour Types
The type of flour you feed your starter can significantly impact its health and activity. While all-purpose or bread flour is common, sometimes a change in flour can help boost a sluggish culture. Different flours have varying levels of nutrients and enzymes that can benefit the microbial population.
Using Whole Wheat Flour
Whole wheat flour is often recommended for reviving a weak sourdough starter because it contains more nutrients and enzymes than refined white flour. These enzymes, particularly amylase, help break down complex starches in the flour into simpler sugars, which are easier for the yeast to consume. Feeding your starter solely with whole wheat flour, or a mix of whole wheat and your usual flour (e.g., 50/50), for a few feedings can provide a significant boost.
For example, try feeding your weak starter with a 1:2:2 ratio using 50% whole wheat flour and 50% unbleached bread flour. Observe the difference in activity over the next 24-48 hours. You might notice more vigorous bubbling and a faster rise. Once the starter shows improvement, you can gradually transition back to your preferred flour type, or continue using a percentage of whole wheat flour in its regular feeding.
Using Rye Flour
Similar to whole wheat, rye flour is another excellent choice for kickstarting a weak sourdough starter. Rye flour is particularly rich in enzymes and nutrients that the wild yeast and lactic acid bacteria love. Even a small amount of rye flour can make a big difference in encouraging activity.
Consider feeding your starter with a mix that includes rye flour, such as 75% bread flour and 25% rye flour, using a 1:2:2 or 1:3:3 ratio. Rye starters often become active very quickly and can have a more tangy aroma. Using rye flour for a few feedings can help strengthen the culture. After seeing improved activity, you can switch back to your regular flour, or maintain a small percentage of rye in your feeding routine for added robustness.
Managing Discard and Feeding
Proper discard management is essential when trying to revive weak sourdough starter. The purpose of discarding a portion of the starter before feeding is to maintain a manageable volume and, more importantly, to ensure that the fresh flour and water you add are primarily consumed by the most active microorganisms, rather than being spread too thin among a large population of less active ones. When reviving a starter, you might need to discard more frequently, especially if you're feeding every 8-12 hours.
Keep only a small amount of the old starter (e.g., 20g) for each feeding and feed it with a generous amount of fresh flour and water (e.g., 40g water, 40g flour or more). This practice, often referred to as using a lower inoculation rate (less starter relative to fresh food), helps to concentrate the available food for a smaller, more active population, encouraging faster growth and strengthening the culture. Don't feel bad about discarding; it's a necessary step in fostering a healthy, active starter.
Troubleshooting Common Starter Problems

Sometimes, reviving a weak sourdough starter involves addressing specific issues like unpleasant smells or the presence of hooch. These are often symptoms of an unhappy culture, but usually fixable.
Addressing Unpleasant Smells
A healthy, active starter should have a pleasant, tangy, slightly yeasty, or even yogurt-like smell. If your starter smells strongly of vinegar, nail polish remover (acetone), or even cheese, it's usually an indicator that the bacteria are overproducing acids, possibly due to infrequent feeding or being kept too cold. The acetone smell is a sign that the yeast have consumed all the simple sugars and are starting to break down alcohol for energy, a stress signal.
To combat unpleasant smells, increase the frequency of feedings and ensure you are feeding with fresh flour and water at the appropriate temperature. A more frequent feeding schedule (every 8-12 hours) with a higher feeding ratio (like 1:2:2 or 1:3:3) provides the yeast and bacteria with a constant supply of food, preventing them from producing excessive acids or acetone. Feeding with a small amount of whole wheat or rye flour can also sometimes help rebalance the microbial population and improve the aroma.
Understanding and Dealing with Hooch
Hooch is the layer of liquid that sometimes separates and settles on top of your sourdough starter. It's a byproduct of fermentation, specifically when the yeast have consumed most of the available carbohydrates in the flour and are becoming hungry. Hooch can range in color from clear to dark gray or black. While not necessarily harmful, a significant amount of hooch is a clear sign that your starter is hungry and needs to be fed.
If you see hooch, you have two main options: you can stir it back into the starter (this adds acidity and can sometimes strengthen the starter, though it can also thin it out), or you can pour it off before feeding. Pouring it off is often preferred if you're trying to revive weak sourdough starter and want to reduce acidity and focus on boosting yeast activity.
After removing the hooch (by stirring or pouring), discard most of the starter and feed the remainder generously with fresh flour and water using a higher ratio. Seeing hooch indicates it's past time for a feeding.
Identifying and Preventing Mold Growth
Mold is the one problem with a sourdough starter that is irreversible and requires discarding the entire culture. Mold typically appears as fuzzy patches on the surface of the starter, often in colors like green, black, orange, or pink. Unlike hooch or discoloration caused by certain flours (like rye), mold is fuzzy and often dry-looking.
To prevent mold, ensure your starter jar and tools are clean. Store your starter in a clean container with a lid that allows gases to escape but prevents contaminants from entering (like a loose-fitting lid or jar covered with cheesecloth secured with a band). Feed your starter regularly, as a healthy, active starter is more resistant to unwanted mold growth due to its acidic environment.
If you see any signs of mold, do not try to salvage the starter; discard it safely and start a new one. It's better to be safe than risk introducing harmful mold into your baked goods.
Maintaining a Healthy and Active Starter
Once you've successfully managed to revive weak sourdough starter, the goal is to keep it healthy and consistently active for future baking projects. Establishing good habits is key.
Long-Term Storage in the Refrigerator
For bakers who don't bake daily, storing your sourdough starter in the refrigerator is the most convenient way to maintain it. Refrigeration significantly slows down the metabolic activity of the yeast and bacteria, allowing you to feed it much less frequently. Typically, a starter can be stored in the fridge for one to two weeks between feedings.
To store, feed your active starter as usual, let it sit at room temperature for 1-2 hours to begin fermentation, and then place it in the refrigerator. When you're ready to bake, remove the starter, let it come to room temperature for a few hours, and then feed it 1-2 times at room temperature until it becomes active and bubbly again, doubling in size within 4-8 hours. This "revival" after refrigeration is important before using it for baking.
Establishing a Regular Feeding Schedule
Whether you store your starter at room temperature or in the fridge, establishing a consistent feeding schedule is vital for its long-term health. For a room temperature starter used frequently (daily or every other day), feeding once every 24 hours is standard. Use a ratio appropriate for maintenance, like 1:1:1 or 1:2:2 (starter:water:flour).
If storing in the refrigerator, commit to feeding it at least once every two weeks. Mark your calendar if necessary. Neglecting a refrigerated starter for too long is a common reason it becomes sluggish and requires significant effort to revive weak sourdough starter again. When you feed a refrigerated starter, it's often beneficial to give it a "wake-up" feeding at room temperature before returning it to the cold.
Recognizing and Responding to Changes
A healthy starter is dynamic and will change slightly depending on temperature, flour, and hydration. Pay attention to these changes. Is it peaking faster than usual? Maybe your kitchen is warmer. Is it producing more hooch? It might need slightly more frequent feeding or a higher feeding ratio. Does the aroma change? This can indicate shifts in the bacterial population.
By observing your starter regularly – its rise, smell, texture, and the presence of hooch – you can catch potential issues early. Responding promptly to these signs, whether it's adjusting the feeding ratio, frequency, or temperature, will help you maintain a strong, active culture and prevent it from becoming weak again, avoiding the need to constantly revive weak sourdough starter.
Advanced Techniques for Revival

If your starter is particularly stubborn and the basic steps haven't fully succeeded in helping you revive weak sourdough starter, there are a couple of more advanced techniques you can try.
The Pineapple Juice Method
The pineapple juice method is a technique sometimes used to help establish or revive a starter that's struggling with the wrong kind of bacteria. The natural acidity of pineapple juice (specifically, fresh, unsweetened juice) can help create an environment that favors the desirable lactic acid bacteria and yeast while inhibiting less desirable microorganisms that might be causing issues.
To use this method for revival, you can replace the water in your feeding for a few cycles with unsweetened pineapple juice. For example, discard most of your starter, and feed the remainder with your usual flour but using pineapple juice instead of water (e.g., 20g starter, 40g pineapple juice, 40g flour). Do this for 1-3 feedings, then gradually switch back to water.
Monitor closely, as some starters don't respond well to the high sugar content or acidity. This method is more commonly used for establishing a new starter, but some bakers find it helps reset a struggling older one.
Utilizing Diastatic Malt Powder
Diastatic malt powder is a baking additive made from sprouted grains (usually barley) that are dried and ground. It contains enzymes, particularly amylase, which are excellent at breaking down starches in flour into simple sugars. Adding a tiny amount of diastatic malt powder to your starter feedings can provide the yeast with a readily available food source, significantly boosting their activity.
To use diastatic malt for revival, add a very small pinch (literally just a tiny amount, less than 0.5% of the flour weight) to your starter feeding. For example, if feeding with 50g of flour, add less than a quarter teaspoon of diastatic malt powder. Do not use non-diastatic malt powder, which is used for flavor and color and lacks the necessary enzymes. Using too much diastatic malt can actually degrade the flour structure too quickly. A little goes a long way in helping to revive weak sourdough starter by ensuring the yeast have plenty to eat.
Expert Tips for a Thriving Culture
Beyond the specific revival steps, keeping a few expert tips in mind can make all the difference in maintaining a consistently strong and active sourdough culture.
- Use Unbleached Flour: Unbleached flours generally contain more natural nutrients and enzymes that benefit a starter compared to bleached varieties.
- Filtered Water: Chlorine and chloramine in tap water can sometimes inhibit microbial activity. Using filtered or bottled water can help, especially if your tap water has high levels of these chemicals. Letting tap water sit out for 24 hours can also help dissipate chlorine.
- Consistency is Key: Whatever feeding schedule and ratio you choose, stick to it as much as possible. Microorganisms thrive on routine.
- Observe, Don't Just Feed: Spend a moment each day observing your starter's behavior. Learn its rhythm, how it looks and smells when active, and how long it takes to peak. This understanding is invaluable for knowing when something is off.
- Keep it Clean: Regularly clean your starter jar and tools to prevent the growth of unwanted bacteria or mold.
- Don't Fear Discard: Discarding excess starter is a necessary part of the process. Think of it as pruning a plant; it allows the remainder to flourish.
By understanding the signs of a weak starter, systematically addressing potential causes through adjusted feeding, temperature control, and perhaps experimenting with flour types or advanced techniques, you can successfully revive weak sourdough starter. With consistent care and attention, you'll be back to baking delicious, well-risen sourdough bread in no time.
Frequently Asked Questions
What are the main signs of a weak sourdough starter?
A weak starter typically exhibits signs like lack of rise after feeding, thin or watery consistency, and the absence of significant bubbling or activity.
How often should I feed my sourdough starter to revive it?
To revive a weak starter, try feeding it twice a day at regular intervals. Ensure you're using the correct ratio of starter, flour, and water (usually 1:1:1).
What kind of flour is best for reviving a weak sourdough starter?
Using a high-protein flour, such as bread flour or whole wheat flour, can provide the starter with the necessary nutrients to boost its activity and strengthen the culture.
Can I use a different water source to improve my starter's activity?
Yes, using unchlorinated water is crucial. Chlorinated water can inhibit the growth of beneficial bacteria and hamper the fermentation process, weakening the starter.
How long does it typically take to revive a weak sourdough starter?
Reviving a starter can take anywhere from 3 to 7 days, depending on its initial condition and your feeding schedule. Be patient and look for signs of increased activity and consistent rise.
Final Reflection: The Enduring Power of a Simple Starter
The humble sourdough starter, a living testament to patience and nurturing, holds a surprising relevance in our fast-paced world. Its fragility mirrors our own need for care and attention, reminding us that even the smallest living things require consistent effort to thrive. The ability to revive a weak starter is not just a baking skill; it's a metaphor for resilience and the power of second chances.
The journey of a sourdough starter, from initial bubbling excitement to periods of dormancy and eventual revival, deeply resonates with the human experience. We too face periods of weakness and stagnation, yet the potential for renewal and growth always remains. The best way to predict the future is to create it,
a quote often attributed to Abraham Lincoln, perfectly encapsulates the proactive approach needed to both nurture a starter and navigate life's challenges. The act of reviving a seemingly lifeless starter is a powerful reminder of our own capacity for renewal and the importance of persistent effort.
Now, consider your own "starter." What aspects of your life, your projects, or your relationships need a little extra care and attention? Perhaps it's a neglected hobby, a faltering ambition, or a strained connection. Take a moment to reflect on what needs reviving, and commit to nurturing it with the same patience and dedication you would give to your sourdough starter. The rewards, like the delicious aroma of freshly baked bread, will be well worth the effort.
Rediscover Your Bubbly Baker's Best Friend!
Thanks for taking the time to learn more about reviving your sourdough starter! We hope you've gained valuable insights and feel empowered to nurture your bubbly companion. Now it's time to put your newfound knowledge into practice.
- Give your starter a refreshing feed and observe its activity: Pay close attention to its rise and fall – this is key to understanding its health. This is the most important step to ensure its vitality.
- Share your starter revival story: Let's connect! Tell us about your experience in the comments below – what worked best for you?
- Explore different recipes to use your revitalized starter: From crusty loaves to tangy pretzels, the possibilities are endless!
Ready to see your starter flourish? What creative baking projects are you excited to tackle next?