
GlutenFree Lemon Bars with a Buttery Shortbread Crust

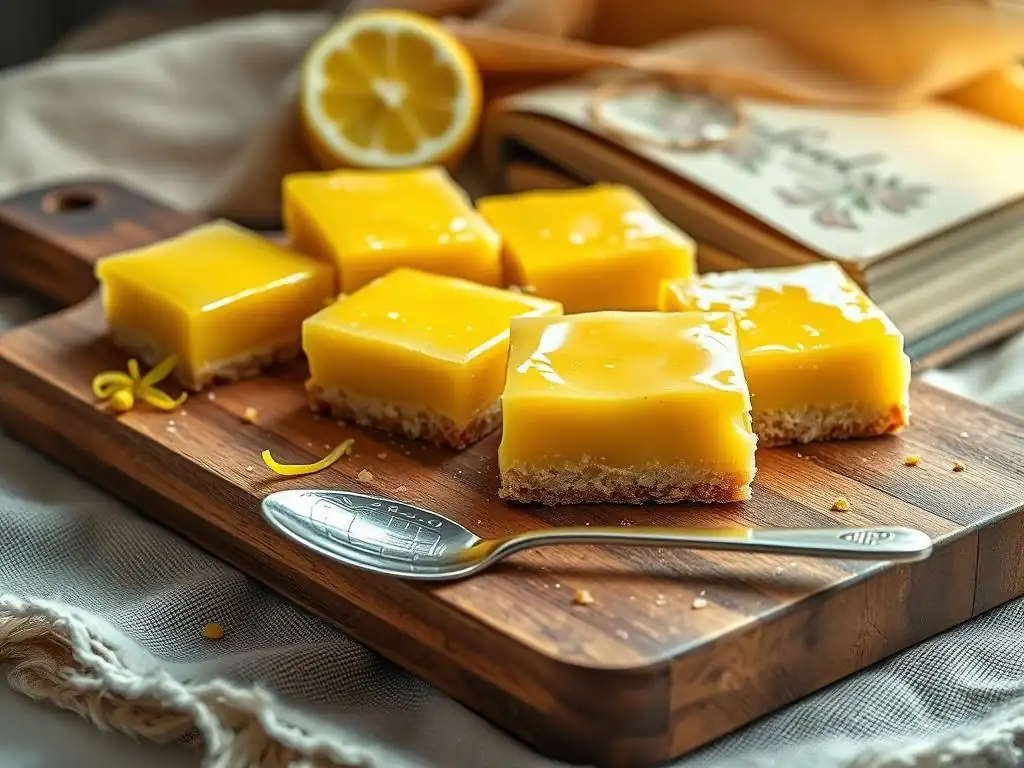
Welcome to BakeWithEase! Ever dreamed of biting into a tangy, melt-in-your-mouth lemon bar, even with dietary restrictions? You're in the right place. Today, we're unveiling a Gluten-Free Lemon Bars Recipe that's so good, you won't believe it's missing the gluten. Curious how to achieve that perfect balance of sweet and tart with a buttery shortbread crust? Let's dive in and unlock the secrets to this delightful, allergen-friendly treat!
- Classic Lemon Bars Recipe with Shortbread Crust: A Delicious Dessert
- Introduction to Lemon Bars: A Zesty Classic
- Crafting the Perfect Shortbread Crust
- Preparing the Tangy Lemon Filling
- Assembling and Baking Your Lemon Bars
- Lemon Bar Variations & Customizations
- Tips for Storing and Serving Your Lemon Bars
- Troubleshooting Common Lemon Bar Issues
- The Best Lemon Bars Recipe: A Summary
- Frequently Asked Questions
- Final Reflection: The Enduring Allure of a Gluten-Free Delight
- Unleash Your Inner Baker: Make These Lemon Bars Today!
Classic Lemon Bars Recipe with Shortbread Crust: A Delicious Dessert
Introduction to Lemon Bars: A Zesty Classic
Lemon bars are a beloved dessert, known for their perfect balance of sweet and tangy flavors nestled atop a rich, buttery crust. This classic treat brings a burst of sunshine to any occasion, from simple weeknight desserts to festive gatherings. Their vibrant yellow hue is as appealing as their refreshing taste. While traditional lemon bars often feature a wheat-based shortbread, adapting this dessert to be gluten-free allows even more people to enjoy this delightful confection without dietary concerns. Our focus here is on creating a truly exceptional glutenfree lemon bars recipe that doesn't compromise on taste or texture.
Creating a successful gluten-free version of a classic like lemon bars involves understanding the nuances of gluten-free flours and their behavior in baking. Unlike wheat flour, which provides structure and elasticity through gluten development, gluten-free blends rely on starches and gums to mimic these properties. This requires careful measurement and often slightly different mixing techniques. Our approach focuses on using a reliable gluten-free flour blend and precise steps to ensure both the shortbread crust and the lemon filling achieve their ideal consistency, resulting in delicious gluten-free lemon bars that everyone can enjoy.
A Guide to Perfect Lemon Bar Baking
Achieving perfect lemon bars, especially when working with a gluten-free lemon bars recipe, hinges on attention to detail at every stage. The process involves creating a sturdy yet tender shortbread crust, preparing a smooth and vibrantly flavored lemon filling, and baking them together until set. Understanding the role of each ingredient is crucial; for instance, fresh lemon juice is paramount for that signature tangy punch, while the amount of sugar balances the tartness. Using cold butter in the crust ensures flakiness, and baking the crust partially before adding the filling prevents it from becoming soggy.
Success in baking this gluten-free lemon bars recipe also comes from understanding oven temperatures and baking times. An oven thermometer can be invaluable to ensure your oven is heating accurately, as variations can significantly impact the outcome. Baking the crust at around 350°F (175°C) for about 15-20 minutes helps it firm up and achieve a light golden color before the filling is added.
The filled bars then bake at a slightly lower temperature, perhaps 325°F (160°C), for another 25-35 minutes, allowing the filling to set without curdling or over-browning the edges. Patience during the cooling process is equally important, as the bars need ample time to firm up before slicing.
Why Choose This Lemon Bar Recipe?
This specific glutenfree lemon bars recipe stands out because it has been developed and tested to ensure excellent results using gluten-free ingredients. Many gluten-free shortbreads can be crumbly or dry, but this recipe focuses on achieving a buttery, tender texture that holds together beautifully. The lemon filling is crafted for optimal tanginess and smooth consistency, avoiding the common pitfalls of being too runny or too firm. It's a straightforward recipe designed to be accessible for bakers of all levels, including those new to gluten-free baking.
Furthermore, this glutenfree lemon bars recipe utilizes readily available ingredients, making it convenient to prepare. You won't need obscure flours or binders; a standard gluten-free all-purpose flour blend that contains xanthan gum should work well. The balance of sugar to lemon juice is carefully calibrated, offering a bright, refreshing taste that is satisfying without being overly sweet. This recipe consistently delivers delightful gluten-free lemon bars that are sure to become a favorite in your baking repertoire.
Crafting the Perfect Shortbread Crust
The foundation of great lemon bars is a stellar shortbread crust. For our glutenfree lemon bars recipe, we aim for a crust that is buttery, slightly crumbly, and sturdy enough to support the tangy filling. Achieving this texture in a gluten-free format requires careful selection of ingredients and proper technique. The key is to use a good quality gluten-free flour blend and cold butter, handled minimally to prevent toughness.
A successful gluten-free shortbread crust should bake up golden brown around the edges and slightly paler in the center. It provides a delightful textural contrast to the smooth lemon filling. The richness of the butter is crucial, contributing both flavor and tenderness. Using approximately 1 cup (2 sticks) of unsalted butter for a standard 9x13 inch pan provides the necessary fat content for a truly decadent crust in this glutenfree lemon bars recipe.
Ingredients for a Buttery Shortbread Crust
Creating the perfect gluten-free shortbread crust for your glutenfree lemon bars recipe requires just a few simple ingredients. The most important is a reliable gluten-free all-purpose flour blend. Look for one that contains a mix of rice flour, tapioca starch, and potato starch, and ideally includes xanthan gum, which helps bind the dough. You'll need about 1 ½ to 2 cups of this blend, depending on the specific brand and how it absorbs moisture.
In addition to flour, you'll need cold unsalted butter, cut into small cubes. Approximately 1 cup (2 sticks or 227 grams) is usually sufficient for a standard 9x13 inch pan. The coldness of the butter is key; it helps create steam during baking, resulting in a flakier texture. Granulated sugar, about ½ cup, adds sweetness and helps with browning. A pinch of salt, roughly ¼ teaspoon, enhances the overall flavor profile, balancing the sweetness and richness.
Step-by-Step Instructions for the Shortbread Base
- Preheat your oven to 350°F (175°C). Line a 9x13 inch baking pan with parchment paper, leaving an overhang on the sides for easy removal later.
- In a large bowl, whisk together the gluten-free all-purpose flour blend, granulated sugar, and salt. Ensure there are no lumps.
- Add the cold, cubed butter to the dry ingredients. Using a pastry blender, fork, or your fingertips, cut the butter into the flour mixture until it resembles coarse crumbs with some pea-sized pieces remaining. Avoid overmixing, as this can develop the gluten-free flour's starches too much and result in a tough crust.
- Pour the mixture into the prepared baking pan. Press the mixture evenly and firmly into the bottom of the pan. You can use the bottom of a glass or a flat measuring cup to get a compact, smooth layer. Ensure the edges are well-pressed.
- Bake the crust in the preheated oven for approximately 18-22 minutes, or until the edges are lightly golden brown. This par-baking step is crucial for preventing a soggy crust once the filling is added.
- Remove the pan from the oven and set it aside while you prepare the lemon filling. Keep the oven on, as you will be returning the pan to bake the completed bars.
Tips for a Flaky and Tender Crust
To achieve a truly flaky and tender shortbread crust for your glutenfree lemon bars recipe, start with very cold butter. If your kitchen is warm, you can even pop the cubed butter into the freezer for 10-15 minutes before mixing. When cutting the butter into the flour, work quickly and avoid using your hands too much, as the warmth can melt the butter prematurely. A pastry blender is an excellent tool for this step, as it keeps the butter cold.
Pressing the dough firmly into the pan is also vital. A loose crust will crumble excessively when cut. Use a flat-bottomed object like a glass or the bottom of a measuring cup to ensure a compact and even layer. Finally, par-baking is non-negotiable. Baking the crust for about 20 minutes until it just starts to turn golden sets its structure and creates a barrier against the moist lemon filling, resulting in that perfect, distinct crust layer in your gluten-free lemon bars.
Preparing the Tangy Lemon Filling

The star of any glutenfree lemon bars recipe is undoubtedly the vibrant, tangy lemon filling. It should be smooth, luscious, and bursting with fresh citrus flavor. Achieving the right balance of sweetness and tartness is key, as is ensuring the filling sets properly without curdling. Our approach focuses on using fresh ingredients and gentle cooking methods (or sometimes no cooking, depending on the method chosen, though most require baking) to create a perfect filling.
A well-made lemon filling for gluten-free lemon bars relies on a combination of lemon juice, sugar, eggs, and a thickener, typically flour or cornstarch. The eggs contribute richness and help with setting, while the thickener ensures the filling isn't runny. The amount of sugar needed will depend on the tartness of your lemons and personal preference, but a common ratio involves using roughly equal parts lemon juice and sugar by volume, adjusted to taste.
Lemon Bar Filling Ingredients: Fresh & Simple
The ingredients for the tangy lemon filling in this glutenfree lemon bars recipe are straightforward but require quality. You'll need fresh lemons – lots of them! For a 9x13 inch pan, you'll likely need the juice of 4-6 large lemons, yielding approximately 1 to 1 ½ cups of fresh lemon juice. Bottled lemon juice just won't provide the same bright, natural flavor. You'll also need the zest of at least 2-3 lemons to intensify the citrus aroma and taste.
Eggs are essential for setting the filling and adding richness. This recipe typically calls for 4-6 large eggs. Granulated sugar, about 1 ½ to 2 cups, is needed to balance the tartness of the lemon juice. The amount can be adjusted slightly based on your preference for sweetness. Finally, a thickener is required. All-purpose gluten-free flour (about ¼ cup) or cornstarch (about 3-4 tablespoons) works well. Using gluten-free flour adds a bit more structure, while cornstarch yields a slightly clearer, smoother filling. A pinch of salt is also recommended to enhance the flavors.
Combining Ingredients for the Perfect Lemon Filling
Once your shortbread crust is par-baked and cooling slightly, it's time to make the filling for your glutenfree lemon bars recipe. In a medium bowl, whisk together the granulated sugar and the thickener (gluten-free flour or cornstarch). Whisking them together first helps prevent clumps when wet ingredients are added. Next, add the eggs and whisk until the mixture is smooth and well-combined.
Gradually whisk in the fresh lemon juice and lemon zest. Continue whisking until the mixture is homogenous. Some recipes suggest straining the mixture to remove the zest and any potential egg chalazae, which can result in a smoother filling, though leaving the zest in adds visual appeal and more intense flavor. Pour this mixture directly over the warm, par-baked shortbread crust in the pan. The warmth of the crust helps the filling start to set slightly before going back into the oven.
Achieving the Ideal Tartness and Sweetness Balance
Balancing the tartness of the lemon with the sweetness of the sugar is a crucial step in perfecting your glutenfree lemon bars recipe. The amount of sugar needed can vary depending on the natural acidity of your lemons and your personal taste preference. As a starting point, a ratio of roughly 1 part lemon juice to 1.5 parts sugar by volume is common, but tasting a tiny bit of the mixture (before adding raw eggs!) can help you adjust.
If you prefer a very tart lemon bar, you might reduce the sugar slightly, perhaps by ¼ cup. For a sweeter bar, add an extra ¼ cup of sugar. Remember that the sweetness of the shortbread crust also contributes to the overall balance. It's often better to err slightly on the side of tartness, as the sweetness of the crust and an optional dusting of powdered sugar later will provide additional balance. The goal is a bright, zesty flavor that makes your gluten-free lemon bars truly memorable.
Assembling and Baking Your Lemon Bars
With the crust par-baked and the lemon filling prepared, assembling and baking your glutenfree lemon bars is the final push towards enjoying this delightful dessert. The process involves carefully combining the two components in the pan and then baking until the filling is set. Precision in baking time and temperature is essential to ensure the filling is firm but not overcooked, and the crust remains tender.
The visual cues for doneness include the filling appearing set around the edges with a slight wobble in the very center. Over-baking can lead to a rubbery texture or even curdling of the filling, while under-baking will result in a runny mess. Following the recommended baking guidelines for this glutenfree lemon bars recipe will help you achieve that perfect, sliceable consistency.
Pressing the Crust and Pouring the Lemon Filling
After preparing the shortbread dough with gluten-free flour, it's time to press it into your prepared 9x13 inch pan. As mentioned earlier, using a piece of parchment paper makes lifting the finished bars out much easier. Pour the crumbly mixture into the bottom of the lined pan. Use the bottom of a flat glass, a measuring cup, or even your hands (lightly floured if sticking) to press the dough firmly and evenly across the bottom and slightly up the sides, creating a shallow well for the filling. Aim for a uniform thickness, typically around ¼ to ½ inch.
Once the crust has been par-baked for about 18-22 minutes and removed from the oven, carefully pour the prepared lemon filling directly over the warm crust. Distribute the filling evenly. Be cautious not to disturb the partially baked crust too much. The warmth from the crust helps the filling begin to set immediately upon contact, aiding in achieving distinct layers in the final gluten-free lemon bars.
Baking Time and Temperature for Golden Perfection
After pouring the filling over the par-baked crust, return the pan to the preheated oven. The ideal temperature for baking the filled bars is typically slightly lower than the crust's par-baking temperature, around 325°F (160°C). This helps the filling set gently without overheating the eggs. Baking time will vary depending on your oven and the exact thickness of your filling, but it generally takes between 25 and 35 minutes.
You'll know the gluten-free lemon bars are done when the edges of the filling appear set and slightly opaque, while the center might still have a slight wobble. The surface should look matte, not liquidy. Avoid baking until the entire surface is completely firm and solid, as the filling will continue to set as it cools. Over-baking can lead to a rubbery texture. Check around the 25-minute mark and continue baking in 5-minute increments until the desired consistency is reached.
Cooling and Setting: Ensuring the Right Texture
Cooling is perhaps the most critical, and often the most challenging, step in making perfect gluten-free lemon bars. Once they are out of the oven, the filling is still quite delicate. Allow the bars to cool completely at room temperature in the pan. This initial cooling period can take 2-3 hours. During this time, the residual heat will continue to set the filling, and the flavors will meld.
After cooling at room temperature, it is highly recommended to chill the lemon bars in the refrigerator for at least 2-4 hours, or preferably longer, before slicing. Chilling solidifies the filling completely and makes the bars much easier to cut cleanly. Attempting to cut warm or even slightly warm bars will likely result in a messy, runny filling. Patience here is rewarded with beautifully set and sliceable gluten-free lemon bars.
Lemon Bar Variations & Customizations
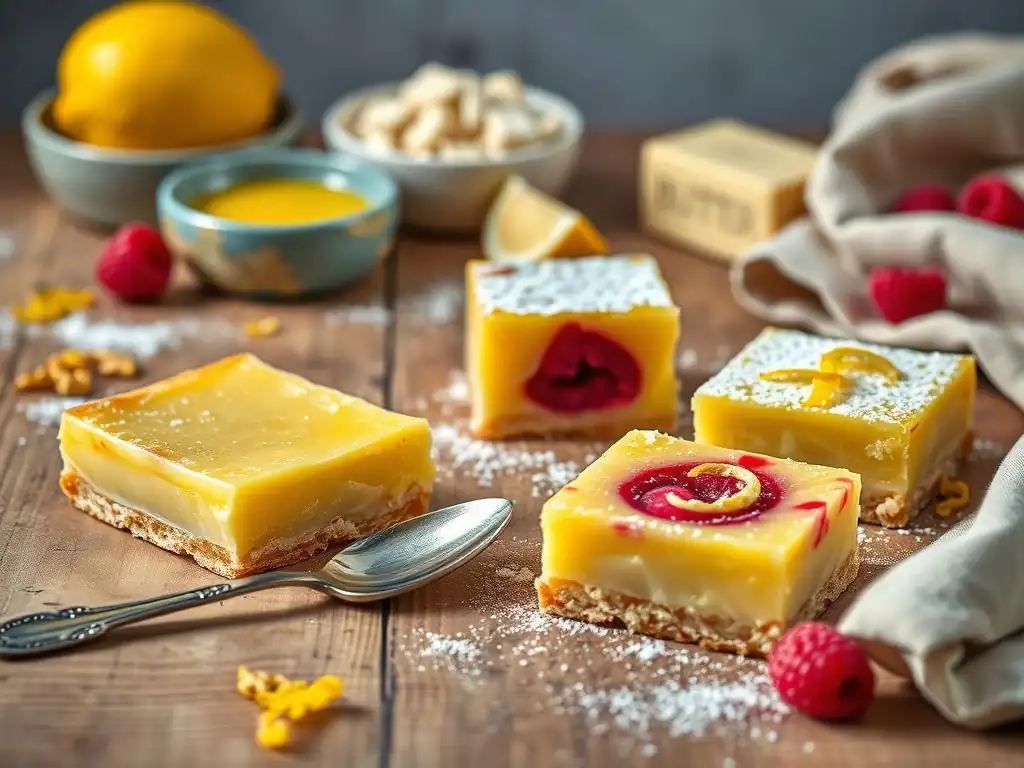
While the classic glutenfree lemon bars recipe is wonderful on its own, there are many ways to customize this dessert to add new flavors or adapt it for different dietary needs. Exploring variations keeps baking exciting and allows you to tailor the recipe to your preferences or the ingredients you have on hand. Simple additions or substitutions can transform the basic lemon bar into something entirely new.
Customizing your gluten-free lemon bars can involve adding fresh fruit, changing the topping, or altering the crust. For instance, swirling in a berry puree adds a beautiful color and complementary flavor. Changing the traditional powdered sugar topping to a glaze provides a different texture and level of sweetness. These variations allow you to put your own spin on this classic glutenfree lemon bars recipe.
Adding Flavors: Raspberry or Blueberry Variations
Incorporating fresh berries is a popular and delicious variation for this glutenfree lemon bars recipe. Raspberries or blueberries add a lovely burst of color and a complementary tart-sweet flavor that pairs wonderfully with lemon. To create a berry swirl, you can prepare a simple berry puree: cook about 1 cup of fresh or frozen berries with a tablespoon of sugar and a splash of water until softened, then mash or blend and strain to remove seeds (optional).
Once the lemon filling is poured over the par-baked crust, gently dollop spoonfuls of the berry puree over the top. Use a knife or skewer to gently swirl the berry puree into the lemon filling. Be careful not to over-swirl, or you'll lose the distinct pattern. Bake as directed. The berries add moisture, so baking might take a few extra minutes, perhaps up to 35-40 minutes total. This variation results in beautiful and flavorful gluten-free lemon bars with a fruity twist.
Topping Ideas: Powdered Sugar or Glaze
The traditional topping for gluten-free lemon bars is a simple dusting of powdered sugar. This adds a touch of sweetness and creates a beautiful, classic look. Ensure the bars are completely cooled before dusting, or the sugar will melt into the filling. You can use a fine-mesh sieve for an even dusting. For a more elegant presentation or a sweeter finish, you can opt for a simple lemon glaze.
A basic lemon glaze can be made by whisking together about 1 cup of powdered sugar with 2-3 tablespoons of fresh lemon juice or milk until smooth and pourable. Drizzle the glaze over the cooled bars before cutting. This adds another layer of lemon flavor and a slightly chewy texture once set. Both powdered sugar and glaze enhance the visual appeal and taste of your glutenfree lemon bars.
Dietary Adaptations: Exploring Options
Beyond making them gluten-free, this lemon bars recipe can be adapted further for other dietary needs. For instance, to make them dairy-free, you can substitute the butter in the shortbread crust with a solid dairy-free baking stick or coconut oil. Choose a brand that performs well in baking for the best results. The filling typically doesn't contain dairy, so no major changes are needed there.
For a vegan version, you would need to replace the butter as mentioned above and also substitute the eggs in the filling. Egg replacements like a commercial egg replacer (often made from starches and leavening agents), silken tofu (blended smooth), or a mixture of cornstarch and water can sometimes work, though achieving the exact texture of a traditional egg-based filling can be challenging. Experimentation with different ratios and thickeners like agar-agar might be needed to develop a reliable vegan glutenfree lemon bars recipe.
Tips for Storing and Serving Your Lemon Bars
Proper storage is key to maintaining the freshness and texture of your glutenfree lemon bars. Once they are completely cooled and set, how you store them will impact how long they remain delicious. Lemon bars, particularly those with a custard-like filling, require refrigeration to stay fresh and prevent spoilage.
Serving these delightful bars is just as important as making them. Clean cuts and appealing presentation enhance the enjoyment. Having them properly chilled makes slicing much easier, resulting in neat squares or rectangles that showcase the distinct layers of crust and filling.
Proper Storage to Maintain Freshness
Once your glutenfree lemon bars are completely chilled and cut, they should be stored in an airtight container. Layering the bars with parchment or wax paper between layers can prevent them from sticking together. Place the container in the refrigerator. Stored this way, the lemon bars will typically stay fresh for 3-5 days.
The acidic nature of the lemon filling helps preserve them somewhat, but refrigeration is essential for food safety and maintaining the filling's set texture. Avoid leaving them at room temperature for extended periods, especially in warm environments. If you notice the filling starting to soften or become watery, it's a sign they are losing their freshness.
Serving Suggestions and Presentation Ideas
Serving your glutenfree lemon bars is simple and elegant. After chilling and cutting, arrange them neatly on a platter or individual plates. A light dusting of powdered sugar just before serving adds a classic finish. For a more refined presentation, you can garnish each bar with a small curl of lemon zest or a fresh raspberry.
These bars are rich and flavorful, so a small portion is often sufficient. They pair wonderfully with a cup of tea or coffee. For dessert, they can be served alongside a dollop of whipped cream or a scoop of vanilla ice cream, although they are perfectly delicious on their own. The bright yellow color makes them a cheerful addition to any dessert table.
Freezing Lemon Bars for Later
Yes, you can freeze gluten-free lemon bars! This is a great option if you've made a large batch or want to save some for a later date. Ensure the bars are completely cooled and chilled before freezing. It's best to freeze them in a single layer on a baking sheet until firm, which usually takes 1-2 hours.
Once frozen solid, transfer the bars to an airtight freezer-safe container or freezer bag. Layer them with parchment or wax paper to prevent sticking. Label the container with the date. Frozen gluten-free lemon bars can last for 1-2 months. To thaw, simply transfer the desired number of bars to the refrigerator and let them thaw overnight. Thawing at room temperature is not recommended as it can affect the texture of the filling.
Troubleshooting Common Lemon Bar Issues
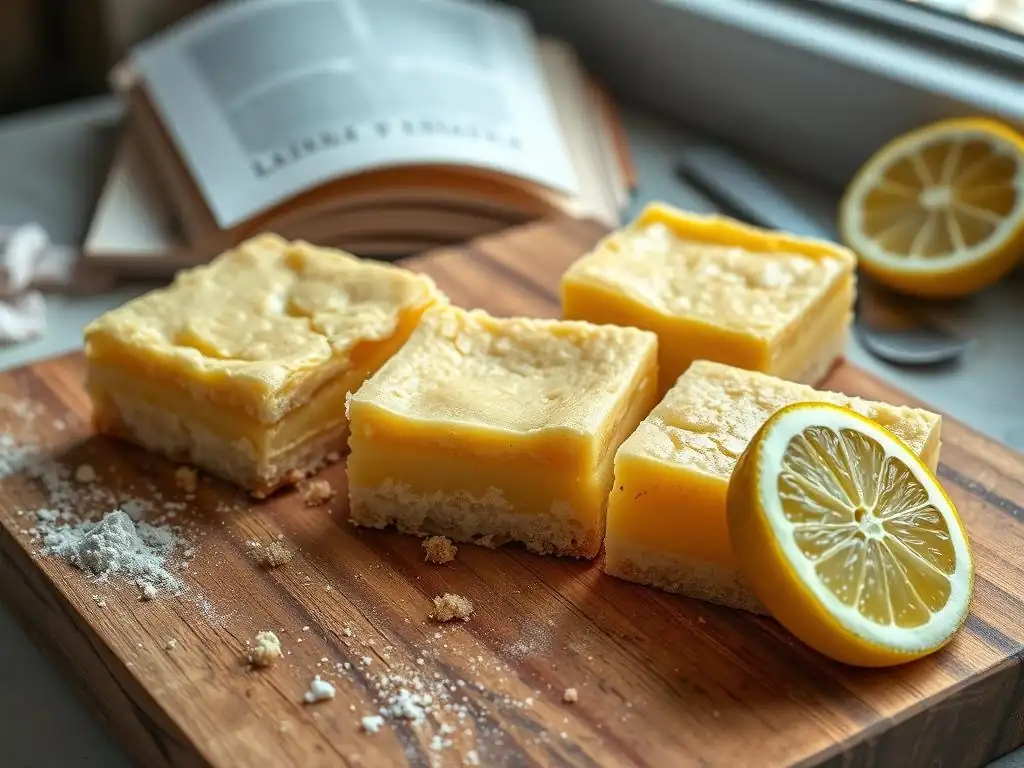
Even with a great glutenfree lemon bars recipe, baking can sometimes present challenges. Understanding common issues and how to address them can help you achieve perfect results every time. Two frequent problems are a soggy crust and a runny filling. These issues are often related to baking time, temperature, and preparation steps.
Other challenges might include the filling cracking or the bars being difficult to cut. Most of these problems can be avoided by following the recipe carefully, paying attention to details like the consistency of the crust dough, the par-baking step, and adequate cooling time.
Avoiding a Soggy Crust: Tips and Tricks
A soggy crust is a common frustration when making lemon bars, especially with gluten-free flours which can absorb moisture differently than wheat. The primary way to prevent this is through par-baking the shortbread crust. Baking the crust for about 18-22 minutes before adding the filling helps it firm up and create a barrier against the moist lemon mixture. Ensure the edges are visibly golden brown before removing it from the oven.
Another tip is to make sure your crust dough isn't too dense or overworked. Overworking gluten-free dough can sometimes lead to a gummy texture. Ensure the butter is cold and cut into the flour properly, resulting in a slightly crumbly mixture before pressing it into the pan. Finally, pouring the filling over a warm (but not hot) crust can help the bottom layer of the filling start to set immediately, further protecting the crust in your glutenfree lemon bars.
Preventing a Runny Lemon Filling
A runny lemon filling is usually a sign of insufficient cooking or an incorrect ratio of ingredients, particularly the thickener (eggs and/or flour/cornstarch). Ensure you are using the correct number of large eggs as specified in the glutenfree lemon bars recipe, as they are crucial for setting. Also, accurately measure your thickener, whether it's gluten-free flour or cornstarch. Using too little will result in a filling that doesn't set properly.
Baking the filled bars for the correct amount of time at the right temperature is also vital. The filling needs sufficient heat and time to coagulate the eggs and activate the thickener. Bake until the edges are set and the center has only a slight jiggle. If your filling seems consistently runny, you might slightly increase the amount of thickener in future batches, perhaps by a tablespoon of flour or a teaspoon of cornstarch, or ensure your oven temperature is accurate using an oven thermometer.
Addressing Baking Challenges
Beyond soggy crust and runny filling, other issues can arise. If your lemon filling cracks on top, it's often a sign of over-baking or cooling too quickly. Baking at a slightly lower temperature (325°F / 160°C) helps prevent this. Rapid temperature changes can also cause cracking; allow the bars to cool gradually at room temperature before refrigerating.
If your bars are hard to cut cleanly, it's almost always because they haven't been chilled long enough. Ensure they spend at least 2-4 hours in the refrigerator before attempting to slice them. Using a sharp knife wiped clean between cuts will also help achieve neat squares for your gluten-free lemon bars.
The Best Lemon Bars Recipe: A Summary
Creating delicious gluten-free lemon bars with a buttery shortbread crust is a rewarding baking project. By following a carefully developed glutenfree lemon bars recipe, paying attention to key techniques like par-baking the crust, using fresh lemon juice, and ensuring adequate cooling time, you can achieve perfect results. This classic dessert, adapted for gluten-free needs, offers a delightful contrast of textures and a bright, tangy flavor that is universally appealing.
From selecting the right gluten-free flour blend to mastering the bake time for the filling, each step contributes to the success of this recipe. Whether you enjoy them plain, dusted with powdered sugar, or enhanced with a berry swirl, these gluten-free lemon bars are sure to impress. They are a testament to the fact that dietary restrictions don't have to mean sacrificing flavor or enjoyment in baking.
Final Thoughts on This Delightful Dessert
This glutenfree lemon bars recipe provides a reliable path to making a truly exceptional dessert. The combination of the rich, tender gluten-free shortbread and the bright, zesty lemon filling is simply irresistible. It's a recipe that proves gluten-free baking can be just as delicious and satisfying as traditional methods. We hope you feel confident to try this recipe and discover the joy of baking these wonderful bars yourself.
Baking is an art and a science, and every oven and ingredient can behave slightly differently. Don't be discouraged if your first batch isn't absolutely perfect. Pay attention to what happened, make small adjustments next time, and you'll soon be making flawless gluten-free lemon bars. Happy baking!
Frequently Asked Questions
What makes this lemon bar recipe gluten-free?
This recipe uses a gluten-free flour blend in both the shortbread crust and the lemon filling, making it suitable for those with gluten sensitivities or celiac disease. We specify a blend that works best for achieving the right texture.
What kind of gluten-free flour is best for the shortbread crust?
A high-quality gluten-free all-purpose flour blend is recommended. Look for blends that contain a mix of rice flour, tapioca starch, and potato starch for the best results in replicating the texture of traditional shortbread.
Can I use regular flour if I don't need gluten-free lemon bars?
Yes, you can substitute the gluten-free flour in both the crust and filling with the same amount of all-purpose flour. However, the texture will differ slightly, becoming more like a traditional lemon bar.
How do I prevent the shortbread crust from becoming soggy?
Blind baking the crust before adding the lemon filling helps prevent it from becoming soggy. Also, ensure the filling is cooked thoroughly to set properly.
What's the best way to store these GlutenFree Lemon Bars?
Store the lemon bars in an airtight container in the refrigerator. They will stay fresh for up to 4 days. The cold temperature helps maintain the firmness and prevents the filling from becoming too soft.
Final Reflection: The Enduring Allure of a Gluten-Free Delight
The perfect gluten-free lemon bar isn't just a recipe; it's a testament to the power of adaptation and deliciousness. Finding the right balance of tangy lemon filling and buttery, crumbly crust is a challenge, but the reward – a treat that's both satisfying and inclusive – is well worth the effort. This recipe, designed to be accessible and enjoyable for everyone, highlights the potential for culinary creativity within dietary restrictions.
The journey of creating this gluten-free lemon bar recipe has been a personal one, highlighting the importance of finding joy in the kitchen, even with limitations. It's a reflection of the broader culinary landscape, where inclusivity and deliciousness go hand in hand. Food is symbolic of love when words are inadequate.
- Alan D. Wolfelt. This quote resonates deeply, as this recipe aims to share love and joy through a delicious, accessible treat. The ongoing shift towards more inclusive food options demonstrates a growing awareness of dietary needs and a desire to make everyone feel welcome at the table.
Now, I invite you to take this recipe and make it your own. Experiment with different citrus fruits, add a sprinkle of zest, or perhaps try a different gluten-free flour blend. The possibilities are endless! More importantly, remember the joy of baking and sharing delicious food with those you care about. Let this recipe be a starting point for your own culinary adventures, a testament to the power of deliciousness and the beauty of inclusivity in the kitchen.
Unleash Your Inner Baker: Make These Lemon Bars Today!
Thanks for taking the time to explore this recipe for Gluten-Free Lemon Bars! We hope you found the process both enjoyable and enlightening. Ready to take your baking skills to the next level?
- Bake these delicious lemon bars today! Use the recipe as a starting point, and let your creativity shine. Try adding different zests or berries.
- Share your creation! Post a picture of your masterpiece on social media and tag @BakeWithEase – we'd love to see your baking journey.
- Explore more gluten-free recipes on our website, bakewithease.com, to discover new baking adventures.
What unique twist will you add to these delightful lemon bars to make them your own?