
Seasonal NutFree Tarts Featuring Spring Berries


Welcome to BakeWithEase, your kitchen companion for delightful baking adventures! Ever dreamed of creating stunning, allergy-friendly desserts that burst with flavor? This season, dive into our guide to crafting exquisite NutFree Spring Berry Tarts. Discover how to harness the vibrant tastes of spring berries in a safe and delicious treat. Intrigued? Let's unlock the secrets to baking these delightful tarts – a perfect blend of simplicity and seasonal charm!
- Lemon Raspberry Tart: A Springtime Treat
- Introduction to Lemon Raspberry Tart
- Understanding the Key Components
- Recipe: Lemon Raspberry Tart
- Tips for a Perfect Tart
- Variations on the Recipe
- Storing and Serving
- Enjoying Your Homemade Tart
- Frequently Asked Questions
- Final Reflection: The Enduring Delight of Spring, Nut-Free and Delicious
- Unleash Your Inner Pastry Chef: Bake These Delightful Tarts!
Lemon Raspberry Tart: A Springtime Treat
Introduction to Lemon Raspberry Tart
A Light and Refreshing Dessert for Spring
Spring arrives with longer days, warmer breezes, and a bounty of fresh, vibrant produce, none more iconic than sweet, juicy berries. A lemon raspberry tart perfectly captures the essence of this season. Its bright citrus notes from the lemon cream filling cut through the sweetness of the raspberries, creating a harmonious balance that feels both refreshing and indulgent. Unlike heavier winter desserts, this tart offers a light, airy texture, especially when made with a crisp, nut-free shortbread crust, making it an ideal choice for welcoming the spring season.
This delightful dessert is a fantastic option for those seeking nutfree spring berry tarts that are both beautiful and delicious. The simplicity of the ingredients allows the natural flavors to shine, highlighting the quality of fresh spring raspberries. Serving it slightly chilled enhances its refreshing quality, making it a palate cleanser after a meal or a delightful standalone treat. It’s a testament to how simple, high-quality ingredients can combine to create something truly memorable and perfectly suited for the season of renewal.
Perfect for Brunch, Dessert, or a Special Occasion
The versatility of a lemon raspberry tart makes it a star player for numerous occasions throughout the spring months. Imagine it as the centerpiece of an Easter brunch table, its vibrant colors echoing the festive atmosphere. It's equally suited as an elegant dessert following a spring dinner party, offering a sophisticated yet approachable finish to the meal. Its relatively simple preparation also makes it a wonderful choice for less formal gatherings, like a casual weekend brunch with friends or a light afternoon tea.
Beyond specific events, this nutfree spring berry tart is simply a wonderful treat to enjoy on a sunny spring afternoon. Its appeal lies not just in its taste but also in its visual charm. The bright red raspberries against the pale yellow lemon cream are inherently cheerful and inviting. Whether you're celebrating a birthday, hosting a baby shower, or simply want to brighten a regular day, a lemon raspberry tart fits the bill, providing a touch of homemade goodness that is appreciated by everyone, including those requiring nut-free options.
Understanding the Key Components
Choosing High-Quality Ingredients
The success of a truly exceptional nutfree spring berry tart hinges significantly on the quality of your ingredients. For the lemon cream filling, using fresh lemons is non-negotiable. The zest contains essential oils that provide intense flavor, while fresh juice offers the perfect balance of tartness. Bottled lemon juice simply won't deliver the same vibrant, complex taste. Aim for organic lemons if possible, as you'll be using the zest directly in the filling, and look for lemons that are firm and heavy for their size, indicating they are juicy.
When it comes to the star garnish, raspberries, freshness is paramount. Choose berries that are plump, firm, and uniformly colored, without any signs of mold or crushing. While organic berries can offer superior flavor, the most important factor is ripeness and condition.
Taste a few if possible before purchasing. The quality of your butter for the nut-free shortbread crust also makes a difference; using a good quality unsalted butter will yield a richer, more tender crust. Ensure all your ingredients are at the correct temperature as specified in the recipe – for instance, cold butter is crucial for a flaky crust, while room temperature eggs are often best for the filling.
Essential Equipment for Tart Making
Having the right tools can make the process of creating a beautiful nutfree spring berry tart significantly easier and more successful. A key piece of equipment is a tart pan with a removable bottom, typically 9 or 10 inches in diameter. This design allows you to easily unmold the finished tart without damaging the delicate crust. While you could use a pie dish, a tart pan gives you those signature fluted edges and a flat bottom, perfect for showcasing the filling and berries.
Other essential tools include a good quality whisk for smoothing the lemon cream filling, a fine grater or zester for the lemon zest, and a juicer. A rolling pin is needed for the shortbread crust, although some recipes allow you to press the dough directly into the pan. Measuring cups and spoons are standard, but accuracy is important, especially in baking.
A kitchen scale can be even more precise for weighing flour and sugar. Finally, cooling racks are vital for allowing both the pre-baked crust and the finished tart to cool properly, preventing condensation and ensuring a crisp crust and set filling.
Recipe: Lemon Raspberry Tart

Ingredients List for the Shortbread Crust
- 2 ¼ cups (approximately 270g) all-purpose flour
- ½ cup (approximately 100g) granulated sugar
- ¼ teaspoon salt
- 1 cup (2 sticks or 227g) cold unsalted butter, cut into small cubes
- 1 large egg yolk
- 2 tablespoons ice water
Ingredients List for the Lemon Cream Filling
- 1 ½ cups (approximately 350ml) fresh lemon juice (from about 6-8 large lemons)
- Zest of 2-3 large lemons
- 1 ½ cups (approximately 300g) granulated sugar
- ½ cup (approximately 60g) cornstarch
- ¼ teaspoon salt
- 6 large egg yolks
- ½ cup (1 stick or 113g) unsalted butter, cut into cubes
Ingredients List for the Raspberry Garnish
- 2 cups (approximately 250-300g) fresh raspberries
- Optional: 2-3 tablespoons apricot jam or red currant jelly, melted and strained (for glaze)
Step-by-Step Guide to Making the Shortbread Crust
Combining Dry Ingredients
First, whisk together the flour, granulated sugar, and salt in a large bowl. This ensures the leavening (if any) and salt are evenly distributed throughout the dough. You can use a stand mixer with the paddle attachment for this step, or simply a hand whisk. Ensure there are no lumps in the dry mix before proceeding.
Adding Butter and Forming the Dough
Cut the cold, cubed butter into the dry ingredients. You can use a pastry blender, your fingertips, or a food processor. Work quickly until the mixture resembles coarse crumbs, with some pea-sized pieces of butter remaining. In a small separate bowl, whisk the egg yolk and ice water together. Add this liquid mixture to the flour-butter mixture. Stir or mix on low speed until the dough just begins to come together. Do not overmix; the dough should still look crumbly but hold together when squeezed.
Pressing the Dough into the Tart Pan
Turn the dough out onto a clean surface. Gently gather it into a ball, then flatten it into a disc. Wrap the disc tightly in plastic wrap and refrigerate for at least 30 minutes. This chilling step is crucial for a tender, flaky crust.
Once chilled, you have two options: roll the dough out to fit your tart pan, or press the dough directly into the pan. Pressing is often easier for a shortbread crust. Press the dough evenly into the bottom and up the sides of the tart pan, ensuring uniform thickness (about ⅛ to ¼ inch). Use the bottom of a glass or a flat measuring cup to help press the bottom flat and even.
Pre-Baking the Crust
Once the dough is pressed into the pan, prick the bottom all over with a fork. This prevents the crust from puffing up excessively during baking. For best results, chill the formed crust in the pan again for at least 15-20 minutes. Preheat your oven to 375°F (190°C). Line the chilled crust with parchment paper or foil and fill it with pie weights, dried beans, or rice.
Bake for 15-20 minutes, or until the edges are lightly golden. Carefully remove the weights and parchment/foil. Continue baking for another 5-10 minutes, or until the bottom is golden brown and appears dry. This step, called blind baking, ensures a crisp crust that won't become soggy when the wet filling is added. Let the crust cool completely in the pan on a wire rack before filling.
Preparing the Lemon Cream Filling
Zesting and Juicing the Lemons
Begin by zesting the lemons. Use a microplane or fine grater to remove only the yellow part of the peel, avoiding the bitter white pith underneath. Zest directly into a medium saucepan or a heatproof bowl set over a saucepan of simmering water (double boiler method). Then, juice the lemons, straining the juice to remove any seeds or pulp. You'll need approximately 1 ½ cups of fresh lemon juice.
Combining Ingredients and Cooking the Filling
In the saucepan or bowl with the zest, whisk together the fresh lemon juice, granulated sugar, cornstarch, and salt until smooth. In a separate bowl, whisk the egg yolks. Gradually whisk about half a cup of the warm lemon mixture into the egg yolks to temper them, preventing the eggs from scrambling. Then, pour the tempered egg mixture back into the saucepan with the remaining lemon mixture.
If using the direct heat method, cook over medium-low heat, whisking constantly, until the mixture thickens significantly, about 5-8 minutes. It should be thick enough to coat the back of a spoon. If using a double boiler, this will take longer, about 10-15 minutes. Do not boil the mixture vigorously.
Cooling the Lemon Cream
Once thickened, remove the saucepan from the heat. Whisk in the cubed cold butter, one piece at a time, until it is completely melted and incorporated, creating a smooth, glossy, and luscious cream. This process is called montage au beurre and adds richness and silkiness to the filling. Pour the warm lemon cream through a fine-mesh sieve into a clean bowl.
This removes the lemon zest and any potential tiny bits of cooked egg, resulting in an incredibly smooth filling. Cover the surface of the lemon cream directly with plastic wrap to prevent a skin from forming as it cools. Let it cool at room temperature for about 30-60 minutes, then refrigerate until completely chilled and set, usually at least 2-3 hours. The filling should be firm enough to slice cleanly.
Assembling the Lemon Raspberry Tart
Filling the Pre-Baked Crust
Once the pre-baked shortbread crust has cooled completely and the lemon cream filling is thoroughly chilled and set, it's time to assemble your nutfree spring berry tart. Carefully spoon or pour the chilled lemon cream filling into the cooled tart shell. Use an offset spatula or the back of a spoon to spread the filling evenly to the edges, creating a smooth, level surface. Ensure the filling is distributed uniformly for an even slice.
Arranging the Raspberries
This is where the artistic touch comes in. Gently arrange the fresh raspberries over the surface of the lemon cream filling. You can place them randomly, in neat rows, or in concentric circles, covering the entire surface or leaving some of the lemon cream exposed. Handle the raspberries carefully as they are delicate. Aim for a visually appealing arrangement that showcases the vibrant red color of the berries. Approximately 2 cups of raspberries should be sufficient to cover a 9 or 10-inch tart.
Optional Glaze
For added shine and to help preserve the freshness of the raspberries, you can apply an optional glaze. Gently heat apricot jam or red currant jelly in a small saucepan or microwave until melted and fluid. Press the melted jam/jelly through a fine-mesh sieve to remove any solids and create a smooth liquid. Using a pastry brush, gently brush the warm, strained glaze over the arranged raspberries. This gives the nutfree spring berry tart a professional, finished look and slightly seals the berries. Allow the glaze to set before serving.
Tips for a Perfect Tart
Achieving a Crisp Shortbread Crust
The hallmark of a great nutfree spring berry tart often starts with a perfectly crisp crust that complements the creamy filling. One critical step is ensuring your butter is very cold and cut into small pieces before you incorporate it into the dry ingredients. This allows the butter to melt slowly in the oven, creating steam pockets that result in flakiness and tenderness. Overworking the dough is another common pitfall; mix only until it just comes together, avoiding excessive gluten development which can make the crust tough.
Blind baking the crust is absolutely essential for a crisp bottom. Pricking the dough with a fork and using pie weights prevents shrinkage and puffing, ensuring the crust holds its shape. Baking it a second time after removing the weights helps the bottom dry out and become golden brown. Cooling the crust completely in the pan before filling is also vital; adding a cold filling to a warm crust will cause condensation, leading to a soggy bottom – the nemesis of any good tart.
Preventing a Cracked Filling
A smooth, unblemished lemon cream filling is aesthetically pleasing and indicates proper preparation. The most common reason for a lemon cream filling to crack is overcooking or cooking too quickly. The filling thickens as the egg yolks cook and the cornstarch gelatinizes; this process needs to happen gently over medium-low heat, with constant whisking, to ensure even cooking and prevent the eggs from curdling or seizing. Avoid high heat at all costs.
Another factor is the cooling process. Once the filling is cooked and strained, it should be cooled completely before being poured into the tart shell. Pouring warm filling into a cool crust and then refrigerating can cause the filling to contract unevenly as it chills, potentially leading to cracks on the surface. Covering the surface of the warm filling directly with plastic wrap while it cools prevents a skin from forming, which can also contribute to cracking. Ensuring the filling is fully set in the refrigerator before adding the berries helps maintain its structure.
Choosing the Best Raspberries
The raspberries are not just a garnish; they are a primary flavor component of this nutfree spring berry tart. Selecting the best quality berries will significantly impact the taste and appearance of your finished dessert. Look for raspberries that are vibrant red, plump, and firm. Avoid containers with crushed, mushy, or moldy berries, as spoilage spreads quickly. Check the bottom of the container if possible.
Ideally, use raspberries that are in season during spring for the freshest, most flavorful experience. While available year-round in many places, spring berries often have a superior taste profile. Store them in a single layer on a paper towel-lined container in the refrigerator and wash them gently just before use – washing them too early can hasten spoilage. Their delicate nature means they should be added to the tart just before serving or shortly before refrigeration, rather than hours ahead of time, to maintain their freshness and appearance.
Creating an Elegant Presentation
Presentation is key to making your nutfree spring berry tart truly shine, especially for a special occasion. The arrangement of the raspberries is the primary way to elevate the visual appeal. Neat rows or geometric patterns can give a sophisticated look, while a more natural, scattered arrangement can appear rustic and inviting. Consider using a mix of whole raspberries and perhaps a few halved ones to add visual interest.
Adding a simple glaze, as mentioned in the recipe, provides a beautiful sheen that makes the berries look even more vibrant and appealing. You can also dust the edges of the tart crust lightly with powdered sugar using a sieve just before serving, adding a touch of elegance and softness to the appearance. Serving the tart on a pretty cake stand or plate also enhances its presentation.
Consider adding a small sprig of fresh mint or a scattering of edible flowers (ensure they are food-safe!) around the base of the tart on the serving plate for an extra touch of spring charm.
Variations on the Recipe
Adding Other Berries
While raspberries are the star, this nutfree spring berry tart base is wonderfully adaptable to other spring berries. A mixed berry tart featuring a combination of raspberries, strawberries, blueberries, and blackberries is a delightful variation. You could use equal parts or adjust the ratio based on your preference and what's freshest. Strawberries pair particularly well with lemon and add a different texture; they can be sliced or halved depending on their size.
Consider using primarily strawberries, perhaps arranged in a beautiful pattern over the lemon cream, or a vibrant mix of blueberries and raspberries. Each berry brings its own unique sweetness and slight tang, adding complexity to the overall flavor profile. When using mixed berries, ensure they are all washed and dried gently. The optional glaze works beautifully with any combination of berries, tying them together visually and protecting their surface.
Using a Different Citrus Fruit
The bright, zesty lemon cream is a highlight, but substituting another citrus fruit can offer a fascinating twist on this nutfree spring berry tart. Lime is a natural substitute, offering a sharper, more intense tang. A lime cream filling paired with raspberries creates a vibrant, almost margarita-like flavor profile. The preparation would be identical, simply substituting fresh lime juice and zest for the lemon.
Another intriguing option is using Meyer lemons, which are a cross between a lemon and a mandarin orange. They are less acidic and have a sweeter, more floral aroma and flavor than standard lemons. A Meyer lemon cream filling would be milder and slightly sweeter, offering a different kind of brightness that pairs beautifully with the sweet-tart raspberries. You could also experiment with a blend of citrus juices, like lemon and orange, for a unique flavor combination, though the cooking time for the cream might need slight adjustment depending on the acidity.
Making Individual Tartlets
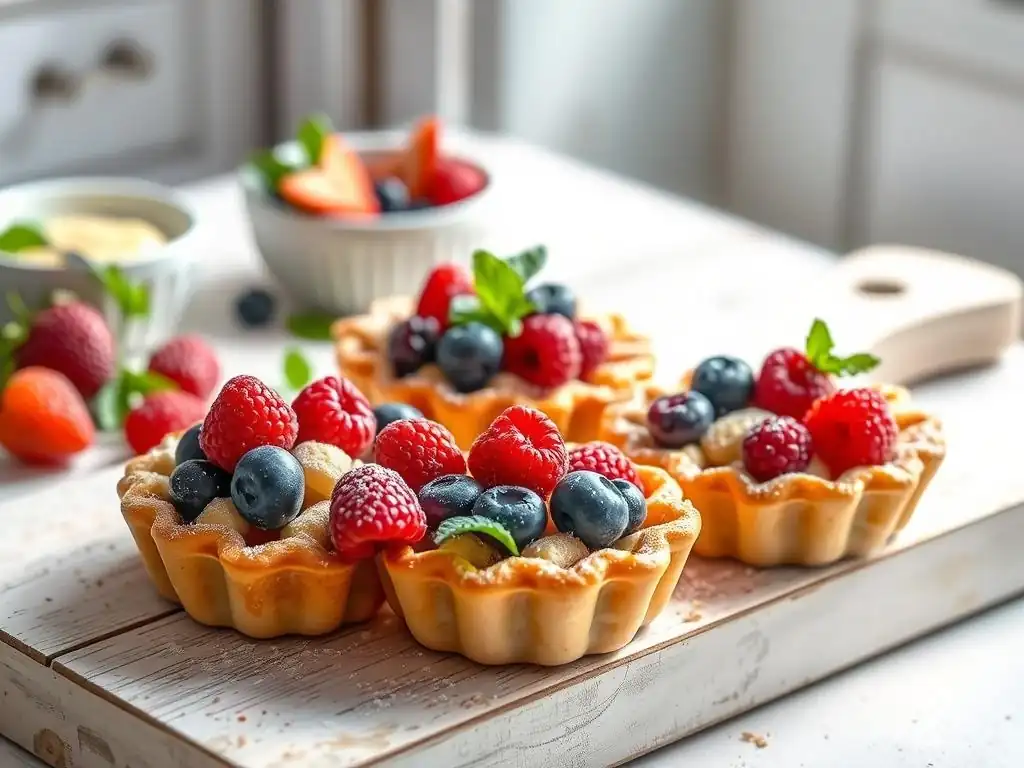
Scaling down the recipe to make individual nutfree spring berry tartlets is a fantastic idea for portion control, easier serving at gatherings, or simply creating charming mini-desserts. You would need several mini tart pans (typically 4-inch or 5-inch) with removable bottoms. The recipe quantities might need slight adjustment depending on the size and number of your mini pans, but the method remains the same.
Pressing the shortbread dough into the smaller pans is often easier than rolling. The baking time for the mini crusts will be shorter, likely around 10-15 minutes for the blind bake and 5-8 minutes after removing weights, so watch them closely. The lemon cream filling recipe should yield enough for several tartlets, and they will also chill and set faster. Arranging a few perfect raspberries on each mini tartlet creates an adorable and elegant presentation, perfect for parties or individual treats.
Storing and Serving

Refrigerating the Tart
Proper storage is crucial to maintain the quality and freshness of your nutfree spring berry tart. Once assembled, the tart should be kept refrigerated. The lemon cream filling is custard-based and requires chilling to set properly and remain food-safe. Cover the tart loosely with plastic wrap or store it in a tart carrier if you have one. Avoid airtight containers if possible, as they can sometimes create condensation, which might soften the crust.
When refrigerated, the tart is best enjoyed within 2-3 days. The crust will gradually lose some of its crispness over time due to moisture from the filling. The raspberries will also hold up well for this duration, though they are freshest on the first day. If the tart contains a glaze, this helps the berries retain their appearance slightly longer. For optimal texture, allow the tart to sit at room temperature for about 15-20 minutes before serving, especially if the filling is very cold, as this can enhance the flavors.
Serving Suggestions
Serving a nutfree spring berry tart is a simple pleasure, but a few additions can elevate the experience. The tart is wonderful served on its own, allowing the bright flavors of lemon and raspberry to be the focus. However, a dollop of freshly whipped cream or a scoop of vanilla bean ice cream makes a classic accompaniment, adding a touch of richness and cooling contrast to the tartness of the filling.
Consider garnishing the plate with a few extra fresh raspberries or a dusting of powdered sugar. A sprig of fresh mint adds a pop of color and a complementary aroma. For a truly decadent serving, drizzle a little raspberry coulis (a simple sauce made from pureed and strained raspberries) around the plate. Ensure any accompaniments are also nut-free if serving to individuals with allergies. Serve slices using a sharp knife dipped in hot water and wiped clean between cuts for neat portions.
Enjoying Your Homemade Tart
One of the greatest joys of baking is sharing the fruits of your labor, and a homemade nutfree spring berry tart is a perfect candidate for this. Its vibrant appearance and refreshing taste make it a crowd-pleaser, suitable for sharing at potlucks, family dinners, or simply bringing a treat to a friend's house. Knowing you've created something delicious from scratch adds a layer of satisfaction.
Sharing this specific nutfree spring berry tart is particularly thoughtful if you know someone with a nut allergy, as finding delicious allergen-friendly desserts can sometimes be challenging. Presenting them with a safe and beautiful homemade treat shows care and consideration. The process of making and sharing food strengthens connections and creates memorable moments around the table.
Exploring Other Tart Recipes
Mastering this lemon raspberry tart opens the door to a wide world of tart-making possibilities. The shortbread crust recipe is a versatile base that can be paired with countless other fillings. Consider exploring other fruit tarts, perhaps featuring stone fruits in the summer like peach or cherry, or apples and pears in the fall. Custard tarts, chocolate tarts, or even savory tarts are also within reach using similar techniques for the crust and adapting the filling.
Experiment with different types of crusts too, such as a Pâte Sucrée (sweet pastry dough) or a gluten-free alternative if needed. Each tart offers a unique canvas for seasonal ingredients and flavor combinations. Continue honing your crust-making skills and experimenting with various fillings to expand your baking repertoire beyond this wonderful nutfree spring berry tart. The journey of exploring different tart recipes is as rewarding as enjoying the finished product.
Frequently Asked Questions
What makes these spring berry tarts NutFree?
These tarts are entirely free of nuts and nut-derived ingredients. We use alternative flours and binding agents to ensure they're safe for those with nut allergies.
What types of spring berries are best to use in these tarts?
The best berries are those that are fresh and in season, such as strawberries, raspberries, blueberries, and blackberries. A mix of berries provides a delicious and colorful finish.
Are there any substitutions I can make if I don't have a specific berry on hand?
Yes, you can substitute with other available seasonal berries. Just make sure the total amount of berries remains approximately the same to maintain the correct fruit-to-tart ratio.
How long do these nut-free spring berry tarts typically last?
These tarts are best enjoyed fresh, ideally within 1-2 days. Keep them refrigerated to maintain their quality and prevent spoilage.
Can I freeze these nut-free spring berry tarts?
While you can freeze them, the texture of the berries may change upon thawing. Freezing is best done before adding the berries, freezing the baked tart shells individually and adding fresh berries later.
Final Reflection: The Enduring Delight of Spring, Nut-Free and Delicious
The vibrant explosion of spring berries in a delicate, nut-free tart is more than just a recipe; it's a celebration of mindful eating and inclusive baking. This simple yet elegant dessert speaks to a growing demand for allergy-friendly options that don't compromise on taste or presentation. The recipes shared highlight the accessibility and joy that can be found in creating beautiful, delicious treats for everyone.
The influence of allergy-conscious baking extends far beyond individual dietary needs; it's a testament to our increasing awareness of inclusivity and the importance of providing options for all. It's about creating a space at the table for everyone, regardless of dietary restrictions. Food is symbolic of love when words are inadequate.
– Alan D. Wolfelt. This sentiment rings true, especially when we consider the power of sharing a delicious, carefully crafted dessert with loved ones, knowing everyone can participate.
Now, I invite you to consider the possibilities. Experiment with different berry combinations, explore variations on the crust, and most importantly, share the joy of these nut-free spring berry tarts with those you cherish. Let this recipe be a springboard for your own culinary creativity, a testament to the power of mindful baking, and a delicious way to celebrate the season and the people you love. Embrace the challenge, and let the sweet taste of success inspire you.
Unleash Your Inner Pastry Chef: Bake These Delightful Tarts!
Thanks for joining us on this delicious journey into the world of nut-free baking! We hope you've gained some inspiration and confidence to create stunning, allergy-friendly desserts. Ready to take your baking skills to the next level?
- Bake a batch of these spring berry tarts: It's easier than you think! Follow our recipe and impress your friends and family with your newfound skills.
- Share your creation: Post a picture of your finished tarts on social media and tag us! We'd love to see your beautiful bakes. #BakeWithEase #NutFreeBaking #SpringBakes
- Explore our other nut-free recipes: Discover a world of delicious possibilities on our website, from cookies to cakes to more exciting tarts!
What delicious spring flavor will you add to your next tart creation? Let us know in the comments!