
Beyond the Basics: Next Steps in Choux Pastry Mastery

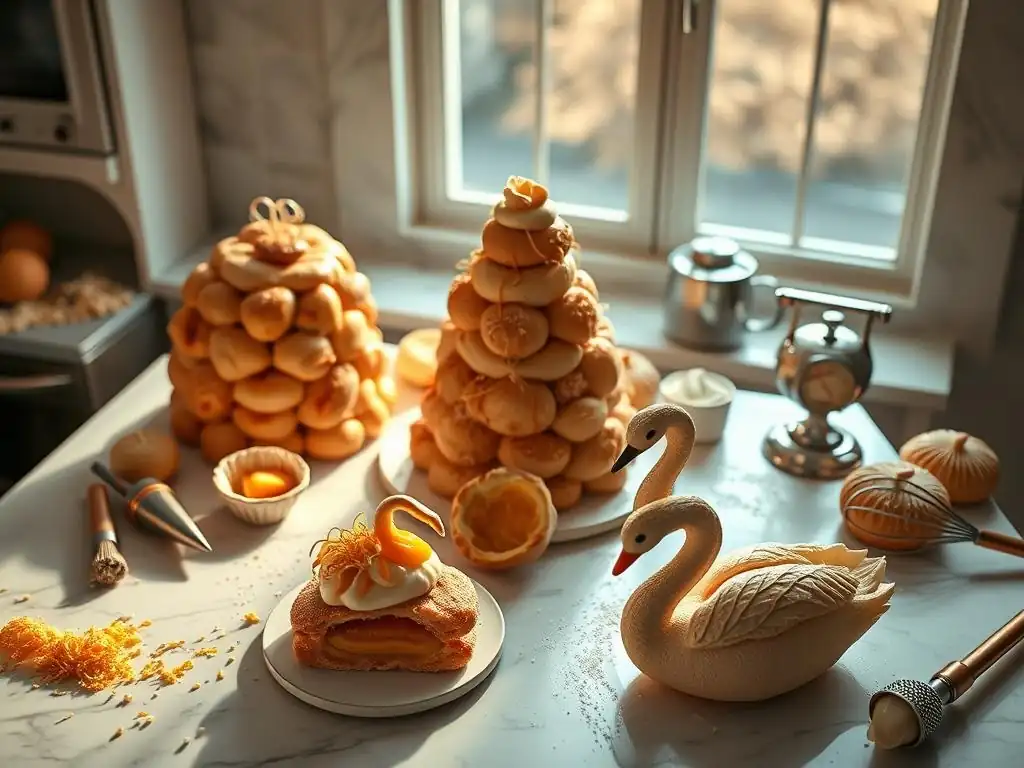
Welcome to BakeWithEase, where we believe everyone can unlock the joys of baking! Ready to elevate your skills? Dive in and uncover the secrets to Choux Pastry Advanced Techniques. We'll guide you through the nuances that separate good choux from exceptional choux, leaving you with perfectly puffed creations. What are the insider tips for achieving that golden, hollow interior? Let's find out!
- Level Up Your Choux: Mastering Advanced Techniques
- Perfecting the Choux Dough: Advanced Considerations
- Shaping and Piping Choux: Advanced Skills
- Advanced Baking Techniques for Choux Pastry
- Flavoring and Filling: Elevating Your Choux Creations
- Advanced Choux Pastry Recipes and Applications
- Decorating and Finishing: The Art of Presentation
- Choux Pastry Troubleshooting: Expert Tips and Tricks
- Frequently Asked Questions
- Final Reflection: Elevating the Humble Puff
- Unlock Your Choux Pastry Potential!
Level Up Your Choux: Mastering Advanced Techniques
You've mastered the perfect pâte à choux, baked fluffy, hollow shells, and perhaps even filled a classic éclair. But the world of choux pastry offers so much more! Moving beyond basic choux pastry techniques opens up a realm of stunning creations, from delicate swans to towering croquembouches. This journey into Choux pastry advanced techniques requires precision, practice, and a deeper understanding of how ingredients and heat interact.
Elevating your choux skills means focusing on consistency in every step – from achieving the ideal dough texture to mastering intricate piping and understanding the nuances of baking. It's about learning to troubleshoot common pitfalls and confidently tackling complex recipes. As you delve into choux pastry advanced techniques, you'll find that small adjustments can make a significant difference in the final product's appearance, texture, and stability.
Perfecting the Choux Dough: Advanced Considerations
Achieving Consistent Dough Texture for Superior Results
Consistency in choux dough texture is paramount for even puffing and a predictable outcome. The ideal dough should resemble a thick paste, smooth but not runny, and should hold its shape when piped. A key factor is the gradual addition of eggs; they must be incorporated one by one, allowing each egg to be fully absorbed before adding the next. This process is often done off the heat after the initial cooking stage, either by hand with a wooden spoon or using a stand mixer with a paddle attachment.
Over-mixing or adding eggs too quickly can result in a dough that is too wet, leading to flattened or collapsed choux. Conversely, a dough that is too stiff, perhaps from insufficient eggs or over-cooking the flour/butter/water base, will not expand properly in the oven. Professional bakers often test the dough consistency by lifting the paddle or spoon; the dough should fall back slowly in a V-shape or form a 'bird's beak'. Aiming for this specific consistency ensures each piece of choux will rise uniformly.
Understanding the Role of Gluten Development in Choux Pastry
Unlike bread dough where gluten development is crucial for structure, choux pastry requires minimal gluten development. The structure of choux relies on the gelatinization of starch in the flour during the initial cooking phase and the rapid expansion of steam during baking. Over-mixing the dough, especially once the eggs are added, can develop too much gluten.
Excessive gluten can make the dough tough and elastic, hindering the delicate steam expansion needed for the choux to puff properly. It can also contribute to a chewier, less desirable texture in the final product. Therefore, after the flour is cooked into the butter and water, and the mixture forms a cohesive ball, mixing should primarily focus on cooling the dough slightly and then incorporating the eggs just until they are fully absorbed and the desired consistency is reached. This gentle handling is a core choux pastry advanced technique.
Mastering the Pâte à Choux: Advanced Mixing Techniques
Mastering the pâte à choux involves precision in both the cooking and mixing stages. The initial cooking of the water (or milk), butter, salt, and flour mixture is critical. It gelatinizes the starch and dries out the dough base. This should be done over medium heat, stirring constantly, until the mixture pulls away from the sides of the pan and forms a ball, often leaving a slight film on the bottom of the pot. This stage typically takes 2-3 minutes after adding the flour.
After cooking, the mixture must cool slightly before adding the eggs. Adding eggs to a hot dough will cook them prematurely, resulting in a scrambled texture. The ideal temperature is below 60°C (140°F). Using a stand mixer allows for controlled, gradual addition of eggs and consistent mixing speed. The paddle attachment is preferred over the whisk. Mixing should continue just until the eggs are incorporated and the dough reaches the desired consistency, avoiding overdevelopment of gluten. This careful process is fundamental to Choux pastry advanced techniques.
Shaping and Piping Choux: Advanced Skills
Creative Choux Pastry Shapes: Beyond the Éclair
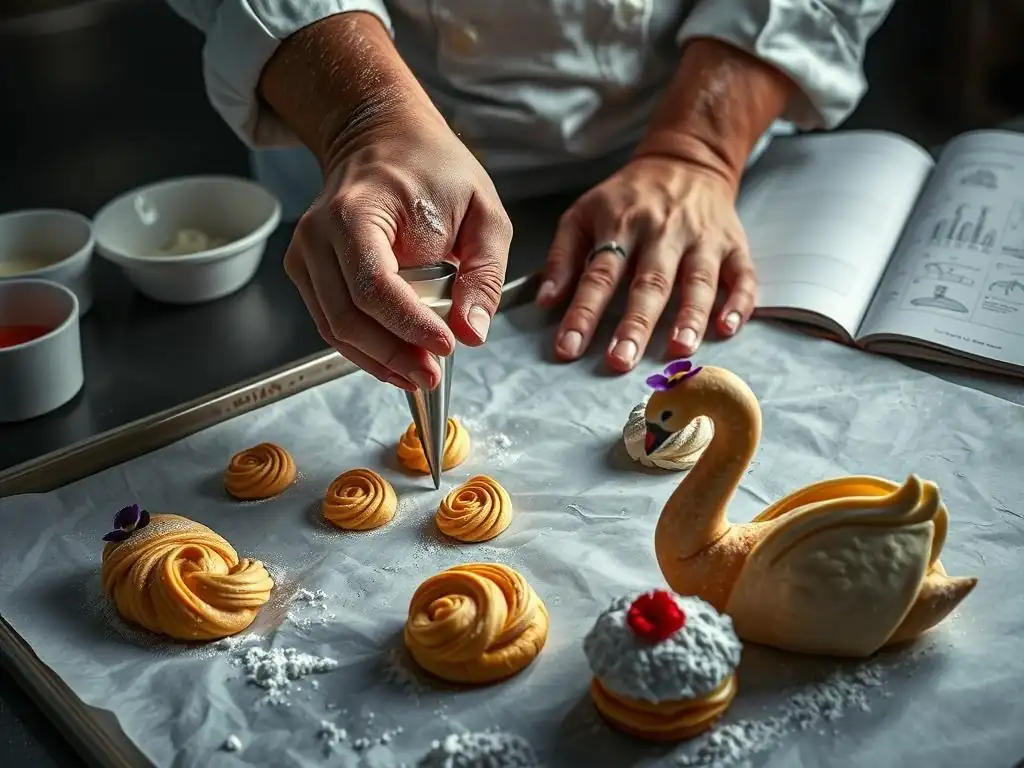
While the classic round profiterole and the elongated éclair are foundational, Choux pastry advanced techniques include creating a variety of shapes. Think of the elegant swan, formed by piping a large teardrop for the body and a thin, curved 'S' for the neck. The Paris-Brest, a large ring shape, requires piping concentric circles or a single thick ring.
Larger rounds are needed for gâteau St-Honoré or the base layers of a croquembouche. Small, uniform spheres (often 3-4 cm in diameter) are essential for building a stable croquembouche tower. Savory applications like gougères are typically small, round puffs. Mastering these different shapes requires adapting piping pressure, angle, and tip choice, showcasing true choux pastry advanced techniques.
Mastering Piping Techniques for Uniform and Professional Results
Achieving uniform choux shells is crucial, especially for multi-piece constructions or professional presentation. This uniformity comes from mastering piping technique: applying consistent, even pressure on the pastry bag, maintaining a consistent angle to the baking sheet (usually perpendicular for rounds, or angled slightly for éclairs), and moving at a steady speed.
Variations in pressure or speed result in irregularly shaped choux that may bake unevenly. For instance, when piping éclairs, maintaining a straight line with consistent pressure is key to avoiding curves or bulges. For profiteroles, a steady, circular motion while releasing pressure at the end creates a neat mound. Practice is vital here; aiming for pieces that vary by no maximum of 1-2 cm in size for a large batch demonstrates skilled choux pastry advanced techniques.
Working with Different Piping Tips for Varied Choux Designs
The choice of piping tip significantly impacts the final shape and texture of the choux. A simple round tip (like an Ateco 805 or 806, approximately 1 cm opening) is standard for profiteroles and the base for swans or croquembouche puffs, creating a smooth surface. Star tips (such as an Ateco 826 or 827) are commonly used for éclairs, resulting in a ridged surface that can add visual appeal and potentially aid in even baking by providing more surface area.
Larger star tips can be used for decorative rosettes or borders. For specific shapes like swans, very thin round tips are needed for the delicate neck. Understanding how different tip sizes and shapes affect the flow of the dough and the resulting form is part of Choux pastry advanced techniques. Experimenting with a few tip types will quickly reveal their impact on your creations.
Advanced Baking Techniques for Choux Pastry
Optimizing Oven Temperature for Perfect Choux Puff
Optimizing oven temperature is perhaps the most critical Choux pastry advanced technique. Choux pastry typically requires a two-stage baking process. An initial high temperature, often around 200-220°C (400-425°F), provides a burst of heat that creates steam inside the dough, causing it to puff rapidly. This phase usually lasts 15-20 minutes, depending on the size of the choux.
After this initial puffing, the temperature is lowered to around 170-180°C (340-350°F) for a longer period (another 20-30 minutes or more). This lower temperature allows the choux to dry out thoroughly and become crisp, preventing it from collapsing upon cooling. It is absolutely essential not to open the oven door during the high-temperature phase, as this releases the steam and can cause the choux to deflate.
Understanding the Impact of Humidity on Choux Pastry Baking
Kitchen humidity can subtly affect choux pastry, particularly during the baking process. High humidity can make the dough slightly wetter, potentially requiring a longer baking time to dry out completely. More significantly, humidity in the oven environment can hinder the shells from becoming truly crisp.
To combat this, especially if you live in a humid climate, some advanced bakers will slightly prop open the oven door during the final few minutes of baking or immediately after turning off the oven. This allows the humid air to escape and helps the choux shells dry out more effectively, ensuring that satisfying crisp exterior. Monitoring the choux closely during this final drying phase is key to achieving the desired texture.
Troubleshooting Common Choux Baking Problems: Advanced Solutions
Even with careful preparation, problems can arise during baking. Collapsing choux is a common issue, almost always due to being underbaked or the oven door being opened too early. The solution is to bake longer at the lower temperature until the shells are light, golden-brown, and feel hollow. Cracking can occur if the initial oven temperature is too high or if the dough was too wet; slightly reducing the initial temperature or adjusting egg quantity can help.
Uneven puffing might indicate inconsistent piping or uneven oven heat. Using an oven thermometer to verify your oven's temperature and rotating your baking sheet halfway through the low-temperature phase can help ensure even baking. Addressing these issues confidently with targeted adjustments is a hallmark of Choux pastry advanced techniques.
Flavoring and Filling: Elevating Your Choux Creations
Infusing Choux Pastry with Unique Flavors
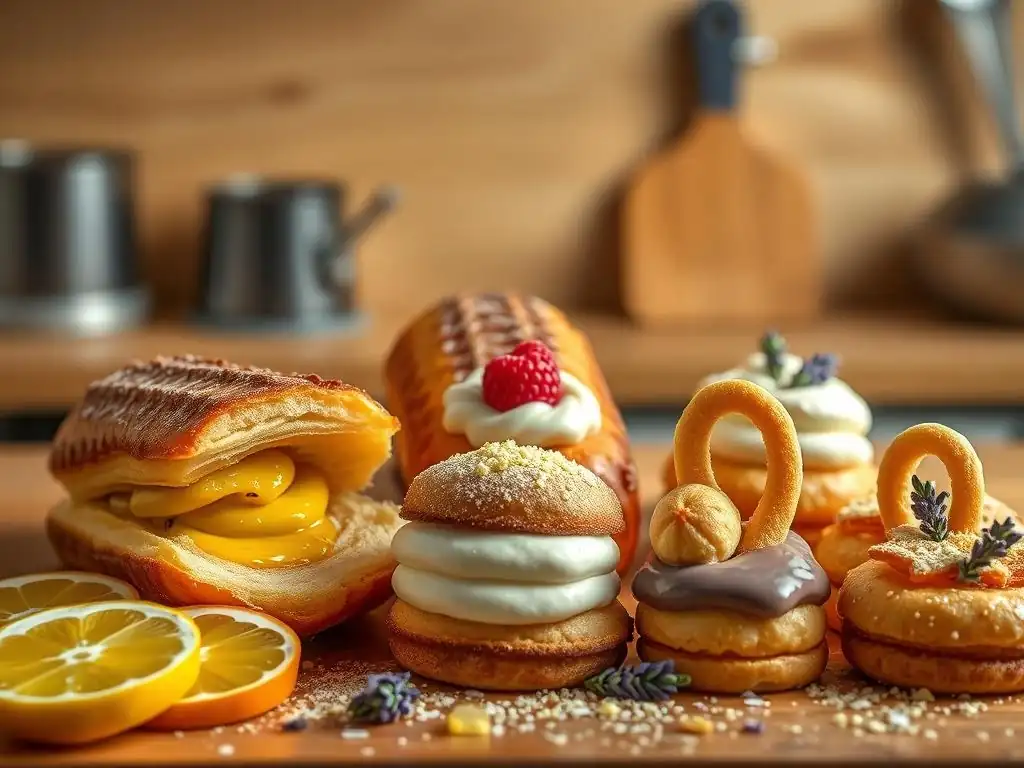
Moving beyond plain choux involves infusing the pastry itself with flavor. This can be achieved by substituting some of the water with milk for a richer dough, or by adding flavorings to the liquid base or with the eggs. Vanilla bean paste adds elegant speckles and intense vanilla flavor. A teaspoon or two of finely grated citrus zest (lemon or orange) can brighten the dough, particularly for fruit-based fillings.
For chocolate choux, replace a small amount of flour (perhaps 10-15%) with unsweetened cocoa powder, ensuring the total dry ingredients remain balanced. Savory choux, like gougères, are flavored by adding grated hard cheese (such as 50-75g of Gruyère per standard batch) after the eggs are incorporated. These simple additions elevate the basic dough into something special.
Creating Delicious and Stable Choux Pastry Fillings
The filling is often the highlight of a choux creation. While classic pastry cream is a staple, Choux pastry advanced techniques involve creating more complex and stable fillings. Diplomat cream, a lighter version of pastry cream folded with whipped cream, is popular. Mousses (chocolate, fruit) provide airiness. Praline cream, made from a praline paste blended into pastry or buttercream, offers rich flavor and slight texture.
Stability is crucial, especially for filled choux that will sit for a while or be stacked (like in a croquembouche). Using sufficient thickener (cornstarch or flour for pastry cream), properly whipping cream to stiff peaks, or incorporating a small amount of gelatin can ensure fillings hold their shape and don't make the choux soggy too quickly. A well-made filling should complement, not overwhelm, the delicate shell.
Advanced Filling Techniques: Layering and Textural Contrast
Choux pastry advanced techniques in filling go beyond simply piping cream into the shell. Consider layering fillings for complexity. For example, a base layer of tangy fruit compote or curd piped into the bottom of an éclair before adding pastry cream provides a bright contrast.
Adding textural contrast elevates the experience. A layer of crisp praline feuilletine (crushed crispy crepes mixed with praline paste) at the bottom of a Paris-Brest adds a delightful crunch against the smooth praline cream. Chopped toasted nuts, chocolate shards, or a thin layer of caramel can also be incorporated inside or just under the lid of the choux. Filling from multiple points (e.g., three small holes in an éclair bottom) ensures the filling is evenly distributed throughout the shell.
Advanced Choux Pastry Recipes and Applications
Croquembouche Construction: A Choux Pastry Masterpiece
The croquembouche is a pinnacle of Choux pastry advanced techniques. This conical tower is constructed from numerous small profiteroles, typically filled with pastry cream, held together with spun sugar or caramel. Achieving uniform puff size (often aiming for 3-4 cm diameter) is crucial for stable stacking.
The real challenge lies in making and working with hot caramel or spun sugar, which requires speed and caution. The filled choux are dipped in caramel and quickly assembled around a cone form, or built freehand. Creating the delicate spun sugar threads for decoration is another intricate step. This impressive structure is a true test of precision, patience, and multiple choux pastry advanced techniques.
Paris-Brest Perfection: Advanced Techniques for This Classic
The Paris-Brest is another classic showcasing Choux pastry advanced techniques. It's a large ring of choux pastry, often topped with sliced almonds and powdered sugar, and traditionally filled with a praline mousseline cream. Piping the ring evenly, often as two or three concentric circles for stability and height, is key.
Ensuring the large ring bakes through completely without collapsing is vital. The rich praline mousseline requires careful preparation, blending praline paste into a stable base like buttercream or pastry cream. The final assembly involves slicing the ring horizontally and filling generously, ensuring the cream holds its shape.
Savory Choux Pastry Applications: Gougères and More
Choux pastry isn't limited to sweets. Savory applications, like gougères, are a delightful use of Choux pastry advanced techniques. Gougères are made by incorporating grated cheese (such as Gruyère, Comté, or Parmesan) into the warm dough after the eggs. They are typically piped as small mounds and baked until puffed and golden.
Beyond gougères, savory choux can be used for small appetizer puffs filled with cheese mousse, smoked salmon cream, or mushroom duxelles. Larger savory éclairs can be filled with chicken salad or other savory fillings. These applications demonstrate the versatility of the basic pâte à choux recipe when adapted with savory flavorings and fillings.
Decorating and Finishing: The Art of Presentation
Advanced Glazing Techniques for Choux Pastry
Finishing choux pastry often involves glazing, and Choux pastry advanced techniques include working with various glazes. Classic éclairs are frequently topped with fondant icing, which needs to be heated to a specific temperature (around 35-40°C or 95-104°F) for the perfect dipping consistency – too hot and it's too thin, too cool and it's clumpy.
Chocolate ganache is another popular glaze. The ratio of chocolate to cream can be adjusted (e.g., a 1:1 ratio for dark chocolate and cream yields a pourable but quick-setting glaze) to achieve different consistencies for dipping or drizzling. More advanced glazes include mirror glaze (glace miroir), which requires precise temperature control and application for a perfectly smooth, reflective finish, often used on larger choux creations or components.
Creating Stunning Choux Pastry Decorations with Chocolate and Sugar
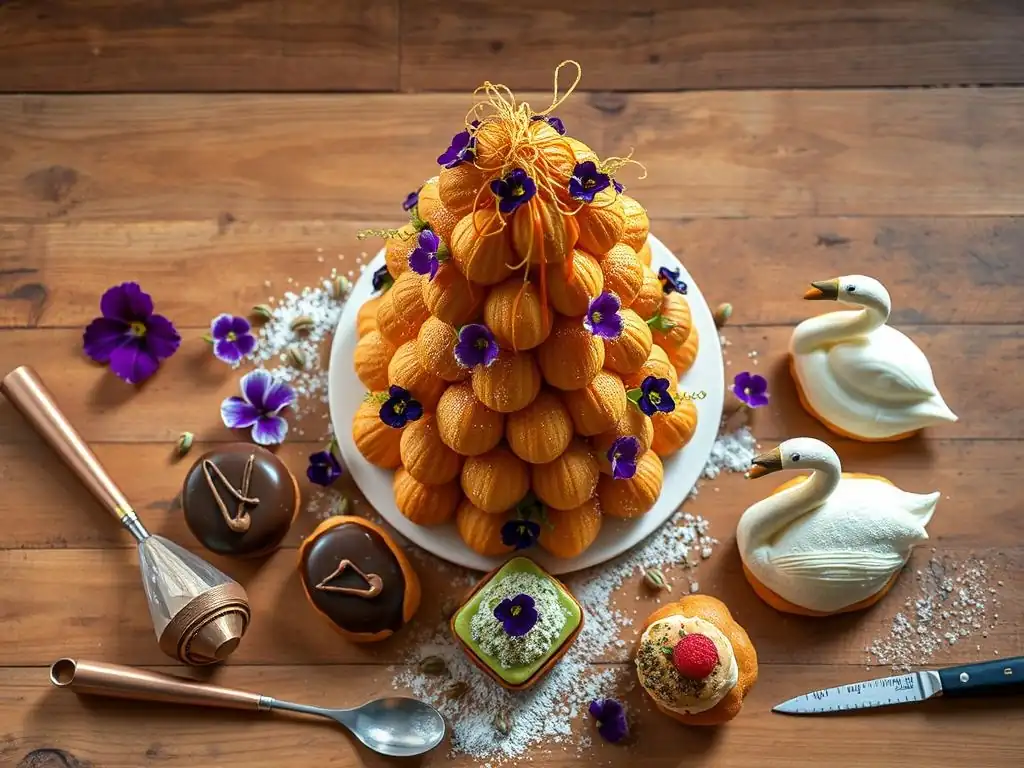
Beyond simple glazes, Choux pastry advanced techniques involve decorative elements like chocolate work and sugar art. Tempering chocolate allows you to create shiny, stable decorations, whether dipping the tops of éclairs, drizzling patterns, or making chocolate curls or shards.
Sugar techniques include making caramel for sticking profiteroles together in a croquembouche, or creating delicate spun sugar threads to wrap around the tower. Boiled sugar can also be pulled or blown into intricate shapes, though this requires specialized equipment and skill. Simple powdered sugar stencils can also add elegant patterns to glazed or plain choux.
Plating and Presentation Tips for Show-Stopping Choux Desserts
Presenting choux pastry beautifully enhances the dining experience. For individual servings, consider arranging éclairs or profiteroles on a plate with a swirl of sauce (like raspberry coulis or chocolate sauce) or a sprinkle of crumbled nuts. Adding a few fresh berries or a sprig of mint provides color and freshness.
For larger creations like Paris-Brest or gâteau St-Honoré, ensure they are centered on an appropriate-sized cake stand or platter. Consider the height and structure, ensuring it looks balanced. For a croquembouche, the structure itself is the centerpiece, but ensuring the spun sugar is delicate and evenly distributed elevates its visual impact. Attention to these details is key in Choux pastry advanced techniques for presentation.
Choux Pastry Troubleshooting: Expert Tips and Tricks
Addressing Common Choux Pastry Issues: A Comprehensive Guide
Even experienced bakers encounter issues with choux. Common problems include choux that doesn't puff, collapses after baking, cracks excessively, has a soggy bottom, or bakes unevenly. Understanding the root cause is the first step in applying Choux pastry advanced techniques for troubleshooting.
Failure to puff is often due to insufficient heat, dough that is too wet or too stiff, or opening the oven door too early. Collapse is almost always linked to underbaking – the shell hasn't dried out enough to support itself. Cracking can result from dough that's too stiff or an oven that's too hot initially. A soggy bottom might mean the baking sheet wasn't prepared correctly (e.g., too much grease) or the choux wasn't dried out sufficiently.
Preventing Collapsed Choux Puffs: Advanced Strategies
Preventing collapsed choux is a key focus in Choux pastry advanced techniques. The primary strategy is ensuring the choux is baked thoroughly. This means trusting the process and baking until the shells are a deep golden-brown color and feel very light when lifted. The internal temperature should reach high enough to dry out the interior completely.
After baking, resist the urge to remove them from the oven immediately. Turning the oven off and leaving the door slightly ajar for 10-15 minutes allows the choux to cool down gradually in a controlled environment, minimizing the shock of a sudden temperature change which can cause deflation. Ensuring the initial dough consistency wasn't too wet also contributes to a more stable structure.
Achieving the Perfect Golden-Brown Color: Advanced Baking Tips
The golden-brown color of choux pastry is not just for aesthetics; it's a visual indicator of doneness and crispness. Choux pastry advanced techniques for color involve managing baking time and temperature. Baking long enough at the lower temperature setting is crucial for developing this color and ensuring the shell is dry and crisp.
Using a reliable oven thermometer helps ensure your oven is actually at the temperature you've set. Darker baking sheets tend to result in faster and deeper browning than lighter, reflective ones. If your choux is browning too quickly on the bottom but isn't fully puffed, your initial temperature might be too high, or the switch to the lower temperature might be delayed. Conversely, pale choux indicates underbaking; increase the time at the lower temperature.
Frequently Asked Questions
How can I ensure my choux pastry puffs up properly every time?
Proper puffing relies on sufficient steam created during baking. Ensure your oven is at the correct temperature and do not open the oven door during the initial baking phase to prevent steam from escaping.
What are some common mistakes that cause choux pastry to collapse?
Collapsing often occurs due to underbaking or insufficient egg incorporation. Bake until the pastry is golden brown and feels hollow, and ensure the dough is smooth and pipeable after adding the eggs.
How can I add different flavors to my choux pastry?
Flavor can be added through infusions in the liquid used (milk or water), or by adding zest or extracts directly to the dough. Experiment with citrus, vanilla, or even savory herbs.
What advanced piping techniques can I use for choux pastry?
Beyond basic rounds, try piping eclairs, swan shapes, or even Paris-Brest rings. Using different piping tips can also create unique textures and visual appeal.
How do I store leftover choux pastry shells?
Unfilled baked shells can be stored in an airtight container at room temperature for a day or two, or frozen for longer storage. Reheat them briefly in the oven to crisp them up before filling.
Final Reflection: Elevating the Humble Puff
The pursuit of choux pastry mastery is not merely about achieving perfectly puffed pastries; it's about understanding the fundamental science that allows for endless creative expression. The techniques explored in this article—from precise hydration control to innovative flavor infusions—represent a gateway to a world of culinary possibilities far beyond the basic cream puff. This isn't just about baking; it's about unlocking a deeper understanding of texture, flavor, and the transformative power of heat and ingredients.
The journey of mastering choux pastry is a deeply rewarding one, mirroring the evolution of culinary arts itself. It's a testament to the power of precision and patience, demanding respect for the delicate balance of ingredients and techniques. The most beautiful thing we can experience is the mysterious. It is the source of all true art and science.
- Albert Einstein. This quote resonates deeply with the almost magical transformation of simple ingredients into the airy lightness of a perfectly executed choux. The subtle nuances, the unexpected successes and even the occasional failures, all contribute to a richer understanding of this versatile pastry.
Now, it's your turn. Don't be afraid to experiment, to push the boundaries of what you think is possible. Take the knowledge gained here and apply it to your own creations. Develop your own signature choux pastry, infusing it with your unique personality and culinary vision. The world of advanced choux pastry awaits—dare to explore its endless possibilities.
Unlock Your Choux Pastry Potential!
Thanks for diving deep into the world of choux pastry! You've now got the foundation – it's time to take your skills to the next level. Ready to create truly stunning treats?
- Master a new choux pastry recipe: Try your hand at those cream puffs you've always admired, or even tackle the challenging profiteroles! Experiment with different fillings and glazes.
- Share your choux creations: Show off your beautiful bakes and inspire others by posting pictures on social media – use #BakeWithEaseChoux to connect with our community!
- Challenge yourself: Try a more intricate design. Can you create a beautiful choux swan or a stunning tower of cream puffs?
What unique choux pastry creation will you bake next?