
Creating PicturePerfect Sweet Roll Swirls: A Visual Guide

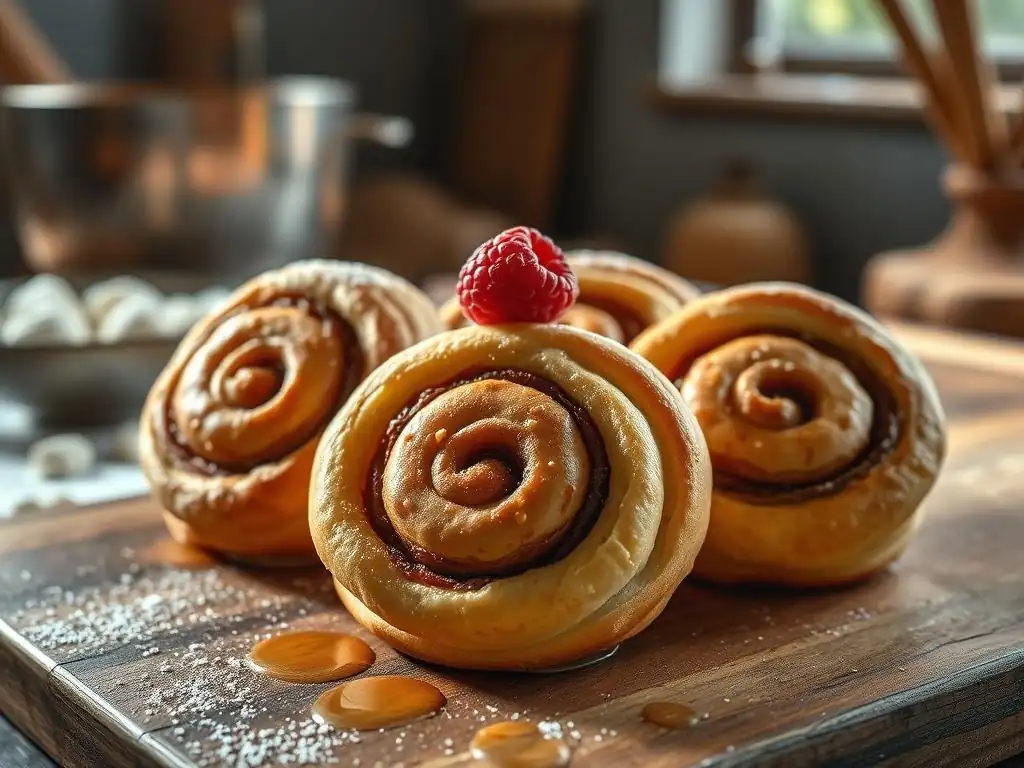
Welcome to BakeWithEase, your passport to pastry perfection! Ever wondered how to achieve those mesmerizing, bakery-worthy swirls in your sweet rolls? Creating picture-perfect sweet roll swirls isn't just about luck; it's about technique. Dive into our visual guide and unlock the secrets to achieving beautifully spiraled treats that are as delicious as they are stunning. Get ready to elevate your intermediate baking skills and impress everyone with your newfound artistry!
- BakeWithEase Presents: Mastering Sweet Roll Swirls
- Understanding the Fundamentals of Sweet Roll Dough for Perfect Swirls
-
Step-by-Step Guide to Creating Picture-Perfect Sweet Roll Swirls
- Preparing the Sweet Roll Dough: A Visual Walkthrough
- Rolling Out the Dough: Achieving Uniform Thickness for Even Swirls
- Spreading the Filling: Tips for Maximum Flavor and Swirl Adhesion
- The Art of Rolling: Creating Tight and Even Sweet Roll Swirls
- Slicing the Sweet Roll Log: Achieving Consistent Swirl Thickness
- Arranging the Sweet Rolls: Promoting Even Baking and Swirl Display
- Baking Your Sweet Rolls to Perfection: A Visual Guide
- Troubleshooting Common Sweet Roll Swirl Problems
- Enhancing Your Sweet Roll Swirls: Creative Filling and Topping Ideas
- Showcasing Your Perfect Sweet Roll Swirls: Presentation Tips
-
Frequently Asked Questions
- How important is the dough's chill time for achieving perfect sweet roll swirls?
- What type of filling is best for showcasing beautiful sweet roll swirls?
- What is the best technique for rolling the dough into a tight log?
- How does the sharpness of the knife impact the appearance of the sweet roll swirls?
- What is the ideal proofing time to ensure the swirls remain visible after baking?
- Final Reflection: The Enduring Allure of the Perfect Swirl
- Unleash Your Inner Pastry Chef!
BakeWithEase Presents: Mastering Sweet Roll Swirls
Welcome back to BakeWithEase! Today, we're diving deep into the art of creating those irresistible, visually stunning sweet rolls with perfectly defined swirls. While the taste is paramount, let's be honest – the visual appeal of a beautifully swirled sweet roll is half the joy. Whether you're aiming for classic cinnamon buns or another delightful variation, mastering the technique for picture-perfect sweet roll swirls elevates your baking from delicious to extraordinary.
This guide will walk you through every crucial step, from preparing your dough just right to slicing the finished log with precision. We'll share tips and tricks to ensure your swirls are tight, even, and hold their shape beautifully during baking, ultimately leading to those sought-after perfect sweet roll swirls that will impress everyone fortunate enough to try them. Get ready to transform your sweet roll game!
Understanding the Fundamentals of Sweet Roll Dough for Perfect Swirls
The Importance of Dough Consistency for Defined Swirls
Achieving perfect sweet roll swirls starts long before you even think about the filling. The consistency of your dough is absolutely critical. If the dough is too sticky, it will be difficult to roll out evenly without adding excessive flour, which can make the final rolls tough. A sticky dough also tends to tear when rolled, disrupting the potential swirl formation.
Conversely, if the dough is too stiff or dry, it will resist rolling and may crack, preventing you from creating a tight, uniform log necessary for defined swirls. The ideal sweet roll dough should be soft, pliable, and slightly tacky to the touch, but not so sticky that it adheres excessively to your hands or the work surface. This balance allows for smooth rolling and ensures the layers adhere properly when rolled up, setting the stage for beautiful, perfect sweet roll swirls.
Choosing the Right Flour for Sweet Roll Dough Texture
The type of flour you use significantly impacts the final texture of your sweet roll dough, and consequently, the quality of your swirls. All-purpose flour is a common choice, offering a good balance of protein (typically around 10-12%). This protein develops gluten, which provides structure, but not so much that the rolls become overly chewy. Using a flour with a moderate protein content helps create a dough that is strong enough to hold its shape but still soft and tender.
Some recipes might call for bread flour, which has a higher protein content (around 12-14%). While this results in a chewier texture, which some prefer in breads, it can sometimes make sweet rolls a bit too dense or tough for those seeking a softer crumb. For consistently soft and pliable dough that rolls beautifully for perfect sweet roll swirls, a quality all-purpose flour is often the most reliable option, providing the right balance of structure and tenderness.
Sweet Roll Dough Proofing: Achieving Optimal Rise for Swirl Definition
Proper proofing is a non-negotiable step for developing flavor and texture in your sweet rolls, and it also plays a vital role in achieving well-defined swirls. During the first proofing, the yeast produces carbon dioxide gas, causing the dough to expand and creating an airy structure. This structure is what gives the dough elasticity, making it easier to roll out thinly and evenly without excessive shrinkage or tearing.
An under-proofed dough will be tight and difficult to handle, leading to uneven rolling and potentially distorted swirls. An over-proofed dough, on the other hand, might collapse slightly or become too fragile. The goal is for the dough to roughly double in size, often taking between 1 to 1.5 hours in a warm environment (around 75-80°F or 24-27°C). This optimal rise ensures the dough is relaxed and ready to be transformed into a flat sheet, perfectly primed for creating tight, even, and ultimately, perfect sweet roll swirls.
Step-by-Step Guide to Creating Picture-Perfect Sweet Roll Swirls
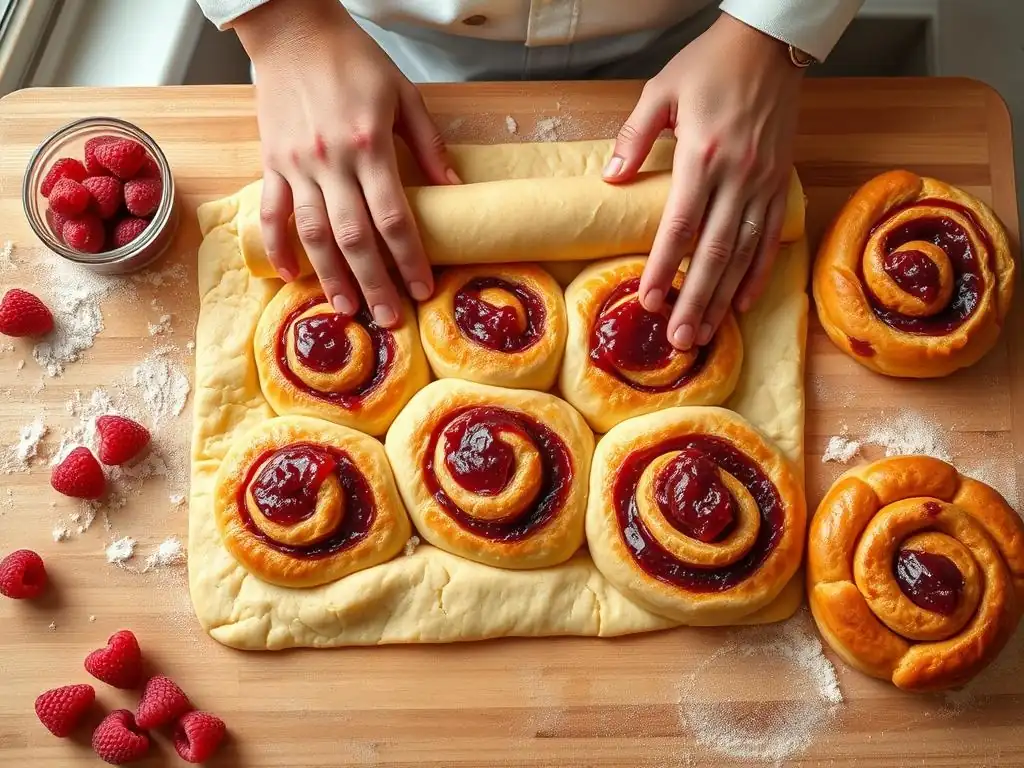
Preparing the Sweet Roll Dough: A Visual Walkthrough
Once your dough has completed its first proof, it's time to prepare it for shaping. Gently punch down the risen dough to release the excess gas. This step helps create a more uniform texture and makes the dough easier to handle. Turn the dough out onto a lightly floured surface. Avoid adding too much flour at this stage, as it can dry out the dough.
Knead the dough briefly, just enough to bring it together into a smooth, cohesive ball. The dough should feel soft and elastic. If you gently press your finger into the dough, the indentation should slowly spring back. This indicates the gluten is developed and relaxed, ready for rolling. This careful preparation ensures your dough is in the best possible condition to form those desirable perfect sweet roll swirls.
Rolling Out the Dough: Achieving Uniform Thickness for Even Swirls
Rolling the dough is a critical step for achieving uniform, picture-perfect sweet roll swirls. Begin by shaping your dough into a rough rectangle. Using a rolling pin, start rolling from the center outwards, applying even pressure. The aim is to create a large rectangle that is consistently thin across its entire surface. A typical target thickness is around 1/4 inch (approximately 0.6 cm).
Consistency in thickness is key because uneven areas will result in some swirls being thicker or thinner than others. If one part is much thicker, it won't roll as tightly, leading to a loose swirl. If it's too thin, it might tear. Aim for dimensions like 12x18 inches (approximately 30x45 cm) or similar, depending on your recipe and desired roll size. Take your time, gently stretching the dough as needed, to create a smooth, even canvas for your perfect sweet roll swirls.
Spreading the Filling: Tips for Maximum Flavor and Swirl Adhesion
With your dough rolled out to a uniform rectangle, it's time to generously spread your chosen filling. Whether it's a classic cinnamon-sugar mix, a rich brown sugar blend, or something more creative, ensure the filling is evenly distributed across the dough surface. Use an offset spatula or the back of a spoon to spread it right up to the edges, leaving only a small border (about 1/2 inch or 1-2 cm) along one of the longer sides bare. This bare edge will help seal the roll later.
Applying the filling evenly not only ensures every bite is flavorful but also helps the layers adhere to each other when rolled, which is essential for tight, well-defined swirls. Pay particular attention to getting the filling into the corners and edges, excluding the designated sealing edge. This careful application is a vital step towards achieving those beautiful, perfect sweet roll swirls.
Choosing the Right Filling Consistency for Optimal Swirls
The consistency of your sweet roll filling significantly impacts how well the swirls hold together during rolling and baking. A filling that is too dry or crumbly might fall out during slicing or baking, leaving gaps in your swirls. Conversely, a filling that is too wet or runny, perhaps due to melted butter that hasn't solidified slightly, can seep out of the dough as it bakes, causing leakage and disrupting the swirl structure.
The ideal filling often involves a mixture of granulated or brown sugar, cinnamon (or other spices), and a binder like softened butter or a small amount of flour. The butter should be soft enough to spread easily but not melted. This creates a paste-like texture that adheres well to the dough and melts slightly during baking to create that gooey center without running everywhere. Getting this consistency right is crucial for maintaining the integrity of your perfect sweet roll swirls.
The Art of Rolling: Creating Tight and Even Sweet Roll Swirls
Rolling the dough log is perhaps the most crucial step for achieving picture-perfect sweet roll swirls. Starting from the long edge opposite the bare border, begin rolling the dough tightly away from you. Use your fingers to keep the roll even as you go, tucking the dough in as you roll. The goal is to create a compact, uniform log without stretching or distorting the rectangle.
Apply gentle but firm pressure to keep the roll tight. As you roll, the layers of dough and filling will stack on top of each other, forming the swirl. When you reach the bare edge, use it to seal the log by pinching the seam closed along the entire length. This rolling technique directly determines how tight and defined your perfect sweet roll swirls will be in the finished product.
Minimizing Air Pockets for Uniform Swirls
One common issue when rolling sweet rolls is trapping air pockets between the layers. These pockets can lead to uneven swirls, gaps, and even cause the rolls to puff up awkwardly during baking. To minimize air pockets, ensure your dough is rolled out evenly and the filling is spread uniformly without significant clumps.
As you begin rolling the log, focus on keeping the initial turn very tight against itself. Use your fingertips to gently press down and ensure the dough adheres to the underlying layer as you continue rolling. Rolling slowly and deliberately, maintaining consistent tension, helps push out any trapped air, resulting in a dense, uniform log that will yield beautifully tight and uniform perfect sweet roll swirls.
Slicing the Sweet Roll Log: Achieving Consistent Swirl Thickness
Once your log is rolled and sealed, consistent slicing is essential for rolls that bake evenly and look uniform. Aim for slices that are roughly equal in thickness, typically between 1 to 1.5 inches (approximately 2.5 to 4 cm) thick. Using a sharp knife is one method, but it can sometimes compress the dough, squishing the swirls and making them less distinct.
To use a knife effectively, use a sawing motion rather than pressing straight down. For the cleanest, most defined perfect sweet roll swirls, however, another method is often preferred. This method avoids compressing the delicate dough layers, preserving the beautiful swirl structure you worked hard to create during the rolling process.
Using Dental Floss for Clean and Precise Sweet Roll Slices
For truly clean and precise sweet roll slices that showcase those perfect sweet roll swirls, plain, unflavored dental floss is an excellent tool. Slide a piece of floss (about 12-18 inches long) under the log at the point where you want to make your cut. Cross the ends of the floss over the top of the log and pull them taut, drawing the floss through the dough.
The floss slices through the dough layers cleanly without pressing down or distorting the shape. This technique is particularly effective for soft, tender dough. Repeat this process along the length of the log, spacing the slices evenly according to your desired thickness. Using dental floss consistently ensures each roll is the same size and shape, contributing significantly to the visual appeal of your perfect sweet roll swirls.
Arranging the Sweet Rolls: Promoting Even Baking and Swirl Display
How you arrange your sliced sweet rolls in the baking pan impacts how they bake and how their swirls are displayed. Sweet rolls are typically baked in a baking dish or pan, often lined with parchment paper for easy removal. Arrange the rolls cut-side up in the pan, leaving a small gap between them – about 1/2 to 1 inch (1-2 cm).
As the rolls bake, they will expand and fill the spaces, supporting each other and helping them rise upwards rather than spreading outwards excessively. This mutual support contributes to taller, more attractive rolls with clearly visible swirls. Ensure the pan size is appropriate for the number of rolls, allowing them to touch when fully proofed but not be overly crowded. Proper arrangement is the final step in preparing your perfect sweet roll swirls for their transformation in the oven.
Baking Your Sweet Rolls to Perfection: A Visual Guide
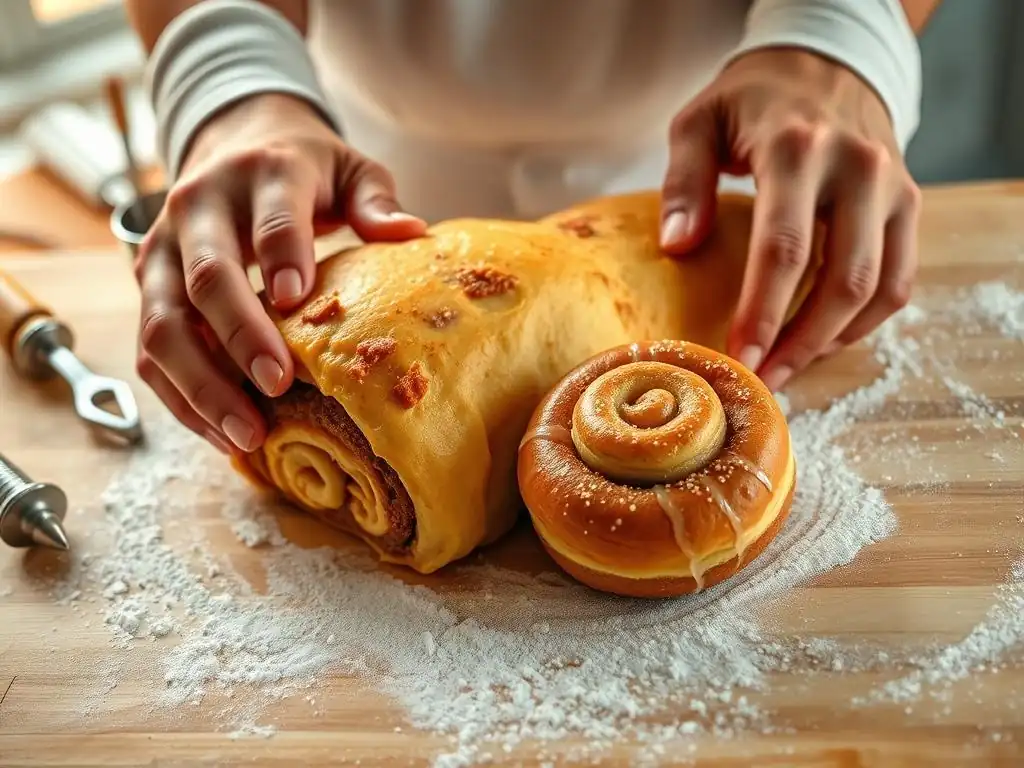
Oven Temperature and Baking Time for Golden-Brown Swirls
Baking temperature and time are critical for achieving perfectly cooked sweet rolls with appealing golden-brown surfaces and well-defined swirls. Most sweet roll recipes call for baking at a moderate temperature, typically between 350°F and 375°F (175°C to 190°C). This temperature allows the rolls to bake through evenly without the exteriors browning too quickly before the center is done.
Baking time will vary depending on the size of your rolls and your oven, but it usually ranges from 20 to 30 minutes. You're looking for the rolls to puff up, turn a lovely golden brown on top and around the edges, and the centers should appear set. Keeping a close eye on them during the last 5-10 minutes is essential to prevent overbaking, which can lead to dry rolls. Achieving this perfect bake time ensures your perfect sweet roll swirls are cooked through and beautifully colored.
Monitoring Sweet Roll Doneness: Ensuring a Perfectly Baked Center
Knowing when your sweet rolls are perfectly baked is key to ensuring they are soft, moist, and fully cooked in the center. Visually, the tops should be a rich golden brown, and the edges where they touch the pan should also show significant browning. The rolls should also feel firm to the touch when gently pressed, indicating they have set.
For absolute certainty, especially with larger rolls, you can use an instant-read thermometer. Insert the thermometer into the center of a roll; a perfectly baked sweet roll should register an internal temperature of around 190°F (approximately 88°C). Baking to this temperature ensures the dough is fully cooked and safe to eat, guaranteeing that your beautiful, perfect sweet roll swirls are delicious inside and out.
Troubleshooting Common Sweet Roll Swirl Problems
Preventing Filling Leakage During Baking
One frustrating issue is when the sweet roll filling leaks out during baking, creating a sticky mess in the pan and potentially leaving gaps in your swirls. This often happens if the filling is too wet, the dough wasn't sealed properly, or the rolls were overfilled. Ensure your filling has the right consistency, as discussed earlier, using softened butter rather than melted.
When rolling the log, make sure that final seam is thoroughly pinched closed along its entire length. This acts as a barrier to help contain the filling. Also, avoid the temptation to overfill the dough; while generous filling is great, excessive amounts are more likely to seep out. If you use a pan with slightly higher sides, it can also help contain minor leaks, keeping your perfect sweet roll swirls intact.
Addressing Uneven Swirls: Tips and Tricks
Uneven swirls can result from several factors, including uneven dough thickness when rolling, inconsistent filling distribution, or rolling the log loosely in some areas. To combat this, practice rolling your dough to a uniform thickness across the entire rectangle – use a ruler if necessary during the initial rolls to get a feel for it.
Spread your filling evenly right to the edges (excluding the sealing edge). When rolling the log, focus on maintaining consistent tension and tightness from one end to the other. Finally, using dental floss for slicing helps ensure each individual roll starts with a clean, uncompressed swirl structure, significantly contributing to achieving evenly shaped and visually appealing perfect sweet roll swirls.
Fixing Dry Sweet Rolls: Maintaining Moisture for Soft Swirls
Dry sweet rolls can happen if the dough is too dry to begin with, they are overbaked, or they aren't stored properly. Ensure your initial dough recipe has adequate fat (like butter or oil) and liquid, and avoid adding too much extra flour during kneading or rolling. Overbaking is a common culprit; follow the baking temperature and time guidelines closely and check for doneness using visual cues or a thermometer.
Removing the rolls from the oven as soon as they hit the target internal temperature is crucial. Applying a glaze or frosting while the rolls are still warm helps lock in moisture. For storage, keep cooled sweet rolls in an airtight container at room temperature for a day or two, or refrigerate for longer storage. Reheating gently can also help restore some softness to your perfect sweet roll swirls if they seem a little dry.
Enhancing Your Sweet Roll Swirls: Creative Filling and Topping Ideas
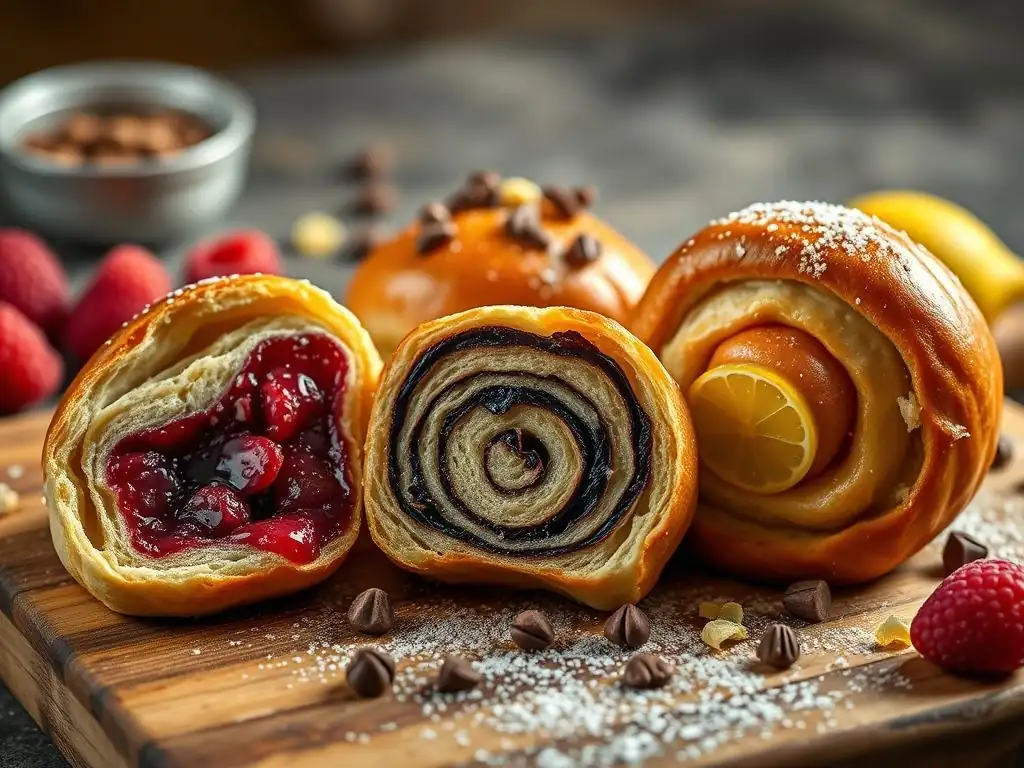
Exploring Different Sweet Roll Filling Flavors: Cinnamon-Sugar, Cream Cheese, Apple Pie
While the classic cinnamon-sugar filling is a beloved standard for perfect sweet roll swirls, there's a whole world of flavor possibilities to explore. A rich brown sugar and pecan filling offers a deeper, nuttier flavor profile. For a tangy twist, a cream cheese filling (often mixed with a little sugar and vanilla) spread thinly over the dough before the sugar mixture adds a wonderful dimension.
Fruit fillings are also fantastic. Imagine apple pie sweet rolls with a filling of finely diced apples, cinnamon, sugar, and a touch of flour or cornstarch to thicken. Other options include berries, lemon zest and poppy seed, or even chocolate and hazelnut spread. Experimenting with different fillings allows you to put your unique spin on achieving delicious and visually appealing perfect sweet roll swirls.
Adding Visual Appeal: Topping Ideas for Picture-Perfect Swirls
The topping is the crowning glory of a sweet roll, adding both flavor and significant visual appeal to your perfect sweet roll swirls. A simple glaze made from powdered sugar and milk or water is quick and classic, allowing the swirls to remain the star. For something richer, a cream cheese frosting is incredibly popular and provides a lovely contrast to the sweet filling.
Drizzle the glaze or frosting generously over the warm (but not hot) rolls so it melts slightly and cascades into the swirls. For added texture and visual interest, consider sprinkling chopped nuts (like pecans or walnuts), toasted coconut flakes, or even a dusting of cinnamon or powdered sugar over the topping. These finishing touches transform your already beautiful perfect sweet roll swirls into truly stunning treats.
Showcasing Your Perfect Sweet Roll Swirls: Presentation Tips
Plating and Serving Suggestions for Sweet Roll Perfection
Once your perfect sweet roll swirls are baked and topped, how you plate and serve them can enhance the experience. Sweet rolls are best served warm, so if they've cooled, a quick reheat in a low oven (around 250°F or 120°C) or microwave can bring them back to their soft, gooey best. Arrange them on a platter or in a basket lined with a clean cloth or parchment paper.
Stacking them slightly or arranging them in a visually appealing pattern can make them look even more enticing. Consider serving them with coffee, tea, or milk. Offering individual servings on small plates allows everyone to admire the distinct swirls before indulging. The simple act of presenting them nicely highlights the effort you put into creating those beautiful, perfect sweet roll swirls.
Photography Tips for Capturing Stunning Sweet Roll Swirl Images
You've worked hard to create beautiful, perfect sweet roll swirls – now capture their glory! Good lighting is essential for food photography. Natural light, like near a window, works best. Avoid harsh direct sunlight; diffused light is more flattering. Arrange the rolls so the swirls are clearly visible; a slight angle often works well to show off the layers.
Focus is key. Ensure the swirls themselves are sharp and in focus. Experiment with different angles – photographing from directly overhead can showcase the pan of rolls, while a side angle can highlight the height and layers of an individual roll. Use a clean background that doesn't distract from the rolls. Capturing a great photo allows you to share your success and inspire others to bake their own perfect sweet roll swirls.
Frequently Asked Questions
How important is the dough's chill time for achieving perfect sweet roll swirls?
Chilling the dough is absolutely crucial! It allows the dough to become firm, making it easier to handle and preventing it from spreading too much during rolling. This helps maintain the defined swirl shape after baking.
What type of filling is best for showcasing beautiful sweet roll swirls?
A filling with a slightly firmer consistency works best. Avoid overly wet or runny fillings as they can seep out during baking, causing the swirls to become messy and less defined. Think cinnamon sugar mixed with butter for a classic look.
What is the best technique for rolling the dough into a tight log?
Roll the dough tightly and evenly, applying gentle pressure. Start from one end and work your way to the other, ensuring there are no air pockets trapped inside. A tight roll is essential for uniform swirls.
How does the sharpness of the knife impact the appearance of the sweet roll swirls?
A sharp knife is essential! A dull knife will compress the dough, deforming the swirls and making them appear squashed. Using a sharp serrated knife or even dental floss ensures clean cuts.
What is the ideal proofing time to ensure the swirls remain visible after baking?
Proofing too long can cause the dough to over-expand, potentially distorting the swirls. Proof until the rolls are puffy but still maintain their shape. Look for about a 50-75% increase in size for optimal results.
Final Reflection: The Enduring Allure of the Perfect Swirl
The pursuit of the perfect sweet roll swirl is more than just baking; it's a reflection of our desire for beauty, precision, and ultimately, deliciousness. In a world increasingly dominated by instant gratification, the meticulous process of creating these visually stunning pastries offers a counterpoint – a reminder of the satisfaction found in mastering a craft and the joy of sharing the results. The detailed steps outlined in this guide are not just instructions, but a pathway to achieving that perfect swirl, a testament to patience and attention to detail.
The impact of visually appealing food on our experience is undeniable. We eat with our eyes first, and the artistry involved in creating these sweet roll swirls elevates the simple act of baking into something truly special. The pleasure of food is often enhanced by its appearance; a beautifully presented dish is more appealing and enjoyable.
This quote speaks to the core of what this guide aims to achieve: to empower bakers to create pastries that are as delightful to look at as they are to taste.
Now, I invite you to take what you've learned and embark on your own journey to create picture-perfect sweet roll swirls. Don't be afraid to experiment, to adapt the techniques to your own style, and most importantly, to enjoy the process. The beauty of baking lies not only in the final product but in the journey itself. So, gather your ingredients, preheat your oven, and let the swirling begin! The perfect swirl awaits.
Unleash Your Inner Pastry Chef!
Thanks for joining us on this sweet journey! We hope you've gained the confidence to create picture-perfect sweet roll swirls. Ready to take your baking skills to the next level?
- Master the Swirl: Practice your swirling technique with different fillings – experiment with fruits, nuts, or even chocolate chips! This is your chance to perfect your personal swirl.
- Share Your Success: Post a picture of your beautiful creations on social media using #BakeWithEaseSwirls – let's inspire each other!
- Explore More Recipes: Dive into our recipe section for even more delicious baking adventures on BakeWithEase.com.
What creative filling combinations will you try first to perfect your own unique sweet roll swirl?