
Exploring BriocheStyle Sweet Rolls: A Richer Intermediate Bake

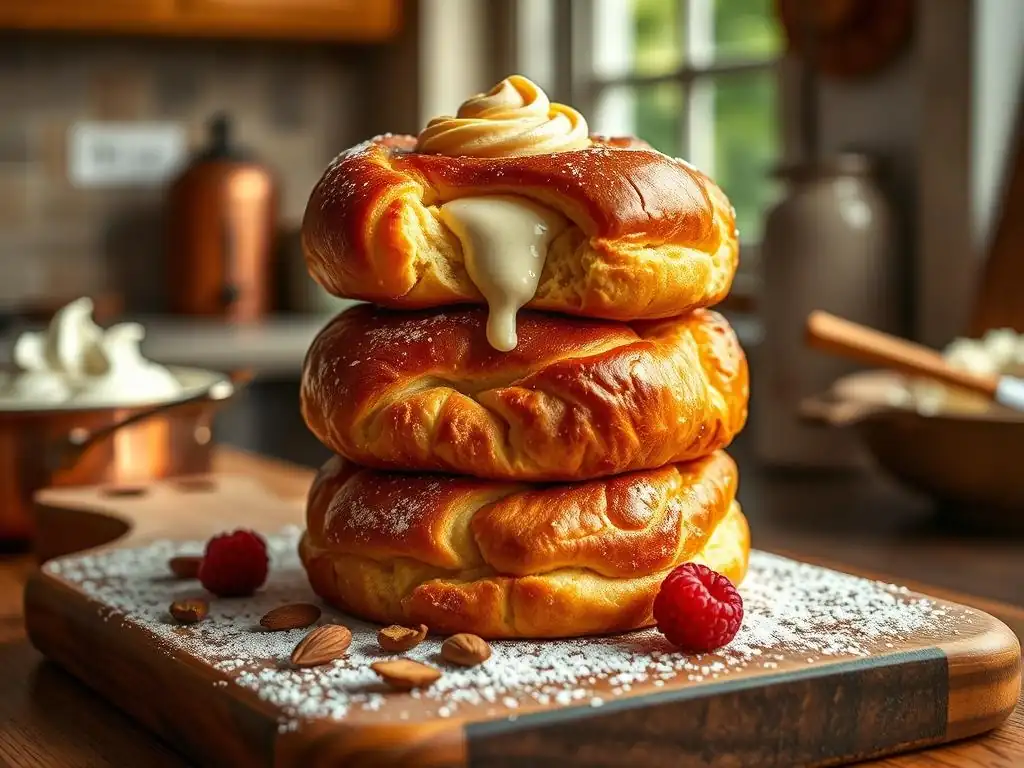
Welcome to BakeWithEase, your companion in the delightful world of baking! Are you ready to elevate your skills beyond the basics? Dive into our Rich Brioche Sweet Roll Recipe and discover the secrets to crafting these incredibly decadent treats. More than just a recipe, this is an exploration of intermediate baking techniques that will unlock a new level of flavor and texture in your creations. What makes our brioche so special? Let's find out...
- Crafting Exquisite Cinnamon Rolls: A Journey into Enriched Dough Baking
- Introduction to Cinnamon Rolls: Elevated Baking
- Mastering the Enriched Dough Cinnamon Roll Recipe: A Detailed Guide
- Crafting the Enriched Dough: The Foundation of Success
- Preparing the Cinnamon Roll Filling: A Symphony of Flavors
- Assembling and Shaping Your Cinnamon Rolls: A Baker's Touch
- Baking Your Cinnamon Rolls: Achieving Golden Perfection
- Glazing and Finishing Touches: Elevating Flavor and Presentation
- Troubleshooting Common Cinnamon Roll Baking Challenges
- Storing and Reheating Your Cinnamon Rolls: Preserving Freshness
- Elevating Your Baking: Exploring Advanced Techniques
- Conclusion: Savoring Your Homemade Cinnamon Rolls
-
Frequently Asked Questions
- What makes a brioche sweet roll "rich"?
- Is this rich brioche sweet roll recipe suitable for beginners?
- What are some common fillings or toppings for brioche sweet rolls?
- How important is the temperature of the ingredients when making brioche dough?
- What is the best way to store leftover brioche sweet rolls?
- Final Reflection: The Enduring Allure of the Brioche Sweet Roll
- Unleash Your Inner Baker: Master the Art of Brioche!
Crafting Exquisite Cinnamon Rolls: A Journey into Enriched Dough Baking
Introduction to Cinnamon Rolls: Elevated Baking
The Allure of Homemade Cinnamon Rolls: A Baker's Perspective
There's an undeniable magic in homemade cinnamon rolls. The aroma filling your kitchen as they bake, the soft, tender crumb, the gooey cinnamon-sugar filling, and that luscious glaze dripping down the sides – it's an experience that transcends mere baking. For many bakers, mastering the art of cinnamon rolls is a milestone, a step up from simpler quick breads or cakes. It involves understanding yeast, dough development, and temperature control, offering a deeply rewarding challenge. The satisfaction of pulling a tray of golden, puffy rolls from the oven, knowing you created them from scratch, is truly unparalleled.
Beyond the sensory delight, homemade cinnamon rolls offer control over ingredients and quality. You can choose the finest butter, fresh spices, and high-quality flour, resulting in a flavor profile far superior to store-bought versions. This allows for customization, whether adjusting the sweetness, adding different spices like cardamom or nutmeg, or experimenting with fillings and glazes. Embarking on this baking journey is not just about following a recipe; it's about learning the nuances of enriched dough and developing the intuition that turns simple ingredients into something truly exquisite.
Why Enriched Dough Excels in Cinnamon Rolls: Flavor and Texture Explained
Enriched dough, like the type used in a rich brioche sweet roll recipe, is fundamentally different from lean doughs (like baguette dough) because it incorporates significant amounts of fat (butter), eggs, and often sugar and milk. These additions play a crucial role in the final texture and flavor of cinnamon rolls. The fat coats the gluten strands, inhibiting their full development, which results in a softer, more tender crumb compared to the chewy texture of lean breads. Eggs contribute richness, color, and structure, while sugar adds sweetness and helps the dough brown beautifully during baking.
The presence of these enriching ingredients also impacts the dough's keeping quality. The fat and sugar help retain moisture, meaning that rolls made with enriched dough tend to stay soft and fresh for longer than those made with lean doughs. This richness also contributes to a deeper, more complex flavor profile, making each bite of a cinnamon roll a truly decadent experience. Understanding how these ingredients interact within the dough is key to mastering this type of baking and achieving that signature soft, pillowy texture characteristic of the best sweet rolls.
Transforming Baking: From Simple Rolls to Cinnamon Roll Mastery
Moving from simple baking projects to mastering enriched dough cinnamon rolls represents a significant step in a baker's journey. It requires patience, attention to detail, and a willingness to understand the science behind yeast activation, gluten development, and proofing. While a basic quick bread might involve simply mixing ingredients and baking, enriched dough requires specific techniques like kneading (either by hand or mixer) to build structure, careful temperature management for successful rising, and precise timing for baking.
This mastery involves learning to read the dough – understanding what "properly kneaded" feels like, recognizing when the dough has doubled in size during proofing, and knowing how to shape rolls that will bake evenly. Tackling a rich brioche sweet roll recipe builds foundational skills applicable to many other enriched dough pastries, such as challah, babka, or sticky buns. It's a process of refining technique, developing intuition, and gaining confidence in handling more complex doughs, ultimately transforming a casual baker into a more skilled artisan.
Mastering the Enriched Dough Cinnamon Roll Recipe: A Detailed Guide
Ingredients for Superior Enriched Dough: Precise Measurements and Quality
Achieving a truly superior enriched dough for your cinnamon rolls starts with precise measurements and high-quality ingredients. Flour is the backbone; using a bread flour (around 12-14% protein) will provide enough gluten structure to support the richness of the dough and create a good rise, though all-purpose flour (around 10-12% protein) can also work for a slightly more tender result.
Yeast, whether instant or active dry, must be fresh; check the expiration date, as dormant yeast is a common cause of dough failure. For a standard batch yielding about 12 large rolls, you might use around 2 ¼ teaspoons (7 grams) of instant yeast or 2 ¾ teaspoons (9 grams) of active dry yeast.
Butter is a critical component of this rich brioche sweet roll recipe. Unsalted butter is preferred as it gives you control over the salt level in the dough. It should be softened but not melted, ideally around 65-70°F (18-21°C). Eggs add richness and color; use large eggs at room temperature for better emulsification with other ingredients.
Milk, typically whole milk, adds moisture and aids in browning; warming it slightly (to around 100-110°F or 38-43°C) is ideal for activating active dry yeast, but not strictly necessary for instant yeast. Sugar, usually granulated sugar, sweetens the dough and feeds the yeast, while a small amount of salt balances the flavors and controls yeast activity. A typical rich brioche sweet roll recipe might call for approximately 1/2 cup (100 grams) of sugar and 1 teaspoon (5 grams) of salt per 4 cups (500 grams) of flour.
Essential Tools for Cinnamon Roll Creation
Having the right tools makes the process of crafting these delightful sweet rolls much smoother. While not strictly necessary for a simple recipe, for an enriched dough like the one in a rich brioche sweet roll recipe, a stand mixer with a dough hook is highly recommended. Kneading enriched dough by hand can be quite challenging due to its stickiness and richness, and a mixer handles the task efficiently, ensuring proper gluten development in about 8-10 minutes on medium speed, versus 15-20 minutes or more by hand.
Other essential tools include accurate measuring cups and spoons, a digital kitchen scale for precise ingredient weights (especially for flour and sugar), a large mixing bowl for the first proof (ideally glass or plastic as metal can sometimes affect yeast), plastic wrap or a damp kitchen towel to cover the dough during proofing, a rolling pin, a sharp knife or dental floss for cutting the rolls, and a baking pan (a 9x13 inch pan is standard for about 12 rolls, though round pans or individual muffin tins can also be used).
A wire rack for cooling the rolls is also helpful.
Crafting the Enriched Dough: The Foundation of Success
Step 1: Activating the Yeast: Maximizing Dough Lift
The first crucial step in many enriched dough recipes, especially when using active dry yeast, is activating the yeast. This involves dissolving the yeast in a warm liquid, usually milk or water, along with a pinch of sugar. The ideal temperature for this process is typically between 100°F and 110°F (38°C and 43°C).
If the liquid is too cool, the yeast won't activate; if it's too hot, it can kill the yeast. After about 5-10 minutes, the mixture should become foamy and bubbly on the surface, indicating that the yeast is alive and active. If it doesn't foam, the yeast may be old or the liquid temperature was incorrect, and you'll need to start this step over with fresh yeast.
While instant yeast doesn't technically require blooming and can often be mixed directly with the dry ingredients, activating it first in warm liquid can still give you confidence that it's viable. This step is particularly important for ensuring maximum dough lift and achieving that light, airy texture in your finished rich brioche sweet roll recipe. Using a thermometer to check the liquid temperature removes guesswork and significantly increases the likelihood of successful yeast activation.
Step 2: Blending Dry and Wet Components: Achieving Ideal Consistency
Once the yeast is active (or if using instant yeast, combined with dry ingredients), the next step involves blending the dry and wet components of the dough. In a stand mixer bowl, whisk together the flour, sugar, and salt.
In a separate bowl or directly with the activated yeast mixture, whisk together the warm milk, eggs, and melted butter (if adding melted butter at this stage, though typically butter is added later in enriched doughs like this rich brioche sweet roll recipe). Gradually add the wet ingredients to the dry ingredients while mixing on a low speed with the dough hook.
Continue mixing until a shaggy dough forms and pulls away from the sides of the bowl. The consistency should be slightly sticky but not overly wet. If the dough appears too dry, you can add a tablespoon of milk at a time; if too wet, add a tablespoon of flour at a time, mixing until the correct consistency is achieved. This initial blending ensures that all ingredients are evenly distributed before the more intensive kneading process begins.
Step 3: Integrating Butter: Unveiling Richness and Tenderness
Incorporating softened butter is a defining characteristic of enriched doughs and is key to the tenderness of a rich brioche sweet roll recipe. After the initial dough has come together and begun to develop some gluten (often after a few minutes of initial kneading), the softened butter is added gradually, piece by piece, while the mixer continues to run on low speed. This process is known as "Beurrage" in classic French baking. The dough will initially look messy and may even separate, but as the mixer continues, the butter will be fully incorporated.
Adding butter gradually allows the gluten network to develop around the fat, rather than the fat inhibiting gluten formation from the start. This results in a dough that is both rich and has sufficient structure to rise well. Once all the butter is incorporated, the dough will become smooth, elastic, and shiny. This stage is critical for achieving the signature soft, melt-in-your-mouth texture of these sweet rolls.
Step 4: Kneading the Dough: Strengthening Gluten Development
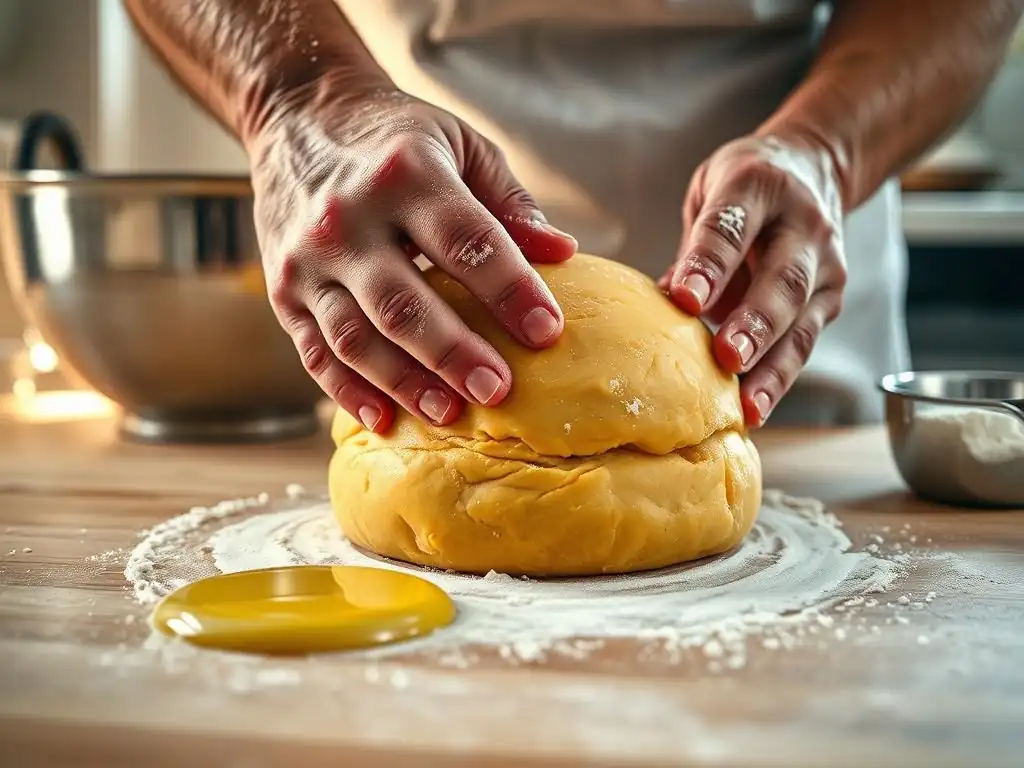
Kneading is the process that develops the gluten network within the dough, providing the structure needed for the dough to rise and hold its shape. For an enriched dough like this rich brioche sweet roll recipe, proper kneading is essential. Using a stand mixer with a dough hook, knead the dough on medium speed for about 8-10 minutes after the butter has been fully incorporated. The dough should become smooth, elastic, and pass the "windowpane test" – when a small piece of dough is stretched thinly, you should be able to see light through it without it tearing immediately.
If kneading by hand, this process will take longer, potentially 15-20 minutes or more. Flour your hands and a clean surface lightly and fold the dough onto itself, pushing it away with the heel of your hand, then repeating. The dough will initially be sticky, but as gluten develops, it will become less so. Proper kneading ensures the dough can trap the carbon dioxide produced by the yeast, leading to a light and airy final product.
Step 5: The First Proof: Promoting Dough Expansion
The first proof, or bulk fermentation, is a crucial resting period where the yeast produces carbon dioxide, causing the dough to expand significantly. After kneading, shape the dough into a ball and place it in a lightly greased large bowl. Turn the dough to coat it with grease, then cover the bowl tightly with plastic wrap or a damp kitchen towel to prevent it from drying out. Place the bowl in a warm, draft-free place. An oven turned off with the light on is an ideal spot, typically reaching 75-80°F (24-27°C).
The dough should rise until it has roughly doubled in size. This usually takes between 1 and 2 hours, depending on the room temperature and the activity of your yeast. Don't rush this process; sufficient proofing is essential for a light texture. You can test if the dough is ready by gently pressing two fingers into it; if the indentations remain, the dough is sufficiently proofed. If they spring back immediately, it needs more time.
Preparing the Cinnamon Roll Filling: A Symphony of Flavors
Classic Cinnamon-Sugar Filling: A Timeless Favorite
The heart of any cinnamon roll is its filling, and the classic cinnamon-sugar combination remains a timeless favorite for a reason. This simple yet incredibly flavorful filling typically consists of softened butter, granulated sugar (or brown sugar for deeper flavor), and a generous amount of ground cinnamon.
A common ratio is about 1/2 cup (100 grams) of softened butter, 1 cup (200 grams) of sugar, and 2-3 tablespoons (15-22 grams) of ground cinnamon for a batch of 12 rolls. Some recipes also include a pinch of salt or a touch of flour to help absorb moisture and prevent the filling from leaking out during baking.
To prepare the classic filling, simply cream together the softened butter and sugar until well combined. Then, stir in the cinnamon until evenly distributed. The consistency should be spreadable. Using softened, not melted, butter is important as it helps the filling stay in place when the dough is rolled and sliced. The heat of the oven will melt the butter during baking, creating that signature gooey layer within the roll.
Expanding Flavor Profiles: Salted Caramel Pecan, Spiced Apple Crumble
While the classic filling is beloved, exploring other flavor profiles can elevate your rich brioche sweet roll recipe to new heights. A popular variation is Salted Caramel Pecan. This involves spreading a layer of salted caramel sauce over the dough before sprinkling it with chopped toasted pecans and a cinnamon-sugar mixture. The combination of sweet caramel, nutty pecans, and warm cinnamon creates a decadent and complex flavor profile.
Another delightful option is Spiced Apple Crumble. This filling uses finely diced apples (such as Granny Smith or Honeycrisp), cooked slightly with brown sugar, cinnamon, nutmeg, and a touch of lemon juice until softened. This apple mixture is then spread over the dough, sometimes topped with a streusel-like crumble made from flour, butter, sugar, and spices. This variation offers a taste reminiscent of apple pie within the soft, rich framework of the sweet roll. Experimenting with these fillings allows you to customize your rolls to suit different tastes and seasons.
Tips for a Lusciously Moist and Flavor-Packed Filling
Achieving a lusciously moist and flavor-packed filling is key to a truly exquisite cinnamon roll. One important tip is to use enough filling! Don't be shy with the cinnamon-sugar mixture; a generous layer ensures flavor in every bite. For the classic filling, ensure your butter is properly softened (not melted) so it spreads easily but doesn't run off the dough. Using brown sugar instead of granulated sugar adds moisture and a deeper, caramel-like flavor.
Adding a tablespoon or two of flour or cornstarch to the cinnamon-sugar mixture can help absorb some of the butter as it melts during baking, creating a thicker, gooier layer rather than a greasy one. If using fruit fillings like apple, cooking them slightly beforehand helps reduce excess moisture that could make the dough soggy. For caramel fillings, ensure the caramel isn't too thin. Finally, consider adding a pinch of salt to any sweet filling – it helps to balance the sweetness and enhance the other flavors, creating a more complex and satisfying taste.
Assembling and Shaping Your Cinnamon Rolls: A Baker's Touch
Rolling the Dough: Maintaining Even Thickness
After the first proof, gently punch down the enriched dough to deflate it. Turn the dough out onto a lightly floured surface. Using a rolling pin, roll the dough into a large rectangle. The ideal size and thickness depend on how many rolls you want and how many swirls you prefer. For a standard batch of 12 rolls in a 9x13 pan, aim for a rectangle approximately 12 inches wide and 18-20 inches long (about 30 cm by 45-50 cm), with a thickness of about 1/4 to 1/3 inch (around 0.6-0.8 cm).
Maintaining an even thickness across the entire rectangle is crucial for uniform baking and consistent swirl patterns in your finished rolls. Uneven dough will result in some rolls being thicker than others, leading to varying baking times and textures. Take your time rolling, and use gentle, even pressure. If the dough springs back excessively, let it rest for 5-10 minutes to allow the gluten to relax before continuing to roll.
Spreading the Filling: Achieving Uniform Flavor Distribution
Once the dough is rolled into the desired rectangle, it's time to spread the filling evenly over the surface. Leave a small border (about ½ inch or 1 cm) along one of the long edges uncoated; this edge will be the final seam and helps seal the roll. For a classic cinnamon-sugar filling, spread the softened butter first, going all the way to the edges you want covered, then sprinkle the cinnamon-sugar mixture evenly over the butter. Gently pat it down so it adheres.
For other fillings like fruit or nuts, distribute them as evenly as possible across the buttered surface. Avoid clumping the filling in one area. Uniform distribution ensures that every slice of the roll has a consistent amount of delicious filling, creating a balanced flavor experience in each bite. Use an offset spatula or the back of a spoon to spread the filling smoothly.
Shaping Techniques: From Traditional Swirls to Elegant Variations
The most common shaping technique for cinnamon rolls is the traditional spiral swirl. Starting from the long edge opposite the uncoated border, tightly roll the dough into a log. Try to keep the roll snug to avoid gaps, which can cause the filling to leak during baking. Once rolled into a log, gently pinch the uncoated seam closed along the entire length.
To cut the rolls, you can use a sharp knife, but dental floss or thread often yields cleaner cuts without squishing the dough. Slide a piece of floss under the log, bring the ends up and cross them over the top, then pull to slice through the dough. Cut the log into individual rolls, typically about 1 to 1.5 inches (2.5 to 3.8 cm) thick. For a standard 18-20 inch log, this yields about 12-15 rolls. Arrange the cut rolls in your prepared baking pan, leaving some space between them for expansion during the second proof and baking.
The Second Proof: Optimizing Fluffiness and Volume
The second proof is where the shaped rolls get their final rise before baking, resulting in a light, fluffy texture. Place the rolls in your prepared baking pan, cover the pan loosely with plastic wrap or a clean kitchen towel, and let them rise in a warm, draft-free place. Again, a turned-off oven with the light on works well.
This proof typically takes 45 minutes to 1.5 hours, depending on the warmth of your proofing environment. The rolls should expand significantly and become puffy, nearly touching each other in the pan. They won't quite double in size again, but they should look noticeably larger and softer. This final rise is crucial for achieving the desired volume and tender crumb in your rich brioche sweet roll recipe. Don't over-proof, as this can lead to a loss of structure and a dough that collapses during baking.
Baking Your Cinnamon Rolls: Achieving Golden Perfection
Oven Temperature and Baking Duration: Precision for Optimal Results
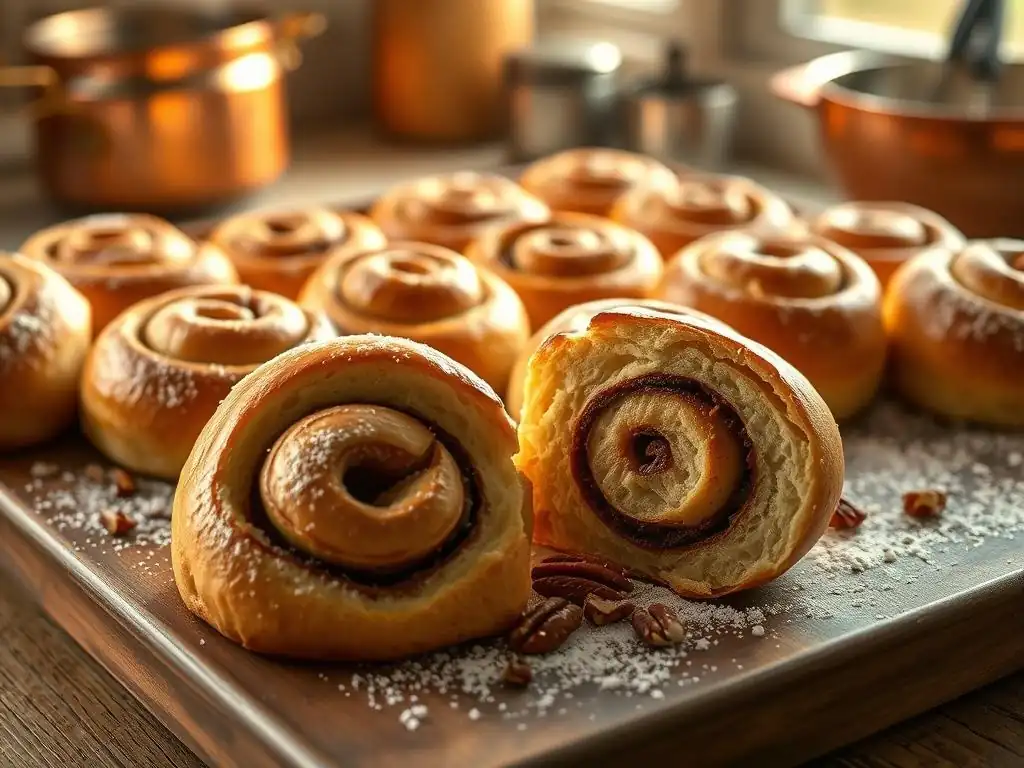
Baking at the correct temperature for the appropriate duration is key to achieving perfectly cooked cinnamon rolls – golden on the outside, tender and gooey on the inside. For most rich brioche sweet roll recipes, a baking temperature of 350°F (175°C) is standard. This moderate temperature allows the rolls to bake through evenly without burning the exteriors before the centers are done.
Baking time will vary depending on the size of your rolls and your specific oven, but typically ranges from 20 to 30 minutes for standard-sized rolls in a 9x13 inch pan. Smaller rolls or those baked in individual muffin cups may bake faster. It's crucial to monitor the rolls closely during the last 5-10 minutes of baking to prevent over-browning.
Monitoring the Rolls: Preventing Over-Browning and Dryness
Preventing over-browning and dryness requires vigilance while the rolls are in the oven. Check on the rolls around the 20-minute mark. They should be starting to turn a light golden brown on top and around the edges. If the tops are browning too quickly but you suspect the centers aren't fully baked, you can loosely tent the pan with aluminum foil. This reflects heat away from the tops, allowing the insides to continue cooking.
The rolls are done when they are a beautiful golden brown across the top and feel set. You can gently lift one from the edge of the pan to check the bottom; it should also be golden. An internal temperature of around 190-200°F (88-93°C) indicates they are fully baked, but often visual cues are sufficient. Over-baking is a common cause of dry, tough rolls, so err on the side of slightly under-baking if you're unsure, as they will continue to cook slightly from residual heat after being removed from the oven.
Achieving a Beautiful Golden-Brown Crust: Secrets Revealed
A beautiful golden-brown crust isn't just for aesthetics; it contributes to the overall texture and flavor of your cinnamon rolls. Several factors contribute to this. Firstly, the sugar and milk in the enriched dough promote Maillard reactions and caramelization during baking, creating that desirable color. Ensuring your dough has sufficient sugar content is important.
Secondly, proofing the rolls adequately allows them to expand, exposing more surface area to the heat. Thirdly, the oven temperature plays a role; 350°F (175°C) is usually hot enough to achieve browning without being so hot that the outside burns before the inside cooks. Finally, avoiding overcrowding the pan allows hot air to circulate around the rolls, promoting even browning. If using a dark metal pan, the bottoms and sides may brown faster than the tops; ceramic or glass pans tend to bake more evenly.
Glazing and Finishing Touches: Elevating Flavor and Presentation
Classic Cream Cheese Glaze: The Perfect Finishing Touch
For many, a cinnamon roll isn't complete without a generous swirl of classic cream cheese glaze. This tangy, sweet glaze perfectly complements the richness of the roll and the spice of the filling.
A standard recipe involves beating softened cream cheese with softened butter (optional but adds richness), then gradually mixing in powdered sugar and a splash of milk or vanilla extract until smooth and spreadable or pourable, depending on desired consistency. For about 12 rolls, you might use 4 ounces (113 grams) of cream cheese, 2-4 tablespoons (28-56 grams) of butter, 2-3 cups (240-360 grams) of powdered sugar, and 1-3 tablespoons (15-45 ml) of milk or vanilla.
The key to a smooth glaze is ensuring the cream cheese and butter are very soft, ideally at room temperature, before mixing. Sift the powdered sugar to prevent lumps. Add liquid gradually until the desired consistency is reached. This glaze is best applied while the rolls are still warm, but not piping hot. The warmth helps the glaze melt slightly and seep into the crevices of the roll, creating that irresistible gooey layer.
Exploring Glaze Options: Brown Butter Glaze, Coffee Glaze
While the classic cream cheese glaze is popular, exploring other glaze options can add unique twists to your rich brioche sweet roll recipe. A Brown Butter Glaze offers a nutty, caramelized flavor that adds depth. To make it, melt butter in a saucepan over medium heat, swirling occasionally, until it turns amber brown and smells nutty. Remove from heat, let it cool slightly, then whisk in powdered sugar, milk or cream, and vanilla extract until smooth.
For coffee lovers, a Coffee Glaze provides a subtle bitterness that balances the sweetness. This can be made by whisking powdered sugar with strongly brewed coffee (cooled) or espresso instead of milk. The intensity of the coffee flavor can be adjusted by the amount used. These alternative glazes allow for creative expression and cater to different flavor preferences.
Garnishing Ideas: Enhancing Visual Appeal
Beyond the glaze, simple garnishes can enhance the visual appeal of your homemade cinnamon rolls. A light dusting of ground cinnamon or nutmeg over the glaze adds a touch of color and reinforces the spice theme. Chopped toasted nuts, such as pecans or walnuts, sprinkled over the glaze add texture and a rustic look, particularly fitting for variations like salted caramel pecan rolls.
A drizzle of extra caramel sauce or a sprinkle of flaky sea salt (especially on salted caramel versions) can also make the rolls look professionally finished. Fresh berries or a sprinkle of citrus zest can add a pop of color and brightness, especially if your filling incorporates fruit flavors. These small touches elevate the presentation and make your exquisite cinnamon rolls even more inviting.
Troubleshooting Common Cinnamon Roll Baking Challenges
Dough Failing to Rise: Identifying and Resolving Issues
One of the most frustrating issues in yeast baking is when the dough fails to rise adequately during proofing. The most common culprit is inactive or dead yeast. Ensure your yeast is fresh and hasn't expired. If using active dry yeast, always activate it in warm liquid (100-110°F / 38-43°C) with a pinch of sugar first; if it doesn't foam within 10 minutes, the yeast is likely dead.
Other factors include the temperature of the liquid used; water or milk that is too hot will kill the yeast. The proofing environment itself is also critical; the dough needs a warm, draft-free place (ideally 75-80°F / 24-27°C) to rise properly. Cold temperatures significantly slow down yeast activity. Ensure your ingredients, especially milk and eggs, are at room temperature before mixing, as cold ingredients can inhibit yeast. Finally, using too much salt can also hinder yeast activity, so measure carefully.
Dry or Hard Rolls: Preventing Over-Baking and Staling
Dry or hard cinnamon rolls are often a result of over-baking. The longer the rolls bake, the more moisture they lose. To prevent this, bake your rolls only until they are golden brown and cooked through, using the visual cues and recommended baking time (20-30 minutes at 350°F / 175°C) as a guide. Tent the pan with foil if the tops are browning too quickly.
Ensuring your dough is properly enriched with sufficient butter and eggs (as in a good rich brioche sweet roll recipe) contributes to moisture and tenderness. Over-kneading can also lead to tough rolls, so stop kneading once the dough is smooth and elastic. Staling occurs naturally over time, but enriched doughs stay soft longer. Proper storage is also key; see the storage section for tips.
Uneven Baking: Achieving Consistent Results Across the Pan
Uneven baking means some rolls are perfectly done while others are under- or over-baked. This is frequently caused by hot spots in your oven or placing the pan too close to a heating element. To mitigate oven hot spots, rotate your baking pan halfway through the baking time (e.g., after 10-15 minutes).
Ensuring your rolls are cut to a uniform thickness and arranged in the pan with roughly equal spacing also promotes even baking. Overcrowding the pan restricts air circulation, leading to uneven heat distribution. If using a convection oven, the fan can sometimes cause uneven browning; try reducing the temperature by 25°F (15°C) and checking for doneness earlier. Using a lighter-colored metal pan or a ceramic/glass dish can also help with more even heat transfer compared to dark metal pans.
Storing and Reheating Your Cinnamon Rolls: Preserving Freshness
Proper Storage Techniques: Maintaining Optimal Quality
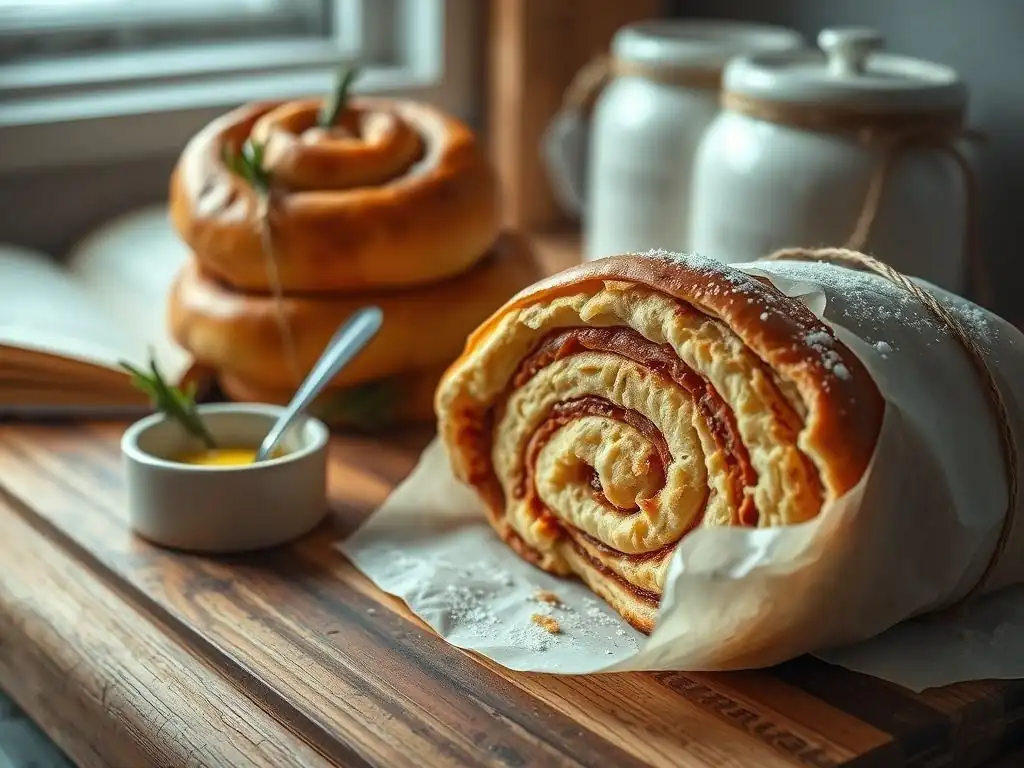
Once your exquisite cinnamon rolls have cooled slightly and been glazed, proper storage is essential to maintain their freshness and soft texture. If they are glazed, allow the glaze to set for a bit before storing. The best way to store cinnamon rolls for short-term freshness (1-2 days) is at room temperature in an airtight container. This prevents them from drying out. A single layer in a container is ideal to prevent them from sticking together, especially if heavily glazed.
For longer storage, cinnamon rolls can be refrigerated for up to a week or frozen for several months. If refrigerating, wrap them tightly in plastic wrap or place them in an airtight container. For freezing, it's best to freeze them unglazed. Once completely cool, wrap individual rolls tightly in plastic wrap, then place them in a freezer-safe bag or container. Glaze can be made fresh when ready to serve the thawed rolls. Frozen glazed rolls can sometimes become sticky or have glaze issues upon thawing.
Reheating Methods: Restoring Warmth and Softness
Reheating homemade cinnamon rolls properly brings back that warm, gooey, just-baked experience. The best method for reheating a single roll or a few rolls is in the microwave. Place a roll on a microwave-safe plate and heat on high for 20-30 seconds. Be careful not to overheat, as this can make them tough. The microwave is quick and effective at restoring softness.
For reheating a larger batch, especially if they are unglazed or if you prefer a slightly crisper exterior, the oven is a great option. Preheat your oven to 300-325°F (150-160°C). Place the rolls in a baking dish and cover tightly with aluminum foil to trap moisture. Heat for 10-15 minutes, or until warmed through. This method works well for both refrigerated and thawed rolls. Thawed rolls may take slightly longer. Avoid reheating glazed rolls directly in a hot oven without covering, as the glaze can melt excessively or burn.
Elevating Your Baking: Exploring Advanced Techniques
Incorporating Sourdough Starter into Cinnamon Roll Dough
For bakers looking to deepen their skills and flavor profiles, incorporating sourdough starter into a rich brioche sweet roll recipe is an excellent advanced technique. A sourdough starter adds a subtle tang and complexity to the dough that complements the sweetness of the filling and glaze. It also contributes to a lighter, more open crumb structure and can even improve the keeping quality of the rolls.
To do this, you typically replace a portion of the flour and liquid in your recipe with active sourdough starter (fed and bubbly). The exact ratio varies depending on the starter's hydration and activity level, but a common approach is to substitute about 150-200 grams of active starter for an equal weight of flour and liquid from the main recipe.
This often requires reducing the amount of commercial yeast used, or sometimes eliminating it entirely for a slower, solely sourdough rise. The proofing times will be significantly longer with sourdough, often requiring an overnight cold proof in the refrigerator for optimal flavor development and easier handling.
Adding Dried Fruit or Chocolate Chips for Enhanced Flavor
Beyond the classic cinnamon-sugar, adding mix-ins to the dough itself can enhance the flavor and texture of your sweet rolls. Incorporating dried fruit, such as raisins, cranberries, or chopped apricots, adds pockets of chewy texture and concentrated sweetness. About 1/2 to 1 cup (80-160 grams) of dried fruit can be gently kneaded into the dough during the final stages of mixing or folding. Soaking dried fruit in hot water or rum for 10-15 minutes beforehand can plump them up and prevent them from drying out the dough.
For chocolate lovers, chocolate chips or chunks can be added to the dough. Dark chocolate provides a nice contrast to the sweetness of the dough and filling. Again, about 1/2 to 1 cup (80-160 grams) is a good starting point. These additions transform the basic rich brioche sweet roll recipe into new delightful variations, offering surprising bursts of flavor within the soft, tender crumb.
Conclusion: Savoring Your Homemade Cinnamon Rolls
The Joy of Baking from Scratch
There is immense joy and satisfaction in baking from scratch, especially when it comes to something as beloved as cinnamon rolls. From the initial steps of activating the yeast and bringing together simple ingredients to the final flourish of drizzling glaze over warm rolls, the process is a rewarding journey. Mastering an enriched dough, akin to a rich brioche sweet roll recipe, is a significant achievement for any home baker, building confidence and skill with yeast doughs. The aroma that fills your home while they bake is a testament to your effort, creating a warm and inviting atmosphere.
Beyond the process, the result itself – a tray of perfectly baked, tender, and gooey cinnamon rolls – is a source of pride. Knowing that you controlled every ingredient and step, producing something so delicious, is deeply satisfying. This journey into enriched dough baking opens up a world of possibilities for other pastries and breads, making your baking repertoire richer and more varied.
Perhaps the greatest pleasure derived from baking exquisite cinnamon rolls is the act of sharing them. A batch of warm, homemade cinnamon rolls is a perfect treat for family breakfasts, brunch with friends, or simply as a thoughtful gift. The smiles and enjoyment they bring to others make the effort entirely worthwhile. There's a unique connection forged over shared food, and these sweet, comforting rolls are particularly adept at creating those moments.
Whether served straight from the oven, warm and gooey, or presented beautifully glazed, your homemade cinnamon rolls are more than just a pastry; they are an expression of care and skill. Embracing the challenge of a rich brioche sweet roll recipe allows you to create something truly special, ready to be savored and shared, spreading warmth and happiness one swirl at a time.
Frequently Asked Questions
What makes a brioche sweet roll "rich"?
Brioche dough is enriched with a high percentage of butter and eggs, creating a tender, flavorful, and rich final product. This richness distinguishes it from other sweet roll doughs.
Is this rich brioche sweet roll recipe suitable for beginners?
While the recipe uses readily available ingredients, it's considered an intermediate bake due to the techniques involved in working with enriched doughs. Beginners may prefer starting with simpler recipes first.
What are some common fillings or toppings for brioche sweet rolls?
Popular options include cinnamon sugar, fruit jams, cream cheese frosting, and nutella. The possibilities are endless, allowing for creative customization.
How important is the temperature of the ingredients when making brioche dough?
Using cold butter is crucial for creating flaky layers and controlling the dough's temperature during mixing. Room temperature ingredients may lead to a greasy, unmanageable dough.
What is the best way to store leftover brioche sweet rolls?
Store them in an airtight container at room temperature for up to 2 days, or freeze them for longer storage. Reheating them slightly before serving will restore some of their original softness.
Final Reflection: The Enduring Allure of the Brioche Sweet Roll
The art of baking, particularly the creation of truly exceptional pastries, is a testament to patience, precision, and a deep appreciation for the simple pleasures in life. The journey through the intricacies of crafting a rich brioche sweet roll, as explored in this article, highlights not just a recipe, but a process that connects us to culinary traditions and the satisfaction of creating something beautiful and delicious. This isn't just about a recipe; it's about understanding the nuances of flavor and texture that elevate a simple roll into a truly memorable experience.
The enduring appeal of the brioche sweet roll lies in its ability to transcend mere sustenance and become a symbol of comfort, celebration, and shared moments. It's a recipe passed down through generations, adapted and refined, yet always retaining its core essence. The rich, buttery aroma alone evokes feelings of warmth and nostalgia. Baking is at once child's play and adult joy. And love, of course.
This quote perfectly encapsulates the emotional connection we forge with the process and the final product. The time invested, the careful attention to detail, all contribute to a final result that is far greater than the sum of its parts.
Now, consider your own kitchen. Think about the possibilities that await you. Don't be intimidated by the seemingly complex steps; embrace the challenge. The reward – the golden-brown crust, the soft, yielding crumb, the intoxicating aroma filling your home – is well worth the effort. Take the time to savor each stage of the process, to appreciate the transformation of simple ingredients into something truly extraordinary. The next time you bake, remember the journey, the connection, and the joy of creating a rich brioche sweet roll – a testament to the enduring power of culinary artistry.
Unleash Your Inner Baker: Master the Art of Brioche!
Thanks for joining us on this delicious journey into the world of brioche! We hope you gained valuable insights and inspiration for your next baking adventure. Now it's time to put your newfound knowledge to the test.
- Bake your own magnificent brioche rolls: Use the recipe and tips from the article to create your own batch of these delectable treats. Don't be afraid to experiment!
- Share your baking triumph: Post a picture of your beautiful brioche rolls on social media and tag us – we’d love to see your creations!
- Explore other enriched doughs: Try your hand at making croissants, challah, or even panettone – the possibilities are endless!
Ready to transform your kitchen into a bakery? What unique twist will you add to your first batch of brioche rolls?