
Mastering High Hydration Sourdough: Secrets to a Wet Dough Success


Welcome to BakeWithEase, your trusted companion on your baking journey! Ever wondered how to achieve that airy, open crumb in your sourdough bread? Prepare to unravel the secrets! This article dives deep into the art of creating and maintaining a high hydration sourdough starter. Discover the techniques and tips you need to succeed, even if you've struggled with wet doughs before. Ready to elevate your sourdough game? Let's get baking!
Working with a high hydration sourdough starter and the resulting wet dough can feel intimidating at first, but it unlocks incredible possibilities in baking, leading to loaves with wonderfully open crumbs and thin, crispy crusts. This journey into the world of high hydration sourdough is rewarding, pushing your baking skills to new levels.
- Understanding High Hydration Sourdough Starter
- Essential Techniques for High Hydration Sourdough Baking
- Achieving the Perfect High Hydration Sourdough Starter
- High Hydration Sourdough Recipe: A Step-by-Step Guide
- Troubleshooting High Hydration Sourdough
- Advanced Tips for High Hydration Sourdough Mastery
- Frequently Asked Questions
- Final Reflection: The Transformative Power of a Wet Dough
- Unleash Your Inner Sourdough Master!
Understanding High Hydration Sourdough Starter
Diving into high hydration sourdough begins with understanding what makes it different, starting with your leavening agent. A vigorous high hydration sourdough starter is the engine that drives the whole process, providing the lift needed for such a wet dough.
What is High Hydration Sourdough? Defining the Wet Dough
High hydration in sourdough refers to the ratio of water to flour in the dough recipe. Standard bread doughs often range from 60% to 70% hydration. High hydration doughs typically start at 75% hydration and can go much higher, sometimes reaching 90% or even 100% (equal weights of water and flour). This higher water content results in a very wet, often sticky dough that behaves quite differently from lower hydration doughs.
For example, a recipe using 500g of flour at 80% hydration would require 400g of water (500g * 0.80). Compare this to a 65% hydration dough using the same flour amount, which would only need 325g of water. This seemingly small difference in water volume dramatically changes the dough's texture and handling characteristics, demanding different techniques throughout the mixing, fermentation, and shaping stages.
The Benefits of Baking with High Hydration Sourdough
Baking with a high hydration sourdough starter and its associated wet dough offers several distinct advantages that contribute to superior bread quality. One of the most sought-after benefits is the development of a more open and irregular crumb structure, often described as having large, beautiful holes. This is largely due to the increased water allowing for greater gluten development and expansion during fermentation and baking.
Furthermore, the higher water content contributes to a thinner, crispier crust. As the dough bakes, the excess water turns to steam, helping to expand the loaf and creating that desirable crackly exterior. High hydration loaves also tend to stay fresh longer because of the increased moisture retained within the crumb. Bakers aiming for that signature airy, light texture and a truly professional-looking loaf often gravitate towards mastering high hydration techniques.
Challenges of Working with High Hydration Dough: Dough Stickiness and Shaping Difficulties
While the results are rewarding, working with a high hydration sourdough starter and its dough presents unique challenges, primarily centered around its stickiness. Dough at 80% hydration or higher can feel more like a thick batter than traditional bread dough, making it notoriously difficult to handle without it sticking to your hands, work surface, and tools. This stickiness requires a shift in technique, often relying more on wet hands or minimal flour dusting rather than dry flouring, which can lower the overall hydration.
Shaping these slack, wet doughs is another hurdle. They lack the inherent structure of lower hydration doughs and tend to spread rather than hold their shape. Achieving a tight surface tension necessary for good oven spring requires practice and specific, gentle techniques like coil folds and careful handling. Many bakers initially struggle with getting a high hydration loaf to maintain its form during proofing and transfer to the oven, leading to flatter loaves.
Essential Techniques for High Hydration Sourdough Baking

Mastering high hydration sourdough isn't just about the recipe; it's about employing specific techniques that manage the wetness and build the necessary dough strength. These methods are crucial for transforming a sticky mass into a beautifully structured loaf.
Autolyse: The Key to Hydrating Flour Effectively
Autolyse is a fundamental technique for high hydration doughs. It involves mixing only the flour and water (and sometimes the levain, though a 'true' autolyse is just flour and water) and letting it rest for 20 minutes to several hours before adding the salt and the rest of the leavening (if not included initially). This resting period allows the flour to fully hydrate and enzyme activity to begin breaking down starches, which helps gluten development without mechanical kneading.
For an 85% hydration dough, performing an autolyse for 30-60 minutes can dramatically change the dough's texture. After the rest, the dough will be noticeably smoother, more extensible, and less shaggy, even before any kneading or folding begins. This initial hydration and relaxation make the subsequent steps of incorporating the high hydration sourdough starter and salt, and then developing gluten, much easier and more efficient.
Mastering the Stretch and Fold Technique for High Hydration Dough
Stretch and folds are the primary method for developing gluten and strength in high hydration doughs, replacing traditional kneading. This technique involves gently stretching a portion of the dough up and folding it over itself, rotating the bowl, and repeating. This process traps air and aligns the gluten strands, building structure in the wet mass.
Typically, a series of stretch and folds are performed during the initial part of bulk fermentation, often every 30-60 minutes for the first 2-3 hours. For a very wet dough (like 85-90% hydration), you might perform 4-6 sets of folds. Each set contributes to the dough becoming progressively smoother, more elastic, and capable of holding its shape better, indicating that the high hydration sourdough starter is actively working and the gluten network is strengthening.
Coil Folds: Strengthening the Dough Structure
Coil folds are another valuable technique for strengthening high hydration dough, particularly when the dough is very slack and difficult to stretch upwards. This method involves wetting your hands, sliding them under the center of the dough in the proofing container, and lifting the dough gently so the ends dangle. As you lift, the dough folds under itself naturally due to gravity. You then lower it back into the container and repeat from the other direction.
Coil folds are less disruptive than traditional stretch and folds and are excellent for building structure in extremely wet doughs without tearing the delicate gluten network. They are often used after the initial stretch and fold series or in place of them for very high hydration levels. Performing 2-4 sets of coil folds during bulk fermentation can significantly improve the dough's ability to hold its shape during proofing and baking, complementing the work done by the active high hydration sourdough starter.
Handling Sticky Dough: Tips and Tricks for a Smooth Process
Working with sticky, high hydration sourdough is perhaps the biggest hurdle for many bakers. The key is to minimize contact with dry flour and utilize water or a bench scraper. Keeping your hands wet when performing stretch and folds or coil folds prevents the dough from sticking to you like glue. A small bowl of water nearby is essential for dipping your hands between manipulations.
For transferring or dividing the dough, a bench scraper is your best friend. Lightly wetting the bench scraper or the work surface (rather than flouring heavily) allows you to manage the sticky mass more effectively. Some bakers also find success by handling the dough directly in its proofing container as much as possible during the early stages of bulk fermentation, reducing the need to transfer it. Embrace the stickiness and learn to work with the dough's wetness, not against it.
Achieving the Perfect High Hydration Sourdough Starter
The success of a high hydration loaf is intrinsically linked to the vitality of your high hydration sourdough starter. A weak or inactive starter will simply not provide the necessary lift to handle such a wet and heavy dough.
Maintaining an Active and Healthy High Hydration Starter
Maintaining a healthy high hydration sourdough starter requires consistent feeding and attention. Typically, a high hydration starter is kept at 100% hydration (equal weights of flour and water). Regular feeding, ideally daily if kept at room temperature, ensures the yeast and bacteria remain active and balanced. Using a consistent feeding ratio, such as 1:1:1 (starter:water:flour by weight), is a common practice.
If you bake less frequently, storing your high hydration sourdough starter in the refrigerator is an option. However, it will need to be fed and allowed to become active at room temperature for several hours (often 4-12 hours, depending on the temperature and feeding ratio) before being used in a recipe. Signs of a healthy starter include predictable rising and falling after feeding, a bubbly texture, and a pleasant, slightly tangy aroma.
Feeding Schedule for Optimal Starter Performance
The feeding schedule for your high hydration sourdough starter depends heavily on how you store it and how soon you need it for baking. For a starter kept at room temperature, feeding it daily, or even twice a day in very warm environments (above 78°F or 26°C), is necessary to keep it vigorous. A typical feeding ratio might be 1 part starter, 2 parts water, and 2 parts flour (1:2:2) to provide enough food for a longer fermentation cycle between feedings.
If your high hydration sourdough starter lives in the refrigerator, you might only need to feed it once a week. When you plan to bake, take it out, feed it generously (perhaps a 1:3:3 or 1:4:4 ratio to ensure strong activity), and let it sit at room temperature until it doubles or triples in size and shows peak activity, which could take 6-12 hours depending on the ambient temperature and the starter's health. Using the starter at its peak ensures maximum leavening power for your wet dough.
Recognizing Signs of a Ready-to-Use Starter
Knowing when your high hydration sourdough starter is ready to be used in a recipe is crucial for successful baking. The most reliable indicator is its volume: a ready starter should have visibly doubled or even tripled in size since its last feeding. You'll also notice many bubbles throughout the starter, not just on the surface.
Another common test is the "float test." Gently take a small spoonful of the starter and drop it into a glass of water. If the starter floats, it's generally considered active enough for baking, indicating it has produced sufficient gas. If it sinks, it likely needs more time to ferment and build strength. A high hydration sourdough starter should also have a pleasant, slightly tangy but not overwhelmingly acidic smell when it's at its peak.
High Hydration Sourdough Recipe: A Step-by-Step Guide

Let's walk through the process of creating a high hydration sourdough loaf. This guide assumes you have an active, ready-to-use high hydration sourdough starter.
Ingredients for a High Hydration Sourdough Loaf
A basic high hydration sourdough loaf requires just four ingredients: flour, water, salt, and your active high hydration sourdough starter. The hydration percentage will dictate the exact water amount relative to the flour.
Here's a common starting point for an 80% hydration loaf using 500g of flour:
- 500g Strong Bread Flour
- 400g Water (80% of flour weight)
- 100g Active High Hydration Sourdough Starter (20% of flour weight)
- 10g Salt (2% of flour weight)
You can adjust the hydration up or down slightly as you gain experience. Using good quality bread flour with a protein content of 12-14% is recommended, as it can better absorb the high amount of water and develop a strong gluten network.
Mixing and Kneading the Wet Dough
Mixing high hydration dough is different from standard doughs. Start with the autolyse phase: combine the flour and 380g of the water (reserve 20g for later) in a bowl and mix until no dry flour remains. Let this rest for 30-60 minutes. After the rest, add the 100g of active high hydration sourdough starter and the 10g of salt. Use the remaining 20g of water to help incorporate the salt and starter into the dough.
Mix everything together with your hands or a dough whisk until just combined. The dough will be very wet and shaggy. Resist the urge to add more flour. The "kneading" will primarily happen through subsequent folding techniques during bulk fermentation, not intensive initial mixing.
Bulk Fermentation: Managing the Dough's Rise
Bulk fermentation is where the magic happens, driven by your high hydration sourdough starter. This phase allows the dough to develop flavor, structure, and gas. Place the mixed dough in a clean, lightly oiled container. The duration of bulk fermentation depends heavily on the ambient temperature and the strength of your high hydration sourdough starter.
At a room temperature of 75-80°F (24-27°C), bulk fermentation might take 4-6 hours. During the first 2-3 hours, perform 4-6 sets of stretch and folds or coil folds every 30-45 minutes to build dough strength. After the folding period, let the dough rest undisturbed until it has increased in volume by about 50-75% and shows signs of activity like bubbles on the surface and along the sides of the container.
Shaping High Hydration Sourdough: A Gentle Approach
Shaping high hydration dough requires a light touch and a surface with minimal stickiness. Turn the dough out gently onto a lightly floured or wet surface. Pre-shape the dough into a rough ball or log and let it rest for 20-30 minutes (this is called the bench rest). This allows the gluten to relax, making the final shaping easier.
For the final shape, handle the dough gently to avoid degassing it. Techniques vary (e.g., boule, batard), but the goal is to create surface tension without tearing the dough. Use a bench scraper to help manage the sticky edges. Quickly transfer the shaped dough seam-side up into a well-floured banneton or proofing basket. The banneton provides support for the wet dough during its final proof.
Proofing Techniques for High Hydration Sourdough
Proofing, or the final rise, prepares the shaped dough for baking. High hydration doughs benefit greatly from cold proofing in the refrigerator. After shaping and placing the dough in the banneton, cover it and refrigerate for 8-16 hours (or even up to 24 hours). Cold proofing slows down fermentation, developing more complex flavors and making the sticky dough much easier to handle and score when cold.
Alternatively, you can proof at room temperature for 1-3 hours, but this requires careful monitoring as high hydration dough can overproof quickly. The dough should look puffy but not overly expanded. A gentle poke test is helpful: if it springs back slowly, it's likely ready. If it springs back immediately, it needs more time. If the indentation stays completely, it's likely overproofed.
Baking to Perfection: Achieving a Crispy Crust and Open Crumb
Baking high hydration sourdough effectively requires high heat and steam, typically achieved using a Dutch oven or a baking stone with steam. Preheat your oven with the Dutch oven or stone inside to a high temperature, usually 450-500°F (230-260°C), for at least 30-60 minutes.
Carefully transfer the cold, proofed dough from the banneton onto parchment paper. Score the loaf quickly using a razor blade or sharp knife. If using a Dutch oven, carefully lower the dough (on the parchment) into the hot pot, cover, and bake for 20-25 minutes.
The lid traps steam released by the wet dough, allowing for maximum oven spring and crust development. After this initial period, remove the lid and continue baking for another 20-30 minutes until the crust is deep golden brown and the internal temperature reaches around 205-210°F (96-99°C). If using a stone, place the scored dough on the stone and create steam in the oven using a steam tray or by adding ice cubes to a hot pan on the bottom rack.
Troubleshooting High Hydration Sourdough
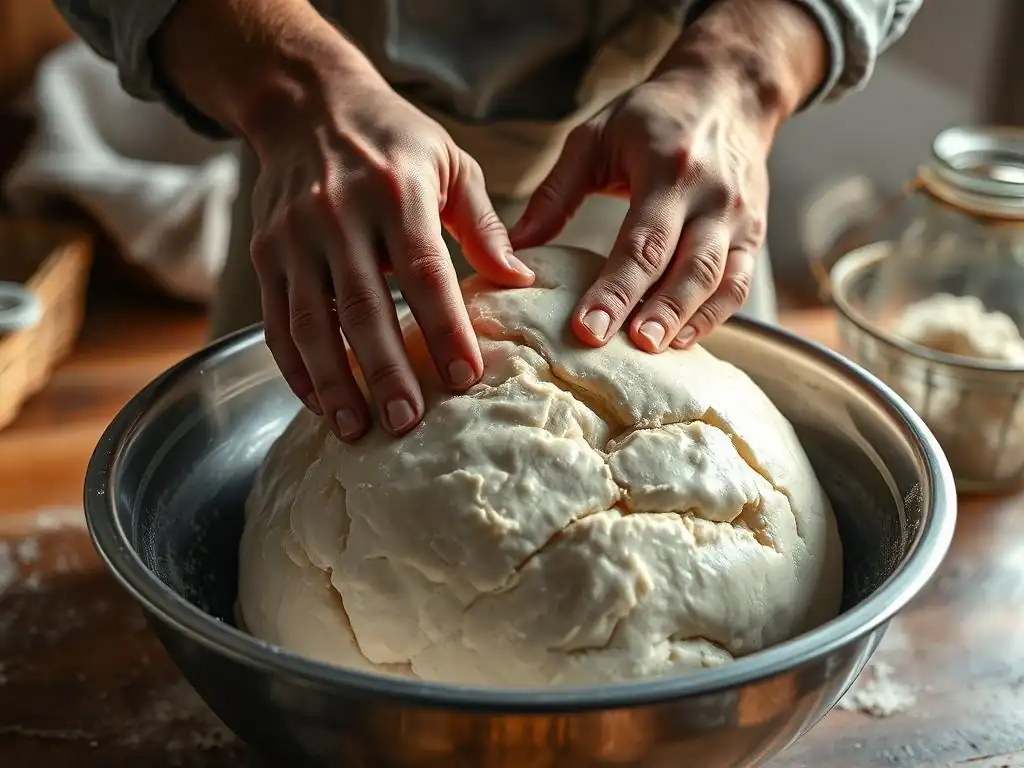
Even with a robust high hydration sourdough starter and careful technique, issues can arise. Understanding how to troubleshoot common problems is part of the mastery process.
Dough Too Sticky: Reducing Hydration for Manageability
A dough that is excessively sticky, even with wet hands or a bench scraper, might indicate that the hydration level is simply too high for the flour used or your current skill level. Different flours absorb water differently; a lower protein all-purpose flour, for instance, cannot handle as much water as a high-gluten bread flour.
If you consistently find the dough unmanageably sticky, try reducing the hydration slightly in your next bake. Instead of 85%, try 80%. Instead of 80%, try 75%. A difference of just 2-3% hydration can make a significant impact on handling. Practice with a slightly lower hydration until you feel comfortable before increasing it again. Remember, even an 80% hydration dough is considered high hydration and will yield excellent results.
Dough Not Rising: Assessing Starter Activity and Adjusting Temperature
If your high hydration dough isn't rising during bulk fermentation or proofing, the most likely culprit is an inactive high hydration sourdough starter or an inadequate fermentation environment. Check your starter's activity before mixing; did it double or triple after feeding? Did it pass the float test? If not, spend a few days strengthening your starter with regular feedings before attempting another bake.
Temperature is also critical. Sourdough fermentation is significantly slower in cooler environments. If your kitchen is cool (below 70°F or 21°C), bulk fermentation could take much longer than expected, perhaps 8-12 hours. Try placing the dough in a warmer spot, like a proofing box, the oven with the light on, or near a warm appliance. Ensure the dough reaches the target volume increase (50-75%) before moving to shaping and proofing.
Flat Loaf: Improving Dough Strength Through Folding
A flat loaf is often a sign that the dough lacked sufficient strength to hold its shape during proofing and baking. High hydration dough needs careful gluten development to build structure. If your loaves are consistently flat, review your folding technique during bulk fermentation.
Are you performing enough sets of stretch and folds or coil folds? Are you being gentle but effective in building tension? Ensure you are performing folds every 30-45 minutes for the first couple of hours of bulk fermentation. Pay attention to how the dough feels – it should become progressively smoother, more elastic, and less slack with each set of folds. Increasing the number or intensity of your folds can help build that crucial internal structure, allowing your active high hydration sourdough starter to lift the dough effectively.
Gummy Crumb: Extending Baking Time for Complete Internal Cooking
A gummy or dense crumb, especially towards the center of the loaf, typically indicates that the bread was underbaked. Even if the crust looks beautiful, the interior may not have reached the proper temperature to set the starches and evaporate excess moisture, which is particularly important with high hydration dough.
Ensure you are baking the loaf until its internal temperature reaches at least 205°F (96°C), ideally 210°F (99°C), using an instant-read thermometer. If your crust is browning too quickly before the interior is done, try reducing the oven temperature slightly for the second half of the bake or covering the loaf loosely with foil after the initial covered period (if using a Dutch oven) to prevent further darkening. Allowing the loaf to cool completely on a wire rack for at least 2-3 hours before slicing is also vital for the internal structure to set properly.
Advanced Tips for High Hydration Sourdough Mastery
Once you're comfortable with the basics, explore these advanced tips to further refine your high hydration sourdough baking.
Using Different Flours for Varied Textures
The type of flour significantly impacts the handling and outcome of high hydration dough. While strong bread flour is a standard choice due to its high protein content (around 12-14%) which supports water absorption and gluten development, experimenting with other flours can yield exciting results.
Adding a percentage of whole wheat flour (e.g., 10-20% of the total flour weight) will increase water absorption even further, requiring slightly more water to reach the same perceived hydration level, but adds flavor and nutrition. Using a portion of rye flour (e.g., 5-10%) introduces different enzymes that affect dough rheology and add a distinct tang, though rye develops less gluten. Even using specialty flours like spelt or einkorn at high hydration can create unique textures and flavors, provided you adjust water levels and handling techniques to account for their different gluten structures.
Incorporating Add-Ins into High Hydration Dough: Achieving Even Distribution
Adding ingredients like seeds, nuts, dried fruits, or cheese to high hydration sourdough can be tricky due to the dough's wetness. The key is even distribution without damaging the delicate gluten network built by your high hydration sourdough starter.
A common method is to add inclusions during the second or third set of folds during bulk fermentation. Gently spread the dough out, sprinkle the inclusions evenly over the surface, and then perform the fold, attempting to trap the additions within the layers. Repeat this process over several folds until the add-ins are relatively dispersed.
Alternatively, some bakers reserve a small amount of water during the initial mix and use it to hydrate seeds (like flax or chia) in a separate bowl, adding this paste during the final mixing stage. This approach helps prevent the seeds from soaking up water from the dough itself.
Scoring Techniques for Optimal Oven Spring
Scoring, or slashing the surface of the dough before baking, is essential for controlling oven spring in high hydration sourdough. The cuts provide weak points for the dough to expand predictably, preventing blowouts and contributing to the final shape and appearance.
For high hydration doughs, which tend to spread, a single, deep score down the length of a batard or a cross pattern on a boule is common. Using a very sharp blade (like a razor blade on a lame) is crucial for clean cuts on the wet, often delicate surface.
Angle the blade at about 30-45 degrees to the dough surface for an 'ear' (a flap of crust that lifts). Practice makes perfect, but effective scoring allows your active high hydration sourdough starter to push the dough outwards and upwards during the initial burst of heat, resulting in a beautiful, open crumb and a well-formed loaf.
Understanding Sourdough Fermentation Times and Temperatures
Mastering high hydration sourdough requires a deep understanding of how temperature affects fermentation speed. The activity of your high hydration sourdough starter is highly dependent on temperature. Warmer temperatures (75-80°F / 24-27°C) accelerate fermentation, while cooler temperatures (below 70°F / 21°C) slow it down significantly.
Learning to read the dough, rather than strictly adhering to times, is key. In a warm environment, bulk fermentation might be complete in 4 hours. In a cooler kitchen, it could take 8-10 hours or even longer. Look for signs like a 50-75% increase in volume, a domed surface, and jiggliness.
Similarly, proofing time varies. Cold proofing in the refrigerator (38-40°F / 3-4°C) for 12-16 hours is common and convenient, while room temperature proofing might only take 1-3 hours. Adjust your schedule based on your environment and the dough's development, ensuring your high hydration sourdough starter has done its job effectively at each stage.
Frequently Asked Questions
What exactly is a high hydration sourdough starter?
A high hydration sourdough starter refers to a starter with a higher water-to-flour ratio, typically 100% hydration or more. This means equal parts (or more water) by weight to flour.
Why would I want to use a high hydration sourdough starter?
High hydration starters often lead to more open crumb structures in your sourdough bread. They can also result in a more complex flavor profile due to increased enzymatic activity.
Is a high hydration starter more difficult to manage?
Yes, a high hydration starter can be more challenging to handle. It requires more frequent feedings and careful observation to prevent over-fermentation or mold growth.
What kind of flour works best for a high hydration sourdough starter?
Generally, strong bread flour works best because it provides the gluten structure needed to support the high hydration. You can also experiment with a mixture of bread flour and whole wheat flour.
How often should I feed my high hydration sourdough starter?
You'll likely need to feed it more frequently, perhaps every 12 hours or even more often, depending on room temperature and the starter's activity. Watch for signs of peak activity.
Final Reflection: The Transformative Power of a Wet Dough
Mastering high hydration sourdough isn't just about technique; it's about unlocking a deeper connection with the baking process itself. The journey from a stiff, manageable dough to the ethereal lightness of a high-hydration loaf represents a significant shift in understanding, demanding patience, intuition, and a willingness to embrace the unexpected. This shift, however, yields rewards far beyond a beautifully risen loaf.
The impact of this seemingly simple adjustment – increasing the hydration of your sourdough starter – ripples far beyond the kitchen. It speaks to a broader cultural shift towards embracing imperfection and trusting the natural processes of fermentation. The unpredictable nature of a wet dough mirrors the unpredictable nature of life itself, teaching us to adapt, to observe, and to appreciate the beauty in the subtle variations that emerge. The best bread is made with love, patience, and a healthy dose of happy accidents.
– Unknown baker. This quote perfectly encapsulates the spirit of high-hydration sourdough baking.
Now, consider your own baking journey. What are you willing to let go of to embrace a new level of understanding? Are you ready to move beyond the familiar comfort of a predictable dough and explore the boundless possibilities of a wetter, more alive starter? I encourage you to experiment, to embrace the challenges, and to savor the unique character of each loaf you create. The rewards – a deeper connection to your craft, a more nuanced understanding of fermentation, and, of course, incredibly delicious bread – are well worth the effort.
Unleash Your Inner Sourdough Master!
Thanks for taking the time to explore the world of high hydration sourdough! We hope you now feel empowered to tackle wetter doughs with confidence. Ready to put your new knowledge into practice?
- Bake your dream loaf: Try out the recipe variations discussed in the article, adjusting hydration levels to find your perfect consistency. This is your chance to experiment and perfect your technique!
- Share your baking journey: Show off your beautiful, bubbly loaves on social media using #BakeWithEaseHighHydration – we'd love to see your creations!
- Dive deeper into sourdough: Explore other resources on our site for more tips and tricks on advanced sourdough techniques.
What unique characteristic of your high-hydration sourdough are you most excited to perfect?