
The Secrets to a Crispy Sourdough Crust: Techniques Revealed

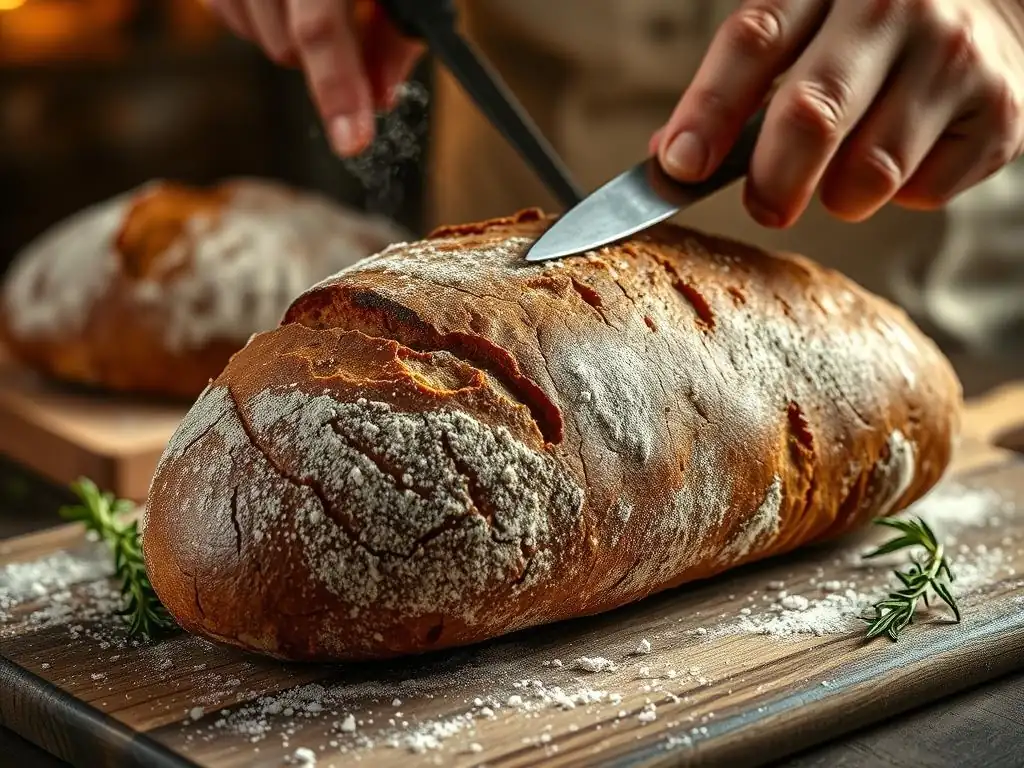
Welcome to BakeWithEase, your trusted guide to baking perfection!
Ever dreamt of achieving that perfectly crisp sourdough crust? This article delves into the secrets to a crispy sourdough crust, revealing techniques that will elevate your bread baking from good to extraordinary. Discover the intermediate baking tips that will transform your loaves and leave you wondering, what other baking mysteries can I unlock? Let's get baking!
- Understanding the Science Behind a Crispy Sourdough Crust
- Essential Techniques for Crispy Sourdough Crusts
- Mastering Oven Temperature and Steam for Sourdough Crispness
- Flour Selection: Impact on Sourdough Crust Texture and Color
- Advanced Techniques for Enhancing Sourdough Crust Crispness
- Troubleshooting Common Sourdough Crust Problems
- Recipe: BakeWithEase's Guide to a Crispy Sourdough Crust
- Conclusion: Mastering the Art of the Crispy Sourdough Crust
-
Frequently Asked Questions
- What are the most important factors for achieving a crispy sourdough crust?
- How does steam contribute to a crispy sourdough crust?
- What temperature should I bake my sourdough at to get a crispy crust?
- What are some techniques for creating steam in a home oven for a crispy crust?
- How does scoring the dough affect the crispiness of the crust?
- Final Reflection: The Enduring Allure of a Perfect Crust
- Unlock Your Perfect Crust: Master Sourdough Baking Today!
Understanding the Science Behind a Crispy Sourdough Crust
Achieving that coveted crispy sourdough crust is more than just luck; it's rooted in understanding basic baking science. When your sourdough loaf bakes, complex chemical reactions occur, transforming the dough from a soft, pliable mass into a structured loaf with a firm, flavorful crust. The interplay of starch gelatinization, moisture evaporation, and gluten development are the primary forces at play, dictating the final texture and crispness of the exterior.
Delving deeper, the temperature inside the oven triggers the Maillard reaction and caramelization on the crust surface. These processes are responsible for the rich brown color and the complex flavors that are characteristic of a well-baked sourdough. By manipulating factors like oven temperature, steam, and dough hydration, bakers can significantly influence these reactions, steering the outcome towards a delightfully crispy sourdough crust. Mastering these fundamentals is the first step in elevating your homemade loaves.
The Role of Starch in Sourdough Crust Crispness
Starch, a primary component of flour, plays a critical role in developing a crispy sourdough crust. As the dough heats up in the oven, the starch granules absorb moisture and swell, a process known as gelatinization. This occurs at temperatures typically between 140°F and 175°F (60°C to 80°C). Gelatinized starch contributes to the structure of the crumb, but its effects on the crust are different.
On the surface, where temperatures exceed the boiling point of water (212°F or 100°C) and the dough dries out, the gelatinized starch forms a rigid, glass-like structure as it cools. This brittle layer is a key contributor to the crispness of the crust. Without proper starch gelatinization and subsequent drying, the crust would remain soft and pliable rather than achieving that desirable shatter.
The Importance of Moisture Content for a Perfect Crust
Moisture content is paramount both within the dough and surrounding it in the oven when aiming for a crispy sourdough crust techniques reveal. High hydration doughs, for instance, provide more internal moisture that converts to steam during baking. This internal steam helps the loaf expand before the crust sets, contributing to better oven spring and a thinner, more delicate crust that can become crispier.
Crucially, moisture in the oven environment during the initial phase of baking is essential. Steam prevents the crust from setting too quickly. This allows the dough to expand maximally, resulting in a larger, airier loaf. Once the steam is removed or dissipates, the crust temperature can rise significantly, allowing the surface to dry out and undergo the Maillard reaction and caramelization, leading to a beautiful color and that satisfyingly crispy texture. Without sufficient steam initially, the crust sets prematurely, restricting oven spring and often resulting in a thicker, less ideally crispy crust.
Gluten Development and its Impact on Crust Texture
Gluten, the protein network formed when water is added to flour and worked, provides the structure and elasticity necessary for the dough to hold its shape and trap gases produced by fermentation. Proper gluten development is vital for a good crumb structure, which in turn influences the crust. A well-developed gluten network allows the loaf to achieve significant oven spring, stretching the surface of the dough thin.
A thinner crust surface, achieved through good gluten development and strong oven spring, is more likely to bake up crispy than a thick, dense one. If gluten is underdeveloped, the loaf may collapse or not rise adequately, leading to a dense crumb and a thick, potentially leathery crust. Conversely, overdeveloped gluten can sometimes lead to a tough crust. Finding the right balance in gluten development through proper kneading or folding techniques is therefore integral to achieving a delightful crispy sourdough crust.
Essential Techniques for Crispy Sourdough Crusts
Beyond the science, specific hands-on techniques are crucial for encouraging a crispy sourdough crust techniques reveal. These methods directly influence how the dough behaves in the oven, how heat and moisture interact with the surface, and ultimately, the final texture of your loaf's exterior. From the initial mixing stage to the moment the loaf hits the heat, each step offers an opportunity to enhance crispness.
Implementing these techniques requires attention to detail and understanding how they contribute to crust development. Whether it's managing a sticky high-hydration dough, mastering the art of scoring, or choosing the right baking vessel, each choice impacts the final outcome. Let's explore some of the most effective techniques for achieving that sought-after crispy sourdough crust.
High Hydration Dough: The Key to a Light and Crispy Crust
High hydration dough, typically meaning dough with a water content of 75% or more relative to the flour weight (e.g., 750g water to 1000g flour), is a powerful tool for achieving a crispy sourdough crust. The abundance of water within the dough converts into steam during baking. This internal steam pushes outwards, expanding the loaf from within and creating a more open crumb structure.
This internal expansion stretches the outer layer of the dough thin. A thinner surface layer dries out more rapidly at high temperatures, allowing it to become significantly crispier than a thick crust. While high hydration doughs can be trickier to handle due to their stickiness, the resulting light, airy crumb and potentially thinner, crispier crust are often well worth the effort for sourdough enthusiasts.
Managing High Hydration Dough for Optimal Results
Working with high hydration dough requires specific techniques to manage its stickiness and develop strength. Instead of traditional kneading, methods like stretch and folds or coil folds are often employed. These techniques build gluten gently without tearing the fragile network and make the dough easier to handle over time. Performing several sets of folds during the bulk fermentation period, perhaps every 30-60 minutes for the first few hours, significantly increases the dough's structure and elasticity.
Using wet hands or a wet dough scraper can prevent sticking. Allowing the dough to rest briefly between manipulations also helps. Furthermore, adequate bulk fermentation and a successful shaping process are critical. A well-shaped, high-hydration loaf will hold its tension, allowing for maximum oven spring and contributing directly to the development of that desirable crispy sourdough crust during baking.
Scoring Techniques for Maximum Oven Spring and Crust Development
Scoring, or slashing the surface of the dough just before baking, is not merely decorative; it's a functional technique vital for controlling oven spring and influencing crust development for a crispy sourdough crust. As the loaf bakes and expands rapidly in the initial heat, the scores provide weak points for the dough to burst through. Without scoring, the loaf would likely burst unpredictably at the weakest spot, resulting in a less controlled shape and potentially a thicker, uneven crust.
Strategic scoring directs the expansion, allowing the baker to control the shape and structure of the final loaf. More importantly for crust crispness, controlled expansion leads to better oven spring, which helps stretch the crust thin. The edges of the scores, known as "ears" or "wings," are areas where the crust can become particularly thin and crispy, often developing a beautiful blistered surface due to direct exposure to the high heat.
Different Scoring Patterns and Their Effect on Crust
Various scoring patterns yield different results in terms of oven spring, shape, and crust appearance. A single, deep slash across the top (a "grigne") is a classic pattern for batards (oval loaves) and encourages the loaf to open dramatically along that line, creating a prominent "ear." This results in significant surface area exposure along the cut, promoting crispness.
For boules (round loaves), multiple shallow cuts, like a simple cross or a more intricate geometric pattern, allow for even expansion in several directions. While they may not produce a single large ear, these patterns create numerous edges and surfaces that can become beautifully caramelized and crispy. The depth and angle of the score also matter; a shallow, angled cut is more likely to create an ear, while a deeper, straight cut will result in a more rounded opening. Experimenting with different patterns helps you understand how they affect the final shape and contribute to a crispy sourdough crust.
Baking Stone vs. Dutch Oven: Which is Best for a Crispy Crust?
The choice of baking vessel significantly impacts the ability to achieve a crispy sourdough crust techniques reveal. Two popular methods stand out: baking on a preheated stone or steel, and baking inside a preheated Dutch oven or lidded pot. Both have their merits, primarily concerning how they manage heat transfer and create steam, but they approach these factors differently.
Ultimately, many bakers find the Dutch oven method more consistently delivers a superior crispy sourdough crust, especially in home ovens. This is largely due to its ability to trap steam effectively in the crucial initial phase of baking. However, baking stones or steels, when used correctly with an external steam source, can also produce excellent results and offer more flexibility for baking multiple loaves simultaneously.
Pros and Cons of Baking Stone for Sourdough
Baking stones (or steels, which heat faster and retain heat better) provide intense radiant heat from the bottom, which helps achieve a good oven spring and browns the base of the loaf effectively. They are also versatile, allowing you to bake loaves of various shapes and sizes directly on the hot surface, and you can bake multiple loaves at once if your stone and oven allow. Using a peel to transfer the loaf onto the hot stone can be a satisfying part of the process.
However, the main challenge with a baking stone for achieving a crispy sourdough crust is creating and maintaining sufficient steam around the loaf during the initial bake. Home ovens are typically vented, and steam quickly escapes. This necessitates using external steam methods, such as pans of hot water, lava rocks, or spraying the oven walls, which can be less effective and harder to control than the steam trapped within a lidded pot. Without adequate steam, the crust can set too early, limiting oven spring and resulting in a thicker, less ideally crispy crust.
Pros and Cons of Dutch Oven for Sourdough
The Dutch oven method excels at creating a steamy environment for the sourdough loaf without needing external measures. By preheating the lidded pot to a high temperature and dropping the dough inside, the moisture evaporating from the dough itself is trapped within the pot. This trapped steam keeps the surface of the dough pliable for the first 15-20 minutes of baking, allowing for maximum expansion and oven spring.
Once the lid is removed, the temperature of the crust surface can rapidly exceed 212°F (100°C), allowing it to dry out and crisp up beautifully through the Maillard reaction and caramelization. Dutch ovens also provide excellent radiant heat from all sides, contributing to even baking and a uniformly browned crust.
The main drawbacks are that you can typically only bake one loaf at a time in a standard Dutch oven, and transferring dough into a very hot pot requires caution. Despite these, the consistent results for a crispy sourdough crust make the Dutch oven a favorite for many home bakers.
Mastering Oven Temperature and Steam for Sourdough Crispness
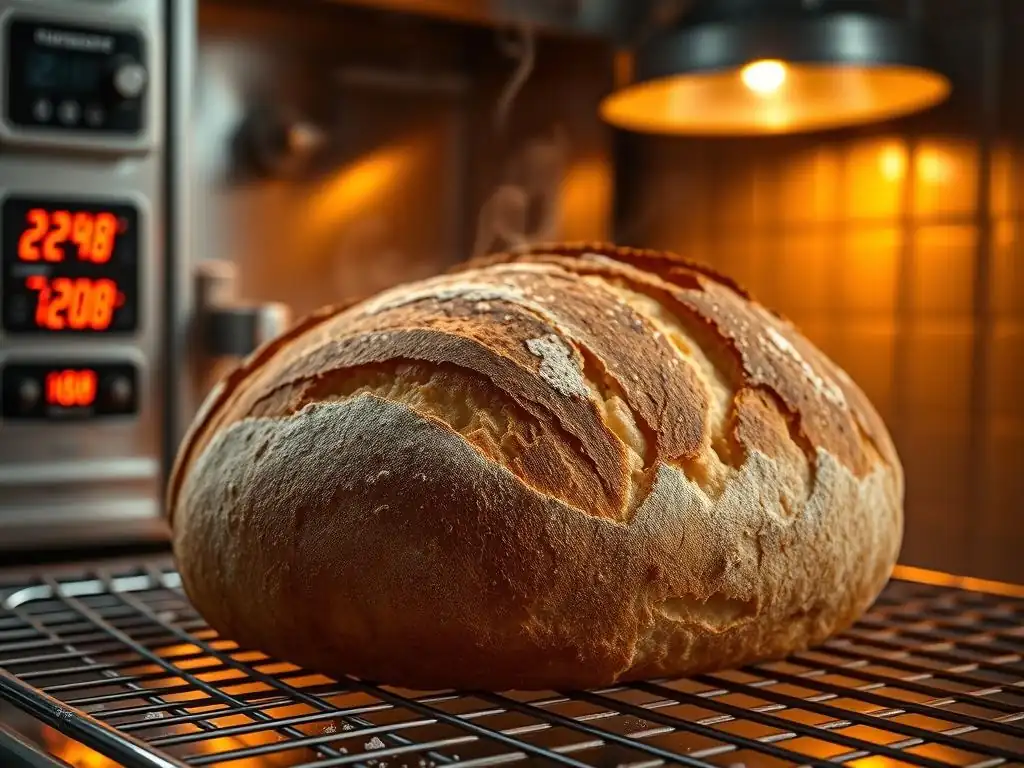
Temperature and steam are the dynamic duo when it comes to developing a crispy sourdough crust techniques reveal. The intense heat initiates rapid expansion and crust formation, while steam manages the rate at which the crust sets, ensuring optimal oven spring and a thinner, more delicate exterior that can crisp up effectively. Getting the balance right is crucial for success.
Understanding how to manipulate these factors in your specific oven is key. Home ovens can vary significantly in temperature accuracy and how well they retain heat and steam. Using an oven thermometer is highly recommended to ensure you are hitting the target temperatures. Mastering the creation and management of steam, whether using a Dutch oven or other methods, is perhaps the most critical skill for achieving that perfect, crispy sourdough crust.
The Importance of Initial High Heat for Crust Formation
Baking sourdough at a high initial temperature, typically between 450°F and 500°F (230°C to 260°C), is fundamental for achieving a crispy sourdough crust. This intense heat provides the necessary thermal shock to the dough, triggering rapid yeast activity and vigorous oven spring. The sudden influx of heat also causes the moisture within the dough to flash into steam, which, if trapped (as in a Dutch oven) or supplemented, further aids expansion.
This phase of high heat, usually lasting for the first 15-25 minutes, is where the structure of the loaf is largely set and the initial crust begins to form. The high temperature quickly dries out the surface layer once steam is removed, allowing the Maillard reaction and caramelization to occur efficiently, leading to a well-colored and potentially very crispy crust. Baking at too low a temperature initially can result in a pale, soft crust and poor oven spring.
Creating Steam in Your Oven: Methods for a Crispy Crust
As discussed, steam is vital in the early stages of baking sourdough to keep the crust pliable and allow for maximum oven spring. While a Dutch oven is the most common method for trapping the dough's own steam, external methods are necessary when baking on a stone or sheet pan. Implementing an effective steaming method is non-negotiable for a truly crispy sourdough crust techniques reveal.
Several techniques can be employed to create a steamy environment in a home oven. Each method has its pros and cons regarding effectiveness, safety, and ease of use. The goal is to generate a burst of steam just as the loaf goes into the oven and maintain a humid environment for the first portion of the bake before allowing the crust to dry out and crisp up.
Using Ice Cubes for Steam Generation
One popular method for creating steam when baking on a stone is to place a tray or cast iron pan on the bottom rack of the oven while preheating. Just before loading the loaf, carefully toss a handful of ice cubes into the hot tray. The ice will instantly melt and vaporize, creating a cloud of steam.
This method is simple and requires minimal equipment. However, the steam generated can dissipate relatively quickly in a vented oven, and opening the oven door to add ice causes a significant drop in temperature. Safety is also a concern, as you are adding water to a very hot surface inside the oven. Despite these drawbacks, it's a widely used technique that can contribute to a crispier sourdough crust compared to baking without any added steam.
Utilizing a Hot Pan for Steam
Another effective external steam method involves placing a sturdy metal pan (like a cast iron skillet or a broiler pan) on the bottom rack of the oven while preheating. Instead of ice cubes, you carefully pour a cup or two of boiling water into the hot pan just after loading the loaf. The boiling water turns to steam instantly and provides a more sustained release of steam than ice cubes.
Using boiling water generally produces more steam and maintains the humid environment for longer than ice cubes. However, this method also involves opening the oven door, causing heat loss. Extreme caution must be used when pouring boiling water into a hot pan inside the oven to avoid burns. This technique, when executed safely, is quite effective at promoting a crispy sourdough crust by allowing for better oven spring before the crust sets.
Adjusting Baking Time for Optimal Crust Color and Crispness
Achieving a crispy sourdough crust isn't just about the initial phase; the total baking time and how you adjust the temperature later in the bake are also critical. After the initial period with steam (typically 15-25 minutes), the steam source is removed (or the Dutch oven lid is taken off). This allows the crust temperature to rise significantly, promoting drying and the browning reactions.
The remaining baking time, usually another 20-35 minutes, is dedicated to fully cooking the interior of the loaf and developing the final crust color and crispness. The temperature is often reduced slightly during this phase, perhaps to 400°F-450°F (200°C-230°C), to prevent the crust from burning before the inside is cooked. Baking until the crust is a deep golden-brown to mahogany color indicates that the Maillard reaction and caramelization are complete, resulting in a more flavorful and inherently crispier crust. A loaf that is underbaked, especially in this second phase, will likely have a pale, soft crust.
Flour Selection: Impact on Sourdough Crust Texture and Color
The type of flour you choose significantly influences the texture, color, and overall success of your crispy sourdough crust techniques reveal. Different flours have varying protein contents, starch characteristics, and mineral levels, all of which play a role in how the dough behaves, how it browns, and how crispy the final crust becomes.
Understanding the properties of different flours allows you to make informed choices based on the desired outcome for your sourdough loaf. While many recipes call for standard bread flour, experimenting with other types or blends can unlock new levels of flavor and contribute to a more robust or nuanced crispy sourdough crust.
Choosing the Right Flour for a Crispy Sourdough
For a consistently crispy sourdough crust, a flour with a relatively high protein content is often preferred. Protein forms the gluten network, which, as discussed, is essential for good structure and oven spring. A strong gluten network allows the dough to expand fully, resulting in a thinner crust that crisps up more effectively.
While all-purpose flour can be used, bread flour (typically 12-14% protein) provides a stronger structure. High-protein bread flour or specialized artisan bread flours can offer even better results, promoting maximum oven spring and a robust crust. The specific milling process and ash content of the flour can also affect crust color and texture.
High Protein Flour vs. All-Purpose Flour
High protein flour, specifically bread flour, contains more gluten-forming proteins (glutenin and gliadin) than all-purpose flour. This higher protein content leads to a stronger, more elastic dough capable of trapping more carbon dioxide produced by the sourdough starter. The result is typically better oven spring and a more open crumb structure.
For the crust, this translates to a thinner, more extended surface area after baking, which dries out and crisps up more readily. All-purpose flour (typically 10-12% protein) can still produce a good loaf, but the structure may not be as strong, potentially leading to slightly less oven spring and a marginally thicker crust that might be less prone to achieving extreme crispness compared to using high-protein flour.
The Role of Whole Wheat Flour in Sourdough Crust
Including whole wheat flour in your sourdough recipe, even if only a small percentage (e.g., 10-30%), can influence the crust's color, flavor, and texture. Whole wheat flour contains the bran and germ of the wheat berry in addition to the endosperm. These components add flavor and nutrition but also affect gluten development and water absorption.
The presence of bran can interfere slightly with gluten formation, potentially leading to a slightly denser crumb if used in very high percentages. However, the minerals and sugars present in whole wheat flour contribute to darker caramelization during baking, resulting in a richer color and often a slightly different, sometimes more rustic, crispy sourdough crust texture. A small amount of whole wheat can add complexity to both the crumb and the crust.
Advanced Techniques for Enhancing Sourdough Crust Crispness
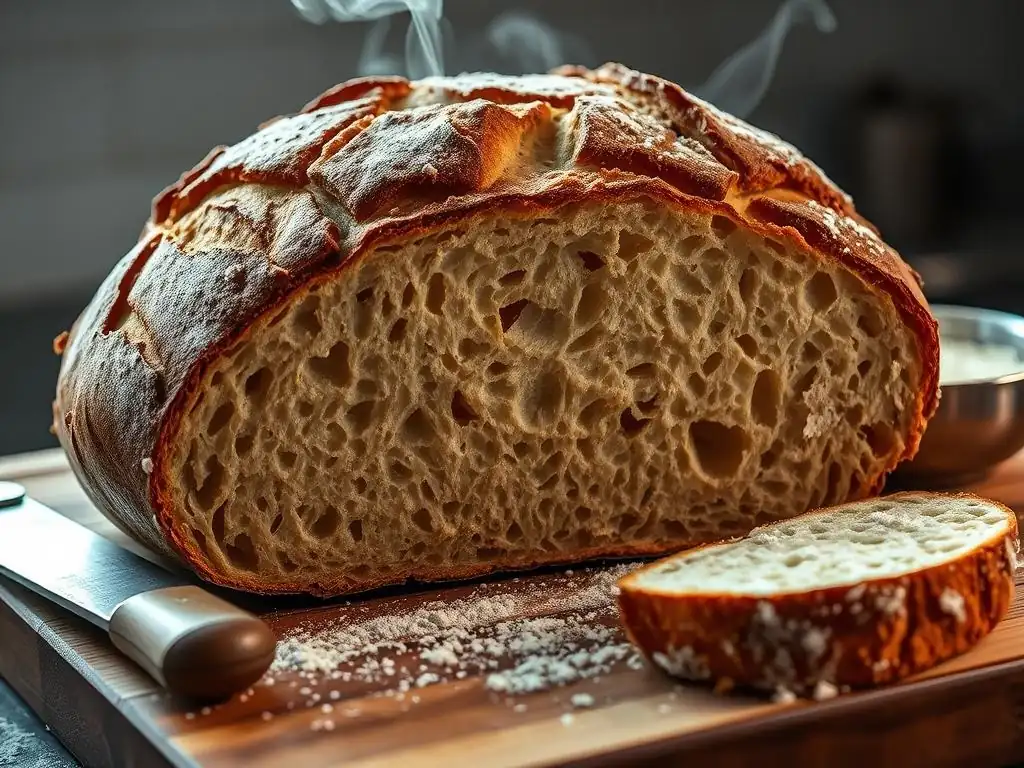
Once you've mastered the fundamental techniques, several advanced strategies can help you push the boundaries and achieve an even more spectacular crispy sourdough crust techniques reveal. These methods often involve manipulating fermentation time, temperature, or adding specific ingredients in small quantities.
Exploring these advanced techniques allows you to fine-tune your process and achieve characteristics like deeper color, enhanced flavor, and prolonged crispness. While not strictly necessary for a good loaf, they can elevate your sourdough baking to the next level and impress with their results.
Using Malt Syrup or Honey for Crust Color and Crispness
Adding a small amount of sugar, such as diastatic malt powder, non-diastatic malt syrup, or honey, to your sourdough dough can significantly enhance crust color and contribute to crispness. Sugars are simple carbohydrates that participate readily in the Maillard reaction and caramelization at lower temperatures than starches alone.
Diastatic malt powder contains enzymes that break down starches into simpler sugars, providing more fuel for fermentation and more sugars available for browning. Non-diastatic malt syrup and honey add fermentable sugars directly. Even a small addition (often 1-2% of the flour weight) can lead to a deeper, richer brown crust color and a more pronounced crispy texture due to increased caramelization on the surface. Use sparingly, as too much can make the crust too dark or even burnt before the interior is cooked.
Cold Proofing and Its Effects on Crust Development
Cold proofing, also known as retarding, involves placing the shaped dough in the refrigerator (typically 38°F-40°F or 3°C-4°C) for an extended period, ranging from 12 to 48 hours or even longer. This slow, cold fermentation has profound effects on both the crumb and the crust.
During cold proofing, enzymatic activity continues slowly, breaking down complex carbohydrates and proteins into simpler compounds. This process develops more complex flavors in the dough. For the crust, cold proofing results in a drier surface on the dough compared to a warm proof. This drier surface is ideal for achieving a crispy sourdough crust because it allows the crust to start drying out and browning almost immediately when it hits the hot oven, leading to better color development and crispness.
The Power of Overnight Retardation
Overnight retardation is a common and highly effective form of cold proofing, typically involving refrigerating the shaped loaf for 12-18 hours. This duration strikes a good balance between developing flavor, improving dough handling, and achieving a surface state conducive to a crispy sourdough crust.
Dough that has been retarded overnight is often easier to score cleanly because it is firmer. The cold temperature also means you can transfer it directly from the refrigerator to a hot oven without worrying about overproofing while the oven preheats. The slightly drier, colder surface hits the intense heat, promoting excellent oven spring and rapid crust development, leading reliably to a flavorful and crispy sourdough crust techniques reveal.
Troubleshooting Common Sourdough Crust Problems
Even with the best techniques, sourdough baking can present challenges. Sometimes, the crust doesn't turn out as expected – it might be pale, soft, too thick, leathery, or even burnt. Identifying the cause of these common problems is the first step in correcting them and moving towards consistently achieving a crispy sourdough crust.
Troubleshooting involves reviewing your process, from mixing and fermentation to shaping and baking. Often, a small adjustment in temperature, steam, or baking time can make a significant difference. Let's look at some typical crust issues and how to address them.
Avoiding a Pale and Soft Crust
A pale and soft crust is often a sign that the crust did not get hot enough or stay hot for long enough to undergo sufficient Maillard reaction and caramelization, or that there was too much moisture present for too long. This can happen if the oven temperature is too low, the baking time is too short, or if there was insufficient initial heat and steam followed by drying time.
To avoid this:
- Ensure your oven is accurately preheated to a high temperature (450°F-500°F or 230°C-260°C). Use an oven thermometer to check.
- Use an effective steaming method (Dutch oven or external steam) for the first 15-25 minutes, but be sure to remove the lid or steam source afterwards to allow the crust to dry.
- Bake the loaf for long enough in the second phase (lid off/steam removed) until it reaches a deep golden or mahogany brown color.
- Consider adding a small amount of sugar (like malt) to the dough to promote browning.
- Try cold proofing, which often results in a drier surface that browns better.
Preventing a Thick and Leathery Crust
A thick, leathery crust can result from several factors, often related to the dough's structure or the baking process. Insufficient oven spring can lead to a thicker dough surface before baking, which then bakes into a thick crust. Baking at too low a temperature initially, or for too long in the presence of steam, can also contribute to a tough crust.
To prevent a thick and leathery crust:
- Ensure proper gluten development during mixing and fermentation to achieve good structure and oven spring.
- Use high initial oven heat (with steam) to maximize oven spring, stretching the crust thin.
- Don't extend the steam phase for too long (typically no more than 25 minutes).
- Consider using a higher hydration dough, as the extra moisture helps create a more open crumb and potentially a thinner crust.
- Ensure the dough is not over-proofed, which can lead to collapse instead of spring.
Addressing a Burnt Crust
A burnt crust, while the inside might be perfectly cooked, is usually caused by excessive heat exposure, either too high a temperature for too long or direct contact with a very hot surface without protection. This is particularly common on the bottom crust when baking on a stone or steel.
To address a burnt crust:
- If using a baking stone or steel, try placing a baking sheet on the rack below the stone for the latter part of the bake to shield the bottom from direct radiant heat.
- If baking in a Dutch oven, you can place a small piece of parchment paper under the loaf or even sprinkle a little cornmeal or rice flour on the bottom of the pot before adding the dough.
- Reduce the oven temperature slightly during the second phase of baking (after removing the lid/steam).
- If the top is browning too quickly, you can loosely tent the loaf with aluminum foil for the remainder of the baking time.
- Ensure your oven temperature is accurate with an oven thermometer; it might be running hotter than the dial indicates.
Recipe: BakeWithEase's Guide to a Crispy Sourdough Crust
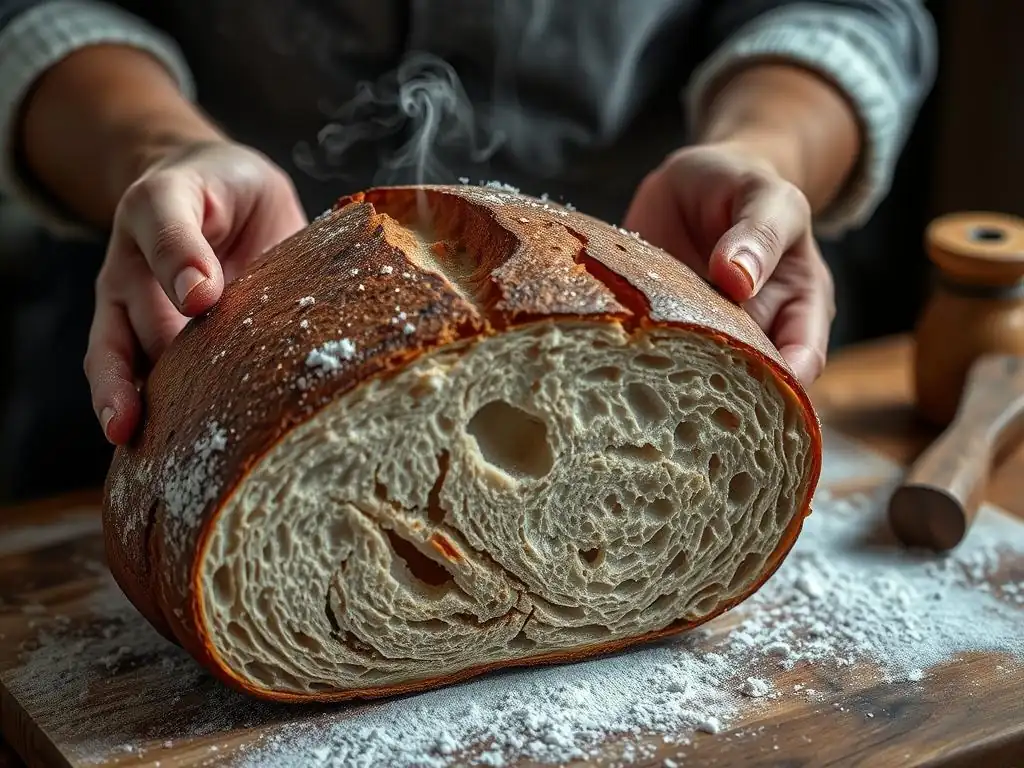
Here at BakeWithEase, we believe that mastering the crispy sourdough crust is a rewarding achievement. This recipe incorporates the techniques discussed to help you bake a loaf with a beautiful, crackling exterior and a satisfyingly open crumb. This guide focuses specifically on the steps and conditions that promote crust development.
While every starter and oven is unique, following these steps closely will set you on the path to achieving that delightful crispy sourdough crust techniques reveal you've been dreaming of. Remember that practice makes perfect, and paying attention to the dough's behavior at each stage is key.
Ingredients for the Crispy Sourdough Loaf
- 400g Strong Bread Flour (approx. 12.5-14% protein)
- 100g Whole Wheat Flour (optional, for flavor and color)
- 375g Water (75% hydration)
- 100g Active Sourdough Starter (levain)
- 10g Fine Sea Salt
- Small pinch of diastatic malt powder (optional, approx. 2g)
This combination of flours provides a good balance of structure and flavor. The 75% hydration promotes a light crumb and a potentially thinner crust. The active starter is crucial for leavening, and salt is essential for flavor and controlling fermentation. The optional malt powder aids in browning for a more prominent crispy sourdough crust.
Step-by-Step Baking Instructions for a Perfect Crust
Here are the steps focused on achieving a crispy sourdough crust:
- Mix: Combine flours, water, and malt (if using) in a bowl. Mix just until no dry flour remains (autolyse) and let rest for 30-60 minutes.
- Add Starter & Salt: Incorporate the active starter and salt into the dough. Mix until fully combined.
- Develop Gluten: Perform 3-4 sets of stretch and folds or coil folds over the next 2-3 hours, resting 30-45 minutes between sets. This builds strength for oven spring.
- Bulk Fermentation: Allow the dough to bulk ferment at room temperature until it has increased in volume by about 50-75% and shows signs of activity (bubbles).
- Shape: Gently pre-shape the dough into a round or oval and let rest for 20 minutes. Then, perform the final shaping, building good surface tension.
- Cold Proof: Place the shaped dough seam-side up in a floured banneton or bowl lined with a floured towel. Cover and refrigerate for 12-18 hours (overnight retardation is excellent for a crispy sourdough crust).
- Preheat Oven & Dutch Oven: About 1 hour before baking, place your Dutch oven (with lid) in your oven and preheat to 475°F (245°C).
- Score: Carefully turn the cold dough out of the banneton onto parchment paper. Score the top of the loaf with a sharp razor blade or lame, creating your desired pattern.
- Bake (Lid On): Carefully transfer the loaf (using the parchment paper as handles) into the preheated Dutch oven. Place the lid on. Bake for 20 minutes. The trapped steam is critical here for oven spring and a thin crust.
- Bake (Lid Off): After 20 minutes, carefully remove the lid from the Dutch oven. Reduce oven temperature slightly to 450°F (230°C). Continue baking for another 25-35 minutes, or until the crust is a deep golden-brown and the internal temperature of the loaf is around 205°F-210°F (96°C-99°C). This phase is where the crust dries out and becomes crispy.
- Cool: Transfer the baked loaf to a wire rack and let it cool completely for at least 2 hours before slicing. Cooling is essential; slicing too early traps steam inside, making the crust soft.
Conclusion: Mastering the Art of the Crispy Sourdough Crust
Achieving a consistently crispy sourdough crust is a hallmark of successful baking and a source of great satisfaction. It involves a blend of scientific understanding and practiced technique. From selecting the right flour and managing dough hydration to mastering oven temperature, steam, and the power of cold proofing, each step plays a vital role in developing that desirable texture and color.
Remember that the journey to the perfect crispy sourdough crust techniques reveal is iterative. Every bake offers a learning opportunity. Pay attention to how your dough responds, how your oven performs, and don't be afraid to experiment with slight variations in your process. With patience and practice, you'll be routinely pulling beautiful, crackling loaves from your oven, ready to enjoy the fruits of your labor.
Frequently Asked Questions
What are the most important factors for achieving a crispy sourdough crust?
The most important factors include using a high baking temperature, proper steam creation in the oven during the initial baking phase, and allowing the crust to fully develop color.
How does steam contribute to a crispy sourdough crust?
Steam in the oven delays crust formation, allowing the dough to expand fully and develop a thin, blistered crust. Once the steam is removed, the crust dries and becomes crispy and golden brown.
What temperature should I bake my sourdough at to get a crispy crust?
Generally, a high temperature, typically between 450°F (232°C) and 500°F (260°C), is recommended for achieving a crispy sourdough crust. The exact temperature may vary depending on your oven.
What are some techniques for creating steam in a home oven for a crispy crust?
Common techniques include using a Dutch oven (with a lid), placing a pan of hot water on the oven rack below the baking stone, or spritzing the oven with water during the first few minutes of baking.
How does scoring the dough affect the crispiness of the crust?
Scoring allows the dough to expand predictably during baking, preventing uncontrolled bursting. Proper scoring also impacts the crust's texture and appearance, contributing to overall crispiness and structure.
Final Reflection: The Enduring Allure of a Perfect Crust
The pursuit of the perfect sourdough crust isn't merely a culinary quest; it's a testament to the enduring power of patience, precision, and the transformative magic of fermentation. The techniques detailed in this article—from understanding hydration levels to mastering the crucial steam injection—represent more than just steps in a recipe; they are keys to unlocking a deeper understanding of the sourdough process itself. This knowledge, readily accessible today, empowers home bakers to achieve results previously considered the exclusive domain of professional bakers.
The journey to a truly crispy crust mirrors life's own challenges: it requires dedication, attention to detail, and the willingness to embrace imperfections along the way. The subtle nuances of each step, from the initial autolyse to the final bake, contribute to the final masterpiece. As the renowned baker, Chad Robertson, once said, Bread baking is a journey of discovery, a constant learning process. Each loaf is a testament to your understanding, and each crust a reflection of your dedication.
This sentiment resonates deeply, highlighting the profound connection between the seemingly simple act of baking and the larger human experience of growth and mastery.
Now, consider your own baking journey. What have you learned from this exploration of sourdough crust techniques? Don't be afraid to experiment, to push your boundaries, and to embrace the inevitable failures as opportunities for learning. The next time you knead dough, remember the power of intention and precision. The reward? Not just a beautifully crisp crust, but a deeper appreciation for the artistry and science behind this ancient craft, and a renewed sense of satisfaction in creating something truly delicious from scratch.
Unlock Your Perfect Crust: Master Sourdough Baking Today!
Thanks for diving into the world of crispy sourdough crusts! We hope you've picked up some invaluable techniques to elevate your baking game. Ready to put your new knowledge into practice?
- Bake your dream sourdough: Try out one of the techniques we discussed – maybe the steam method or the specific scoring pattern that caught your eye. Share your results with us!
- Join our Sourdough Community: Connect with fellow bakers on our forum (we're building one!) and share your sourdough adventures. Ask questions, learn from others, and get inspired.
- Experiment with different flours: Discover the impact of different flour types on your crust – rye, spelt, or even a blend. It's all part of the sourdough journey!
So, what unique twist will you add to your next sourdough loaf? Let's hear about it in the comments!