
Sourdough Focaccia: Advanced Techniques for a Perfect Crumb

Welcome to BakeWithEase, where we transform baking dreams into delicious realities! Are you ready to elevate your sourdough game? This week, we're diving deep into the secrets behind achieving that coveted, airy crumb in your sourdough focaccia. Discover advanced techniques and expert tips for creating a truly unforgettable bake. Intrigued? Let's unlock the key to a perfect crumb together!
- Sourdough Focaccia: Achieving Open Crumb & Delicate Texture
- Introduction to Open Crumb Sourdough Focaccia
- The Science of Open Crumb and Delicate Texture
- Advanced Techniques for Open Crumb and Delicate Texture
- Baking for Ultimate Crumb and Texture: Step-by-Step
- Troubleshooting Crumb and Texture Issues
- Sourdough Focaccia Recipes for Crumb Development
- Conclusion: Mastering Open Crumb Focaccia
-
Frequently Asked Questions
- What makes Sourdough Focaccia different from regular focaccia?
- How do I achieve a perfect crumb in my sourdough focaccia?
- What role does bulk fermentation play in sourdough focaccia?
- What are some common mistakes that prevent a perfect crumb?
- Can beginners successfully bake sourdough focaccia with a perfect crumb?
- Final Reflection: The Enduring Allure of the Perfect Sourdough Focaccia Crumb
- Unlock Your Focaccia Potential: Master the Crumb!
Sourdough Focaccia: Achieving Open Crumb & Delicate Texture
Introduction to Open Crumb Sourdough Focaccia
Elevating Your Sourdough Focaccia Baking
Welcome to the next level of sourdough baking! If you've mastered a basic sourdough loaf and are ready to explore new textures and flavors, sourdough focaccia is a fantastic next step. It offers a delightful canvas for toppings and a unique, airy texture that differs significantly from traditional bread.
Achieving that coveted open crumb and delicate interior in your sourdough focaccia isn't just about following a recipe; it involves understanding the interplay of fermentation, hydration, and gluten development. This guide will walk you through the advanced techniques needed to consistently produce a sourdough focaccia with a truly perfect crumb. We'll delve into the 'why' behind each step, empowering you to adjust and perfect your process.
Moving beyond a simple rise, creating a sourdough focaccia with a beautiful open crumb requires precision and patience. It's about harnessing the power of your sourdough starter to develop a strong yet extensible dough capable of trapping large pockets of air during fermentation and baking. Think of the best focaccia you've had – likely light, airy, with delightful dimples and a rich olive oil flavor.
That texture is the result of careful handling and specific techniques aimed at maximizing aeration. This article focuses specifically on how to manipulate these variables to achieve that signature open structure and delicate mouthfeel, pushing your sourdough focaccia skills to new heights.
Understanding Open Crumb and Delicate Texture in Sourdough Focaccia
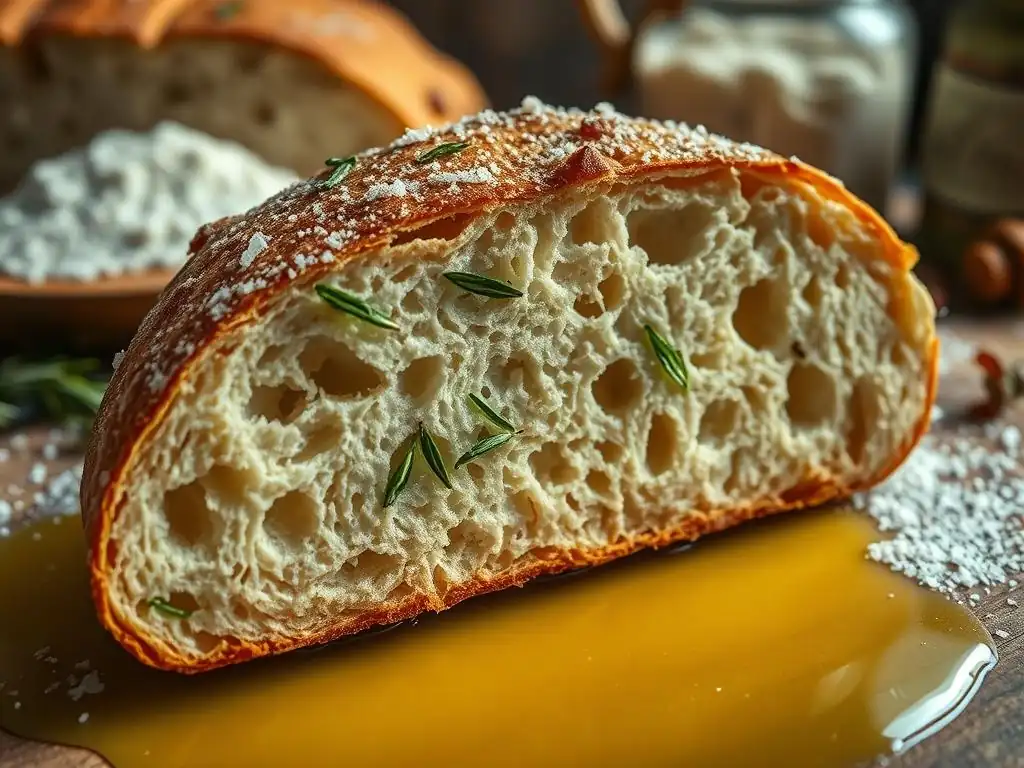
The term "open crumb" in bread baking refers to the internal structure characterized by large, irregular air pockets distributed throughout the loaf. In sourdough focaccia, this translates to a light, airy interior that is soft and yielding, a stark contrast to a dense or tight crumb. A delicate texture complements this open crumb, meaning the bread is tender and easy to chew, not tough or chewy in an undesirable way.
This combination is highly sought after in sourdough focaccia, contributing significantly to its overall appeal. It allows the bread to absorb delicious olive oil and provides a pleasant contrast to the crispy, golden crust.
Achieving a sourdough focaccia perfect crumb is the hallmark of a skilled baker. It signifies that the dough was handled gently, proofed correctly, and baked efficiently to maximize oven spring. A tight crumb, on the other hand, often indicates under-fermentation, insufficient hydration, or rough handling that degassed the dough. A gummy texture might point to under-baking or improper cooling. By focusing on techniques that promote aeration and gentle handling throughout the process, you can consistently produce a sourdough focaccia that boasts that desirable open crumb and delicate texture, making every bite a pleasure.
The Science of Open Crumb and Delicate Texture
Hydration's Role in Achieving Open Crumb
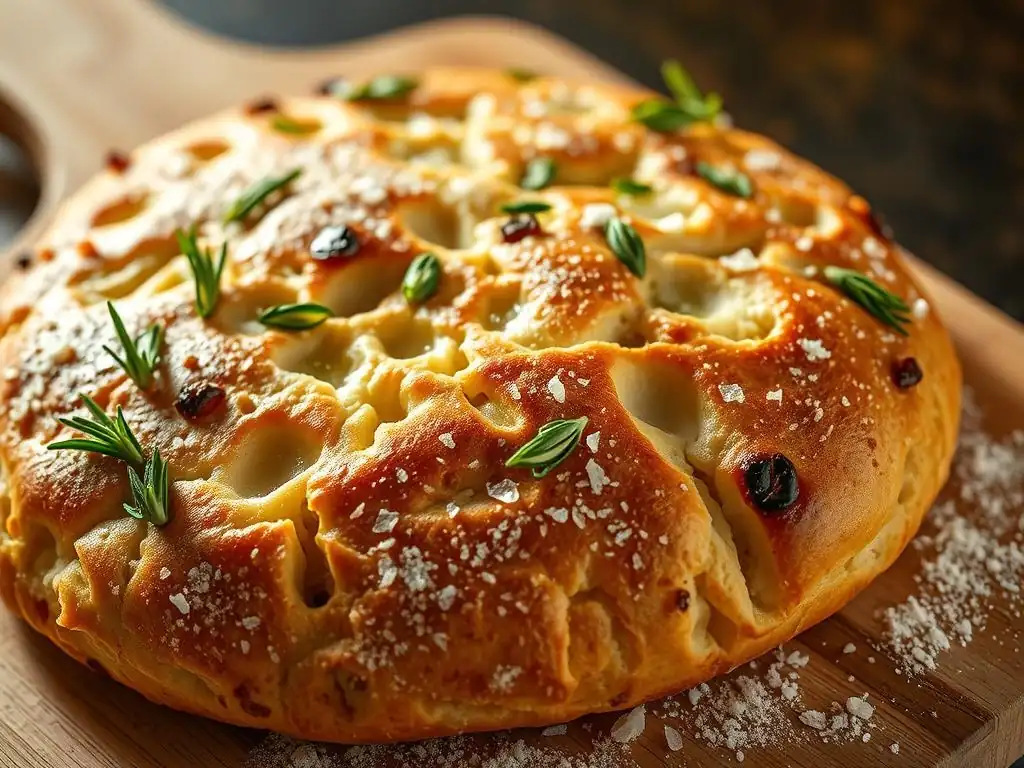
Hydration, or the ratio of water to flour in your dough, is perhaps the most critical factor in achieving an open crumb sourdough focaccia. Higher hydration doughs are inherently more challenging to handle because they are sticky, but this extra water is crucial for developing gluten and creating a more extensible dough matrix. Water allows gluten proteins (glutenin and gliadin) to hydrate and form a strong, elastic network that can trap the gases produced during fermentation.
A typical sourdough focaccia might have a hydration level ranging from 75% to upwards of 90%. For example, using 500g of flour with 400g of water results in 80% hydration (400/500 = 0.8).
The increased water in high-hydration doughs facilitates better gluten development and allows the dough to expand more readily, creating larger air pockets. Think of it like blowing bubbles – a more liquid soap solution allows for bigger, more ephemeral bubbles. While handling a sticky, high-hydration dough requires practice, techniques like autolyse and stretch and folds become essential tools to manage it effectively. Aiming for at least 80% hydration is a good starting point for an open crumb sourdough focaccia, though beginners might start slightly lower around 75% and gradually increase as they gain confidence.
Gluten Development and its Impact on Texture
Gluten development is the backbone of your sourdough focaccia's structure and directly influences both the open crumb and delicate texture. Gluten is formed when the proteins glutenin and gliadin in flour combine with water and are worked through mixing or folding. This creates a viscoelastic network – it's both elastic (can stretch) and viscous (can flow). A well-developed gluten network is strong enough to hold the gases produced by the starter, allowing the dough to rise significantly and form those large, desirable air pockets that define an open crumb.
Insufficient gluten development results in a dough that cannot hold its shape or trap gas effectively, leading to a dense crumb. Over-development, while less common with gentle sourdough methods, can lead to a tough texture.
Techniques like autolyse, stretch and folds, and time (allowing enzymes to naturally break down proteins) all contribute to optimal gluten development. For a sourdough focaccia perfect crumb, you want a dough that is strong enough to pass the "windowpane test" (stretching a small piece thin enough to see light through without tearing) but still extensible and relaxed, indicating a balanced development ready to expand beautifully.
Fermentation's Influence on Aeration and Flavor
Fermentation is the magical process where your sourdough starter (yeast and bacteria) consumes sugars in the flour, producing carbon dioxide gas and organic acids. The gas is what creates the air bubbles, contributing to aeration and ultimately the open crumb structure. The acids contribute the characteristic tangy flavor of sourdough. Proper fermentation is crucial for both texture and taste in your sourdough focaccia. Too little fermentation (under-proofing) means insufficient gas production and a tight, dense crumb. Too much fermentation (over-proofing) can lead to the gluten structure breaking down, resulting in a dough that collapses and a gummy, uneven crumb.
The duration and temperature of fermentation significantly impact the outcome. Bulk fermentation (the first rise after mixing) typically occurs at room temperature or in a slightly warmer environment (around 24-26°C or 75-79°F) for several hours, followed by a cold proofing period in the refrigerator (around 4°C or 39°F) for 12-48 hours.
The cold proof slows fermentation, allowing flavors to deepen and strengthening the gluten structure, which helps achieve that sourdough focaccia perfect crumb upon baking. A typical bulk fermentation for a high-hydration focaccia might be 3-4 hours at room temperature with folds, followed by a cold proof of 18-24 hours.
Advanced Techniques for Open Crumb and Delicate Texture
Mastering Autolyse for Improved Hydration
Autolyse is a simple yet powerful technique that significantly improves dough hydration and gluten development, crucial for an open crumb sourdough focaccia. It involves mixing just the flour and water from your recipe and letting it rest for 30 minutes to an hour before adding the starter and salt. During this resting period, the flour fully hydrates, and enzymatic activity begins to break down proteins, making the dough more extensible. This process also allows gluten development to start without the interference of salt (which tightens gluten) or the starter (which introduces gas production).
Implementing autolyse makes subsequent mixing or folding much easier, as the dough becomes less sticky and more pliable. For a high-hydration focaccia, an autolyse of 30-60 minutes can make a noticeable difference in how the dough handles and its ability to develop a strong, elastic network capable of holding large air pockets. This initial hydration step sets the stage for achieving that desirable sourdough focaccia perfect crumb by ensuring the flour is fully saturated before active fermentation and gluten building begin.
Autolyse Duration: Optimizing for Focaccia
The optimal duration for autolyse in sourdough focaccia depends on the flour used and the overall recipe hydration. For standard bread flour, a 30-60 minute autolyse is generally sufficient to see significant benefits. If using a portion of whole wheat flour, which absorbs water more slowly, you might extend the autolyse period up to 90 minutes. The key is to allow enough time for the flour to fully hydrate and for enzymatic activity to begin breaking down proteins, but not so long that wild fermentation kicks off prematurely before the starter is added.
For a typical 80%+ hydration sourdough focaccia, starting with a 45-minute autolyse is a good rule of thumb. Observe the dough after the autolyse period; it should look less shaggy and feel smoother and more extensible than immediately after mixing.
This improved extensibility is a direct result of the water having time to work on the gluten proteins, making the dough easier to handle and contributing to the potential for an open crumb structure later on. Experimenting with autolyse times within this range can help you find what works best with your specific flour and conditions for achieving a sourdough focaccia perfect crumb.
Sourdough Starter Management for Dough Strength
The health and activity of your sourdough starter are paramount to achieving a well-risen sourdough focaccia with an open crumb. A vigorous, active starter provides the necessary leavening power to inflate the dough and create gas bubbles.
Using a starter that is past its peak or not sufficiently active will result in a sluggish rise and a dense, tight crumb. It's essential to feed your starter regularly and use it when it is at its peak activity, typically when it has doubled or tripled in volume and is full of bubbles, usually 4-8 hours after feeding at room temperature (around 21-24°C or 70-75°F).
A strong starter also contributes to the dough's overall strength and structure. The microbial activity helps develop the gluten network and improves the dough's ability to hold its shape and trap gas. Think of your starter as the engine of your focaccia; a weak engine won't get you far. Ensuring your starter is robust and bubbly before incorporating it into your dough is a fundamental step towards achieving that coveted sourdough focaccia perfect crumb.
Feeding Ratios and Their Effect on Dough
The feeding ratio (the ratio of starter:flour:water by weight) used to refresh your starter before baking significantly impacts its activity and microbial balance, which in turn affects your dough. Common ratios are 1:1:1, 1:2:2, or even 1:5:5.
A 1:1:1 ratio (e.g., 20g starter, 20g flour, 20g water) results in a faster rise time for the starter (peaking in 4-6 hours), useful if you need it ready quickly. A lower inoculation ratio, like 1:5:5 (e.g., 10g starter, 50g flour, 50g water), results in a slower, longer fermentation (peaking in 8-12 hours), which can develop more complex flavors and potentially a more balanced microbial population.
For a high-hydration sourdough focaccia aiming for an open crumb, using a starter fed at a 1:2:2 or 1:3:3 ratio and using it at its peak ensures you're adding a good amount of active yeast and bacteria without overly diluting the culture. This provides the necessary leavening power and enzymatic activity required for strong gluten development and robust gas production. For example, if a recipe calls for 100g of starter, feeding 20g starter with 40g flour and 40g water (1:2:2) the night before or morning of mixing ensures you have 100g of peak-activity starter ready when you need it.
Recognizing Peak Starter Activity
Recognizing when your starter is at its peak activity is crucial for successful sourdough baking, especially when aiming for a sourdough focaccia perfect crumb. A peak starter is one that has risen significantly (often doubled or tripled in volume) since being fed, is bubbly on the surface and throughout, and smells pleasantly yeasty and slightly acidic. The "float test" is a common way to check: drop a small spoonful of starter into a glass of water. If it floats, it's generally ready to use. If it sinks, it might be past its peak or not active enough.
Using your starter at its peak ensures you're adding the maximum amount of leavening power to your dough. If you use it before its peak (under-ripe), the dough may rise slowly or insufficiently. If you use it after its peak (over-ripe or fallen), much of the gas production has already occurred, and the starter's leavening power is diminished. While a slightly past-peak starter can still work, using it consistently at its peak will yield the most reliable results for a well-risen, open-crumb sourdough focaccia.
Bulk Fermentation and Light Crumb Development
Bulk fermentation, the first rise of the dough after mixing and before shaping (or in the case of focaccia, transferring to the pan), is when the majority of gas production and gluten development occurs. This phase is critical for establishing the structure and aeration that will lead to an open crumb sourdough focaccia. During bulk fermentation, the dough should visibly increase in volume, become more aerated, and feel lighter. For high-hydration focaccia, this typically takes several hours at room temperature, punctuated by periodic sets of stretch and folds.
The goal of bulk fermentation is to allow sufficient gas to build within the developing gluten network without letting the dough over-proof. Under-fermentation leads to a dense crumb, while over-fermentation weakens the gluten and can result in a gummy texture. Monitoring the dough's volume increase (aiming for a 30-50% increase, though visual cues like surface bubbles and jiggle are more reliable for focaccia) and its feel is key. The dough should feel alive, slightly puffy, and elastic by the end of bulk fermentation, ready for the final proof.
Temperature Control During Bulk Fermentation
Temperature plays a significant role in the rate of fermentation. Warmer temperatures accelerate microbial activity, while cooler temperatures slow it down. For many sourdough focaccia recipes aiming for an open crumb, a bulk fermentation temperature between 24°C and 26°C (75°F and 79°F) is ideal. This range encourages active yeast and bacteria, leading to efficient gas production and flavor development within a reasonable timeframe (often 3-5 hours).
Fermenting at cooler temperatures (e.g., 20°C or 68°F) will require a longer bulk fermentation time, potentially 6-8 hours or more. While slower fermentation can sometimes develop more complex flavors, it's crucial not to under-proof. Conversely, temperatures above 28°C (82°F) can speed up fermentation too much, potentially leading to over-proofing and a less desirable texture. Using a proofing box, oven with the light on, or simply finding a warm spot in your kitchen can help maintain a consistent temperature for achieving that sourdough focaccia perfect crumb.
Stretch and Folds for Gluten Structure
Stretch and folds are a gentle technique used during bulk fermentation to develop gluten strength and equalize dough temperature without degassing it harshly like traditional kneading. For high-hydration sourdough focaccia, this method is far superior to kneading for creating an open crumb. Typically, you perform 3-5 sets of stretch and folds during the first 1-2 hours of bulk fermentation, with 30-60 minutes rest in between.
To perform a stretch and fold, wet your hand, grab one side of the dough, stretch it upwards gently, and fold it over the center. Rotate the bowl and repeat 3-4 times until all sides have been stretched and folded.
These gentle manipulations build layers in the dough, strengthening the gluten network and helping it form a strong, elastic structure capable of trapping large air bubbles. They also redistribute the yeast and bacteria, providing them with fresh food. By the final set of folds, the dough should feel significantly stronger, smoother, and more cohesive than when you started, showing resistance when stretched. This developed strength is essential for the dough to hold its shape and expand vertically during baking, contributing directly to achieving a sourdough focaccia perfect crumb.
Proofing for Signature Open Crumb
After bulk fermentation, the dough is transferred to its baking vessel (usually a well-oiled sheet pan) for the final proof. This stage is where the dough relaxes into its final shape and continues to build aeration before baking. For sourdough focaccia, the final proof is often done cold in the refrigerator. This slow, cold proof is key to developing both flavor and texture. It allows enzymes to continue breaking down starches into sugars, contributing to browning and flavor, while the cold temperature slows down yeast activity, preventing over-proofing while simultaneously strengthening the gluten structure.
During the final proof, the dough should noticeably increase in volume, though not necessarily double. It should look bubbly on the surface. The length of the cold proof can vary significantly, from 12 hours up to 48 hours. A longer cold proof generally results in a more complex flavor and can contribute to a more open crumb structure. However, proofing duration must be balanced with dough strength and starter activity to avoid over-proofing, which can lead to a flat, dense focaccia.
Cold Proofing vs. Room Temperature Proofing
Choosing between cold proofing and room temperature proofing impacts both the flavor and texture of your sourdough focaccia. Room temperature proofing is faster (typically 2-4 hours after transferring to the pan) and can still yield a decent crumb, but it develops less complex flavors. Cold proofing, on the other hand, involves refrigerating the dough for an extended period (12-48 hours).
This slow, cold fermentation allows for deeper flavor development as organic acids accumulate. Crucially for texture, the cold temperature also helps firm up the dough and strengthens the gluten network, making it easier to handle and promoting a better oven spring, which is vital for an open crumb.
For achieving a truly sourdough focaccia perfect crumb with excellent flavor depth, cold proofing is generally preferred. The longer fermentation time, albeit slow, contributes significantly to the signature tang and allows the dough structure to mature. While room temperature proofing is an option for a quicker bake, the nuances of flavor and the potential for a more pronounced open crumb are often enhanced by a long, cold proof in the refrigerator.
Identifying Over-Proofing and Under-Proofing
Correctly identifying when your sourdough focaccia dough is perfectly proofed before baking is critical for achieving the desired open crumb. Under-proofing means the dough hasn't had enough time to build sufficient gas; it will feel dense and won't have many surface bubbles. When baked, it will have limited oven spring and result in a tight, dense crumb. Over-proofing, conversely, occurs when the dough has fermented for too long, and the gluten structure begins to collapse.
An over-proofed dough will look very airy, may have large, fragile bubbles on the surface, and might even start to deflate slightly. It will feel fragile and may not hold the dimples well. When baked, it will likely spread out rather than spring up, potentially resulting in a flat focaccia with a gummy or uneven crumb.
The sweet spot for a sourdough focaccia perfect crumb lies in between. The dough should look visibly increased in volume from when it was first placed in the pan, be bubbly on the surface, and feel light and airy but still have some structure. When you gently press a finger into the dough (the poke test, though less common for very wet focaccia dough), the indentation should spring back slowly, not immediately (under-proofed) or stay completely (over-proofed). Visual cues like significant aeration and puffiness in the pan after cold proofing are often the best indicators for focaccia.
Baking for Ultimate Crumb and Texture: Step-by-Step
Preparing Baking Sheet and Dough for Oven Spring
Proper preparation of your baking vessel and dough is the final step before baking and is essential for maximizing oven spring and achieving that delightful sourdough focaccia perfect crumb. Focaccia is traditionally baked in a well-oiled pan.
Using a generous amount of good quality extra virgin olive oil is not just for flavor; it prevents sticking, helps fry the bottom crust to a beautiful crispness, and contributes to the overall rich texture. Pouring a substantial amount of oil (several tablespoons, enough to coat the bottom and pool slightly) into the pan before gently transferring the proofed dough is standard practice.
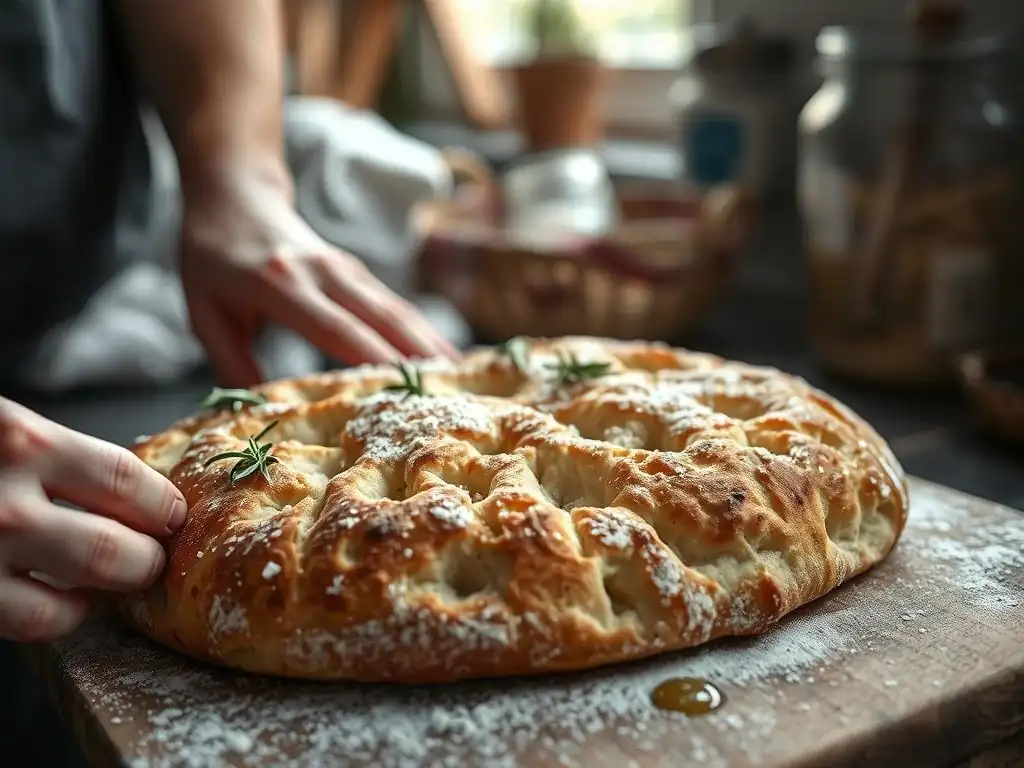
Once the dough is in the pan, gently coax it towards the edges, being careful not to deflate the precious air pockets created during fermentation. Allow it to rest for 15-30 minutes if it resists stretching. Before baking, drizzle more olive oil over the top and dimple the dough generously with your fingertips. These dimples are characteristic of focaccia and help distribute the oil and prevent large, uneven air pockets from forming on the surface. This preparation ensures the dough is ready to expand evenly and develop a wonderful crust and open crumb during baking.
Olive Oil's Role in Crust and Crumb
Olive oil plays a dual role in sourdough focaccia, impacting both the crust and the internal crumb structure. On the crust, particularly the bottom, the generous amount of oil essentially deep-fries the dough, creating a wonderfully golden, crisp, and flavorful base. On the top, drizzling oil before dimpling ensures that the surface remains moist and develops a lovely texture and color. The oil also pools in the dimples, creating pockets of intense flavor that permeate the bread during baking.
Internally, while not directly creating the open crumb (that's fermentation and gluten), the oil contributes to the delicate texture. Fat tenderizes the dough by interfering with gluten formation, making the final product softer and more pleasant to chew. The use of a significant amount of olive oil is one of the key differentiators of focaccia from other breads and is crucial for achieving that desirable soft interior coupled with a crisp exterior, contributing greatly to the sourdough focaccia perfect crumb experience.
Achieving Oven Spring: Temperature and Steam
Oven spring is the final dramatic rise that occurs during the initial phase of baking, as the gases within the dough rapidly expand from the heat. Maximizing oven spring is vital for achieving a voluminous sourdough focaccia with a beautiful open crumb. This is best achieved in a very hot oven with some form of steam.
A common baking temperature for focaccia is between 220°C and 240°C (425°F and 465°F). Preheating your oven thoroughly, including the baking pan if possible (though often the dough is placed in a cold, oiled pan and then put into a hot oven), ensures the dough receives an immediate burst of heat.
Steam in the oven environment keeps the surface of the dough moist during the first 10-15 minutes of baking. This moisture allows the crust to remain flexible, enabling the dough to expand more freely before the crust sets. Without steam, the crust would harden too quickly, restricting oven spring and resulting in a denser loaf. While dedicated steam ovens are ideal, home bakers can create steam by placing a tray of hot water on the bottom rack of the oven or by spraying water onto the hot oven walls immediately after placing the focaccia inside.
Baking Temperature and Crumb Structure
The high baking temperature used for sourdough focaccia plays a significant role in developing the desired open crumb and crust. Baking at 220-240°C (425-465°F) provides the intense heat needed for rapid oven spring. This quick expansion is what pushes the gluten network to its limits, creating those large, irregular air pockets characteristic of an open crumb. The high heat also ensures the crust develops quickly, providing structural support for the airy interior.
If the oven temperature is too low, the dough will rise more slowly, potentially collapsing before the structure sets, leading to a denser crumb. Too high, and the crust might burn before the interior is fully cooked. A typical baking time for a large focaccia might be 25-35 minutes, or until the top is golden brown and the bottom is crisp and golden when checked with a spatula. Monitoring your focaccia and adjusting temperature or time as needed is crucial for balancing crust development with achieving a perfectly cooked, open-crumb interior.
Steam's Impact on Oven Spring and Crumb
Steam is an unsung hero in achieving optimal oven spring and contributing to the sourdough focaccia perfect crumb. Introducing steam into the oven during the initial baking phase keeps the surface of the dough moist and pliable. This prevents a hard crust from forming prematurely, allowing the dough maximum flexibility to expand during oven spring. As the internal temperature rises, the trapped gases and water vapor expand rapidly, inflating the loaf.
Once the crust sets (after about 10-15 minutes, when the steam dissipates), the internal structure is locked in. The presence of steam also contributes to a thinner, crispier crust rather than a thick, hard one. While focaccia doesn't require as much steam as a lean loaf baked in a Dutch oven, a humid environment in the first part of the bake undeniably helps achieve a better rise and a more open, airy internal structure.
Cooling and Cutting to Appreciate the Texture
The final, often overlooked, step in achieving and appreciating your sourdough focaccia perfect crumb is proper cooling and cutting. It is absolutely essential to let your focaccia cool significantly, ideally completely, on a wire rack after it comes out of the oven. While tempting to slice into a warm loaf, the internal structure is still fragile and the starches are still setting. Cutting too early can compress the crumb, making it seem denser and potentially gummy, even if it was perfectly baked.
Cooling on a wire rack allows air to circulate around the entire focaccia, preventing the bottom crust from becoming soggy from trapped steam. A large focaccia might need 1-2 hours to cool sufficiently. Once cooled, slice into it with a sharp knife and admire the beautiful open crumb structure you worked so hard to achieve. The light, airy interior should be visible, a testament to successful fermentation and baking techniques.
Cooling the Focaccia Completely
Cooling sourdough focaccia completely is non-negotiable for the best texture. As the bread cools, moisture redistributes throughout the loaf, and the starch molecules crystalize in a process called retrogradation. This process solidifies the crumb structure and ensures the interior is soft, moist, and not gummy. Cutting into hot bread releases steam too quickly, which can make the inside feel wet and dense.
Allowing your sourdough focaccia to cool fully, for at least an hour or two on a wire rack, ensures that the internal structure stabilizes. When you slice into it, you'll see the true open crumb you've achieved, and the texture will be perfectly soft and delicate, ready to be enjoyed with its crispy crust. Patience during this final step is rewarded with the best possible outcome for your sourdough focaccia perfect crumb.
Slicing for Crumb Structure Observation
How you slice your sourdough focaccia can also impact your ability to observe and appreciate the open crumb structure. Using a sharp bread knife is crucial for clean cuts that don't compress the soft interior. Slicing straight down or using a gentle sawing motion works best. Cutting a cross-section of the focaccia will give you the clearest view of the internal crumb structure, allowing you to see the size and distribution of the air pockets.
Observe the crumb: are the holes large and irregular? Is the texture consistent throughout, or are there dense spots? Are there tunnels? Analyzing the crumb provides valuable feedback on your process – a very open, even crumb suggests successful hydration, gluten development, and fermentation. Dense spots might indicate insufficient mixing or folding, while a gummy layer near the bottom could point to under-baking or insufficient cooling. Taking the time to look at the crumb is an educational step towards consistently achieving a sourdough focaccia perfect crumb.
Troubleshooting Crumb and Texture Issues
Dense or Gummy Crumb: Causes and Solutions
A dense or gummy crumb is one of the most common and frustrating issues when baking sourdough focaccia. A dense crumb typically indicates insufficient rise, often due to under-proofing or a weak starter. If your focaccia doesn't rise much in the pan and feels heavy, suspect that your bulk fermentation or final proof wasn't long enough, or your starter wasn't active enough. Solution: Ensure your starter is active and used at its peak.
Extend bulk fermentation until the dough is visibly aerated and lighter. Give the dough adequate cold proofing time (18-24 hours is a good starting point). Check your dough temperature during bulk fermentation to ensure it's warm enough (24-26°C).
A gummy crumb often suggests the bread is under-baked or was cut before it cooled completely. The starches inside haven't fully set, leaving a wet, sticky texture. Solution: Ensure your oven is properly preheated to the correct temperature (220-240°C). Bake the focaccia until the top is deeply golden brown and the bottom crust is crisp and golden when lifted. An internal temperature of around 95-100°C (205-210°F) indicates it's fully baked. Crucially, let the focaccia cool completely on a wire rack before slicing. Rushing this step is a primary cause of gumminess, ruining the potential sourdough focaccia perfect crumb.
Large, Uneven Holes: Addressing Air Pockets
While an open crumb is desired, sometimes focaccia can have just a few very large, uneven holes or tunnels, often near the surface, with denser areas elsewhere. This can indicate that air pockets weren't evenly distributed during handling or that the dough wasn't dimpled sufficiently before baking. Large tunnels can also sometimes result from improper shaping or transferring the dough to the pan in a way that traps a few large bubbles rather than distributing smaller ones.
Solution: Ensure you perform enough sets of stretch and folds during bulk fermentation to build an even gluten structure and distribute aeration. When transferring the dough to the pan, do so gently but purposefully, trying to get it into shape without trapping large singular bubbles. Most importantly, dimple the dough thoroughly and evenly before baking. Use well-oiled fingertips to press down firmly, creating many dimples across the entire surface. This action breaks up large surface bubbles and encourages the air pockets to distribute more evenly throughout the dough, contributing to a more consistent sourdough focaccia perfect crumb.
Lack of Oven Spring: Improving Rise
If your sourdough focaccia looks promising after proofing but doesn't spring up much in the oven, resulting in a flatter loaf, several factors could be at play. The most common reasons are insufficient proofing (either bulk or final), a weak starter, or insufficient oven temperature/steam. If the dough was under-proofed, it simply didn't build enough gas to expand significantly. If it was over-proofed, the gluten structure might be too weak to hold the expansion.
Solution: Review your proofing times and temperatures. Ensure your starter is active and used at its peak. Increase bulk fermentation time if the dough isn't showing sufficient signs of aeration. Consider a longer cold proof.
Make sure your oven is fully preheated to a high temperature (220-240°C) and that you are introducing some form of steam during the initial bake. Baking on a preheated steel or stone (if your pan allows) can also provide a stronger heat source from below, aiding oven spring. A strong starter, proper proofing, and a hot, steamy oven are your best allies for maximizing oven spring and achieving that beautiful sourdough focaccia perfect crumb.
Sourdough Focaccia Recipes for Crumb Development
Basic Sourdough Focaccia Recipe
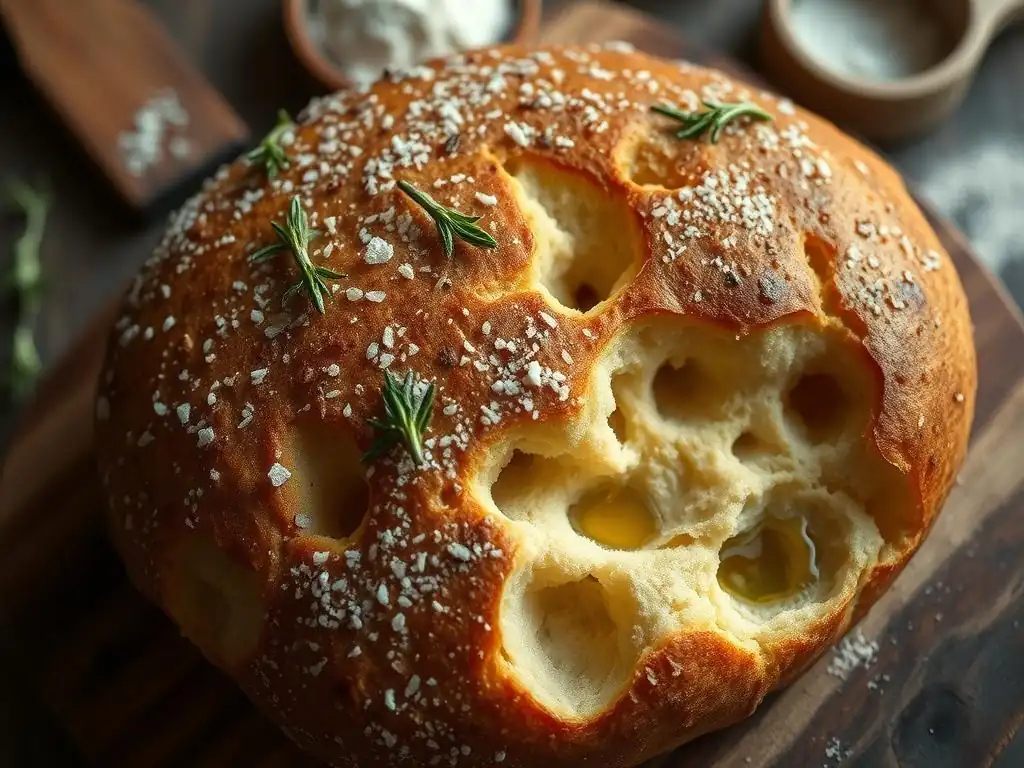
This recipe is designed to highlight techniques for achieving an open crumb sourdough focaccia. It uses relatively high hydration and incorporates autolyse, stretch and folds, and a cold proof.
Ingredients:
- 500g strong bread flour
- 400g water (80% hydration)
- 100g active sourdough starter (100% hydration, fed at 1:2:2 or 1:3:3 ratio)
- 10g salt (2%)
- Extra virgin olive oil, for pan and topping
- Flaky sea salt, for topping
Instructions:
- Autolyse: In a large bowl, mix flour and water until just combined. Cover and let rest for 45-60 minutes.
- Mix: Add starter and salt to the autolysed dough. Mix with wet hands or a stand mixer on low speed for 5-10 minutes until the starter and salt are incorporated. The dough will be very wet and sticky.
- Bulk Fermentation (with Folds): Cover the bowl. Over the next 3-4 hours at 24-26°C (75-79°F), perform 4-5 sets of stretch and folds every 30-45 minutes. By the last set, the dough should be smoother, more elastic, and show some surface bubbles.
- Cold Proof: Generously oil a 9x13 inch baking pan (or similar size) with at least 3-4 tablespoons of olive oil. Gently transfer the dough to the pan, trying not to deflate it. Cover tightly and refrigerate for 12-24 hours (up to 48 hours for more flavor). The dough should visibly increase in volume and appear bubbly.
- Preheat & Prepare: About 1 hour before baking, remove the pan from the fridge. Preheat your oven to 230°C (445°F). Drizzle more olive oil generously over the top of the dough (another 2-3 tablespoons). Use well-oiled fingertips to gently dimple the dough all over, pressing almost to the bottom of the pan. Sprinkle generously with flaky sea salt.
- Bake: Place the pan in the hot oven. If using steam, create steam now. Bake for 25-35 minutes, or until the top is golden brown and the bottom is crisp and golden (check by lifting a corner with a spatula).
- Cool: Carefully remove the focaccia from the pan and transfer it to a wire rack to cool completely (1-2 hours) before slicing.
This method focuses on building strength gently and allowing a long, slow cold proof, key steps for achieving a sourdough focaccia perfect crumb.
Sourdough Focaccia with Roasted Garlic and Rosemary
This variation adds wonderful flavor while still emphasizing the techniques for an open crumb sourdough focaccia. Follow the basic recipe above, incorporating the additions during the mixing phase.
Ingredients:
- Follow the Basic Sourdough Focaccia Recipe ingredients.
- 1-2 heads of garlic, roasted
- 2-3 sprigs fresh rosemary, finely chopped
Preparation:
- Roast Garlic: Preheat oven to 200°C (400°F). Cut off the top of the garlic heads, drizzle with olive oil, wrap in foil, and roast for 40-60 minutes until very soft. Let cool, then squeeze the softened cloves out.
- Add to Dough: During step 2 (Mixing) of the Basic Recipe, add the roasted garlic cloves and chopped rosemary along with the starter and salt. Mix until evenly distributed. The garlic may make the dough slightly stickier.
- Continue: Proceed with steps 3-7 of the Basic Sourdough Focaccia Recipe (Bulk Fermentation, Cold Proof, Preheat & Prepare, Bake, Cool).
- Topping: When dimpling the dough before baking (Step 5), you can press extra rosemary sprigs or roasted garlic cloves into the dimples for added visual appeal and flavor.
The addition of roasted garlic adds moisture and flavor, while rosemary provides aromatic notes. These additions don't fundamentally change the dough's structure as long as they are well incorporated, allowing you to focus on the techniques for achieving that desirable sourdough focaccia perfect crumb while enjoying a flavored variation.
Conclusion: Mastering Open Crumb Focaccia
Continuing Your Focaccia Journey
Achieving a sourdough focaccia perfect crumb is a rewarding milestone in your baking journey. It requires patience, attention to detail, and an understanding of how each step—from starter health and hydration to fermentation length and baking temperature—influences the final texture. Don't be discouraged if your first few attempts aren't perfectly airy. Baking is a process of continuous learning and refinement. Pay close attention to how your dough behaves at each stage: how it feels during folds, how it proofs in the pan, and how it looks after baking.
Experiment with slight variations in hydration (try 85% next time! ), cold proofing duration, or even different flours to see how they impact the crumb. Keep detailed notes of your process, including temperatures and timings, as these variables can significantly affect the outcome. With practice, you'll develop an intuition for your dough and starter, allowing you to consistently produce beautiful, open-crumb sourdough focaccia.
There's immense satisfaction in pulling a golden, bubbly sourdough focaccia with a visible open crumb from the oven. This bread is meant to be shared! Whether served simply with more olive oil and balsamic vinegar, as a base for sandwiches, or alongside a meal, its delightful texture and tangy flavor are sure to impress. Sharing your creations is also a great way to get feedback on your sourdough focaccia perfect crumb and continue improving.
Take photos of the crumb! Analyzing photos helps you see the structure objectively. Talk to fellow bakers, share your successes and challenges. The community aspect of sourdough baking is incredibly supportive. So bake, share, learn, and enjoy the delicious results of your efforts to master the art of the open crumb sourdough focaccia. Your journey to perfect focaccia crumb is just beginning!
Frequently Asked Questions
What makes Sourdough Focaccia different from regular focaccia?
Sourdough focaccia relies on a sourdough starter for leavening, resulting in a more complex flavor and a chewier texture compared to focaccia made with commercial yeast. This also contributes to the desired perfect crumb structure.
How do I achieve a perfect crumb in my sourdough focaccia?
Achieving a perfect crumb depends on proper hydration, bulk fermentation, and gentle handling of the dough. High hydration helps create the airy pockets within the focaccia.
What role does bulk fermentation play in sourdough focaccia?
Bulk fermentation is crucial for developing flavor and strength in the dough. It allows the sourdough starter to work its magic, creating those desirable air pockets.
What are some common mistakes that prevent a perfect crumb?
Over-proofing or under-proofing the dough are common culprits. Also, kneading too aggressively after bulk fermentation can deflate the dough, resulting in a dense crumb.
Can beginners successfully bake sourdough focaccia with a perfect crumb?
While sourdough focaccia involves some advanced techniques, beginners can achieve a perfect crumb by following the recipe closely and paying attention to the details, especially regarding fermentation times and hydration.
Final Reflection: The Enduring Allure of the Perfect Sourdough Focaccia Crumb
The pursuit of the perfect sourdough focaccia crumb is more than just a baking challenge; it's a journey into the heart of artisanal bread making, a testament to patience, precision, and the enduring magic of fermentation. The techniques explored in this article – from understanding hydration levels to mastering the crucial final proof – are not merely steps in a recipe, but keys to unlocking the complex interplay of flavor, texture, and visual appeal that defines a truly exceptional loaf. This pursuit remains relevant today as home bakers increasingly seek authentic, handcrafted experiences in their kitchens.
The journey to mastering the sourdough focaccia crumb is a deeply rewarding one, mirroring the slow, deliberate process of life itself. The subtle nuances of each stage – the tangy aroma of the starter, the satisfying stretch and fold, the golden-brown crust – create a sensory experience that transcends the simple act of baking. It's a connection to a long tradition of bread making, a testament to the power of simple ingredients transformed by time and care. Bread is the staff of life,
they say, and in the case of sourdough focaccia, it's a staff crafted with both skill and soul.
Now, consider your own baking journey. What have you learned from this exploration of sourdough focaccia? What challenges did you face, and how did you overcome them? More importantly, what will you take away from this experience to inform your future baking endeavors?
Don't be afraid to experiment, to push your boundaries, and to embrace the imperfections along the way. The pursuit of the perfect crumb is a lifelong journey, and each loaf baked is a step closer to mastery, a testament to your dedication and passion. So, embrace the challenge, and may your next sourdough focaccia be even more magnificent than the last.
Unlock Your Focaccia Potential: Master the Crumb!
Thanks for diving into the world of sourdough focaccia with us! We hope you gained valuable insights into achieving that perfect, airy crumb. Now it's time to put your new knowledge into action.
- Bake your dream focaccia: Use what you've learned to create your own masterpiece. Experiment with different herbs, oils, and toppings – let your creativity shine!
- Share your focaccia journey: Post a picture of your creation on social media and tag us – we'd love to see your results! Use #BakeWithEaseFocaccia to join the community.
- Explore advanced sourdough techniques: Dive deeper into our blog for more expert tips and recipes, expanding your baking skills beyond focaccia.
Ready to transform your baking game and create incredible focaccia? What unique topping will you experiment with first?