
Decorating with Sprinkles: Fun and Easy Layer Cake Ideas

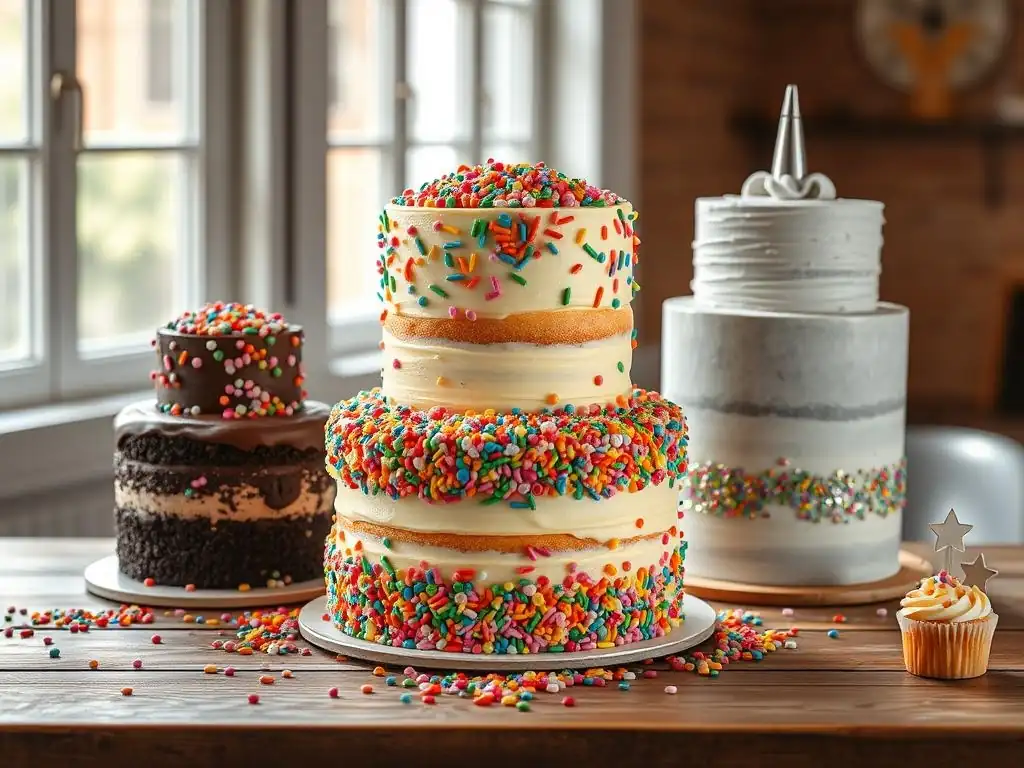
Welcome to BakeWithEase, your haven for all things baking! Ever dreamt of creating a show-stopping layer cake without the stress? Get ready to sprinkle some magic! This week we're diving into the art of the easy sprinkle layer cake, unlocking secrets to vibrant designs and effortless decorating. But the fun doesn't stop there… Discover how to elevate your baking game with simple techniques and creative twists. Are you ready to bake something unforgettable?
- Introduction to Layer Cake Decoration
- Essential Tools and Ingredients for Layer Cakes
- Layer Cake Decorating Ideas: Step-by-Step Guides
- Advanced Layer Cake Decoration Techniques
- Tips and Tricks for Perfect Frosting Application
- Layer Cake Variations and Flavor Pairings
- Conclusion: Unleash Your Creativity with Layer Cakes
-
Frequently Asked Questions
- How do I ensure my sprinkles stick to the frosting on my layer cake?
- What type of frosting works best for decorating with sprinkles?
- What are some creative ways to apply sprinkles beyond just scattering them on top?
- Can I use different types of sprinkles together on my layer cake?
- How far in advance can I decorate my sprinkle layer cake before serving it?
- Final Reflection: The Enduring Joy of a Sprinkled Layer Cake
- Unleash Your Inner Cake Artist!
Introduction to Layer Cake Decoration
Layer cakes are a canvas for creativity, offering endless possibilities for stunning visual presentations. Beyond simply assembling layers, the true magic often lies in the final decorative touches. Mastering the fundamentals of frosting and piping is the gateway to transforming a simple cake into a showstopper. Whether you're aiming for elegant sophistication or playful fun, understanding these techniques is crucial for any aspiring cake decorator.
This guide, brought to you by BakeWithEase.com, is designed to walk you through the essential steps and creative ideas for decorating your layer cakes. We'll explore everything from choosing the right tools to executing various popular designs. Our goal is to demystify the process and empower you to create beautiful and delicious cakes that impress your friends and family, making even an easy sprinkle layer cake look professionally finished.
The Art of Frosting and Piping
Frosting and piping are the cornerstones of classic cake decoration. Frosting provides a smooth or textured base, seals in moisture, and of course, adds delicious flavor. Piping, on the other hand, allows for intricate details, borders, and decorative elements like rosettes, shells, or delicate lines. The combination of these two techniques provides the foundation for almost any cake design you can imagine.
Developing skill in frosting means achieving an even crumb coat, a smooth final finish, or creating specific textures. Piping involves controlling pressure and movement to form consistent shapes. While it might seem intimidating at first, practicing with different tips and frosting consistencies is key. With patience and practice, you'll find yourself effortlessly creating beautiful patterns and designs that elevate your easy sprinkle layer cake and beyond.
BakeWithEase.com's Guide to Cake Decorating Success
At BakeWithEase.com, we believe that cake decorating should be accessible and enjoyable for everyone, regardless of skill level. Our approach focuses on breaking down techniques into simple, actionable steps. We emphasize understanding the 'why' behind each step – why a crumb coat is essential, why frosting consistency matters for piping, or why specific tools are better suited for certain tasks.
This guide reflects our philosophy by providing clear instructions and practical tips. We'll share insights gained from years of baking experience to help you avoid common pitfalls and achieve successful results. From selecting the perfect cake base to adding that final flourish, we're here to support your journey in mastering the art of cake decoration, ensuring your easy sprinkle layer cake turns out perfectly every time.
Essential Tools and Ingredients for Layer Cakes
Successful cake decoration starts with having the right equipment and high-quality ingredients. Just as an artist needs brushes and paints, a cake decorator relies on specific tools to bring their vision to life. Investing in a few key items can make a significant difference in the ease and outcome of your decorating process, allowing you to confidently tackle everything from simple swirls to intricate designs on your easy sprinkle layer cake.
Beyond tools, the quality and type of ingredients, particularly the cake and frosting, play a vital role. A cake that is too crumbly or fragile won't hold up to decorating, and frosting that is too soft or too stiff will be difficult to work with. Choosing the right components ensures a stable structure and a smooth, workable medium for your creative endeavors.
Choosing the Right Frosting Tips for Your Design
Piping tips come in a vast array of shapes and sizes, each designed to create a specific effect. Understanding the basic categories is a good starting point. Round tips (like Wilton #1, #3, #12) are perfect for dots, lines, and writing. Star tips (open or closed, like Wilton #18, #21, #1M) are used for stars, shells, rosettes, and borders. Petal tips (like Wilton #104) create ruffles and flower petals. Leaf tips (like Wilton #352) are for making leaves.
For popular designs, specific tips are often recommended. For instance, the classic rosette often uses a large open star tip like the Wilton 1M. For textured buttercream, you might not need a tip at all, relying instead on spatulas or combs. Having a basic set containing a few sizes of round, star, and petal tips will cover most common decorating needs, making it easier to add piped details alongside sprinkles on your easy sprinkle layer cake.
Best Types of Cake for Decorating [Sponge, Pound, etc.]
The type of cake you choose can significantly impact how easy it is to decorate. Cakes that are too delicate or crumbly, like some chiffon cakes, can be challenging to handle and frost smoothly. Sturdier cakes provide a more stable base for stacking layers and applying frosting and decorations.
Pound cake, with its dense and fine crumb, is excellent for carving and holds up very well to heavy frosting and fondant. Sponge cakes, while lighter, can also be used, particularly if they are slightly denser versions like a Genoise. Butter cakes are perhaps the most popular choice for layer cakes due to their moist crumb and sturdy structure, making them ideal for stacking, frosting, and adding various decorations, including sprinkles for an easy sprinkle layer cake. A well-baked butter cake provides a reliable foundation.
Frosting Options for Optimal Piping [Buttercream, Swiss Meringue, etc.]
The consistency and type of frosting are paramount for successful piping and decoration. Different frostings behave differently under pressure and temperature changes. American buttercream, a simple mix of butter, powdered sugar, and liquid, is widely used because it's easy to make and holds stiff peaks well, making it great for piping defined shapes like stars and rosettes, although it can be quite sweet.
Meringue-based buttercreams, such as Swiss, Italian, or French buttercream, offer a smoother, less sweet alternative. Swiss meringue buttercream, made by whisking warm egg whites and sugar before adding butter, is known for its silky texture and stability, making it excellent for smooth finishes and delicate piping work. These buttercreams are generally less prone to crusting than American buttercream. For an easy sprinkle layer cake, any frosting that pipes well and adheres sprinkles effectively will work, but a slightly firmer consistency is usually best for defined patterns.
Layer Cake Decorating Ideas: Step-by-Step Guides
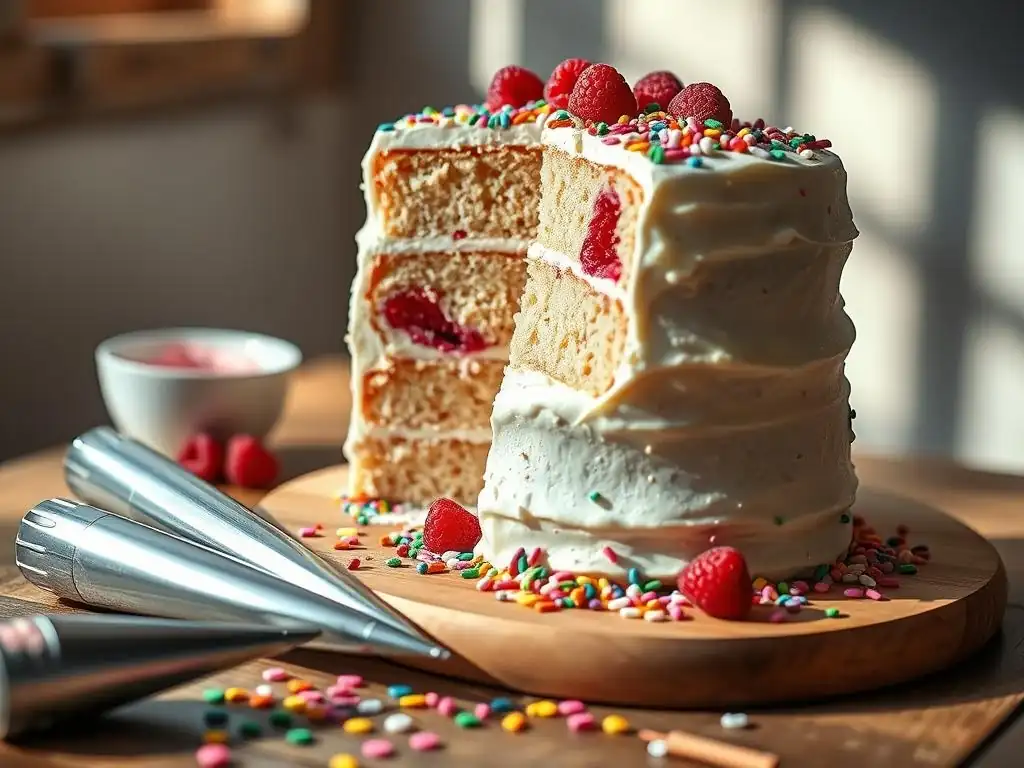
Let's dive into some popular and achievable layer cake decorating techniques. These step-by-step guides will walk you through the process, offering practical tips to help you recreate these designs in your own kitchen. Each technique offers a different aesthetic, from classic elegance to modern artistry, providing inspiration for your next baking project, whether it's a simple frosted cake or an easy sprinkle layer cake.
Remember that practice makes perfect. Don't be discouraged if your first attempt isn't flawless. Focus on understanding the technique, and you'll see improvement with each cake you decorate. These guides are designed to build your confidence and expand your decorating repertoire.
Classic Rosette Cake: A Timeless Design
The rosette cake is a perennial favorite, known for its beautiful, floral-like appearance created by piping swirls of frosting. It's a relatively simple technique that yields stunning results, making it perfect for celebrations. This design works beautifully with various colors and can even be enhanced by strategically placing sprinkles within or around the rosettes for an easy sprinkle layer cake variation.
To create a classic rosette cake, you'll need a large open star piping tip (like Wilton 1M or 2D) and a piping bag filled with medium-stiff buttercream. The key is consistency in your piping pressure and starting point for each rosette.
Preparing the Cake for Frosting
Before you can pipe rosettes, your cake needs to be properly prepared. This involves ensuring the cake is cool and stable. Start by leveling your cake layers if necessary, using a cake leveler or a serrated knife. Stack your layers with a filling of your choice – this could be more frosting, fruit curd, or ganache.
Next, apply a thin layer of frosting all over the cake, including the top and sides. This is called the crumb coat. Its purpose is to trap any loose crumbs, preventing them from showing up in your final frosting layer. Chill the cake in the refrigerator for about 15-30 minutes until the crumb coat is firm. This creates a stable surface for your final frosting layer or, in this case, directly for piping the rosettes.
Piping Rosettes for a Floral Effect
Once the crumb coat is firm, you are ready to pipe the rosettes. Hold the piping bag with the tip perpendicular to the cake surface. Start at the outer edge of the cake (either the side or the top). Apply steady pressure to the bag while moving your hand in a tight circular motion, swirling the frosting outwards from the center point you started at.
Release pressure as you complete the circle, pulling the tip away quickly to create a clean finish. You can pipe rosettes side-by-side on the top or down the sides of the cake. Ensure each rosette touches or slightly overlaps the previous one to create a continuous, textured surface. For an easy sprinkle layer cake effect, you can add sprinkles to the wet rosettes immediately after piping.
Tips for Achieving Uniform Rosettes
Consistency is key to a beautiful rosette cake. To achieve uniform rosettes, maintain consistent pressure on the piping bag. Practice piping on a piece of parchment paper first to get a feel for the pressure needed to create the desired size and shape. Start each rosette from approximately the same point relative to the previous one.
Ensure your buttercream is the correct consistency – it should be stiff enough to hold its shape but soft enough to pipe smoothly. If it's too stiff, add a tiny bit of milk or cream; if too soft, add more powdered sugar or chill it slightly. Using a large tip helps make the process faster and creates more defined rosettes. Piping rosettes is a fantastic way to make an easy sprinkle layer cake look elaborate.
Textured Buttercream Cake: Adding Depth and Dimension
Textured buttercream cakes are popular for their modern, artistic look. Instead of a perfectly smooth finish, the frosting is intentionally applied to create swirls, peaks, ridges, or other patterns using spatulas, combs, or even spoons. This technique is very forgiving and allows for a lot of creativity, making it a great option for beginners or those looking for an easy sprinkle layer cake design that's a bit different.
Creating texture adds visual interest and depth to the cake surface. It can range from subtle waves to dramatic peaks. This method often requires a bit more frosting than a smoothly iced cake but results in a dynamic and unique finish.
Creating a Smooth Frosting Base
Even when creating a textured finish, starting with a relatively smooth base can be helpful, though not always strictly necessary depending on the desired texture. Apply a generous amount of frosting to the top and sides of your crumb-coated cake. Use an offset spatula to spread the frosting evenly, covering the entire surface.
You don't need to strive for absolute perfection at this stage, as the texture will cover any minor imperfections. The goal is simply to get a consistent layer of frosting over the cake that you can then work with to create your chosen texture. Ensure you have enough frosting on the cake to create the desired peaks or ridges.
Applying Textures with Spatulas and Tools
Now for the fun part: adding texture! There are many ways to do this. For simple swirls, use the back of a spoon or the tip of an offset spatula to create swirling motions in the frosting. For vertical or horizontal ridges, hold a cake scraper or a textured comb against the side of the cake while slowly rotating the cake on a turntable.
You can create rustic peaks by simply dabbing the surface of the frosting with the tip of your spatula. Experiment with different tools – even a fork or a pastry brush can create interesting textures. This technique is excellent for creating a surface that holds sprinkles well, making it ideal for an easy sprinkle layer cake with a unique finish.
Blending Colors for a Visually Appealing Texture
Textured buttercream provides a wonderful opportunity to play with color blending. You can apply multiple colors of frosting to the cake and then swirl or scrape them together to create a marbled or gradient effect within the texture. Apply dollops or stripes of different colored frostings to the cake surface before applying the texture.
As you create the texture with your spatula or comb, the colors will blend together, creating a beautiful, artistic look. For example, combining shades of blue and white can create a wave-like texture reminiscent of the ocean. This adds another layer of visual appeal to your textured cake, complementing any easy sprinkle layer cake design.
Vertical Swirls: A Modern Cake Design
Vertical swirls offer a sleek and modern look compared to traditional horizontal piping or smooth finishes. This design involves piping lines or swirls of frosting vertically up the sides of the cake, creating a sense of height and movement. It's a relatively straightforward technique that looks sophisticated and is quite achievable, making it a great candidate for an easy sprinkle layer cake with a contemporary twist.
This technique works well with a medium-stiff buttercream that holds its shape. The key to clean vertical swirls is steady hands and consistent pressure. You can use various piping tips depending on the desired thickness and pattern of the swirls.
Techniques for Creating Clean Lines
Achieving clean vertical lines or swirls requires a steady hand and consistent movement. Using a turntable is highly recommended, as it allows you to rotate the cake smoothly while keeping your piping bag in a relatively stable position. Hold the piping bag with the tip against the bottom edge of the cake.
Apply steady pressure and move the bag upwards in a straight line or a gentle wave-like motion towards the top edge of the cake. Release pressure as you reach the top. Practice this motion on parchment paper first to get a feel for the speed and pressure needed to create a continuous, even line or swirl. Overlapping your vertical elements slightly can help cover the cake completely.
Applying Swirls in Vertical Sections
To apply vertical swirls, start at the bottom edge of the cake and pipe your chosen pattern (a straight line, a gentle wave, a zigzag) all the way up to the top edge. Repeat this process, placing each subsequent vertical element right next to the previous one, working your way around the entire circumference of the cake.
Ensure that the spacing between your vertical lines or swirls is consistent for a uniform look. You can use a straight edge tool lightly pressed against the frosting to guide you if needed. This method creates a dynamic visual effect and provides a textured surface that can hold sprinkles beautifully for an easy sprinkle layer cake.
Color Combinations for Striking Swirls
Vertical swirls are an excellent canvas for playing with multiple colors. You can use a single color for a monochromatic look or alternate between two or more colors for a striped effect. To create blended vertical swirls, you can load your piping bag with stripes of different colored frostings.
When you pipe, the colors will twist together, creating a beautiful, blended vertical pattern. For example, alternating between pink and white or blue and green can create a vibrant and eye-catching design. Consider complementary colors for a bold statement or analogous colors for a softer blend. Adding contrasting sprinkles to these colorful swirls enhances the easy sprinkle layer cake effect.
Watercolor Effect Cake: An Artistic Celebration
The watercolor effect on a cake mimics the soft, blended look of watercolor paintings. This technique involves applying different colors of frosting to the cake and then gently blending them together using a spatula or brush, creating soft transitions and washes of color. It's a beautiful and artistic way to decorate a cake, offering a unique look every time.
This technique is quite forgiving as the blending process hides imperfections. It's a great way to use multiple colors subtly and create a visually stunning cake that looks far more complex than it is, perfect for adding a sophisticated touch to an easy sprinkle layer cake.
Creating a Crumb Coat for Color Adhesion
A smooth, firm crumb coat is essential for a successful watercolor effect. The crumb coat provides a clean, neutral base for applying the colors and prevents crumbs from mixing into your final, colorful layer. Apply a thin layer of white or light-colored frosting to your stacked cake, ensuring it's as smooth as possible.
Chill the cake until the crumb coat is firm to the touch. This firm base allows you to apply the colored frostings and blend them without disturbing the underlying cake or picking up crumbs. A well-chilled crumb coat is key to achieving clean color transitions in the watercolor effect.
Applying Colors to the Frosting
Once your crumb coat is firm, apply dollops or smears of your chosen frosting colors onto the cake. You can apply them randomly or in specific areas where you want certain colors to dominate. Use an offset spatula or a spoon to place the colors. Don't worry about making them neat at this stage; the blending comes next.
Use colors that are slightly different shades or complementary to create interesting blends. For example, shades of blue and green, or pink and orange. Ensure you have enough frosting applied to cover the cake fully once blended. For an easy sprinkle layer cake with a watercolor look, choose sprinkle colors that complement your frosting palette.
Achieving a Blended Watercolor Look
With the colors applied, use a clean offset spatula or a bench scraper to gently smooth the frosting around the cake. As you smooth, the colors will begin to blend together. You can also use a clean pastry brush or even a food-safe paintbrush (dedicated for cakes) to gently brush over the colors, mimicking the strokes of a watercolor painting.
Work in sections, cleaning your spatula or brush between blending areas if you want to keep certain colors separate. The goal is to create soft, diffused transitions between the colors, avoiding harsh lines. You can go over areas multiple times until you achieve the desired blended effect. This technique provides a beautiful, soft backdrop for adding sprinkles to create an easy sprinkle layer cake.
The "Fault Line" Cake: A Dramatic Effect
The "fault line" cake is a trendy design that creates the illusion of a crack or split horizontally around the cake, revealing a decorative layer underneath. This hidden layer is often filled with sprinkles, edible glitter, or contrasting colors, providing a dramatic and eye-catching effect. It's a clever technique that looks complex but is surprisingly achievable, making it perfect for showcasing a vibrant easy sprinkle layer cake design within the 'fault line'.
This design requires careful layering and precise application of frosting to create the distinct 'fault line'. The revealed section provides a fantastic opportunity to add a burst of color and texture.
Building the Base for the Fault Line
To create a fault line cake, you first need to frost the entire cake smoothly with one color of frosting. This will be the color visible above and below the 'fault line'. Ensure this base layer is smooth and even, as it will frame the decorative section. Chill the cake until this base layer is firm.
Next, you'll create the raised edges that define the fault line. Using a piping bag or spatula, apply a thicker layer of frosting horizontally around the middle section of the cake, where you want the fault line to appear. This layer should be about 1-2 inches wide and thicker than the base layer, creating a ridge. Chill the cake again until this ridge is firm.
Creating the Decorative Gap
Once the raised frosting ridge is firm, it's time to create the decorative 'gap' or fault line. This is where you'll apply your chosen decoration, such as sprinkles. Apply a thin layer of contrasting colored frosting, edible glue, or even just slightly wet frosting to the exposed cake surface between the top and bottom ridges you created.
Immediately apply your sprinkles or other decorations to this wet surface. Gently press them into the frosting or adhesive to ensure they stick well and completely cover the area between the ridges. This decorated strip is the 'revealed' section of your fault line, showcasing your chosen easy sprinkle layer cake element.
Securing Decorations for a Lasting Effect
To ensure the sprinkles or other decorations within the fault line stay put, gently press them into the wet frosting or adhesive layer. You can use your hand, a piece of parchment paper, or a clean bench scraper to lightly press the decorations into the surface.
Once the sprinkles are applied, carefully apply the final layer of frosting only to the areas above and below the sprinkle-filled fault line. Use a spatula or bench scraper to smooth this final layer, ensuring it meets the edges of the sprinkle section cleanly and creates the illusion of a break in the frosting. Chill the cake again to set everything firmly in place. This technique makes for a truly dramatic easy sprinkle layer cake.
Advanced Layer Cake Decoration Techniques
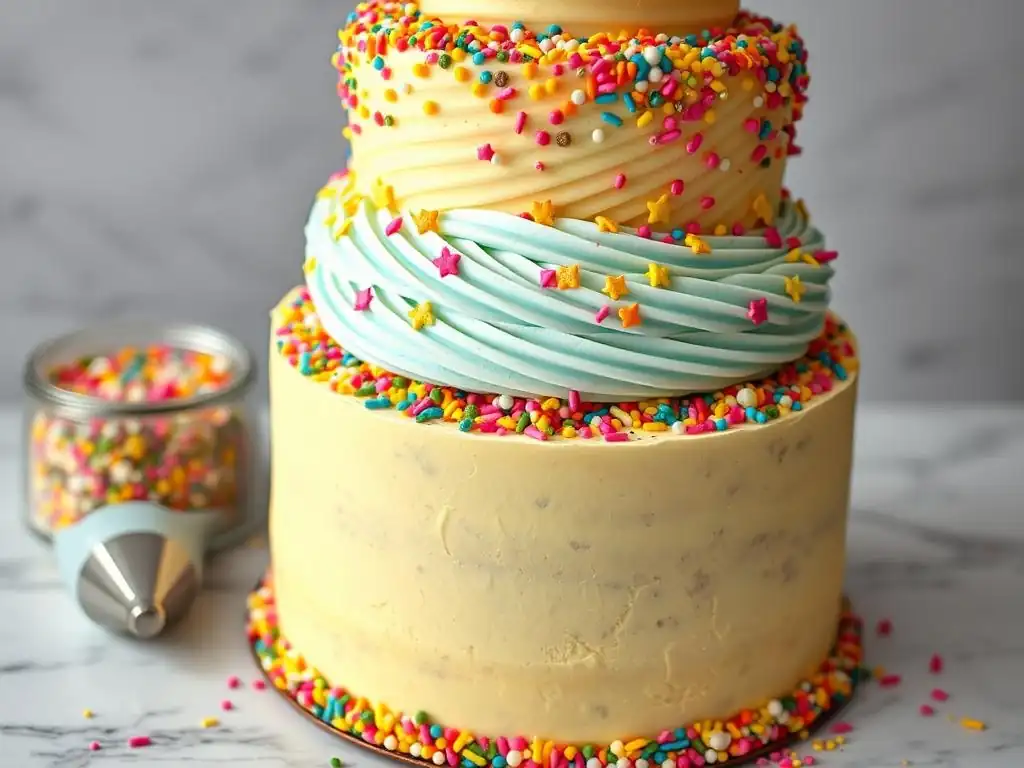
Once you've mastered the basics of frosting and piping, you can explore more advanced techniques that add intricate details and sophisticated patterns to your layer cakes. These methods often involve combining tools and materials to achieve complex designs that elevate your cake decorating skills.
Exploring advanced techniques allows you to push the boundaries of your creativity and create truly unique and impressive cakes. These methods can be combined with simpler techniques, like a smooth frosting base, to add focal points or detailed borders.
Using Stencils for Frosting Designs
Stencils are a fantastic tool for adding intricate patterns or images to a frosted cake surface. They allow you to transfer a design accurately and repeatedly, making it possible to create detailed patterns that would be difficult to achieve with freehand piping. Stencils can be used on both smooth and lightly textured frosting surfaces.
To use a stencil, ensure your frosting base is firm and chilled. Place the stencil gently against the side or top of the cake. Hold it securely in place (you might need an extra pair of hands or pins). Apply a thin layer of frosting over the stencil using an offset spatula or bench scraper, pressing the frosting into the openings of the design. Carefully remove the stencil to reveal the pattern. This can add a sophisticated element to an easy sprinkle layer cake background.
Creating Patterns with Piping Bags
Beyond simple lines and stars, piping bags can be used to create complex patterns directly onto the cake surface. Techniques like basketweave, lace patterns, or intricate scrollwork require control over pressure, movement, and tip placement. These designs build upon basic piping skills but involve more complex sequences of movements.
For example, a basketweave pattern is created by piping horizontal and vertical lines of frosting in an overlapping sequence. Lace patterns involve piping delicate, interconnected lines and dots. Mastering these requires practice and patience, but the results are incredibly impressive. These piped patterns can serve as a frame or base for adding sprinkles, enhancing an easy sprinkle layer cake's visual appeal.
Combining Frosting with Other Decorations [Edible Glitter, Fondant]
Frosting and piping are often just one component of a larger decorative scheme. Combining frosting techniques with other elements like edible glitter, sprinkles, fondant shapes, or fresh flowers can create multi-dimensional and visually rich cakes. Sprinkles, in particular, are incredibly versatile and pair well with almost any frosting technique.
For instance, you can pipe a border of buttercream shells and then immediately press sprinkles into the wet frosting. You can use frosting to adhere fondant cutouts to the cake surface. Edible glitter can be sprinkled over wet frosting or applied to specific piped details for added sparkle. The possibilities are vast when you start combining different decorative mediums, allowing for creative easy sprinkle layer cake designs.
Tips and Tricks for Perfect Frosting Application
Applying frosting smoothly and evenly can sometimes feel like the trickiest part of cake decorating. Even if you plan to add texture or piping, a good base makes the process much easier. Here are some essential tips and tricks to help you achieve perfect frosting application every time, ensuring your canvas is ready for any design, including an easy sprinkle layer cake.
From preventing frustrating air bubbles to properly storing your finished masterpiece, these practical tips address common challenges and help you achieve professional-looking results in your home kitchen.
Preventing Air Bubbles in Frosting
Air bubbles in frosting can ruin a smooth finish or cause breaks in piped lines. They often occur when mixing the frosting or when transferring it to a piping bag. To minimize air bubbles, mix your buttercream on low speed for several minutes after creaming the butter and sugar. This helps to push out trapped air.
When filling a piping bag, avoid scooping the frosting in; instead, use a spatula to push the frosting down into the bag, eliminating air pockets as you go. Once the bag is filled, twist the top tightly to prevent air from entering. Before piping, give the bag a gentle squeeze to push any remaining air towards the tip. If you notice a bubble while piping, stop, untwist the bag, gently push the frosting down, and then continue.
Storing Your Decorated Cake
Proper storage is essential to maintain the freshness and appearance of your decorated cake. If your cake has buttercream frosting, it can usually be stored at room temperature for 1-2 days, provided the environment is cool and free from direct sunlight. For longer storage or in warmer conditions, refrigeration is necessary.
When refrigerating a decorated cake, especially one with delicate piping or sprinkles (like an easy sprinkle layer cake), it's best to place it in an airtight cake carrier or a box slightly larger than the cake. This protects the frosting and decorations from drying out or getting damaged. Allow the cake to come to room temperature for about an hour before serving for the best flavor and texture. Cakes can also be frozen for longer storage, ideally well-wrapped after being chilled firm.
Troubleshooting Common Cake Problems [Melting Frosting, Uneven Layers]
Even experienced bakers encounter problems. Melting frosting, especially in warm conditions, is common. If your frosting is too soft, it might need more powdered sugar or simply chilling. Work in a cool environment if possible. If frosting is melting while you're decorating, pop the cake and frosting into the refrigerator for 10-15 minutes to firm up.
Uneven cake layers can make stacking and decorating difficult. Prevent this by ensuring your batter is evenly distributed in the pans and that your oven temperature is accurate. If layers bake with domes, level them using a serrated knife once they are cool. If layers are significantly uneven after baking, you can use frosting to help level the stack, adding more frosting to the thinner areas between layers. These troubleshooting tips apply whether you're making a simple or an easy sprinkle layer cake.
Layer Cake Variations and Flavor Pairings
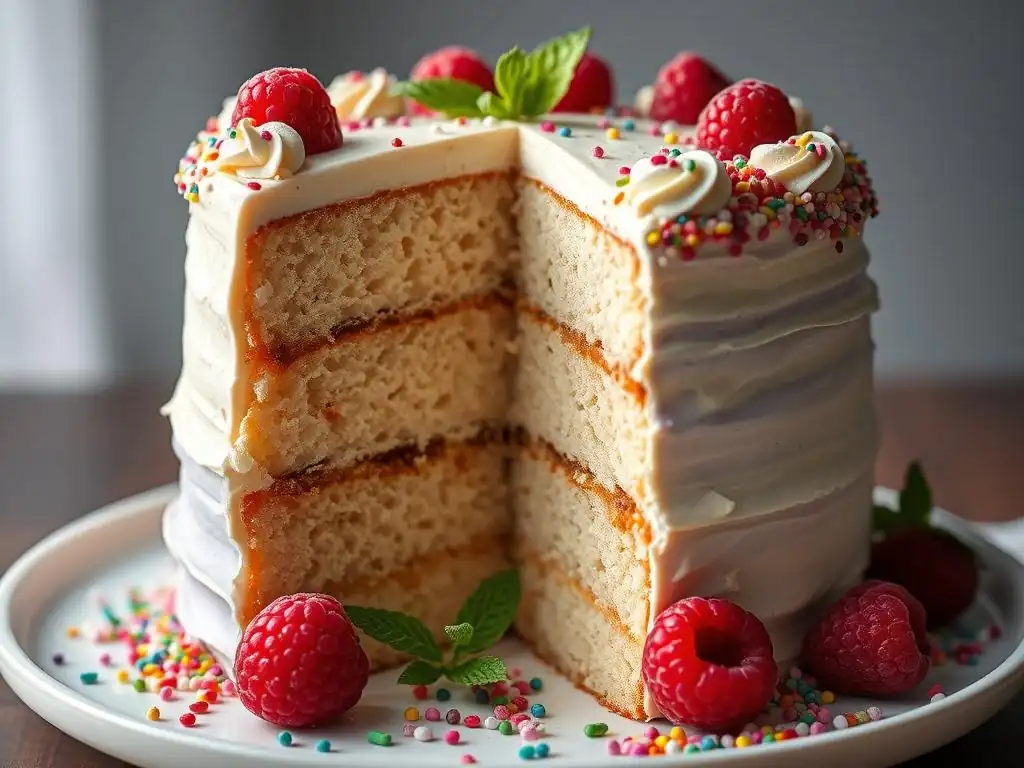
While decorating techniques are key, the flavors of the cake and frosting are equally important for a delicious result. Experimenting with different cake and frosting combinations allows you to create a wide variety of flavor profiles to suit any occasion.
Here are a few classic and popular flavor pairings that work well for layer cakes and provide a delicious base for any decoration, including adding sprinkles for an easy sprinkle layer cake.
Chocolate Cake with Chocolate Ganache
A rich, moist chocolate cake paired with smooth, decadent chocolate ganache is a timeless classic. The deep flavor of the chocolate cake is perfectly complemented by the intense chocolate flavor and creamy texture of the ganache.
Ganache, made from chocolate and heavy cream, can be used as a filling or a poured glaze. When chilled, it becomes firm enough to act as a sturdy base for frosting or decorations. This pairing is a guaranteed crowd-pleaser and provides a dark, rich backdrop perfect for contrasting sprinkles on an easy sprinkle layer cake.
Vanilla Cake with Raspberry Buttercream
For a lighter, brighter flavor combination, consider a classic vanilla cake with a vibrant raspberry buttercream. The subtle sweetness of the vanilla cake provides a perfect canvas for the tangy, fruity flavor of the raspberry frosting.
Raspberry buttercream can be made by incorporating fresh raspberry puree or freeze-dried raspberry powder into your favorite buttercream recipe. The vibrant pink color is naturally appealing and pairs wonderfully with various sprinkle colors for a cheerful easy sprinkle layer cake.
Lemon Cake with Lemon Curd
A zesty lemon cake with a bright, tart lemon curd filling and a complementary frosting (like vanilla buttercream or cream cheese frosting) is wonderfully refreshing. The citrus flavors are invigorating and perfect for spring or summer gatherings.
The lemon curd adds a burst of intense lemon flavor and a smooth, slightly tangy texture between the cake layers. Pairing this with a sweet frosting balances the tartness. This combination offers a lovely yellow hue in the cake or filling, providing a sunny base for adding colorful sprinkles to an easy sprinkle layer cake.
Coffee Cake with Coffee Buttercream
For coffee lovers, a tender coffee-flavored cake paired with a rich coffee buttercream is a dream come true. The robust flavor of coffee is infused into both the cake batter and the frosting, creating a deeply satisfying treat.
Coffee buttercream can be made by adding espresso powder or strong brewed coffee reduction to your buttercream. This pairing is sophisticated and flavorful. The warm brown tones of the coffee cake and frosting provide an earthy backdrop that makes brightly colored sprinkles pop on an easy sprinkle layer cake.
Conclusion: Unleash Your Creativity with Layer Cakes
Decorating layer cakes is a rewarding process that combines baking with artistic expression. From mastering the smooth application of frosting to creating intricate piped designs or adding playful sprinkles, each step allows you to personalize your creation. We've explored various techniques, from classic rosettes to modern fault lines, providing a foundation for your decorating adventures.
Remember that the most important ingredient is your willingness to experiment and have fun. Don't be afraid to try new techniques or combine elements from different designs. Every cake you decorate is an opportunity to learn and grow your skills.
Embrace the Art of Cake Decoration
Cake decoration is a continuous journey of learning and creativity. As you practice, you'll develop a feel for frosting consistency, gain control over your piping bag, and discover your own unique style. Whether you aim for perfection or embrace a more rustic aesthetic, the joy is in the making and sharing.
We hope this guide from BakeWithEase.com has inspired you to pick up your spatula and piping bag. Remember the satisfaction of slicing into a beautiful cake you decorated yourself, especially a fun and easy sprinkle layer cake that brings smiles to faces.
Further Baking Resources on BakeWithEase.com
For more recipes, tips, and guides on baking and decorating, explore the wealth of resources available on BakeWithEase.com. We offer everything from beginner-friendly recipes to advanced techniques, covering cakes, pastries, breads, and more.
Whether you're looking for the perfect cake recipe to pair with your frosting designs, tutorials on making different types of buttercream, or ideas for other cake decorating projects, you'll find it on our site. Keep baking, keep decorating, and keep sharing the joy of homemade treats!
Frequently Asked Questions
How do I ensure my sprinkles stick to the frosting on my layer cake?
To get sprinkles to adhere properly, apply them immediately after frosting while the frosting is still fresh and sticky. Consider using a slightly thicker frosting for better adhesion.
What type of frosting works best for decorating with sprinkles?
A classic buttercream or a smooth cream cheese frosting works wonderfully. Avoid overly runny frostings, as the sprinkles may slide off. Consistency is key for good sprinkle adhesion.
What are some creative ways to apply sprinkles beyond just scattering them on top?
Try creating sprinkle patterns or designs using stencils. You can also press sprinkles onto the sides of the cake for a textured, festive look.
Can I use different types of sprinkles together on my layer cake?
Absolutely! Mixing different shapes, sizes, and colors of sprinkles can create a visually stunning effect. Experiment with combinations to find your favorite look.
How far in advance can I decorate my sprinkle layer cake before serving it?
Sprinkles can sometimes bleed color into the frosting if left for too long, especially with certain frostings. Decorate no more than a day in advance for the best results.
Final Reflection: The Enduring Joy of a Sprinkled Layer Cake
The simple act of decorating a layer cake with sprinkles transcends mere aesthetics; it's a celebration of creativity, joy, and the power of small details to transform the ordinary into something extraordinary. In a world often dominated by complexity and pressure, the ease and accessibility of creating a beautiful sprinkle layer cake offers a refreshing counterpoint. It reminds us that happiness can be found in the simplest of things, and that even the most basic recipe can be elevated with a touch of playful imagination.
The enduring appeal of the sprinkle layer cake lies in its ability to evoke feelings of nostalgia and childlike wonder. It's a dessert that effortlessly bridges generations, connecting us to cherished memories of birthdays, celebrations, and the pure, unadulterated joy of sweet treats. A cake is a celebration of life, a symbol of joy, and a delicious way to share happiness.
This sentiment perfectly captures the essence of what a sprinkle layer cake represents – a tangible expression of positive emotion and shared experience.
Now, I invite you to consider the possibilities. Don't just bake a cake; create a cake. Experiment with different sprinkle colors and textures, explore unique frosting flavors, and let your creativity run wild. The next time you feel the need for a little bit of joy, remember the power of a sprinkle layer cake. It's a reminder that even the smallest details can make a world of difference, and that sometimes, the simplest things in life are the sweetest.
Unleash Your Inner Cake Artist!
Thanks for joining us on this sprinkle-filled journey! We hope you've discovered some delicious and inspiring layer cake ideas to brighten your day (and your dessert table!). Ready to turn those ideas into reality?
- Bake your dream cake: Grab your favorite recipe (or try one of our many on BakeWithEase.com!) and get baking. Don't be afraid to experiment with frosting and sprinkle combinations!
- Share your masterpiece: Show us your creations! Post a picture of your cake on social media using #BakeWithEase and tag us – we can't wait to see your baking artistry.
- Explore new sprinkle possibilities: Dive deeper into the world of sprinkles! Search online for unique sprinkle blends, colors, and sizes to add even more personality to your next creation.
What amazing flavor combination will you create with sprinkles next?