
Easy Chocolate Swiss Roll with Cream Filling

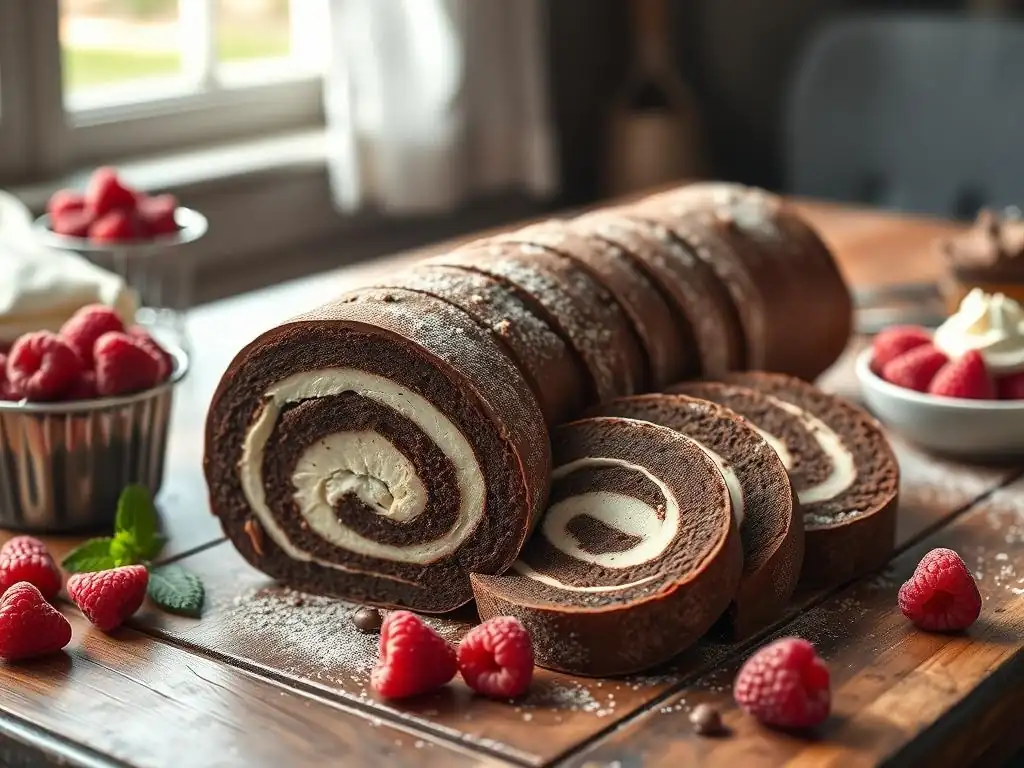
Welcome to BakeWithEase, your kitchen companion on a journey to baking brilliance! Ever dreamed of creating a show-stopping dessert without the fuss? You're in the right place. Today, unlock the secrets to a delectable Easy Chocolate Swiss Roll with Cream Filling – a surprisingly simple treat that's guaranteed to impress. But that's just the beginning... Discover even more effortless pastry and dessert recipes, techniques, and tips designed to elevate your baking game, one delicious bite at a time. Ready to roll?
- Classic Vanilla Swiss Roll Recipe with Raspberry Filling
- Introduction to the Perfect Vanilla Swiss Roll
- Ingredients for Your Homemade Vanilla Swiss Roll
- Step-by-Step Guide: Making the Vanilla Swiss Roll Cake
- Preparing the Raspberry Filling: Simple and Flavorful
- Assembling Your Vanilla Swiss Roll with Raspberry
- Chilling and Setting the Vanilla Swiss Roll
- Decorating Your Vanilla Swiss Roll
- Slicing and Serving Your Delicious Vanilla Swiss Roll
- Troubleshooting Your Vanilla Swiss Roll
- Storing Your Vanilla Swiss Roll
- Conclusion: Enjoy Your Homemade Vanilla Swiss Roll
-
Frequently Asked Questions
- How easy is the Easy Chocolate Swiss Roll recipe on BakeWithEase.com?
- What kind of cream filling is recommended for the Easy Chocolate Swiss Roll?
- Where can I find the ingredients list for the Easy Chocolate Swiss Roll recipe?
- What if my Easy Chocolate Swiss Roll cracks when I roll it?
- Does BakeWithEase.com offer other baking recipes besides the Easy Chocolate Swiss Roll?
- Final Reflection: The Enduring Delight of a Simple Swiss Roll
- Unleash Your Inner Baker: Make This Swiss Roll Today!
Classic Vanilla Swiss Roll Recipe with Raspberry Filling
Introduction to the Perfect Vanilla Swiss Roll
Why This Vanilla Swiss Roll Recipe is Beginner-Friendly
Crafting a beautiful Swiss roll might seem intimidating at first glance, but this vanilla version with a tangy raspberry filling is designed specifically for bakers new to the technique. The recipe uses readily available pantry staples like eggs, sugar, flour, and vanilla, eliminating the need for specialty ingredients often found in more complex pastries. The sponge cake is forgiving if handled correctly, relying on simple whipping and folding methods rather than intricate dough work.
Furthermore, the steps are broken down into manageable stages, from preparing the simple batter to mastering the crucial warm-roll technique. We provide clear indicators for doneness and tips for preventing common issues like cracking. With a few key pointers on gentle handling and temperature control, even a novice baker can achieve a stunning and delicious result that looks far more complicated than it is, making it a fantastic entry point into the world of rolled cakes.
A Guide to a Light and Airy Vanilla Swiss Roll
The hallmark of a truly great Swiss roll is its light, pliable sponge cake. Achieving this requires careful attention to two main principles: air incorporation and gentle handling. The process begins by whipping eggs and sugar together until they are very pale and thick, reaching what bakers call the "ribbon stage." This typically takes about 5-7 minutes with a stand mixer on medium-high speed, and it's crucial because this mixture forms the primary structure and lightness of the cake by trapping air bubbles.
Once the eggs are properly whipped, the dry ingredients, primarily flour and sometimes a touch of baking powder, must be folded in gently. Overmixing at this stage will deflate the precious air bubbles you've worked hard to create, resulting in a tough, dense cake. Using a large spatula and a cutting and folding motion helps distribute the flour evenly without losing volume. The final batter should be airy and pourable, ready to bake into a sponge that is both delicate enough to roll and sturdy enough to hold its filling.
Ingredients for Your Homemade Vanilla Swiss Roll
Vanilla Swiss Roll Cake Ingredients
To create the foundation of our classic vanilla Swiss roll, you'll need a handful of simple ingredients. Start with 4 large eggs, preferably at room temperature, as they whip to a greater volume. You'll also need about 3/4 cup (150g) of granulated sugar to sweeten the sponge and help stabilize the whipped eggs. For the dry component, approximately 3/4 cup (95g) of all-purpose flour is standard, sifted to ensure lightness and prevent lumps.
A teaspoon of pure vanilla extract is essential for that signature flavor, and a pinch of salt (about 1/4 teaspoon) helps balance the sweetness. Some recipes also call for a teaspoon of baking powder to give a little extra lift, though a well-whipped egg mixture can often provide sufficient rise on its own. Preparing your pan is also key; a standard 10x15 inch jelly roll pan is typical, lined with parchment paper and lightly greased to prevent sticking.
Raspberry Filling Ingredients: A Tangy Complement
The vibrant, slightly tart raspberry filling provides a perfect counterpoint to the sweet vanilla sponge. You'll need about 2 cups (about 250-300g) of fresh or frozen raspberries. If using frozen, there's no need to thaw them completely beforehand. Approximately 1/4 to 1/2 cup (50-100g) of granulated sugar is needed, adjusted to your preference and the sweetness of the berries. A squeeze of fresh lemon juice (about 1 tablespoon) brightens the fruit flavor and adds essential tanginess.
For the creamy component, you'll require about 1.5 to 2 cups (360-480ml) of cold heavy whipping cream. This should be whipped with powdered sugar (about 1/4 cup or 30g) and a splash of vanilla extract (about 1/2 teaspoon) until stiff peaks form. The cooled raspberry puree is then gently folded into the whipped cream, creating a light, luscious filling that holds its shape when the cake is rolled.
Ingredient Notes and Baking Tips
Using room temperature eggs is a small but significant detail that greatly impacts the volume achieved when whipping them with sugar. Cold eggs simply won't incorporate as much air. When measuring your flour, spoon it lightly into your measuring cup and level it off with a straight edge rather than scooping directly from the bag; this prevents compacting the flour and adding too much, which can result in a dry, heavy cake.
For the raspberry filling, straining the cooked raspberry puree through a fine-mesh sieve is highly recommended. While it adds a few minutes to the process, it removes the seeds, resulting in a much smoother and more pleasant texture for the filling. Ensure the puree is completely cooled before folding it into the whipped cream; adding warm puree will cause the cream to melt and the filling to become runny, making rolling difficult.
Step-by-Step Guide: Making the Vanilla Swiss Roll Cake
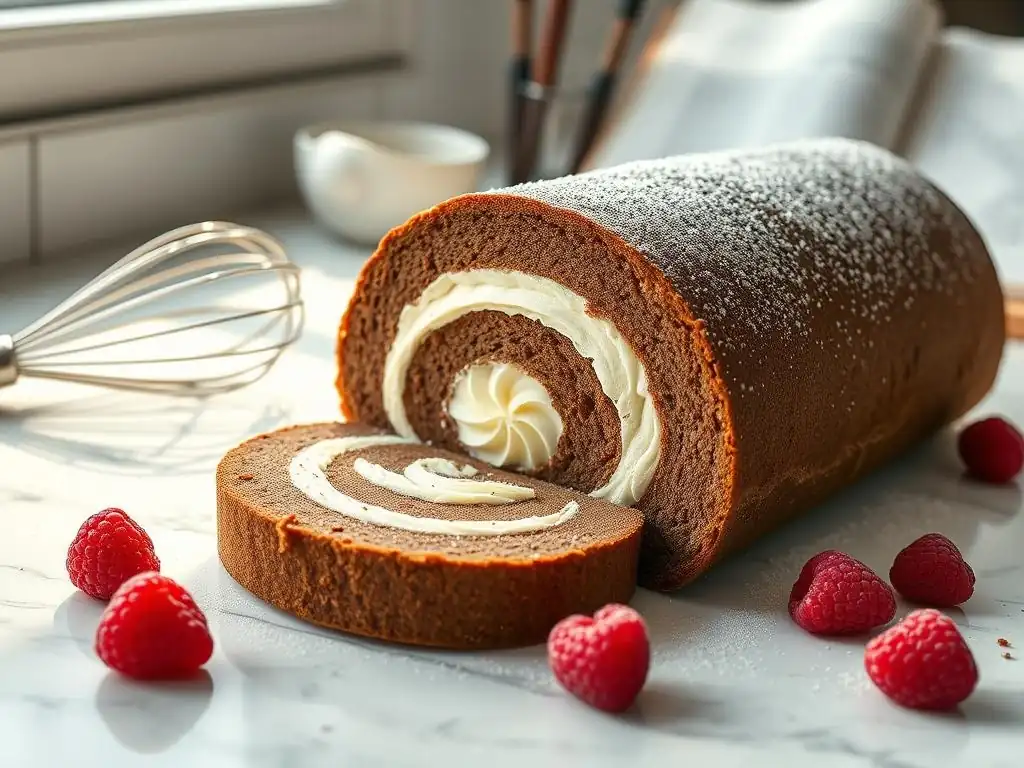
Preparing the Cake Batter: A Detailed Walkthrough
Begin by preheating your oven to 375°F (190°C) and preparing your 10x15 inch jelly roll pan by lining it with parchment paper, leaving some overhang on the sides to help lift the cake later. Lightly grease the parchment paper and the exposed sides of the pan. In a large bowl, or the bowl of a stand mixer, combine the room temperature eggs and granulated sugar.
Beat this mixture on high speed for 5-7 minutes until it is very pale yellow, thick, and falls in a ribbon when the whisk is lifted. This ribbon should hold its shape on the surface of the mixture for a few seconds before dissolving. Gently sift the flour (and baking powder if using) over the whipped egg mixture in two or three additions. Using a large rubber spatula, carefully fold the dry ingredients into the wet using a cutting and lifting motion, rotating the bowl, until just combined.
Overmixing develops gluten and makes the cake tough. Stir in the vanilla extract. Pour the batter into the prepared pan and spread it evenly to the edges using an offset spatula.
Baking the Vanilla Sponge Cake: Achieving the Perfect Texture
Place the pan in the preheated oven. The vanilla sponge cake bakes relatively quickly due to its thin layer, typically taking only 10 to 12 minutes. Keep a close eye on it, as overbaking will result in a dry, crack-prone cake. You'll know it's done when the edges are lightly golden, the center springs back when gently pressed with a fingertip, and the cake has slightly pulled away from the sides of the pan.
Avoid opening the oven door too early in the baking process, as this can cause the cake to collapse. Once baked, remove the pan from the oven and place it on a wire rack. The cake needs to be rolled while it's still warm and flexible, so have your rolling material ready – typically a clean kitchen towel heavily dusted with powdered sugar, or a fresh sheet of parchment paper also dusted with powdered sugar.
Rolling the Cake While Warm: Preventing Cracks
This step is crucial for preventing your vanilla Swiss roll from cracking. Immediately after taking the cake out of the oven, while it's still hot and pliable, invert the entire cake onto your prepared towel or sugared parchment paper. Carefully peel off the parchment paper that was used for baking; if it resists, you can gently brush the back of the paper with a little water to help loosen it.
Starting from one short end, carefully roll the cake up tightly along with the towel or parchment paper inside. Place the rolled cake, seam-side down, on the wire rack and let it cool completely in this rolled shape. This "muscle memory" allows the cake to cool in a curved form, making it much easier to unroll and re-roll later with the filling without breaking. Cooling typically takes about 1-2 hours.
Preparing the Raspberry Filling: Simple and Flavorful
Making the Raspberry Puree
The first step for the delightful raspberry filling is creating a simple fruit puree. In a small saucepan, combine the fresh or frozen raspberries with the granulated sugar and lemon juice. Place the saucepan over medium heat and bring the mixture to a simmer, stirring occasionally. As the berries heat up, they will release their juices and start to break down.
Continue to cook the mixture for about 5 to 10 minutes, stirring frequently, until the berries are soft and have formed a thick, jam-like consistency. Once cooked, remove the saucepan from the heat. For a smoother filling, press the hot mixture through a fine-mesh sieve set over a bowl using the back of a spoon to remove all the seeds. Discard the seeds. Let the strained raspberry puree cool completely to room temperature before proceeding; chilling it in the refrigerator can speed this up. You should end up with about 1/2 to 3/4 cup of vibrant raspberry puree.
Combining with Whipped Cream for a Light Filling
While the raspberry puree is cooling, prepare the whipped cream component of the filling. Pour the very cold heavy whipping cream into a clean mixing bowl (a chilled bowl helps). Add the powdered sugar and vanilla extract. Beat the mixture with an electric mixer or whisk attachment on medium-high speed until stiff peaks form. Be careful not to overbeat, or you'll end up with butter.
Once the whipped cream is ready and the raspberry puree is completely cool, gently fold the raspberry puree into the whipped cream. Use a spatula and a light hand to marble or swirl the puree into the cream, or fold until just combined for a uniform pink color. Avoid overmixing, which can deflate the whipped cream. The goal is a light, airy, and flavorful filling that is easy to spread but firm enough to hold the roll's shape.
Assembling Your Vanilla Swiss Roll with Raspberry
Unrolling the Cake: Gentle and Careful Technique
Once the vanilla sponge cake has completely cooled in its rolled shape (typically after 1-2 hours), it's time to unroll it gently. Place the cooled, rolled cake (still wrapped in the towel or parchment) on a clean, flat surface. Slowly and carefully, begin to unroll the cake. Because it cooled in a curve, it should unroll without cracking.
Take your time with this step. If you encounter any resistance, pause and allow the cake's own weight to help. The goal is to lay the cake flat on the towel or parchment it was rolled in, ready to receive the filling. The cake will naturally want to curl back up, which is exactly what you want for the final roll.
Spreading the Raspberry Filling Evenly
With the vanilla sponge unrolled and lying flat, it's time to add the prepared raspberry whipped cream filling. Use an offset spatula to dollop spoonfuls of the filling over the surface of the cake. Begin spreading the filling evenly across the entire surface of the cake, extending it almost to the edges.
Leave a small border, perhaps about a half-inch (1 cm), along one of the long edges. This border helps prevent the filling from squeezing out excessively when you roll the cake back up. Ensure the filling is spread in a relatively uniform layer across the rest of the cake for an even distribution in each slice.
Re-rolling the Cake: Achieving a Tight and Even Roll
Now for the final roll! Starting from the short edge opposite the border you left unfilled, begin to carefully re-roll the cake. Use the towel or parchment paper underneath the cake to help lift and guide the roll, making it easier to get a tight spiral. Roll the cake up firmly but gently, ensuring you keep the roll as tight as possible from the start.
Continue rolling until the cake is fully rolled up, ending with the seam side down. The seam should be the edge you left the small border on. Once rolled, use the towel or parchment to lift the entire roll and transfer it to a serving platter or a tray lined with fresh parchment paper. At this point, the roll might look slightly soft or misshapen, which is perfectly normal before chilling.
Chilling and Setting the Vanilla Swiss Roll
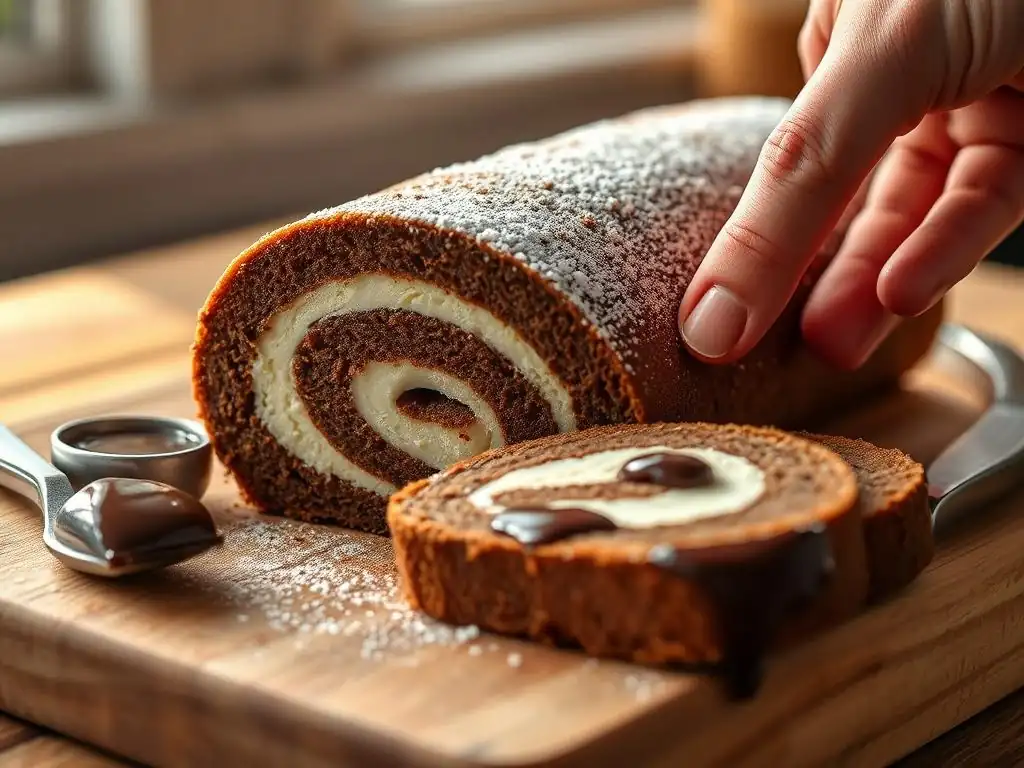
Why Chilling is Important
Chilling the assembled vanilla Swiss roll is a non-negotiable step that significantly impacts the final result. During the chilling period, several important processes occur. Firstly, the filling, particularly the whipped cream component, firms up considerably. This allows the roll to hold its shape when sliced, preventing the filling from oozing out and creating clean, defined swirls.
Secondly, chilling allows the flavors of the vanilla sponge and the raspberry filling to meld together. The moisture from the filling also slightly softens the cake, resulting in a more cohesive and tender texture throughout the roll. Attempting to slice a Swiss roll before it has been properly chilled will inevitably lead to a messy, squashed cake with the filling everywhere but in neat layers.
How Long to Chill for Optimal Results
For the best results when chilling your vanilla Swiss roll, aim for a minimum of 1 to 2 hours in the refrigerator. This amount of time is usually sufficient for the whipped cream filling to set enough for the cake to be sliced cleanly. However, if time allows, chilling for 4 hours or even overnight is highly recommended.
An extended chilling period allows the cake and filling to become fully firm and the flavors to develop more deeply. When the roll is well-chilled, slicing becomes significantly easier, resulting in picture-perfect slices with distinct layers of cake and filling. Always cover the Swiss roll tightly with plastic wrap before chilling to prevent it from drying out or absorbing odors from the refrigerator.
Decorating Your Vanilla Swiss Roll
Simple Decoration Ideas: Powdered Sugar, Fresh Raspberries
Once your vanilla Swiss roll is thoroughly chilled and set, it's ready for its finishing touches. One of the simplest yet most elegant ways to decorate a Swiss roll is with a dusting of powdered sugar. Place a sieve over the roll and lightly tap it to create a fine, even layer of sugar over the top. This provides a beautiful snowy contrast to the cake and filling.
For an extra touch of freshness and color, arrange a few fresh raspberries along the top of the dusted roll. You can place them artfully along the seam or scatter them randomly. This not only enhances the visual appeal but also gives a hint of the delicious filling inside and adds a burst of fresh fruit flavor when serving. This minimalist approach highlights the classic shape and vibrant filling.
Elegant Decoration Techniques: Italian Meringue Buttercream
For a more elaborate presentation, you could frost the entire vanilla Swiss roll with a stable buttercream, such as Italian meringue buttercream. This type of frosting is smooth, not overly sweet, and holds its shape beautifully, making it ideal for covering rolled cakes. You would first chill the roll, then apply a thin crumb coat of frosting, chill again, and finally apply a thicker, smooth outer layer.
Alternatively, you could pipe decorative swirls or patterns along the top using a piping bag fitted with a decorative tip. While this adds more complexity to the process, it creates a stunning visual impact, perfect for special occasions. You could even tint the buttercream a pale pink using a tiny drop of red food coloring to complement the raspberry filling.
Slicing and Serving Your Delicious Vanilla Swiss Roll
Best Way to Slice for Presentation
Achieving clean, beautiful slices of your vanilla Swiss roll is key to a great presentation. The most effective method is to use a very sharp knife, ideally a serrated knife, and to wipe the blade clean with a damp cloth between each slice. This removes any residual filling or cake crumbs that could drag through the next slice and make it messy.
Cut straight down in a decisive motion rather than sawing back and forth. Aim for slices that are about 1 to 1.5 inches (2.5-4 cm) thick. Cutting the ends off first can give you a neater starting point and two "baker's treats." Arrange the slices cut-side up on a serving plate to showcase the beautiful vanilla sponge and raspberry swirl.
Pairing Suggestions: Coffee, Tea, or Sparkling Wine
The classic vanilla and raspberry flavors of this Swiss roll make it a versatile dessert that pairs well with various beverages. For a comforting afternoon treat, serve slices with a freshly brewed cup of coffee. A medium roast complements the sweetness without overpowering the delicate cake.
If you prefer tea, a classic black tea like Earl Grey or a lighter floral tea like Chamomile or English Breakfast provides a lovely balance. For a more festive occasion, consider pairing a slice with a glass of chilled Prosecco or a dry sparkling rosé. The effervescence and slight acidity of the wine cut through the richness of the cream and enhance the bright raspberry flavor.
Troubleshooting Your Vanilla Swiss Roll
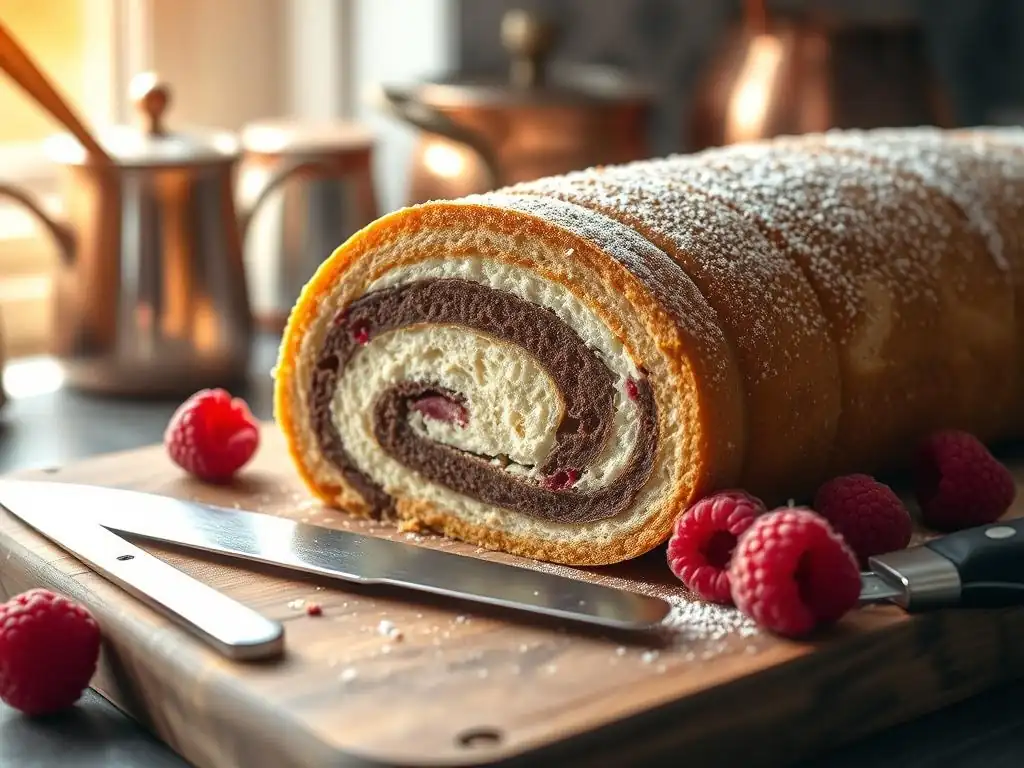
Common Problems and Solutions: Cracking, Uneven Baking
Cracking is perhaps the most common frustration when making a Swiss roll. The primary culprits are either overbaking the sponge cake, which makes it dry and brittle, or waiting too long to roll it after it comes out of the oven. Solution: Bake the cake just until it's done (springy to the touch, edges pulling away) and roll it immediately while it's still hot and flexible. If it still cracks slightly, don't despair; the filling and chilling will often help mask minor imperfections.
Uneven baking can result in parts of the cake being overdone while others are underdone. This is often due to hot spots in the oven or not spreading the batter evenly in the pan. Solution: Ensure your oven is properly calibrated (an oven thermometer can help) and rotate the pan halfway through the baking time. Make sure the batter is spread in a uniform thickness across the entire pan before baking. If the cake sticks to the parchment, you might not have greased it sufficiently; ensure both the parchment and the pan sides are lightly greased.
Tips for a Perfect Roll Every Time
To consistently achieve a perfect vanilla Swiss roll, remember these key tips. Firstly, ensure your eggs are at room temperature and whip them with the sugar until a very thick ribbon forms – this is the foundation of your light sponge. Secondly, fold in the dry ingredients gently and stop mixing as soon as no dry streaks remain; overmixing is the enemy of tenderness.
Thirdly, do not overbake the cake; err on the side of slightly underbaking rather than overbaking. The 10-12 minute timeframe is a guide, but watch for the visual cues. Most importantly, roll the cake while it is warm, using a towel or parchment dusted generously with powdered sugar. This trains the cake to stay rolled. Finally, chill the assembled roll thoroughly for at least 2 hours before slicing.
Storing Your Vanilla Swiss Roll
How to Keep Your Cake Fresh
Once your delicious vanilla Swiss roll with raspberry filling has been sliced or if you have leftovers, proper storage is essential to maintain its freshness and texture. The cake should be stored in an airtight container in the refrigerator. This prevents it from drying out and keeps the dairy-based filling safe.
When stored correctly, the Swiss roll will remain fresh and enjoyable for approximately 3 to 4 days. While the texture remains good, the cake might become slightly softer over time as it continues to absorb moisture from the filling. For the best texture and flavor, it's often enjoyed within the first 1-2 days.
Freezing for Longer Storage
If you need to store your vanilla Swiss roll for a longer period, freezing is a great option. It's best to freeze the entire roll before slicing, if possible, but individual slices can also be frozen. To freeze the whole roll, ensure it is well-chilled and set. Wrap the roll tightly first in plastic wrap, ensuring no part is exposed to prevent freezer burn.
Follow the plastic wrap layer with a layer of aluminum foil or place the wrapped roll inside a freezer-safe bag or container. Properly wrapped, the Swiss roll can be stored in the freezer for up to 1 to 2 months. To thaw, transfer the frozen roll to the refrigerator and let it thaw overnight. Once thawed, it can be sliced and served. Note that the texture might be slightly different after freezing and thawing, potentially a little moister.
Conclusion: Enjoy Your Homemade Vanilla Swiss Roll
You've done it! You've successfully created a beautiful and delicious Classic Vanilla Swiss Roll with Raspberry Filling. From mastering the light sponge to preparing the vibrant filling and executing the perfect roll, you've navigated the steps to create a stunning dessert. This recipe proves that making a Swiss roll is well within reach for home bakers, offering a rewarding experience and a delightful treat.
The combination of the delicate vanilla cake and the tangy raspberry cream is a timeless classic, perfect for any occasion, from a simple afternoon tea to a celebratory gathering. Each slice reveals a lovely spiral, a testament to your baking skill. Don't hesitate to try variations with different fillings once you've mastered this basic technique – perhaps an easy chocolate swiss roll recipe next?
We hope you loved making this Classic Vanilla Swiss Roll with Raspberry Filling. There's a special satisfaction that comes from baking something so visually appealing and delicious from scratch. We encourage you to showcase your baking success!
Whether your roll is perfectly formed or has a few charming imperfections, it's a homemade creation to be proud of. Share your experience and your beautiful slices! Enjoy every bite of your hard work.
Frequently Asked Questions
How easy is the Easy Chocolate Swiss Roll recipe on BakeWithEase.com?
The recipe is designed for bakers of all levels, with step-by-step guides and easy-to-find ingredients. It prioritizes simplicity and clear instructions.
What kind of cream filling is recommended for the Easy Chocolate Swiss Roll?
The recipe likely features a classic cream filling, but specific ingredients will be detailed in the recipe itself. Options might include whipped cream or buttercream.
Where can I find the ingredients list for the Easy Chocolate Swiss Roll recipe?
The full ingredient list and measurements are provided directly on the BakeWithEase.com website, within the recipe instructions.
What if my Easy Chocolate Swiss Roll cracks when I roll it?
Cracking can happen, but BakeWithEase.com likely offers tips to prevent this, such as rolling while warm and using a damp towel.
Does BakeWithEase.com offer other baking recipes besides the Easy Chocolate Swiss Roll?
Yes, BakeWithEase.com offers a wide variety of baking recipes, including pastries, breads, cakes, and cookies, suitable for various skill levels.
Final Reflection: The Enduring Delight of a Simple Swiss Roll
The ease of baking a delicious chocolate swiss roll belies its profound ability to connect us to cherished memories and simple pleasures. It's more than just a recipe; it's a gateway to comfort, creativity, and the joy of sharing something homemade. In a world increasingly dominated by fast food and convenience, the act of creating something beautiful and delicious from scratch offers a powerful antidote.
The enduring appeal of the swiss roll lies in its versatility and adaptability. It's a blank canvas for culinary creativity, easily customized with different fillings, frostings, and decorations. The simplest things are often the most beautiful.
This quote perfectly encapsulates the magic of this seemingly simple dessert. From childhood birthday parties to sophisticated afternoon teas, the swiss roll transcends generations and occasions, consistently delivering a moment of pure indulgence. It's a testament to the power of simple ingredients transformed by a little love and skill.
Now, I invite you to consider the possibilities. Don't just bake this swiss roll; experience it. Embrace the process, savor the aroma of baking chocolate, and delight in the satisfaction of creating something truly special. Share your creation with loved ones, and watch as the simple act of sharing a slice brings smiles and connection. The recipe is just a starting point; let your creativity flourish and make this delightful treat your own.
Unleash Your Inner Baker: Make This Swiss Roll Today!
Thanks for joining us on this delicious journey! We hope you feel inspired and ready to create your own amazing chocolate Swiss roll. Now, let's turn that inspiration into action:
- Bake your own Swiss roll today! Grab your ingredients and follow the recipe – it's easier than you think!
- Share your creation with us! Post a picture on social media and tag us – we’d love to see your baking masterpiece!
- Explore more delicious recipes on BakeWithEase.com for even more baking inspiration.
Ready to impress your friends and family with this delightful treat? What flavour variations will you try next?