
Easy PressIn Tart Crust: No Rolling Required!

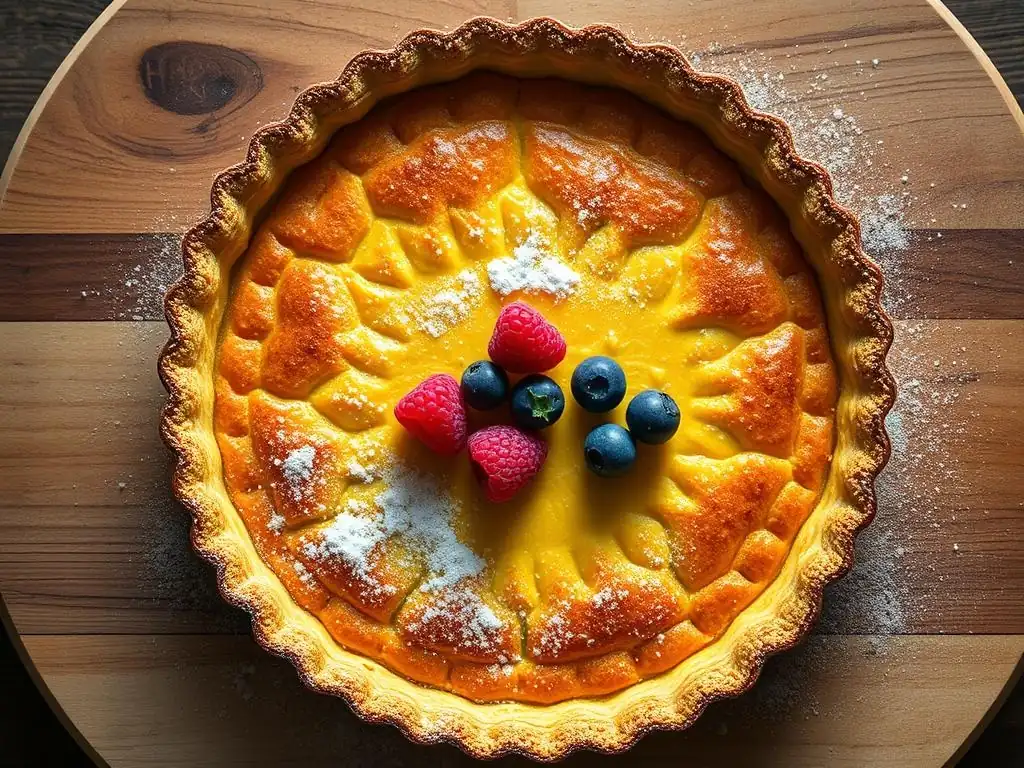
Welcome to BakeWithEase, your shortcut to baking brilliance! Ever dreamt of a perfectly flaky tart crust without the fuss of rolling? Our guide to the Easy Press-In Tart Crust will unveil the secrets to this no-roll marvel. Discover how to create stunning, delicious tarts with minimal effort, opening up a world of pastry possibilities you never thought possible. Ready to ditch the rolling pin and dive into effortless baking? Let's get started!
- Easy Press-In Tart Crust: No Rolling Required! - BakeWithEase.com
- Introduction: The Easiest Tart Crust You'll Ever Make
- Understanding the No-Roll Press-In Tart Dough
- Step-by-Step Guide: Mastering the Press-In Tart Crust Technique
- Troubleshooting Your Press-In Tart Crust
- Flavor Variations for Your No-Roll Press-In Tart
- Perfect Fillings for Your Press-In Tart Shell
- Tips for Storing Your Press-In Tart Crust
- Conclusion: Enjoy Baking with Ease!
-
Frequently Asked Questions
- What is a "press-in" tart crust, and how does it differ from a traditional tart crust?
- Why would I choose to make a press-in tart crust over a rolled tart crust?
- What type of tart fillings work best with a press-in crust?
- Can I make a press-in tart crust ahead of time?
- What are some common mistakes to avoid when making a press-in tart crust?
- Final Reflection: The Joy of Effortless Baking
- Unleash Your Inner Pastry Chef: Effortless Tart Crust Awaits!
Easy Press-In Tart Crust: No Rolling Required! - BakeWithEase.com
Introduction: The Easiest Tart Crust You'll Ever Make
Baking a beautiful tart can seem intimidating, especially when it comes to the crust. Traditional methods often involve chilling, rolling, and carefully transferring delicate dough, which can be a source of frustration for even experienced bakers. But what if there was a simpler way? A method that eliminates the need for a rolling pin entirely?
Welcome to the world of the press-in tart crust. This revolutionary technique simplifies the process dramatically, allowing you to create a perfect tart shell with just your fingers or the bottom of a glass. It's the ultimate shortcut to delicious tarts, making baking accessible and enjoyable for everyone, regardless of skill level.
Skip the Rolling Pin: A Press-In Tart Crust Revolution
For many, the rolling pin is the nemesis of perfect pastry. Achieving an even thickness, preventing sticking, and avoiding tearing during transfer are common hurdles. The press-in method bypasses these challenges entirely. Instead of manipulating the dough with tools, you simply press it directly into the tart pan.
This approach is not only easier but also more forgiving. Minor imperfections can be smoothed over with a touch, and there's no risk of the dough cracking or stretching unevenly during a precarious transfer. It's a truly hands-on technique that puts you in direct control of shaping your tart base, making the process less about struggle and more about creation.
Why This No-Roll Tart Crust Recipe is a Game Changer
This specific no-roll pressin tart recipe is designed for maximum ease and reliability. It uses standard pantry ingredients and requires minimal equipment. Unlike some tart doughs that need extensive chilling, this recipe is often ready to press in after just a short rest, or sometimes immediately, depending on the specific formula.
The resulting crust is wonderfully tender and flavorful, providing a perfect foundation for both sweet and savory fillings. Whether you're making a classic lemon tart, a rich chocolate ganache tart, or a savory quiche, this easy press-in tart crust delivers consistent results without the stress of traditional methods. It truly embodies the BakeWithEase philosophy.
Understanding the No-Roll Press-In Tart Dough
The magic of a press-in dough lies in its composition. It's typically softer and less elastic than a traditional rolled pastry dough, which allows it to be easily pressed into shape without springing back. This characteristic is achieved through a careful balance of ingredients and minimal manipulation.
Understanding the role of each component is key to successful execution. The proportions of fat, flour, and sugar are critical in creating a dough that is pliable enough to press but still bakes up into a crisp, tender crust. It's a delicate balance that makes this no roll pressin tart recipe so effective.
What Makes This Tart Crust Recipe Different?
Traditional pie or tart crusts often rely on creating flaky layers by incorporating cold fat into flour, then adding just enough liquid to bring it together. This requires careful handling and chilling to maintain those fat pockets. A press-in dough, however, often uses a slightly different fat-to-flour ratio and can sometimes incorporate fat in a more "creamed" or softened state, or simply rely on pressing cold fat directly into the flour mixture until crumbly.
The key difference is the minimal liquid and handling. While a rolled dough needs enough gluten development to withstand rolling and transfer, a press-in dough benefits from less gluten development. This results in a more tender, almost cookie-like texture that is easy to press and less prone to toughness. The goal is a crumbly mixture that comes together easily under pressure, making it the ideal base for a no roll pressin tart.
Key Ingredients for a Perfect Press-In Tart Shell
Creating a successful press-in tart shell starts with understanding the fundamental ingredients. Each plays a specific role in the dough's texture, flavor, and ability to be easily pressed into shape. Getting these right is crucial for achieving a reliable and delicious no roll pressin tart.
A typical recipe might include all-purpose flour, granulated or powdered sugar, salt, and cold unsalted butter. Sometimes, an egg yolk or a tablespoon of ice water is added to help bind the dough, but many simple recipes omit liquid entirely, relying solely on the fat to hold the crumbs together when pressed. The quality of these few ingredients significantly impacts the final result.
The Importance of Cold Butter for a Flaky Crust
Even in a press-in dough, using cold butter is often recommended, though the technique differs slightly from rolled pastry. Instead of cutting cold butter into flour until pea-sized crumbs form, for a press-in dough, you might cut the cold butter into small cubes and then work it into the dry ingredients using a pastry blender or your fingertips until the mixture resembles coarse meal or wet sand.
The cold butter pieces remain distinct within the flour mixture. As the tart bakes, these cold pockets of butter melt, creating steam that pushes the flour particles apart. This process contributes to a tender, slightly crumbly texture that is characteristic of a good press-in crust. Using butter that is too soft or melted will result in a greasy, dense crust rather than the desired tender crumb.
Flour Power: Choosing the Right Flour for Your Tart
For most press-in tart crust recipes, standard all-purpose flour works perfectly. It contains a moderate amount of protein (typically around 10-12%), which provides just enough structure without making the dough tough when minimally handled. Using a lower protein flour, like pastry flour (around 8-9% protein), can result in an even more tender crust, while a higher protein flour, like bread flour (around 12-14% protein), is generally not recommended as it can lead to a very tough texture in this type of dough.
The type of flour you choose can slightly impact how easily the dough presses and how it holds its shape. Ensure your flour is fresh and properly stored. For best results with a no roll pressin tart, measure your flour correctly, preferably by weight (e.g., 1 cup of all-purpose flour is approximately 120-125 grams), to ensure consistent results batch after batch.
Sweetness Matters: Sugar in the Tart Dough
Sugar in a tart dough does more than just add sweetness; it also contributes to the texture and browning of the crust. Granulated sugar provides a slight crispness, while powdered sugar (confectioners' sugar) can result in a more tender, melt-in-your-mouth texture. Many recipes use a combination or specify one over the other based on the desired outcome.
The amount of sugar can vary, but a typical sweet press-in tart crust might contain anywhere from 30 to 60 grams of sugar per cup of flour. This sugar helps to tenderize the dough by interfering with gluten development and also helps the crust achieve a beautiful golden-brown color during baking through caramelization. Adjusting the sugar level can subtly change the structure and sweetness of your easy press-in tart crust.
Step-by-Step Guide: Mastering the Press-In Tart Crust Technique
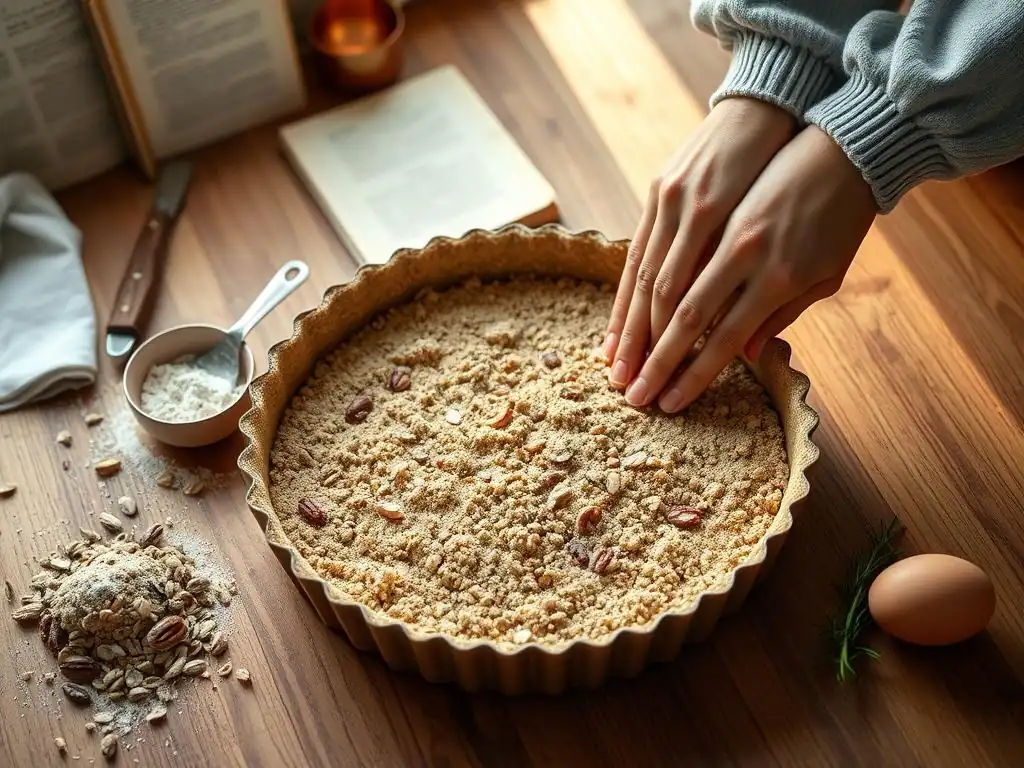
Creating a no-roll press-in tart crust is wonderfully straightforward. The key is in the preparation of the ingredients and the simple pressing technique. Once you master these steps, you'll find yourself reaching for this method again and again.
Follow these steps closely for a perfect result every time. Remember, the goal is minimal handling and gentle pressing to create a uniform shell without the need for rolling or complex maneuvers.
Preparing Your Ingredients for the No-Roll Tart Base
Start by accurately measuring all your ingredients. This is crucial for baking success, especially with a simple recipe like this where ingredient ratios are key. Ensure your butter is very cold, cut into small cubes (around 1/2 inch or 1 cm). Some recipes even suggest freezing the butter cubes for 10-15 minutes before use.
Combine your dry ingredients – flour, sugar, and salt – in a medium bowl. Give them a quick whisk to ensure they are evenly distributed. Having everything prepped and measured before you start combining is a simple step that saves time and prevents errors, setting you up for a smooth process with your no roll pressin tart.
Combining the Dry and Wet Ingredients: Achieving the Right Consistency
Add the cold butter cubes to the dry ingredients. Using a pastry blender, your fingertips, or a food processor on pulse mode, cut the butter into the flour mixture until it resembles coarse crumbs or wet sand. There should be no large pieces of butter remaining. If using your hands, work quickly to prevent the butter from melting from your body heat.
The mixture should hold together loosely when squeezed in your fist but still be crumbly. If the recipe calls for a liquid binder like an egg yolk or ice water, add it now and mix just until the dough barely comes together. Overmixing will develop gluten and make the crust tough. The final consistency should be like damp sand, ready to be pressed into your tart pan.
Pressing the Dough: Creating the Perfect Tart Shell
Once your dough mixture is ready, pour it into your tart pan. A pan with a removable bottom is highly recommended for easy serving. Distribute the crumbly mixture evenly across the bottom of the pan.
Start pressing the dough into the bottom of the pan using your fingertips. Then, work your way up the sides, pressing the dough firmly and evenly against the fluted edges. The goal is to create a shell of uniform thickness, typically about 1/8 to 1/4 inch (about 3-6 mm). Take your time to ensure there are no thin spots or gaps.
Tips for Evenly Distributing the Dough
Achieving an even thickness is key to consistent baking. Start by pressing the bottom layer first, ensuring it's flat and uniform. Then, gather dough for the sides and press it upwards against the pan, joining it seamlessly with the bottom layer. You can use the bottom of a flat glass or a measuring cup to help press the dough firmly and evenly into the bottom and up the sides.
Another trick is to scoop handfuls of dough and press them against the sides first, building up the wall before pressing the bottom. Whichever method you use, periodically step back and look at the shell from different angles to spot any thin areas that need more dough. A uniform shell is essential for a perfectly baked no roll pressin tart.
Working with a Tart Pan: Removable Bottom is Key
Using a tart pan with a removable bottom is a game-changer for press-in crusts. The separate bottom allows you to easily lift the tart out of the fluted ring after baking and cooling, making slicing and serving much simpler and preventing damage to the delicate crust.
Before pressing in the dough, ensure the pan is clean and dry. Some bakers lightly grease the pan, although the high butter content in most press-in crusts usually prevents sticking. If you are concerned, a light spray of non-stick baking spray or a thin layer of butter can provide extra insurance. Make sure the removable bottom is securely seated in the pan before adding the dough mixture.
Blind Baking the Tart Crust: Preventing a Soggy Bottom
Many tart recipes, especially those with wet fillings like quiches or creamy custards, require blind baking the crust. Blind baking means partially or fully baking the empty tart shell before adding the filling. This step is crucial for ensuring the bottom of your easy press-in tart crust is fully cooked and crisp, preventing the dreaded "soggy bottom."
While some fillings can be baked directly in a raw press-in crust, blind baking is a reliable way to guarantee a sturdy foundation for almost any tart. It helps set the structure of the crust and gives it a head start on browning.
When and Why to Blind Bake Your Press-In Crust
You should blind bake your press-in tart crust when your filling is either:
- Unbaked (like a no-bake pastry cream or fruit filling).
- Baked for a very short time.
- Very wet (like a custard or savory egg mixture).
Blind baking provides structural support to the crust, preventing the sides from collapsing during baking. More importantly, it allows the bottom crust to cook and become firm and golden before the filling is added. Without this step, a wet filling can prevent the steam from escaping the bottom crust, resulting in a pale, undercooked, and soggy layer. Blind baking ensures your no roll pressin tart has a perfectly crisp base.
How to Blind Bake: The Bean Method or Pie Weights
After pressing the dough into the pan, chill the crust for at least 30 minutes (or up to several days) in the refrigerator. This step helps set the butter and prevents the crust from shrinking excessively during baking. Preheat your oven to the temperature specified in your recipe, often around 375°F ( 190°C).
Line the chilled crust with parchment paper or foil, pressing it gently into the corners and up the sides. Fill the lined crust with pie weights, dried beans, or rice. These weights prevent the bottom crust from puffing up and the sides from slumping.
Bake for the time specified in your recipe (often 15-20 minutes) until the edges are lightly set and starting to turn golden. Remove the weights and parchment/foil, then continue baking for another 5-10 minutes, or until the bottom is golden brown and looks dry. This ensures a fully baked base for your easy press-in tart crust.
Troubleshooting Your Press-In Tart Crust
Even with the easiest recipes, sometimes things don't go exactly as planned. Don't worry! Most common issues with press-in tart crusts are easily fixable or avoidable with a few simple tips. Learning how to troubleshoot will build your confidence and ensure your no roll pressin tart is a success.
Understanding the potential pitfalls helps you prevent them. Here are some common problems and how to address them, ensuring your baking experience remains enjoyable.
Common Issues and How to Avoid Them
One frequent issue is the crust shrinking down the sides of the pan during baking. This is often caused by insufficient chilling before baking or overworking the dough, which can develop gluten and cause it to contract. Another problem can be cracks forming in the crust, usually due to insufficient pressing or handling the baked shell before it's fully cooled.
Uneven browning is also possible, leading to some parts being too pale while others are overly dark. This can be due to hot spots in your oven or inconsistent thickness of the pressed dough. Paying attention to oven temperature and ensuring uniform dough distribution are key preventative measures for your easy press-in tart crust.
Soggy Crust Solutions: Tips and Tricks
The primary defense against a soggy bottom is proper blind baking. Ensure you bake the crust with weights until the edges are set, remove the weights, and then continue baking until the bottom is visibly golden and dry. This full blind bake is essential for wet fillings.
If you're using a filling that requires a long bake time, consider coating the inside of the blind-baked crust with a thin layer of egg wash (one egg whisked with a tablespoon of water) or melted chocolate (for sweet tarts) before adding the filling. This creates a barrier that prevents moisture migration from the filling into the crust during baking. Chilling the filled tart for 15-20 minutes before baking can also help.
Cracked Crust Repair: Simple Fixes
If you notice cracks in your unbaked press-in crust after chilling or before adding filling, you can easily patch them. Simply take a small amount of the reserved dough mixture (if you saved any) or gently scrape a bit from the sides, press it into the crack, and smooth it over with your finger.
For cracks that appear after baking, you can often patch them with a bit of melted chocolate or a dab of the filling itself, depending on the type of tart. While not structurally perfect, this can help prevent leaks and make the tart presentable. Handling the baked crust gently and allowing it to cool completely in the pan before attempting to remove it significantly reduces the risk of cracking.
Uneven Baking: Achieving a Golden Brown
Uneven browning usually points to inconsistencies in oven temperature or dough thickness. First, ensure your oven temperature is accurate by using an oven thermometer. If your oven has hot spots, rotate the tart halfway through the baking time.
Secondly, make sure you press the dough into the pan as evenly as possible. A thicker bottom or sides will take longer to bake than thinner areas. If you notice some areas browning faster than others during blind baking, you can lightly tent those areas with foil. For a fully baked crust, continue baking until the pale spots catch up, even if the edges seem done – focus on the color of the base for your no roll pressin tart.
Flavor Variations for Your No-Roll Press-In Tart
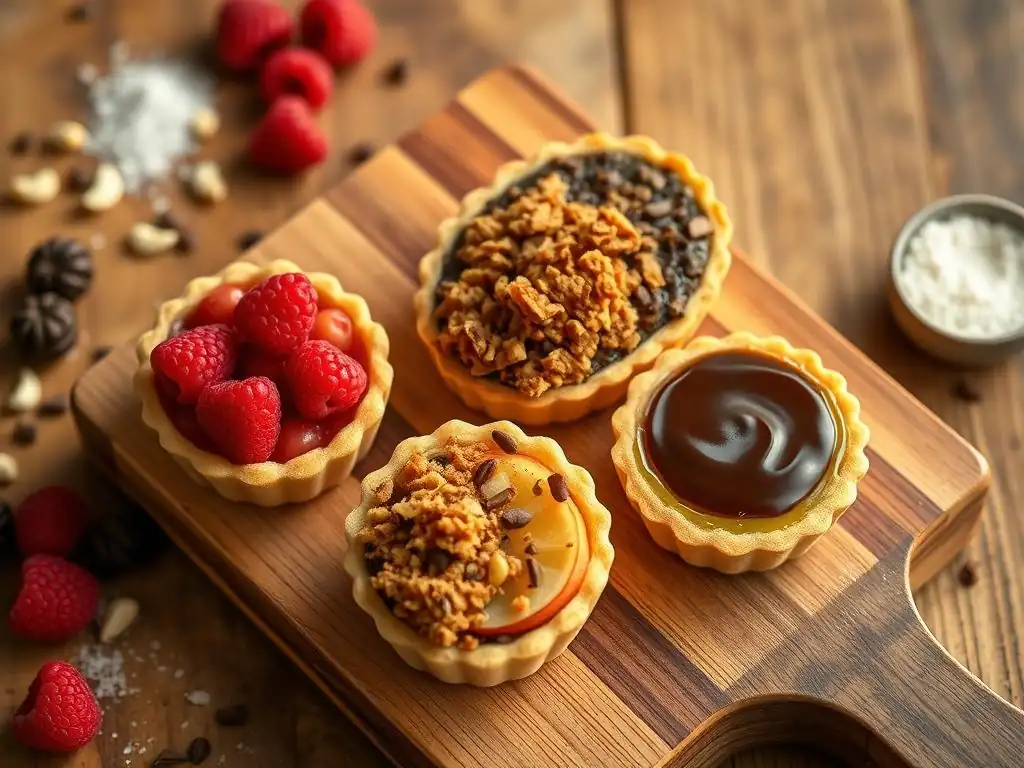
While a classic butter press-in crust is delicious on its own, you can easily customize the flavor profile to perfectly complement your filling. Adding simple ingredients to the dough mixture can transform your easy press-in tart crust into something truly unique and exciting.
These variations allow you to play with different flavor combinations, expanding the possibilities of your tart creations. From bright citrus notes to rich nutty undertones, the base can be just as interesting as the filling.
Sweet Variations: Adding Flavor to the Dough
For sweet tarts, incorporating flavor directly into the dough adds an extra layer of complexity. These additions are mixed in with the dry ingredients or worked in with the butter. The key is to use finely processed additions that won't disrupt the pressable texture of the dough.
Experiment with different extracts, spices, or zests to match your filling. A simple addition can elevate a standard fruit tart or chocolate tart filling into something truly special, starting with the base of your no roll pressin tart.
Citrus Zest for a Zesty Tart Crust
Adding finely grated citrus zest is a fantastic way to infuse your sweet press-in tart crust with bright, aromatic flavor. Lemon, orange, or lime zest works beautifully. Use a microplane grater to get very fine zest, avoiding the bitter white pith.
For a standard recipe using about 1.5 cups (approx. 180-190g) of flour, the zest of one medium lemon or half an orange is usually sufficient to impart a noticeable flavor without being overwhelming. Add the zest to the dry ingredients and rub it in with your fingertips to release its oils before adding the butter. This creates a wonderfully fragrant and zesty easy press-in tart crust.
Nutty Flavors: Incorporating Ground Nuts
Incorporating finely ground nuts adds a lovely nutty flavor and tender texture to your press-in crust. Almond flour, finely ground pecans, or pistachios work well. Be sure the nuts are ground to a very fine meal; larger pieces can make the dough harder to press smoothly.
Replace a small portion of the all-purpose flour with ground nuts, typically 1/4 cup (approx. 25-30g) per 1.5 cups of flour. This substitution adds flavor and richness while slightly reducing the gluten, contributing to tenderness. Nut flours can absorb moisture differently, so you might need a tiny splash more liquid if the dough seems too dry, though most no roll pressin tart recipes are quite forgiving.
Savory Variations: Expanding Your Tart Horizons
Press-in crusts aren't just for desserts! They make an excellent base for savory tarts like quiches, vegetable tarts, or meat pies. Just like with sweet variations, you can add flavorings to the dough to complement your savory filling.
When making a savory press-in crust, you will typically reduce or omit the sugar from the standard recipe. Replace the sweetness with savory elements like herbs, cheese, or spices to create a flavorful foundation for your savory no roll pressin tart.
Herb Infusion: Aromatic Savory Crust
Adding finely chopped fresh herbs or dried herbs to your savory press-in dough imparts wonderful aroma and flavor. Rosemary, thyme, chives, or parsley are excellent choices. Dried herbs should be crumbled finely.
For a dough using about 1.5 cups of flour, start with 1-2 tablespoons of finely chopped fresh herbs or 1-2 teaspoons of dried herbs. Mix them in with the dry ingredients before adding the butter. The heat of the oven during baking will release the herbs' essential oils, creating a fragrant and flavorful easy press-in tart crust perfect for quiches or vegetable tarts.
Cheese Please: Adding Cheese to the Dough
Adding grated hard cheese to a savory press-in dough creates a rich, flavorful crust that pairs beautifully with many savory fillings. Parmesan, Gruyère, or sharp cheddar are popular choices. Use finely grated cheese so it distributes evenly throughout the dough.
Mix about 1/4 to 1/2 cup (approx. 25-50g) of finely grated cheese into the dry ingredients before adding the butter. The cheese will melt slightly during baking, creating pockets of flavor and contributing to a tender texture. This cheesy variation makes for an exceptionally delicious no roll pressin tart base for fillings like spinach and feta or roasted red pepper.
Perfect Fillings for Your Press-In Tart Shell
Once you have mastered the easy press-in tart crust, the possibilities for fillings are endless! The beauty of this versatile base is that it pairs well with a wide variety of sweet and savory options. Choose a filling that complements the flavor profile of your customized crust.
Here are a few ideas to get you started, showcasing how this no roll pressin tart base can be the foundation for countless delicious creations.
Fruit Tart Filling Ideas: Complementing the Crust
A classic choice for a sweet press-in crust is a vibrant fruit filling. Fresh berries, sliced stone fruits like peaches or plums, or a cooked apple filling all work wonderfully. Often, these are combined with a simple pastry cream or a glaze.
- Fresh Berry Tart: Fill a blind-baked crust with pastry cream and top generously with mixed fresh berries (strawberries, blueberries, raspberries).
- Lemon Meringue Tart: A tangy lemon curd filling baked or set in the crust, topped with fluffy meringue.
- Apple or Pear Tart: Thinly sliced fruit arranged over a layer of frangipane (almond cream) or simply tossed with sugar and spice, then baked in the shell.
Consider adding citrus zest to the dough if using a berry or lemon filling, or a touch of cinnamon or nutmeg if using apple or pear.
Chocolate Tart Filling: A Decadent Combination
For chocolate lovers, a rich chocolate filling is a perfect match for a buttery press-in crust. The simplicity of the crust allows the decadent chocolate flavor to shine.
- Chocolate Ganache Tart: A simple filling of melted chocolate and hot cream poured into a blind-baked crust and chilled until set.
- Chocolate Silk Pie: A lighter, airy chocolate mousse-like filling poured into a blind-baked shell and chilled.
- Baked Chocolate Custard Tart: A rich, baked chocolate custard filling that sets up beautifully inside the crust.
Adding a touch of espresso powder or a pinch of chili flakes to the chocolate filling can add an extra layer of complexity that complements the buttery base of your easy press-in tart crust.
Savory Tart Filling Suggestions: Beyond Sweet
The savory variations of the press-in crust open up a world of possibilities for main courses or appetizers. Quiches are a popular choice, but don't stop there!
- Classic Quiche Lorraine: A filling of bacon, Gruyère cheese, and a rich egg and cream mixture baked in a savory crust.
- Spinach and Feta Tart: Sautéed spinach, crumbled feta cheese, and herbs bound with an egg mixture.
- Roasted Vegetable Tart: Roasted seasonal vegetables (like bell peppers, zucchini, and onions) layered with goat cheese or ricotta in an herb-infused crust.
A press-in crust made with cheese or herbs provides a sturdy and flavorful base that stands up well to the heartier ingredients often found in savory tarts. It's a reliable alternative to traditional pastry for your savory no roll pressin tart ideas.
Tips for Storing Your Press-In Tart Crust
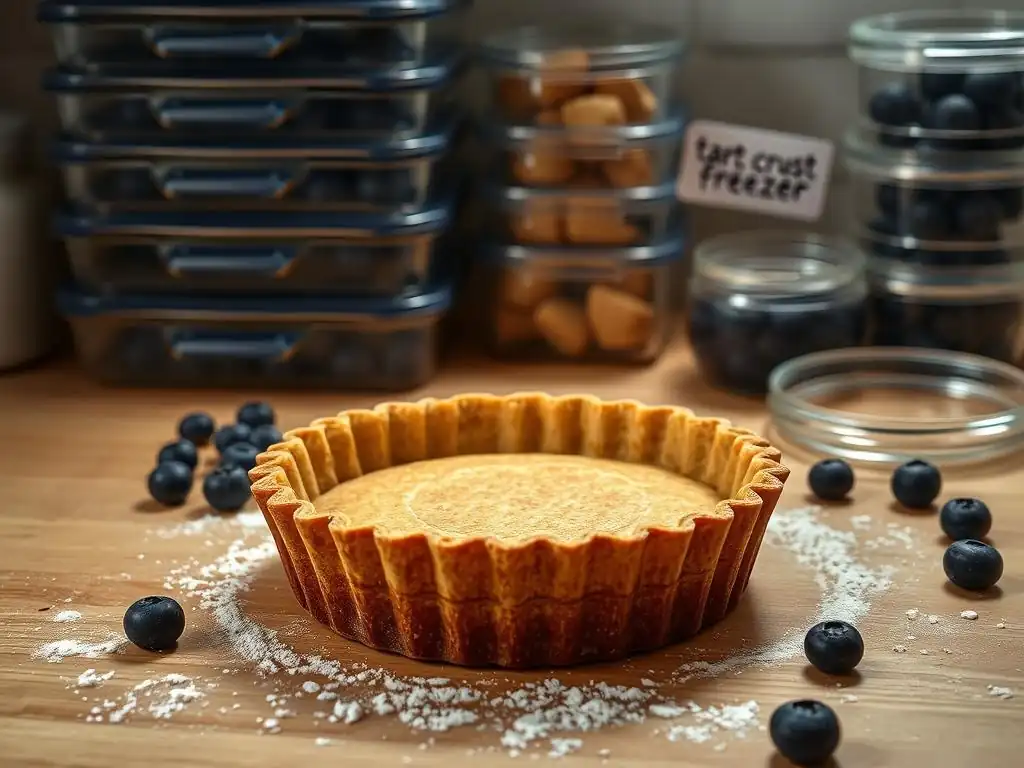
Proper storage is key to maintaining the quality of your press-in tart crust, whether you've made the dough ahead of time or have leftover baked shells. Knowing how to store your crust ensures it's ready when you need it and stays fresh.
These simple storage tips will help you plan your baking schedule and minimize waste, making your easy press-in tart crust even more convenient.
Storing Unbaked Tart Crust
If you want to make the dough ahead of time or prepare multiple shells, the unbaked press-in dough stores very well. After preparing the dough mixture, you can either:
- Wrap the crumbly mixture tightly in plastic wrap and store in the refrigerator for up to 3-4 days.
- Press the dough into the tart pan, then wrap the entire pan securely in plastic wrap and store in the refrigerator for up to 2-3 days.
- Wrap the crumbly mixture or the pressed shell tightly in plastic wrap and then place it in a freezer-safe bag or container. Freeze for up to 2-3 months.
To use frozen dough (crumbly or pressed), thaw it overnight in the refrigerator before pressing or baking as usual. This make-ahead capability adds to the convenience of the no roll pressin tart method.
A blind-baked press-in tart shell can also be stored for later use. This is perfect for preparing components of a tart in advance.
- Allow the blind-baked crust to cool completely in the pan on a wire rack.
- Once cool, carefully remove the crust from the pan (if using a removable bottom pan).
- Wrap the cooled crust tightly in plastic wrap, then in foil.
- Store the wrapped crust at room temperature for 1-2 days. For longer storage, place the foil-wrapped crust in a freezer-safe bag or container and freeze for up to 1 month.
To use a frozen baked crust, unwrap it and let it thaw at room temperature for about 30-60 minutes before filling. If the crust seems a little soft, you can crisp it up by baking it in a preheated oven at 350°F ( 175°C) for 5-8 minutes before filling. This flexibility makes the easy press-in tart crust incredibly practical.
Conclusion: Enjoy Baking with Ease!
Baking a tart no longer needs to be a daunting task involving finicky dough and frustrating rolling pins. The press-in tart crust method provides a simple, reliable, and delicious alternative that anyone can master. By understanding the key ingredients and following the easy steps, you can create perfect tart shells every time, ready to be filled with your favorite sweet or savory creations.
Embracing the no roll pressin tart technique frees you up to focus on the fun part – the filling! Whether you're a beginner or an experienced baker looking for a stress-free option, this method is a fantastic addition to your baking repertoire.
Embrace the Simplicity of No-Roll Tart Crusts
The beauty of the no roll pressin tart lies in its simplicity. It demystifies tart making and proves that you don't need complex techniques or specialized equipment to achieve delicious results. This method is all about ease, convenience, and reliable outcomes.
From ingredient prep to the final bake, the press-in approach minimizes steps and potential pitfalls. It's a testament to the fact that sometimes, the simplest path leads to the most satisfying rewards in the kitchen. Give this method a try and experience the joy of easy tart baking!
We love seeing what you bake! Once you've made your easy press-in tart crust and filled it with something wonderful, share your creations with us. Tag us on social media or send us a photo – we can't wait to see your beautiful no roll pressin tart masterpieces!
Happy Baking from BakeWithEase.com! Let this simple technique inspire you to make more tarts and share them with friends and family. Baking should be a source of joy, and the press-in method helps make it just that.
Frequently Asked Questions
What is a "press-in" tart crust, and how does it differ from a traditional tart crust?
A press-in tart crust, as the name suggests, is made by pressing the dough directly into the tart pan, eliminating the need for rolling. This is different from traditional crusts which require rolling out the dough before placing it in the pan.
Why would I choose to make a press-in tart crust over a rolled tart crust?
Press-in tart crusts are easier and faster to make, especially for beginners. They're also a great option when you want a rustic or crumbly texture, as they don't require the same level of precision as rolled crusts.
What type of tart fillings work best with a press-in crust?
Press-in crusts are versatile and work well with a variety of fillings. Consider creamy fillings, fruit fillings, or even savory fillings. The best choice depends on the specific recipe.
Can I make a press-in tart crust ahead of time?
Yes, you can! The unbaked press-in tart crust can be stored in the refrigerator for a few days or frozen for longer storage. Just wrap it tightly in plastic wrap before storing.
What are some common mistakes to avoid when making a press-in tart crust?
Avoid overworking the dough, as this can lead to a tough crust. Also, ensure the dough is evenly distributed in the pan to prevent thin spots. Finally, be sure to blind bake the crust if the filling requires it.
Final Reflection: The Joy of Effortless Baking
The ease of creating a perfect tart crust without the fuss of rolling is a revelation, transforming a potentially daunting task into a simple and enjoyable experience. This isn't just about saving time; it's about unlocking the joy of baking for everyone, regardless of skill level. The "no-roll" method democratizes the art of pastry, making delicious, homemade tarts accessible to a wider audience.
The impact of this simple technique extends beyond the individual kitchen. It empowers home bakers to confidently tackle more complex recipes, fostering a sense of accomplishment and creativity. Baking is at once child's play and adult joy. And love, of course.
This quote perfectly encapsulates the feeling of satisfaction derived from mastering a seemingly difficult skill, and the simple press-in method makes that mastery achievable for all. It's a small change with a significant ripple effect, encouraging more people to explore the rewarding world of baking.
Now, it's your turn. Don't let the fear of a challenging crust hold you back from creating beautiful, delicious tarts. Try this simple press-in method, experiment with different fillings, and share your creations with loved ones. Embrace the ease, celebrate the success, and discover the joy of effortless baking. You might be surprised at what you can achieve!
Unleash Your Inner Pastry Chef: Effortless Tart Crust Awaits!
Thanks for taking the time to explore the magic of no-roll press-in tart crusts! You've just unlocked a world of delicious possibilities with minimal effort. Now it's time to put your newfound skills to the test.
- Bake your dream tart today! Grab your favorite filling and get creative. The possibilities are endless!
- Share your masterpiece! Show us your stunning creations on social media using #BakeWithEaseNoRollCrust. We can't wait to see what you whip up.
- Explore other BakeWithEase recipes for more simple yet impressive baking ideas. We have tons of easy recipes that will surprise and delight.
Ready to transform your baking routine? What delicious flavor combination will you create with your new favorite crust?