
NoBake Fruit Tart: Quick & Refreshing Options

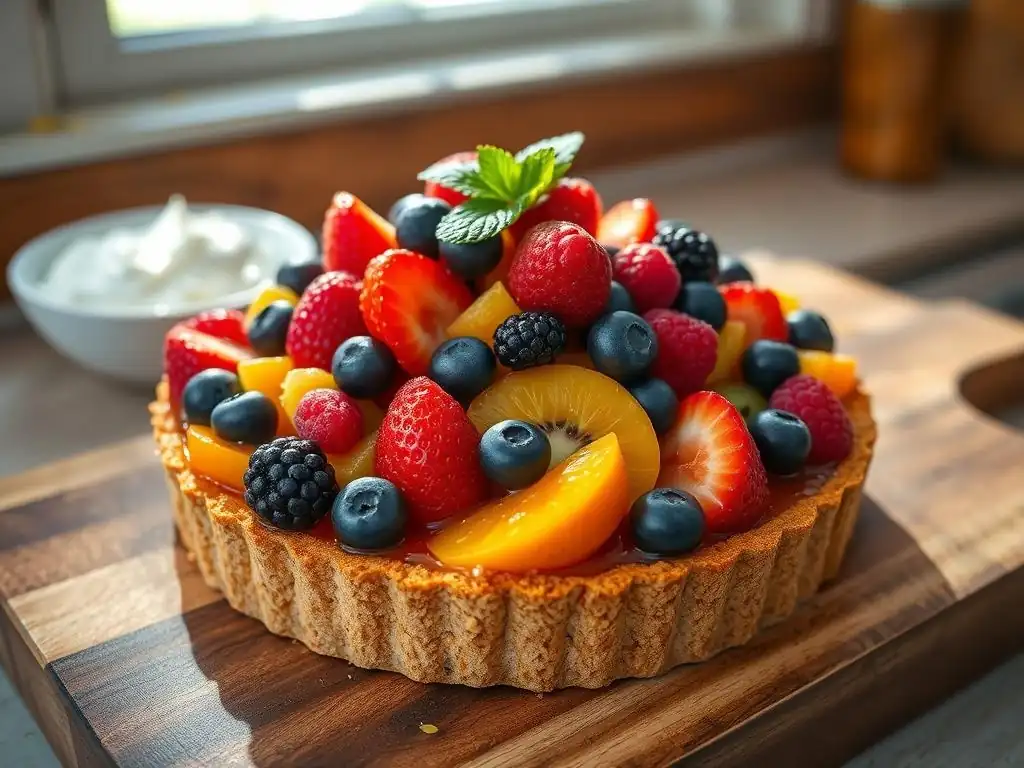
Welcome to BakeWithEase, your guide to delightful baking adventures!
Craving a show-stopping dessert without the oven? Dive into the world of our No Bake Fruit Tart, a vibrant and refreshing treat perfect for any occasion. Discover how to create stunning pastries with simple ingredients and easy-to-follow steps. Intrigued? Let's unlock the secrets to a perfect no-bake tart and explore a world of effortless baking!
- No-Bake Lemon Raspberry Tart: A Zesty Delight
- Introduction to No-Bake Lemon Raspberry Tarts: The Perfect Spring Dessert
- Why Choose a No-Bake Tart? The Benefits Explained
- No-Bake Tart Crust Options: From Classic to Creative
- No-Bake Tart Filling Ideas: Creamy and Tangy
- Best Fruits for Your Tart: Color and Flavor Combinations
- Assembling Your No-Bake Tart: Step-by-Step Guide
- No-Bake Tart Recipe Variations: Adapt and Customize
- Tips for a Perfect No-Bake Tart: Avoiding Common Mistakes
- Storing Your No-Bake Tart: Keeping it Fresh
- Conclusion: Enjoy Your Refreshing No-Bake Lemon Raspberry Tart
- Frequently Asked Questions
- Final Reflection: The Enduring Allure of the No-Bake Fruit Tart
- Unlock Your Inner Pastry Chef: Create Your Dream No-Bake Tart!
No-Bake Lemon Raspberry Tart: A Zesty Delight
Introduction to No-Bake Lemon Raspberry Tarts: The Perfect Spring Dessert
As the weather warms and the days grow longer, the last thing many of us want to do is turn on a hot oven. Yet, the craving for a delightful, refreshing dessert persists! This is where the magic of a no-bake fruit tart truly shines.
Imagine a crisp, buttery crust filled with a smooth, tangy cream, piled high with vibrant, juicy raspberries and bright lemon zest – all without generating a single degree of heat in your kitchen. A no-bake lemon raspberry tart is not just a dessert; it's a celebration of fresh flavors and effortless elegance, making it an ideal choice for springtime gatherings, summer picnics, or simply a treat on a warm afternoon.
This particular no-bake fruit tart, focusing on the classic pairing of lemon and raspberry, offers a perfect balance of sweet and tart notes. The simplicity of its preparation makes it accessible to bakers of all skill levels, from those just starting their culinary journey to experienced home cooks looking for a quick win. We'll explore various options for crafting your perfect no-bake tart, from selecting the ideal crust to creating a luscious filling and arranging the fruit for maximum visual appeal. Get ready to discover how easy and rewarding creating a stunning no-bake dessert can be.
Why Choose a No-Bake Tart? The Benefits Explained
Opting for a no-bake fruit tart offers a multitude of advantages, extending beyond just avoiding oven heat. It's a smart choice for various situations, providing convenience, accessibility, and delicious results with minimal fuss. Whether you're short on time, baking in a small space, or simply prefer a simpler process, a no-bake tart delivers.
Consider the typical baking process: preheating the oven, careful timing, potential for burning or uneven baking. A no-bake tart bypasses many of these potential pitfalls. The focus shifts from precise oven management to simple mixing, chilling, and assembly. This simplified approach opens the door to dessert making for many who might feel intimidated by traditional baking methods. It's a forgiving format that still allows for incredible flavor and beautiful presentation.
Beat the Heat: No-Bake Tarts for Warm Weather Baking
One of the most compelling reasons to choose a no-bake fruit tart, especially in warmer climates or during the summer months, is its ability to keep your kitchen cool. Traditional baking, particularly large items like pies or cakes that require long oven times, can significantly raise the temperature in your home. This can be uncomfortable and even impractical when temperatures outside are already high.
A no-bake tart eliminates this issue entirely. The process primarily involves using a refrigerator or freezer for chilling and setting. This means you can prepare a decadent dessert without breaking a sweat or relying heavily on air conditioning. For instance, on a 90°F (approximately 32°C) summer day, preparing a baked pie might increase your kitchen temperature by several degrees for an hour or more. A no-bake option keeps the process cool from start to finish, making it a far more pleasant activity and a refreshing dessert to enjoy in the heat.
Save Time: Quick and Easy Dessert Solutions
In today's fast-paced world, finding time for elaborate baking projects can be challenging. A no-bake fruit tart is a fantastic solution for satisfying your sweet tooth or preparing a dessert for guests without dedicating hours to the kitchen. While chilling time is required for the tart to set properly, the active preparation time is often surprisingly short.
For example, making a classic graham cracker crust takes mere minutes – just crushing cookies and mixing with melted butter. The filling often involves whisking or beating a few ingredients together until smooth. Compared to the multiple stages of dough preparation, rolling, blind baking, and custard making involved in a traditional baked tart, the time savings are substantial. Many no-bake tart recipes can be assembled and ready for chilling in under 30 minutes of hands-on work, leaving you more time to enjoy your day.
No Oven Needed: Accessible Baking for All
The absence of an oven requirement makes no-bake tarts incredibly accessible. This is particularly beneficial for individuals who may not have access to a fully equipped kitchen, such as students in dorms, people in temporary housing, or those with small kitchen spaces lacking a reliable oven.
Furthermore, for those who are new to baking or feel intimidated by operating an oven, a no-bake fruit tart provides a low-stress entry point into dessert making. The steps are typically straightforward, focusing on simple techniques like mixing, pressing, and chilling. This accessibility means that almost anyone, anywhere, can successfully create a beautiful and delicious no-bake fruit tart, fostering confidence and enjoyment in the kitchen (or lack thereof! ).
No-Bake Tart Crust Options: From Classic to Creative
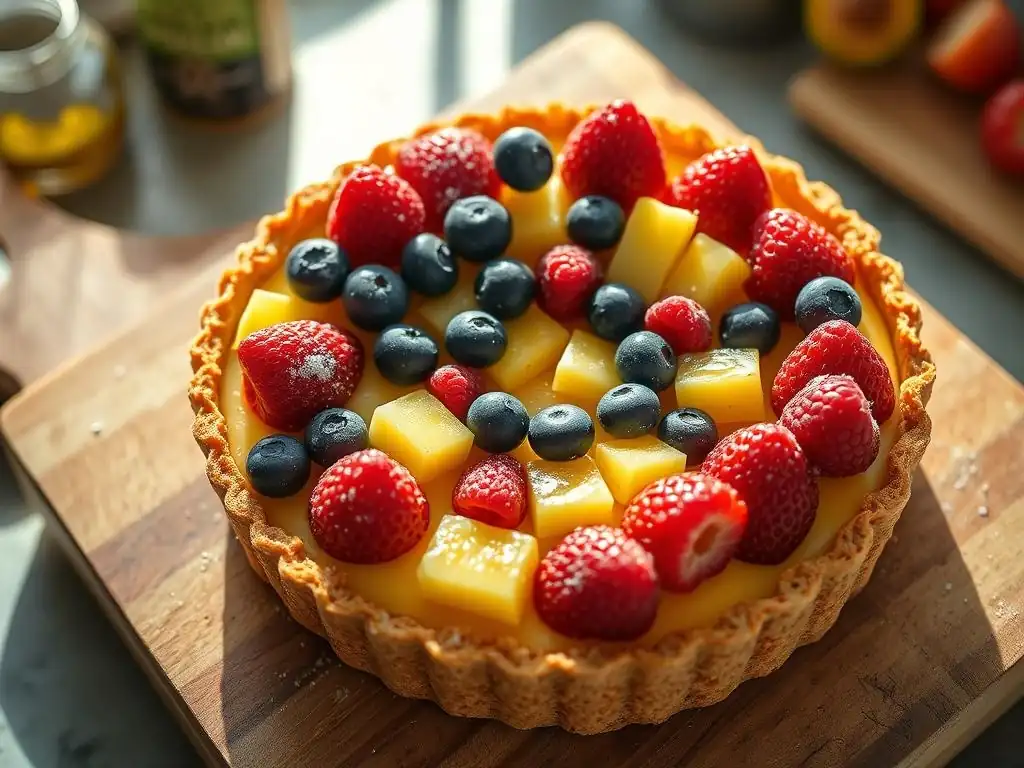
The foundation of any great tart is its crust, and no-bake tarts offer a delightful variety of options, each contributing a unique texture and flavor profile. The key principle for these crusts is simple: a binding agent (usually melted butter or a dairy-free alternative) holds crushed cookies, crackers, or nuts together, which then sets firm when chilled.
Choosing the right crust depends on your personal preference and dietary needs. Do you want something classic and slightly savory like graham cracker, rich and buttery like shortbread, or perhaps a gluten-free or chocolatey base? Each option provides a sturdy yet yielding base that perfectly complements the creamy filling and fresh fruit of your no-bake fruit tart.
Graham Cracker Crust: The Traditional Choice
The graham cracker crust is arguably the most classic and widely used base for no-bake desserts, and for good reason. Its slightly sweet, subtly spiced flavor pairs wonderfully with a variety of fillings, including tangy lemon and sweet raspberries. The texture is pleasantly crumbly yet holds together well when chilled.
To make a standard 9-inch graham cracker crust, you typically need about 1 ½ cups of finely crushed graham cracker crumbs (which comes from about 10-12 full graham cracker sheets, or roughly half of a standard 13.5-ounce box). These crumbs are then mixed with about 6-8 tablespoons of melted unsalted butter and often a tablespoon or two of sugar for extra sweetness and structure. The mixture is pressed firmly into the tart pan and chilled until set, usually for at least 30 minutes, before adding the filling. This simple ratio provides a reliable and delicious base for your no bake fruit tart.
For a richer, more buttery base, a shortbread cookie crust is an excellent alternative. Shortbread cookies, known for their high butter content and tender crumb, create a luxurious foundation that melts in your mouth. This crust adds a touch of elegance and a deeper, more indulgent flavor to your no-bake fruit tart.
Creating a shortbread crust follows the same principle as the graham cracker version. You'll need about 1 ½ - 2 cups of finely crushed shortbread cookies (this might require a standard 5.3-ounce package or slightly more, depending on the brand). These crumbs are then combined with 4-6 tablespoons of melted butter. Because shortbread is already quite buttery, you often need less added butter compared to graham crackers. The mixture is pressed into the pan and chilled. The resulting crust is dense, buttery, and provides a lovely contrast to a light, tangy filling.
Almond Flour Crust: A Gluten-Free Option
For those seeking a gluten-free alternative, an almond flour crust is a fantastic choice. It offers a delicate texture and a subtle nutty flavor that complements the fruits beautifully. This option allows individuals with gluten sensitivities or celiac disease to enjoy a delicious no-bake fruit tart.
An almond flour crust is typically made by combining fine almond flour (about 1 ½ - 2 cups) with melted butter or coconut oil ( 4-6 tablespoons) and sometimes a little sweetener like maple syrup or a sugar substitute. The mixture is pressed into the tart pan and chilled. Unlike cookie or cracker crumbs which rely on pre-baking, almond flour is simply ground nuts. This results in a slightly softer, more delicate crust than the cookie-based options, but it holds together well once thoroughly chilled. It's a healthy-ish and flavorful base for any no bake fruit tart.
Chocolate Wafer Crust: A Rich Indulgence
If you're a chocolate lover looking to add a decadent twist to your no-bake fruit tart, a chocolate wafer crust is the way to go. The deep, slightly bitter flavor of chocolate wafers provides a wonderful contrast to sweet fruits and creamy fillings, creating a truly indulgent dessert experience.
Similar to other cookie crusts, you'll need about 1 ½ - 2 cups of finely crushed chocolate wafer cookies (like Nabisco Famous Wafers, which typically come in a 9-ounce box, yielding more than enough crumbs from about half the package). Mix these crumbs with 6-8 tablespoons of melted butter. The process is identical: press into the pan and chill. The result is a dark, flavorful crust that makes the vibrant fruit topping pop visually and adds a rich dimension to the overall flavor profile of your no bake fruit tart.
No-Bake Tart Filling Ideas: Creamy and Tangy
The filling is the heart of the no-bake fruit tart, providing the creamy, flavorful base upon which the fruit is placed. For a lemon raspberry tart, a tangy filling is essential to balance the sweetness of the fruit and crust. There are several excellent no-bake options, ranging from classic cream cheese to lighter or vegan alternatives.
The key to a successful no-bake filling is achieving the right consistency – it needs to be smooth, spreadable, and set firmly enough to hold its shape when the tart is sliced. This is usually achieved through the use of ingredients like cream cheese, yogurt, coconut cream, or sometimes a setting agent like gelatin or cornstarch (though many simple recipes rely solely on chilling power).
Lemon Cream Cheese Filling: A Classic and Tangy Base
A lemon cream cheese filling is a beloved classic for no-bake tarts due to its rich texture and bright, tangy flavor. The slight saltiness of the cream cheese balances the sweetness, while the lemon provides a refreshing zestiness that pairs perfectly with raspberries.
A typical recipe for a 9-inch tart might use 16 ounces (two standard 8-ounce blocks) of softened cream cheese, whipped together with about 1 cup of powdered sugar, the zest and juice of one or two lemons (depending on desired tanginess), and often 1 teaspoon of vanilla extract. Some recipes also incorporate whipped cream or condensed milk for added lightness and sweetness. The mixture is beaten until smooth and creamy, then spread into the chilled crust and refrigerated for several hours (usually 2-4 hours) until firm. This filling provides a substantial and satisfying foundation for your no bake fruit tart.
Greek Yogurt Filling: A Light and Healthy Option
For a lighter, tangier, and protein-rich filling, Greek yogurt is an excellent choice. It provides a wonderful creamy texture and a pronounced tang that complements the lemon and raspberries beautifully. This option feels less heavy than cream cheese or traditional pastry cream.
Using full-fat Greek yogurt (about 2-3 cups) is recommended for the best texture, as it's thicker and less likely to weep. It can be sweetened with honey, maple syrup, or sugar (to taste) and flavored with lemon zest and a touch of lemon juice. Some recipes may add a small amount of cornstarch or gelatin mixed with a liquid to help with setting, though often, simply using very thick Greek yogurt and chilling for an extended period (4-6 hours) is sufficient. This filling creates a vibrant, tangy, and relatively healthy no bake fruit tart.
Coconut Cream Filling: A Vegan Delight
For a dairy-free and vegan no-bake fruit tart, coconut cream offers a rich, smooth, and delicious filling option. When chilled, full-fat coconut cream becomes thick and scoopable, making it an ideal base that can be flavored with lemon and sweetened.
To make a coconut cream filling, you'll need several cans of full-fat coconut milk or dedicated coconut cream, chilled thoroughly in the refrigerator. The solid cream is then scooped out (leaving the liquid behind) and whipped with powdered sugar (or another vegan sweetener) and lemon zest/juice. A stabilizer like cornstarch slurry or agar-agar powder is often used to ensure it sets firmly. For a 9-inch tart, you might use the solid cream from 2-3 cans of coconut milk, whipped with ½ cup powdered sugar and lemon flavoring. This filling provides a tropical hint and a wonderfully creamy texture for your no bake fruit tart.
Lemon Curd Filling: A Tangy and Intense Flavor
While traditional lemon curd is often cooked, it can be used as a no-bake filling when combined with other elements that provide structure. Using pre-made high-quality lemon curd or making a batch ahead of time allows for an intensely tangy and smooth filling that is pure lemon flavor.
To use lemon curd in a no-bake tart, it's typically folded into whipped cream or a cream cheese mixture to lighten it and help it set without baking. For example, 1 ½ cups of chilled lemon curd could be gently folded into 2 cups of stiffly whipped heavy cream. This creates a mousse-like texture that is incredibly light yet packed with bright lemon flavor. This mixture is then spread into the crust and chilled until firm (usually 3-4 hours). This method delivers a powerful burst of lemon flavor in your no bake fruit tart.
Best Fruits for Your Tart: Color and Flavor Combinations
The fruit topping is the crowning glory of a no-bake fruit tart, adding vibrant color, fresh texture, and complementary flavors. For a lemon raspberry tart, raspberries are the star, but other fruits can be incorporated to enhance both the visual appeal and the taste profile.
Choosing fresh, ripe fruit is key. The natural sweetness and slight acidity of fruits like berries and citrus pair exceptionally well with the creamy, tangy filling and crisp crust. Arranging the fruit artistically transforms a simple dessert into a stunning centerpiece.
Berries: Raspberries, Blueberries
Raspberries are essential for a lemon raspberry tart, offering their delicate sweetness and slight tartness, plus their beautiful deep red color. Blueberries are a natural partner, providing a slightly sweeter flavor and a contrasting deep blue-purple hue.
Using a generous amount of mixed berries, say 2-3 cups total for a 9-inch tart, creates a lush topping. Raspberries can be placed individually, while blueberries are often scattered or clustered. The combination of these berries provides a wonderful mix of textures and flavors that harmonize with the lemon filling. Other berries like strawberries (sliced or halved) or blackberries can also be included for variety, contributing different shades of red and purple and slightly different flavor notes to your no bake fruit tart.
Citrus Fruits: Lemon Zest and Segments
Incorporating fresh lemon directly onto the tart amplifies the lemon flavor and adds a beautiful visual element. Fine lemon zest sprinkled over the top provides intense aroma and tiny bursts of tartness. Lemon segments (supremes) add a more substantial citrus punch.
To prepare lemon segments, you'll need 1-2 fresh lemons. Using a sharp knife, cut off the top and bottom, then stand the lemon upright and slice away the peel and pith, following the curve of the fruit. Then, carefully slice between the membranes to release the individual segments. These segments can be arranged amongst the berries. A final sprinkle of finely grated lemon zest just before serving brightens the flavors considerably and adds a professional touch to your no bake fruit tart.
Fruit Preparation: Washing, Drying, and Slicing
Proper fruit preparation is crucial for both hygiene and presentation. All fruits should be gently washed under cool water. Berries, being delicate, should be washed just before use to prevent them from becoming waterlogged or moldy.
After washing, it is absolutely essential to dry the fruit thoroughly. Excess moisture can make the crust soggy, dilute the glaze (if using), and cause the fruit to break down faster. Berries can be gently patted dry with paper towels or spread in a single layer on paper towels to air dry for a bit. Larger fruits like strawberries should be hulled and sliced uniformly if desired. Taking the time to prepare the fruit properly ensures the best texture and longevity for your no bake fruit tart.
Assembling Your No-Bake Tart: Step-by-Step Guide
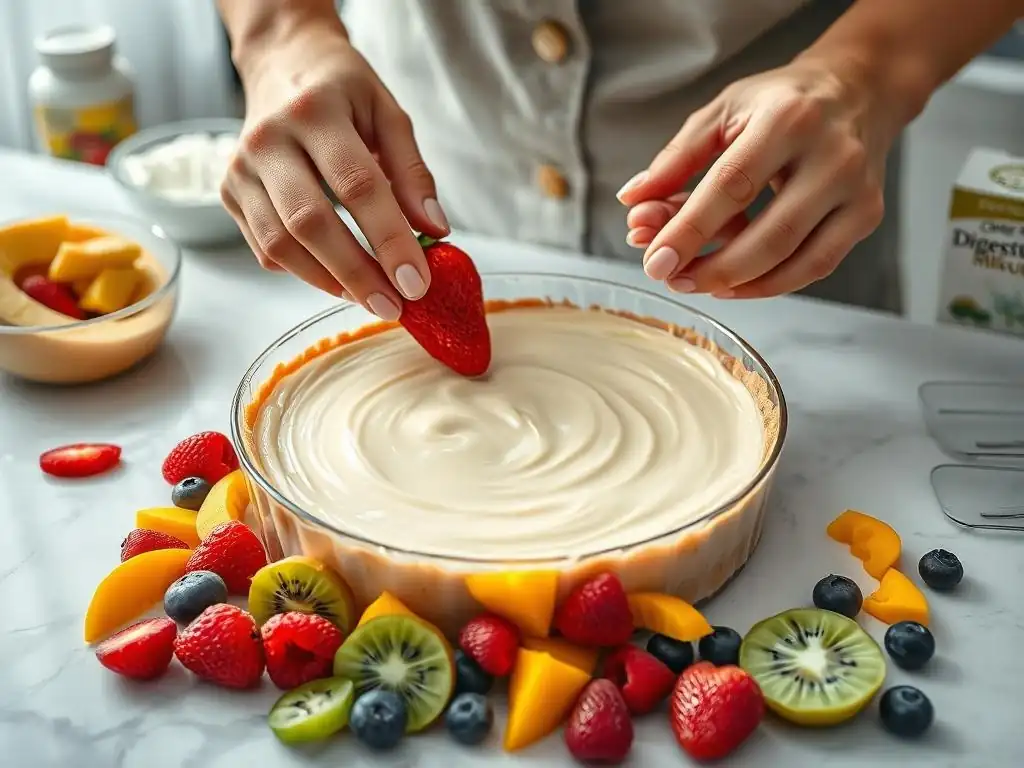
Assembling a no-bake tart is a straightforward process that involves layering the prepared components. It's less about complex techniques and more about careful handling and patience during the chilling stages. Breaking it down into simple steps makes the process easy to follow, even for beginners.
The typical assembly involves preparing the crust, making and adding the filling, arranging the fruit, and finally, optionally adding a glaze. Each step builds upon the last, resulting in a beautiful and delicious dessert.
- [ ] Prepare the crust ingredients.
- [ ] Mix and press the crust into the pan.
- [ ] Chill the crust until firm.
- [ ] Prepare the filling ingredients.
- [ ] Mix the filling until smooth.
- [ ] Spread filling into the chilled crust.
- [ ] Chill the tart until the filling is set.
- [ ] Wash and dry the fruit.
- [ ] Arrange the fruit on top of the filling.
- [ ] Prepare glaze (if using).
- [ ] Brush or pour glaze over the fruit.
- [ ] Chill the final tart before serving.
Preparing the Crust: Pressing and Chilling
Once your chosen crust ingredients (like graham cracker crumbs and melted butter) are mixed, the next step is to press this mixture firmly and evenly into your tart pan. A 9-inch tart pan with a removable bottom is ideal for easy serving. Use the bottom of a glass or a flat-bottomed measuring cup to press the mixture firmly onto the bottom and up the sides of the pan. Aim for an even thickness throughout.
Firmly pressing the crust is key to preventing it from crumbling when sliced. Pay extra attention to the edges where the bottom meets the sides. After pressing, the crust must be chilled to set. Refrigerate for at least 30 minutes, or freeze for about 15 minutes. This chilling process solidifies the butter, binding the crumbs together and creating a sturdy foundation for your no bake fruit tart.
Making the Filling: Mixing and Setting
With the crust chilling, prepare your chosen no-bake filling (such as the lemon cream cheese or Greek yogurt option). Follow the recipe instructions for combining the ingredients, usually involving beating or whisking until the mixture is smooth and free of lumps. Ensure any flavorings like lemon juice or zest are fully incorporated.
Once the filling is ready, spoon or pour it carefully into the chilled crust. Use an offset spatula or the back of a spoon to spread the filling evenly across the bottom of the crust, smoothing the top. The tart then needs significant chilling time to allow the filling to set completely. This typically requires refrigeration for a minimum of 2 to 4 hours for cream cheese or yogurt fillings, or longer for less stable mixtures. The filling should be firm to the touch before you add the fruit.
Arranging the Fruit: Artistic Placement Tips
Arranging the fruit is where you add the final visual flourish to your no-bake fruit tart. This step should be done after the filling is fully set. Wash and thoroughly dry your raspberries, blueberries, and any other fruits or lemon segments you are using.
Start by placing larger or more structured pieces, like strawberry slices or lemon segments, if using. Then, fill in the spaces with smaller fruits like raspberries and blueberries. You can arrange them in patterns (concentric circles, rows, or clusters) or simply scatter them artfully. Aim for a full, vibrant layer of fruit that covers the filling completely. Consider color contrast – the red of raspberries and blue of blueberries look stunning against a white or pale yellow filling and a golden-brown crust.
Glazing the Tart: Enhancing Shine and Freshness
A glaze is an optional but highly recommended step for a no-bake fruit tart. It adds a beautiful shine to the fruit, makes the colors pop, and helps to protect the fruit, keeping it looking fresh longer and preventing it from drying out. A simple glaze can be made using melted apricot jam or a mixture of cornstarch, sugar, and water cooked until thickened.
For a quick glaze, gently heat about ¼ cup of apricot jam with a tablespoon of water or lemon juice until melted and slightly runny. Strain it if you want a very smooth finish. Once slightly cooled but still liquid, gently brush or spoon the glaze over the arranged fruit. Ensure all fruit surfaces are lightly coated. This step takes just a few minutes but significantly enhances the visual appeal and freshness of your no bake fruit tart.
No-Bake Tart Recipe Variations: Adapt and Customize
One of the joys of making a no-bake fruit tart is how easily it can be adapted and customized. Once you understand the basic components – crust, filling, and fruit – you can experiment with different flavors, sizes, and additions to create unique desserts.
These variations allow you to cater to different preferences, dietary needs, or occasions. Whether you want individual servings, a richer flavor profile, a vegan option, or added texture, there's a way to modify the classic no-bake lemon raspberry tart to suit your needs.
Mini No-Bake Lemon Raspberry Tarts: Individual Portions
Mini tarts are perfect for parties, portion control, or simply adorable individual desserts. The principles of making a mini no-bake lemon raspberry tart are the same as a full-sized one, just on a smaller scale.
You'll need mini tart pans or muffin tins lined with paper liners. Prepare your chosen crust mixture and press about 1-2 tablespoons into the bottom of each cavity. Chill these mini crusts for about 15-20 minutes. Then, spoon your prepared filling into each mini crust and chill for 1-2 hours until set. Finally, top with a few raspberries and blueberries and a sprinkle of lemon zest. Mini tarts often require less chilling time due to their size and are delightful single-serving versions of the classic no bake fruit tart.
No-Bake Lemon Raspberry Tart with White Chocolate Drizzle: An Extra Touch of Indulgence
Adding a white chocolate drizzle introduces another layer of sweetness and richness, complementing the tartness of the lemon and raspberries. White chocolate pairs particularly well with both fruit and the creamy filling.
To add a white chocolate drizzle, gently melt about ½ cup of white chocolate chips or chopped white chocolate using a double boiler or microwave (heating in 30-second intervals, stirring between each). Let the melted chocolate cool slightly. Once the fruit is arranged on the chilled tart, use a spoon or a piping bag with a fine tip to drizzle the melted white chocolate back and forth across the top of the fruit. Allow the chocolate to set in the refrigerator for a few minutes before serving. This simple addition elevates your no bake fruit tart to something truly decadent.
Vegan No-Bake Lemon Raspberry Tart: Dairy-Free and Delicious
Creating a vegan no-bake lemon raspberry tart is entirely possible and equally delicious. This requires substituting dairy ingredients in the crust and filling with plant-based alternatives.
For a vegan crust, use a cookie crust made with accidentally vegan cookies (like some brands of graham crackers or Oreos, if you wanted a chocolate version) and vegan butter or coconut oil. For the filling, the coconut cream option mentioned earlier is perfect. Ensure all other ingredients, like sugar or flavorings, are also vegan-friendly. The result is a creamy, tangy, and fruity no bake fruit tart that everyone can enjoy, regardless of dietary restrictions.
No-Bake Lemon Raspberry Tart with a Streusel Topping: Added Texture
While traditionally streusel is baked, you can create a "faux" streusel topping or a crumbly element to add texture to your no-bake tart. This provides a pleasant contrast to the smooth filling and soft fruit.
One way to achieve this is to reserve a small amount of your crust mixture before pressing it into the pan. After the filling is set and the fruit is arranged, sprinkle these reserved crumbs over a portion of the tart. Alternatively, you can quickly toast some oats, chopped nuts, and a bit of sugar in a pan with a little butter until golden and crumbly, then let them cool completely before sprinkling. This adds a delightful crunch to your no bake fruit tart.
Tips for a Perfect No-Bake Tart: Avoiding Common Mistakes
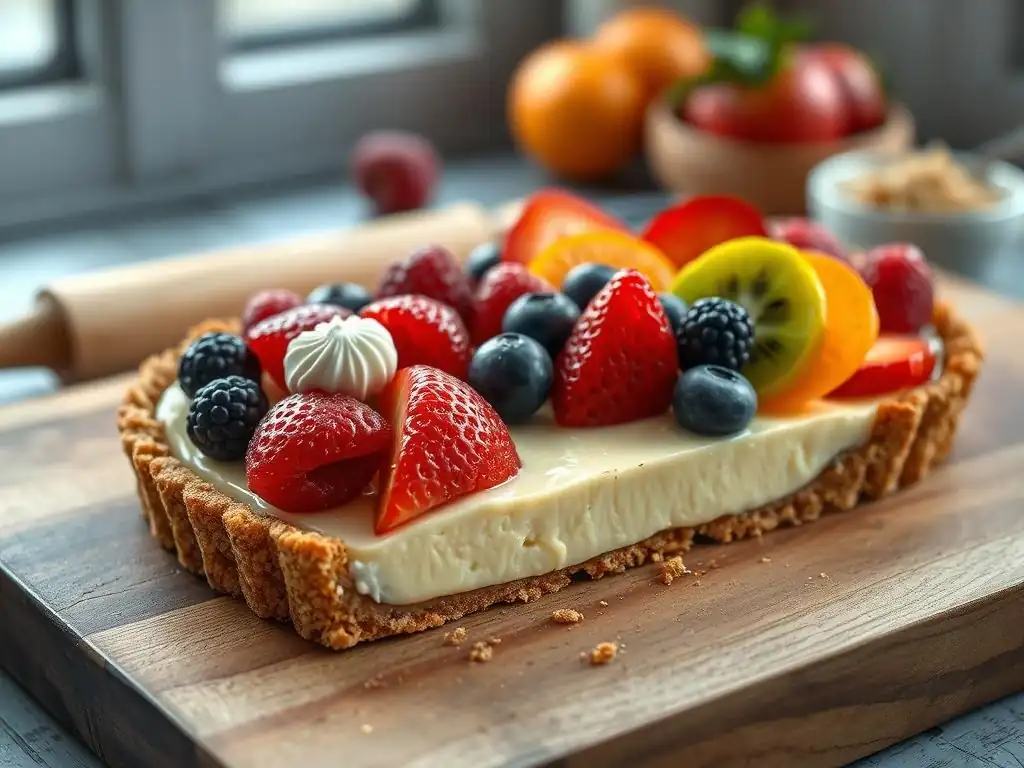
Even though no-bake tarts are simpler than their baked counterparts, there are still a few common pitfalls to avoid to ensure your tart turns out perfectly. Paying attention to details like chilling times and moisture levels will make a significant difference in the final result.
These tips cover crucial aspects from preparing the crust to maintaining the freshness of the fruit. Following these guidelines will help you achieve a no-soggy-bottom, perfectly set, and beautiful no bake fruit tart every time.
Preventing a Soggy Crust: Blind Baking and Sealing
The most common issue with no-bake tarts is a soggy crust, especially when the filling is moist. While you don't bake the crust, you can "blind bake" it in a sense by ensuring it's pressed very firmly and chilled thoroughly before adding the filling. The cold butter solidifies, forming a barrier.
Additionally, some bakers like to brush a thin layer of melted white chocolate or a mixture of powdered sugar and milk/lemon juice onto the inside of the chilled crust before adding the filling. Once this thin layer sets (which happens quickly in the cold crust), it creates a seal that further prevents moisture from the filling from seeping into the crust. This simple step can be a game-changer for your no bake fruit tart's texture.
Achieving a Smooth Filling: Mixing and Setting Tips
A smooth, well-set filling is essential for clean slices and a pleasant texture. Ensure your cream cheese (if using) is fully softened to room temperature before mixing, as this prevents lumps. Beat the filling ingredients thoroughly until completely smooth using an electric mixer if possible.
Patience during the chilling phase is key. Do not rush this step. The filling needs adequate time in the refrigerator to firm up. While 2-4 hours is often a minimum, chilling for 6 hours or even overnight is ideal for many fillings to achieve the best, sliceable consistency. Ensure your refrigerator is set to a proper cold temperature (around 35-40°F or 1.5-4°C). A properly set filling makes your no bake fruit tart much easier to serve.
Keeping Fruit Fresh: Glazing and Storage
To keep the fruit topping looking vibrant and fresh, especially if preparing the tart ahead of time, glazing is highly recommended. As mentioned earlier, a simple fruit glaze creates a protective layer.
Beyond glazing, proper storage is vital. Always store your no-bake fruit tart in the refrigerator. Cover it loosely with plastic wrap or aluminum foil once it's fully chilled and set. Try to avoid placing plastic wrap directly onto the fruit if possible, as condensation can form. If preparing the tart more than a few hours in advance, consider adding the most delicate fruits (like raspberries) and the glaze closer to serving time for the freshest appearance.
Storing Your No-Bake Tart: Keeping it Fresh
Proper storage is crucial for maintaining the quality, texture, and safety of your no-bake fruit tart. Because it contains dairy or other perishable ingredients and fresh fruit, refrigeration is always necessary.
Understanding how long the tart will last and whether freezing is an option helps you plan when to make it and how to handle leftovers.
Refrigeration Guidelines: How Long Does It Last?
A finished no-bake fruit tart should be stored in the refrigerator at all times until ready to serve. When properly covered and refrigerated, most no-bake tarts are best consumed within 3-4 days.
The longevity depends slightly on the filling type and the freshness of the fruit. Fillings made with cream cheese or cooked elements tend to last a bit longer than those primarily based on whipped cream or yogurt. Fresh berries are best within the first couple of days. Always store the tart in an airtight container or well-wrapped to prevent it from absorbing odors from the refrigerator and to keep it from drying out.
Freezing Options: Extending Shelf Life
Freezing a no-bake fruit tart is possible, but it depends heavily on the type of filling and fruit used. Fillings made with cream cheese or condensed milk tend to freeze better than those based on whipped cream or yogurt, which can become watery or lose texture upon thawing.
If you choose to freeze, it's often best to freeze the tart without the fresh fruit topping. Wrap the chilled, set tart (crust and filling) very well in plastic wrap and then in aluminum foil. It can be frozen for up to 1-2 months. Thaw the tart overnight in the refrigerator before adding fresh fruit and glaze just before serving. Freezing a tart with fresh berries is generally not recommended, as they can become mushy and lose their vibrant color and texture when thawed, impacting the quality of your no bake fruit tart.
Conclusion: Enjoy Your Refreshing No-Bake Lemon Raspberry Tart
Creating a no-bake lemon raspberry tart is a rewarding experience that yields a stunning and delicious dessert with minimal effort. From choosing your ideal crust and crafting a smooth, tangy filling to artfully arranging fresh raspberries and lemon, each step is approachable and enjoyable. This no-bake fruit tart is the perfect solution for satisfying dessert cravings on a warm day or providing an elegant finish to any meal without ever needing to turn on the oven.
Whether you stick to the classic combination or experiment with variations like a chocolate crust or a vegan filling, the core appeal remains the same: a cool, creamy, and fruity delight set upon a crisp base. With just a few simple ingredients and some patient chilling time, you can create a dessert that looks as impressive as it tastes. So go ahead, gather your ingredients, embrace the simplicity of no-bake, and prepare to enjoy a truly refreshing and zesty treat.
Frequently Asked Questions
What makes a no-bake fruit tart a good option?
A no-bake fruit tart is a great choice because it eliminates the need for an oven, making it quick and easy to prepare, especially during warm weather. It's also a refreshing and lighter dessert option.
What kind of crust is typically used for a no-bake fruit tart?
Common crust options include a graham cracker crust, a cookie crumb crust, or even a nut-based crust. These are usually held together with melted butter or coconut oil and pressed into a tart pan.
What types of fruit work best in a no-bake fruit tart?
Almost any fruit can be used, but berries, kiwi, peaches, and mangoes are popular choices. Consider using a variety of colors and textures for a visually appealing tart.
What can I use as a filling for a no-bake fruit tart?
Popular fillings include a cream cheese mixture, pastry cream, or a custard. You can also use a simple yogurt or whipped cream base for a lighter option.
How long does a no-bake fruit tart need to chill before serving?
Typically, a no-bake fruit tart needs to chill for at least 2-3 hours to allow the filling to set properly. This ensures that the tart slices cleanly and the flavors meld together.
Final Reflection: The Enduring Allure of the No-Bake Fruit Tart
The simplicity of the no-bake fruit tart belies its profound impact on our culinary landscape. It's more than just a dessert; it's a testament to the power of fresh, vibrant ingredients and the joy of effortless creation. In a world increasingly obsessed with complicated recipes and lengthy preparation times, the no-bake fruit tart offers a refreshing counterpoint, a delicious reminder that sometimes, the most satisfying creations are the easiest.
The no-bake fruit tart's enduring appeal lies in its versatility and adaptability. It's a blank canvas for culinary creativity, allowing for endless variations in fruit combinations, crust types, and flavor profiles. This adaptability reflects our own desire for personalization and self-expression, even in the kitchen. The best things in life are simple,
a sentiment perfectly embodied by this delightful dessert. Its ease of preparation makes it accessible to everyone, regardless of skill level, fostering a sense of accomplishment and shared enjoyment.
Now, I invite you to consider the possibilities. Don't just passively consume this information; actively create. Experiment with different fruits, explore unique crust options, and share your culinary adventures with friends and family. The no-bake fruit tart isn't just a recipe; it's a gateway to a world of fresh flavors, simple pleasures, and the undeniable satisfaction of creating something beautiful and delicious with your own hands. Embrace the simplicity, and let the joy of creation blossom.
Unlock Your Inner Pastry Chef: Create Your Dream No-Bake Tart!
Thanks for spending some time with us today – we hope you're feeling inspired to create something delicious and refreshing! You've learned the secrets to quick and easy no-bake fruit tarts, and now it's time to put your newfound skills to the test.
- Craft your masterpiece: Dive into the kitchen and experiment with your favorite fruits and flavor combinations. Remember, there's no such thing as a "perfect" tart – get creative!
- Share your fruity creation: Snap a picture of your finished tart and share it on social media using #BakeWithEaseNoBake. Let's see those beautiful creations!
- Explore our other no-bake recipes: Want more easy dessert ideas? Explore our website for a wider selection of no-bake treats that are just as delicious and satisfying.
So, what amazing fruit combination will you be whipping up first?