
NoFail Easter Cookie Decorating Techniques


Welcome to BakeWithEase, your haven for all things baking!
Ever dream of flawlessly decorated Easter cookies that rival those in magazines? This year, ditch the stress and embrace the joy of creating beautiful treats with our NoFail Easter Cookie Decorating guide. We'll unveil simple techniques and expert tips that guarantee stunning results, even if you're a complete beginner. Ready to unlock the secrets to picture-perfect cookies? Let's get baking!
- Mastering Easter Cookie Decorating with Royal Icing
- Introduction to Royal Icing Cookie Decorating
- Preparing Your Easter Cookies for Decoration
- Royal Icing Cookie Decorating Techniques: Step-by-Step Guide
- Advanced Easter Cookie Decorating Tips
- Easter Cookie Decorating Ideas & Inspiration
- Troubleshooting Common Easter Cookie Decorating Problems
- Conclusion: Enjoying Your Decorated Easter Cookies
-
Frequently Asked Questions
- ### What makes these Easter cookie decorating techniques "Nofail"?
- ### What kind of cookie dough is best for Easter cookie decorating?
- ### What type of icing should I use for decorating Easter cookies?
- ### Are there any shortcuts for decorating Easter cookies if I'm short on time?
- ### Where can I find the complete recipes and step-by-step guides mentioned on BakeWithEase.com?
- Final Reflection: Mastering the Art of the No-Fail Easter Cookie
- Unleash Your Inner Easter Bunny: Decorate Like a Pro!
Royal icing is the preferred medium for many bakers when it comes to decorating intricate sugar cookies, especially for occasions like Easter. Its unique composition, typically made from powdered sugar, meringue powder or egg whites, and water, allows it to dry hard and smooth. This creates a beautiful, porcelain-like finish that is perfect for detailed designs, vibrant spring colors, and stacking or packaging decorated Easter cookies without smudging.
Unlike buttercream, which remains soft, royal icing sets completely, making it ideal for creating crisp lines, delicate patterns, and achieving that polished look that makes holiday treats truly special. It provides a stable base for further layering and detail work, ensuring your beautiful Easter creations hold up.
Furthermore, royal icing is incredibly versatile. By adjusting the amount of liquid, you can achieve different consistencies, from a thick outline icing that holds its shape to a thinner flood icing that spreads smoothly to cover large areas. This adaptability is crucial for executing a wide range of nofail Easter cookie decorating techniques, from simple color blocking to complex wet-on-wet designs.
Its ability to take on vibrant food colors allows for the bright, cheerful palette typical of Easter and spring themes, bringing bunnies, eggs, chicks, and flowers to life on your cookie canvases. The hard finish also means these decorated delights can be easily transported and shared, making them perfect gifts or party favors for your Easter celebrations.
Embarking on your Easter cookie decorating journey with royal icing doesn't have to be intimidating. Even beginners can achieve stunning results by mastering a few fundamental techniques. The key is to start simple and gradually build your skills.
Basic methods like outlining and flooding create a smooth, solid background color on your cookies, which is the foundation for many designs. Once you have a smooth base, you can add simple details like dots, lines, or swirls using a slightly thicker icing consistency. For example, a simple egg-shaped cookie can be flooded with a single color, and then polka dots or stripes can be added once the base is dry.
As you gain confidence, you can explore more advanced techniques such as wet-on-wet designs, which involve dropping or swirling wet icing into a wet base icing to create marbled or feathered effects. This is particularly effective for creating intricate patterns on Easter egg cookies. Stenciling is another excellent technique for adding detailed patterns or messages quickly and efficiently.
The goal of nofail Easter cookie decorating is to equip you with reliable methods that minimize common issues and help you create beautiful, edible art that everyone will enjoy. Focusing on consistency control and proper drying times are two crucial steps towards achieving consistent, beautiful results.
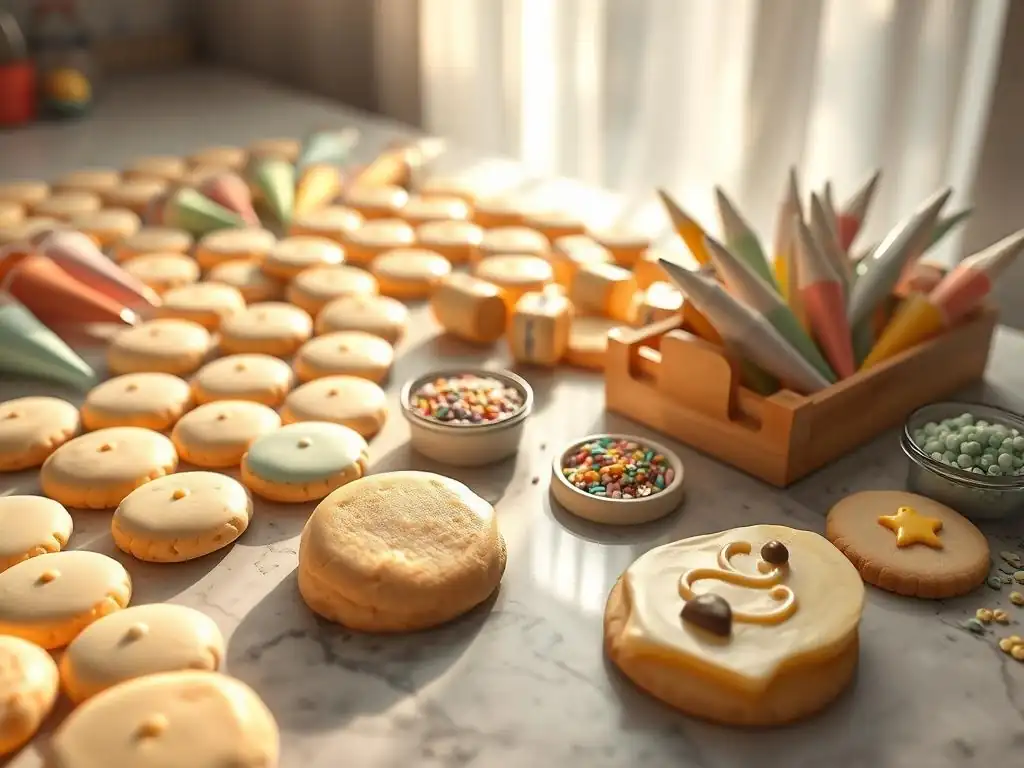
A successful decorated cookie starts with a great cookie base. For royal icing decoration, the ideal sugar cookie is one that holds its shape during baking, doesn't spread excessively, and bakes up flat and sturdy. A common characteristic of such recipes is a higher ratio of flour to fat compared to chewier cookie recipes.
Using cold butter and chilling the dough thoroughly before rolling and cutting are critical steps to prevent spreading. Many reliable recipes call for chilling the dough for at least 1-2 hours, or even overnight, to ensure the butter is firm. Baking at a moderate temperature, typically around 350°F (175°C), also helps the cookies set before they spread too much.
To achieve a consistently flat surface, which is essential for smooth royal icing application, avoid overworking the dough. Rolling the dough to an even thickness, usually about 1/4 inch, is also important. Some bakers even recommend briefly chilling the cut-out shapes on the baking sheet for 10-15 minutes before baking.
This extra step helps the edges stay sharp and the surface remains flat. Using parchment paper or silicone baking mats ensures even heat distribution and prevents sticking, further contributing to a smooth, flat cookie surface ready for your nofail Easter cookie decorating. Letting the cookies cool completely on a wire rack before decorating is absolutely essential; warm cookies will melt or mess up the icing.
Cookie Cutters: Choosing Shapes for Easter Themes
Selecting the right cookie cutters is the first step in bringing your Easter cookie decorating vision to life. For Easter, popular shapes include eggs, bunnies, chicks, carrots, flowers (like tulips or daffodils), lambs, and even simple circles or squares that can be decorated as abstract designs or used as bases for more complex scenes. Having a variety of sizes can add visual interest to your cookie platter. Metal cutters provide sharp edges, which help maintain the cookie's shape during baking, while plastic cutters are often sturdy and easy to handle.
When choosing cutters, consider the level of detail in the shape. Very intricate cutters can be beautiful, but the dough might be harder to work with, and the baked cookie more fragile. For beginners focusing on nofail Easter cookie decorating, simpler shapes like eggs, circles, or basic bunny silhouettes are often easier to flood and decorate smoothly. Remember to have cutters in the shapes you plan to feature in your decorating techniques!
Royal Icing: Achieving the Right Consistencies
Mastering royal icing consistency is perhaps the most crucial skill in nofail Easter cookie decorating. Royal icing is typically made from powdered sugar, meringue powder (a safer alternative to raw egg whites), and water. The ratio of water determines the consistency. Outline consistency is thick, like toothpaste, and holds a firm line. Flood consistency is thinner, like honey or thick glue, and spreads out smoothly to fill areas. You can test flood consistency by dropping a spoonful back into the bowl; it should disappear back into the main mixture within 10-15 seconds.
To achieve these different consistencies, start with a basic recipe and add water very slowly, a teaspoon at a time, mixing thoroughly after each addition, until you reach the desired flow. It's much easier to thin icing than to thicken it. If you accidentally add too much water, you can add a little more sifted powdered sugar or meringue powder, but be careful not to make it grainy. Always cover your royal icing tightly with plastic wrap pressed directly onto the surface when not in use, as it dries out quickly when exposed to air.
Food Coloring: Creating a Spring Color Palette
Vibrant and cheerful colors are a hallmark of Easter and spring. Gel food colorings are highly recommended for coloring royal icing because they are concentrated and do not add excess liquid, which could alter the icing's consistency. A little gel color goes a long way. Start with a small amount on a toothpick and gradually add more until you achieve your desired shade.
For an Easter palette, think pastels: soft pinks, blues, yellows, greens, and lavender. You can also incorporate brighter pops of color like carrot orange or grass green. Common colors needed for Easter themes might include yellow for chicks, white and pink for bunnies, various bright colors for eggs, and green for leaves or grass. Experiment with mixing colors to create unique shades. Remember that colors often deepen slightly as the icing dries. Using good quality gel colors will ensure vibrant, consistent results for your nofail Easter cookie decorating.
Piping Bags & Tips: Selecting the Right Tools for the Job
Piping bags and tips are essential for applying royal icing with control and precision. Disposable piping bags are convenient as they require no cleanup. Reusable silicone or plastic-coated bags are also an option. For outlining, small round tips are standard, such as Wilton tip sizes 1, 2, or 3. The smaller the tip number, the finer the line. A size 2 tip is a great all-around choice for both outlining and adding fine details.
For flooding, you don't necessarily need a tip; you can simply cut a small opening in the piping bag. However, using a larger round tip, like a size 3 or 4, can provide more control and a faster flow of icing for filling larger areas. You'll need multiple piping bags for different colors and consistencies. Having couplers is also helpful, as they allow you to change tips on the same bag of icing. Investing in a few basic round tips will significantly enhance your ability to execute nofail Easter cookie decorating techniques.
Technique 1: Outlining and Flooding for a Smooth Base
Preparing Piping Bags for Outlining and Flood Consistency Icing
Before you begin outlining and flooding, you need to prepare your icing bags. Start with your outline consistency icing. Fill a piping bag fitted with a small round tip (like a size 2 or 3) about half to two-thirds full. Twist the top of the bag or secure it with a rubber band to prevent icing from squeezing out the top. Gently squeeze the bag to bring the icing down to the tip, expelling any air bubbles. Practice piping a few lines on parchment paper to get a feel for the pressure needed.
Next, prepare your flood consistency icing. Fill a separate piping bag (either with a larger tip like a 3 or 4, or just a cut opening) with the flood icing. Again, fill it appropriately and secure the top. Gently squeeze to bring the icing down. You might need a scribe tool or toothpick handy to help guide the flood icing and pop any air bubbles that appear on the cookie surface. Having both consistencies ready before you start decorating a batch of cookies makes the process much smoother and contributes to nofail Easter cookie decorating results.
Achieving a Smooth Flood Fill on Easter Cookies
Outlining and flooding is the foundational technique for creating a smooth, colored base on your Easter cookies. First, using the outline consistency icing, pipe a border around the edge of the cookie. This border acts as a dam to contain the thinner flood icing. Try to make the outline as continuous and even as possible. Let the outline dry for 10-15 minutes to set slightly before flooding. This helps prevent the flood icing from breaking through the barrier.
Once the outline is set, use the flood consistency icing to fill the area within the border. Apply icing generously, letting it flow. Use a scribe tool or toothpick to gently guide the icing into corners and edges and to pop any visible air bubbles. Work relatively quickly so the flood icing stays wet and settles smoothly.
Once the area is filled, leave the cookie undisturbed on a flat surface. Allow the flooded base to dry completely, which can take anywhere from 4 to 24 hours depending on humidity levels and icing thickness. A fully dry base is essential before adding any further details or layers in your nofail Easter cookie decorating.
Technique 2: Wet-on-Wet Decorating for Marbled Designs
Mastering Wet-on-Wet Easter Egg Designs
Wet-on-wet is a technique where you apply wet icing onto a base of wet icing. As the colors settle together while still wet, they create beautiful, blended effects, like marbling, swirls, or dots that sink into the base. This technique is perfect for creating intricate patterns on Easter egg cookies without the need for multiple drying steps. To start, flood your egg-shaped cookie with your base color of flood consistency icing, making sure the surface is smooth.
Immediately, before the base color begins to crust over, pipe lines, dots, or swirls of different colored flood consistency icing onto the wet base. For example, on a pink base, you could pipe lines of yellow, blue, and green icing. Then, use a scribe tool or toothpick to gently drag through the wet icing, pulling the colors through each other to create marbled or feathered patterns.
Wipe your scribe tool clean between drags to keep the colors distinct if desired. The key to success is working quickly while all the icing is still wet. This technique allows for stunning, unique nofail Easter cookie decorating patterns with relatively little effort once you get the hang of it.
Examples of Wet-on-Wet Easter Egg Patterns
The possibilities for wet-on-wet patterns on Easter egg cookies are vast. A simple yet effective design is the marbled effect: flood the cookie with one color, then immediately pipe wavy lines of one or two other colors across it. Drag a scribe tool perpendicularly through the lines to create a marbled look. Another classic is the feathered pattern: pipe parallel lines of contrasting colors onto a wet base, then drag a scribe tool back and forth perpendicularly through the lines, alternating direction with each drag.
Polka dots are also easy with the wet-on-wet method. Flood the base, then immediately drop dots of different colored flood icing onto the wet surface. You can leave them as simple dots that sink slightly, or drag a scribe tool through the center of the dots to create heart shapes or pulls. Stripes are made by piping lines and leaving them as is or dragging a tool through them. These techniques allow for quick, colorful, and nofail Easter cookie decorating variations on a single shape.
Technique 3: Adding Details with Piping
Creating Fine Lines and Shapes with Piping
Once your flood-dried base is completely hard (ideally 12-24 hours later), you can add details using outline consistency icing. A small round tip, like a size 1 or 2, is best for fine lines and delicate shapes. Hold the piping bag at a 45-degree angle, hovering slightly above the cookie surface. Apply steady pressure and let the icing fall onto the cookie in a continuous stream, guiding it with your hand but not letting the tip touch the surface. This technique, called "piping," allows the icing to flow smoothly without dragging.
You can pipe various details: straight lines, curved lines, dots, swirls, outlines around shapes, text, or simple patterns. For example, on a chick cookie base, you can pipe wings, eyes, and a beak. On an egg cookie, add squiggles, zigzags, or lattice patterns. Practice on parchment paper first to get comfortable with pressure and control. Achieving clean, consistent lines is key to professional-looking nofail Easter cookie decorating details.
Piping Techniques for Flowers and Other Details
Beyond simple lines, piping can create more complex details like flowers, leaves, or furry textures. Small dots piped closely together can create a fluffy texture for a lamb cookie or the body of a chick. Using a star tip (like a Wilton 1M or 21) with slightly thicker icing can create rosettes or stars for flower centers or borders. Leaf tips (like Wilton 352) can create realistic leaves.
To pipe simple flowers, you can pipe a series of dots in a circle for petals and add a contrasting dot in the center. Or, using a petal tip, you can create more elaborate blooms. The key is to use the correct icing consistency – usually a medium or thick consistency that holds its shape when piped. These piped details add dimension and character to your nofail Easter cookie decorating designs, transforming a simple cookie into a miniature work of art.
Technique 4: Stenciling with Royal Icing
Creating Detailed Designs with Stencils and Royal Icing
Stenciling is an excellent technique for adding repetitive patterns or intricate designs quickly and consistently, contributing to nofail Easter cookie decorating. You can purchase stencils with various Easter or spring patterns, such as floral designs, geometric shapes, or text. The stencil is placed directly on top of a fully dry, smooth royal icing base.
To apply the icing, use a medium-thick consistency royal icing – thicker than flood, but spreadable. Hold the stencil firmly in place (or use magnets/weights if available) and apply a small amount of icing along one edge of the stencil using an offset spatula or scraper. Then, holding the spatula at a low angle, gently and evenly scrape the icing across the stencil, filling the openings. Scrape off any excess icing.
Tips for Using Stencils Effectively
For best results when stenciling, ensure your base layer of royal icing is completely dry and smooth. Any bumps or imperfections will show through. Use a medium-thick icing consistency; if it's too thin, it will bleed under the stencil; if too thick, it will be hard to spread smoothly. Hold the stencil firmly to prevent movement.
After scraping the icing across, carefully lift the stencil straight up immediately. Don't slide it, as this can smudge the design. Clean your stencil between uses, especially if using different colors, to prevent color transfer and clogged openings. A quick rinse under water and patting dry works well. Stenciling allows for professional-looking, repeatable patterns, making it a valuable nofail Easter cookie decorating technique for adding detail efficiently.

Preventing Craters in Your Icing
Craters are unsightly holes that can appear in flooded royal icing as it dries, particularly in larger areas. They are often caused by air bubbles trapped in the icing or by icing that is too thin. To prevent craters, ensure your flood consistency icing is properly mixed and free of air bubbles. After mixing, let the icing sit for 10-15 minutes to allow bubbles to rise, then stir gently.
When flooding the cookie, fill the area completely and use a scribe tool or toothpick to gently swirl the icing and pop any visible air bubbles. Pay close attention to corners and edges where bubbles tend to hide. Tapping the cookie gently on your work surface after flooding can also help bring bubbles to the surface to be popped. Using a slightly thicker flood consistency can also reduce the likelihood of craters, contributing to nofail Easter cookie decorating.
Achieving a Glossy Finish
A glossy finish on royal icing makes decorated cookies look polished and professional. The key to a glossy finish is ensuring the icing dries slowly and evenly. Drying in a low-humidity environment is ideal. If your climate is humid, using a fan or a dehydrator set on a very low temperature (around 90-100°F or 32-38°C) can significantly speed up drying and help achieve a glossier surface.
Avoid drying the cookies in direct sunlight or in a very hot oven (even turned off after being on), as this can cause the icing to dry too quickly on the surface while the underneath is still wet, potentially leading to cracks or a dull finish. Allowing adequate drying time at room temperature, ideally overnight for larger areas, is crucial for a hard, glossy, nofail Easter cookie decorating finish. Some recipes also suggest adding a tiny amount of corn syrup (a teaspoon per batch) to the royal icing mixture to promote glossiness and prevent brittleness.
Proper storage ensures your beautifully decorated Easter cookies stay fresh and the royal icing remains intact. Once the royal icing is completely dry and hardened (usually 12-24 hours), store the cookies in an airtight container at room temperature. Layering cookies between sheets of parchment paper or wax paper can help prevent them from sticking together or damaging the delicate icing designs.
Avoid storing decorated cookies in the refrigerator, as condensation can form on the surface of the icing, causing it to become sticky or develop spots. If you live in a very humid climate, adding a desiccant packet (food-safe silica gel) to the airtight container can help absorb excess moisture. Stored correctly, royal icing decorated sugar cookies can stay fresh for several weeks, allowing you to prepare your nofail Easter cookie decorating creations well in advance of the holiday.
Chick cookies are an Easter classic, and royal icing is perfect for bringing them to life. Start with a chick-shaped cutter or even a simple circle. Flood the cookie with bright yellow royal icing. Once the yellow base is completely dry, use orange icing (outline consistency) to pipe a small triangular beak and two tiny feet.
Use black or dark brown icing to pipe two small dots for eyes. For a fluffy effect, you can pipe small dots of yellow icing onto the wet flood base using the wet-on-wet technique, or pipe small tufts of slightly thicker yellow icing onto the dry base. This simple design is a perfect example of nofail Easter cookie decorating for beginners.
Carrot cookies are another festive shape. Flood the carrot shape with vibrant orange royal icing. Once dry, you can add details like horizontal lines to give it texture using a slightly darker orange or brown outline consistency icing. For the green top, flood the top section with green icing.
Once dry, you can pipe fine green lines for leaves using a small round tip, or use a leaf tip for a more realistic look. Alternatively, for a simpler design, just flood the top green and leave it plain. These variations allow for different skill levels in your nofail Easter cookie decorating.
Tulip-shaped cookies offer a beautiful canvas for bright spring colors. Flood the tulip shape with your desired flower color (pink, purple, red, yellow, etc.). Flood the stem and leaves with green. Once fully dry, you can add details. Use a slightly darker shade of the flower color to pipe lines or swirls on the petals for dimension. On the green stem/leaves, you can pipe veins using a darker green. Or, keep it simple with solid colors for an easy, nofail Easter cookie decorating option.
Lamb cookies are adorable and a great way to play with texture. Use a lamb or sheep shaped cutter. Flood the head and legs with white or light grey icing. For the body, instead of flooding, use a medium-thick white royal icing and pipe small dots or stars using a round tip or star tip (like a Wilton 1M) all over the body area.
This creates a fluffy wool texture. Once the white is dry, use black or brown icing to pipe eyes and a nose on the face. This textural technique adds a fun element to your nofail Easter cookie decorating repertoire.

Icing Too Stiff or Too Runny: Solutions
Royal icing consistency is key, and getting it wrong is a common issue. If your icing is too stiff (like toothpaste), it's hard to pipe smoothly and can cause hand strain. Simply add water very slowly, a tiny amount at a time (a drop or two), and stir thoroughly until the desired consistency is reached.
If your icing is too runny (like milk), it will spread uncontrollably and won't hold a shape for outlining. To thicken runny icing, gradually add more sifted powdered sugar and/or meringue powder. Sift the powdered sugar first to prevent lumps. Add a tablespoon at a time and mix well until it thickens. Getting the consistency right is a fundamental step towards nofail Easter cookie decorating.
Air Bubbles in Your Icing: Prevention and Removal
Air bubbles can ruin the smooth surface of your flooded icing, leading to craters or an uneven finish. They are often incorporated during mixing. To prevent them, mix your royal icing on a low speed after the initial ingredients are combined. After mixing, let the icing sit covered for 10-15 minutes to allow bubbles to rise to the surface. Gently stir before using.
When flooding the cookie, use a scribe tool or toothpick to gently swirl the icing and pop any visible bubbles. Pay attention to the edges. Tapping the cookie gently on your counter after flooding can also help trapped bubbles rise. Removing air bubbles is a simple yet crucial step for achieving smooth, nofail Easter cookie decorating results.
Icing Cracking: Causes and Solutions
Icing cracking after it dries can be frustrating. Cracking is often caused by the icing drying too quickly on the surface while the icing underneath is still wet, or by applying a second layer of icing over a base that isn't fully dry. High humidity can also contribute, as can icing that is too thick for flooding.
To prevent cracking, ensure your flood consistency icing is not too thick – it should flow smoothly. Allow each layer of icing to dry completely before adding subsequent layers (this can take 12-24 hours). If you live in a dry climate, you can try drying the cookies in a slightly humid environment (like a room with a humidifier) to slow down surface drying. Using a dehydrator on a very low setting can help dry the icing evenly from bottom to top, preventing surface tension that leads to cracks. Patience with drying time is key to nofail Easter cookie decorating.
After putting in the effort to create beautifully decorated Easter cookies using nofail techniques, you'll want to share them! Proper packaging not only protects your delicate icing but also makes for a lovely presentation. Once the royal icing is completely dry and hard, you can stack cookies carefully in airtight containers, using parchment or wax paper between layers to prevent sticking.
For gifting, individual cellophane bags tied with festive ribbons are popular. You can also package them in decorative boxes or tins, again using cushioning like shredded paper or paper liners and separating layers with paper. Arranging a variety of shapes and colors on a platter is perfect for serving at an Easter gathering. Your stunning, nofail Easter cookie decorating efforts will be a highlight of the holiday!
Mastering the techniques outlined here is just the beginning of your cookie decorating journey. As you become more comfortable with royal icing, you can explore even more advanced methods. This includes techniques like brush embroidery, painting on dry icing with edible colors, using edible markers, or even creating 3D effects.
There are endless possibilities for creativity with royal icing. Continue practicing the fundamental nofail Easter cookie decorating techniques, and don't be afraid to experiment with new colors, patterns, and designs. Online tutorials, classes, and cookie decorating communities offer abundant inspiration and guidance as you continue to hone your skills and create edible masterpieces for every occasion. Happy decorating!
Frequently Asked Questions
The "Nofail" aspect comes from simplified recipes and clear, step-by-step instructions designed to minimize common baking errors, ensuring even beginners can achieve beautiful results.
A sturdy sugar cookie dough that holds its shape during baking is ideal. We recommend a recipe that minimizes spreading and allows for clean edges for easy decorating.
Royal icing is highly recommended because it dries hard, making it perfect for intricate designs and stacking cookies. It's also easy to color and work with.
Absolutely! Consider using pre-made cookie dough or store-bought icing to save time. Focus on simple designs like sprinkles or basic color flooding.
### Where can I find the complete recipes and step-by-step guides mentioned on BakeWithEase.com?
You can find all our recipes and guides on the BakeWithEase.com website, under the "Easter Cookies" or "Cookie Decorating" sections.
The pursuit of the perfect Easter cookie is a timeless tradition, and thankfully, no longer a source of frustrating failures. This article has explored simple yet effective techniques to ensure your Easter cookie decorating experience is one of joy, not stress. From mastering royal icing consistency to employing clever decorating shortcuts, we've demystified the process, making it accessible to bakers of all skill levels.
The enduring appeal of Easter cookies lies not just in their deliciousness, but in the shared experience of creation and celebration. They represent a tangible connection to family traditions, a way to express creativity, and a delicious symbol of spring's renewal. Baking is at once child's play and adult joy. And love, of course.
– This sentiment perfectly captures the heart of Easter cookie decorating, transforming a simple activity into a cherished memory. The techniques shared here aim to enhance that joy, ensuring that the focus remains on the fun and the connection, not on the potential for disaster.
Now, as you prepare to embark on your own Easter cookie decorating adventure, remember the power of preparation and the beauty of imperfection. Don't be afraid to experiment, to embrace the unique charm of your own creations. Let this guide serve as a springboard for your creativity, and most importantly, savor the process. This Easter, let your cookies be a testament to your skill, your love, and the joy of sharing something beautiful with those you cherish.
Unleash Your Inner Easter Bunny: Decorate Like a Pro!
Thanks for joining us on this sweet journey into Easter cookie decorating! We hope you picked up some delicious inspiration and new techniques. Ready to put your newfound skills to the test?
- Master the perfect royal icing flood: Practice your piping skills and create flawlessly smooth cookies using our recommended icing consistency (found within the article!). This is your chance to perfect that technique and impress your friends and family.
- Share your creations: Tag us on social media – we’d love to see your beautiful Easter cookie masterpieces! Use #BakeWithEaseEaster to join the baking fun.
- Try a unique flavor twist: Instead of the traditional vanilla, experiment with a fun Easter-themed flavor like lemon, lavender, or even a hint of peppermint! Let your creativity run wild.
Ready to transform plain cookies into edible works of art? What unique Easter cookie design will you try first?