
Simple Homemade Chocolate Peppermint Bark


Welcome to BakeWithEase, your trusted companion on your baking journey! Ever dreamed of creating show-stopping desserts without the fuss? You're in the right place. Dive into our guide and learn how to whip up easy homemade chocolate peppermint bark that will impress your friends and family. But that's just the beginning... discover all the secrets to effortless baking and unlock a world of delicious possibilities! Ready to get started?
- Easy Homemade Chocolate Peppermint Bark Recipe: A BakeWithEase Delight
- Introduction: The Joy of Easy Homemade Chocolate Peppermint Bark
- What You'll Need: Ingredients for Chocolate Peppermint Bark
-
Step-by-Step Guide: Making Your Own Chocolate Peppermint Bark
- Preparing Your Baking Sheet for Chocolate Bark Success
- Melting the Chocolate: Achieving a Smooth, Glossy Finish
- Layering the Chocolate: Creating the Perfect Bark Base
- Adding the Peppermint: Crushed Candies for a Festive Touch
- Setting and Breaking: Achieving the Ideal Chocolate Peppermint Bark Texture
- Tips & Tricks for Perfect Peppermint Bark Every Time
- Storing Your Homemade Chocolate Peppermint Bark
- Serving Suggestions: Enjoying Your Peppermint Bark Creation
- Troubleshooting: Common Peppermint Bark Problems & Solutions
- Conclusion: Enjoy the Ease of Homemade Chocolate Peppermint Bark
-
Frequently Asked Questions
- What makes this chocolate peppermint bark recipe easy?
- Can I use different types of chocolate for this peppermint bark?
- How do I prevent the chocolate from seizing while melting?
- What's the best way to crush the peppermint candies?
- How long does the chocolate peppermint bark need to set before I can break it?
- Final Reflection: The Enduring Delight of Simple Sweets
- Unleash Your Inner Chocolatier: Make This Peppermint Bark!
Easy Homemade Chocolate Peppermint Bark Recipe: A BakeWithEase Delight
Introduction: The Joy of Easy Homemade Chocolate Peppermint Bark
BakeWithEase Presents: A Festive Chocolate Peppermint Treat
Welcome to BakeWithEase, where we believe that creating delicious treats should be a joyful and simple process! Today, we're diving into a holiday classic that's surprisingly easy to master: chocolate peppermint bark. This festive confection, with its delightful combination of smooth chocolate and crunchy peppermint, is a staple during the holiday season. It's not just a treat to eat; making it is a fun activity that even beginner bakers can enjoy, proving that an easy homemade chocolate peppermint bark is well within reach for everyone.
Our goal at BakeWithEase is to demystify baking, and this simple chocolate peppermint bark recipe is a perfect example. You don't need fancy equipment or complex techniques to achieve a truly impressive result. We'll guide you through each step, ensuring that your homemade chocolate peppermint bark turns out perfectly every time. Whether you're making it for family, friends, or just for yourself, this recipe promises a festive flavor experience with minimal fuss.
Why Homemade Peppermint Bark is Perfect for the Holidays
The holiday season is synonymous with warmth, sharing, and delicious sweets. Making your own easy homemade chocolate peppermint bark embodies all these things. It's a wonderful activity to do with children, filling the kitchen with festive aromas and creating edible memories. Unlike some more complex holiday baking projects, peppermint bark requires just a few key ingredients and straightforward steps, making it accessible even during busy times.
Furthermore, homemade treats like simple chocolate peppermint bark make heartfelt gifts. A beautifully packaged batch shows extra care and thoughtfulness compared to store-bought options. Imagine presenting friends and neighbors with a bag or box of your own creation – it’s a personal touch that’s always appreciated. Plus, controlling the quality of ingredients means you can tailor the flavor and texture exactly to your liking, ensuring your easy homemade chocolate peppermint bark is truly special.
What You'll Need: Ingredients for Chocolate Peppermint Bark
Key Ingredients for Delicious Peppermint Bark
Creating easy homemade chocolate peppermint bark requires only a handful of ingredients, focusing on quality over quantity. The foundation is, of course, chocolate. You'll typically need two types: a base layer, often dark or semi-sweet, and a top layer, commonly white chocolate, though combinations are endless. The other crucial component is peppermint, usually in the form of crushed hard candies like candy canes.
- High-quality chocolate wafers or bars (around 16-20 ounces total, split between two types)
- Peppermint candies (about 1/2 to 1 cup crushed)
- Optional: A touch of peppermint extract (about 1/4 teaspoon)
These core ingredients are all you need to start making your simple chocolate peppermint bark. The beauty lies in their combination and the simple process of layering them. While exact quantities can vary based on how thick you like your bark or the size of your pan, these approximations provide a solid starting point for a generous batch perfect for sharing or gifting.
High-Quality Chocolate: Choosing the Best for Your Bark
The success of your easy homemade chocolate peppermint bark heavily relies on the quality of the chocolate you use. Opting for good couverture chocolate or high-quality baking bars that contain cocoa butter is key for a smooth melt and a professional-looking finish. Compound chocolate (often labeled as "baking chips" or "confectionery coating") contains vegetable oils instead of cocoa butter, which makes it easier to melt but results in a less rich flavor and a waxier texture that can feel greasy.
For the best flavor and texture in your simple chocolate peppermint bark, look for chocolate with a cocoa percentage you enjoy. Dark chocolate around 60-70% cocoa provides a nice contrast to the sweet white chocolate and sharp peppermint. When choosing white chocolate, ensure it lists cocoa butter as an ingredient – this is what gives it that creamy, melt-in-your-mouth quality. Using higher quality chocolate not only tastes better but also melts more smoothly, making the process of making peppermint bark at home much easier.
Peppermint Power: Extract vs. Candies
The signature peppermint flavor in your easy homemade chocolate peppermint bark comes primarily from crushed peppermint candies, typically candy canes. Crushing the candies provides both the characteristic flavor and a delightful crunch. You can crush them by placing them in a sealed plastic bag and gently hitting them with a rolling pin or heavy pan until they are broken into small pieces, aiming for a mix of fine dust and small chunks for visual appeal and varied texture.
While crushed candies are essential for texture and traditional look, a tiny amount of pure peppermint extract can intensify the flavor of the chocolate layers themselves. Add just a drop or two (no more than 1/4 teaspoon per pound of chocolate) to the melted chocolate after it's melted and slightly cooled, just before spreading. Be cautious, as too much extract can seize the chocolate, making it grainy and unusable. The combination of extract in the chocolate and crushed candies on top creates a powerful and refreshing peppermint punch in your simple chocolate peppermint bark.
Step-by-Step Guide: Making Your Own Chocolate Peppermint Bark
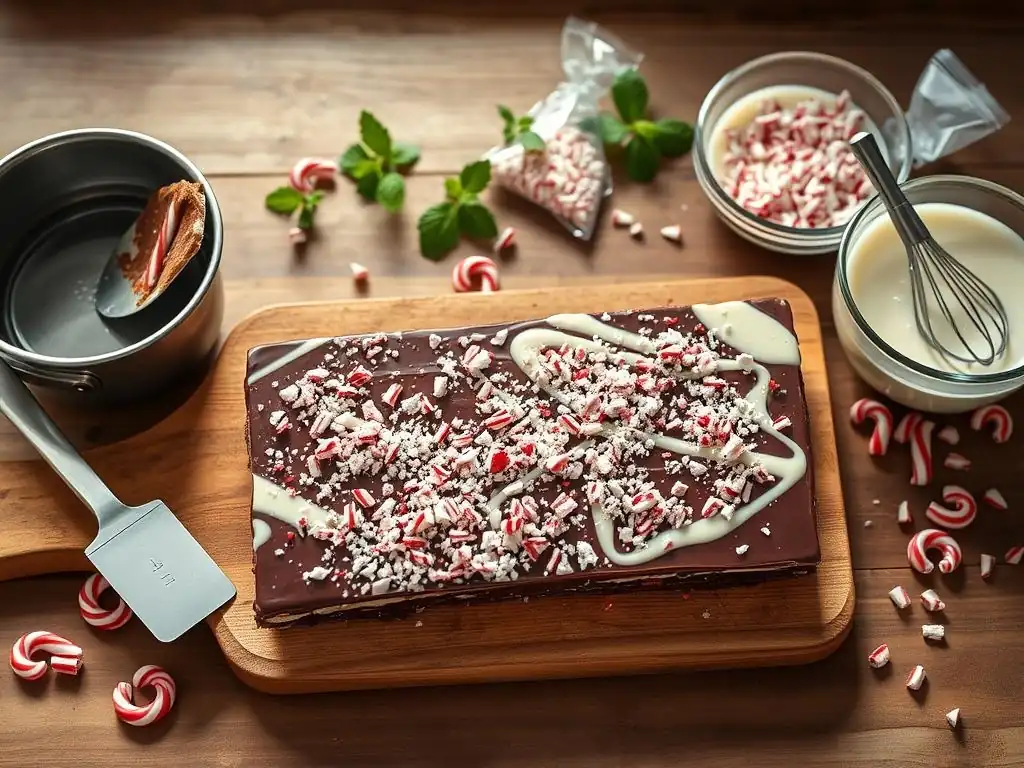
Preparing Your Baking Sheet for Chocolate Bark Success
The first step in making your easy homemade chocolate peppermint bark is preparing the surface where it will set. You'll need a sturdy baking sheet, approximately 10x15 inches or similar. Line the baking sheet completely with parchment paper or a silicone baking mat. This prevents the melted chocolate from sticking and makes it incredibly easy to lift off and break the finished bark once it's set.
Ensure the parchment paper lies flat against the sheet, smoothing out any wrinkles. If using parchment, you can tape down the corners with a tiny piece of regular tape underneath the sheet (where it won't touch the chocolate) or even use a dab of melted chocolate in the corners before laying the paper down to help it stay put. A well-prepared surface is crucial for achieving smooth, even layers when making peppermint bark at home.
Melting the Chocolate: Achieving a Smooth, Glossy Finish
Melting the chocolate correctly is perhaps the most critical step for achieving a smooth, glossy, and snappy easy homemade chocolate peppermint bark. The double boiler method or careful microwave melting are recommended. For the double boiler, place chopped chocolate or wafers in a heatproof bowl set over a pot of simmering water (the bottom of the bowl should not touch the water). Stir gently until about 80% melted, then remove from heat and stir until fully melted and smooth.
Using the microwave requires more attention. Place chopped chocolate in a microwave-safe bowl and heat in 30-second intervals, stirring thoroughly after each, until mostly melted. Then, reduce to 15-second intervals, stirring well each time, until completely smooth. Be careful not to overheat, as this can burn the chocolate or cause it to seize. The target temperature for melting dark chocolate is typically around 115-120°F (46-49°C), while milk and white chocolate are lower, around 105-110°F (40-43°C). Proper melting ensures your simple chocolate peppermint bark has a beautiful sheen and texture.
Layering the Chocolate: Creating the Perfect Bark Base
Once your first layer of chocolate (typically dark or semi-sweet) is perfectly melted and smooth, pour it onto the prepared baking sheet. Use an offset spatula or the back of a spoon to spread the chocolate evenly into a thin layer, aiming for about 1/8 to 1/4 inch thickness. Work relatively quickly, as the chocolate will start to set. Gently tap the baking sheet on the counter a few times to remove any air bubbles and create a smooth surface.
Allow this first layer to set partially but not completely. It should be firm enough that the next layer won't sink into it, but still slightly tacky so the layers adhere well. This usually takes about 20-30 minutes at room temperature or 10-15 minutes in the refrigerator. While the first layer is setting, melt your second type of chocolate (often white chocolate) using the same careful melting method, ensuring it's smooth and ready to pour. This layering technique is key to making your easy homemade chocolate peppermint bark visually appealing and structurally sound.
Adding the Peppermint: Crushed Candies for a Festive Touch
With the first chocolate layer partially set and the second chocolate layer melted, you're ready to add the peppermint power. Pour the second melted chocolate layer over the first, spreading it evenly to cover the entire surface. Again, tap the tray gently to smooth the top and remove bubbles.
Immediately after spreading the second layer, generously sprinkle the crushed peppermint candies evenly over the entire surface of the wet chocolate. Gently press some of the larger pieces into the chocolate with your fingertips or the back of a spoon to ensure they stick securely. Don't be shy with the peppermint – it's the star of this simple chocolate peppermint bark! The contrast of the vibrant red and white against the chocolate is visually stunning and promises that signature holiday flavor.
Setting and Breaking: Achieving the Ideal Chocolate Peppermint Bark Texture
After adding the peppermint, the easy homemade chocolate peppermint bark needs to set completely. Place the baking sheet in the refrigerator for at least 1-2 hours, or until the chocolate is firm and snaps cleanly when broken. You'll know it's ready when it feels hard to the touch and no longer looks glossy or wet.
Once fully set, remove the bark from the refrigerator. Slide the parchment paper or silicone mat off the baking sheet onto a flat surface. Then, simply break the bark into irregular pieces by hand. This is part of the charm of bark – the rustic, unique shapes. Aim for pieces of varying sizes, perfect for snacking or gifting. The clean snap indicates you've achieved the correct texture for your delicious homemade chocolate peppermint bark.
Tips & Tricks for Perfect Peppermint Bark Every Time
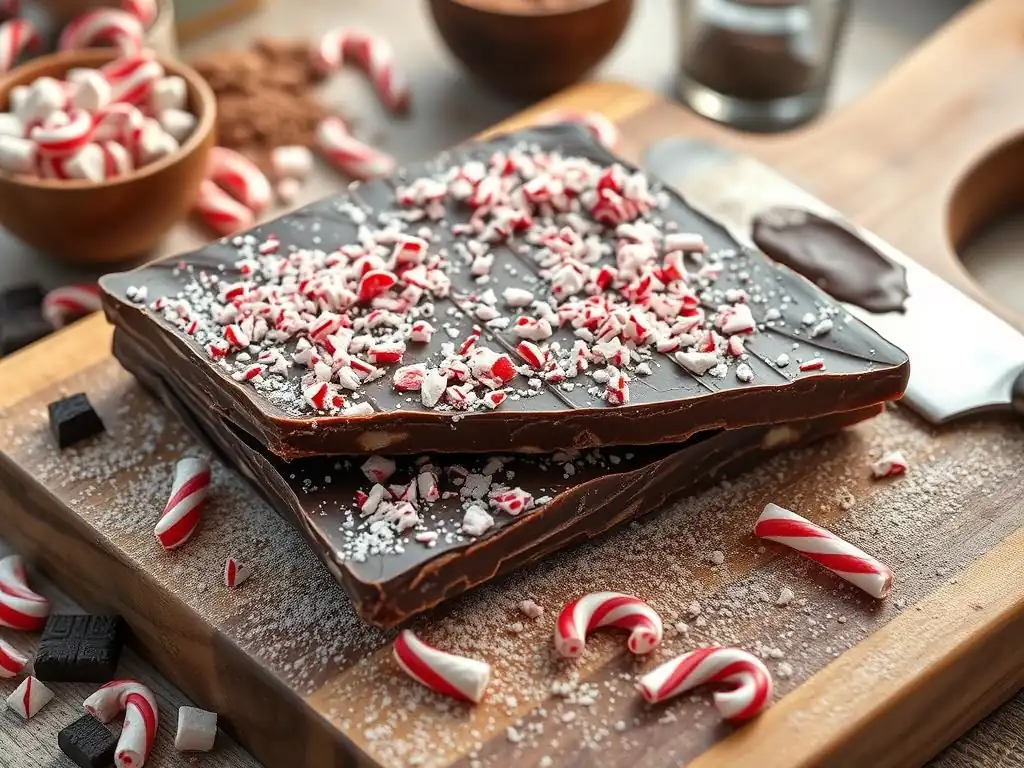
Achieving the Perfect Chocolate Temper for Bark
While a simple melt-and-set method works for easy homemade chocolate peppermint bark, tempering the chocolate will result in a professional-quality bark that is shiny, snaps cleanly, and resists melting at room temperature and preventing bloom (those white streaks). Tempering involves melting chocolate, cooling it to a specific temperature while stirring (seeding with unmelted chocolate or using the tabling method), and then warming it slightly to its working temperature.
- Dark Chocolate: Melt to 115-120°F (46-49°C), cool to 84-88°F (29-31°C), reheat to 88-91°F (31-33°C).
- Milk Chocolate: Melt to 105-110°F (40-43°C), cool to 82-84°F (28-29°C), reheat to 86-88°F (30-31°C).
- White Chocolate: Melt to 105-110°F (40-43°C), cool to 80-82°F (27-28°C), reheat to 84-86°F (29-30°C).
Tempering can seem intimidating, but it's achievable with a good thermometer and patience. If you're aiming for truly professional results with your easy homemade chocolate peppermint bark, mastering tempering is a valuable skill. However, for a simple, delicious treat, melting and setting is perfectly adequate, especially if you plan to store it in the refrigerator.
Preventing Chocolate Bloom: Keeping Your Bark Looking Its Best
Chocolate bloom is the appearance of grayish streaks or spots on the surface of chocolate. There are two types: sugar bloom (caused by moisture) and fat bloom (caused by temperature fluctuations). While harmless to eat, bloom affects the appearance and texture of your easy homemade chocolate peppermint bark.
To prevent fat bloom, avoid storing chocolate in warm places or exposing it to drastic temperature changes. If you tempered your chocolate correctly, it will be much more resistant to fat bloom. To prevent sugar bloom, ensure no water gets into your melted chocolate (even a single drop can cause seizing or bloom) and store the finished bark in an airtight container in a cool, dry place, ideally not the refrigerator unless humidity is controlled. Proper storage is key to keeping your simple chocolate peppermint bark looking pristine.
Customizing Your Bark: Flavor Variations & Add-Ins
While the classic easy homemade chocolate peppermint bark is delicious on its own, don't hesitate to get creative with variations! You can use different combinations of chocolate, such as all dark chocolate, all white chocolate, or milk chocolate as the base. Consider swirling the two chocolate layers together instead of creating distinct layers for a marbled effect.
Additional toppings can elevate your simple chocolate peppermint bark. Try adding:
- Chopped nuts (pecans, walnuts, almonds)
- Sprinkles (festive colors!)
- Crushed cookies (Oreos are a popular choice)
- A sprinkle of sea salt (enhances the chocolate flavor)
- A drizzle of caramel or ganache (once the chocolate is set)
Experimenting with these additions allows you to personalize your homemade chocolate peppermint bark and discover new favorite flavor combinations. Just be sure not to overload the bark, as it can make it difficult to break cleanly.
Storing Your Homemade Chocolate Peppermint Bark
How to Keep Your Bark Fresh and Delicious
Proper storage is essential to maintain the freshness, texture, and appearance of your easy homemade chocolate peppermint bark. Once the bark is fully set and broken into pieces, it should be stored in an airtight container. Exposure to air can cause the chocolate to oxidize, leading to stale flavors and potential bloom.
The ideal storage location is a cool, dry place, away from direct sunlight or heat sources. A pantry shelf or a cool cupboard is often suitable. If your home is warm, or if you live in a humid climate, storing the bark in the refrigerator is an option, but be mindful of condensation which can cause sugar bloom. If refrigerating, place the airtight container in a larger bag to help buffer against temperature changes when taking it in and out. Stored correctly, your simple chocolate peppermint bark can last for several weeks.
Best Storage Practices for Long-Lasting Peppermint Bark
For optimal longevity and to prevent flavors from mingling, separate different types of bark or other strong-smelling foods when storing. Use parchment paper or wax paper between layers of bark within the container to prevent pieces from sticking together, especially if the room temperature fluctuates.
Store bark in a single layer or with paper dividers.
Avoid storing peppermint bark near items with strong odors, as chocolate can absorb smells. This includes onions, garlic, or even heavily scented spices. By following these simple storage practices, you can ensure that every piece of your easy homemade chocolate peppermint bark remains as delicious and visually appealing as the day you made it, perfect for enjoying over the holiday season or giving as gifts.
Serving Suggestions: Enjoying Your Peppermint Bark Creation
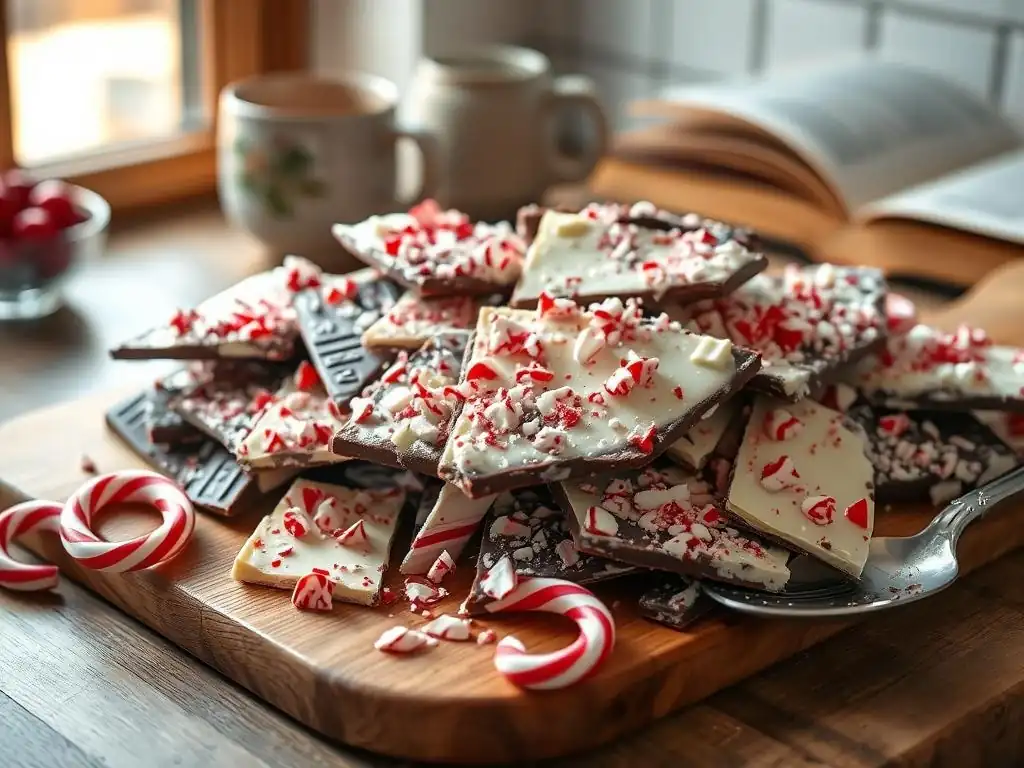
Pairing Your Bark: Complementary Flavors and Drinks
Your easy homemade chocolate peppermint bark is a delightful treat on its own, but pairing it with certain drinks or other snacks can enhance the experience. The rich chocolate and refreshing peppermint flavors pair beautifully with hot beverages. Consider serving it alongside a steaming mug of hot cocoa, coffee, or tea. The warmth of the drink often intensifies the chocolate flavor.
For a more adult pairing, a glass of red wine, particularly a Zinfandel or Cabernet Sauvignon, can complement the dark chocolate layer. Alternatively, a sweet dessert wine or even a crisp peppermint schnapps can highlight the minty notes. Serving your simple chocolate peppermint bark after dinner with coffee is a classic way to end a meal on a sweet and festive note.
Gifting Your Bark: Packaging Ideas for a Festive Present
Homemade chocolate peppermint bark makes a fantastic holiday gift. Its ease of preparation means you can make large batches to share with many people. Thoughtful packaging elevates the gift and makes it even more special.
- Cellophane bags tied with festive ribbon
- Small decorative tins or boxes
- Mason jars with a custom label
- Stacked on a small decorative plate and wrapped in cellophane
Consider adding a small tag with the ingredients list (helpful for allergy awareness) and perhaps a note indicating it's easy homemade chocolate peppermint bark from your kitchen. Presenting your simple chocolate peppermint bark in attractive packaging turns a delicious treat into a cherished holiday present.
Troubleshooting: Common Peppermint Bark Problems & Solutions
Chocolate Not Melting Smoothly? Here's What to Do.
One common issue when making easy homemade chocolate peppermint bark is chocolate that refuses to melt into a smooth, pourable consistency. This is often due to overheating or introducing even a tiny amount of water. Overheating burns the chocolate, making it thick and unusable. Water causes chocolate to seize, turning it into a thick, grainy paste.
If your chocolate has seized due to water, you might be able to salvage it by stirring in a tablespoon or two of a neutral oil (like vegetable or canola) or melted shortening, one teaspoon at a time, until it becomes somewhat fluid again. However, this will affect the final texture and snap. If the chocolate is simply too thick from slight overheating, try adding a very small amount of cocoa butter or a neutral oil and stir vigorously.
Prevention is best: melt chocolate slowly and carefully, avoiding high heat and moisture. Using quality chocolate designed for melting also helps ensure a smooth finish for your simple chocolate peppermint bark.
Peppermint Candies Sinking? A Quick Fix.
Sometimes, when adding crushed peppermint candies to the second layer of chocolate, they can sink instead of remaining visible on top. This usually happens if the second layer of chocolate is too hot or if the first layer hasn't set quite enough, making the base too soft.
To prevent sinking, ensure your second layer of melted chocolate has cooled slightly before pouring it over the first layer. It should still be liquid and spreadable, but not steaming hot. Also, make sure the first chocolate layer is at least partially set – firm to the touch but still slightly tacky. If you find candies sinking as you sprinkle, gently press them into the surface immediately after sprinkling to help them adhere to the setting chocolate. This quick fix helps ensure your easy homemade chocolate peppermint bark has that beautiful, festive topping visible on every piece.
Conclusion: Enjoy the Ease of Homemade Chocolate Peppermint Bark
BakeWithEase: Your Guide to Simple Baking Success
At BakeWithEase, our mission is to empower everyone to experience the joy of baking, regardless of their skill level. This guide to making easy homemade chocolate peppermint bark is a perfect example of how simple ingredients and straightforward steps can yield truly delightful results. We hope this recipe inspires you to get into the kitchen and create something delicious this holiday season.
Making peppermint bark at home is not just about the final product; it's about the process – the festive smells, the satisfaction of creating something beautiful, and the pleasure of sharing it with others. We believe that baking should be accessible and enjoyable, and this simple chocolate peppermint bark recipe perfectly embodies that philosophy. Keep exploring BakeWithEase for more easy recipes and helpful tips to build your baking confidence.
We love seeing what our community bakes! If you make this easy homemade chocolate peppermint bark, we encourage you to share your creations. Take photos of your beautiful bark, show off your packaging ideas, or tell us about any fun variations you tried. Sharing your successes (and even your learning moments!) helps inspire others on their baking journey.
Making peppermint bark at home is a rewarding experience, and sharing the results makes it even better. Whether you're a seasoned baker or just starting out, your simple chocolate peppermint bark is sure to bring smiles. Join the BakeWithEase community and let's celebrate the joy of easy baking together!
Frequently Asked Questions
What makes this chocolate peppermint bark recipe easy?
This recipe focuses on simple ingredients and straightforward steps, avoiding complicated techniques. It prioritizes ease of preparation for even beginner bakers.
Can I use different types of chocolate for this peppermint bark?
Yes, you can! While the recipe likely specifies a type, feel free to experiment with dark, milk, or white chocolate to suit your preference. Adjust sweetness accordingly.
How do I prevent the chocolate from seizing while melting?
Melting chocolate carefully is key. Use a double boiler or microwave in short intervals, stirring frequently to prevent overheating and burning.
What's the best way to crush the peppermint candies?
You can use a food processor, rolling pin, or even a sturdy bag and mallet to crush the peppermint candies. Aim for a mix of fine and coarse pieces.
How long does the chocolate peppermint bark need to set before I can break it?
Generally, the bark needs at least an hour in the refrigerator to fully set. You can also speed up the process by placing it in the freezer for a shorter time.
Final Reflection: The Enduring Delight of Simple Sweets
The ease of crafting delicious treats at home, especially during the holiday season, remains a powerful antidote to the pressures of modern life. This simple chocolate peppermint bark recipe isn't just about creating a festive confection; it's about reclaiming the joy of making something beautiful and delicious with your own hands. The satisfying crackle of the bark, the perfect blend of sweet chocolate and refreshing peppermint – these are sensory experiences that connect us to a simpler, more joyful time.
The enduring appeal of homemade gifts, especially those made with love and care, transcends mere culinary satisfaction. It’s about creating a tangible expression of warmth and connection. This recipe, in its simplicity, allows for personalization and creativity, fostering a sense of accomplishment and pride. As the great Julia Child once said, Find something you're passionate about and keep tremendously interested in it.
And for many, that passion lies in the kitchen, in the act of creating something delicious to share.
This holiday season, and beyond, I encourage you to embrace the simplicity of this recipe. Don't be intimidated by the seemingly complex world of baking; start small, experiment with flavors, and most importantly, enjoy the process. The joy isn't just in the finished product, but in the journey of creating it, in the shared moments of laughter and connection that often accompany the making of simple sweets. Let the aroma of melting chocolate and peppermint fill your home with warmth and the spirit of the season. Make some memories, and most importantly, make some bark!
Unleash Your Inner Chocolatier: Make This Peppermint Bark!
Thanks for spending some time with us today and discovering the joy of making simple, delicious chocolate peppermint bark! You now have a recipe that's both impressive and easy to master. Ready to take your baking to the next level?
- Craft your perfect bark: Experiment with different types of chocolate and add-ins – maybe crushed candy canes, pretzels, or even sea salt! Let your creativity flow!
- Share your creation: Post a picture of your bark on social media and tag us @BakeWithEase – we'd love to see your culinary masterpiece!
- Give the gift of homemade: This peppermint bark is the perfect treat for friends, family, or even yourself. It's so much more delicious than store-bought!
What unique twist will you add to your homemade chocolate peppermint bark? Let us know in the comments!