
Troubleshooting Frosting Application on a Layer Cake

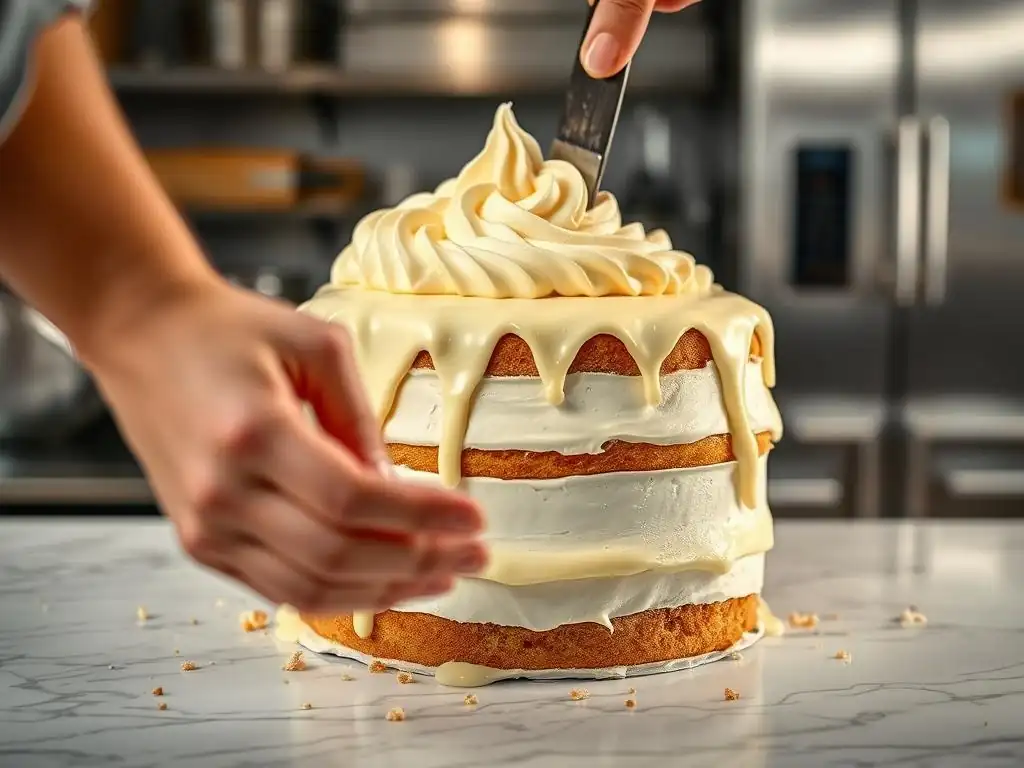
Welcome to BakeWithEase, your guide to confident baking! Ever wondered why your frosting layer cake application isn't as smooth as you'd like? We're diving deep into common issues and offering simple solutions to achieve that professional finish. Discover the secrets to flawless frosting and transform your layer cakes from good to gorgeous. Keep reading to unlock the tips and tricks that will have you frosting like a pro!
- Troubleshooting Frosting Layer Cake Application Issues: A BakeWithEase Guide
- Introduction: Achieving Flawless Frosting on Your Layer Cake
- Common Frosting Layer Cake Application Issues: Identifying the Problems
- Problem 1: Dealing with Uneven Frosting Application on Cakes
- Problem 2: Preventing and Removing Crumbs from Frosting
- Problem 3: Addressing Frosting Sliding Off Cake Layers
- Problem 4: Eliminating Air Bubbles in Cake Frosting
- Problem 5: Preventing and Repairing Frosting Tears and Cracks
- Advanced Frosting Techniques for Problem Prevention
- Essential Tools for Flawless Cake Frosting Application
- Conclusion: Mastering Frosting Application for Stunning Layer Cakes
-
Frequently Asked Questions
- How do I prevent crumbs from getting into my frosting when frosting a layer cake?
- What's the best way to achieve a smooth frosting finish on a layer cake?
- My frosting is too soft and keeps sliding off my layer cake. What am I doing wrong?
- How do I avoid air bubbles in my frosting when applying it to a layer cake?
- What can I do if my frosting is uneven after applying it to my layer cake?
- Final Reflection: Mastering the Art of Frosted Perfection
- Unleash Your Inner Cake Artist: Perfect Frosting Every Time!
Troubleshooting Frosting Layer Cake Application Issues: A BakeWithEase Guide
Introduction: Achieving Flawless Frosting on Your Layer Cake
Perfectly frosted layer cakes are a joy to behold, but sometimes, the journey from bowl to cake isn't as smooth as we'd hope. Whether you're a seasoned baker or just starting out, you've likely encountered a few challenges when applying frosting to your beautiful cake layers. Issues like uneven coverage, pesky crumbs, or frosting that just won't stay put can be frustrating. But don't worry! With the right techniques and a little patience, you can overcome these common frosting layer cake application issues and achieve that smooth, professional finish you desire.
BakeWithEase's Guide to Perfect Layer Cake Frosting
At BakeWithEase, we believe that mastering baking techniques should be accessible and fun. This guide is designed to walk you through the most common frosting layer cake application issues, offering practical solutions and tips to help you troubleshoot effectively. We'll cover everything from preparing your cake layers correctly to using the right tools and techniques for a flawless finish. Think of this as your essential resource for conquering those tricky frosting moments and elevating your cake decorating skills.
Common Frosting Layer Cake Application Issues: Identifying the Problems
Before we dive into solutions, let's identify the common culprits behind less-than-perfect frosting application. Recognizing the problem is the first step to fixing it!
Uneven Frosting: Causes and Solutions
Uneven frosting can make a cake look amateurish, with thick patches in one area and thin spots showing the cake beneath in another. This often happens due to inconsistent application pressure, using too little frosting, or working with cake layers that aren't level or are still warm. The key to evenness lies in generous initial application and systematic smoothing.
To combat unevenness, start by applying a generous dollop of frosting to the top and sides of the cake – more than you think you'll need. Use an offset spatula or bench scraper to push and pull the frosting, gradually spreading it across the surface. It's often easier to remove excess frosting later than to add more to thin spots without disturbing what's already there. Ensure your cake layers are completely cooled and leveled before you begin, as a tilted surface makes even application nearly impossible.
Crumbs in Frosting: Preventing and Removing
Few things are more annoying than seeing cake crumbs marring the smooth surface of your frosting. Crumbs typically get picked up by the spatula and mixed into the frosting when you're spreading it, especially if the cake is very moist or has been recently sliced. The edges and tops of cake layers are particularly prone to shedding crumbs.
The most effective defense against crumb invasion is the crumb coat. This is a thin layer of frosting applied to the entire cake before the final, thicker layer. Its purpose is to trap any loose crumbs and seal them against the cake.
Once the crumb coat is applied, the cake is chilled until the frosting is firm, usually about 15-30 minutes in the refrigerator. This sets the crumbs in place, creating a clean surface for your final frosting layer. If you do get a few stray crumbs in your final coat, try to pick them out carefully with the tip of your spatula rather than spreading them around.
Frosting Sliding Off Cake Layers: Stability Solutions
Imagine your beautifully frosted cake, only to find the top layer slowly migrating sideways or the side frosting drooping. Frosting sliding off the cake layers is a frustrating issue, often caused by warm cake layers, the wrong type of frosting for the cake's size or height, or insufficient support. A cake that is too warm will melt the frosting slightly, causing it to lose its structure and grip.
Choosing a stable frosting is crucial, especially for taller or multi-tiered cakes. Buttercreams made with a higher ratio of butter or shortening tend to be more stable than, say, a light whipped cream frosting, which can soften quickly at room temperature.
Ensure your cake layers are thoroughly chilled before frosting; placing them in the refrigerator for at least 30 minutes, or even the freezer for 10-15 minutes, firms them up and provides a solid, cool base for the frosting to adhere to. For tall cakes (e.g., 3 layers or more), internal support like dowels or cake boards can distribute weight and prevent slippage.
Air Bubbles in Frosting: Achieving a Smooth Finish
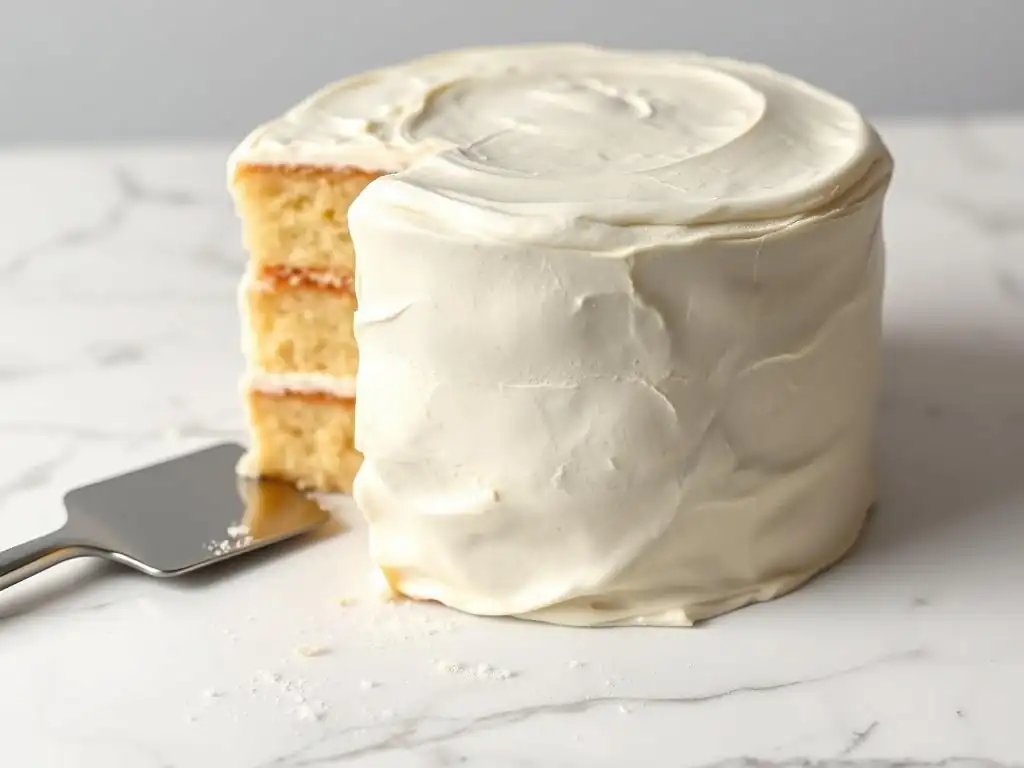
Tiny air bubbles trapped within your frosting can create a bumpy or pockmarked surface, preventing that perfectly smooth look. These bubbles are often incorporated during the mixing process, especially if the frosting is whipped at high speed for a long time. While some air is necessary for light and fluffy frosting, too much can be detrimental to a smooth finish.
To minimize air bubbles, try mixing your frosting at a lower speed once the ingredients are just combined. If you've already whipped it and see many bubbles, you can often remove them by stirring the frosting slowly by hand with a spatula for a few minutes. This technique helps release trapped air. Alternatively, letting the frosting rest for 10-15 minutes before using it can allow some bubbles to dissipate on their own. When applying, use smooth, consistent strokes rather than whipping or beating the frosting onto the cake.
Frosting Tears and Cracks: Preventing and Repairing
Frosting tears or cracks can appear during application or even after the cake has been sitting. This issue is often related to the frosting's consistency being too stiff, the cake surface being too dry, or applying frosting to a frozen cake layer that causes the frosting to set too quickly and crack as it warms. Working too slowly with certain frostings (like those with powdered sugar) can also cause them to set before you've finished smoothing.
Maintaining the correct frosting consistency is key. If your frosting is too stiff, add a tiny amount of liquid (milk, cream, or water) and mix until it's smooth and spreadable. If it's too soft, try chilling it briefly.
Ensure your cake layers aren't excessively dry; a simple syrup can help moisten them slightly if needed. If a tear or crack appears on a partially frosted cake, you can gently apply a little more frosting over the area and smooth it out. For cracks that appear later, often warming your spatula slightly in hot water and drying it, then gently smoothing the area, can help mend them, though this works best on buttercreams.
Problem 1: Dealing with Uneven Frosting Application on Cakes
Achieving a perfectly level and evenly frosted cake is a hallmark of skilled baking. Uneven application detracts from the cake's aesthetic appeal, but it's a common hurdle for bakers at all levels. Understanding why it happens is the first step to achieving that smooth, consistent coat.
Diagnosing Uneven Frosting on Layer Cakes
Uneven frosting can stem from several factors. A primary cause is applying frosting to a cake that is not level; if the top surface slopes, gravity will cause the frosting to be thicker on one side. Another common issue is using too little frosting to begin with; trying to stretch a small amount over a large area inevitably leads to thin spots. The temperature of the cake and the frosting also play a role; a cake that's too warm can soften the frosting, making it difficult to control, while frosting that's too stiff is hard to spread smoothly.
Furthermore, inconsistent pressure and angle with your spatula during application can create hills and valleys. Working too quickly without pausing to step back and assess the coverage is another pitfall. For instance, applying frosting to a 9-inch round cake typically requires about 2-3 cups of frosting for a good base layer and final coat combined. If you're trying to use only 1 cup for the entire cake, achieving even coverage will be nearly impossible.
Techniques for Achieving an Even Frosting Layer
The secret to an even frosting layer often lies in applying more frosting than you initially need and then carefully scraping the excess away. Start by placing a generous mound of frosting on top of the cake. Using an offset spatula, spread it towards the edges, allowing some to spill over the sides. Then, apply frosting to the sides of the cake, aiming for a thick, somewhat messy layer. Don't worry about perfection at this stage.
Once the cake is fully covered with a substantial amount of frosting, hold your spatula or bench scraper at a consistent angle (often around 45 degrees) against the side of the cake while rotating the turntable. Use light, steady pressure to remove the excess frosting, revealing a smoother, more even layer underneath. For the top, hold the spatula flat or slightly angled and draw it from the edge towards the center, cleaning the spatula after each pass. Repeat this process, gradually refining the shape and smoothness.
Tools for Even Frosting: Spatulas, Scrapers, and Turntables
Having the right tools significantly impacts your ability to apply frosting evenly. An offset spatula is indispensable for scooping frosting and applying it to the top and sides of the cake. The offset handle keeps your hand clear of the cake surface, preventing accidental bumps. Different sizes are useful; a smaller one (say, 4-6 inches) is good for detail work, while a larger one (8-10 inches) covers more area quickly.
A cake turntable is crucial for achieving smooth sides. It allows you to rotate the cake smoothly while holding your scraper or spatula stationary. Bench scrapers and icing smoothers, often made of plastic or metal, are ideal for creating perfectly straight and smooth sides. Holding a bench scraper vertically against the side of the cake while turning the turntable is the most effective way to achieve a smooth, even finish on the sides, helping to resolve common frosting layer cake application issues related to side coverage.
Problem 2: Preventing and Removing Crumbs from Frosting
Crumbs are the nemesis of a smooth frosting finish. They can turn a pristine white frosting into a speckled mess. Understanding why crumbs integrate into your frosting is key to keeping them at bay.
Understanding Why Crumbs Appear in Frosting
Crumbs are loose particles from the cake itself. When you spread frosting, the spatula can pick up these loose crumbs, especially from the cut surfaces of the cake layers or the edges. Cakes that are very tender, moist, or freshly cut are more prone to shedding crumbs. Trying to apply a final, thick layer of frosting directly to a crumbly cake surface is almost guaranteed to result in crumbs mixing into your beautiful frosting.
For example, a red velvet cake, known for its moist and tender crumb, will almost always produce noticeable red crumbs that can stand out significantly in a white cream cheese frosting. Similarly, slicing a cake while it's still slightly warm or before it has fully settled can make it more crumbly. The friction of spreading the frosting is what dislodges these particles and incorporates them into your frosting layer.
Crumb Coating: The Essential First Layer
The crumb coat is your best friend when dealing with crumbly cakes. It's a thin layer of frosting, often applied with a spatula, that acts as a sealant. You only need a small amount, just enough to cover the entire cake surface – top and sides – in a thin, translucent layer. This first layer effectively traps any loose crumbs, adhering them to the cake so they don't get picked up by your spatula when you apply the final coat.
Think of it like priming a wall before painting. The primer seals the surface and prevents the final paint layer from picking up dust or imperfections. A crumb coat does the same for your cake, creating a clean, stable base for the final, thick layer of frosting. It doesn't need to be perfectly smooth, but it should cover every bit of exposed cake.
Techniques for a Flawless Crumb Coat
Applying a crumb coat is relatively simple. Use an offset spatula to apply a small amount of frosting to the top of the cake, spreading it thinly towards the edges and letting a little fall over the sides. Then, grab a bit more frosting and apply it thinly around the sides, using your spatula to spread it evenly. The goal is to use just enough frosting to cover the cake's surface and trap the crumbs.
Once the cake is fully covered in the thin crumb coat, use your spatula or a bench scraper to lightly smooth it. Don't press hard or try to make it perfect; you just want to ensure all crumbs are covered and the layer is relatively even. After applying the crumb coat, immediately place the cake in the refrigerator or freezer. Chilling for about 15-30 minutes in the fridge, or 10-15 minutes in the freezer, allows the thin layer of frosting to firm up and lock those crumbs in place, preparing the cake for the final, crumb-free frosting application.
Removing Crumbs After Frosting Application
Despite your best efforts, sometimes a few stubborn crumbs might still find their way into your final frosting layer. If you spot a crumb, resist the urge to just spread over it. Spreading will likely drag the crumb and create a larger smear. Instead, try to gently lift the crumb out using the tip of your clean spatula or a toothpick.
If the crumb is embedded and trying to remove it creates a bigger mess, you might need to carefully scrape away the affected area of frosting and reapply a small amount, blending it in. This is easier to do with certain frostings like buttercream that can be smoothed and blended. This is one of the more frustrating frosting layer cake application issues, but careful, targeted removal is better than spreading the problem.
Problem 3: Addressing Frosting Sliding Off Cake Layers
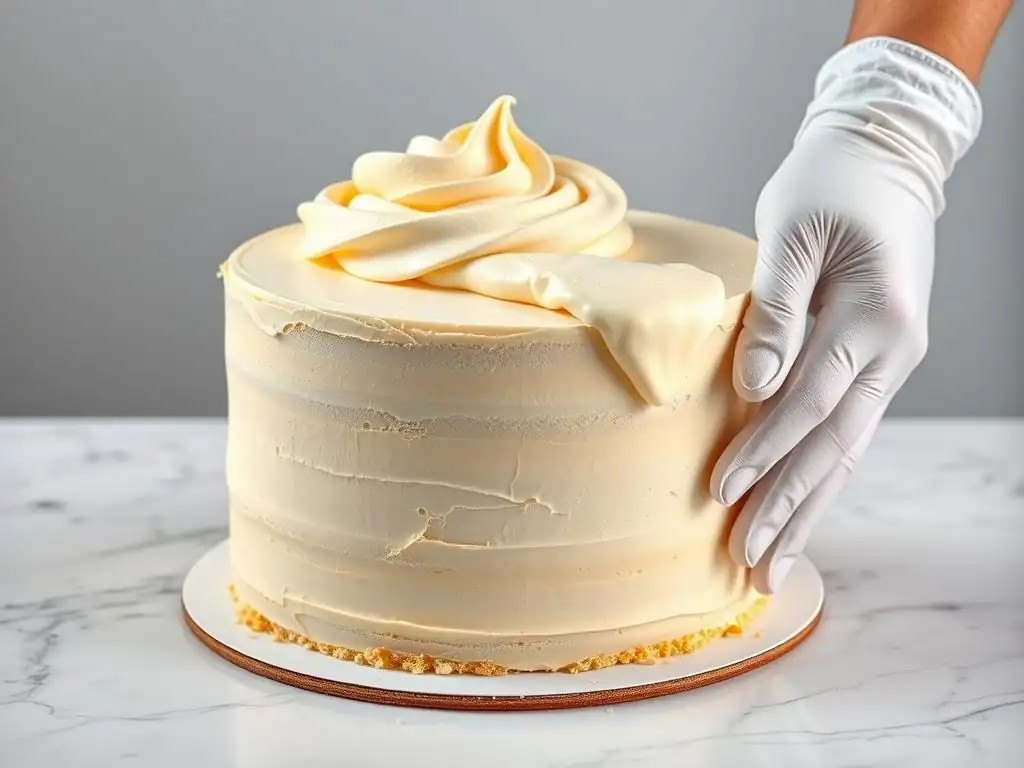
A cake that starts to lean or lose its frosting is disheartening. Frosting slippage is a sign that the cake structure or frosting stability isn't adequate for the conditions or height.
Causes of Frosting Slippage on Cakes
Several factors can contribute to frosting sliding off cake layers. The most common cause is applying frosting to cake layers that are too warm. Heat from the cake will melt the fat in the frosting, causing it to soften and lose its grip. Another significant factor is the type of frosting used; lighter, less stable frostings like whipped cream or some mousses are more prone to sliding, especially on taller cakes or in warm environments.
Additionally, stacking cake layers that are too soft or unstable themselves can lead to issues. If the bottom layers compress under the weight of the layers and frosting above, the whole structure can shift, causing the frosting to crack or slide. For instance, a delicate sponge cake might not provide enough structural support for a heavy ganache frosting on a three-layer cake.
Choosing the Right Frosting for Cake Stability
The type of frosting you choose should be appropriate for the cake's size, height, and serving conditions. For multi-layer cakes or cakes that will be displayed for a while, a stable frosting is essential. American buttercream, which is primarily butter and powdered sugar, offers good stability due to its high fat content. Swiss, Italian, or French buttercreams, while lighter in texture, are also generally stable once they set, thanks to the meringue base.
Cream cheese frosting, while delicious, can be softer and less stable than buttercream, especially in warmer temperatures. If using cream cheese frosting on a tall cake, ensure it's made with enough butter to provide structure and keep the cake well-chilled. Ganache, made from chocolate and cream, is very stable once set but can be heavy. For maximum stability on taller cakes, consider using a firmer frosting between layers and a slightly softer one for the exterior if desired, or ensure your exterior frosting has enough structure.
Chilling Cake Layers for Enhanced Stability
Chilling cake layers before assembly and frosting is a simple yet effective way to prevent slippage and address frosting layer cake application issues related to stability. Cold cake layers are firmer and less likely to compress. They also provide a cool surface that helps the frosting set upon contact, creating a stronger bond between layers and between the frosting and the cake.
After baking and cooling your cake layers completely, wrap them tightly in plastic wrap and refrigerate them for at least 30 minutes, or ideally, several hours or overnight. You can even freeze them for 15-20 minutes for a quick chill. This not only makes the layers easier to handle (less prone to breaking) but also ensures they are firm and cool, providing a stable foundation for stacking and frosting. Frosting a chilled cake is significantly easier and reduces the risk of the frosting becoming too soft as you work.
Doweling and Support for Tall Layer Cakes
For tall layer cakes (typically three layers or more, or cakes over 8-10 inches high), internal support is often necessary to prevent the upper layers and frosting from crushing the lower layers and causing the cake to lean or slide. Dowels (food-safe plastic or wooden rods) are inserted into the lower cake layers to bear the weight of the layers above.
A simple method involves inserting several dowels (e.g., 3-5 for a standard round cake) into the bottom layer, cutting them flush with the top of that layer. A cake board is then placed on top of these dowels, and the next cake layer sits on the board. This transfers the weight through the dowels to the base, protecting the cake layers below. For very tall cakes, you might need to use dowels in multiple layers. This structural support is crucial for preventing major frosting layer cake application issues like catastrophic slippage or collapse on grand designs.
Problem 4: Eliminating Air Bubbles in Cake Frosting
While a light and airy texture is desirable in some frostings, large or numerous air bubbles can ruin a smooth finish. Getting rid of these bubbles is key to achieving that polished look.
Why Air Bubbles Form in Frosting
Air bubbles are primarily incorporated into frosting during the mixing process. High-speed mixing, especially with a stand mixer, whips air into the frosting ingredients. While this is necessary for creating volume and a fluffy texture in buttercreams, excessive whipping or the design of certain mixers can trap more air than desired for a perfectly smooth finish.
Sometimes, air bubbles can also be introduced when you're transferring frosting to a piping bag or container, or even during the initial stages of spreading if you're vigorously working the frosting. Certain types of frosting, like those with a high ratio of shortening or some whipped ganaches, can be more prone to trapping air compared to a dense fudge frosting.
Techniques for Releasing Air Bubbles During Frosting
Once your frosting is mixed, you can significantly reduce air bubbles with a simple technique: stirring by hand. Transfer the frosting to a large bowl (if it's not already in one). Use a sturdy spatula to stir the frosting slowly and deliberately, pressing it against the sides of the bowl. This action helps to push the air bubbles out. Continue stirring and pressing for several minutes until you see fewer bubbles surfacing.
Another effective method is to let the frosting rest. After mixing or stirring by hand, cover the bowl with plastic wrap, pressing it directly onto the surface of the frosting to prevent a crust from forming. Let the frosting sit at room temperature for 10-15 minutes. During this time, many of the trapped air bubbles will naturally rise to the surface and dissipate. A gentle stir after resting can help release any remaining ones.
Achieving a Smooth, Bubble-Free Frosting Finish
The key to a smooth, bubble-free finish during application is using smooth, consistent strokes and avoiding overworking the frosting on the cake. Once you've applied the initial generous layer of frosting, use your spatula or bench scraper to smooth it out in long, even passes. Don't lift and reapply the spatula too often, as this can reintroduce air.
If you spot a bubble while smoothing, you can often gently pop it with the tip of your spatula and then smooth the area again. For stubborn bubbles or a truly glass-smooth finish, consider using the warm spatula technique mentioned earlier – dip your spatula in hot water, dry it completely, and use the warm surface to gently smooth the frosting. This can help melt the outermost layer of frosting just enough to eliminate small imperfections, addressing these specific frosting layer cake application issues.
Problem 5: Preventing and Repairing Frosting Tears and Cracks
Frosting that tears or cracks can be frustrating, especially when you're aiming for a seamless look. These issues are often related to the frosting's physical properties and how it's handled.
Understanding Frosting Tears and Cracks
Tears and cracks in frosting typically occur when the frosting lacks elasticity or is applied to a surface that causes it to set too quickly. A frosting that is too stiff, perhaps due to too much powdered sugar or being too cold, can tear rather than spread smoothly. As you pull your spatula across it, it resists and rips.
Applying frosting to a frozen cake layer can also cause the frosting to crack as the cake warms up and expands slightly, while the frosting on the surface sets rigidly in its cold state. Additionally, some frostings can develop a crust quickly when exposed to air; if you try to smooth a crusted frosting layer, it will likely crack rather than becoming smooth. For example, an American buttercream left exposed to air for 15-20 minutes can start to crust, making it prone to tearing if you try to manipulate it further.
Maintaining the Correct Frosting Consistency
The most effective way to prevent tears and cracks is to ensure your frosting has the correct consistency – smooth, spreadable, and not too stiff. It should be soft enough to glide across the cake but firm enough to hold its shape. If your frosting feels too stiff, add a very small amount of liquid (like a teaspoon of milk, cream, or even water) and mix thoroughly. Repeat with tiny additions until the desired consistency is reached. Be cautious not to add too much, as you can quickly make it too soft.
Conversely, if the frosting is too soft, chilling it in the refrigerator for 10-15 minutes can help firm it up. For frostings that crust quickly, work relatively efficiently or keep the frosting covered when not in use. You can also add a small amount of fat, like shortening or butter, to some recipes to improve elasticity and prevent crusting.
Repairing Tears and Cracks in Finished Frosting
If you notice a tear or crack while you're still frosting the cake, the easiest fix is to simply apply a little more frosting over the affected area and gently smooth it in. Use a clean spatula and light pressure to blend the new frosting with the existing layer.
For cracks that appear after the frosting has set, repairing them can be trickier but often possible, especially with buttercreams. The warm spatula technique is useful here. Dip a metal spatula in hot water, wipe it completely dry, and then gently glide the warm spatula over the crack.
The heat will slightly melt the frosting's surface, allowing you to smooth the area. For larger cracks, you might need to gently press the frosting near the crack together before smoothing. For frostings that don't melt well (like some non-dairy varieties), a tiny dab of fresh frosting applied and smoothed can sometimes work, though it might leave a visible patch.
Advanced Frosting Techniques for Problem Prevention
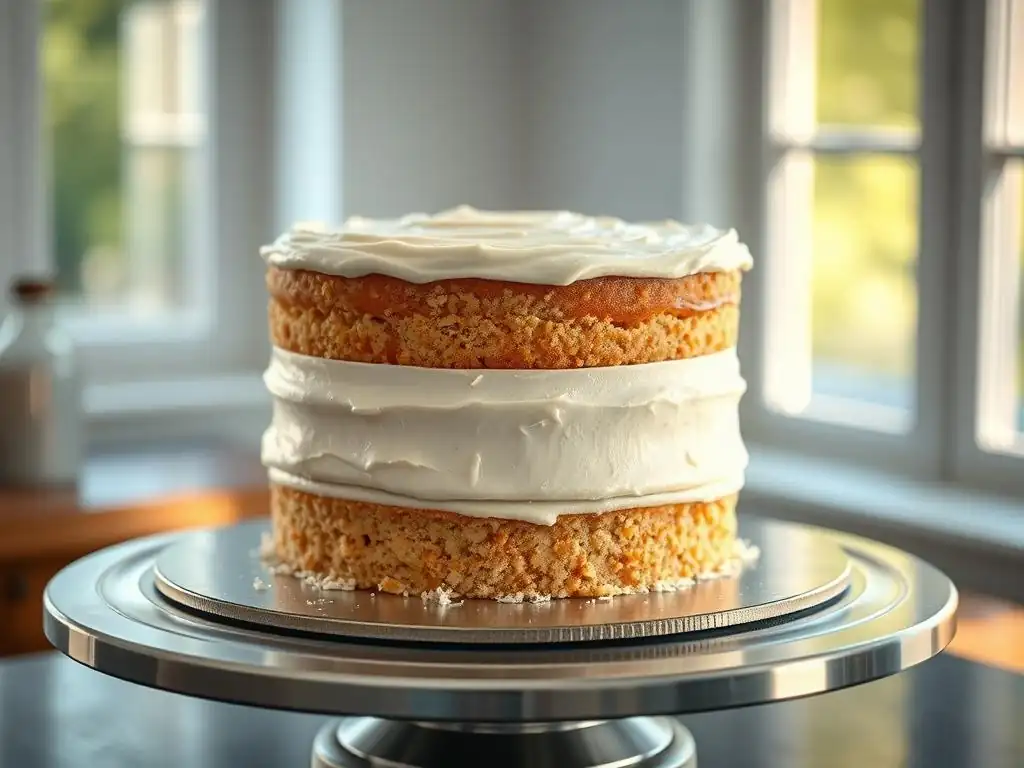
Moving beyond basic application, incorporating some advanced techniques can preemptively solve many common frosting layer cake application issues before they even arise.
The Importance of Properly Prepared Cake Layers
The foundation of a beautifully frosted cake is well-prepared cake layers. This means the layers must be:
- Completely Cooled: Warm cakes melt frosting. Ensure layers are cooled to room temperature, or preferably chilled.
- Leveled: Uneven layers make even frosting application incredibly difficult. Use a serrated knife or cake leveler to trim off any domes.
- Stable: Delicate or moist cakes should be handled gently. Chilling helps firm them up.
- Crumb-Free (relatively): While a crumb coat handles most crumbs, handling layers gently and brushing off obvious loose crumbs before assembly helps.
For example, if you bake a cake and try to frost it while it's still warm to the touch (say, 80-90°F / 27-32°C), a standard buttercream will start melting immediately, leading to a messy, uneven application and potential slippage. Waiting until the cake is fully cooled, ideally below 70°F (21°C), is crucial.
Mastering the Art of the Smooth Finish
Achieving a perfectly smooth finish is a skill that improves with practice. It requires patience and consistent technique. After applying a generous amount of frosting, use a bench scraper held vertically against the side of the cake at a consistent angle (around 45 degrees) while rotating the turntable. Apply even, light pressure. Clean your scraper frequently between passes.
For the top, apply excess frosting and then, holding your spatula flat or slightly angled, draw it from the outer edge towards the center, cleaning the spatula after each pull. Repeat around the entire cake. The excess frosting you remove can be reused if it hasn't mixed with too many crumbs. This method, combined with a chilled cake and stable frosting, significantly reduces issues like unevenness and tearing. Using a large batch of frosting (e.g., 4-5 cups for an 8-inch, 2-layer cake) provides enough material to work with generously before smoothing.
Tips for Working with Different Frosting Types (Buttercream, Ganache, Cream Cheese)
Different frostings have unique properties that affect application.
- Buttercream (American): Can crust quickly. Work efficiently or keep it covered. Can be easily smoothed with a warm spatula. Responds well to chilling for setting.
- Buttercream (Meringue-based): Smooth and silky. Less prone to crusting. Can be sensitive to temperature; too warm and it can melt, too cold and it can stiffen significantly. Often benefits from a quick whisking before use if it's been sitting, to restore texture.
- Cream Cheese Frosting: Often softer than buttercream. Ensure it's made with enough stabilizer (like butter) for tall cakes. Keep chilled. Can be harder to achieve a perfectly smooth finish due to its softer texture, but a bench scraper still works well.
- Ganache: Consistency varies greatly with the chocolate:cream ratio. A 1:1 ratio (like 8 oz chocolate to 8 oz cream) is pourable when warm but sets firmly. A 2:1 ratio is firmer when set, good for whipping or frosting. Ensure ganache is at the right temperature – cool but still spreadable – for application. Too warm, it's liquid; too cold, it's hard.
Understanding these nuances helps you anticipate and prevent frosting layer cake application issues specific to your chosen frosting. For example, you wouldn't try to smooth a crusted American buttercream the same way you'd smooth a fresh meringue buttercream.
Essential Tools for Flawless Cake Frosting Application
While skill is paramount, the right tools are your allies in the quest for perfectly frosted cakes. Investing in a few key items can make a significant difference in overcoming frosting layer cake application issues.
The Right Spatula for Perfect Frosting
An offset spatula is the most crucial tool for applying frosting. The bend in the handle allows you to spread frosting without your knuckles dragging on the cake or turntable. They come in various sizes, typically from 4 inches to 12 inches. A medium-sized offset spatula (6-8 inches) is versatile for both applying frosting and initial smoothing on the top and sides.
Straight spatulas are also useful, particularly for smoothing the top surface or for working with very stiff frostings. Having both an offset and a straight spatula in your toolkit provides flexibility for different tasks and frosting consistencies. Look for spatulas with comfortable handles and sturdy blades.
Using a Cake Turntable for Even Application
A cake turntable is indispensable for achieving smooth, even frosting on the sides of a cake. Trying to frost the sides by moving around a stationary cake is incredibly difficult and almost guarantees an uneven result. A good turntable allows you to keep your body and scraping tool stationary while smoothly rotating the cake.
Turntables range from simple plastic models that cost around $10-20 to professional-grade metal ones that cost $50-$100+. While a basic plastic one will work, heavier, more stable turntables (often with ball bearings for smooth rotation) offer better control and ease of use, making the smoothing process much more efficient and effective in resolving frosting layer cake application issues on the sides.
Bench Scrapers and Icing Smoothers: Achieving Professional Results
Bench scrapers and icing smoothers are essential for achieving perfectly smooth and straight sides on your cake. A bench scraper is a flat, rectangular tool, usually 6-8 inches tall, with a straight edge. An icing smoother can be similar or have specific contours for different effects, but the basic straight edge is key for smooth sides.
To use one, apply enough frosting to the sides, then hold the scraper vertically against the side of the cake, touching the cake board or turntable base. Maintain a consistent, slight angle (around 45 degrees) and light pressure, then rotate the turntable smoothly. The scraper removes excess frosting and leaves a flat, smooth surface. This tool is arguably the most effective way to combat unevenness and achieve professional-looking sides, directly addressing significant frosting layer cake application issues.
Conclusion: Mastering Frosting Application for Stunning Layer Cakes
Troubleshooting frosting layer cake application issues is a normal part of the baking process. Every baker, no matter their experience level, encounters challenges. But by understanding the common problems and learning the techniques to address them, you can dramatically improve your results. From preventing crumb invasions with a solid crumb coat to achieving silky-smooth finishes by managing air bubbles and consistency, each step brings you closer to cake decorating success.
Recap of Frosting Troubleshooting Tips
Let's quickly recap the key strategies for tackling frosting layer cake application issues:
- Ensure cake layers are completely cool and level.
- Always apply a crumb coat and chill the cake before the final frosting layer.
- Choose a frosting type appropriate for the cake's structure and environment.
- Chill cake layers and assembled cakes to enhance stability and prevent slippage.
- Use proper mixing techniques and hand-stirring to minimize air bubbles.
- Maintain the correct frosting consistency – not too stiff, not too soft.
- Use generous amounts of frosting initially and scrape away the excess for evenness.
- Invest in and utilize key tools like offset spatulas, a cake turntable, and a bench scraper.
- Practice patience and gentle technique during application and smoothing.
Elevate Your Cake Decorating Skills with BakeWithEase
Mastering frosting application is a skill that develops with practice. Don't be discouraged by imperfections; view them as learning opportunities. Each cake you frost is a chance to refine your technique and build confidence. At BakeWithEase, we're here to support your baking journey. By applying the troubleshooting tips and techniques discussed in this guide, you'll be well on your way to creating stunning layer cakes with flawless frosting. Keep baking, keep learning, and enjoy the delicious process!
Frequently Asked Questions
How do I prevent crumbs from getting into my frosting when frosting a layer cake?
The key is a crumb coat. Apply a very thin layer of frosting to seal in the crumbs and then chill the cake before applying the final layer. This prevents crumbs from migrating.
What's the best way to achieve a smooth frosting finish on a layer cake?
Use a smooth, offset spatula and a turntable. Apply even pressure and scrape away excess frosting. Consider warming your spatula for an extra smooth finish.
My frosting is too soft and keeps sliding off my layer cake. What am I doing wrong?
Your frosting might be too warm or have too much liquid. Try chilling the frosting for a bit before using it, or adjust the recipe to add more powdered sugar and less liquid.
How do I avoid air bubbles in my frosting when applying it to a layer cake?
Gently tap the bowl of frosting on the counter a few times before applying it to release trapped air. Also, avoid over-mixing the frosting, as this can incorporate more air.
What can I do if my frosting is uneven after applying it to my layer cake?
Use a bench scraper or a long spatula to smooth the sides. You can also add more frosting to low spots and then re-smooth the entire cake. A turntable is very helpful for this.
Final Reflection: Mastering the Art of Frosted Perfection
The seemingly simple act of frosting a layer cake holds a surprising amount of potential for disaster, yet mastering this technique unlocks a world of delicious possibilities. From uneven application to crumbling layers, the challenges are real, and the frustration is palpable for even experienced bakers. This article has explored common pitfalls and offered practical solutions, aiming to empower every baker to achieve flawlessly frosted cakes.
The journey of perfecting frosting application is more than just a technical skill; it's a reflection of our dedication to creating something beautiful and delicious. It's about taking the time to understand the nuances of different frostings, the importance of properly chilled cakes, and the patience required for a smooth, even finish. As the saying goes, The best things in life are worth waiting for,
and a perfectly frosted cake is a testament to that enduring truth. The pride in achieving a flawless finish, the joy of sharing that creation, and the memories made around a beautifully decorated cake are all part of the larger story.
Now, consider your own baking journey. What challenges have you faced in frosting your cakes? What techniques have you found most effective? I encourage you to embrace the learning process, to experiment with different methods, and to never be discouraged by setbacks. The next time you face a frosting challenge, remember the tips and tricks discussed in this article, and approach the task with renewed confidence. The perfectly frosted cake awaits – and so does the immense satisfaction of creating it.
Unleash Your Inner Cake Artist: Perfect Frosting Every Time!
Thanks for taking the time to level up your cake decorating skills! You've now got the knowledge to tackle even the trickiest frosting challenges. Ready to put your new expertise into action?
- Master the art of the perfect swirl: Practice your frosting techniques on a few practice cakes (or cupcakes!) until you achieve that flawless finish. Remember those tips on using the right piping bag and pressure?
- Share your creations: Show off your beautifully frosted cakes on social media! Use #BakeWithEase to connect with our amazing community and inspire others.
- Experiment with new flavors and techniques: Don't be afraid to get creative! Try different frosting recipes and piping methods to discover your signature style.
What’s your go-to frosting flavor for a show-stopping layer cake? Let’s chat in the comments below!