
Easy Ways to Add Texture to Your Layer Cake Frosting

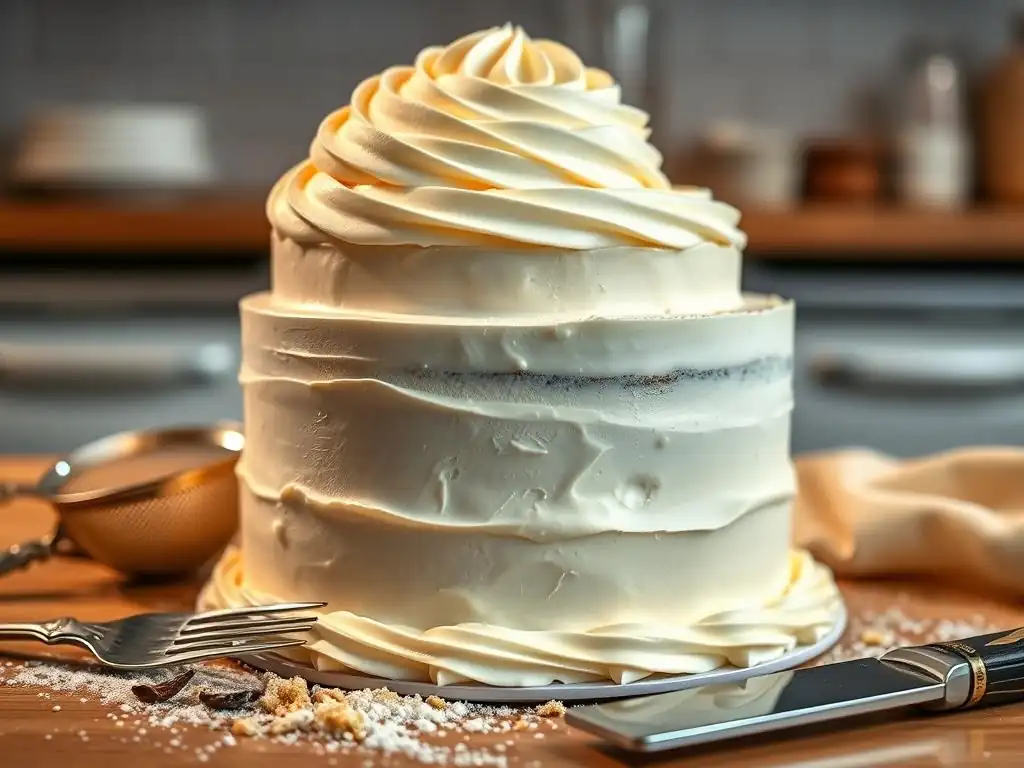
Welcome to BakeWithEase, your kitchen companion for all things baking! Ever wondered how to achieve that perfectly textured frosting on your layer cake? Discover the secrets to transforming ordinary frosting into a masterpiece. Get ready to explore easy-to-follow techniques and tips that will elevate your layer cake frosting texture game, making your creations truly unforgettable. Let's dive in and unlock the secrets!
- Elevate Your Cakes: Mastering Textured Frosting Techniques
- Introduction: Why Textured Frosting Enhances Cake Design
- Understanding Frosting Fundamentals
- Simple Textured Frosting Techniques
- Advanced Frosting Texture Techniques
- Specific Texture Tutorials: Step-by-Step
- Troubleshooting Common Frosting Issues
- Inspiration Gallery: Textured Cake Designs
- Maintaining Your Textured Masterpiece
- Conclusion: Unleash Your Artistic Flair with Textured Frosting
-
Frequently Asked Questions
- How can I achieve a smooth, even frosting base before adding texture?
- What are some simple tools I can use to create texture in my layer cake frosting?
- Can I add ingredients to my frosting to change its texture?
- What's the best way to prevent my frosting texture from melting or drooping?
- Are there specific frosting types that are better for creating textured designs?
- Final Reflection: Unlocking the Secrets of Textured Frosting
- Unlock Your Frosting's Hidden Potential!
Elevate Your Cakes: Mastering Textured Frosting Techniques
Introduction: Why Textured Frosting Enhances Cake Design
The Impact of Texture: Beyond Smooth Finishes
While a perfectly smooth frosting finish on a layer cake is undeniably elegant, exploring texture opens up a whole new dimension in cake design. Texture adds visual interest, depth, and character that a flat surface simply can't achieve. It allows light to play differently across the cake, creating highlights and shadows that make the design pop. Furthermore, mastering layer cake frosting texture tips can be incredibly forgiving, often helping to disguise minor imperfections in the frosting application underneath. Think of the difference between a flat painted wall and one with subtle plasterwork – texture adds life and artistry.
Beyond just aesthetics, texture can also evoke a specific mood or style. A roughly textured cake can feel rustic and charming, perfect for a casual celebration. Sharp, defined textures might lean towards modern and sophisticated. Soft, flowing waves can feel romantic or whimsical. By intentionally adding texture, you're not just decorating; you're communicating a feeling and enhancing the overall impact of your beautiful layer cake, making it truly memorable.
A Guide to Achieving Stunning Frosting Textures
Adding texture to your layer cake frosting doesn't have to be complicated. This guide is designed to walk you through various techniques, from the incredibly simple to those requiring a bit more practice, providing practical layer cake frosting texture tips along the way. We'll cover everything from choosing the right frosting consistency to using common kitchen tools in creative ways. Our goal is to empower you to move beyond basic frosting and start playing with surfaces to create truly unique and stunning cake designs.
Whether you're aiming for dramatic peaks, delicate waves, or intricate patterns, the principles remain the same: understanding your materials and wielding your tools with intention. We'll break down the process into manageable steps, offering insights into common challenges and how to overcome them. Get ready to transform your layer cakes from delicious desserts into edible works of art using these versatile layer cake frosting texture tips.
Understanding Frosting Fundamentals
Selecting the Ideal Frosting: Buttercream, Cream Cheese, and More
The type of frosting you choose is fundamental to achieving successful texture on your layer cake. Buttercream, in its various forms (American, Swiss Meringue, Italian Meringue), is a popular choice because it holds its shape well and is relatively easy to work with for texturing. American buttercream, made primarily from butter and powdered sugar, is quite stiff and excellent for sharp peaks, deep swirls, or textured stripes. Swiss or Italian meringue buttercreams are lighter and silkier, lending themselves well to softer textures like gentle waves or smooth finishes that can then be stenciled upon.
Cream cheese frosting is another fantastic option, offering a tangy flavor that pairs wonderfully with many cakes. Its consistency is often slightly softer than American buttercream but can be adjusted by adding more powdered sugar for stiffness. This makes it suitable for rustic textures achieved with a spoon or offset spatula.
While other frostings like ganache can be used, they behave differently; a poured ganache provides a smooth, glass-like texture, while a whipped ganache can be textured similarly to buttercream, though often softer. The key is ensuring your chosen frosting has a consistency that is firm enough to hold the shape you create but pliable enough to work with easily.
Essential Tools for Texturing Success
Having the right tools, or knowing how to use common kitchen items creatively, is crucial for applying layer cake frosting texture tips effectively. The most basic tools include offset spatulas (small and large), which are indispensable for spreading frosting and creating simple swirls or peaks. A bench scraper or cake smoother is essential for achieving straight sides, which provides a clean canvas for many textures, and can also be used to create striped textures when held at an angle.
For more defined patterns, piping bags fitted with various tips (like star, round, or petal tips) offer incredible versatility for creating textures like rosettes, shells, lines, or ruffles directly on the cake surface. Palette knives, with their flexible blades, are perfect for creating painterly, abstract textures. Even everyday items like the back of a spoon, a fork, or a pastry brush can be used to create unique, simple textures. Investing in a rotating cake stand is also highly recommended, as it allows for smooth, continuous movement while applying texture to the sides of your layer cake.
Simple Textured Frosting Techniques
Palette Knife Art: Swirls, Peaks, and Abstract Designs
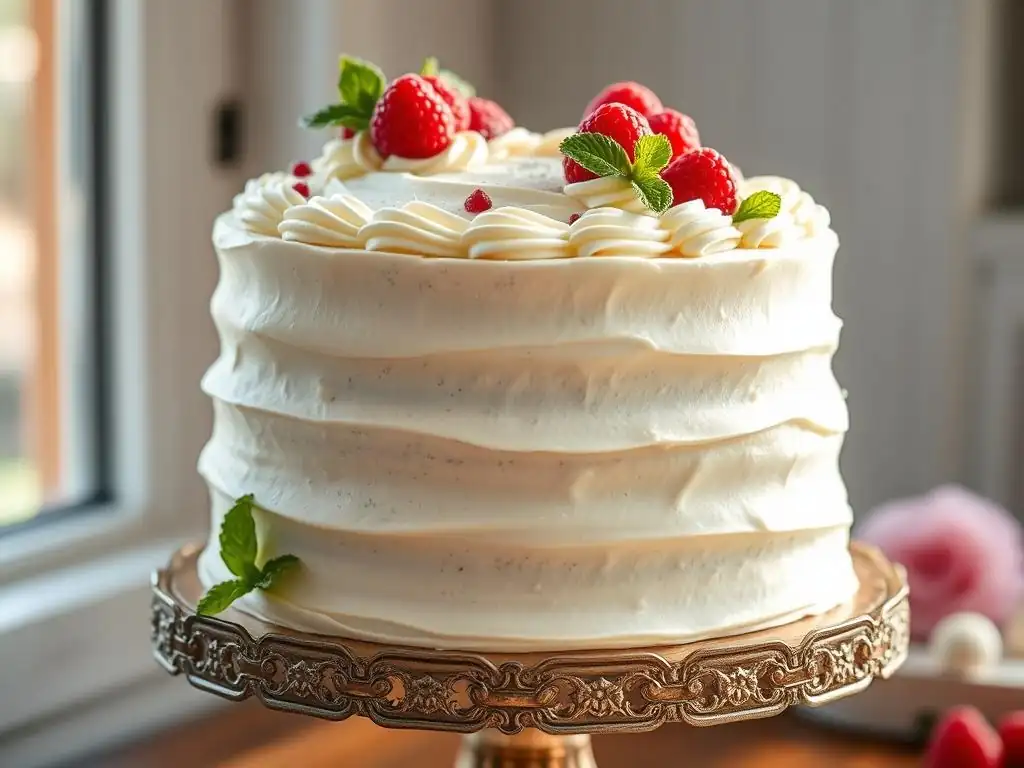
Using a palette knife or offset spatula is one of the easiest and most forgiving ways to add texture to your layer cake frosting. Once the cake is covered with a base layer of frosting, you can use the tip or edge of the knife to create simple swirls by pressing and lifting the tool as you move around or across the cake. Varying the pressure will create swirls of different depths and sizes, adding dynamic movement to the surface.
Alternatively, you can use the edge of the knife to create vertical or horizontal strokes for a more structured look, or simply dab and lift the knife all over the cake surface to create random peaks and valleys. This abstract approach is incredibly versatile and can range from subtle texture to dramatic, impasto-like effects. It's a fantastic starting point for beginners looking to practice their layer cake frosting texture tips without needing specialized skills or tools.
The Rustic Charm of Spoon Texturing
For a lovely, rustic texture, look no further than your kitchen spoon. The back of a spoon can be used to create simple, repeating patterns that add a handcrafted feel to your layer cake. A common technique involves gently pressing the back of the spoon into the frosting and then dragging it slightly in a consistent direction, creating soft scallops or waves.
You can vary the size of the spoon and the direction of the drag (up, down, or sideways) to create different effects. This technique works beautifully on the sides or top of the cake and pairs well with slightly softer frostings like cream cheese or a less-stiff buttercream. It's a straightforward method that provides delightful texture with minimal effort, making it one of the most accessible layer cake frosting texture tips.
Piping Bag Versatility: From Ruffles to Intricate Patterns
Piping bags fitted with various tips offer a structured way to add texture directly to the surface of your layer cake. Using a star tip, you can pipe small stars or rosettes covering the entire cake for a classic textured look. A round tip can be used to pipe lines or dots, while a petal tip is perfect for creating beautiful, flowing ruffles around the sides of the cake.
Mastering piping techniques requires a little practice to maintain consistent pressure and pattern, but the results can be stunning. You can create everything from simple shells and borders to complex basketweave patterns using specific tips. Piping is a fundamental skill for many layer cake frosting texture tips, allowing for precise and repeatable designs.
Advanced Frosting Texture Techniques
Stencil Magic: Creating Repeating Patterns
Cake stencils allow you to apply intricate, repeating patterns to your frosted layer cake, adding a layer of sophisticated texture. This technique typically works best on a cake that has been frosted smoothly and chilled until firm. You hold the stencil flush against the cake surface and then apply a thin layer of frosting (often royal icing or a stiff buttercream) over the stencil using an offset spatula or scraper.
Carefully peeling away the stencil reveals the raised pattern underneath. Stencils come in countless designs, from geometric shapes to floral motifs, offering endless possibilities for unique layer cake frosting texture tips. Patience and a steady hand are key to preventing smudging and achieving clean lines with this method.
Sprinkle Integration: Enhancing Texture and Visual Appeal
Sprinkles aren't just for topping cakes; they can be integrated into the frosting itself to create interesting textures. One simple method is to gently press sprinkles onto the sides of a freshly frosted cake, covering the entire surface or just a band. This adds both visual appeal and a tactile texture.
For a more subtle effect, very fine sprinkles like nonpareils or sanding sugar can sometimes be lightly mixed into the frosting before application, creating a slightly gritty texture and speckle effect. Different types of sprinkles offer varied textures – jimmies provide a softer feel, while coarse sugar adds sparkle and a more pronounced crunch. Incorporating sprinkles is a fun way to add both texture and color using accessible layer cake frosting texture tips.
The Fault Line Effect: A Modern Textured Design
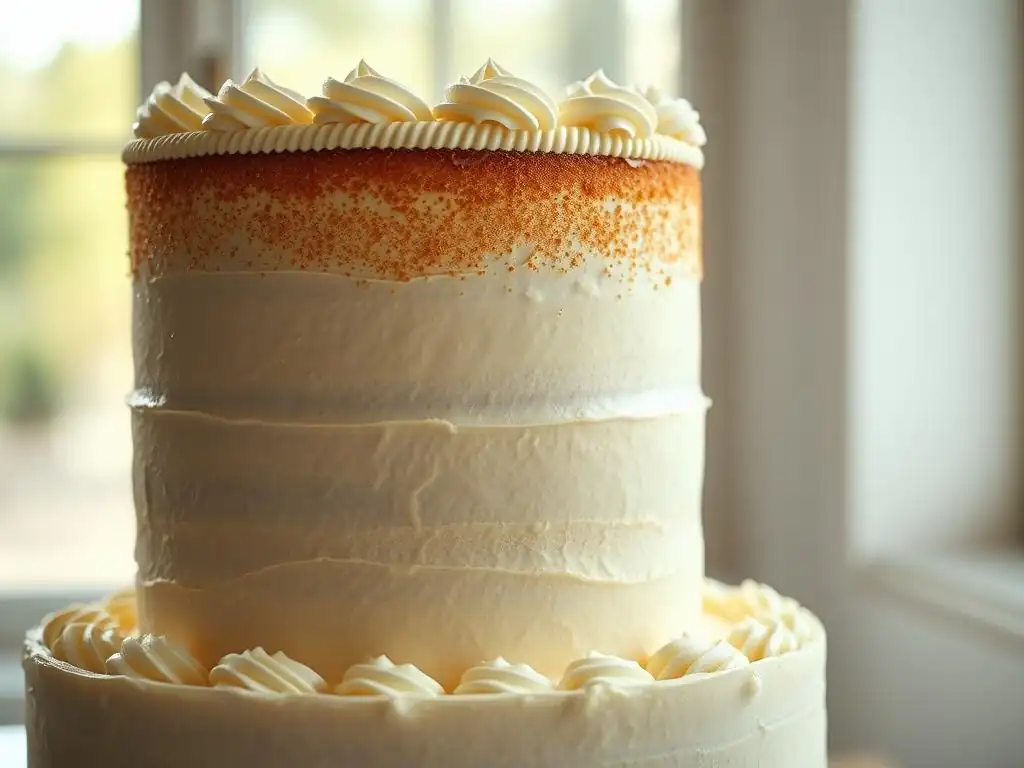
The fault line effect is a popular modern technique that creates the illusion of a crack or "fault line" running horizontally around the cake, revealing a different texture or color underneath. To achieve this, you first apply a layer of frosting to the cake. Then, you create a gap or indentation around the middle of the cake's circumference.
This gap is filled with a contrasting element – often sprinkles, edible glitter, crushed cookies, or a different colored frosting. Finally, you apply another layer of frosting above and below the filled gap, leaving the middle section exposed. The top and bottom sections are often textured (e.g., with swirls or waves) to contrast with the revealed texture in the fault line, creating a striking visual effect and highlighting these specific layer cake frosting texture tips.
Specific Texture Tutorials: Step-by-Step
Achieving a Smooth, Glass-Like Finish
While this guide focuses on texture, understanding how to achieve a smooth base is crucial, as many textured techniques are applied over a smooth crumb coat or final layer. To get a smooth finish, apply a generous amount of frosting to the cake, ensuring full coverage. Use an offset spatula to roughly smooth the top and sides.
Then, using a bench scraper held against the side of the cake at about a 45-degree angle, rotate the cake stand while applying gentle, even pressure to scrape away excess frosting and create a smooth surface. For an extra smooth finish, you can dip your bench scraper in hot water, dry it quickly, and use the warm tool to melt and smooth the surface slightly. Repeat passes, cleaning the scraper frequently, until you achieve the desired smoothness.
Embracing Rough, Organic Textures
Creating rough, organic textures is perhaps the most forgiving of all layer cake frosting texture tips. Start by applying a generous layer of frosting to your cake. Using a small offset spatula, the back of a spoon, or even just the tip of a larger offset spatula, begin pressing and pulling the frosting in random or semi-random motions.
The goal is not uniformity but natural variation. You can create deep ridges, soft peaks, or jagged edges simply by changing the angle and pressure of your tool. This technique is quick, hides imperfections beautifully, and results in a cake that looks artfully unfinished, perfect for a relaxed or bohemian style.
Creating Dynamic Wavy Frosting
Wavy frosting adds a sense of movement and flow to your layer cake. One way to achieve this is by using a cake comb designed with a wavy pattern. After applying a smooth or semi-smooth layer of frosting, hold the wavy comb against the side of the cake and rotate the cake stand, keeping steady pressure.
Alternatively, you can create waves using an offset spatula. Apply frosting to the cake sides. Then, starting at the bottom, use the edge of the spatula to create horizontal waves by moving the spatula up and down slightly as you rotate the cake stand. For vertical waves, apply frosting thickly and use a bench scraper or large offset spatula in an up-and-down motion while rotating the cake. Consistency in your movement is key to achieving even waves with these layer cake frosting texture tips.
Troubleshooting Common Frosting Issues
Eliminating Air Bubbles for a Flawless Finish
Air bubbles can be frustrating, especially when aiming for smooth or detailed textures. They often get incorporated during the mixing process, particularly when beating butter and sugar or adding color. To minimize bubbles, try mixing your frosting on a lower speed for the final few minutes. After mixing, you can also let the frosting sit for 10-15 minutes, then stir it gently by hand with a spatula to help push out trapped air pockets.
When applying frosting, if you spot a large bubble, you can often pop it with the tip of a knife or a pin and then gently smooth over the area. If using a piping bag, gently squeeze the bag before piping to push any air pockets to the top, where they can be expelled before they ruin your design. Addressing bubbles ensures your layer cake frosting texture tips look their best.
Correcting Uneven Texture for a Professional Look
Unevenness is a common challenge when applying texture, especially when starting out. For many freehand textures like swirls or spoon work, if an area looks uneven, you can often simply smooth that section gently with your tool and reapply the texture. Don't be afraid to scrape off a section if it's not working and add a little fresh frosting before trying again.
For more structured textures like stripes or waves created with a comb, unevenness usually means inconsistent pressure or speed while rotating the cake. Practice on a dummy cake or even the inside of your frosting tub first. Ensure your base layer of frosting is even before applying the texture. Sometimes, applying a slightly thicker layer of frosting initially gives you more material to work with when creating texture.
Preventing Cracking in Textured Frosting
Cracking in frosting, particularly butter-based ones, can occur if the frosting is too dry or experiences drastic temperature changes. To prevent this, ensure your frosting has the right consistency – pliable but not too soft. If your frosting seems dry or stiff, you can often beat in a very small amount of liquid (like milk, cream, or simple syrup), a teaspoon at a time, until it reaches the desired consistency.
Also, avoid moving a very cold frosted cake directly into a warm environment, as the sudden temperature change can cause the frosting to contract and crack. Allow chilled cakes to come to temperature gradually if possible. Ensuring the cake itself is fully cooled before frosting also helps prevent heat from the cake causing issues with the frosting's structure and leading to cracks.
Inspiration Gallery: Textured Cake Designs
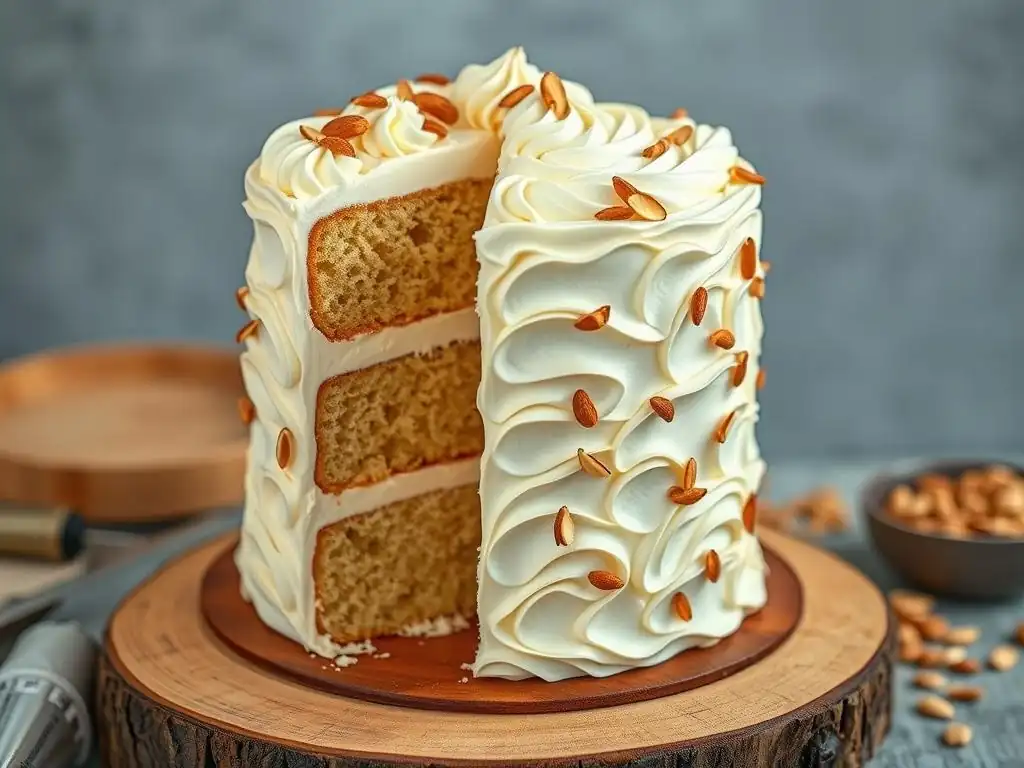
[Image Gallery: Diverse Textured Frosting Examples]
While we can't display them here, an image gallery showcasing diverse textured frosting examples would illustrate the incredible range of possibilities. Imagine seeing cakes adorned with deep, dramatic palette knife swirls that look like painted strokes, contrasting with others featuring delicate, repeating patterns created with stencils. Picture the rustic appeal of spoon-textured sides next to the modern elegance of a cake with sharp, striped edges achieved with a cake comb.
Such a gallery would feature everything from simple all-over textures to intricate designs combining multiple layer cake frosting texture tips, like a smooth top with textured sides, or a fault line revealing a burst of color and sparkle. Looking at these examples can provide immense inspiration for your own cake projects and help you visualize the techniques discussed.
[Link to Complementary Cake Decorating Tutorials]
To fully master textured frosting, it's helpful to have a strong foundation in basic cake decorating skills. Complementary tutorials that cover topics like making different types of buttercream from scratch, achieving a perfect crumb coat, or stacking and filling layer cakes smoothly are invaluable resources. These foundational skills ensure your cake is stable and provides the best base for applying any texture.
Seeking out guides on achieving sharp edges before applying textured stripes, or tutorials on using piping bags effectively, will enhance your ability to execute more complex layer cake frosting texture tips. Look for these resources within the BakeWithEase website to build your skills comprehensively.
Maintaining Your Textured Masterpiece
Preserving Frosting Freshness
Once your layer cake is beautifully frosted with stunning texture, preserving its freshness and appearance is key. Butter-based frostings can dry out and harden when exposed to air, potentially dulling the texture. Store your frosted cake loosely covered at room temperature for a day or two, or in the refrigerator if it contains perishable fillings or needs to be kept longer.
An airtight cake carrier is ideal for refrigerator storage, as it protects the frosting from absorbing odors and prevents the surface from drying out while keeping the texture intact. Cream cheese frosting should always be refrigerated. Properly stored, most frosted layer cakes will remain delicious for 2-3 days.
Safely Transporting Textured Cakes
Transporting a cake with delicate textured frosting requires care to ensure your hard work arrives intact. Always use a sturdy cake box or a specialized cake carrier that is large enough to accommodate the cake's height and texture without smudging. Place the cake on a non-slip mat or secure its base within the box.
Keep the cake level at all times, especially when carrying it. For longer distances or in warm weather, transport the cake in a vehicle with air conditioning, ideally on a flat surface like the floorboard or trunk, rather than on a seat where it might tip. A chilled cake is generally more stable for transport, helping to preserve those carefully applied layer cake frosting texture tips.
Conclusion: Unleash Your Artistic Flair with Textured Frosting
Adding texture to your layer cake frosting is a powerful way to elevate your baking from simple dessert creation to edible artistry. We've explored a range of layer cake frosting texture tips, from the easy elegance of palette knife swirls and spoon textures to the more advanced techniques involving stencils and fault lines. Each method offers unique possibilities for transforming the surface of your cake.
Don't be afraid to experiment with different frostings, tools, and techniques. Practice is key, and the beauty of many textured finishes is their forgiving nature. By embracing these layer cake frosting texture tips, you can unleash your creativity and add a professional, artistic touch to every layer cake you bake, making each one a unique masterpiece.
Frequently Asked Questions
How can I achieve a smooth, even frosting base before adding texture?
A smooth base is crucial. Use a thin crumb coat first, chill it, then apply a final, thicker layer of frosting for a clean canvas.
What are some simple tools I can use to create texture in my layer cake frosting?
Common household items work great! Try a spatula, fork, or even the back of a spoon to create swirls, lines, or peaks.
Can I add ingredients to my frosting to change its texture?
Yes! Adding ingredients like chopped nuts, sprinkles, or cookie crumbs can add both texture and flavor to your frosting.
What's the best way to prevent my frosting texture from melting or drooping?
Ensure your frosting is the right consistency – not too thin. Chilling the cake between frosting layers also helps the frosting set properly.
Are there specific frosting types that are better for creating textured designs?
Yes, buttercream and whipped cream frostings are generally easier to work with for creating textures due to their pliability and ability to hold shape.
Final Reflection: Unlocking the Secrets of Textured Frosting
The pursuit of the perfect layer cake frosting goes far beyond simple sweetness; it's about creating a sensory experience. A beautifully textured frosting elevates a classic dessert into a masterpiece, transforming a simple treat into a conversation starter. This isn't just about aesthetics; the right texture enhances the overall taste and enjoyment, proving that sometimes, the details truly matter.
The impact of texture on our perception of food is undeniable. We crave the satisfying crackle of a perfectly crisp meringue, the smooth melt of a ganache, and the delightful peaks and valleys of a skillfully textured buttercream. The pleasure of eating is doubled when one has someone to share it with.
This sentiment, while about companionship, also speaks to the shared joy of experiencing a beautifully crafted dessert, a joy amplified by the tactile and visual appeal of its frosting. The techniques explored in this article, from simple swirls to intricate piping, are not merely recipes; they are tools for creating memorable moments and expressing culinary creativity.
Now, it's your turn. Consider the next layer cake you bake. Don't just frost it; sculpt it. Experiment with the techniques discussed, find your own unique style, and let your creativity flow. Embrace the imperfections, learn from each attempt, and most importantly, enjoy the process of transforming a simple cake into a work of edible art. The journey to mastering textured frosting is a rewarding one, filled with delicious discoveries and the satisfaction of creating something truly special.
Thanks for taking the time to explore new ways to elevate your layer cakes! You've just learned some amazing techniques to add texture and visual appeal to your frosting. Ready to put your newfound skills to the test?
- Master a new frosting texture today: Choose your favorite technique from the article and try it out on your next cake. Experiment with different tools and ingredients to find your signature style.
- Share your textured frosting creations: Post a picture of your masterpiece on social media and tag us! Let's inspire each other with delicious creations.
- Challenge yourself with a new flavor combination: Use this opportunity to explore unusual flavor pairings that complement your chosen frosting texture.
What incredible textured frosting masterpiece will you create next?