
Mastering the Palette Knife for Modern Cake Decoration

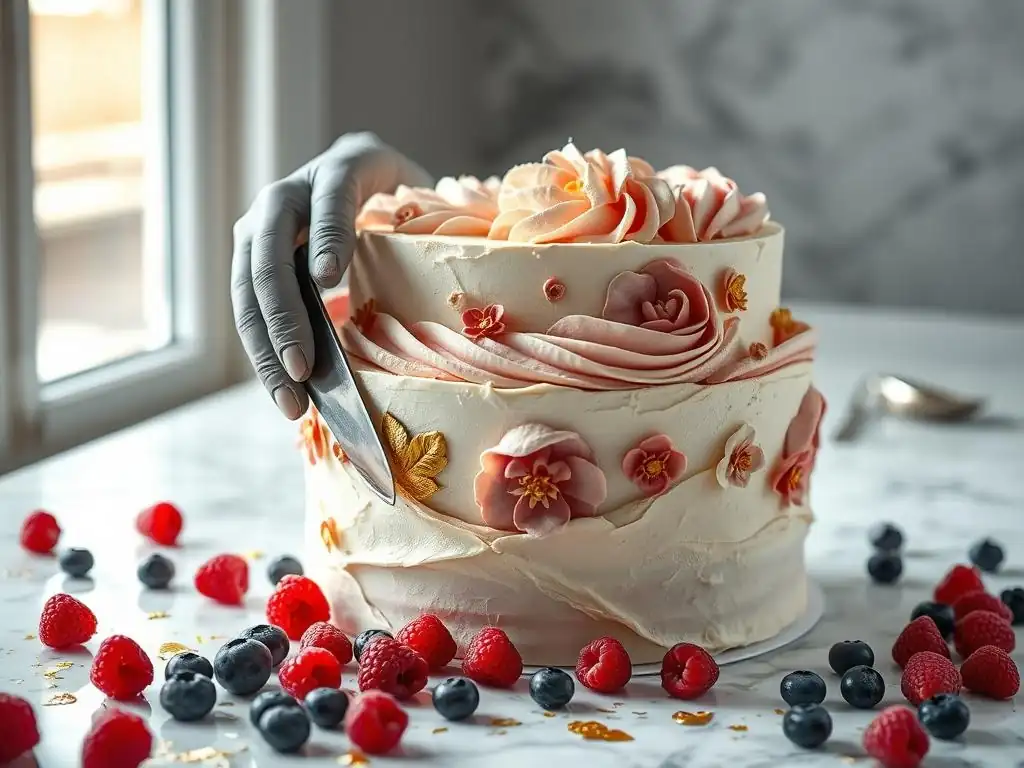
Welcome to BakeWithEase, your partner in creating delicious baked masterpieces! Ever wondered how professional bakers achieve those effortlessly chic, textured cakes? This article dives into the fascinating world of palette knife cake decorating techniques, revealing secrets that will transform your cakes from simple to stunning. Get ready to unlock your inner artist and discover how to create modern, eye-catching designs with just a palette knife and a little creativity. Let's begin!
- Mastering Palette Knife Cake Decorating Techniques for Modern Cake Design
- Introduction to Palette Knife Cake Art
- Preparing Your Cake for Palette Knife Decoration
- Basic Palette Knife Techniques for Cake Decorating
- Advanced Palette Knife Cake Decorating Techniques
- Exploring Different Palette Knife Styles and Effects
- Troubleshooting Common Palette Knife Cake Decorating Issues
- Palette Knife Cake Decorating Ideas and Inspiration
- Cleaning and Maintaining Your Palette Knives
- Conclusion: Elevating Your Cake Decorating Skills with Palette Knife Techniques
-
Frequently Asked Questions
- How does a palette knife differ from other cake decorating tools?
- What types of cakes are best suited for palette knife decoration?
- What are some basic palette knife techniques for beginners?
- How do I clean a palette knife effectively between applications or colors?
- Can I use a palette knife to create sharp edges on my cake?
- Final Reflection: The Enduring Allure of the Palette Knife
- Unleash Your Inner Cake Artist!
Mastering Palette Knife Cake Decorating Techniques for Modern Cake Design
Introduction to Palette Knife Cake Art
What is Palette Knife Cake Decorating?
Palette knife cake decorating is a contemporary approach to applying and manipulating frosting on a cake surface using various types of palette knives. Unlike traditional piping techniques that focus on structured shapes and patterns created by forcing frosting through a tip, palette knife art treats the cake as a canvas, allowing for painterly strokes, textures, and abstract designs. This method embraces a more organic, often less perfect, aesthetic that is highly popular in modern cake design, offering a unique blend of simplicity and artistic expression.
The essence of palette knife cake decorating techniques lies in the direct interaction between the tool, the frosting, and the cake surface. It's about the movement of the hand, the angle of the blade, and the consistency of the medium (buttercream or ganache) to create visual interest. From achieving perfectly smooth finishes to building dramatic textures or blending colors seamlessly, using a palette knife opens up a vast array of possibilities for decorating cakes that feel effortlessly chic and artisanal.
Advantages of Palette Knife Techniques for Cake Decoration
One significant advantage of using palette knife techniques for cake decoration is the speed and relative ease with which stunning, professional-looking results can be achieved, even by beginners. Compared to mastering intricate piping skills that require steady hands and practice with various tips, palette knife work often feels more intuitive, allowing decorators to embrace imperfections as part of the design's charm. This makes palette knife cake decorating techniques particularly accessible for home bakers looking to elevate their cake presentations without extensive training.
Furthermore, palette knife work offers unparalleled versatility in texture and finish. You can create everything from a perfectly smooth, sharp-edged cake to a cake with dramatic, impasto-like peaks or subtle, painterly swirls. The ability to blend colors directly on the cake surface or the knife also allows for unique gradients and abstract color blocking not easily achievable with piping. These characteristics make palette knife techniques ideal for creating modern, artistic cakes that stand out.
Essential Tools for Palette Knife Cake Decorating
Mastering palette knife cake decorating techniques begins with having the right tools. The most fundamental tools are palette knives themselves, which come in various shapes and sizes. Straight palette knives, with a flat blade and often a rounded tip, are excellent for smoothing large surfaces and applying frosting evenly. Angled or offset palette knives, featuring a blade that is bent away from the handle, are crucial for working on the top and sides of the cake without your knuckles dragging in the frosting, providing better control and precision.
Beyond the basic straight and offset knives, a variety of smaller, more flexible palette knives, often with pointed or uniquely shaped tips, are invaluable for creating specific textures, detailed strokes, and fine lines. Consider investing in a set that includes several sizes and shapes. Additionally, a sturdy turntable is essential for rotating the cake smoothly while applying frosting or creating textures. A cake scraper (or bench scraper) is also vital for achieving smooth, straight sides before applying decorative palette knife work.
Preparing Your Cake for Palette Knife Decoration
Achieving the Ideal Cake Base
The foundation for successful palette knife cake decorating techniques is a well-prepared cake. This starts with baking level cake layers. If your layers have domes, leveling them with a serrated knife or cake leveler is crucial for a stable, even structure. Once leveled and cooled completely, the cake layers should be stacked with a filling. Ensure the filling is stable enough to support the weight of the upper layers; buttercreams, ganaches, or firm jam fillings work well.
Proper chilling is key to a stable cake base ready for frosting and palette knife work. After stacking and filling, refrigerate the cake for at least 30-60 minutes. This firms up the filling and cake layers, making them easier to handle and less prone to shifting while you apply the frosting. A stable, chilled base allows you to apply pressure with the palette knife without distorting the cake's shape, which is essential for achieving clean lines and smooth surfaces.
Frosting Consistency for Palette Knife Techniques
The consistency of your frosting is paramount when using palette knife cake decorating techniques. For smoothing and creating clean lines, a medium consistency buttercream is ideal. It should be soft enough to spread easily without tearing the cake but firm enough to hold its shape and not slump. Think of a consistency similar to soft-serve ice cream – smooth, pliable, but not runny. If your buttercream is too stiff, it will drag and pull the cake crumbs; if too soft, it will be difficult to smooth and won't hold textures.
For creating dramatic textures like impasto or peaks, a slightly firmer buttercream can be beneficial, but still needs to be workable. Adding a tiny bit more powdered sugar or chilling it briefly can achieve this. Conversely, for very fluid, painterly effects or thin washes of color, you might need a slightly softer consistency, perhaps achieved by adding a touch of milk or cream. Always test a small amount of frosting on the side of the bowl to ensure it behaves as desired before applying it to the cake for palette knife decoration.
The Importance of a Crumb Coat
A crumb coat is a thin layer of frosting applied to the naked cake before the final decorative layer. This step is absolutely essential for clean and professional-looking palette knife cake decorating techniques, especially when aiming for smooth finishes or vibrant colors. The crumb coat traps any loose crumbs from the cake layers, preventing them from mixing into your final frosting layer and creating unsightly bumps or streaks.
After applying a thin, even layer of frosting covering the entire cake, chill the cake thoroughly for at least 15-30 minutes until the crumb coat is firm to the touch. This creates a stable, sealed surface. Once the crumb coat is firm, you have a clean "canvas" ready for applying the final layer of frosting and executing your desired palette knife techniques without the frustration of crumbs ruining your work. This simple step saves time and ensures a much smoother, cleaner result.
Basic Palette Knife Techniques for Cake Decorating
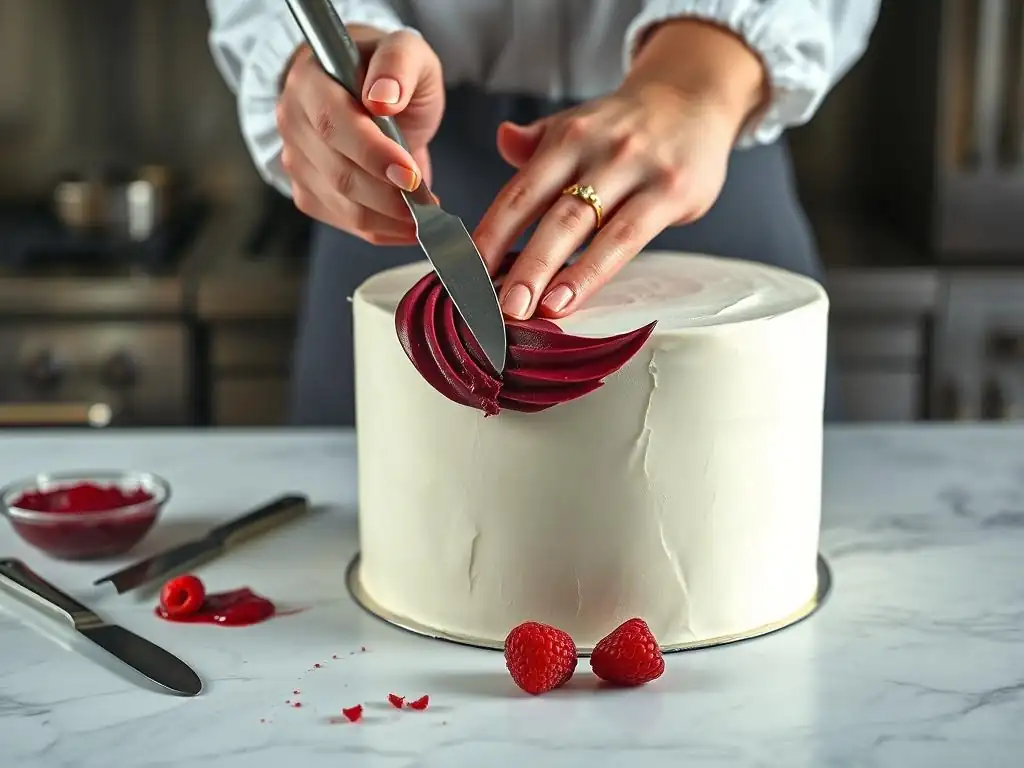
Achieving a Smooth Finish
Achieving a smooth finish with a palette knife is a fundamental skill in palette knife cake decorating techniques. Start by applying a generous amount of frosting to the top and sides of the crumb-coated cake using an offset palette knife. Don't worry about smoothness at this stage, just ensure there is enough frosting to cover the cake completely. For the sides, apply frosting by pressing it against the cake and rotating the turntable.
Once the cake is covered, use a straight or offset palette knife (whichever you find more comfortable) held at a slight angle (around 45 degrees) against the side of the cake. With gentle, consistent pressure, rotate the turntable smoothly while holding the knife still. Scrape off excess frosting from the knife into your bowl as needed.
For the top, hold the knife flat or at a slight angle and gently pull excess frosting from the edge towards the center, cleaning the knife after each pass. Repeat these steps, gradually reducing pressure, until the surface is smooth. Chilling the cake slightly can help firm up the frosting between passes for easier smoothing.
Creating Texture with Palette Knife Techniques
Creating texture is one of the most expressive aspects of palette knife cake decorating techniques. Simple textures can be achieved by manipulating the final layer of frosting applied to the cake. For a rustic, horizontal wave effect, apply your final frosting layer and then use a small offset palette knife or the tip of a larger one to gently drag horizontally along the side of the cake while slowly rotating the turntable. Varying the pressure and angle will create different wave patterns.
Another popular texture is the "spackled" or "concrete" look. Apply the frosting unevenly, then use a palette knife or even a bench scraper held at a steep angle to scrape away sections, revealing the crumb coat or cake beneath in places, or creating rough, imperfect patches. For sharp peaks, apply a thicker layer of frosting and then gently lift the palette knife straight up from the surface. Experimentation is key here; different knife shapes and motions will yield unique textural results, allowing you to personalize your palette knife cake decorating techniques.
Color Blending Techniques
Color blending with palette knife techniques allows for beautiful, painterly effects directly on the cake. One simple method is to apply different colors of frosting side-by-side on the cake surface. Then, using a clean palette knife, gently drag the knife through the colors, either horizontally, vertically, or in swirling motions, to merge them and create gradients or marbled effects. For example, apply stripes of blue and white frosting and then drag a knife through them for a watercolor sky effect.
Alternatively, you can load multiple colors onto your palette knife before applying it to the cake. Scoop small amounts of different colored frostings onto the blade side-by-side. Then, apply the frosting to the cake in strokes. As the colors are applied, they will naturally blend and streak, creating a dynamic, multi-colored effect. This technique is fantastic for abstract designs or creating floral petals with natural color variations. Mastering color blending adds another dimension to your palette knife cake decorating techniques.
Advanced Palette Knife Cake Decorating Techniques
Abstract Designs
Abstract designs are a hallmark of modern palette knife cake decorating techniques, allowing for immense creativity and freedom. These designs often involve applying frosting in expressive strokes, swirls, and dabs, focusing on texture and color interaction rather than precise shapes. To create an abstract design, apply your base layer of frosting (which can be smooth or textured), then use smaller palette knives to apply contrasting or complementary colors in random or deliberate patterns.
Experiment with different knife sizes and angles. Use the edge of a small knife to create thin lines, the flat of the blade for broader strokes, and the tip for small dabs of color. You can layer colors, scrape through them (sgraffito), or build up thick sections (impasto). Abstract palette knife cake decorating techniques are forgiving; there's no "wrong" way, allowing you to play with composition, color balance, and texture to create a unique edible piece of art. Consider using a mood board for color inspiration.
Floral Designs
Creating floral designs with palette knife techniques is a popular way to add delicate beauty to cakes. Unlike piped flowers, palette knife flowers have a more organic, painted appearance. To create a simple rose, apply a small mound of frosting as the base. Then, using a small, flexible palette knife, apply small dabs or strokes of frosting around the base, shaping them into petals by pressing gently and pulling the knife away. Layer these petals, gradually increasing their size, to build the flower.
Different flowers can be created by varying the petal shape and arrangement. For instance, sunflowers can be made with longer, thinner strokes radiating from a central point, while hydrangeas can be represented by clusters of small, textured dabs. Use different shades of frosting on your knife for multi-tonal petals. Practice on a flat surface first to get a feel for the pressure and motion required for various petal types before attempting them on the cake. Mastering these palette knife cake decorating techniques can result in stunning, lifelike floral arrangements.
Geometric Patterns
While palette knife techniques often lend themselves to organic and abstract styles, they can also be used to create striking geometric patterns. This usually involves applying a base layer of frosting, allowing it to firm up slightly, and then using a straight palette knife or bench scraper to create clean lines and shapes by either applying frosting within masked areas or carefully scraping away frosting. For example, you can create vertical or horizontal stripes by applying frosting thickly and then smoothing it with a straight edge.
More complex geometric patterns, like chevrons or diamond shapes, can be achieved using stencils or by lightly marking the pattern onto a firm crumb coat before filling in sections with frosting using a palette knife. Alternatively, you can apply frosting in a specific pattern (e.g., overlapping squares or triangles) and then smooth or texture each segment individually. Precision is key when working with geometric palette knife cake decorating techniques, often requiring patience and multiple passes with a clean knife.
Exploring Different Palette Knife Styles and Effects
Impasto Effects
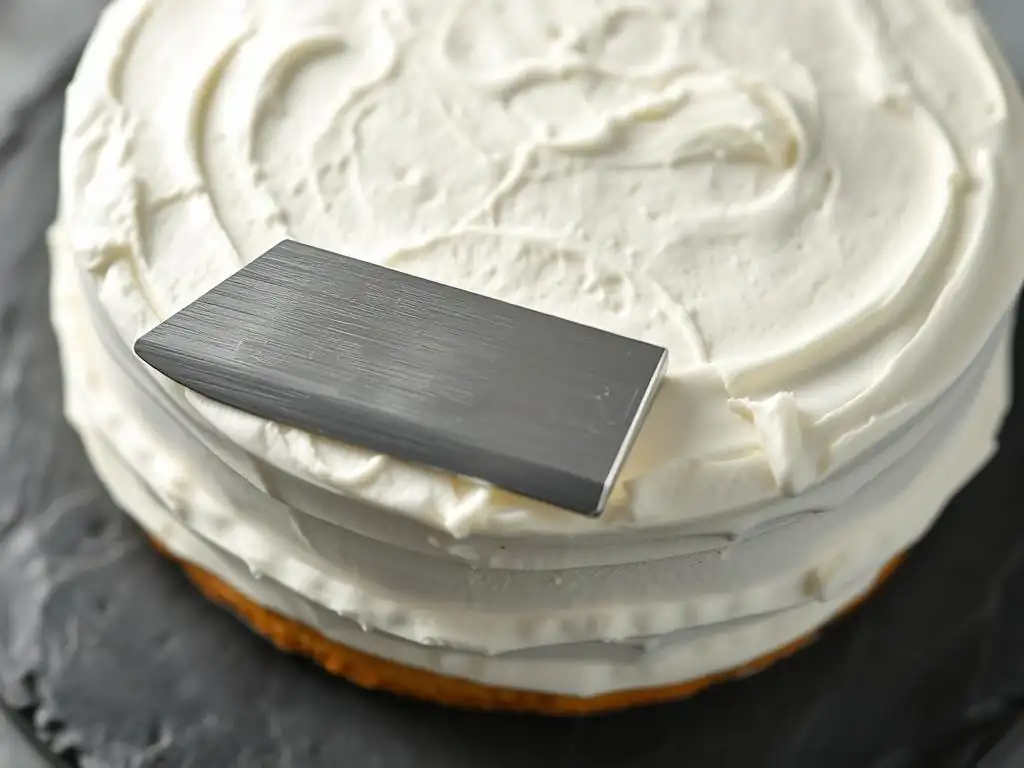
Impasto is a painting technique where paint is applied thickly, so brushstrokes are visible, adding texture to the surface. In palette knife cake decorating techniques, impasto refers to applying buttercream thickly, allowing the distinct marks of the palette knife to remain prominent. This creates a beautiful, tactile texture on the cake surface, adding depth and dimension. To achieve impasto, use a medium-firm buttercream.
Apply the frosting generously to the cake using a palette knife. Instead of smoothing it out completely, use the knife to create deliberate strokes, swirls, or peaks. You can dab the frosting on, drag it across the surface, or lift the knife straight up to create sharp points. Impasto is often used in abstract designs or to create highly textured flowers or backgrounds. The thicker the application, the more pronounced the texture will be. This technique truly showcases the artistic potential of palette knife cake decorating.
Sgraffito Technique
Sgraffito, borrowed from plasterwork and painting, involves scratching through a layer of material to reveal another color or layer beneath. In palette knife cake decorating techniques, this means applying a base layer of frosting (often a contrasting color or the crumb coat) and letting it firm up. Then, apply a second, thin layer of frosting on top. While the second layer is still soft, use the tip or edge of a small palette knife to scratch designs, lines, or patterns through the top layer, exposing the color beneath.
This technique is excellent for creating intricate patterns, outlines, or detailed drawings directly onto the cake surface. For example, apply a layer of dark blue frosting over a white crumb coat, then use a palette knife to scratch star patterns, revealing the white beneath. The contrast between the layers makes the design pop. Sgraffito adds a unique, hand-drawn quality to your palette knife cake decorating techniques.
Palette Knife Cake Sculpting
Palette knife cake sculpting goes beyond applying frosting to create texture; it involves using the palette knife to shape and form the frosting into three-dimensional elements directly on the cake. This can range from creating defined ruffles and folds to sculpting abstract shapes or even elements of figures. A medium-firm buttercream is essential for sculpting, as it needs to hold its shape once manipulated.
To sculpt ruffles, apply a strip of frosting and then use the edge of a small, flexible palette knife to gently push and pull the frosting, creating waves or folds. For more defined shapes, apply a thicker amount of frosting and use the knife to carve, shape, and smooth it into the desired form. This advanced application of palette knife cake decorating techniques requires practice and understanding how the frosting behaves under pressure, but it allows for truly unique and sculptural cake designs.
Troubleshooting Common Palette Knife Cake Decorating Issues
Avoiding Air Bubbles
Air bubbles are a common frustration when using palette knife cake decorating techniques for smoothing. These tiny pockets of air can appear on the surface as you smooth, disrupting the finish. Air bubbles are often caused by incorporating too much air into the buttercream during mixing or by trapping air as you apply the frosting. To minimize bubbles during mixing, mix your buttercream on a low speed after adding powdered sugar to help push out air.
When applying frosting to the cake, try to work methodically, pressing the frosting against the cake to avoid trapping air pockets. If you spot small bubbles while smoothing, gently pop them with the tip of a palette knife or a pin, then smooth over the area. For larger areas with persistent bubbles, scrape off the frosting, remix it briefly by hand with a spatula to release trapped air, and reapply. Chilling the cake slightly before the final smooth can also help, as the firmer frosting is less likely to trap air.
Correcting Uneven Frosting
Uneven frosting is another challenge in palette knife cake decorating techniques, resulting in some areas being thicker or thinner than others, or the cake appearing lopsided. This often happens if the initial frosting layer isn't applied evenly or if inconsistent pressure is used during smoothing. To correct unevenness, first identify the areas that are too thin or have dips.
Apply a little more frosting to the thin areas using a small palette knife, building up the layer. Then, go back to your smoothing technique, using a straight edge or large palette knife held at a consistent angle and pressure, rotating the turntable to remove the excess from the thicker areas and blend everything smoothly. It might take several passes, adding a little frosting here and scraping a little there, to achieve an even layer. Patience and a systematic approach are key to correcting uneven frosting and perfecting your palette knife cake decorating techniques.
Preventing Sticking
Frosting sticking to your palette knife while smoothing or texturing can pull the frosting off the cake and ruin your clean finish or texture. Sticking is often caused by the frosting being too cold, the knife not being clean, or the knife being held at the wrong angle. Ensure your buttercream is at the right temperature – pliable and smooth, not hard from being too cold. If it's too cold, let it warm up slightly at room temperature or gently warm the bowl exterior.
Keep your palette knife clean by regularly wiping it on the side of your frosting bowl or on a clean paper towel between passes, especially when smoothing. Residue on the knife can cause drag. When smoothing, hold the knife at a slight angle (around 45 degrees); holding it too flat can increase surface tension and cause sticking.
For texturing, sometimes a very slight misting of the knife with non-stick spray (ensure it's food-grade and doesn't affect taste) can help, though usually proper frosting consistency and a clean knife are sufficient. These simple tips will help you prevent sticking and execute your palette knife cake decorating techniques smoothly.
Palette Knife Cake Decorating Ideas and Inspiration
Modern Cake Designs
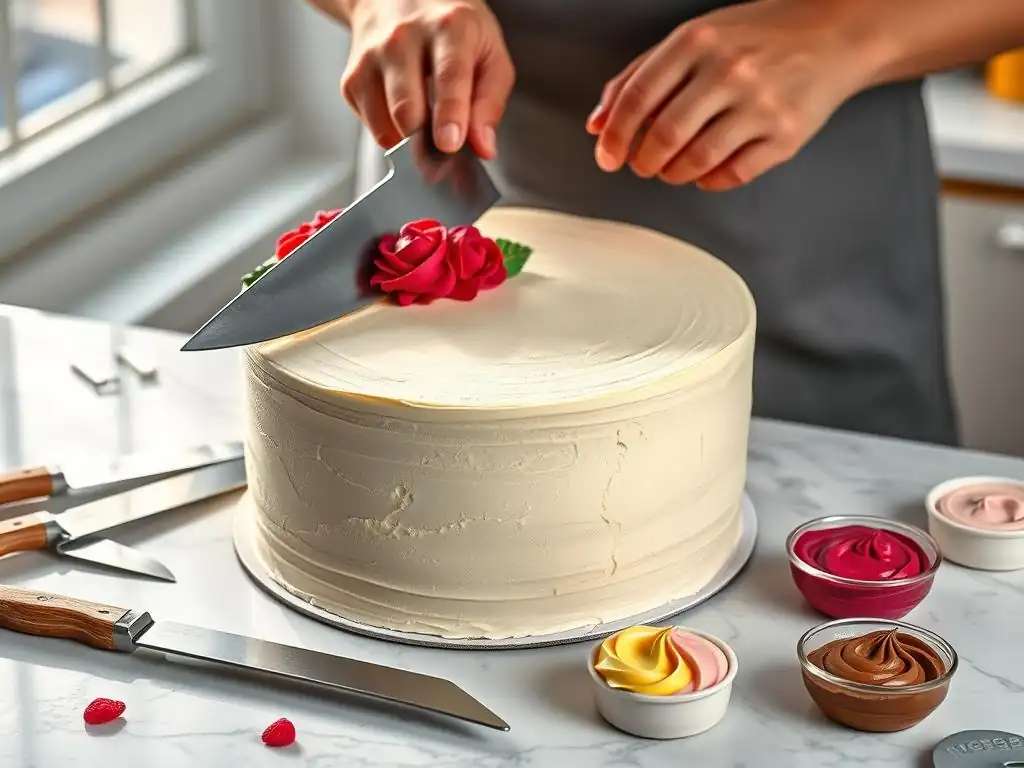
Modern palette knife cake decorating techniques are all about clean lines, striking textures, and often minimalist aesthetics. Think single-tier cakes with dramatic impasto textures, multi-tiered cakes with smooth, sharp edges on some tiers contrasted with textured finishes on others, or cakes featuring abstract color blocks applied with a palette knife. Geometric patterns like clean stripes or textured segments are also popular.
Consider using a limited color palette for a sophisticated modern look, perhaps shades of a single color or a monochromatic scheme. Metallic accents, like touches of edible gold leaf applied with a palette knife, pair beautifully with textured buttercream. Modern designs often rely on the texture itself to be the primary decoration, showcasing the skill involved in the palette knife work rather than relying on elaborate piped details. Explore galleries online to see how contemporary bakers are utilizing palette knife techniques.
Seasonal Cake Designs
Palette knife cake decorating techniques are wonderfully adaptable for creating seasonal designs. For spring, think soft pastel colors applied with loose, painterly strokes to resemble cherry blossoms or abstract floral fields. You could use palette knife flowers to create delicate arrangements. For summer, vibrant, blended colors evoking sunsets or ocean waves are achievable with color blending techniques.
Autumn offers rich, warm tones. Use impasto techniques to create textures resembling bark or fallen leaves, or blend oranges, reds, and yellows for a fall foliage effect. For winter and holiday cakes, palette knife techniques can create textures like swirling snowdrifts or rough, icy surfaces. Use white or silver frosting with sharp, pulled peaks for a frosty look. Incorporating seasonal colors and textures makes palette knife cake decorating techniques perfect for any time of year.
Textured Buttercream Cake Tutorial
Creating a simple textured buttercream cake using palette knife techniques is a great starting point. After applying a smooth crumb coat and chilling, apply a generous final layer of medium-consistency buttercream to the top and sides of the cake. Don't aim for perfect smoothness yet.
Next, choose your texture tool – it could be a small offset palette knife, a bench scraper with a patterned edge, or even the back of a spoon for certain effects. For a simple wavy texture, hold a small palette knife parallel to the cake side and gently drag it upwards in a slightly wiggling motion while rotating the turntable slowly. For a rustic horizontal texture, hold the knife horizontally against the side and drag it around the cake.
Experiment on a practice board first. The beauty of textured palette knife cake decorating techniques is that slight variations add to the handmade charm.
Abstract Floral Cake Design
An abstract floral cake design using palette knife techniques is a popular and forgiving project. Start with a base layer of frosting, which can be smooth or have a light texture. Prepare several colors of buttercream for your "flowers" and "leaves." Using small palette knives, apply dabs and strokes of colored frosting onto the cake surface to represent petals and leaves.
Don't try to create perfectly realistic flowers; instead, focus on color placement, texture, and composition. Use different knife sizes for variety in petal shapes and sizes. Blend colors directly on the knife or the cake for multi-tonal effects. Add small dabs of contrasting color for flower centers. Fill in gaps with green strokes for leaves or simple textured background elements. Abstract floral palette knife cake decorating techniques allow for artistic freedom and create a vibrant, painterly effect.
Cleaning and Maintaining Your Palette Knives
Proper Cleaning Techniques
Proper cleaning is essential for maintaining your palette knives and ensuring they are ready for your next palette knife cake decorating project. As soon as you finish using a knife, scrape off as much excess frosting as possible back into your bowl or discard it. Don't let frosting dry on the blade, as it becomes much harder to remove.
Wash palette knives in warm, soapy water. Use a soft sponge or cloth to gently clean the blade and handle, being careful of sharp edges on some knives. For stubborn, dried-on frosting, you might need to soak the knife for a few minutes before washing. Rinse thoroughly with clean water to remove all soap residue. Ensure the area where the blade meets the handle is clean, as frosting can accumulate there.
Storing Palette Knives
Proper storage protects your palette knives from damage and keeps them organized. After washing and thoroughly drying (to prevent rust, especially on carbon steel blades, though most are stainless steel), store them carefully. Avoid tossing them into a drawer where they can rub against other utensils, potentially scratching the blades or damaging the handles.
Consider storing palette knives in a knife block with slots, similar to kitchen knives, or in a dedicated tool roll or case designed for art supplies or cake decorating tools. Some decorators use magnetic strips on the wall to keep them easily accessible and separated. Storing them properly ensures the blades stay sharp and clean, ready for your next session of applying palette knife cake decorating techniques.
Selecting the Right Palette Knife
Selecting the right palette knife depends on the task at hand in your palette knife cake decorating techniques. For smoothing large cakes, a larger offset palette knife (around 8-10 inches) is often preferred as it covers more surface area efficiently. For smaller cakes or detailed smoothing, a smaller offset knife (4-6 inches) provides more control.
For applying textures and creating specific designs like flowers or abstract strokes, a variety of smaller, more flexible palette knives with different blade shapes (pointed, rounded, square) and flexibilities are invaluable. A set of 5-7 assorted palette knives is a good starting point for exploring various palette knife cake decorating techniques. As you practice, you'll discover which shapes and sizes you prefer for different applications.
Conclusion: Elevating Your Cake Decorating Skills with Palette Knife Techniques
Trends in Palette Knife Cake Art
Palette knife cake decorating techniques continue to evolve, with several trends currently popular. The "concrete" or "plaster" effect remains a strong trend, using grey or white frosting applied roughly and scraped back for an urban, minimalist look. Abstract art-inspired cakes with bold color blocking and expressive textures are also highly sought after.
Floral designs created with palette knives are moving towards more impressionistic and textured styles rather than strictly realistic ones, often grouped in bountiful arrangements. The combination of smooth tiers with one or two highly textured tiers is a classic modern approach. Additionally, the use of metallic accents applied with a palette knife on textured surfaces adds a touch of luxury. Keeping an eye on these trends can provide fresh inspiration for your own palette knife cake decorating techniques.
Resources for Continued Learning
To continue elevating your skills in palette knife cake decorating techniques, there are numerous resources available. Online platforms offer video tutorials demonstrating specific techniques like smoothing, creating different textures, or piping palette knife flowers. Many talented cake decorators share their processes on social media, providing visual inspiration and tips.
Investing in cake decorating books that cover modern techniques, including palette knife work, can provide detailed instructions and step-by-step guides. Consider taking an in-person or online class focused specifically on palette knife techniques, which can offer personalized feedback and hands-on practice opportunities. Consistent practice is perhaps the most valuable resource; the more you use your palette knives, the more comfortable and skilled you will become in mastering these beautiful cake decorating methods.
Frequently Asked Questions
How does a palette knife differ from other cake decorating tools?
A palette knife offers greater flexibility and control for creating smooth surfaces and textured effects compared to spatulas or piping bags. It's designed for spreading and sculpting, not just precise piping.
What types of cakes are best suited for palette knife decoration?
Cakes with a relatively flat top and stable frosting, such as buttercream or ganache, work best. Avoid cakes with intricate shapes or unstable fillings, as palette knife techniques require a smooth canvas.
What are some basic palette knife techniques for beginners?
Start with smooth frosting application using a back-and-forth motion, then practice creating simple textures like swirls or peaks. Experiment with different angles and pressures to achieve varied effects.
How do I clean a palette knife effectively between applications or colors?
Wipe the blade clean with a damp cloth or paper towel after each use. For stubborn frosting, use warm water and soap, ensuring the knife is completely dry before re-using to prevent color bleeding.
Can I use a palette knife to create sharp edges on my cake?
Yes, a palette knife can be used to create sharp edges by holding it at a 90-degree angle to the cake and carefully scraping away excess frosting. This requires a sturdy base coat of frosting for best results.
Final Reflection: The Enduring Allure of the Palette Knife
The palette knife's reign in modern cake decorating isn't just a trend; it's a testament to the enduring power of artistic expression in the culinary arts. Its versatility allows for both breathtakingly smooth finishes and dramatically textured designs, pushing the boundaries of what's considered possible in cake artistry. This technique, once a niche skill, is now readily accessible and increasingly popular, transforming ordinary cakes into stunning works of art.
The impact of the palette knife on the cake decorating landscape is undeniable. It has democratized a level of artistry previously associated only with highly skilled professionals. The accessibility of tutorials and readily available tools has empowered countless home bakers to explore their creativity and achieve professional-looking results. The beauty of art lies in its ability to transform the ordinary into the extraordinary,
and the palette knife perfectly embodies this sentiment in the world of cake decorating.
Now, it's your turn to pick up the palette knife and explore its endless possibilities. Don't be afraid to experiment, to embrace imperfections, and to let your creativity flow. Each stroke, each swirl, each carefully placed texture tells a story – your story. The journey of mastering the palette knife is a continuous one, filled with learning, growth, and the immense satisfaction of creating something beautiful and delicious. So, grab your tools, gather your inspiration, and let the artistry begin!
Unleash Your Inner Cake Artist!
Thanks for taking the time to explore the world of palette knife cake decorating! We hope you've gained some valuable techniques and inspiration. Now it's time to put your newfound skills to the test.
- Embrace the Swirl: Start by practicing your palette knife strokes on a small cake or even just frosting on parchment paper. Experiment with different pressure levels and angles to create unique textures. This is your chance to truly master the technique!
- Share Your Creations: We'd love to see what you create! Post a picture of your palette knife masterpiece on social media and tag us – let's build a vibrant community of cake artists together.
- Explore Advanced Techniques: Dive deeper into palette knife decorating by searching for tutorials on specific designs or textures. Try experimenting with different frosting consistencies and color combinations for truly unique results.
What incredible cake designs will you bring to life today?