
Master Key Lime Pie: Simple Steps for Perfect Tart & Sweet Balance

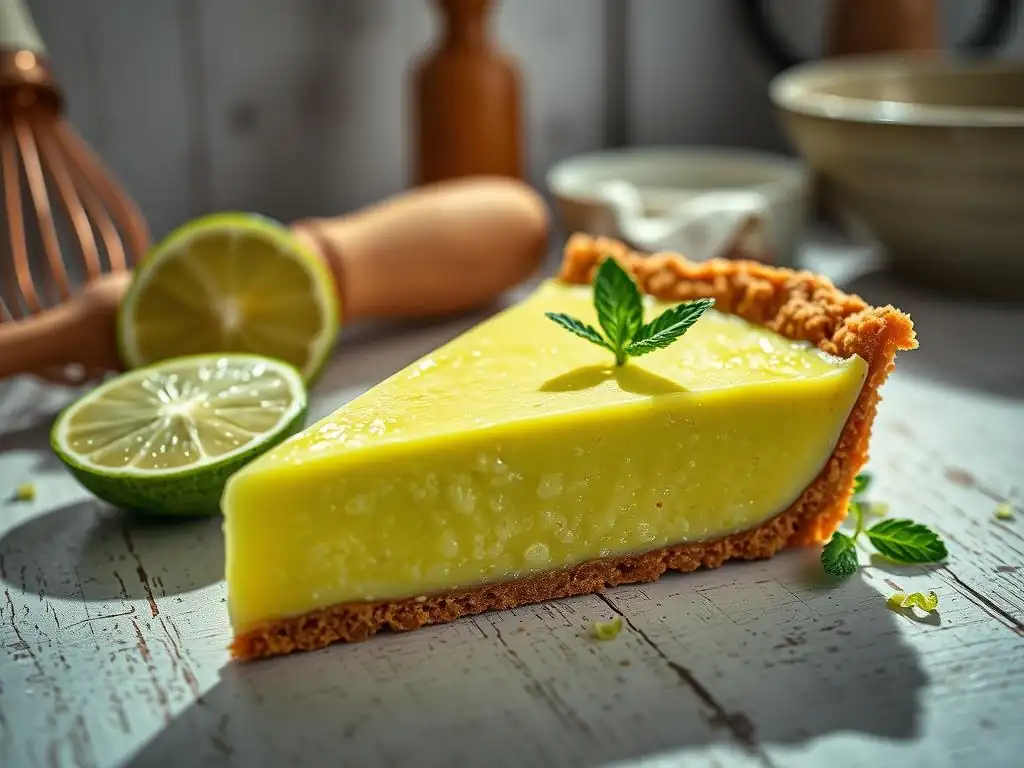
Welcome to BakeWithEase, your trusted guide to baking brilliance! Ever dreamt of crafting the perfect dessert, a symphony of tart and sweet that dances on your tongue? Look no further! This week, we're diving into the secrets behind an authentic, utterly delicious Easy Key Lime Pie Recipe. But be warned – mastering this seemingly simple dessert unlocks a whole new world of flavor combinations. Intrigued? Keep reading to discover the key to a pie that's guaranteed to impress, and explore the fascinating cultural roots of this beloved dessert.
- Award-Winning Key Lime Pie: Simple Steps for Perfect Tart & Sweet Balance
- SouthernBakingDelights Presents: The Ultimate Easy Key Lime Pie Recipe
- Achieving the Perfect Key Lime Pie: Ingredients and Equipment
- Step-by-Step Guide: Baking Your Easy Key Lime Pie
- Key Lime Pie Variations and Toppings: Elevating Your Dessert
- Troubleshooting Your Key Lime Pie: Common Issues and Solutions
- Savoring Your Homemade Key Lime Pie: Serving and Storage
- Frequently Asked Questions
- Final Reflection: Unlocking the Sweetness of Simplicity
- Unlock Your Inner Pastry Chef: Bake the Perfect Key Lime Pie!
Award-Winning Key Lime Pie: Simple Steps for Perfect Tart & Sweet Balance
SouthernBakingDelights Presents: The Ultimate Easy Key Lime Pie Recipe
A Taste of the Keys: Exploring Key Lime Pie's Origins
Key Lime Pie, a beloved dessert from the Florida Keys, boasts a history as vibrant as its flavor. While its exact origins are debated, one popular story attributes its creation to Aunt Sally, a cook for Key West's first millionaire, William Curry, in the late 19th or early 20th century. The pie's existence was tied to the lack of refrigeration in the Keys at the time; fresh milk was scarce, but canned sweetened condensed milk was readily available and didn't require chilling.
This practical necessity, combined with the abundance of small, tart Key limes, led to the creation of this iconic dessert. The original method often involved a simple mixture poured into a crust and not baked, relying on the acidity of the limes to "cook" the dairy proteins, a process known as denaturation.
The traditional Key Lime Pie filling is remarkably simple, typically consisting of just three main ingredients: Key lime juice, egg yolks, and sweetened condensed milk. This minimalist approach highlights the unique flavor of the Key lime itself, which is more aromatic and slightly less acidic than its Persian lime cousin. Early recipes often used raw egg yolks, relying solely on the chemical reaction between the acidic lime juice and the condensed milk for thickening.
However, modern recipes almost universally incorporate baking for food safety and a firmer set. This evolution from a no-bake, necessity-driven dessert to a baked classic enjoyed worldwide showcases the enduring appeal of this tangy, sweet treat. Mastering an easy key lime pie recipe allows anyone to capture a slice of this rich culinary history.
Achieving the Perfect Key Lime Pie: Ingredients and Equipment
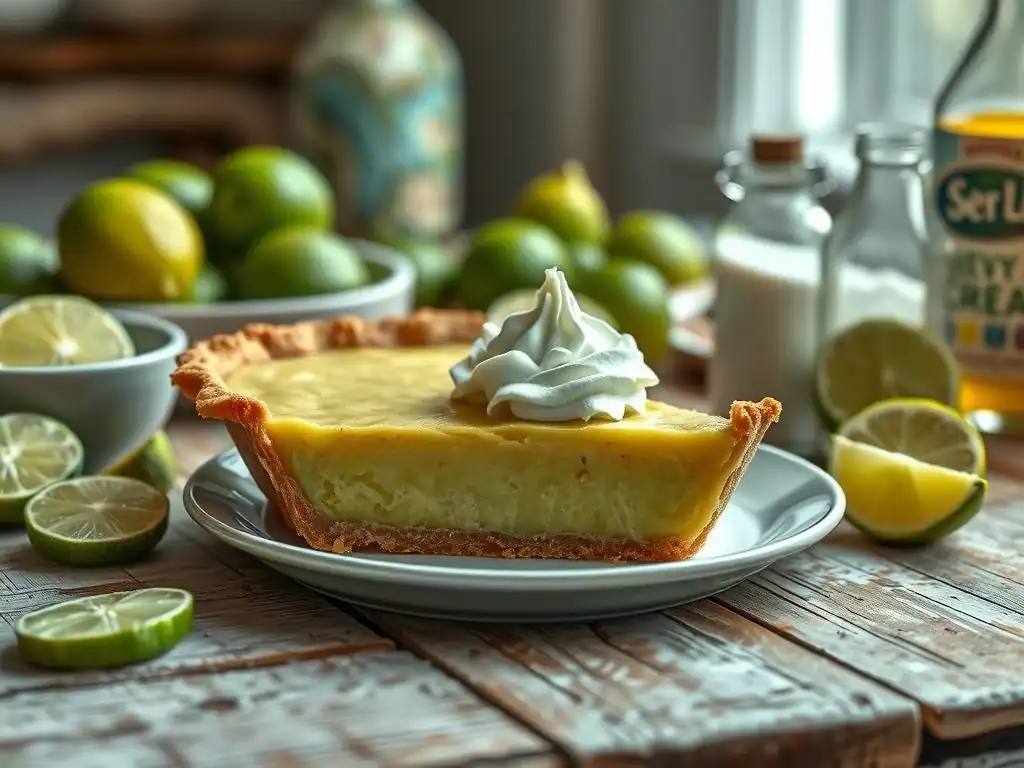
Gathering Your Key Lime Pie Ingredients: A Comprehensive List
Creating a truly memorable key lime pie starts with selecting the right ingredients. For an authentic taste, you'll need fresh Key limes – approximately 1 pound to yield the necessary juice, although this can vary based on the size and juiciness of the fruit. You'll also need 1 (14-ounce) can of sweetened condensed milk, 4 large egg yolks (separated from the whites), and if you plan on a meringue topping, you'll need the egg whites plus some sugar. For the classic graham cracker crust, gather 1 and 1/2 cups of graham cracker crumbs (about 10 full sheets), 1/3 cup granulated sugar, and 6 tablespoons of melted unsalted butter. Some recipes might call for a pinch of salt in the crust or filling to enhance the flavors.
| Ingredient | Quantity | Notes |
|---|---|---|
| Fresh Key Limes | ~ 1 pound |
For juice and zest |
| Sweetened Condensed Milk | 1 (14-ounce) |
~400 grams |
| Large Egg Yolks | 4 |
Room temperature is ideal |
| Graham Cracker Crumbs | 1 1/2 cups |
~150 grams |
| Granulated Sugar (Crust) | 1/3 cup |
~65 grams |
| Unsalted Butter | 6 tablespoons |
Melted |
| Optional: Salt | Pinch | For crust or filling |
| Optional: Egg Whites | 4 |
For meringue topping |
| Optional: Sugar (Meringue) | 1/4 cup |
Or more, depending on desired sweetness |
The Importance of Fresh Key Limes for Authentic Flavor
Using fresh Key limes is paramount for achieving the signature tartness and distinct aroma of an authentic Key Lime Pie. While bottled Key lime juice is available, it often lacks the vibrant, complex flavor and subtle floral notes found in freshly squeezed juice. Approximately 1 pound of fresh Key limes typically yields about 1/2 cup of juice, which is a standard amount for a single pie. The zest is equally important, containing essential oils that intensify the lime flavor; aim for about 1-2 teaspoons of finely grated zest. Sourcing fresh Key limes can sometimes be a challenge outside of Florida, but many grocery stores carry them seasonally or year-round. If fresh Key limes are absolutely unavailable, a high-quality bottled Key lime juice can be used as a last resort, but be prepared for a slightly different flavor profile.
Choosing ripe Key limes is key – they should feel heavy for their size and yield slightly to pressure. While Persian limes (the larger, more common variety) can be substituted, they are less acidic and have a different flavor, resulting in a pie that tastes more like lime meringue pie than true Key Lime Pie.
The small size of Key limes means juicing them can be a bit more work, but the payoff in flavor is well worth the effort for this easy key lime pie recipe. The distinct balance of tartness and sweetness is heavily reliant on the unique properties of the Key lime itself.
Graham Cracker Crust Essentials: Building the Base
The classic base for an easy key lime pie recipe is a simple graham cracker crust. This provides a sweet, slightly crumbly contrast to the creamy, tart filling. The basic ratio is typically 1 and 1/2 cups of fine graham cracker crumbs mixed with 1/3 cup of granulated sugar and 6 tablespoons of melted butter. You can make crumbs from whole graham crackers by processing them in a food processor or crushing them in a bag with a rolling pin. Ensure the crumbs are fine and consistent for an even crust.
Once the ingredients are combined, the mixture should resemble wet sand. Pressing this mixture firmly into the bottom and up the sides of your pie plate is crucial. Use the bottom of a glass or a measuring cup to compact the crumbs tightly. A well-compacted crust will hold its shape better during baking and slicing, preventing crumbling. Pre-baking the crust, as discussed later, also contributes significantly to a sturdy and slightly crisp base, which is essential for supporting the rich key lime filling.
Sweetened Condensed Milk: The Key to Creamy Texture
Sweetened condensed milk is a non-negotiable ingredient in a traditional easy key lime pie recipe. This thick, syrupy product, made by heating milk to remove water and adding sugar, provides both sweetness and the necessary body for the filling. It's the interaction between the acidity of the Key lime juice and the proteins in the condensed milk (often aided by the egg yolks and baking) that causes the filling to thicken and set into a smooth, creamy custard. Using a standard 14-ounce can provides the perfect balance of sweetness and structure for the typical amount of lime juice and egg yolks.
Do not confuse sweetened condensed milk with evaporated milk, which is unsweetened and much thinner; using evaporated milk will result in a watery filling that will not set correctly. The high sugar content of sweetened condensed milk also helps to balance the intense tartness of the Key limes, creating that signature sweet-tart harmony. The creamy texture it imparts is fundamental to the pie's appeal, making it a smooth, melt-in-your-mouth dessert.
Essential Equipment for Baking a Key Lime Pie
Having the right tools on hand simplifies the process of making an easy key lime pie recipe and helps ensure success. While you don't need specialized gadgets for every step, a few key pieces of equipment are highly recommended. A good quality pie plate is essential, of course. You'll also need tools specifically for handling the Key limes, such as a zester and a juicer. Standard kitchen items like mixing bowls, measuring cups and spoons, and a whisk or electric mixer are also necessary for combining the ingredients for both the crust and the filling.
For the crust, a food processor makes quick work of turning graham crackers into fine crumbs, though a sturdy bag and a rolling pin work just as well. When pressing the crust into the plate, a flat-bottomed glass or measuring cup is invaluable for achieving a compact, even layer. For the filling, a fine-mesh sieve is helpful for straining the lime juice to remove seeds and pulp, ensuring a smooth custard. A rubber spatula is useful for scraping down bowls and folding ingredients gently.
Pie Plate Perfection: Choosing the Right Size and Material
The standard size for a Key Lime Pie is a 9-inch pie plate. This size accommodates the typical quantities of ingredients for both the crust and the filling, resulting in a pie of appropriate depth. Pie plates come in various materials, including glass, ceramic, metal, and even disposable aluminum. Glass and ceramic plates conduct heat slowly and evenly, which can be beneficial for baking the crust and setting the filling without over-browning the edges. A clear glass plate also allows you to monitor the browning of the crust.
Metal pie plates, particularly those made of aluminum or steel, heat up quickly and can promote crispier crusts, but they also cool down faster. Disposable aluminum pans are convenient for transport but may not heat as evenly. Whatever material you choose, ensure it's oven-safe for the temperatures required for pre-baking the crust (typically around 350°F or 175°C). The depth of the pie plate can also affect baking time; a deeper dish might require a few extra minutes in the oven to set the center.
Zesting and Juicing: Tools for Extracting Key Lime Flavor
Extracting the maximum flavor from your fresh Key limes requires the right tools for zesting and juicing. For zesting, a microplane zester is highly recommended. Its sharp, tiny blades remove only the outermost layer of the lime peel, where the flavorful essential oils are concentrated, without digging into the bitter white pith underneath. Aim for about 1-2 teaspoons of finely grated zest for a standard recipe. Zest should be added to the filling mixture along with the juice to amplify the citrus flavor.
Juicing Key limes can be a bit finicky due to their small size. A small citrus reamer or juicer is ideal. Cut the limes in half crosswise and press or twist them on the reamer to extract the juice. You'll need about 1/2 cup of fresh Key lime juice. While squeezing by hand is possible, a juicer makes the process much more efficient, especially when dealing with a pound of small limes. After juicing, it's a good idea to strain the juice through a fine-mesh sieve to remove any seeds or pulp before adding it to the filling mixture, ensuring a silky-smooth custard.
Step-by-Step Guide: Baking Your Easy Key Lime Pie
Preparing the Graham Cracker Crust: A Simple Method
Creating a sturdy and delicious graham cracker crust is the first step in this easy key lime pie recipe. Begin by finely crushing your graham crackers. You can achieve this quickly using a food processor, pulsing until fine, even crumbs are formed. Alternatively, place the crackers in a zip-top bag, seal it, and crush them using a rolling pin until you have about 1 and 1/2 cups of crumbs. In a medium bowl, combine the graham cracker crumbs with 1/3 cup of granulated sugar and 6 tablespoons of melted unsalted butter. Stir until the crumbs are evenly moistened and resemble wet sand.
Next, transfer the crumb mixture to your 9-inch pie plate. Start by pressing the mixture into the bottom of the plate in an even layer. Then, work your way up the sides, pressing the crumbs firmly against the dish. Use the bottom of a flat-bottomed glass or a measuring cup to compact the crust tightly against the plate. This firm packing is crucial for preventing the crust from crumbling when you slice the pie. Ensure the thickness is consistent throughout the bottom and sides for even baking.
Combining Graham Cracker Crumbs, Butter, and Sugar
The combination of graham cracker crumbs, melted butter, and sugar forms the foundation of the crust. The butter acts as a binder, holding the crumbs and sugar together. The sugar adds sweetness and helps the crust brown slightly when baked. The typical ratio of 1 1/2 cups crumbs to 6 tablespoons butter and 1/3 cup sugar provides a good balance that is easy to work with and results in a crust that is neither too dry nor too greasy. It's important that the butter is fully melted and evenly distributed throughout the crumbs to ensure proper binding.
Once combined, the mixture should hold together when squeezed in your hand but still appear crumbly. If it seems too dry, you might add another tablespoon of melted butter, but be careful not to add too much, as this can result in a greasy crust. Conversely, if it seems too wet, add a few more graham cracker crumbs. Achieving the right consistency before pressing it into the pie plate is key to a successful crust for your easy key lime pie.
Pre-Baking the Crust for Optimal Texture
Pre-baking the graham cracker crust is a step that significantly improves its texture and helps prevent a soggy bottom once the filling is added. Preheat your oven to 350°F (175°C). Place the pie plate with the pressed crust on a baking sheet (this makes it easier to transfer in and out of the oven and catches any potential spills). Bake the crust for about 8 to 10 minutes, or until it is lightly golden brown around the edges and smells fragrant.
This brief period of baking helps to set the butter and sugar, making the crust firmer and more resistant to absorbing moisture from the filling. Once pre-baked, remove the crust from the oven and let it cool completely on a wire rack before adding the filling. Adding the filling to a hot crust can cause it to become greasy and potentially cook the bottom layer of the filling unevenly. Allowing it to cool ensures a crisp base for your delicious easy key lime pie.
Making the Key Lime Filling: Achieving the Perfect Tart-Sweet Balance
The heart of this easy key lime pie recipe is its vibrant, creamy filling. This step focuses on combining the key ingredients to achieve that signature tart-sweet flavor and smooth texture. You'll need your freshly squeezed Key lime juice and zest, sweetened condensed milk, and egg yolks. Accuracy in measurements is important here to ensure the correct balance of flavors and proper setting of the custard.
In a medium bowl, whisk together the 4 large egg yolks until they are pale yellow and slightly thickened. This takes about 1-2 minutes of whisking. Then, gradually whisk in the 14-ounce can of sweetened condensed milk until the mixture is smooth and well combined. Finally, slowly whisk in the 1/2 cup of fresh Key lime juice and the 1-2 teaspoons of Key lime zest. The mixture will thicken slightly as you add the lime juice due to the acid reacting with the condensed milk.
Zesting and Juicing the Key Limes: Maximizing Flavor
Properly extracting the zest and juice is fundamental to the flavor of your easy key lime pie recipe. Use a microplane zester to carefully remove only the green part of the lime peel, avoiding the bitter white pith. Aim for 1-2 teaspoons of finely grated zest. Zest contains concentrated citrus oils that provide a burst of aromatic flavor, so don't skip this step! Add the zest directly to your mixing bowl.
Next, juice the Key limes to yield 1/2 cup of fresh juice. A citrus reamer is helpful here. Remember, it takes approximately 1 pound of Key limes to get this amount of juice. Strain the juice through a fine-mesh sieve to remove any seeds or pulp before adding it to the filling mixture. This ensures a smooth, silky texture in the final pie. The fresh juice provides the essential tartness that balances the sweetness of the condensed milk.
Combining Key Lime Juice, Zest, and Sweetened Condensed Milk
The magic of Key Lime Pie filling happens when the acidic lime juice meets the sweet, thick condensed milk. After whisking the egg yolks and condensed milk together, slowly pour in the strained Key lime juice while continuously whisking. You will notice the mixture visibly thicken as the acid from the lime juice reacts with the proteins in the condensed milk. This is a natural process that helps set the custard. Whisk until the mixture is completely smooth and uniform in color and consistency.
Finally, stir in the Key lime zest. While the juice provides the primary tartness, the zest adds depth and a more complex citrus aroma. Ensure the zest is evenly distributed throughout the filling. The resulting mixture should be thick enough to coat the back of a spoon. This simple combination, when baked, transforms into the creamy, tangy filling that defines a classic easy key lime pie.
Achieving the Right Consistency: Tips and Tricks
The filling for an easy key lime pie recipe should be thick enough to hold its shape when baked but still creamy and smooth. The reaction between the lime juice and condensed milk provides initial thickening, but the egg yolks and baking are crucial for the final set. Ensure your ingredients are at room temperature, especially the egg yolks, as this helps them emulsify better with the other ingredients, leading to a smoother filling. Over-whisking the filling after adding the lime juice can sometimes incorporate too much air, potentially leading to cracks during baking.
Whisk gently but thoroughly until just combined and smooth. The mixture should be pourable but not runny. If your mixture seems too thin after adding the juice, it might indicate insufficient lime juice or issues with the condensed milk quality. Conversely, if it becomes excessively thick and almost curdled-looking immediately, you might have added the juice too quickly or the limes were exceptionally acidic. Generally, following the specified measurements ( 1/2 cup juice to 14 oz condensed milk and 4 yolks) will yield the correct consistency before baking.
Baking the Key Lime Pie: Ensuring a Smooth and Creamy Texture
Baking the Key Lime Pie is a delicate process aimed at gently setting the custard without curdling the eggs or cracking the surface. Pour the prepared filling into the pre-baked and cooled graham cracker crust. Smooth the top with a spatula if necessary. Place the pie plate back onto a baking sheet. Preheat your oven to a relatively low temperature, typically around 325°F (160°C). This lower temperature promotes slow, even cooking, which is key to a smooth filling.
Bake the pie for approximately 15 to 20 minutes. The baking time can vary depending on your oven and the depth of your pie plate. The goal is to bake it just until the center is almost set but still has a slight wobble. The edges should appear set and maybe slightly puffed, but the very center (about a 2-inch circle) should still jiggle gently when the pie is lightly shaken. Over-baking is the most common cause of a rubbery texture or cracks in the filling.
Baking Time and Temperature: Avoiding Cracks and Overbaking
Maintaining the correct baking temperature and duration is critical for a perfectly set key lime pie. Baking at 325°F (160°C) for 15-20 minutes is a standard guideline for a 9-inch pie. This temperature is low enough to prevent the egg proteins from cooking too quickly and curdling, which can lead to a grainy texture or a cracked surface. Placing the pie on a baking sheet can also help regulate the temperature exposure on the bottom of the pie.
Watch the pie carefully during the last few minutes of baking. You want the filling to transition from completely liquid to mostly set. The surface should look opaque and dry around the edges, but the center should not be completely firm. If the top starts to brown too quickly before the center is set, you can loosely tent the pie with aluminum foil. Removing the pie from the oven at the right moment is crucial; it will continue to set as it cools.
The Jiggle Test: Knowing When Your Pie Is Ready
The "jiggle test" is the most reliable method for determining when your easy key lime pie recipe is finished baking. Gently nudge the edge of the pie plate. The filling should appear set around the perimeter, perhaps for an inch or two inwards, but the very center of the pie, typically a circle about 2 inches in diameter, should still have a soft, slight wobble. It should not look liquid, but it shouldn't be completely firm either.
Think of it like setting jelly; it needs to be stable but still have a little give. If the entire pie is perfectly firm and doesn't jiggle at all, it's likely over-baked, which can result in a less creamy texture. If the center jiggles excessively and looks liquid, it needs more time. Err on the side of under-baking slightly, as the residual heat will continue to set the pie as it cools.
Cooling and Setting: Patience is Key
Once your easy key lime pie has passed the jiggle test, remove it from the oven and place it on a wire rack to cool completely. This cooling process is just as important as the baking time for achieving the proper set and texture. Do not be tempted to move the pie or put it directly into the refrigerator while it is still hot. Rapid temperature changes can cause the filling to crack or condense moisture on the surface.
Allow the pie to cool at room temperature for at least 1 to 2 hours. During this time, the residual heat will continue to gently cook the center, and the filling will firm up further. Once it has cooled to room temperature, the pie needs to be refrigerated to finish setting completely. This chilling period is essential for achieving the firm yet creamy consistency that slices cleanly.
Allowing the Pie to Cool Completely
Removing the pie from the oven and letting it cool gradually at room temperature prevents thermal shock. If a hot pie is immediately placed in a cold refrigerator, the rapid contraction can cause the filling to crack. It also allows the internal temperature to stabilize and the setting process, which began in the oven, to continue naturally. Place the pie on a wire rack so that air can circulate around the dish, allowing it to cool more efficiently.
Wait until the pie dish is cool to the touch before moving on to the refrigeration step. This typically takes at least 1 to 2 hours, depending on the ambient temperature of your kitchen. Patience here pays off in a beautifully set and smooth filling for your easy key lime pie. Resist the urge to cut into it before it's properly chilled.
Refrigeration for Optimal Setting
After cooling at room temperature, the key lime pie requires refrigeration to firm up completely and achieve its final, sliceable consistency. Cover the pie loosely with plastic wrap (try not to let the wrap touch the surface of the filling immediately to avoid condensation marks) or aluminum foil. Refrigerate the pie for a minimum of 4 hours, but preferably 6 hours or even overnight.
This extended chilling period allows the filling to set fully into a smooth, creamy custard that holds its shape when sliced. It also allows the flavors to meld and intensify. A well-chilled pie is not only easier to slice cleanly but also has the best texture and refreshing tartness. Plan ahead when making your easy key lime pie recipe to ensure adequate refrigeration time before serving.
Key Lime Pie Variations and Toppings: Elevating Your Dessert
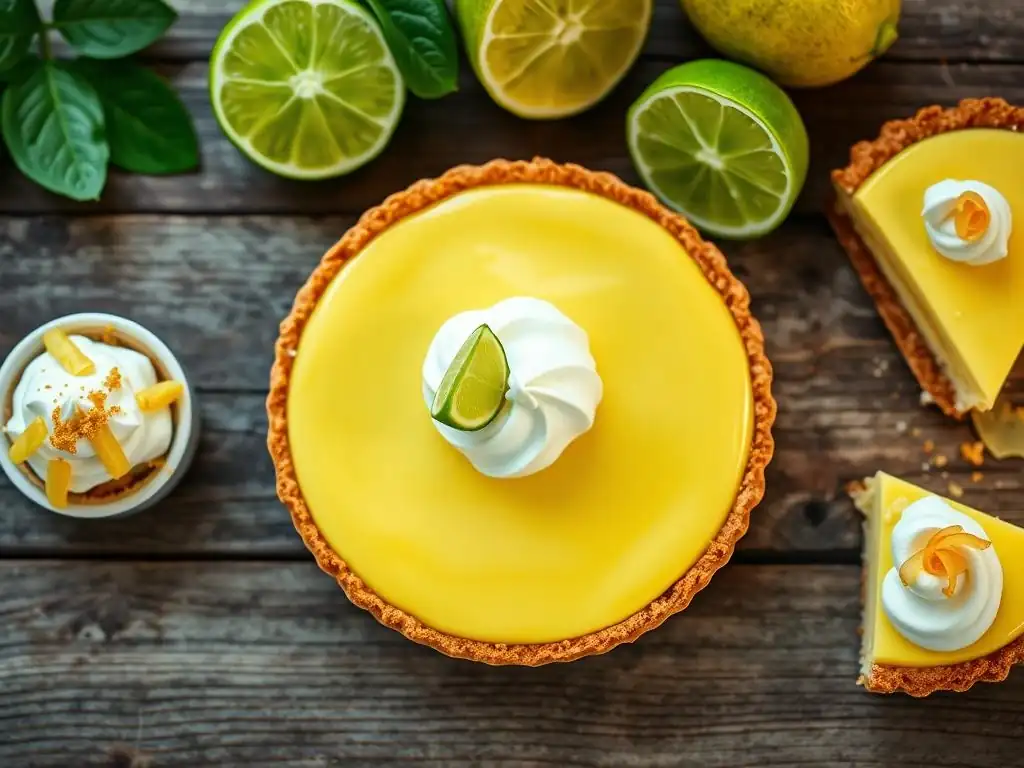
While a classic easy key lime pie recipe is perfect on its own, adding toppings or exploring variations can elevate the dessert and cater to different tastes. The most traditional toppings are either whipped cream or meringue, each offering a different texture and sweetness to complement the tart filling. Beyond toppings, slight modifications to the base recipe can introduce new flavors, creating exciting twists on the classic.
Consider the balance when adding variations. If you're adding a sweet element like coconut, you might slightly reduce the sugar in the crust or adjust the tartness of the filling. Toppings should enhance, not overpower, the signature Key lime flavor. Experimenting with different additions allows you to personalize your easy key lime pie while staying true to its creamy, tangy core.
Classic Toppings: Whipped Cream or Meringue?
The debate between whipped cream and meringue as the ultimate Key Lime Pie topping is a matter of personal preference. Both offer a sweet contrast to the tart filling, but they provide distinctly different textures and visual appeals. Whipped cream is light, airy, and creamy, adding a cool, soft element. Meringue is sweet, often slightly chewy or marshmallow-like inside, with a beautiful toasted exterior, offering a more dramatic presentation.
Choosing between them depends on your desired outcome. For a simple, quick finish to your easy key lime pie, whipped cream is the easier option. For a more traditional, visually stunning dessert, meringue is the way to go. Some purists argue that no topping is needed, letting the pure flavor of the pie shine, but most agree a sweet counterpoint enhances the experience.
Making the Perfect Whipped Cream Topping
Homemade whipped cream is a simple yet elegant topping for an easy key lime pie recipe. For the best results, use heavy whipping cream that is very cold. You'll typically need about 1 cup of cold heavy whipping cream to top a 9-inch pie generously. Combine the cream with 2 to 4 tablespoons of powdered sugar (also known as confectioners' sugar) and 1/2 teaspoon of vanilla extract in a chilled bowl.
Using an electric mixer or a whisk, whip the mixture on medium-high speed until soft or stiff peaks form. Soft peaks hold their shape but curl over at the tip, while stiff peaks stand straight up. Be careful not to over-whip, as this can turn the cream grainy or into butter. Spoon or pipe the whipped cream onto the chilled pie just before serving for a fresh, light finish.
Creating a Light and Fluffy Meringue Topping
A classic meringue topping adds a touch of elegance and a sweet, fluffy texture to your easy key lime pie. This uses the 4 large egg whites leftover from the filling. Ensure the egg whites are at room temperature, as they whip up to a greater volume this way. Also, make sure your mixing bowl and whisk are spotlessly clean and free of any grease, which can prevent the whites from whipping properly.
Whip the egg whites on medium speed until soft peaks form. Gradually add granulated sugar, typically 1/4 cup to 1/2 cup depending on desired sweetness, one tablespoon at a time, while continuing to whip on high speed. Continue whipping until stiff, glossy peaks form and the sugar is fully dissolved (rub a little meringue between your fingers; it should feel smooth, not gritty). Spread or pipe the meringue over the chilled pie, ensuring it touches the crust all around to prevent shrinking. Bake in a 350°F (175°C) oven for 8-12 minutes, or until the tips are lightly browned.
Creative Key Lime Pie Variations: Exploring New Flavors
Beyond the classic, there are many ways to put a spin on your easy key lime pie recipe by introducing additional flavors. These variations keep the core creamy, tart filling but add complementary notes. Remember to consider how the added ingredient will affect the texture and adjust accordingly. These ideas can provide a delightful twist for those looking to experiment.
One popular variation incorporates coconut, which pairs wonderfully with lime. Another, more unconventional but surprisingly delicious option, involves avocado for added creaminess and a beautiful green hue. Exploring these variations allows you to customize the classic and find a new favorite version of this simple key lime pie.
Coconut Key Lime Pie: A Tropical Twist
Adding coconut brings a tropical dimension to the classic easy key lime pie recipe. You can incorporate coconut flavor in several ways. Use shredded coconut in the graham cracker crust mixture – about 1/4 to 1/2 cup added to the crumbs before mixing with butter and sugar gives a nice texture and flavor boost. For the filling, you can replace some of the condensed milk with cream of coconut (not coconut milk or coconut cream, but the sweetened product used in cocktails like piña coladas). Start by substituting about 1/4 cup of the condensed milk with cream of coconut, adjusting to taste.
Another method is to infuse the filling with coconut extract or add a layer of toasted coconut on top of the finished pie, either under or over the whipped cream or meringue. The sweet, nutty flavor of coconut complements the tartness of the Key lime beautifully, creating a dessert reminiscent of a tropical getaway. Adjusting the sweetness might be necessary depending on the sweetness of the cream of coconut used.
Avocado Key Lime Pie: A Creamy and Healthy Alternative
For a truly unique and often healthier take on the easy key lime pie, consider incorporating avocado. Ripe avocados provide an incredibly creamy texture and a natural green color, mimicking the look of a traditional Key Lime Pie without relying solely on egg yolks for richness. While this version often omits eggs entirely and is typically no-bake, it still uses Key lime juice and sweetened condensed milk (or sometimes alternative sweeteners and thickeners).
To make an avocado version, blend ripe avocados with Key lime juice, sweetened condensed milk, and perhaps a touch of lime zest until perfectly smooth and creamy. Pour this mixture into a pre-baked or no-bake crust (often made with nuts or dates for an even healthier spin). Chill until set. The avocado flavor is surprisingly neutral when combined with strong citrus, primarily contributing creaminess and healthy fats. This variation offers a delightful, albeit non-traditional, way to enjoy the tartness of Key limes.
Troubleshooting Your Key Lime Pie: Common Issues and Solutions
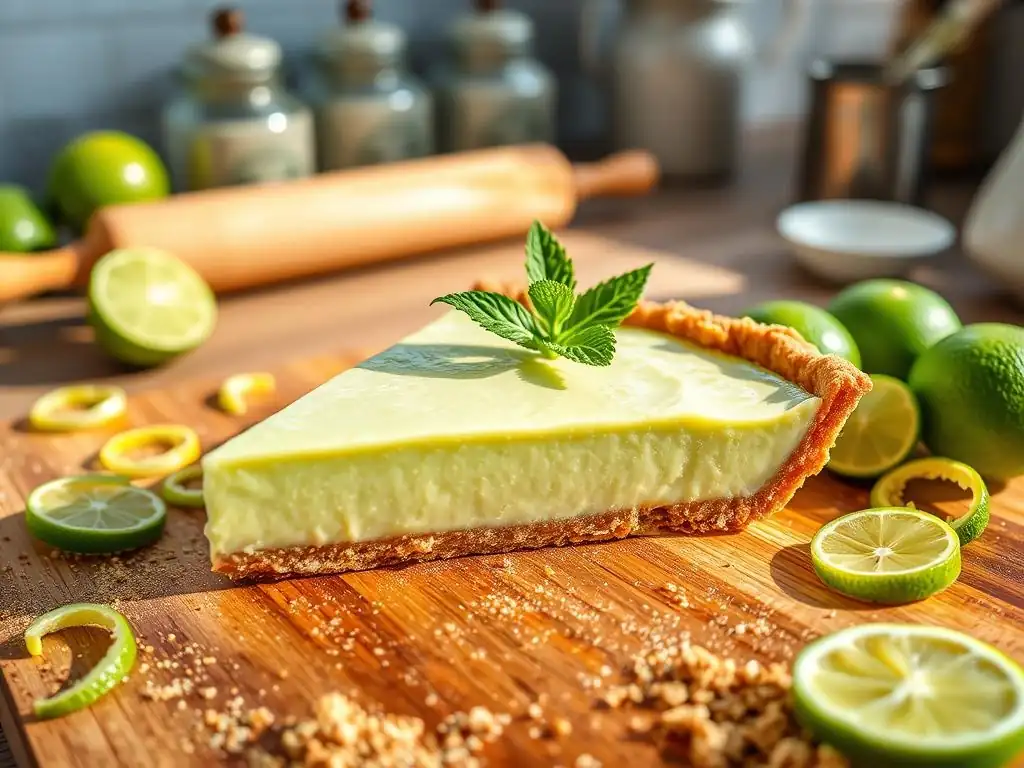
Even with an easy key lime pie recipe, sometimes things don't go exactly as planned. Common issues include a soggy crust, a cracked filling, or a filling that doesn't set properly and remains watery. Fortunately, understanding the causes of these problems can help you prevent them or fix them for future baking endeavors. Don't be discouraged if your first attempt isn't perfect; baking is a process of learning and refinement.
Addressing these issues often comes down to precise measurements, proper technique, and understanding how the ingredients interact during baking and cooling. Paying attention to details like pre-baking the crust, not over-baking the filling, and allowing adequate chilling time are key steps in avoiding disappointment.
Preventing a Soggy Crust: Tips for a Crisp Base
A soggy graham cracker crust is a common pitfall when making an easy key lime pie. This usually happens when the crust absorbs moisture from the wet filling during baking or chilling. The primary way to prevent this is by properly preparing and pre-baking the crust. Ensure the graham cracker crumbs are mixed thoroughly with the melted butter and sugar and pressed very firmly into the pie plate.
Pre-baking the crust at 350°F (175°C) for 8-10 minutes until lightly golden sets the butter and sugar, creating a barrier that is less permeable to moisture. Make sure the crust cools completely before adding the filling. You can also brush a thin layer of egg white onto the warm, pre-baked crust and bake for another 1-2 minutes to create an even stronger moisture barrier. Finally, adding the filling to a completely cooled crust reduces the risk of immediate moisture absorption.
Avoiding a Cracked Filling: Baking Techniques for Success
A crack appearing on the surface of your beautiful key lime pie filling is disappointing but often preventable. Cracking is typically caused by over-baking or rapid temperature changes during cooling. When the custard bakes too long, the proteins contract too much, pulling the surface apart.
To avoid cracks, pay close attention to the baking time and temperature ( 325°F/ 160°C for 15-20 minutes). Rely on the jiggle test to know when it's done – the center should still be slightly wobbly. Remove the pie from the oven as soon as it reaches this point. Allow the pie to cool gradually at room temperature for 1-2 hours on a wire rack before refrigerating. Avoid placing a hot pie directly into a cold refrigerator. If a crack does appear, you can often cover it with whipped cream or meringue topping before serving!
Addressing a Watery Filling: Adjusting Ingredients and Baking Time
A watery or unset filling in your easy key lime pie recipe means the custard didn't thicken properly. This can result from using too much lime juice, not enough egg yolks, using evaporated milk instead of sweetened condensed milk, or insufficient baking/chilling time. Ensure you use the specified amount of fresh Key lime juice ( 1/2 cup) and a full 14-ounce can of sweetened condensed milk. Using fewer than 4 egg yolks can also lead to a looser set.
Confirm you are using sweetened condensed milk, not evaporated milk. If the filling seems very thin before baking, double-check your measurements. During baking, ensure the pie reaches the point where the edges are set, and the center has a slight jiggle, baking for the full 15-20 minutes or slightly longer if needed, without over-baking. Most importantly, allow the pie to chill for the recommended minimum of 4 hours (preferably longer) in the refrigerator. The majority of the setting happens during this chilling period.
Savoring Your Homemade Key Lime Pie: Serving and Storage
After successfully baking and chilling your easy key lime pie, the best part arrives: serving and enjoying it! A perfectly set, chilled pie is a delight to slice and serve. Consider how you want to present it, whether naked, with a dollop of whipped cream, or under a fluffy meringue. Thinking about complementary flavors can also enhance the serving experience.
Knowing how to store any leftover pie is also important to maintain its freshness, texture, and vibrant flavor. Proper storage ensures that each slice remains as delicious as the first, allowing you to enjoy your homemade treat for a few days.
Serving Suggestions: Pairing with Complementary Flavors
Key Lime Pie is wonderfully refreshing on its own, but certain pairings can elevate the experience. The classic serving suggestion is chilled and topped with fresh whipped cream or toasted meringue. A sprinkle of fresh Key lime zest over the topping adds an extra burst of aroma.
Consider serving small slices, as the pie is quite rich and intense in flavor. It pairs well with fresh berries, such as raspberries or blueberries, which provide a slightly different tartness and beautiful color contrast. A light dusting of graham cracker crumbs or toasted coconut flakes on top of the whipped cream also adds texture and visual appeal. For drinks, a simple iced tea or a glass of sparkling water with a lime twist complements the pie without overpowering its distinct flavor.
Storing Your Key Lime Pie: Maintaining Freshness and Flavor
Proper storage is essential for keeping your easy key lime pie fresh and delicious. Once the pie has been chilled and set, cover it loosely with plastic wrap or aluminum foil. Avoid pressing the wrap directly onto the surface of the filling, especially if it's topped with whipped cream or meringue, as this can cause condensation and mar the surface.
Store the covered pie in the refrigerator. Key Lime Pie is best enjoyed chilled. It will keep well in the refrigerator for 3 to 4 days. The crust may soften slightly over time, but the filling should maintain its texture and flavor. For longer storage, you can freeze Key Lime Pie (without meringue topping, as meringue doesn't freeze well). Wrap the chilled pie tightly in plastic wrap, then in aluminum foil, and freeze for up to 1-2 months. Thaw it in the refrigerator overnight before serving.
Frequently Asked Questions
What makes this key lime pie recipe "easy"?
This recipe focuses on simple steps and easy-to-find ingredients, minimizing complexity for bakers of all skill levels. We also provide clear instructions to guide you through each stage.
What is the key to achieving the perfect tart and sweet balance in a key lime pie?
The perfect balance relies on using fresh key lime juice and adjusting the amount of sugar to your preference. A high-quality graham cracker crust also adds a complementary sweetness.
Can I use regular limes instead of key limes?
While possible, using regular limes will alter the flavor profile. Key limes have a distinctly floral and tart flavor that is characteristic of key lime pie. The substitution is not recommended.
What are some common mistakes to avoid when making key lime pie?
Overbaking can cause the filling to crack. Also, avoid using too much lime zest, as it can make the pie bitter. And don't forget to chill the pie thoroughly before serving.
How can I store leftover key lime pie?
Leftover key lime pie should be stored in the refrigerator, covered, for up to 3-4 days. This will help maintain its texture and flavor. Freezing is not generally recommended.
Final Reflection: Unlocking the Sweetness of Simplicity
Mastering the art of key lime pie isn't about complex techniques; it's about achieving a perfect balance of tart and sweet, a harmony that resonates far beyond the plate. This simple recipe, designed for ease and accessibility, proves that culinary excellence can be found in the most straightforward approaches. The ease of execution doesn't diminish the impact of the final product – a vibrant, refreshing dessert that's both satisfying and elegant.
The enduring appeal of key lime pie lies not just in its deliciousness, but in its ability to evoke memories and create new ones. It's a dessert that transcends generations, a taste of sunshine and simpler times. The best things in life are simple,
a sentiment perfectly embodied by this classic dessert. Its continued popularity speaks to our innate desire for uncomplicated pleasures, a welcome respite from the complexities of modern life. The recipe itself, passed down and adapted, reflects this shared culinary heritage, a testament to the power of simple recipes to connect us across time and cultures.
Now, I invite you to consider the power of simplicity in your own life. Don't be intimidated by complex recipes or elaborate techniques. Embrace the beauty of straightforward approaches, whether in the kitchen or in other aspects of your life. Try this recipe, savor the taste, and let it inspire you to find joy in the simple things. Perhaps, like this key lime pie, your own life's masterpiece awaits, ready to be created with ease and grace.
Unlock Your Inner Pastry Chef: Bake the Perfect Key Lime Pie!
Thanks for joining us on this delicious journey into the world of Key Lime Pie! We hope you now feel confident in your ability to create a truly exceptional dessert. Ready to take your baking skills to the next level?
- Bake your dream Key Lime Pie: Gather your ingredients and follow our recipe again – this time, experiment with different crust options or add a unique topping!
- Share your masterpiece: Post a picture of your creation on social media and tag us @BakeWithEase – we'd love to see your baking brilliance!
- Challenge a friend: Dare a friend to bake along with you and see who creates the most stunning Key Lime Pie!
What unique twist will you add to your next Key Lime Pie creation? Let us know in the comments below!