
Simple Steps to Baking French Macaron Shells Perfectly

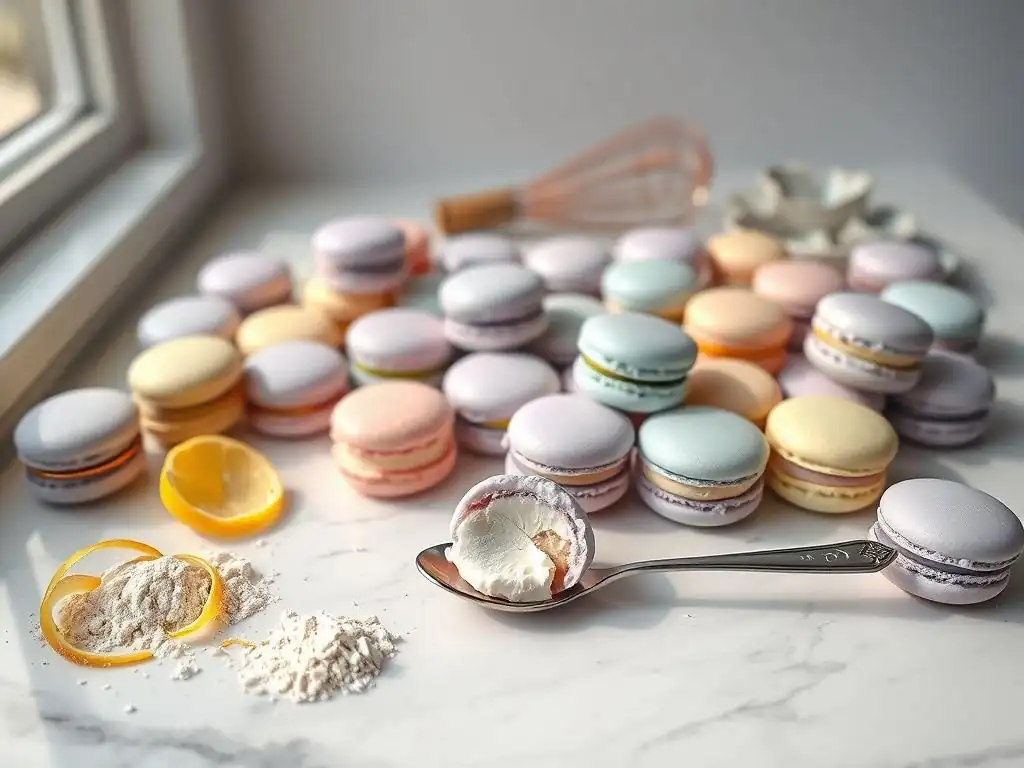
Welcome to BakeWithEase, your guide to baking bliss!
Ever dreamt of creating those delicate, ethereal French treats? You've come to the right place. Get ready to unlock the secrets to achieving perfect French macaron shells. This recipe simplifies the process, guiding you through each step with clarity and confidence. Intrigued? Let's dive in and transform your kitchen into a Parisian patisserie!
- Mastering French Macarons: A Comprehensive Guide to Perfect Shells
- Achieving Macaron Perfection: Your Guide to Exquisite Shells
- Essential Ingredients for Impeccable Macaron Shells
-
Equipment Needed for Baking Exquisite Macaron Shells
- Baking Sheets: Selecting the Right Material and Size
- Parchment Paper or Silicone Mats: Ensuring Easy Release
- Stand Mixer or Hand Mixer: Optimizing Meringue Volume
- Piping Bag and Round Tip: Precision Piping for Uniformity
- Kitchen Scale: Precise Measurements for Macaron Consistency
- Sifter: Achieving Smoothness and Preventing Lumps
- Step-by-Step: The Detailed French Macaron Shell Recipe
-
Troubleshooting Common Macaron Shell Challenges
- Cracked Macaron Shells: Identifying Causes and Implementing Solutions
- Hollow Macaron Shells: Understanding and Preventing Formation
- No Feet on Macarons: Diagnosing and Correcting the Issue
- Uneven Macaron Shells: Achieving Uniformity and Consistency
- Sticky Macaron Shells: Addressing Texture Issues and Improving Results
- Storing Your Exquisite French Macaron Shells
- Advanced Tips for French Macaron Shell Success
-
Frequently Asked Questions
- How crucial is the almond flour quality in achieving perfect French macaron shells?
- What role does aging the egg whites play in the macaron baking process?
- Can I substitute ingredients in the French macaron shells recipe?
- What's the "macaronage" technique, and why is it so important?
- How do I prevent cracked macaron shells during baking?
- Final Reflection: Mastering the Delicate Art of the Macaron
- Unlock Your Inner Pâtissier: Master the Macaron!
Mastering French Macarons: A Comprehensive Guide to Perfect Shells
Achieving Macaron Perfection: Your Guide to Exquisite Shells
Making perfect French macaron shells can feel like a culinary Everest, but with the right guidance and attention to detail, it's absolutely achievable. These delicate, airy cookies, sandwiched with luscious fillings, are a testament to precision in baking. The journey to mastering the perfect French macaron shells recipe involves understanding the science behind the ingredients and the technique of macaronage. It's a rewarding process that yields beautiful, delicious results.
This guide breaks down the process into simple, manageable steps, focusing specifically on creating those coveted smooth, shiny shells with the characteristic "foot." We'll explore everything from selecting the best ingredients to troubleshooting common issues, ensuring you have the knowledge and confidence to bake stunning macarons right in your own kitchen. Let's unlock the secrets to baking exquisite macaron shells together.
The Ultimate French Macaron Shell Recipe: A Detailed Guide
Crafting the perfect French macaron shells recipe requires precision, patience, and a bit of practice. The foundation of successful macarons lies in accurate measurements and careful execution of each step, especially the meringue preparation and the crucial macaronage stage.
While ratios can vary slightly, a common starting point uses approximately 150g of almond flour, 150g of icing sugar, 55g of aged egg whites for the dry ingredients, and another 55g of aged egg whites with 150g of granulated sugar for the meringue. This specific ratio, or close variations, is widely regarded for producing stable meringue and a batter that yields smooth, footed shells.
The process begins with preparing your dry ingredients by sifting them meticulously to remove any lumps, which is critical for smooth shells. Simultaneously, aged egg whites are whipped into a stable meringue with granulated sugar. The magic happens during macaronage, where the dry ingredients are folded into the meringue until the batter reaches the "lava" or "ribbon" consistency. This balance is key; under-mixing prevents the foot from forming, while over-mixing leads to flat, cracked shells. Following this guide will provide a solid framework to consistently achieve beautiful, perfect French macaron shells.
Essential Ingredients for Impeccable Macaron Shells
Almond Flour: Selecting and Preparing for Optimal Results
Choosing the right almond flour is paramount for smooth, professional-looking macaron shells. Look for superfine blanched almond flour. This means the almonds have been skinned before grinding, resulting in a lighter color and finer texture. Coarser almond flour will give your shells a grainy appearance and texture, detracting from the delicate nature of a perfect macaron. It's important to ensure the almond flour is fresh and free from excess oil, which can weigh down the batter. Storing it in an airtight container in the refrigerator or freezer can help maintain its freshness.
Before using, almond flour should always be sifted, often together with the icing sugar. Even superfine flour can contain small clumps or larger pieces of almond. Passing the mixture through a fine-mesh sieve, sometimes even twice, ensures that your dry ingredients are perfectly uniform. Any bits left in the sieve should be discarded. For instance, sifting 150g of high-quality superfine almond flour might leave behind just 1-2g of larger particles, but removing these is vital for that signature smooth finish on your perfect French macaron shells.
Icing Sugar (Powdered Sugar): Achieving the Ideal Fineness
Icing sugar, also known as powdered sugar or confectioners' sugar, is another critical component for achieving smooth macaron shells. Its fine texture contributes to the delicate structure and helps absorb moisture. Like almond flour, icing sugar must be sifted, as it is prone to clumping due to the small amount of cornstarch often added to prevent caking (typically around 3-5%). These clumps can create bumps on the surface of your shells.
Sifting the icing sugar, preferably with the almond flour, ensures a homogenous mixture. For example, when sifting 150g of icing sugar, you might find several grams of stubborn clumps that wouldn't incorporate smoothly into the batter. Using a food processor briefly to pulse the almond flour and icing sugar together before sifting can help break up clumps and further refine the mixture, but be careful not to over-process, which can release oils from the almonds. This step is non-negotiable for achieving that desirable smooth top on your perfect French macaron shells.
Egg Whites: Preparing and Aging for Meringue Stability
Egg whites are the backbone of the macaron's structure, forming the meringue that gives the shells their lift and airy texture. Using aged egg whites is a widely recommended practice. Aging simply means separating the egg whites from the yolks and letting them sit at room temperature for several hours (4-24 hours is common) or in the refrigerator for a few days in a covered container.
This process is believed to slightly dehydrate the whites, altering their protein structure and allowing them to whip up to a more stable, voluminous meringue. For a batch requiring 110g of egg whites (split into two portions), aging ensures maximum stability.
Ensure your egg whites are free of any trace of yolk or grease, as fat is the enemy of meringue and will prevent the whites from whipping properly. Using room temperature egg whites (around 20-22°C or 68-72°F) is also crucial, as they whip up faster and achieve greater volume and stability than cold ones. For instance, 55g of room-temperature, aged egg whites can easily triple or quadruple in volume when whipped correctly, forming the necessary base for the perfect French macaron shells.
Granulated Sugar: Selecting the Right Type for Meringue
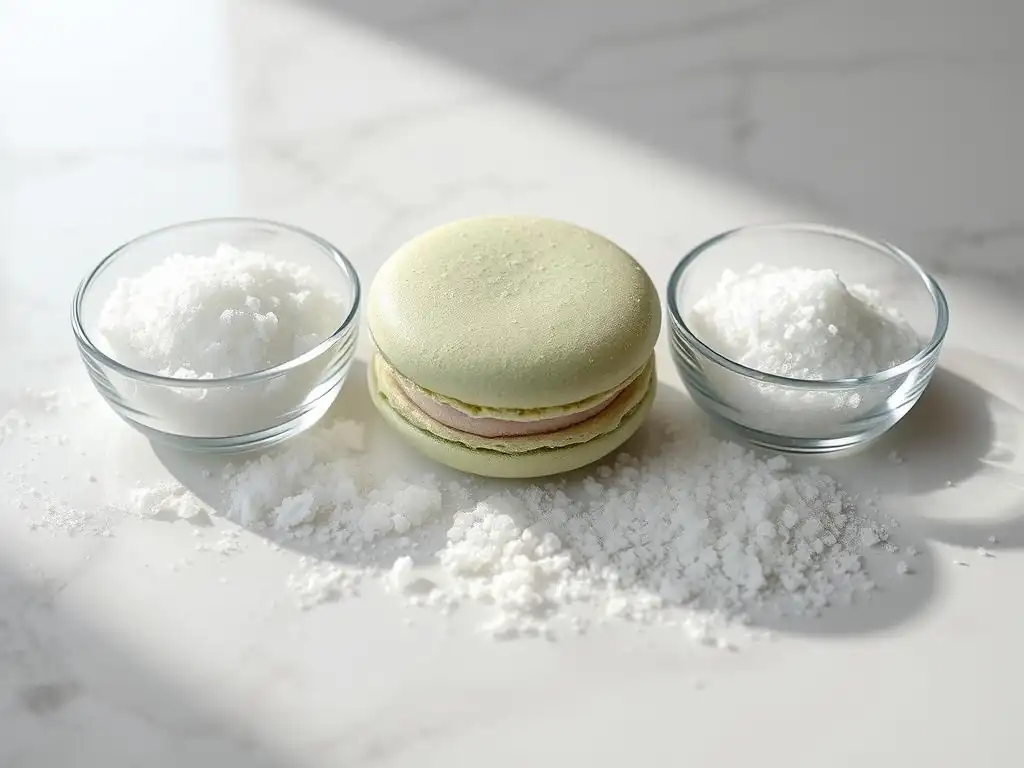
Granulated sugar plays a vital role in stabilizing the meringue by dissolving into the egg whites and forming a strong protein network. Fine granulated sugar or caster sugar is often preferred because it dissolves more easily and quickly into the whipping egg whites, reducing the risk of a grainy meringue. Using standard coarse granulated sugar is possible, but requires more whipping time to ensure it's fully dissolved. Undissolved sugar can lead to gritty shells or can cause the meringue to break down.
The amount of granulated sugar relative to the egg whites is also important; too little sugar results in an unstable meringue that won't hold its shape, while too much can make it difficult to achieve stiff peaks. A common ratio uses roughly twice the weight of granulated sugar to egg whites for the meringue portion (e.g., 110g egg whites to 150-220g sugar across both meringue and dry ingredients if using the Italian method, or 55g egg whites to 150g sugar for the French method meringue).
For the French method, gradually adding 150g of granulated sugar to 55g of whipping egg whites helps build a strong, glossy meringue essential for perfect French macaron shells.
Food Coloring (Optional): Choosing and Using Colorants Effectively
Adding color is part of what makes macarons so visually appealing, but the type and amount of food coloring used can impact the batter consistency. Gel or powder food colorings are highly recommended over liquid ones. Liquid colorings add too much moisture to the batter, which can disrupt the delicate balance and lead to cracked shells or affect the texture. Gel colors are concentrated and require only a small amount to achieve vibrant hues, while powder colors are even more potent and don't add any liquid.
Add food coloring to the meringue once it has reached soft to medium peaks, before achieving stiff peaks. This allows the color to be fully incorporated as the meringue stiffens. Start with a small amount – even a tiny drop of gel color or a pinch of powder can be enough for a batch using 110g of egg whites total. Remember that the color will deepen slightly as the shells bake. Using too much coloring, especially gel, can sometimes weaken the meringue structure, so moderation is key when aiming for vibrant, perfect French macaron shells.
Equipment Needed for Baking Exquisite Macaron Shells
Baking Sheets: Selecting the Right Material and Size
The baking sheet you use significantly impacts how your macaron shells bake. Sturdy, flat aluminum baking sheets are generally preferred because they conduct heat evenly. Avoid dark-coated non-stick pans, as they can absorb too much heat and cause the bottoms of your macarons to brown too quickly or develop unevenly. Light-colored, heavy-gauge aluminum sheets promote consistent baking temperature across the entire surface.
The size of your baking sheet should fit comfortably in your oven with enough space around it for air circulation. Standard half-sheet pans (approximately 18x13 inches) are ideal for most home ovens and allow you to bake a good number of shells per batch, typically fitting 20-24 piped shells depending on their size. Having multiple sheets allows you to pipe the next batch while the first is resting or baking, streamlining the process of making perfect French macaron shells.
Parchment Paper or Silicone Mats: Ensuring Easy Release
To prevent your macaron shells from sticking and to ensure they lift off the baking sheet cleanly, you need a non-stick surface. Parchment paper and silicone baking mats (like Silpat) are the two primary options. Parchment paper is convenient and disposable, offering a reliable non-stick surface. It can be cut to fit your baking sheet, and you can even draw macaron templates on the underside to guide your piping for uniform size.
Silicone mats are reusable and offer excellent non-stick properties, often providing slightly better heat distribution and promoting a more even 'foot' development. They are durable and a good investment if you plan to bake macarons frequently. Whether you choose parchment paper or a silicone mat, ensure it lies flat on the baking sheet without wrinkles, which could distort the shape of your perfect French macaron shells.
Stand Mixer or Hand Mixer: Optimizing Meringue Volume
A powerful mixer is essential for whipping the egg whites into a stiff, stable meringue, which is the foundation of perfect macaron shells. A stand mixer with a whisk attachment is the preferred tool for its consistent speed and ability to handle the meringue as it becomes thick. It allows you to focus on gradually adding sugar while the mixer does the hard work of incorporating air.
If you don't have a stand mixer, a good quality electric hand mixer can also work, though it may take slightly longer to achieve the desired stiff peaks. The key is to use a mixer that can maintain a consistent speed and has enough power to whip the egg whites to the correct consistency without overheating. Proper meringue is achieved when it is glossy, smooth, and holds stiff peaks that don't droop, crucial for the structure of your perfect French macaron shells.
Piping Bag and Round Tip: Precision Piping for Uniformity
Achieving uniform macaron shells is key to their aesthetic appeal and ensuring they bake evenly and can be matched for filling. A piping bag, either disposable or reusable, is necessary to portion the batter onto the baking sheet. Coupling this with a round piping tip allows you to create smooth, circular shells.
A medium-sized round tip, such as an Ateco #805, #806, or a Wilton 1A, is commonly used for standard macaron sizes (about 1.5-2 inches in diameter). The tip size influences the speed and control you have while piping. Ensure the tip is securely fitted in the bag. Practice piping on a piece of parchment paper beforehand if you are new to it. Uniform piping is a skill that improves with practice and is vital for consistently beautiful, perfect French macaron shells.
Kitchen Scale: Precise Measurements for Macaron Consistency
Baking, especially macarons, is a science where precision is paramount. Using a digital kitchen scale to weigh your ingredients is far more accurate than using volume measurements (like cups and spoons). Variations in how ingredients are scooped or packed can lead to significant differences in weight, throwing off the delicate balance of the macaron recipe. For example, 1 cup of almond flour can weigh anywhere from 90g to 120g depending on how it's measured by volume.
Weighing ensures you use the exact amount specified in the recipe every time. This consistency is crucial for replicating successful batches and troubleshooting failures. Weighing out 150g of almond flour and 150g of icing sugar, along with precise amounts of egg whites and sugar for the meringue, provides a reliable foundation. Investing in an accurate kitchen scale is perhaps the single most important step towards consistently baking perfect French macaron shells.
Sifter: Achieving Smoothness and Preventing Lumps
A fine-mesh sifter is an indispensable tool for macaron making. As mentioned earlier, both almond flour and icing sugar are prone to clumps that will ruin the smooth surface of your shells. Sifting removes these impurities and aerates the dry ingredients, helping them combine more easily with the meringue.
A sifter or sieve with very small holes is best. You can use a traditional crank sifter or a fine-mesh sieve and a spoon or bench scraper to push the ingredients through. Sifting the almond flour and icing sugar together ensures they are thoroughly combined and lump-free. This simple step of sifting your 150g of almond flour and 150g of icing sugar together is critical for achieving that coveted smooth top on your perfect French macaron shells.
Step-by-Step: The Detailed French Macaron Shell Recipe
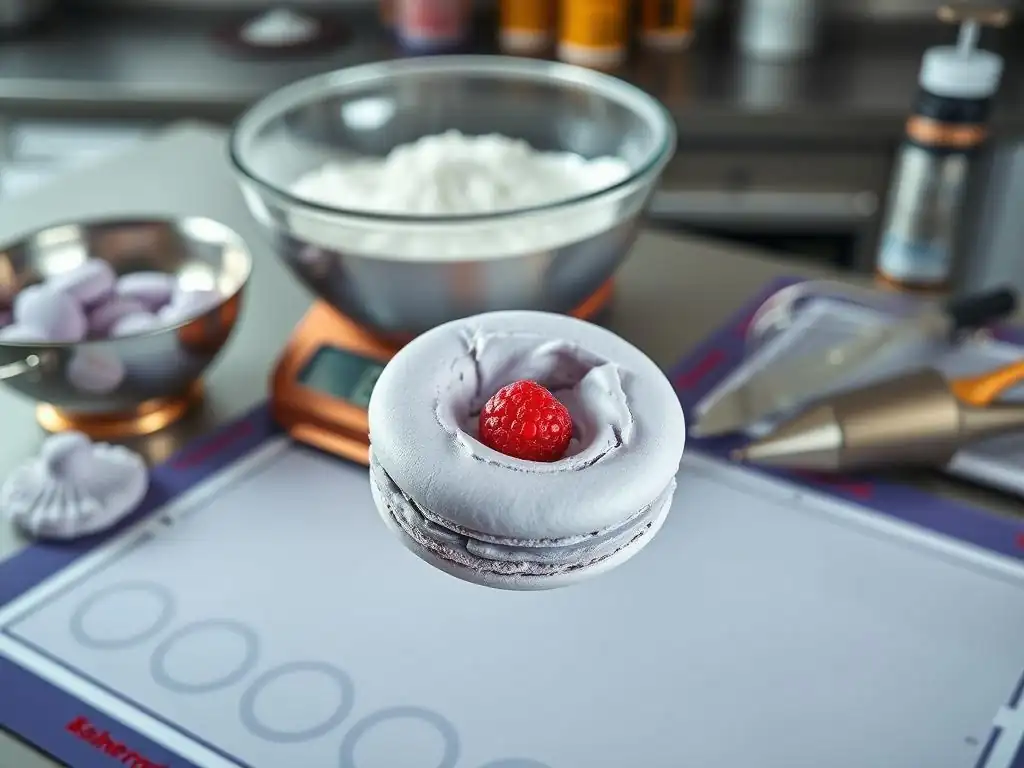
Step 1: Preparing the Almond Flour Mixture
Sifting Almond Flour and Icing Sugar: Preventing Lumps and Ensuring Texture
Begin by accurately weighing out your superfine almond flour and icing sugar using a digital kitchen scale. For a typical batch producing around 30-40 shells, this might be 150g of almond flour and 150g of icing sugar. Combine these two ingredients in a bowl.
The next crucial step is sifting this mixture. Use a fine-mesh sieve and gently push the almond flour and icing sugar through, discarding any larger pieces of almond or stubborn sugar clumps that remain in the sieve. Some bakers even pulse the mixture briefly in a food processor before sifting to break up any remaining large particles, taking care not to over-process and release oils.
Repeat the sifting process at least once, or even twice, to ensure the dry ingredients are as fine and lump-free as possible. This meticulous sifting (passing perhaps 300g of mixture through the sieve twice) is directly responsible for the smooth, unblemished surface of perfect French macaron shells. A grainy texture is often a result of insufficient sifting. Set the perfectly sifted mixture aside in a dry bowl.
Weighing the Dry Ingredients: Accuracy for Consistent Results
Precision in measuring dry ingredients is non-negotiable for consistent macaron success. Using a kitchen scale to weigh your almond flour and icing sugar (e.g., 150g each) ensures you have the correct ratio of dry to wet ingredients. Unlike volume measurements, which can vary based on density and packing, weight is constant. This accuracy is fundamental because the balance between the dry ingredients and the meringue is what determines the batter's consistency during macaronage.
Even small variations in the weight of almond flour or icing sugar – say, being off by just 5-10g – can significantly impact the final batter texture and the resulting shells. If there's too much dry ingredient, the batter will be too stiff; too little, and it will be too wet. Both scenarios make achieving the correct macaronage consistency difficult and can lead to issues like hollows, cracks, or lack of feet. Always rely on your scale for perfect French macaron shells.
Step 2: Whipping the Meringue
Aging Egg Whites: Improving Meringue Volume and Stability
Using aged egg whites is a technique favored by many macaron experts for producing a more stable and voluminous meringue. This process involves separating egg whites (e.g., 110g for a batch, split into two portions of 55g each) from the yolks and letting them sit uncovered (or loosely covered to prevent drying out completely) at room temperature for several hours (4-24 hours) or in the refrigerator for 2-3 days. Aging is thought to slightly dehydrate the whites, altering their protein structure and allowing them to whip up higher and hold air better.
Ensure the egg whites are at room temperature before whipping (around 20-22°C or 68-72°F), as cold whites do not whip as effectively. Room temperature whites achieve full volume faster and result in a more stable foam. While some bakers skip aging, many find it significantly improves their meringue's performance, leading to stronger, more reliable perfect French macaron shells.
Adding Granulated Sugar Gradually: Creating a Stable and Glossy Meringue
Once your room temperature, aged egg whites (e.g., 55g for the meringue portion) are in the clean bowl of your stand mixer, begin whipping them on medium speed until they become frothy and opaque, like soap bubbles. This is the point to start adding the granulated sugar (e.g., 150g). Add the sugar very slowly, a tablespoon or two at a time, allowing each addition to dissolve into the egg whites before adding the next. This gradual incorporation is crucial for building a strong sugar-protein matrix.
Increase the mixer speed to medium-high or high as you continue adding sugar. The meringue will transition from frothy to soft peaks, then to medium peaks, and finally to stiff, glossy peaks. The slow addition of sugar ensures it fully dissolves, creating a smooth, stable, and shiny meringue that is essential for the structure and appearance of perfect French macaron shells. The entire process of whipping and adding sugar can take 8-15 minutes depending on your mixer.
Achieving Stiff Peaks: Knowing the Right Meringue Consistency
The meringue is ready when it reaches stiff peaks. This means when you stop the mixer and lift the whisk attachment, the meringue should stand straight up without drooping. It should also look smooth, glossy, and homogeneous, without any grainy texture (indicating undissolved sugar). If you tilt the bowl, the meringue should stay firmly in place, not slide or move.
Testing for stiff peaks and ensuring the sugar is dissolved is vital. Rub a tiny amount of meringue between your fingers; it should feel smooth, not gritty. Over-whipping the meringue can cause it to become dry and separated, which is difficult to incorporate properly into the dry ingredients. Under-whipping will result in a weak meringue that collapses during macaronage or baking, leading to flat shells. Mastering the stiff peak stage is a key step towards perfect French macaron shells.
Incorporating Food Coloring (Optional): Achieving Consistent and Vibrant Colors
If you plan to color your macaron shells, this is the stage to incorporate gel or powder food coloring. Once the meringue has reached soft to medium peaks (before it's fully stiff), add a small amount of coloring. Start with just a drop or two of gel or a tiny pinch of powder, as colors intensify as they bake. Continue whipping the meringue until it reaches stiff peaks and the color is evenly distributed.
Adding color too early can sometimes interfere with the whipping process, while adding it too late makes it difficult to achieve a uniform color. Gel and powder colors are preferred because they don't add excess moisture like liquid food dyes. For example, to achieve a pastel pink using 110g total egg whites, you might only need 1-2 drops of a concentrated gel color added at the medium peak stage. Achieving consistent color across all shells is part of creating beautiful, perfect French macaron shells.
Step 3: Macaronage: Achieving the Perfect Batter Consistency
Folding the Meringue into the Almond Flour Mixture: Gentle Incorporation
Macaronage is the unique folding technique that combines the dry ingredients (sifted almond flour and icing sugar) with the meringue. This is arguably the most critical step for achieving perfect macaron shells. Add about one-third of the stiff meringue to the sifted dry ingredients. Use a spatula to gently fold the meringue into the dry ingredients. At this stage, you can be a bit more vigorous to start incorporating the mixture.
Once partially combined, add the remaining meringue. The goal of macaronage is to deflate the meringue just enough to create a smooth, flowing batter. Use a scraping and folding motion, working from the bottom of the bowl up and over, rotating the bowl as you go. Don't stir or beat the mixture; this will knock out too much air. Gentle folding is key to preserving enough air bubbles for the shells to rise properly and develop feet.
The Ribbon Test: Identifying the Ideal Macaron Batter Consistency
The macaronage is complete when the batter reaches the "lava" or "ribbon" consistency. This is tested by scooping some batter onto your spatula and letting it fall back into the bowl. The batter should flow slowly and continuously like molten lava or a thick ribbon, without breaking. You should be able to draw a figure eight with the falling batter without it breaking. It should then slowly reabsorb back into the main mass of batter in the bowl within 15-20 seconds, leaving a faint line.
If the batter is too stiff and doesn't flow, you need to continue folding gently. If it's too liquid and flows too quickly, it's likely over-mixed, and unfortunately, there's little you can do at that point to salvage the batch for perfect macaron shells. It typically takes between 50-80 folds depending on the batch size and meringue stability to reach this perfect consistency. This "ribbon test" is the definitive sign that your batter is ready for piping.
Step 4: Piping the Macaron Shells
Filling the Piping Bag: Preventing Air Bubbles and Ensuring Smooth Flow
Once your macaron batter has reached the correct ribbon consistency, it's time to transfer it to a piping bag fitted with a round tip (e.g., Ateco #805). To fill the bag easily and minimize air bubbles, place the piping bag, tip down, inside a tall glass or container and fold the top edges over the rim. Spoon the batter into the bag, pushing it down gently as you go to remove any large air pockets.
Once filled, twist the top of the bag tightly to seal it and push the batter down towards the tip. This prevents batter from oozing out the top and helps maintain pressure for even piping. Ensuring a smooth, air-bubble-free flow is crucial for creating smooth, uniform discs when piping, contributing directly to the aesthetic of your perfect French macaron shells.
Piping Uniform Circles: Achieving Even and Consistent Shells
Holding the piping bag vertically (at a 90-degree angle) about half an inch above your baking sheet lined with parchment paper or a silicone mat, apply steady, even pressure to pipe rounds of batter. Stop squeezing when the batter is slightly smaller than your desired shell size, then quickly flick the bag upwards with a circular motion to break off the flow cleanly. The batter will settle and spread slightly into a perfect circle.
Aim for consistent size and spacing between shells (at least 1-2 inches apart) to prevent them from merging as they spread. If using a template, pipe directly within the circle guides. Consistent pressure and technique across all piped shells are key to ensuring they bake evenly and can be easily matched for filling, resulting in a batch of uniform, perfect French macaron shells. Piping takes practice, but uniformity improves with each tray.
Tapping the Baking Sheet: Releasing Trapped Air Bubbles
Immediately after piping all the shells on a baking sheet, firmly tap the bottom of the sheet against your counter several times (4-6 sharp taps are usually sufficient). This action helps to release any remaining trapped air bubbles within the batter, which can cause shells to crack during baking. As you tap, you will often see tiny bubbles rise to the surface and pop.
Tapping also helps the piped rounds to settle and spread slightly, creating a smoother surface. If any small bubbles remain on the surface after tapping, you can gently pop them with a toothpick or scribe. This step is surprisingly effective in preventing surface imperfections and is a standard technique for achieving smooth, beautiful perfect French macaron shells.
Step 5: Resting the Macaron Shells
Forming a Skin: Essential for Proper Foot Development
After piping and tapping, the macaron shells must rest at room temperature until they develop a dry skin on their surface. This resting period is absolutely crucial for the development of the 'foot' – the ruffled base characteristic of a perfect macaron. The skin forms as moisture evaporates from the surface of the shell.
The skin acts like a cap during baking. As the internal temperature of the shell rises and the trapped air expands, the skin prevents the air from escaping upwards, forcing it downwards instead. This downward pressure pushes the batter outwards at the base, creating the signature lifted foot. Without a proper skin, the air will escape through cracks on the surface, resulting in flat, cracked shells without feet.
Determining the Resting Time: Factors Affecting Skin Formation
The time required for the shells to form a skin varies significantly depending on the humidity of your kitchen. In a dry environment (low humidity, say below 40%), shells might develop a skin in as little as 30-60 minutes. In a humid environment (high humidity, say above 60-70%), it could take 2-3 hours, or even longer. Do not rush this step.
The skin is ready when you can gently touch the surface of a shell with your fingertip without any batter sticking to you. The surface should feel dry and smooth. If you live in a very humid climate, running a dehumidifier in the room where the shells are resting can help speed up the process. Patience during this resting phase is rewarded with reliably footed, perfect French macaron shells.
Step 6: Baking the Macaron Shells
Oven Temperature: Optimizing Baking for Even Cooking
Baking macarons requires a specific, consistent oven temperature. Most recipes recommend a temperature between 140°C and 160°C (285°F and 320°F). Lower temperatures (like 140-145°C) generally result in slower baking, which can help prevent cracking and promote even foot development, though they might take longer (18-22 minutes). Higher temperatures (like 150-160°C) bake faster (12-16 minutes) but increase the risk of issues if your oven isn't perfectly calibrated.
It is highly recommended to use an oven thermometer to verify your oven's internal temperature, as oven thermostats can be inaccurate by as much as 20-30°C. Preheat your oven thoroughly for at least 20-30 minutes to ensure the temperature is stable. Baking at the correct, consistent temperature is vital for achieving evenly cooked, footed, perfect French macaron shells.
Baking Time: Achieving a Perfect Foot and Desired Texture
The baking time for macaron shells typically ranges from 12 to 22 minutes, depending on your oven temperature, the size of your shells, and whether you are using parchment or a silicone mat. At a temperature of 150°C (around 300°F), shells often take about 14-18 minutes. During the first 5-8 minutes of baking, you should see the 'feet' begin to rise around the base of the shells.
The shells are properly baked when they have developed a distinct foot, the tops are set and no longer shiny, and they look matte. Over-baking will result in hard, brittle shells, while under-baking will leave them soft, sticky, and prone to collapsing or sticking to the mat. Observing the shells closely as they bake is key to determining the exact time needed in your oven for perfect French macaron shells.
Checking for Doneness: The Gentle Wiggle Test and Visual Cues
A reliable way to check if macaron shells are done is the gentle wiggle test. Carefully open the oven door slightly and gently touch the side of a shell. If it wiggles loosely on its foot, it needs more baking time. If it feels stable and doesn't move easily from its base, it is likely done. The surface should also appear matte and the color should be set.
Another visual cue is the underside of the shell; if you can peek under one (carefully! ), it should appear cooked and not wet. If baking multiple trays, rotate them halfway through the baking time for even heat distribution, especially if your oven has hot spots. Mastering this doneness test ensures your perfect French macaron shells are properly cooked through.
Step 7: Cooling and Maturing the Macaron Shells
Cooling Completely: Preventing Sticking and Damage
Once the macaron shells are baked, immediately remove the baking sheet from the oven. Let the shells cool completely on the baking sheet before attempting to remove them. This is a critical step to prevent them from sticking to the parchment paper or silicone mat. Trying to peel them off while they are still warm will likely result in them tearing or leaving the bottom stuck.
Cooling allows the shells to firm up and release naturally from the non-stick surface. This process can take 15-30 minutes, depending on the ambient temperature. Once fully cooled, they should peel off easily. If they are sticking, it's often a sign they were under-baked. Proper cooling ensures you have intact, perfect French macaron shells ready for filling.
Maturing in the Refrigerator: Enhancing Flavor and Texture
After the shells are filled with ganache, buttercream, or jam, the assembled macarons should ideally be stored in an airtight container in the refrigerator for at least 12-24 hours before serving. This resting period is called "maturing" or "marinating." During this time, the moisture from the filling permeates the shells, softening them slightly and allowing the flavors of the shell and filling to meld together.
Maturing transforms the texture of the macaron from potentially slightly crisp or chewy to the classic delicate, melt-in-your-mouth consistency. While you can eat them immediately, the texture and flavor are significantly improved after maturation. For example, a batch of raspberry-filled macarons will have a more integrated, softer texture after 24 hours in the fridge compared to just 2 hours. This maturation step is essential for achieving the truly exquisite experience of perfect French macaron shells and their filling.
Troubleshooting Common Macaron Shell Challenges
Cracked Macaron Shells: Identifying Causes and Implementing Solutions
Cracked macaron shells are a frustrating but common issue, often indicating that air expanded too quickly during baking without a strong enough structure to contain it. One primary cause is insufficient resting time before baking; if the shells haven't developed a proper dry skin, the expanding air will break through the surface instead of pushing downwards to form a foot. Ensure your shells are completely dry to the touch before they go into the oven – this can take 30 minutes to 2+ hours depending on humidity.
Another common culprit is incorrect oven temperature. If the oven is too hot (e.g., above 160°C or 320°F), the surface can set too quickly and crack before the foot has a chance to develop. Ensure your oven temperature is accurate using an oven thermometer and try baking at a slightly lower temperature (e.g., 140-145°C) for a longer duration (18-22 minutes). Over-whipped or under-whipped meringue can also contribute, as can adding too much food coloring or using liquid coloring which adds excess moisture. Troubleshooting cracked shells often involves adjusting resting time and oven temperature to achieve perfect French macaron shells.
Hollow Macaron Shells: Understanding and Preventing Formation
Hollow shells, where the top dome of the shell is detached from the base, are another frequent problem. This occurs when the shell rises too quickly during baking before the internal structure has fully set. One major cause is an oven temperature that is too high or inconsistent. The rapid expansion of air creates a void. Baking at a slightly lower temperature (e.g., 140-150°C) and ensuring the oven is accurately preheated can help.
Over-mixing the batter during macaronage can also lead to hollows. If the batter is too liquid, it spreads too much and doesn't have enough structure to support the top as it rises, causing it to puff up and then collapse inwards, leaving a hollow. Aim for that perfect ribbon consistency.
Furthermore, sometimes simply allowing the baked shells to cool completely on the tray before removing them and then letting the filled macarons mature in the fridge for 12-24 hours can help "fill in" slight hollows as the moisture from the filling softens the shell. Adjusting temperature and perfecting macaronage are key to preventing hollow perfect French macaron shells.
No Feet on Macarons: Diagnosing and Correcting the Issue
The absence of the signature ruffled 'foot' is often linked to issues with the meringue or the resting process. The foot forms when the dry skin on the macaron surface forces the expanding air downwards during baking. If there's no foot, it's highly probable that a sufficient skin did not form. This is usually due to inadequate resting time or high humidity in the environment. Ensure your shells rest until they are completely dry to the touch, which might take significantly longer in humid conditions.
Another reason for no feet is an unstable or improperly whipped meringue. If the meringue doesn't reach stiff peaks, it won't have the necessary structure to support the shell and create the foot. Similarly, over-mixing the batter during macaronage can knock out too much air and deflate the mixture to the point where it won't rise properly. Ensure your meringue is stiff and glossy, and that you stop macaronage at the perfect ribbon stage. Correcting meringue issues and ensuring proper resting are essential steps towards achieving perfect French macaron shells with beautiful feet.
Uneven Macaron Shells: Achieving Uniformity and Consistency
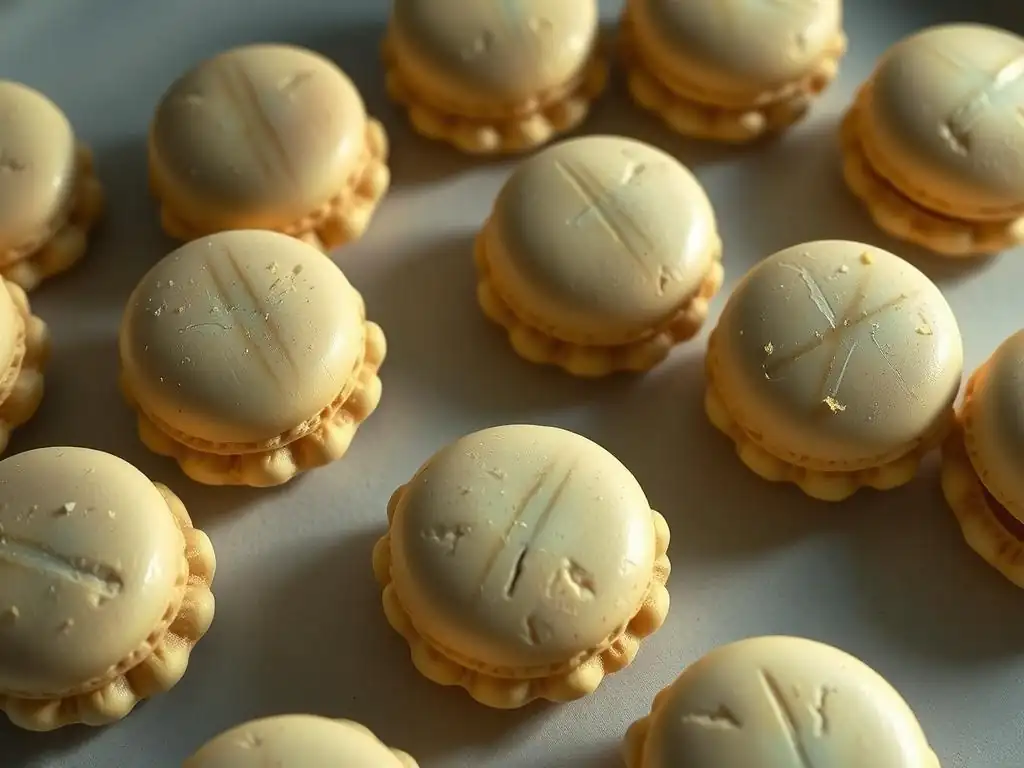
Uneven macaron shells can manifest in several ways: some shells spreading more than others, irregular shapes, or varying sizes. Lack of uniformity often stems from inconsistent piping technique. Applying uneven pressure to the piping bag or not holding it vertically can result in oddly shaped or sized shells. Practice piping on parchment paper beforehand to gain control and consistency in applying pressure and lifting the bag. Using a template drawn on the underside of the parchment paper can also help maintain consistent size and spacing (e.g., aiming for 1.5-inch diameter circles spaced 2 inches apart).
Variations in oven temperature, particularly hot spots, can also cause uneven baking and spreading. Using an oven thermometer to identify and mitigate hot spots, and rotating your baking sheets halfway through the baking time, can help. Ensuring your baking sheet is flat and not warped is also important. Consistent piping technique and managing oven heat are crucial for a batch of uniformly perfect French macaron shells.
Sticky Macaron Shells: Addressing Texture Issues and Improving Results
Sticky macaron shells, either on the surface or the bottom (sticking to the mat/paper), are typically a sign of under-baking or issues with the batter consistency. If the shells are sticky on top even after cooling, they likely needed more time in the oven to dry out completely. Try baking them for an extra 2-3 minutes in the next batch, ensuring the temperature isn't too high to cause browning.
If the bottoms are sticking to the mat or parchment paper after cooling, this is also a strong indicator of under-baking. The internal structure hasn't fully set, causing it to adhere. Ensure you are baking for a sufficient time until the shells pass the wiggle test and release easily after cooling. Over-mixed batter can also contribute to stickiness as it may not develop the proper internal structure. Adjusting baking time and confirming the ribbon consistency during macaronage are key steps to avoid sticky perfect French macaron shells.
Storing Your Exquisite French Macaron Shells
Proper Storage Techniques: Maintaining Optimal Freshness and Texture
Once your perfect French macaron shells have completely cooled, they can be stored unfilled for a short period. To maintain their texture and freshness, place them in an airtight container. Store the container at room temperature for no more than 1-2 days. Any longer, and they are best stored in the refrigerator or freezer.
Proper storage prevents the shells from absorbing excess moisture from the air, which can make them soft, or becoming too dry and brittle. If storing in the refrigerator (which is ideal after filling), ensure the container is truly airtight to prevent them from picking up odors from other foods. Storing shells correctly is vital whether you plan to fill them immediately or later, preserving their delicate texture until they become perfect French macaron shells with their filling.
Freezing Macaron Shells: Extending Shelf Life and Preserving Quality
Macaron shells freeze exceptionally well, making them a great make-ahead component. Ensure the shells are completely cooled. Place them in a single layer on a baking sheet and freeze until solid (about 30-60 minutes). Once frozen, transfer the shells to an airtight container or a freezer-safe bag, layering them carefully between sheets of parchment paper to prevent sticking.
Properly frozen macaron shells can last for up to 1-2 months. When you're ready to use them, take them out of the freezer and let them thaw completely at room temperature in their airtight container before filling. This prevents condensation from forming on the shells, which could affect their texture. Freezing is an excellent way to preserve the quality of your perfect French macaron shells, allowing you to fill and enjoy them at your convenience.
Advanced Tips for French Macaron Shell Success
Beyond the fundamental steps, here are a few advanced tips to help you consistently achieve perfect French macaron shells:
- Use a Thermometer: An oven thermometer is non-negotiable for accurate temperature. Consider a candy thermometer for Italian meringue (though this guide focuses on French).
- Control Humidity: If humidity is a constant issue, consider baking on less humid days or using a small dehumidifier near where the shells are resting.
- Double Sift: Sifting the almond flour and icing sugar mixture two or even three times can make a noticeable difference in shell smoothness.
- Tap Firmly: Don't be afraid to give the trays a good, firm tap after piping – this is key for releasing air bubbles.
- Know Your Oven: Every oven is different. Keep notes on temperature and baking time for your specific oven to refine your process. A slight adjustment (e.g., 5°C lower or higher) can make a big difference.
- Practice Macaronage: The ribbon test is learned through practice. It's better to under-mix slightly on your first few tries than to over-mix.
Key Takeaways: Essential Techniques for Mastering Macarons
Mastering perfect French macaron shells boils down to a few critical techniques executed with precision and patience. Firstly, accurate measurement by weight is non-negotiable; a digital scale is your best friend. Secondly, creating a stable, stiff, and glossy meringue from aged, room-temperature egg whites and gradually added sugar is the structural foundation.
Thirdly, the macaronage stage is paramount – achieving the perfect "ribbon" consistency requires gentle folding and knowing when to stop. Fourthly, proper resting until a dry skin forms is essential for foot development, and the time needed depends heavily on humidity. Finally, baking at the correct, consistent temperature (verified by an oven thermometer) for the right duration ensures they are cooked through without cracking or becoming hollow. Embrace the learning process, and with attention to these key steps, you will be well on your way to consistently baking perfect French macaron shells.
Frequently Asked Questions
How crucial is the almond flour quality in achieving perfect French macaron shells?
The quality of almond flour is absolutely crucial. You need finely ground almond flour with no skins for a smooth, even shell surface.
What role does aging the egg whites play in the macaron baking process?
Aging the egg whites helps to reduce their moisture content. This leads to more stable meringue and ultimately, better macaron feet.
Can I substitute ingredients in the French macaron shells recipe?
While tempting, substitutions are generally discouraged. The recipe is finely balanced, and altering ingredients can affect the macaron's structure and texture.
What's the "macaronage" technique, and why is it so important?
"Macaronage" is the careful folding of the dry ingredients into the meringue. It's vital to achieve the right batter consistency - not too stiff, not too runny.
How do I prevent cracked macaron shells during baking?
Cracked shells can be caused by too high oven temperature, insufficient resting time before baking, or too much air in the batter.
Final Reflection: Mastering the Delicate Art of the Macaron
The pursuit of the perfect French macaron shell is more than just a recipe; it's a journey of precision, patience, and ultimately, self-discovery. The seemingly simple steps outlined in this guide—from the meticulous aging of egg whites to the crucial macaronage technique—reveal a deeper truth: achieving culinary excellence requires a profound understanding of both the ingredients and the process. This understanding, once gained, translates far beyond the kitchen.
The enduring appeal of the macaron lies not just in its exquisite taste and beauty, but in the challenge it presents. It's a testament to the power of dedication and the rewards of perseverance. The only way to do great work is to love what you do.
- Steve Jobs. This quote resonates deeply with the macaron-making process; the meticulous attention to detail, the potential for setbacks, and the ultimate joy of a perfectly formed shell all mirror the dedication required to achieve excellence in any field.
Now, it's your turn. Don't be intimidated by the seemingly complex nature of macaron-making. Embrace the challenge, experiment with the techniques, and allow the process to teach you about precision, patience, and the sweet rewards of mastering a difficult skill. The perfect macaron shell awaits, not just as a culinary triumph, but as a symbol of your own potential for growth and achievement. Go forth, and bake!
Unlock Your Inner Pâtissier: Master the Macaron!
Thanks for taking the time to explore the art of French macaron shells! You've now got the knowledge to create truly stunning treats. Ready to put your newfound skills to the test?
- Bake a batch of your own macarons today! Use the recipe and tips from the article to create your perfect shells. Don't be afraid to experiment!
- Share your macaron creations with us on social media – we'd love to see your beautiful results! Use #BakeWithEaseMacarons.
- Challenge a friend to a macaron-baking showdown! It's a fun way to practice and share the joy of baking.
What unique flavor combination will you try for your next macaron masterpiece?