
Easy Steps for Flaky Berry Pie Crusts

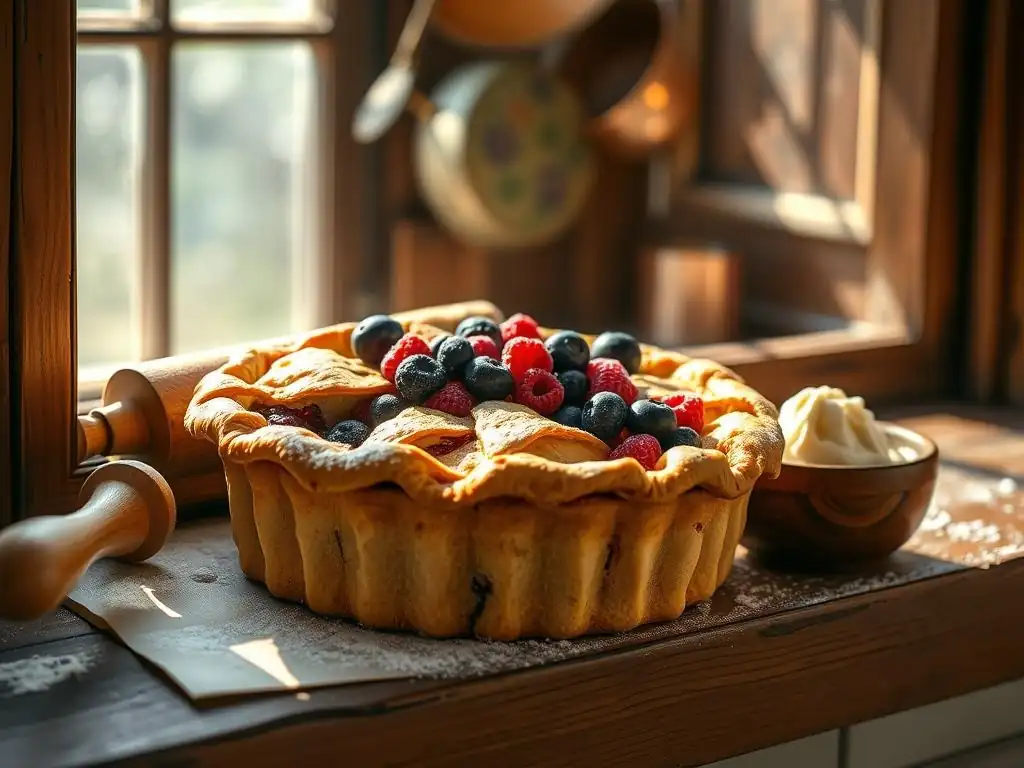
Welcome to BakeWithEase, your haven for delectable homemade creations! Ever dreamt of crafting a perfect, flaky berry pie crust that melts in your mouth? We're about to unlock the secrets to achieving just that. Get ready to discover our easy steps to baking success and elevate your seasonal baking game. But what's the secret to that irresistible texture? Let's dive in and find out!
- Easy Steps for Flaky Berry Pie Crusts: A BakeWithEase Guide
- Introduction to Perfecting Your Flaky Berry Pie Crust Recipe
- Preparing for Your Flaky Berry Pie Crust: Ingredients & Tools
-
Step-by-Step Guide to Making the Perfect Flaky Berry Pie Crust
- Step 1: Combining Dry Ingredients for Optimal Texture
- Step 2: Cutting in the Cold Fat: Achieving Pea-Sized Pieces
- Step 3: Adding Ice Water: Hydrating the Dough for Flakiness
- Step 4: Forming the Dough: Gentle Handling for a Tender Crust
- Step 5: Chilling the Dough: Relaxing the Gluten for Easy Rolling
- Rolling Out Your Flaky Berry Pie Crust: Achieving the Ideal Shape
- Crimping and Pre-Baking (Blind Baking) Your Pie Crust
- Filling and Baking Your Berry Pie with Flaky Crust
- Troubleshooting Common Pie Crust Problems
- Storing Your Flaky Berry Pie Crust and Pie
- Conclusion: Mastering the Art of Flaky Berry Pie Crusts with BakeWithEase
- Frequently Asked Questions
- Final Reflection: The Enduring Allure of a Perfectly Flaky Crust
- Unlock Your Perfect Pie Crust: Bake With Confidence!
Easy Steps for Flaky Berry Pie Crusts: A BakeWithEase Guide
Introduction to Perfecting Your Flaky Berry Pie Crust Recipe
Why a Flaky Pie Crust is Essential for Summer Berry Pies
A truly exceptional summer berry pie begins with a foundation that complements the sweet, juicy filling: a wonderfully flaky pie crust. The delicate, buttery layers of a flaky crust provide a perfect textural contrast to the soft fruit inside. When you bite into a slice, you want to experience a delightful crunch from the crust before reaching the burst of flavor from the berries. This interplay of textures is what elevates a simple berry pie into a memorable dessert, making the flaky berry pie crust recipe a cornerstone for summer baking success.
Furthermore, a well-made flaky crust doesn't just offer texture; it contributes a rich, buttery flavor that enhances the natural sweetness and slight tartness of summer berries like blueberries, raspberries, and strawberries. Unlike a dense or tough crust that can feel heavy and detract from the light, fresh taste of the fruit, a flaky crust feels light and airy.
This makes it the ideal vehicle for showcasing the vibrant flavors of seasonal berries, ensuring that each forkful is a harmonious blend of fruit and pastry. Mastering this specific flaky berry pie crust recipe is key to unlocking peak summer pie enjoyment.
BakeWithEase's Commitment to Simple Baking Recipes
At BakeWithEase, our mission is to demystify baking and make it accessible and enjoyable for everyone, regardless of their experience level. We believe that creating delicious treats, like a perfect flaky berry pie crust recipe, shouldn't require complex techniques or specialized equipment. Our guides break down each step into manageable actions, providing clear instructions and helpful tips along the way. We focus on fundamental principles and reliable methods that yield consistent, delightful results every time you bake.
This dedication to simplicity is evident in our approach to crafting a flaky berry pie crust. We'll walk you through the process, explaining not just how to do something, but why it works, empowering you with the knowledge to bake confidently. Our goal is to help you achieve that coveted flaky texture without the stress often associated with pie crusts. By following our straightforward flaky berry pie crust recipe, you'll build confidence and create a pie that tastes as beautiful as it looks, bringing the joy of homemade baking into your kitchen.
Preparing for Your Flaky Berry Pie Crust: Ingredients & Tools
Essential Ingredients for a Tender and Flaky Pie Crust
Flour Selection: The Key to a Light Pie Crust
The type of flour you choose plays a significant role in the texture of your flaky berry pie crust. All-purpose flour is the most common choice and works very well for pie crusts because it has a moderate protein content, typically ranging from 10% to 12%. This protein forms gluten when mixed with water, which gives structure to the dough. However, too much gluten development leads to a tough crust, which is why careful handling and minimal mixing are crucial when using all-purpose flour for your flaky berry pie crust recipe.
For an even more tender crust, some bakers opt for pastry flour, which has a lower protein content (around 8-9%). This results in less gluten formation and a more delicate texture. While pastry flour can produce an exceptionally tender crust, all-purpose flour is readily available and, when handled correctly according to this flaky berry pie crust recipe, will still yield wonderfully flaky results. Always measure your flour accurately, preferably by weight (e.g., 120-130 grams per cup), to ensure consistent results.
Fat Matters: Choosing Between Butter, Shortening, and Lard
The fat you use is paramount to achieving flakiness in your pie crust. Cold butter is a popular choice because it provides excellent flavor and contributes to flakiness. As the cold butter melts in the oven, it creates steam, which pushes apart the layers of dough, resulting in those desirable flaky pockets. For best results in a flaky berry pie crust recipe, use unsalted butter so you can control the salt level, and ensure it is very cold, cut into cubes, or even frozen and grated.
Vegetable shortening and lard are other options, known for producing very flaky and tender crusts. Shortening, being 100% fat (unlike butter which is about 80% fat and 20% water), is easier to work with and less prone to melting quickly, making it forgiving for beginners. Lard, traditionally used, offers exceptional flakiness and a unique richness. Many bakers use a combination of butter for flavor and shortening or lard for added flakiness and ease of handling. A common ratio might be half butter and half shortening for a robust flaky berry pie crust recipe.
Ice Water: The Secret Weapon for Flaky Layers
Ice water is a critical component in a flaky pie crust recipe, and using it correctly is essential. The water hydrates the flour to form just enough gluten for structure, but the key is to use very cold water, ideally with ice cubes still floating in it before measuring. The cold temperature helps keep the fat solid in the dough. When the pie bakes, these cold pockets of fat melt slowly, releasing steam that creates distinct layers of flakiness.
The amount of water needed can vary slightly depending on the flour and humidity, but it's typically only a few tablespoons per cup of flour, perhaps 4-6 tablespoons for a standard double-crust recipe. Adding too much water develops too much gluten, resulting in a tough crust, while too little water will make the dough crumbly and hard to roll. The goal is to add just enough ice water for the dough to barely come together, forming a shaggy mass. This precise hydration is vital for a successful flaky berry pie crust recipe.
Must-Have Tools for a Successful Pie Crust
Pie Plate Perfection: Finding the Right Size and Material
Choosing the right pie plate is important for baking an even, golden-brown flaky berry pie crust. A standard pie plate is typically 9 inches in diameter and holds about 6-8 cups of filling. Using a plate that is too large or too small for your dough amount can affect the crust thickness and baking time. Depth also matters; a deep-dish pie plate (often 9.5 or 10 inches wide and deeper) requires more dough and a longer baking time.
Materials like glass, ceramic, and metal all have different properties. Glass pie plates conduct heat slowly and evenly, allowing you to see the browning progress on the bottom crust, which is helpful for preventing a soggy bottom in a berry pie. Ceramic plates also heat evenly and retain heat well, often offering beautiful presentation.
Metal pie plates, particularly aluminum or steel, conduct heat quickly, leading to crispier crusts, though they can sometimes result in uneven browning compared to glass or ceramic. For a flaky berry pie crust recipe, any of these can work, but glass is often recommended for beginners to monitor the bottom crust.
Pastry Blender or Food Processor: Your Choice for Cutting in Fat
The method you use to cut the cold fat into the flour mixture significantly impacts the flakiness of your pie crust. A pastry blender, a simple tool with wires or blades, is a traditional method. It allows you to manually work the cold butter or shortening into the flour until it resembles coarse crumbs with some larger, pea-sized pieces of fat remaining. This manual process gives you good control over the texture, ensuring those crucial pockets of fat remain intact for flakiness.
Alternatively, a food processor offers a faster way to cut in the fat. You simply pulse the cold, cubed fat with the flour mixture until it reaches the desired consistency of coarse crumbs and pea-sized pieces. This method is quicker and keeps the ingredients colder, which is beneficial for flakiness. However, it's easy to over-process, which can lead to a tougher crust by breaking down the fat too much and developing gluten. Whichever tool you choose for your flaky berry pie crust recipe, the key is to work quickly and avoid overmixing.
Rolling Pin Essentials: Achieving Even Thickness
A good rolling pin is indispensable for transforming your chilled dough into a uniform sheet for your flaky berry pie crust. Rolling pins come in various styles, including American (with handles and a central cylinder), French (tapered dowel), and baker's (straight dowel). French and baker's pins offer more direct contact and control, allowing you to feel the dough's thickness more intuitively, while American pins can be easier to handle for some.
Regardless of style, the goal is to roll the dough to an even thickness, typically about 1/8 inch (approximately 3mm). Consistent thickness ensures that the crust bakes evenly, preventing thin spots that might burn and thick spots that might remain doughy. Rolling from the center outwards and rotating the dough frequently helps maintain a circular shape and even thickness, essential steps in achieving a perfectly baked flaky berry pie crust from your recipe.
Step-by-Step Guide to Making the Perfect Flaky Berry Pie Crust
Step 1: Combining Dry Ingredients for Optimal Texture
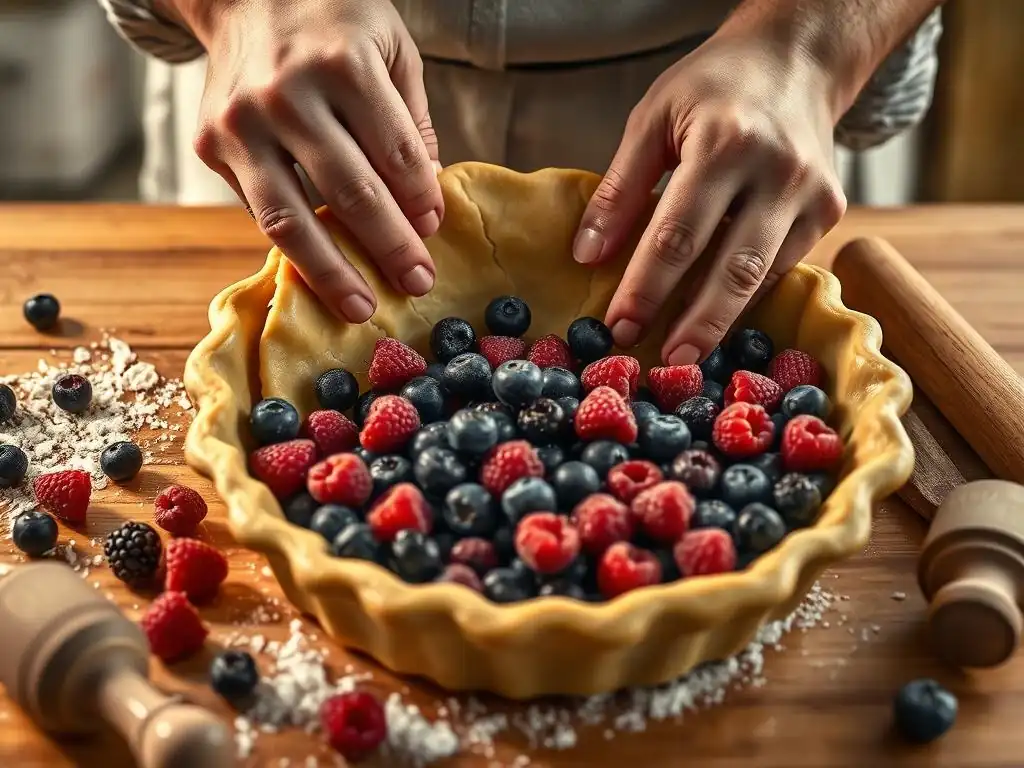
The first step in creating your flaky berry pie crust recipe is to prepare the dry ingredients. In a large bowl, whisk together the all-purpose flour, salt, and any optional sugar. The salt is crucial as it enhances the flavor and also helps to tenderize the gluten. A small amount of sugar (like 1-2 teaspoons) can be added for a touch of sweetness and to aid in browning, though it's not strictly necessary for a savory crust.
Whisking ensures that the salt and sugar are evenly distributed throughout the flour. This prevents pockets of saltiness and ensures a consistent flavor profile in your finished flaky berry pie crust. Make sure your bowl is large enough to comfortably work the fat into the flour in the next step without making a mess. Starting with well-combined dry ingredients sets the stage for successfully incorporating the fat and liquid.
Step 2: Cutting in the Cold Fat: Achieving Pea-Sized Pieces
Cutting cold fat into the dry ingredients is the cornerstone technique for a flaky berry pie crust recipe. Add your cold, cubed butter, shortening, or lard to the flour mixture. Using a pastry blender, your fingertips, or a food processor (pulsing just a few times), work the fat into the flour until the mixture resembles coarse meal with some larger pieces of fat still visible, ranging in size from small peas to flat pebbles (about 1/4 to 1/2 inch).
These visible pieces of fat are key to flakiness. As they melt during baking, they create steam, separating the layers of dough. If the fat is worked in too thoroughly, resulting in a fine, uniform texture like cornmeal, you'll get a tender but not truly flaky crust, more like shortbread. Aim for that distinct mix of textures to ensure a beautifully layered flaky berry pie crust.
Tips for Keeping Your Fat Cold During the Process
Keeping your fat as cold as possible throughout the cutting-in process is paramount for a flaky berry pie crust. If you're using butter, consider cutting it into cubes and placing it in the freezer for 10-15 minutes before you begin. Some bakers even grate frozen butter directly into the flour mixture for maximum coldness and even distribution.
Working quickly also helps keep the fat cold. If using your hands, try to use just your fingertips, which are cooler than your palms. If your kitchen is warm, you can also chill your flour beforehand in the refrigerator or freezer for 20-30 minutes. These simple steps ensure the fat remains solid until it hits the heat of the oven, guaranteeing those desirable flaky layers in your flaky berry pie crust recipe.
Step 3: Adding Ice Water: Hydrating the Dough for Flakiness
Once the fat is cut into the flour, it's time to add the ice water. Have a glass of ice water ready, and measure out a small amount to start, typically 4-6 tablespoons for a single crust. You want to add just enough water to bring the dough together. Too much water will develop excess gluten, resulting in a tough crust, while too little will leave the dough dry and crumbly.
Sprinkle the measured ice water over the flour-fat mixture a tablespoon at a time. Use a fork or your hands to gently mix it in. The dough should start to look shaggy and clumpy. Continue adding water, just a teaspoon or two at a time, until the dough just begins to hold together when you squeeze a piece. Avoid pouring in all the water at once; this precise hydration is key to a successful flaky berry pie crust recipe.
The Importance of Adding Water Gradually
Adding ice water gradually is a crucial step that prevents over-hydration and ensures a tender, flaky berry pie crust. Different flours absorb water differently, and humidity can also play a role. By adding water a little at a time and gently mixing, you can control exactly how much liquid goes into the dough, stopping as soon as it's just hydrated enough.
If you add too much water at once, it's difficult to correct without adding significantly more flour, which can also make the crust tough. Adding it gradually allows you to feel the dough's consistency and stop adding water the moment it comes together in a shaggy mass. This careful approach is vital for achieving the perfect balance of hydration needed for a truly flaky berry pie crust recipe.
Step 4: Forming the Dough: Gentle Handling for a Tender Crust
Once the ice water is added and the dough is shaggy but holds together when squeezed, it's time to gently bring it together. Turn the dough out onto a clean, lightly floured surface. Using your hands, very gently gather the shaggy pieces and press them together to form a cohesive mass. Do not knead the dough like bread dough; this will develop too much gluten and result in a tough crust.
Divide the dough in half if you're making a double-crust pie. Gently shape each half into a flattened disk, about 1 inch thick. The edges might be a little crumbly, but that's okay. Wrapping the dough disks tightly in plastic wrap is the next step. Handling the dough minimally at this stage is paramount for ensuring a tender, flaky berry pie crust. You're just encouraging it to come together, not developing its structure.
Step 5: Chilling the Dough: Relaxing the Gluten for Easy Rolling
Chilling the pie dough is a non-negotiable step for a flaky berry pie crust recipe. Once the dough disks are formed and wrapped, they must be refrigerated. Chilling serves two primary purposes: it allows the gluten developed during mixing to relax, making the dough easier to roll out without shrinking, and it firms up the fat pieces, which is essential for creating those distinct flaky layers during baking.
Skipping the chilling step will result in a dough that is sticky, difficult to roll, prone to shrinking in the oven, and less likely to achieve the desired flakiness. A minimum chilling time is required, but a longer chill often yields even better results. This resting period is a simple yet critical technique that significantly impacts the final texture of your flaky berry pie crust.
How Long to Chill the Pie Dough for Best Results
For best results with your flaky berry pie crust recipe, the dough should be chilled for at least 30 to 60 minutes in the refrigerator. This minimum time allows the gluten to begin relaxing and the fat to firm up. However, chilling for 2 hours or even longer, up to 2 days, can be even more beneficial. A longer chill further relaxes the gluten, making the dough incredibly easy to roll and less likely to shrink during baking.
If you are in a hurry, a 30-minute chill is sufficient, but you might find the dough slightly less cooperative during rolling. If you chill the dough for more than a few hours, you may need to let it sit at room temperature for 10-15 minutes before rolling to prevent cracking. Proper chilling is a simple step that guarantees a smoother rolling process and contributes significantly to the ultimate flakiness of your berry pie crust.
Rolling Out Your Flaky Berry Pie Crust: Achieving the Ideal Shape
Preparing Your Work Surface for Easy Rolling
Before you begin rolling your chilled flaky berry pie crust dough, prepare your work surface to prevent sticking. Lightly flour a clean, dry surface – a countertop, pastry board, or even a large sheet of parchment paper works well. You'll also want a little extra flour nearby for dusting your rolling pin and the dough itself as needed.
Take one disk of chilled dough from the refrigerator. If it's been chilling for more than a couple of hours, let it sit at room temperature for 10-15 minutes to become slightly more pliable, preventing cracking. Lightly flour the top of the dough disk as well. The goal is to use just enough flour to prevent sticking, but not so much that it dries out the dough and makes the crust tough.
Rolling Techniques: Achieving Even Thickness and a Circular Shape
Rolling out your flaky berry pie crust dough requires a gentle touch and consistent technique. Place the floured dough disk on your floured surface. Begin rolling from the center outwards, applying even pressure. Rotate the dough frequently (about a quarter turn after every few rolls) to help maintain a circular shape and prevent it from sticking to the surface. Lift and gently nudge the dough if needed.
Aim to roll the dough into a circle about 12-13 inches in diameter for a standard 9-inch pie plate, and to an even thickness of approximately 1/8 inch (3mm). Rolling to a consistent thickness is crucial for even baking. If you encounter cracks around the edges, you can gently press them back together. This careful rolling technique is key to preparing the base for your delicious flaky berry pie crust recipe.
Transferring the Crust to the Pie Plate: Avoiding Tears and Stretching
Transferring the rolled-out flaky berry pie crust dough to the pie plate can feel intimidating, but a few simple techniques make it easy. One common method is to lightly flour your rolling pin, then gently roll the dough circle loosely around it. Position the rolling pin over your pie plate and unroll the dough carefully into the plate, centering it as you go.
Another effective technique is to fold the dough circle in half or quarters, gently lift the folded dough, place the pointed corner in the center of the pie plate, and then unfold it, easing it into the corners and up the sides. Whichever method you use, avoid stretching the dough as you fit it into the plate; stretching can cause the crust to shrink significantly during baking. Gently press the dough into the bottom and sides of the plate, ensuring it's settled without tension.
Crimping and Pre-Baking (Blind Baking) Your Pie Crust
Creative Crimping Techniques for a Beautiful Pie
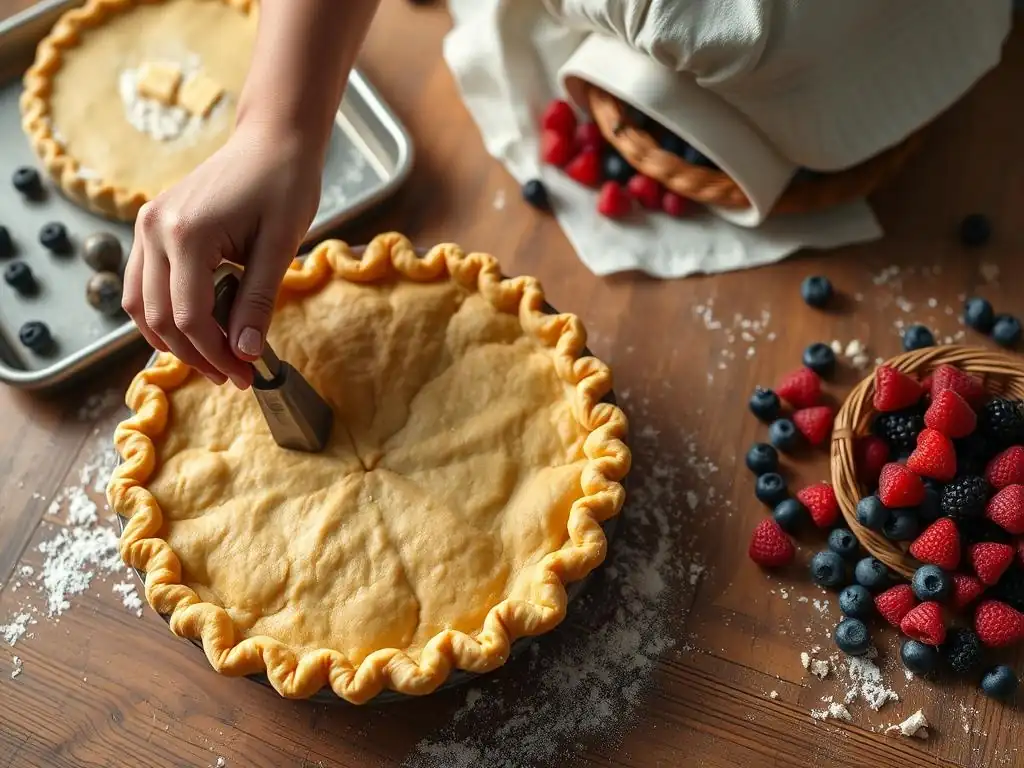
Once your flaky berry pie crust is fitted into the plate, crimping the edges adds both visual appeal and helps hold the crust's shape during baking. There are many ways to crimp, from simple to elaborate. A basic crimp involves using your thumbs and index fingers to pinch the edge of the dough, creating a wavy pattern. Place your left thumb on the outside edge and use the index finger and thumb of your right hand to pinch the dough against the left thumb, working your way around the perimeter.
Another easy method is using a fork. Simply press the tines of a fork down onto the edge of the dough all the way around the pie plate. You can do this on the edge of the plate itself or press down onto the rim of the dough if it extends slightly over the edge. Experiment with different tools or patterns to make your flaky berry pie crust uniquely yours before adding the delicious berry filling.
Preventing Soggy Bottoms: The Art of Blind Baking
For pies with wet fillings like berry pies, blind baking (or pre-baking) the bottom crust is often necessary to prevent a soggy bottom. Blind baking partially or fully bakes the bottom crust before the filling is added. This gives the bottom crust a head start, allowing it to set and become firm enough to withstand the moisture from the berries during the final bake.
The process typically involves lining the fitted and crimped pie crust with parchment paper or aluminum foil, filling it with pie weights, dried beans, or rice, and baking it. This weight holds the crust down and prevents the sides from collapsing or shrinking. Blind baking is a crucial step in many flaky berry pie crust recipes designed for juicy fruit fillings, ensuring a crisp base for your summer pie.
Properly Docking the Crust to Avoid Puffing
When blind baking a flaky berry pie crust, it's important to "dock" the bottom of the crust before lining it with paper and weights. Docking simply means pricking the bottom of the crust all over with a fork. Make about 15-20 small holes evenly spaced across the base. Be careful not to prick all the way through if you're using a very thin crust, but ensure the holes are sufficient to allow steam to escape.
The purpose of docking is to prevent the crust from puffing up unevenly during blind baking. As the crust heats, trapped steam beneath the dough can create large bubbles. The small holes created by docking allow this steam to escape, ensuring the bottom crust bakes flat and evenly, providing a stable foundation for your berry filling.
Using Pie Weights or Beans for Even Baking
To keep the flaky berry pie crust from shrinking or bubbling excessively during blind baking, you need to use weights. After docking the crust and lining it with parchment paper or foil, fill the cavity with pie weights, dried beans, rice, or even clean pennies. Fill them up to the rim of the pie plate to provide even pressure against the sides and bottom.
Bake the weighted crust in a preheated oven (often around 375-400°F) for about 15-20 minutes, or until the edges are set and lightly golden. Then, carefully remove the weights and the paper/foil. If the recipe calls for a fully blind-baked crust, return the pie plate to the oven for another 10-15 minutes, or until the bottom is golden brown and looks dry. This two-stage process ensures a sturdy, flaky base for your berry pie.
Filling and Baking Your Berry Pie with Flaky Crust
Choosing the Right Berries for Your Summer Pie
Summer offers an abundance of delicious berries perfect for filling your flaky berry pie crust. You can use a single type of berry, like classic blueberries or sweet strawberries, or create a vibrant mix. Popular combinations include strawberry-rhubarb, mixed berry (strawberries, blueberries, raspberries, blackberries), or just a simple, perfect blueberry pie. The key is to use fresh, ripe, in-season berries for the best flavor. Approximately 5-6 cups of berries are typically needed for a standard 9-inch pie.
Consider the moisture content of the berries. Strawberries and raspberries tend to be juicier than blueberries. If using very juicy berries, you might need to adjust the amount of thickener slightly. Taste your berries before preparing the filling; their sweetness level will help you determine how much sugar to add. A mix often provides a good balance of flavor and texture in your flaky berry pie crust creation.
Preparing the Berry Filling: Sweetening and Thickening
Preparing the berry filling for your flaky berry pie crust is straightforward. In a large bowl, gently toss the fresh berries with sugar, a little lemon juice (which brightens the flavor), and a thickener. The amount of sugar will depend on the sweetness of your berries, but typically ranges from 1/2 cup to 1 cup for 5-6 cups of fruit. Start with less and add more if needed after tasting a berry with the sugar.
Thickeners are essential to prevent a watery pie. Common choices include cornstarch, tapioca starch, or flour. Tapioca starch tends to create a clearer, glossier filling, while cornstarch provides a more opaque set. Flour is also effective but can sometimes give the filling a slightly cloudy appearance. Use about 1/4 cup of cornstarch or tapioca starch (or slightly more flour) per 6 cups of berries. Gently mix everything together, being careful not to mash the delicate berries.
Assembling and Baking Your Berry Pie: Achieving Golden Perfection
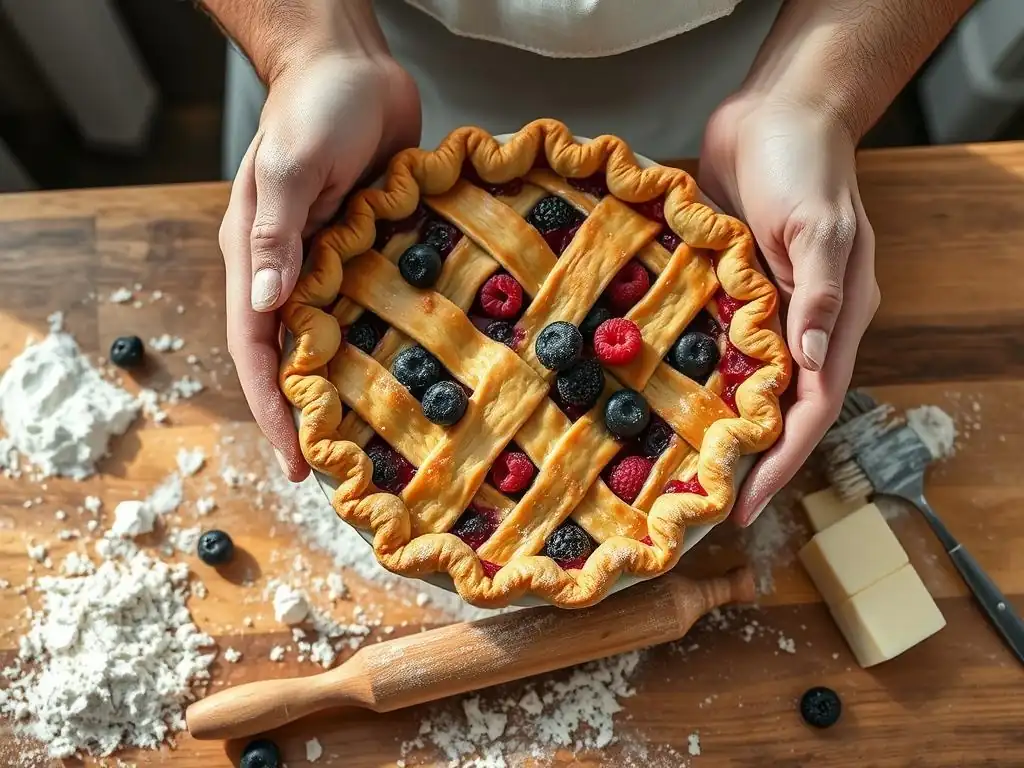
With your blind-baked (or unbaked, depending on preference and filling moisture) flaky berry pie crust ready and your berry filling prepared, it's time to assemble and bake. Pour the berry mixture evenly into the pie crust. If using a double crust, top the filling with the second rolled-out dough disk. You can make a full top crust with vents cut into it, or create a lattice top, which allows steam to escape and shows off the vibrant berry color. Crimp the edges of the top crust to the bottom crust to seal.
Bake the assembled pie in a preheated oven. A common method is to start at a higher temperature (e.g., 400°F or 425°F) for the first 15-20 minutes to help the crust set quickly and become flaky, then reduce the temperature (e.g., to 375°F) for the remaining baking time. The total baking time for a berry pie is typically 45-60 minutes, or until the crust is golden brown and you see the filling bubbling through the vents or lattice. Place the pie on a baking sheet to catch any drips.
Troubleshooting Common Pie Crust Problems
Dough Too Dry: How to Rescue a Crumbly Pie Crust
If, after adding the recommended amount of ice water, your flaky berry pie crust dough still seems very dry and crumbly and won't hold together when squeezed, don't despair – it can often be rescued. The issue might be slightly dry flour, very low humidity, or simply needing a tiny bit more liquid.
Carefully add just a teaspoon of ice water at a time, gently pressing the dough together after each addition. You want to add just enough moisture for the dough to barely come together into a shaggy ball, not become wet or sticky. Stop adding water the moment it holds together. Over-correcting by adding too much water will lead to a tough crust, so add liquid very sparingly until the dough is just pliable enough to form a disk.
Dough Too Wet: Dealing with Sticky Pie Dough
If you accidentally add too much ice water, your flaky berry pie crust dough might feel overly wet and sticky. This can make it difficult to handle and roll out. A sticky dough is prone to developing excess gluten, which leads to a tough crust rather than a flaky one.
The best way to deal with sticky dough is to add a small amount of flour, perhaps a tablespoon at a time, and gently incorporate it until the dough is no longer excessively sticky. Then, wrap the dough tightly and chill it thoroughly, ideally for at least 1-2 hours or even longer. Chilling helps firm up the dough and makes it much easier to handle and roll, mitigating some of the effects of the extra water in your flaky berry pie crust recipe.
Shrinking Crust: Preventing Pie Crust Shrinkage During Baking
Crust shrinkage during baking is a common frustration. It often happens when the dough hasn't been chilled sufficiently or when it was stretched into the pie plate instead of being gently eased in. Gluten is elastic, and if it hasn't had time to relax or if it's been stretched, it will contract when heated in the oven.
To prevent shrinkage in your flaky berry pie crust, ensure you chill the dough for the recommended time (at least 30-60 minutes, preferably longer). When fitting the dough into the pie plate, make sure it's settled into the corners without being pulled taut. Let the dough relax slightly in the pie plate for 10-15 minutes in the refrigerator before blind baking or filling. These steps help the gluten relax and hold its shape better during baking.
Tough Crust: Achieving Tenderness in Your Pie Crust
A tough pie crust is usually the result of overworking the dough or adding too much water. Overworking develops too much gluten, creating a dense, bread-like texture instead of light flakiness. Adding too much water also contributes to excessive gluten development.
To ensure a tender flaky berry pie crust, handle the dough as little as possible throughout the process. When cutting in the fat, stop when you have pea-sized pieces, not a uniform meal. When adding water, add it gradually and stop as soon as the dough comes together. Avoid kneading the dough; simply press it together gently. Use cold ingredients and chill the dough properly. Following these steps minimizes gluten development, resulting in a wonderfully tender and flaky crust.
Storing Your Flaky Berry Pie Crust and Pie
Storing Unbaked Pie Crust for Future Use
If you've made extra flaky berry pie crust dough or want to prepare it in advance, it stores very well. Wrap the unbaked dough disks tightly in plastic wrap, ensuring no air pockets. Place the wrapped disks in a resealable plastic bag.
Unbaked pie dough can be stored in the refrigerator for up to 2 days. For longer storage, you can freeze the dough for up to 3-6 months. Thaw frozen dough overnight in the refrigerator before using. You may need to let it sit at room temperature for 10-20 minutes to become pliable enough to roll after thawing. Having pre-made dough on hand makes whipping up a flaky berry pie crust recipe quick and easy whenever the craving strikes.
Storing Baked Berry Pie for Optimal Freshness
Once your delicious flaky berry pie is baked and cooled, proper storage helps maintain its quality. Let the pie cool completely at room temperature on a wire rack before storing. Covering a warm pie can trap steam and make the bottom crust soggy.
Cover the cooled pie loosely with plastic wrap or aluminum foil, or store it in a pie carrier. Berry pies can typically be stored at room temperature for 1-2 days. If you need to store it longer, or if your kitchen is very warm, refrigerate the pie for up to 3-4 days. Refrigeration can slightly alter the texture of a flaky berry pie crust, making it less crisp, but the pie will still be delicious.
Conclusion: Mastering the Art of Flaky Berry Pie Crusts with BakeWithEase
Enjoying Your Homemade Berry Pie: Tips for Serving and Sharing
After successfully creating a beautiful flaky berry pie crust and filling it with luscious summer berries, the best part is enjoying the fruits of your labor! Allow the pie to cool for at least 2-3 hours after baking before slicing. This allows the filling to set properly, preventing it from being too runny. Serving a slightly warm pie is delightful, perhaps with a scoop of vanilla ice cream or a dollop of whipped cream.
Share your homemade berry pie with friends and family. There's a special satisfaction that comes from serving something you've made from scratch, especially a classic like berry pie with a perfect flaky crust. Watching others enjoy your creation, appreciating the tender, flaky layers and the sweet-tart berry filling, is the ultimate reward for mastering this flaky berry pie crust recipe.
Further Baking Adventures: Exploring Other Pie Recipes on BakeWithEase
Mastering this flaky berry pie crust recipe opens the door to a world of pie-making possibilities. The techniques you've learned – from cutting in cold fat to gentle handling and proper chilling – are fundamental to many other pie variations. This versatile dough can be used for sweet or savory pies, adapting the principles to different fillings.
We encourage you to explore the many other pie recipes available on BakeWithEase. Try your hand at apple pie, pumpkin pie, or even savory quiches, using your newfound pie crust skills. Each recipe offers a chance to refine your technique and discover new favorites, building confidence in your baking journey. Keep practicing this flaky berry pie crust recipe, and soon it will become second nature!
Frequently Asked Questions
What makes a pie crust flaky?
The flakiness in a pie crust comes from creating thin layers of fat and flour. Keeping the ingredients cold is crucial to prevent the fat from melting and blending completely with the flour.
What type of fat is best for a flaky berry pie crust?
For the best flaky texture and flavor, a combination of cold butter and shortening often works well. Butter provides flavor, while shortening contributes to tenderness.
How can I prevent my pie crust from shrinking during baking?
Prevent shrinking by using cold ingredients, avoiding overworking the dough, and allowing the crust to rest in the refrigerator before baking. This relaxes the gluten.
What's the best way to handle pie dough to avoid a tough crust?
Avoid over-mixing the dough, as this develops too much gluten, resulting in a tough crust. Mix until just combined, and handle it gently when rolling it out.
Can I make the pie crust dough ahead of time?
Yes, you can definitely make the pie crust dough ahead of time! Wrap it tightly in plastic wrap and store it in the refrigerator for up to two days, or in the freezer for longer storage.
Final Reflection: The Enduring Allure of a Perfectly Flaky Crust
The pursuit of the perfect flaky berry pie crust is more than just a culinary quest; it's a testament to the enduring power of simple pleasures. A perfectly executed crust, with its delicate layers and buttery aroma, elevates a humble berry pie into a truly unforgettable experience. This isn't just about following a recipe; it's about understanding the fundamental principles of pastry and the artistry involved in creating something beautiful and delicious.
The impact of a good pie crust extends far beyond the individual slice. It's a symbol of comfort, tradition, and the joy of sharing homemade goodness with loved ones. The simple act of creating something from scratch, of nurturing the dough and coaxing out its potential, connects us to a rich culinary heritage. As Julia Child once wisely said, Find something you're passionate about and keep tremendously interested in it.
For me, that passion is undeniably found in the pursuit of the perfect pie crust, and the joy it brings to others.
Now, I invite you to consider your own approach to baking. Perhaps you'll try your hand at this recipe, embracing the challenge of mastering the flaky crust. Or maybe you'll be inspired to explore other baking techniques, driven by the same desire for perfection and the satisfaction of creating something truly special. Remember, the journey towards a perfect pie crust, like any worthwhile endeavor, is as rewarding as the destination itself. So, roll up your sleeves, gather your ingredients, and embark on your own culinary adventure. The flaky, buttery reward awaits.
Unlock Your Perfect Pie Crust: Bake With Confidence!
Thanks for taking the time to explore the secrets of a flawlessly flaky berry pie crust! We hope you now feel empowered to tackle this baking challenge with ease. Ready to put your new skills to the test?
- Bake your dream pie: Immediately head to the kitchen and try making a berry pie using your newly acquired techniques. Don't be afraid to experiment!
- Share your baking triumph: Post a picture of your magnificent pie on social media and tag us – we'd love to see your creations! Use #BakeWithEaseBerryPie.
- Join our baking community: Share your tips and tricks, or ask questions about your next pie adventure in the comments below!
What unexpected ingredient will you try adding to your next pie crust for an extra delicious twist?