
Effortless Delight: NoBake Lemon Mousse Pie

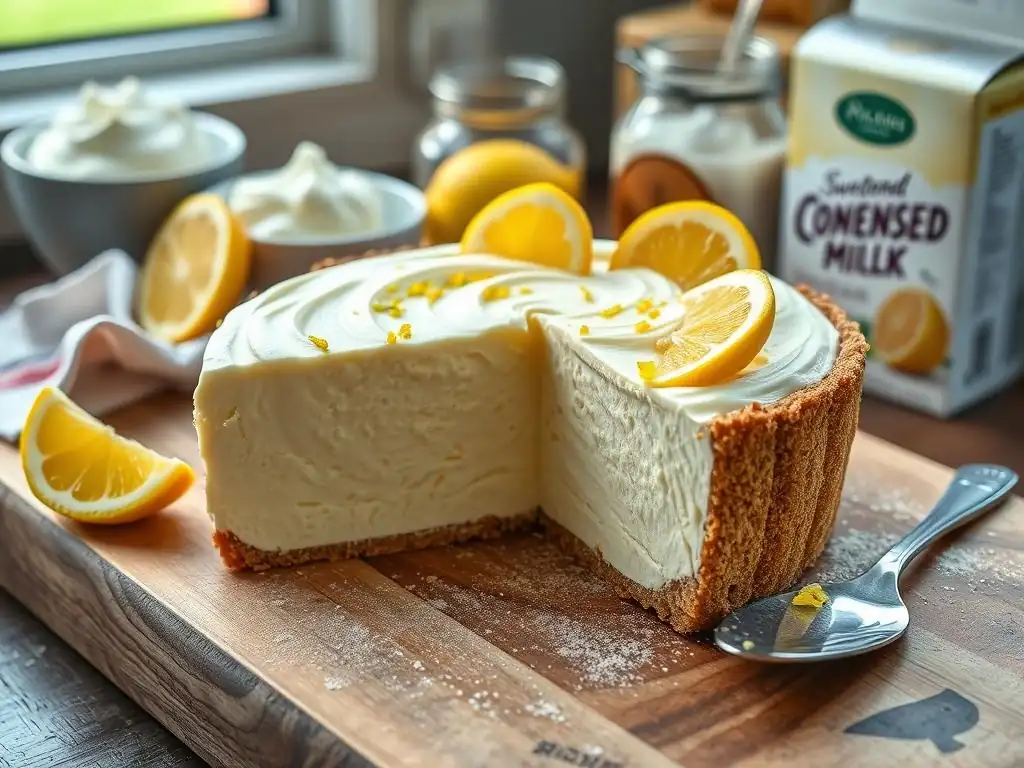
Welcome to BakeWithEase, your haven for baking mastery! Tired of complicated recipes and endless hours in the kitchen? Discover the secret to effortless indulgence with our latest creation. This time, we're diving into the tangy world of No Bake Lemon Mousse. Intrigued? Prepare to be amazed at how easily you can create a stunning dessert that tastes like sunshine. Dive in and unlock the recipe – a world of lemony bliss awaits!
- Effortless Delight: No-Bake Lemon Mousse Pie - A BakeWithEase Recipe
- Introduction to No-Bake Lemon Mousse Pie
- Understanding the Key Ingredients for Your Lemon Mousse Pie
- Step-by-Step Guide to Creating Your No-Bake Lemon Mousse Pie
- Tips and Tricks for the Perfect No-Bake Lemon Mousse Pie
- Serving and Storing Your No-Bake Lemon Mousse Pie
- Troubleshooting Common Issues with No-Bake Lemon Mousse Pie
- No-Bake Lemon Mousse Pie: A Perfect Spring Dessert
-
Frequently Asked Questions
- What makes this Lemon Mousse Pie "No-Bake"?
- What kind of crust is best for a no-bake lemon mousse pie?
- What key ingredient gives the lemon mousse its light and airy texture?
- Can I substitute any of the ingredients in the no-bake lemon mousse pie recipe?
- How long does the no-bake lemon mousse pie need to chill before serving?
- Final Reflection: The Enduring Allure of Effortless Elegance
- Unlock Your Inner Pastry Chef: Make This Dreamy Pie Today!
Effortless Delight: No-Bake Lemon Mousse Pie - A BakeWithEase Recipe
Introduction to No-Bake Lemon Mousse Pie
Embrace Spring Baking with a Refreshing No-Bake Dessert
As the days grow longer and the first blossoms appear, our thoughts often turn to lighter, brighter flavors. Spring baking doesn't always have to involve turning on a hot oven, especially when you can create something as delightful as a no-bake lemon mousse pie. This dessert perfectly captures the essence of the season with its zesty citrus notes and airy texture, offering a refreshing end to any spring meal. It's a fantastic way to welcome warmer weather without breaking a sweat in the kitchen.
Imagine a dessert that requires minimal effort but delivers maximum impact. That's precisely what a no-bake lemon mousse pie offers. It's a dessert that feels sophisticated enough for a spring gathering yet is simple enough for a weeknight treat. The combination of a crisp crust and a light, tangy filling is truly irresistible, making it a staple in many spring recipe rotations. BakeWithEase is here to guide you through crafting this simple yet stunning pie.
Why Choose a No-Bake Lemon Mousse Pie?
Choosing a no-bake lemon mousse pie is opting for simplicity without sacrificing flavor or elegance. It's an ideal recipe for beginners looking to impress or experienced bakers seeking a quick and reliable dessert. The "no-bake" aspect is particularly appealing during warmer months or when oven space is at a premium, like during holiday gatherings. This dessert eliminates the guesswork often associated with baked custards or cheesecakes, offering a more forgiving process.
Beyond its ease, the no-bake lemon mousse pie is incredibly versatile. It serves as a wonderful base for various toppings, from fresh berries to whipped cream or even a simple dusting of powdered sugar. Its bright, clean flavor profile makes it a palate cleanser after a rich meal. Furthermore, preparing a no bake lemon mousse pie allows you to focus on the simple joy of assembly and chilling, making it a truly effortless delight.
Understanding the Key Ingredients for Your Lemon Mousse Pie
The Importance of High-Quality Ingredients
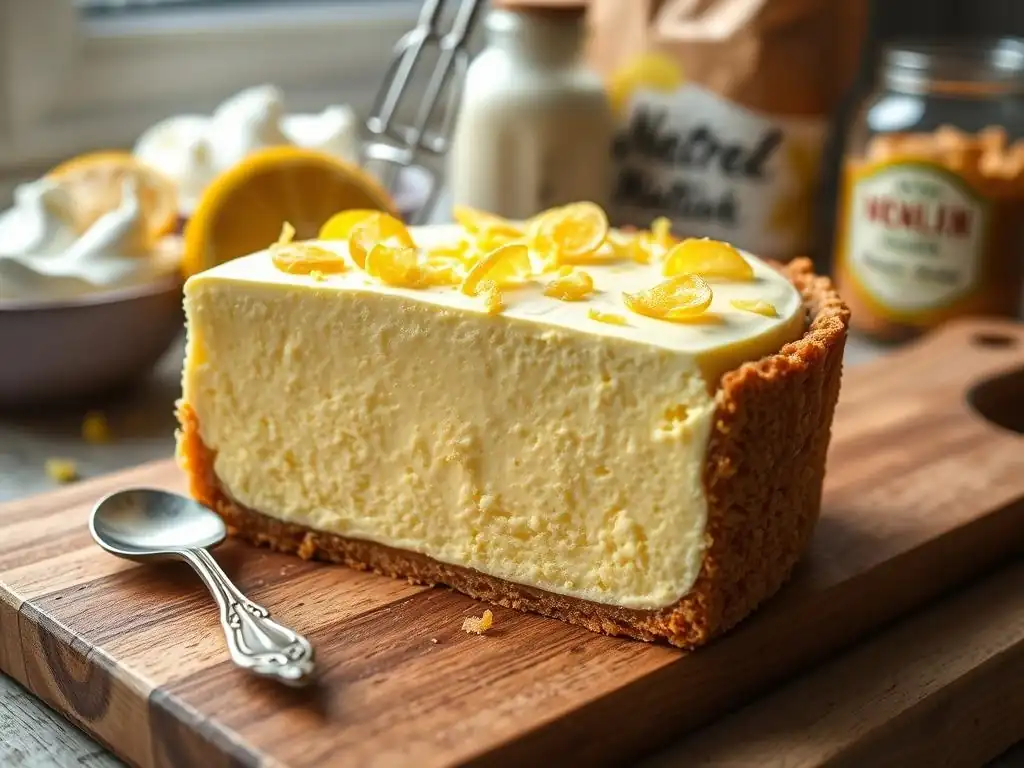
The success of a no-bake lemon mousse pie, despite its simplicity, hinges significantly on the quality of its components. Since there's no baking involved, the flavors of the individual ingredients shine through more prominently. Using fresh, vibrant lemons will yield a brighter, more authentic citrus taste compared to bottled juice. Similarly, high-quality heavy cream will whip up beautifully and provide the rich, stable base needed for a perfect mousse texture.
Investing in good ingredients doesn't necessarily mean breaking the bank, but it does mean being mindful of freshness and flavor. For instance, choosing good quality graham crackers for the crust can make a noticeable difference in taste and texture. When making a no bake lemon mousse, every ingredient plays a crucial role in creating the desired light, creamy, and tangy profile. Think of it as building flavor layer by layer with the best possible building blocks.
No-Bake Lemon Mousse Pie Ingredients Breakdown
Let's break down the essential ingredients you'll need to create this delightful no bake lemon mousse pie. Understanding the function of each component helps ensure success.
Graham Cracker Crust Essentials
The foundation of our no bake lemon mousse pie is a sturdy and flavorful graham cracker crust. You'll need approximately 1 and 1/2 cups of finely crushed graham cracker crumbs, which usually comes from about 10-12 full graham cracker sheets. These crumbs are then mixed with 1/4 cup of granulated sugar for a touch of sweetness and about 6-8 tablespoons of melted unsalted butter, which acts as the binder holding everything together. The butter coats the crumbs, and as it chills, it solidifies, creating a firm crust.
Using unsalted butter allows you to control the saltiness, although a pinch of salt is sometimes added to the crust mixture to enhance the flavor. Ensure the graham crackers are crushed to a fine, even consistency – a food processor works best for this, but a Ziploc bag and a rolling pin are also effective. The ratio of butter to crumbs is crucial; too little butter results in a crumbly crust, while too much can make it greasy. Aim for a mixture that resembles wet sand and holds its shape when squeezed.
Lemon Mousse Filling Ingredients
The star of the show is the light and airy lemon mousse filling. The core ingredients are heavy cream (often called whipping cream), a sweetener (usually granulated sugar or powdered sugar), fresh lemon juice, and lemon zest. You'll typically need about 1 to 1.5 cups of heavy cream, which will whip up to create the volume and lightness. The amount of sugar can vary based on preference, but starting with 1/2 to 3/4 cup balances the tartness of the lemon.
Freshly squeezed lemon juice is non-negotiable for that vibrant, natural lemon flavor – expect to need the juice of 2-3 medium lemons (about 1/4 to 1/3 cup). The zest of 1-2 lemons adds essential aromatic oils that boost the citrus punch. Sometimes, a stabilizer like cream cheese (about 8 ounces) or sweetened condensed milk (one 14-ounce can) is incorporated to give the mousse more body and ensure it sets firmly. These additions also add creaminess and sweetness, slightly altering the texture from a pure whipped cream mousse but often making it more reliable for a no-bake application.
Optional Toppings for Added Flavor
While delicious on its own, a no bake lemon mousse pie can be elevated with simple toppings. Fresh berries, such as raspberries, blueberries, or sliced strawberries, pair wonderfully with the lemon flavor and add a pop of color. A dollop of freshly whipped cream is a classic choice, enhancing the dessert's creamy texture.
A sprinkle of additional lemon zest, a few thin lemon slices, or even toasted coconut flakes can add visual appeal and extra layers of flavor. For a touch of elegance, consider shaving white chocolate over the top. These optional additions allow you to customize your no bake lemon mousse pie to suit your taste and the occasion.
Step-by-Step Guide to Creating Your No-Bake Lemon Mousse Pie
Preparing the Graham Cracker Crust
Creating the foundation for your no bake lemon mousse pie is a straightforward process. A well-made crust provides a delightful textural contrast to the smooth filling.
Crushing the Graham Crackers
Begin by crushing your graham crackers. As mentioned, a food processor is the quickest method, yielding fine, uniform crumbs in seconds. Pulse the crackers until no large pieces remain. If you don't have a food processor, place the crackers in a sturdy Ziploc bag, seal it, and use a rolling pin or the bottom of a heavy pan to crush them until they are fine crumbs. Aim for approximately 1.5 cups of crumbs.
Ensure the crumbs are consistently fine; larger pieces can make the crust uneven and difficult to press firmly. This step is crucial for achieving a compact crust that won't crumble when sliced. Once crushed, transfer the crumbs to a medium bowl.
Mixing with Melted Butter and Sugar
Add 1/4 cup of granulated sugar to the graham cracker crumbs. Stir to combine the sugar evenly throughout the crumbs. Next, pour in 6-8 tablespoons of melted unsalted butter. Start with 6 tablespoons and add more if needed, ensuring the mixture resembles wet sand.
Use a fork or spoon to mix thoroughly until all the crumbs are coated with butter. The mixture should clump together when squeezed. If it still seems dry and powdery, add another tablespoon of melted butter at a time and mix again until the desired consistency is reached.
Pressing into the Pie Plate
Transfer the buttered graham cracker mixture into a standard 9-inch pie plate. Use the bottom of a glass or a flat-bottomed measuring cup to firmly press the mixture evenly across the bottom and up the sides of the plate. Pay special attention to the edges to create a defined crust line.
Pressing firmly is key to a stable crust. Once pressed, you can place the crust in the freezer for about 10-15 minutes while you prepare the filling. This quick chill helps set the butter, providing a head start on creating a firm base for your no bake lemon mousse.
Making the Creamy Lemon Mousse Filling
Now for the star: the light and tangy lemon mousse. This process is relatively quick, but attention to detail ensures a smooth, airy filling.
Combining Lemon Juice, Zest, and Sugar
In a bowl, whisk together the fresh lemon juice (about 1/4 to 1/3 cup), lemon zest (from 1-2 lemons), and granulated sugar (1/2 to 3/4 cup). Taste this mixture and adjust the sugar if necessary, depending on how tart you like your no bake lemon mousse. If you are using a recipe that includes cream cheese or condensed milk, you would typically combine these ingredients first until smooth, then whisk in the lemon mixture.
Ensure the sugar is mostly dissolved in the lemon juice before proceeding. The zest is vital here; it contains potent citrus oils that provide a more complex and fragrant lemon flavor than juice alone. Use a fine grater or microplane for the zest, being careful to only get the yellow part, not the bitter white pith.
Whipping the Heavy Cream to Perfection
In a separate, chilled bowl, pour 1 to 1.5 cups of cold heavy cream. Using an electric mixer (handheld or stand mixer with a whisk attachment), whip the cream on medium-high speed until stiff peaks form. This means when you lift the whisk, the peaks stand straight up without drooping. This step is crucial for achieving the airy texture of the no bake lemon mousse.
Be careful not to over-whip the cream, as it can turn into butter. Stiff peaks are what you're aiming for – the cream should hold its shape beautifully. Chilling the bowl and beaters beforehand can help the cream whip faster and achieve firmer peaks.
Folding in the Lemon Mixture
Gently fold the lemon juice/zest/sugar mixture (or the cream cheese/condensed milk/lemon mixture) into the whipped cream. Use a spatula and a gentle, sweeping motion, cutting through the center and scooping up the sides, turning the bowl as you go.
Fold just until the ingredients are combined and no streaks of plain whipped cream remain. Over-mixing at this stage will deflate the whipped cream, resulting in a denser mousse. The goal is to maintain as much air as possible for that signature light and fluffy no bake lemon mousse texture.
Assembling and Chilling Your Pie
The final steps involve putting it all together and letting time do its magic.
Pouring the Mousse into the Crust
Retrieve your chilled graham cracker crust from the freezer. Carefully pour or spoon the prepared lemon mousse filling into the crust.
Use the spatula to gently spread the mousse evenly across the bottom and smooth the top. Avoid pressing down too hard, which could compress the mousse and make it less airy.
Chilling for Optimal Texture and Flavor
Once the mousse is in the crust, cover the pie loosely with plastic wrap. Place the pie in the refrigerator to chill. A no bake lemon mousse pie requires significant chilling time to set properly.
Ideally, the pie should chill for at least 4-6 hours. For the best results and a perfectly set mousse that slices cleanly, chilling for 8 hours or even overnight is recommended. This allows the flavors to meld and the mousse to firm up completely.
Tips and Tricks for the Perfect No-Bake Lemon Mousse Pie

Achieving the Ideal Mousse Consistency
The key to a perfect no-bake lemon mousse is achieving that balance between airy lightness and firm structure. Using cold heavy cream and whipping it to stiff peaks is the primary step. If your mousse seems too soft after folding in the lemon mixture, it might not have been whipped enough, or perhaps the liquid ratio was slightly off.
Some recipes incorporate gelatin or a stabilizer like cream cheese or condensed milk specifically to ensure a firmer set. For instance, adding about 1 teaspoon of unflavored gelatin dissolved in a few tablespoons of hot water and cooled before folding it in can guarantee a solid set. If using cream cheese, ensure it's softened to room temperature before beating it smooth, preventing lumps in your no bake lemon mousse.
Preventing a Soggy Crust
A common issue with chilled pies is a soggy bottom crust. To prevent this with your no bake lemon mousse pie, ensure the graham cracker crust is pressed very firmly into the pie plate. The tighter the crumbs are packed, the less likely they are to absorb moisture from the filling.
Chilling the crust before adding the filling also helps. Some bakers even brush a thin layer of melted white chocolate or tempered chocolate onto the bottom of the crust before adding the filling. This creates a barrier that prevents moisture migration. While not strictly necessary, it's a trick that can make a significant difference, especially if the pie will sit for an extended period before serving.
Flavor Variations and Customizations
The beauty of a no bake lemon mousse pie is its adaptability. Once you've mastered the basic recipe, you can easily experiment with different flavor combinations.
Adding Berries for a Fruity Twist
Fresh berries are a natural pairing for lemon. You can fold a handful of fresh raspberries or blueberries directly into the mousse before pouring it into the crust, or simply arrange them on top before serving. Approximately 1/2 cup of berries works well within the mousse, adding bursts of fruity flavor.
Alternatively, create a simple berry compote by simmering about 1 cup of mixed berries with 1-2 tablespoons of sugar and a splash of lemon juice until thickened, then cool and spoon over slices of the chilled no bake lemon mousse pie.
Incorporating a Hint of Vanilla
While lemon is the star, a touch of vanilla can add depth and complexity. A teaspoon of pure vanilla extract added to the heavy cream before whipping can round out the flavors beautifully.
Be careful not to overpower the lemon, as the goal is to enhance, not mask, the primary flavor of your no bake lemon mousse. Start with a small amount and adjust to your preference.
Using Different Types of Crusts
While graham cracker is traditional, you can easily substitute other cookies or crackers for the crust. Vanilla wafers, shortbread cookies, or even ginger snaps (for a spicier kick) can be crushed and used in place of graham crackers.
Adjust the amount of butter slightly if needed, as different cookies absorb fat differently. For example, shortbread cookies might require less butter than graham crackers. Experimenting with different crusts can give your no bake lemon mousse pie a whole new dimension.
Serving and Storing Your No-Bake Lemon Mousse Pie
Best Serving Practices
Serving your no bake lemon mousse pie at the right temperature is key to enjoying its light and airy texture. Ensure the pie is well-chilled, ideally having spent at least 6-8 hours in the refrigerator. A cold pie will slice cleanly and hold its shape.
Use a sharp knife dipped in hot water and wiped dry between slices for the cleanest cuts. This technique helps the knife glide through the mousse without dragging. Serve slices immediately after cutting, perhaps with a dollop of whipped cream or fresh berries, to maintain the pie's structure and chill.
Proper Storage Techniques
To store leftover no bake lemon mousse pie, cover the pie plate tightly with plastic wrap or aluminum foil. Ensure the wrap doesn't directly touch the surface of the mousse if possible, to prevent condensation from forming on the surface.
Alternatively, if you have individual slices, place them in airtight containers. Proper storage helps maintain the pie's texture and prevents it from absorbing odors from the refrigerator. Keep the pie refrigerated at all times.
How Long Does No-Bake Lemon Mousse Pie Last?
When stored properly in the refrigerator, a no bake lemon mousse pie typically lasts for 3 to 4 days. The quality of the mousse and crust will start to degrade after this period, with the crust potentially becoming softer and the mousse losing some of its airy texture.
It's best to enjoy the pie within the first couple of days for optimal flavor and texture. While technically safe to eat for a bit longer, the peak deliciousness of your no bake lemon mousse is within this timeframe.
Troubleshooting Common Issues with No-Bake Lemon Mousse Pie

Addressing a Runny Mousse
A runny no-bake lemon mousse is usually a result of not whipping the cream enough or adding too much liquid (lemon juice). Ensure your heavy cream is very cold and whipped to stiff peaks. If the mousse is still too soft after folding, you might need to add a stabilizer.
If you haven't added one already, dissolving 1 teaspoon of unflavored gelatin in 2-3 tablespoons of hot water, letting it cool slightly, and then gently folding it into the mousse mixture can help it set firmly. Ensure the gelatin is fully dissolved and cooled before adding it to avoid melting the whipped cream.
Fixing a Crumbly Crust
A crumbly graham cracker crust indicates there wasn't enough melted butter to bind the crumbs together. The mixture should resemble wet sand and hold its shape when squeezed.
If your crust is crumbly before chilling, you can gently break it up, add another tablespoon or two of melted butter, mix well, and re-press it into the pie plate. If it's crumbly after chilling, unfortunately, it's harder to fix without completely starting over. Ensure you measure your butter accurately and press the mixture very firmly next time.
What to Do if the Pie Doesn't Set Properly
If your entire no bake lemon mousse pie doesn't set after the recommended chilling time, it's likely an issue with the mousse consistency (see "Addressing a Runny Mousse"). If you used a recipe without a stabilizer and it didn't set, incorporating a stabilizer is the most reliable solution for future attempts.
For a pie that hasn't set, you can try placing it in the freezer for an hour or two to firm it up quickly before serving, though the texture won't be quite the same as one that set in the fridge. If it's very runny, it might be salvageable as a delicious lemon mousse served in individual cups, perhaps layered with graham cracker crumbs and topped with whipped cream, transforming it into a parfait.
No-Bake Lemon Mousse Pie: A Perfect Spring Dessert
Enjoy the Ease and Flavor of this Delightful Recipe
The no-bake lemon mousse pie truly embodies effortless delight. Its simple ingredients and straightforward process make it accessible to bakers of all skill levels, while its bright, tangy flavor and light texture make it a universally loved dessert. It's the ideal sweet treat for welcoming spring or cooling down on a warm day, proving that you don't need to turn on the oven to create something spectacular.
Making a no bake lemon mousse pie allows you to spend less time worrying about complex techniques and more time enjoying the process and the delicious result. It's a testament to the fact that some of the best desserts are the ones that rely on the quality of fresh ingredients and a simple, elegant combination of flavors and textures.
We love seeing what our BakeWithEase community creates! If you make this no-bake lemon mousse pie, we encourage you to share your results. Did you add a special topping? Did you try a different crust? Your culinary adventures inspire others and help us all learn and grow as bakers.
Making a no bake lemon mousse is a rewarding experience, and sharing your success (or even your troubleshooting!) makes the baking journey even more fun. So, chill your pie, snap a photo, and let us know how your effortless delight turned out!
Frequently Asked Questions
What makes this Lemon Mousse Pie "No-Bake"?
This Lemon Mousse Pie is considered "No-Bake" because it doesn't require any cooking or baking of the filling. The crust is also designed to be made without oven use.
What kind of crust is best for a no-bake lemon mousse pie?
A graham cracker crust is a popular and easy choice for a no-bake lemon mousse pie. You can also use an Oreo crust for a different flavor profile.
What key ingredient gives the lemon mousse its light and airy texture?
The light and airy texture of the lemon mousse comes from whipped cream or meringue folded into the lemon mixture. This incorporates air and prevents a dense texture.
Can I substitute any of the ingredients in the no-bake lemon mousse pie recipe?
While substitutions are possible, they may affect the final result. For example, using a different type of sweetener might alter the taste and texture.
How long does the no-bake lemon mousse pie need to chill before serving?
The pie needs to chill for at least 4 hours, but preferably overnight, to allow the mousse to set properly. This ensures a firm and sliceable consistency.
Final Reflection: The Enduring Allure of Effortless Elegance
The pursuit of deliciousness shouldn't be a Herculean task. This no-bake lemon mousse pie proves that exquisite desserts can be achieved with minimal effort, a refreshing counterpoint to the often-daunting world of baking. The simplicity of its creation allows for a focus on the pure, vibrant flavors, a testament to the power of quality ingredients and clever technique.
The enduring appeal of this recipe, and no-bake desserts in general, lies in their accessibility. They democratize dessert, making the joy of creating and sharing something special attainable for everyone, regardless of baking skill. This resonates deeply with me, as I believe that culinary creativity shouldn't be confined to the kitchen wizards among us. The best things in life are simple,
a sentiment perfectly captured by this light and zesty pie. Its ease of preparation allows for spontaneous moments of indulgence, transforming an ordinary day into something extraordinary.
Now, I invite you to consider the possibilities. Don't let the perceived complexity of dessert recipes hold you back. Embrace the simplicity, the effortless elegance, and the sheer joy of creating something beautiful and delicious with your own hands. Try this recipe, adapt it, share it – let the effortless delight of this no-bake lemon mousse pie inspire your own culinary adventures. The kitchen awaits!
Unlock Your Inner Pastry Chef: Make This Dreamy Pie Today!
Thanks for joining us on this delicious journey! We hope you've gained some inspiration (and maybe a little extra sweetness) from our No-Bake Lemon Mousse Pie recipe. Ready to take your baking skills to the next level?
- Whizz up your own dreamy pie: Grab those ingredients and get baking! The recipe is super simple, and the result? Pure bliss.
- Share your creation: Tag us on social media with your stunning Lemon Mousse Pie – we'd love to see your masterpiece!
- Explore other delightful no-bake recipes: Head over to our website for more easy-to-make, mouth-watering treats.
So, what's your favorite element of this decadent dessert? Let us know in the comments below!