
Ultimate Easy Guide to Summer Berry Crisps

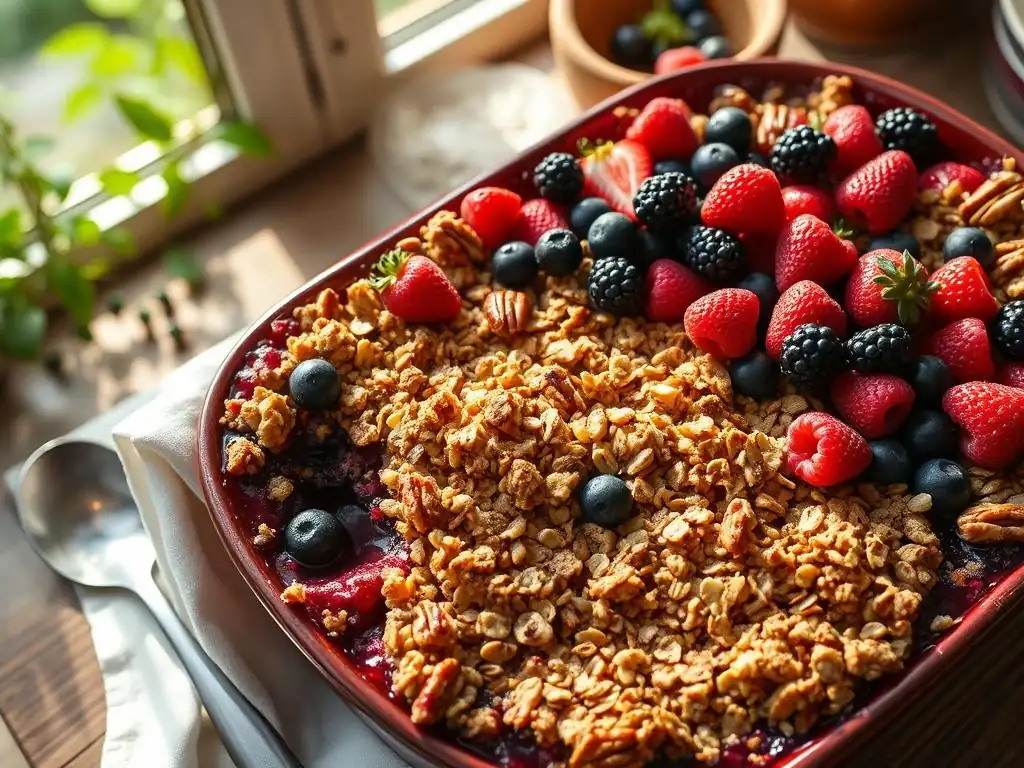
Welcome to BakeWithEase, your trusted guide to baking bliss! Ever dream of effortlessly creating a show-stopping dessert that bursts with summer flavors? Then you're in the right place. Dive into our Ultimate Easy Guide to Summer Berry Crisps and discover how simple it is to bake a perfectly golden, fruit-filled delight. But that's just the beginning! What makes our crisp truly special, and how can you customize it to your own taste? Find out as you explore the secrets within...
- BakeWithEase Presents: The Easiest Summer Berry Crisp Recipe
- Why You'll Love This Easy Summer Berry Crisp
- Mastering the Art of Summer Berry Crisps: A Step-by-Step Guide
- Summer Berry Crisp Variations and Customizations
- Tips for the Best Summer Berry Crisp
- Troubleshooting Common Summer Berry Crisp Issues
- More Baking Recipes from BakeWithEase
- Frequently Asked Questions
- Final Reflection: The Sweet Simplicity of Summer
- Unlock Your Inner Baker: Create the Perfect Berry Crisp!
BakeWithEase Presents: The Easiest Summer Berry Crisp Recipe
Welcome to BakeWithEase, where we believe baking should be simple, fun, and delicious! Summer brings an abundance of fresh, vibrant berries, and there's no better way to celebrate their sweetness than with a warm, bubbling crisp. This recipe is designed for bakers of all levels, proving that you don't need complex techniques to create a show-stopping dessert. We'll guide you through making an incredibly easy summer berry crisp that's perfect for weeknight treats or effortless entertaining.
Our focus is on minimal fuss and maximum flavor. We're talking about tossing fresh berries with just a touch of sweetener and thickener, topping them with a simple, crumbly oat topping, and baking until golden and bubbly. This easy summer berry crisp comes together quickly, making it an ideal last-minute dessert option. Forget complicated pastry or lengthy chilling times – this is pure, unadulterated summer goodness in a dish.
Why You'll Love This Easy Summer Berry Crisp
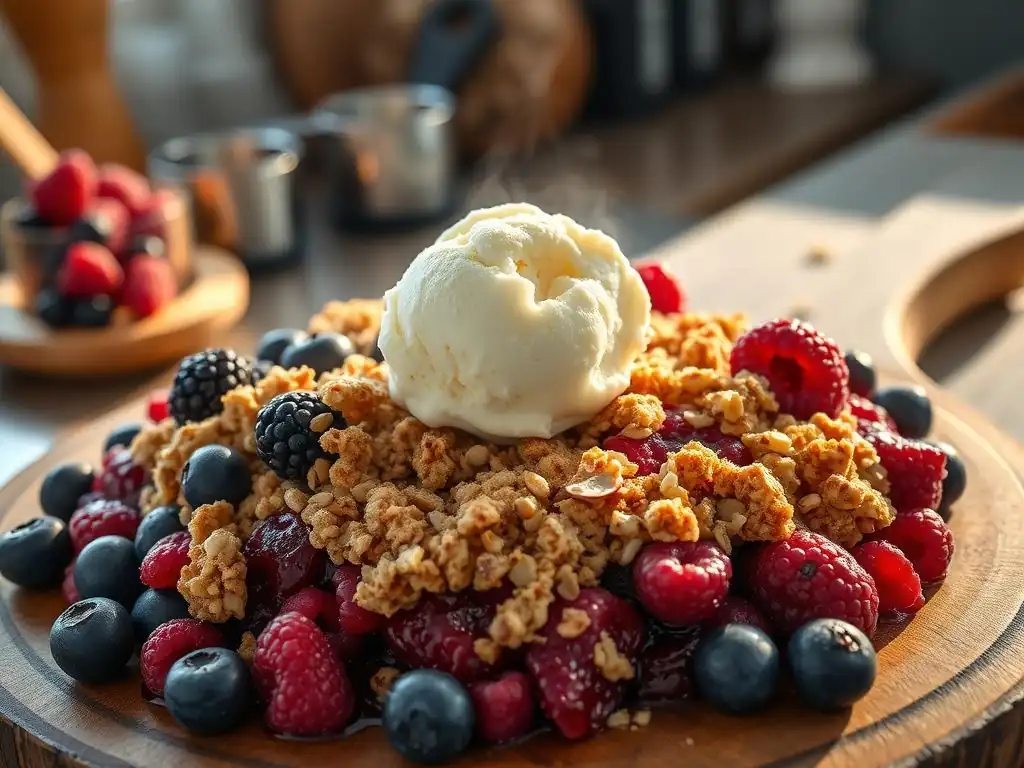
There are countless reasons to fall in love with this easy summer berry crisp. First and foremost is its simplicity. It requires basic pantry staples and fresh or frozen berries, making it accessible no matter where you are or your grocery list length. The hands-on time is minimal, often less than 15-20 minutes before it goes into the oven. This is crucial for busy summer days when you want a homemade dessert without spending hours in the kitchen.
Beyond ease, the flavor is simply unbeatable. The warmth of the baked berries, slightly sweetened and thickened, combined with the buttery, crunchy oat topping creates a textural and taste sensation. It's comforting, vibrant, and perfectly captures the essence of summer. Plus, it's incredibly versatile – enjoy it warm straight from the oven, perhaps with a scoop of vanilla ice cream, or at room temperature. It's a crowd-pleaser that always disappears fast! Making an easy summer berry crisp is a rewarding experience for any home baker.
Simple Ingredients for a Delicious Berry Crisp
One of the hallmarks of an easy summer berry crisp is its reliance on simple, readily available ingredients. For the filling, you'll need fresh summer berries – a mix of strawberries, blueberries, raspberries, and blackberries works beautifully, or pick your favorite single type.
About 6-8 cups of berries will typically fill a standard 9x13 inch baking dish or a similar-sized round dish. You'll also need a small amount of granulated sugar (adjusting based on the sweetness of your berries), a thickener like cornstarch or flour (cornstarch usually provides a clearer finish), and a splash of lemon juice to brighten the flavors.
The crisp topping is equally straightforward. It typically involves all-purpose flour, rolled oats (old-fashioned oats provide the best texture), brown sugar for moisture and depth of flavor, a pinch of salt to balance the sweetness, and cold butter cut into small pieces. Some recipes might add a touch of cinnamon or other spices, but the basic combination of flour, oats, sugar, and butter is the foundation for that perfect crumbly texture. Using cold butter is key to achieving a nice, crumbly topping rather than a solid crust.
Quick & Easy Summer Berry Crisp Baking Process
The beauty of an easy summer berry crisp lies in its speedy preparation. Once your berries are washed and prepped, they are gently tossed with the sugar, thickener, and lemon juice directly in your baking dish. There's no need for pre-cooking the fruit, which saves significant time and effort. This simple step ensures the berry filling is flavorful and slightly thickened as it bakes.
While the berries are getting ready, you quickly mix the topping ingredients. Combine the dry ingredients (flour, oats, sugars, salt) in a bowl, then cut in the cold butter using your fingers, a pastry blender, or even a food processor for speed, until the mixture resembles coarse crumbs. This takes just a few minutes. Sprinkle this topping evenly over the berry mixture in the dish. The whole assembly process can realistically be completed in under 15 minutes, leaving you with plenty of time to relax while your easy summer berry crisp bakes to perfection in the oven.
The Perfect Summer Dessert: From Oven to Table in Minutes
One of the most delightful aspects of an easy summer berry crisp is how quickly it transitions from baking dish to serving bowl. Once the topping is golden brown and the berry filling is visibly bubbling around the edges (a sign that the thickener has activated), it's ready. The aroma alone is enough to draw everyone to the kitchen! While it's best to let it rest for 5-10 minutes after removing it from the oven to allow the filling to set slightly, you don't need to wait long before digging in.
Serving this easy summer berry crisp warm is a classic choice. The contrast between the hot, sweet berries and the cool, creamy addition of vanilla ice cream or a dollop of whipped cream is heavenly. For a slightly healthier twist, plain Greek yogurt or a drizzle of cream can also be wonderful accompaniments. The ease of preparation means you can decide to make this dessert spontaneously after dinner and have it ready in about an hour total (including baking time), making it truly a perfect, low-stress summer treat.
Mastering the Art of Summer Berry Crisps: A Step-by-Step Guide
Creating a delicious summer berry crisp is genuinely simple, but following a few key steps ensures consistent success. This guide breaks down the process into manageable stages, from preparing the star ingredient – the berries – to getting that perfect golden-brown crisp topping. Even if you've never made a crisp before, these steps will lead you to a fantastic result.
The process is forgiving and adaptable, allowing for slight variations in fruit amounts or topping consistency. The goal is to achieve a bubbly, flavorful berry base with a crunchy, buttery topping that provides a delightful textural contrast. Mastering this easy summer berry crisp means understanding how the simple ingredients interact during baking to create that comforting, classic dessert.
Step 1: Preparing Your Fresh Summer Berries
The first step to any great berry crisp is getting your fruit ready. This is arguably the easiest part! You'll need approximately 6-8 cups of fresh berries for a standard crisp, but you can adjust slightly based on your dish size. A mix of strawberries, blueberries, raspberries, and blackberries offers a complex flavor profile and beautiful color, but a single berry type works just as well. For instance, 6 cups of ripe blueberries make a wonderfully classic easy summer berry crisp.
Once you have your berries, they need a quick clean-up. This involves choosing the best ones and giving them a gentle wash.
Choosing the Best Summer Berries for Your Crisp
Selecting ripe, flavorful berries is key to a delicious crisp. Look for berries that are plump, brightly colored, and free from mold or soft spots. If using strawberries, choose ones that are deep red throughout. Blueberries should be a dusty blue color and feel firm.
Raspberries and blackberries should be tender but not mushy. While fresh berries in peak season offer the best flavor, frozen berries are a perfectly acceptable and convenient alternative, especially outside of summer. If using frozen berries, you can often use them directly from the freezer, though they might release more liquid, requiring a slight adjustment in thickener.
Consider the sweetness and tartness balance when choosing your mix. Strawberries and blueberries are generally sweeter, while raspberries and blackberries tend to be tarter. A good mix often balances these flavors beautifully in an easy summer berry crisp. Aim for about 1.5 to 2 pounds of fresh berries for a standard 9x13 inch dish.
Washing and Preparing the Berry Mixture
Washing berries requires a gentle touch. Place them in a colander and rinse them under cool water. Avoid soaking, as this can make them absorb too much water and become mushy, which can lead to a watery crisp filling. After rinsing, gently pat them dry with paper towels or let them air dry briefly on a clean towel. For strawberries, hull them (remove the green tops) and slice larger ones in half or quarters. Raspberries and blackberries are usually fine as is. Blueberries don't typically need slicing.
Once washed and prepped, place the berries directly into your baking dish. Sprinkle about 1/4 to 1/2 cup of granulated sugar over the berries, depending on their natural sweetness and your preference. Add 2-3 tablespoons of cornstarch or flour (cornstarch is preferred for clarity) to help thicken the juices, and a squeeze of fresh lemon juice (about 1 tablespoon) to enhance the berry flavors and balance the sweetness. Gently toss everything together in the dish until the berries are coated. This simple mixture forms the base of your easy summer berry crisp.
Step 2: Crafting the Perfect Crisp Topping
The crisp topping is the delightful crown of your berry dessert. It's easy to make and provides that essential crunchy contrast to the soft, warm fruit underneath. The classic combination uses oats, flour, sugar, and butter, creating a crumbly texture that becomes golden and slightly chewy when baked.
Getting the right texture for the topping is straightforward. The key is to incorporate the cold butter into the dry ingredients properly. This prevents the butter from melting too quickly and helps create those wonderful, irregular crumbs that crisp up beautifully in the oven.
Ingredients for an Oatmeal Crisp Topping
A standard oatmeal crisp topping requires just a few basic pantry items. You'll need about 1 cup of all-purpose flour, 1 cup of rolled oats (old-fashioned oats are recommended for their texture, quick oats can be used but result in a finer topping), 1/2 cup of packed light or dark brown sugar, and optionally 1/4 cup of granulated sugar for extra sweetness and crispness. A pinch of salt (about 1/4 teaspoon) is important to enhance the flavors.
The binder that brings it all together is cold butter. You'll need about 1/2 to 3/4 cup (1 to 1.5 sticks) of unsalted butter, cut into small cubes. Using cold butter is crucial because as it melts during baking, it creates steam, which helps separate the flour and oat particles, resulting in a more crumbly and "crisp" texture. If the butter is too soft, it will blend too much with the dry ingredients and create a more cookie-like topping.
Mixing the Crisp Topping: Tips and Tricks
Mixing the topping is simple. In a medium bowl, whisk together the flour, oats, brown sugar, granulated sugar (if using), and salt. Add the cold butter cubes to the dry ingredients. Now, you need to cut the butter into the mixture until it resembles coarse crumbs, with some pieces of butter still visible (about the size of small peas). You can do this using a pastry blender, two forks, or your fingertips. Using your fingertips is effective but work quickly so the butter doesn't melt from the heat of your hands.
Alternatively, for an even faster method, you can pulse the dry ingredients and cold butter cubes in a food processor until the mixture is crumbly. Be careful not to over-process, or you'll end up with a paste. Once the mixture is ready, you can sprinkle it directly over the berry filling. Some bakers like to chill the topping briefly before sprinkling it, which can help maintain the coldness of the butter for a crispier result, but it's not strictly necessary for a quick and easy summer berry crisp.
Step 3: Assembling and Baking Your Summer Berry Crisp
With the berry filling prepped and the crisp topping ready, it's time to assemble and bake! This is where the magic happens, transforming simple ingredients into a warm, bubbly, irresistible dessert. The assembly is incredibly quick, making this easy summer berry crisp perfect for when you're short on time.
Properly assembling ensures even baking and that delightful balance of fruit and topping in every bite. Baking at the right temperature allows the berries to soften and release their juices while the topping turns golden brown and crispy.
Preparing Your Baking Dish
For an easy summer berry crisp, a standard baking dish works best. A 9x13 inch rectangular dish is common and holds a good amount, typically around 6-8 cups of fruit. A 2-quart or 3-quart oval or round gratin dish also works beautifully and presents nicely. There's generally no need to grease the dish, as the fruit filling is moist and unlikely to stick significantly. However, placing the baking dish on a rimmed baking sheet is highly recommended.
Berries release juice as they bake, and sometimes the delicious, bubbly filling can overflow the sides of the dish, especially if it's filled quite full. A baking sheet catches any drips, preventing a sticky mess in the bottom of your oven. This simple preparation step saves you from potential cleanup headaches later on.
Layering the Berry Filling and Crisp Topping
Once your baking dish is on a baking sheet, the layering is straightforward. If you prepped your berries directly in the dish (as suggested for maximum ease), they are already in place. If you prepped them in a bowl, pour the entire berry mixture, including any juices that have accumulated, into the prepared baking dish and spread it into an even layer.
Next, take your prepared crisp topping and sprinkle it evenly over the top of the berry filling. Aim for an even distribution so that every serving gets a good amount of topping. Don't press the topping down; leave it loose and crumbly. This allows the hot air to circulate through the topping as it bakes, promoting crispness. The topping should generously cover the berries from edge to edge.
Baking Time and Temperature for a Golden-Brown Crisp
Preheat your oven to 375°F (190°C). Place the assembled easy summer berry crisp on the middle rack of your preheated oven, on the rimmed baking sheet. The baking time will vary depending on the size and depth of your dish and whether you used fresh or frozen berries, but it typically takes between 35 and 50 minutes.
You'll know the crisp is ready when the topping is golden brown and the berry filling is visibly bubbling thickly around the edges and throughout the center. The bubbling indicates that the fruit juices are hot and the thickener is working. If the topping is browning too quickly before the fruit is bubbly, you can loosely tent the dish with aluminum foil for the remaining baking time. Let the crisp cool for at least 10-15 minutes before serving to allow the filling to set slightly.
Summer Berry Crisp Variations and Customizations
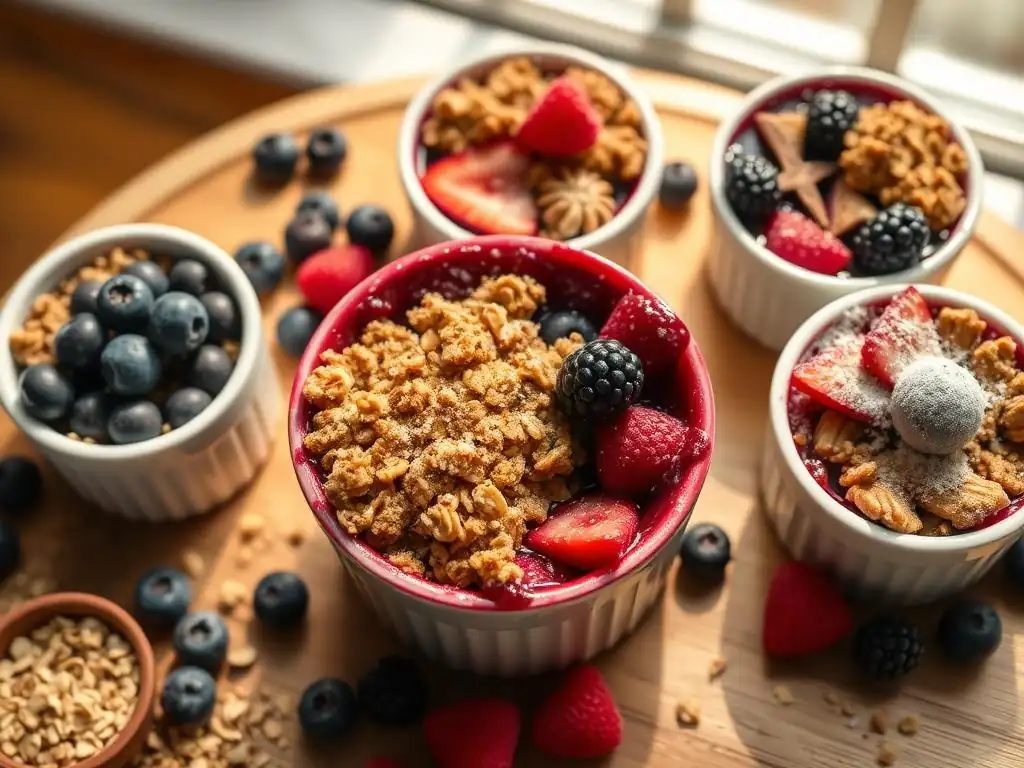
While the classic easy summer berry crisp is fantastic on its own, one of its joys is how easily it can be customized. You can play with different berry combinations, add extra flavorings, or even adapt it to dietary needs like veganism. These variations allow you to tailor the crisp to your personal preferences and the ingredients you have on hand, making it a versatile dessert for any occasion.
Exploring different additions and substitutions keeps this simple dessert exciting and proves that an easy summer berry crisp is far from boring. Whether you're craving something purely sweet or something with a hint of spice, there's a berry crisp variation for you.
Adding Different Summer Berries for Unique Flavor Combinations
The beauty of a berry crisp is the ability to mix and match! While a single-berry crisp is delicious, combining different types adds layers of flavor and texture. Consider the sweetness and tartness of each berry when creating your mix. A popular approach is using a mix of equal parts strawberries, blueberries, raspberries, and blackberries for a truly 'mixed berry' experience.
However, you can easily lean into specific flavor profiles. For instance, pairing sweeter blueberries with tangier raspberries creates a vibrant contrast. Or, combine juicy strawberries with slightly firmer blackberries for textural interest. Approximately 6-8 cups total volume is a good starting point for most recipes.
Strawberry Crisp: A Sweet Staple
A crisp made purely with strawberries is a delightful, sweet treat, especially when strawberries are at their peak ripeness in early summer. Use about 6-8 cups of hulled and sliced strawberries. Since strawberries release a lot of water, you might want to increase the thickener slightly, maybe using 3-4 tablespoons of cornstarch or flour per 6 cups of fruit, to ensure the filling isn't too runny.
Strawberry crisp is wonderfully sweet and slightly floral. Its flavor pairs exceptionally well with vanilla in the topping or served with vanilla ice cream. It's a straightforward and beloved variation of the easy summer berry crisp that highlights the simple sweetness of this popular fruit.
Raspberry Crisp: Tangy and Bright
Raspberries bring a lovely tartness and intense berry flavor to a crisp. Using 6-8 cups of fresh raspberries creates a tangy, vibrant filling. Due to their delicate nature, handle raspberries gently when washing and mixing. Their seeds provide a unique texture that some people love.
A raspberry crisp is less sweet than a strawberry or blueberry crisp, offering a brighter, more refreshing taste. It pairs well with a slightly sweeter topping or served with whipped cream to balance the tartness. This variation of the easy summer berry crisp is perfect for those who prefer a dessert that isn't overly sugary.
Blueberry Crisp: Classic Comfort
Blueberry crisp is arguably one of the most classic and comforting versions of a berry crisp. Blueberries become wonderfully soft and jammy when baked, and their natural sweetness makes for a universally loved dessert. Use 6-8 cups of fresh blueberries – they require minimal prep, just a wash.
Blueberry crisp has a deeper, richer flavor compared to strawberry or raspberry. It pairs beautifully with cinnamon or a hint of lemon zest in the topping. This easy summer berry crisp variation is a go-to for many bakers due to its consistent results and crowd-pleasing appeal.
Mixed Berry Crisp: The Best of All Worlds
Combining different berries allows you to harness the unique characteristics of each, resulting in a complex and incredibly flavorful crisp. A popular mix includes equal parts strawberries, blueberries, raspberries, and blackberries, totaling 6-8 cups. The sweetness of strawberries and blueberries balances the tartness of raspberries and blackberries.
This mixed berry crisp provides a delightful interplay of textures and flavors, offering a little bit of everything in each bite. It's a fantastic way to use up a bounty of different summer berries and create a truly spectacular easy summer berry crisp that showcases the season's best.
Enhancing Your Berry Crisp with Spices and Extracts
While the simple combination of berries, sugar, and topping is delicious, adding a touch of spice or extract can elevate the flavor profile of your easy summer berry crisp. These additions can complement the natural fruit flavors and add warmth or brightness to the dessert.
Spices like cinnamon are classic pairings with baked fruit, while extracts can add subtle background notes that make the crisp taste more complex. A little goes a long way, so start with small amounts and adjust to your preference.
Adding a Touch of Cinnamon or Lemon Zest
Cinnamon is a beloved spice in fruit desserts and pairs wonderfully with berries, especially blueberries and mixed berries. Add 1/2 to 1 teaspoon of ground cinnamon to the crisp topping mixture for a warm, comforting flavor. You can also sprinkle a pinch over the berry filling before adding the topping.
Lemon zest, on the other hand, adds a bright, fresh note that enhances the natural acidity and sweetness of the berries. Finely grate the zest of half a lemon and toss it with the berries before adding the sugar and thickener. The citrus oil in the zest brings a lively counterpoint to the rich fruit and buttery topping, making for a more vibrant easy summer berry crisp.
Vanilla Extract: A Classic Pairing
Vanilla extract is a versatile flavor enhancer that works well in many baked goods, including berry crisps. While not always included in the most basic recipes, adding a teaspoon of pure vanilla extract to the berry mixture before baking can deepen and round out the fruit flavors.
Vanilla has a natural affinity for berries, particularly strawberries and blueberries. It adds a layer of sweet, aromatic complexity without overpowering the fresh fruit taste. A splash of vanilla extract is an easy way to make your easy summer berry crisp taste just a little bit more special.
A Hint of Balsamic: Elevating Berry Flavor
This might sound unusual, but a tiny splash of good quality balsamic vinegar can remarkably enhance the flavor of berries, especially strawberries and raspberries. Balsamic vinegar, particularly aged varieties, has a subtle sweetness and acidity that concentrates and amplifies the natural fruit flavors.
Add just a teaspoon or two of balsamic vinegar to the berry mixture along with the lemon juice. You won't taste the vinegar itself; instead, it acts as a secret ingredient that makes the berries taste more intensely like themselves. This technique adds a sophisticated depth to your easy summer berry crisp.
Making a Vegan Summer Berry Crisp
Adapting an easy summer berry crisp to be vegan is straightforward, primarily involving substituting the butter in the topping. This makes the dessert accessible to those following a plant-based diet without sacrificing flavor or texture.
With the availability of excellent vegan butter alternatives, you can achieve a topping that is just as crumbly, golden, and delicious as the traditional version. The fruit filling is naturally vegan (assuming you use sugar, which is typically vegan, but check if you are strict).
Vegan Butter Options for the Crisp Topping
The key ingredient to substitute for a vegan crisp topping is butter. Look for solid, stick-style vegan butter alternatives, often made from plant-based oils like soy, palm, or a blend. These work best because they behave similarly to dairy butter when cut into dry ingredients. Avoid soft or whipped vegan margarines, as they contain too much water and won't create the desired crumbly texture.
Use the same amount of cold, cubed vegan butter as you would dairy butter (about 1/2 to 3/4 cup) and cut it into the flour, oats, and sugar mixture using the same methods (pastry blender, fingers, or food processor). The goal is still to have coarse crumbs with visible pieces of the vegan butter substitute.
Ensuring a Delicious Vegan Berry Crisp
Beyond the butter substitute, the rest of the easy summer berry crisp recipe is typically vegan. Ensure your sugar is vegan if that is a concern (some white sugars are processed with bone char, but many, especially organic or brown sugars, are not). Use cornstarch or flour as your thickener, as both are plant-based.
Follow the same assembly and baking instructions. The vegan crisp topping should brown similarly to a dairy topping, though the exact color and crispness might vary slightly depending on the specific vegan butter used. Bake until the topping is golden brown and the berry filling is bubbly. The result is a warm, comforting, and completely plant-based easy summer berry crisp that everyone can enjoy.
Tips for the Best Summer Berry Crisp
Making an easy summer berry crisp is simple, but a few insider tips can elevate your results from good to absolutely fantastic. These pointers cover common areas where small adjustments can make a big difference in texture, flavor, and overall enjoyment.
Paying attention to details like the fruit-to-topping ratio or how to prevent a soggy bottom can help you achieve consistently perfect crisps every time.
Achieving the Perfect Berry to Crisp Ratio
The ideal balance between the warm, soft berry filling and the crunchy, sweet topping is subjective, but a good ratio is key to a satisfying bite. Generally, you want enough topping to generously cover the fruit layer without being excessively thick. A common ratio is roughly equal parts fruit (by volume) to topping (by volume before baking, as it flattens slightly).
For a standard 9x13 inch dish holding about 6-8 cups of berries, 3-4 cups of prepared crisp topping mixture is usually sufficient. If you prefer more topping, you can increase the topping ingredients proportionally. Conversely, if you like a higher fruit-to-topping ratio, use the specified amount of fruit but slightly reduce the topping volume. Experiment to find your personal perfect balance in your easy summer berry crisp.
Preventing a Soggy Berry Crisp
A common issue with fruit crisps can be a watery filling or a soggy topping where it meets the fruit. Several factors can contribute to this, but the most important is ensuring you use enough thickener in the berry mixture. Cornstarch is often more effective than flour for creating a clear, thick sauce that doesn't become gluey. Using 2-3 tablespoons of cornstarch per 6-8 cups of berries is usually adequate, possibly slightly more if using very juicy or frozen berries.
Another tip is to ensure the crisp bakes long enough. The filling must reach a high enough temperature (around 200-212°F or 93-100°C) for the thickener to activate and thicken the juices properly. You should see visible, thick bubbling throughout the crisp, not just around the edges. If the topping is browned but the filling isn't bubbling thickly, tent the top with foil and continue baking until the filling is clearly thickened. Using fresh, ripe (but not overripe) berries can also help, as they tend to release less excess liquid than frozen or mushy fruit.
Serving and Storing Your Summer Berry Crisp
Once your easy summer berry crisp emerges from the oven, it's tempting to dive right in. However, letting it rest for 10-15 minutes is beneficial. This allows the filling to cool slightly and set up, preventing it from being excessively runny when served. The topping will also retain its crispness better if not immediately subjected to a cold topping.
Serving warm is the most popular way to enjoy a berry crisp, but it's also delicious at room temperature or even cold the next day. Knowing how to serve it for maximum enjoyment and store leftovers properly ensures you can savor your homemade treat.
Serving Suggestions: Warm with Ice Cream or Yogurt
Serving warm easy summer berry crisp with a scoop of cold vanilla ice cream is a classic pairing for a reason. The melting ice cream creates a luscious sauce that complements the warm, bubbly fruit and crunchy topping beautifully. Other delicious options include whipped cream, crème fraîche, or a dollop of Greek yogurt for a tangy contrast.
For breakfast or brunch, serve it warm with a side of yogurt or granola. The warmth of the crisp is comforting, and the sweetness is just right to start the day. No matter how you serve it, the combination of textures and temperatures is key to its appeal.
Storing Leftover Berry Crisp for Maximum Freshness
Leftover easy summer berry crisp should be cooled completely before storing. Once cool, cover the baking dish tightly with plastic wrap or transfer individual portions to airtight containers. Stored in the refrigerator, it will keep for 3-4 days.
To reheat, you can microwave individual portions, though this may soften the topping. For best results in keeping the topping crispy, reheat larger portions in an oven or toaster oven at about 350°F (175°C) for 10-15 minutes, or until warmed through. You can also enjoy leftovers cold directly from the fridge – the topping might soften slightly, but the flavors are still wonderful.
Troubleshooting Common Summer Berry Crisp Issues
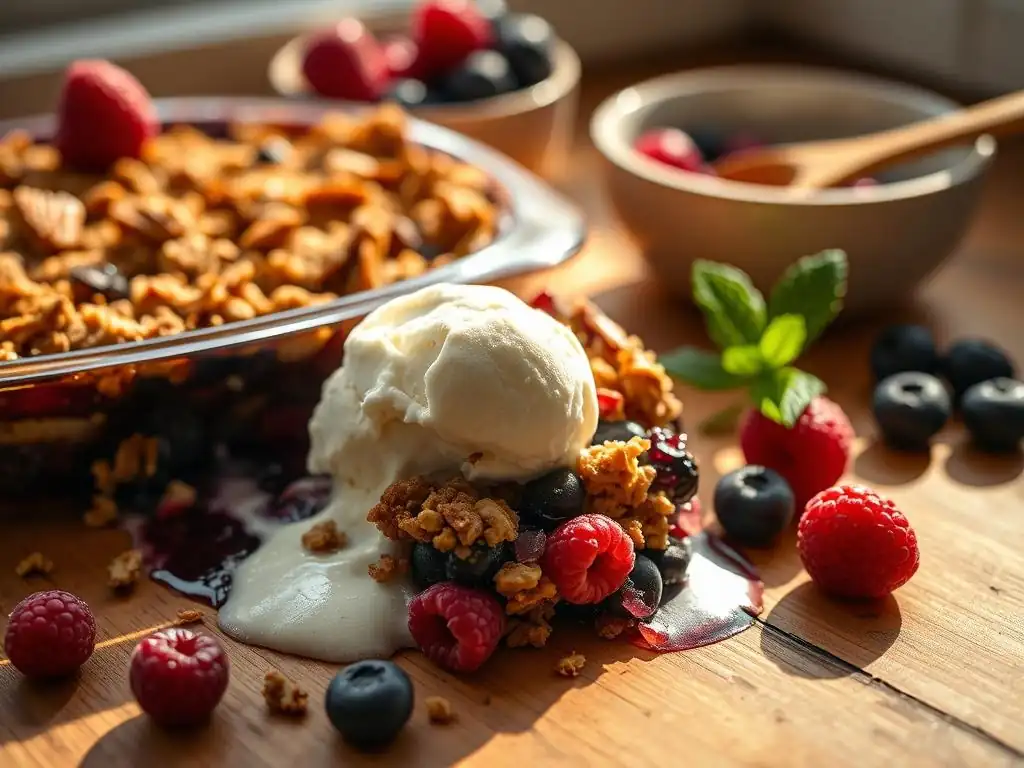
Even with an easy recipe, sometimes things don't go exactly as planned. Knowing how to identify and fix common issues like a dry topping or a runny filling can save your dessert and your sanity. Most problems with an easy summer berry crisp have simple solutions.
Don't be discouraged if your first attempt isn't perfect. Baking is a learning process, and understanding what went wrong is the first step to getting it right next time. These troubleshooting tips address the most frequent crisp conundrums.
Crisp Topping Too Dry? Here's How to Fix It.
If your crisp topping mixture seems too dry and crumbly to even form coarse crumbs, or if it looks more like flour with a few chunks of butter, it likely needs more fat. This happens if you didn't use enough butter or if the butter wasn't cold enough and melted too much into the dry ingredients before you could properly cut it in.
To fix a dry topping mixture before baking, you can cut in a little more cold butter, one tablespoon at a time, until the mixture holds together slightly when squeezed but is still crumbly. If the crisp is already baked and the topping is dry and sandy, there's not much you can do to change its texture directly. However, serving it warm with plenty of ice cream or whipped cream will add moisture and richness, compensating for the dry topping.
Berry Filling Too Runny? Easy Solutions.
A runny berry filling is usually the result of not using enough thickener or not baking the crisp long enough for the thickener to activate. Different berries release varying amounts of juice, and sometimes the fruit is just exceptionally juicy.
If your crisp is still baking and the filling looks watery but the topping isn't overly browned, tent it with foil and continue baking. The extra time in the heat should help the thickener work. If the crisp is out of the oven and cooled but still too runny, you can't easily thicken it in the dish.
For next time, ensure you use the correct amount of thickener (cornstarch is more potent than flour) and bake until the filling is vigorously bubbling throughout. Serving a runny crisp with something absorbent like pound cake or biscuits can help, or just embrace the saucy goodness – it still tastes great!
Crisp Not Browning Properly? Tips for a Golden Finish.
If your crisp topping isn't turning a lovely golden brown, it might be due to insufficient baking time, a low oven temperature, or the placement of the dish in the oven. The Maillard reaction, which causes browning and develops flavor, needs adequate heat and time.
Ensure your oven is accurately preheated to 375°F (190°C). If the topping is still pale after the suggested baking time and the fruit is bubbly, you can carefully move the crisp to a higher rack in the oven, closer to the top heating element (but not too close to burn it), for the last 5-10 minutes of baking. Keep a close eye on it during this time.
Alternatively, some ovens have a convection setting which can help with browning and crisping. Ensure you used brown sugar in the topping, as its molasses content contributes to better browning than just white sugar.
More Baking Recipes from BakeWithEase
Loved making this easy summer berry crisp? BakeWithEase is your resource for mastering simple and delicious baking. We have a wide variety of recipes designed for home bakers of all skill levels, from beginner-friendly cookies to impressive yet achievable cakes and breads.
Explore our site to find your next baking project! We focus on clear instructions, readily available ingredients, and tips to help you succeed in the kitchen.
Explore Our Collection of Desserts
Beyond crisps, our dessert collection features everything from fudgy brownies and chewy cookies to moist muffins and simple cakes. Whether you're craving chocolate, fruit-filled treats, or something light and airy, you'll find a recipe that suits your mood and skill level.
We share tips on everything from measuring flour accurately to creaming butter and sugar, ensuring your desserts turn out perfectly every time. Find your new favorite sweet treat among our easy-to-follow dessert guides.
Baking with Berries: Beyond the Crisp
Summer berries offer endless possibilities in baking! If you enjoyed working with fresh berries in this easy summer berry crisp, explore our other berry-centric recipes. We feature recipes for berry pies, cobblers, muffins, scones, and quick breads.
Learn how to prevent berries from sinking in your muffins or achieve a perfectly flaky pie crust for your berry pie. Our guides cover techniques specific to baking with these delicate and flavorful fruits, helping you make the most of berry season.
Frequently Asked Questions
What makes this berry crisp recipe "easy"?
This recipe emphasizes simple steps and easily accessible ingredients, ensuring even beginner bakers can achieve delicious results. We focus on minimizing prep time without sacrificing flavor.
Can I substitute different berries in this summer crisp?
Absolutely! Feel free to use a mix of your favorite berries, like blueberries, raspberries, strawberries, or blackberries. Adjust the sugar slightly depending on the berries' sweetness.
What's the best way to prevent the berry crisp from becoming too soggy?
The key is to use a thickening agent, like cornstarch or tapioca starch, to absorb excess moisture from the berries. Also, don't overbake it.
Can I make this berry crisp ahead of time?
You can prepare the berry filling and the crisp topping separately up to 24 hours in advance. Store them in the refrigerator and assemble just before baking.
What are some tips for achieving a perfectly golden and crispy topping?
Use cold butter when making the topping and ensure it's evenly distributed. Optionally, add a sprinkle of sugar on top before baking for extra caramelization.
Final Reflection: The Sweet Simplicity of Summer
The art of the summer berry crisp transcends mere dessert; it's a celebration of seasonal abundance and the simple joys of homemade goodness. In a world increasingly dominated by fast food and processed ingredients, the crisp stands as a testament to the power of fresh, readily available fruits transformed into something truly special with minimal effort. This easy-to-follow guide aims to empower everyone, regardless of baking experience, to create this delightful treat.
The enduring appeal of the summer berry crisp lies in its ability to evoke cherished memories and create new ones. It's a dish that effortlessly bridges generations, bringing families together around a warm, comforting dessert. The aroma alone—a symphony of sweet berries and warm spices—is enough to transport you to a sun-drenched afternoon spent with loved ones. The best things in life are simple,
a sentiment perfectly embodied by this humble yet exquisite dessert. This simple act of baking connects us to a slower pace of life, a time when we appreciate the bounty of nature and the satisfaction of creating something delicious from scratch.
Now, I invite you to embrace the simplicity and joy of the summer berry crisp. Don't be intimidated by the seemingly complex recipes you might find online; this guide proves that creating something truly special doesn't require hours of work or specialized skills. Gather your favorite berries, find a cozy spot in your kitchen, and let the sweet aroma guide you. This isn't just about baking a crisp; it's about creating a moment of peace, connection, and deliciousness in your day. Go ahead, bake one today – you deserve it.
Unlock Your Inner Baker: Create the Perfect Berry Crisp!
Thanks for joining us on this delicious journey into the world of summer berry crisps! We hope you've gained the confidence to tackle this classic dessert with ease. Now it's time to put your newfound skills to the test!
- Bake your dream crisp: Grab those berries and get baking! We're confident you can now create a stunning and delicious crisp. Remember to experiment with different berry combinations and toppings.
- Share your creation: Show off your baking masterpiece! Snap a picture of your finished crisp and share it on social media using #BakeWithEaseBerryCrisp – let's see those delicious results!
- Challenge a friend to a bake-off: Why not turn this into a friendly competition? Challenge a friend or family member to bake their own berry crisp and compare your creations!
So, what unique berry combination will you create for your next berry crisp masterpiece?