
Baking Vegan Bread in a Stand Mixer: A Quick Guide

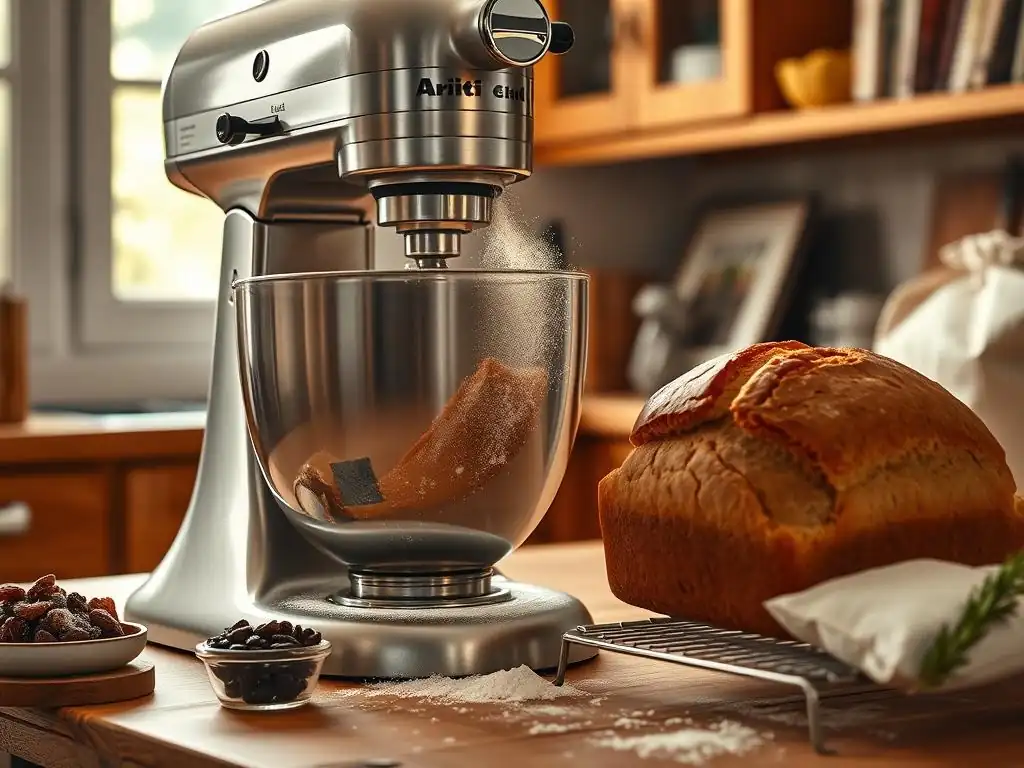
Welcome to BakeWithEase, your guide to unlocking the delicious world of baking! Ever wondered if you could achieve bakery-quality vegan bread at home, using your trusty stand mixer? Then you're in the right place. This article dives into the surprisingly simple process of baking vegan bread in a stand mixer, revealing the secrets to a perfect crumb and crust. Get ready to elevate your baking game – the aroma of freshly baked bread awaits!
- Baking Vegan Bread in a Stand Mixer: A Quick Guide for BakeWithEase
- Introduction to Vegan Bread Baking with a Stand Mixer
- Preparing to Bake Vegan Bread: Ingredients and Equipment
- Step-by-Step Guide: Making Vegan Bread Dough in a Stand Mixer
- Shaping and Baking Your Vegan Bread
- Tips and Tricks for Perfect Vegan Bread with a Stand Mixer
- Enjoying Your Homemade Vegan Bread from BakeWithEase
-
Frequently Asked Questions
- How can a stand mixer help when baking vegan bread?
- What ingredients are typically used in vegan bread recipes?
- Can any stand mixer be used for vegan bread dough?
- What's the best way to proof vegan bread dough?
- What are some common challenges when baking vegan bread, and how can a stand mixer help overcome them?
- Final Reflection: The Joy of Vegan Baking, One Loaf at a Time
- Unleash Your Inner Baker: Craft the Perfect Vegan Loaf!
Baking Vegan Bread in a Stand Mixer: A Quick Guide for BakeWithEase
Introduction to Vegan Bread Baking with a Stand Mixer
Baking delicious, fluffy vegan bread at home might seem daunting, especially if you're new to the world of plant-based baking. However, with the right tools and techniques, it's entirely achievable and incredibly rewarding. One of the most valuable allies in the vegan bread baker's kitchen is the stand mixer. It takes the hard work out of kneading, ensuring consistent results every time.
This guide from BakeWithEase will walk you through the process of using a vegan bread stand mixer to create wonderful loaves. We'll cover everything from selecting your ingredients to troubleshooting common issues, all designed to make your baking journey smooth and enjoyable. Whether you're craving a simple sandwich loaf or something more adventurous, your stand mixer is ready to help you master vegan bread.
Why Use a Stand Mixer for Vegan Bread?
Using a stand mixer for kneading vegan bread dough offers significant advantages, particularly for those seeking efficiency and consistency. The mechanical action of a stand mixer's dough hook is far more consistent and tireless than hand kneading, leading to a more evenly developed gluten structure. This is crucial for vegan doughs, which sometimes behave differently than traditional doughs made with dairy or eggs.
Beyond consistency, a stand mixer saves you considerable time and effort. Kneading dough by hand can take 10-15 minutes of continuous, vigorous work, which can be tiring. A stand mixer, on the other hand, can achieve the same results in often half the time, typically between 6-10 minutes depending on the dough and mixer. This efficiency makes baking vegan bread much more accessible for busy schedules.
BakeWithEase' Guide to Simple Vegan Bread
At BakeWithEase, we believe baking should be enjoyable and straightforward, and that certainly applies to making vegan bread with a stand mixer. Our approach focuses on clear steps, reliable recipes, and understanding the fundamental techniques. We aim to demystify the process, showing you how simple ingredients can transform into a beautiful, crusty loaf with the help of your kitchen appliance.
This guide is structured to provide a clear path from start to finish. We'll break down each stage, from gathering your ingredients and setting up your vegan bread stand mixer to the final bake and enjoying the fruits of your labor. By following these steps, you'll gain confidence in your ability to bake delicious vegan bread consistently, opening up a world of possibilities for your baking adventures.
Preparing to Bake Vegan Bread: Ingredients and Equipment
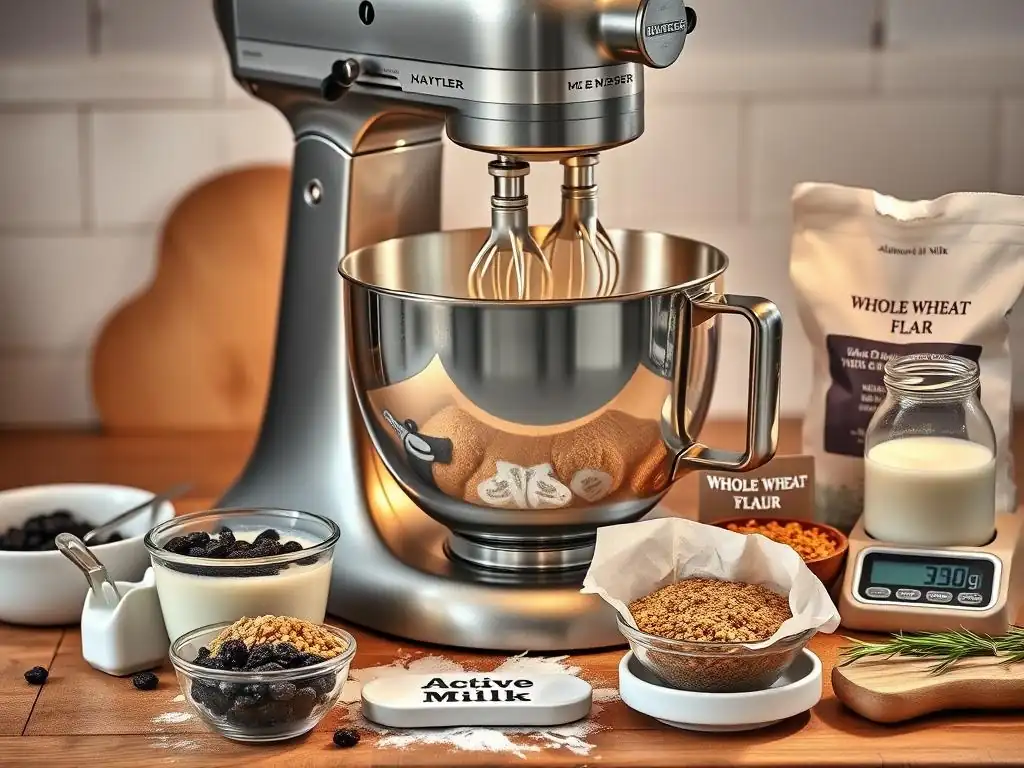
Before you even think about turning on your vegan bread stand mixer, it's essential to gather all your ingredients and ensure you have the necessary equipment ready. Having everything measured out and within reach saves time and prevents last-minute rushes, which can lead to mistakes. Baking is a science, and preparation is key to successful results.
This section will detail the core components of most simple vegan bread recipes and guide you through selecting the right tools, specifically focusing on your stand mixer and its attachments. Understanding your ingredients and equipment is the first step towards mastering the art of making vegan bread in a stand mixer.
Essential Ingredients for Delicious Vegan Bread
Creating delicious vegan bread requires just a few basic ingredients, each playing a vital role. These typically include flour, a leavening agent (like yeast), a liquid, a sweetener (optional, but helps activate yeast and adds flavor/color), and salt. Unlike traditional bread, vegan bread omits eggs and dairy, relying on other ingredients to achieve structure, flavor, and texture.
The quality and type of these core ingredients significantly impact the final loaf. For instance, the protein content of your flour affects gluten development, while the temperature of your liquid is crucial for yeast activation. Using fresh yeast and properly stored flour can make a noticeable difference in the rise and texture of your vegan bread.
Flour Selection for Vegan Bread Baking
The most common flour for baking vegan bread is all-purpose flour, which provides a good balance of protein for gluten development, resulting in a well-structured loaf. However, you can experiment with various flours or blends. Whole wheat flour adds nutrients and a heartier texture, though it often requires slightly more liquid and can produce a denser loaf due to its bran content interfering with gluten formation.
High-gluten bread flour contains more protein (typically 12-14%) than all-purpose flour (around 10-12%), leading to a stronger gluten network and often a chewier crumb with a higher rise. Many bakers find a blend of bread flour and all-purpose flour, or even a small percentage of whole wheat or rye flour, provides the best balance for their vegan bread stand mixer recipes, offering both structure and interesting flavor profiles.
Vegan-Friendly Yeast Options
Yeast is the primary leavening agent in most bread recipes, responsible for producing carbon dioxide that makes the dough rise. For vegan bread, you can use any standard baker's yeast as yeast itself is a single-celled fungus and is vegan. Common types include active dry yeast, instant yeast, and fresh yeast.
Active dry yeast requires activation in warm liquid (typically 105-115°F or 40-46°C) with a pinch of sugar before combining with other ingredients. Instant yeast is more convenient as it can usually be mixed directly with the dry ingredients, and it rises faster. Fresh yeast is less common for home bakers but provides a unique flavor; it also needs to be proofed. Ensure your yeast isn't expired for a good rise! A small packet of dry yeast (around 2.25 teaspoons or 7 grams) is usually sufficient for a standard loaf using a vegan bread stand mixer.
Liquid Choices: Water, Plant-Based Milks, and More
The liquid in vegan bread provides moisture and helps activate the yeast and develop gluten. Water is the simplest and most common liquid, producing a classic bread texture and flavor. Its temperature is critical, usually warm (around 105-115°F or 40-46°C) for active dry yeast, or lukewarm for instant yeast.
Plant-based milks like soy milk, almond milk, oat milk, or cashew milk can be used instead of water. These often add a touch of richness, a slightly softer crumb, and can contribute to better browning due to their sugar content (check the label). Ensure the plant milk is unsweetened unless the recipe accounts for added sugar. Other liquids like vegetable stock or fruit juice can also be used for specific flavor profiles, but water or unsweetened plant milk are standard for basic loaves made in a vegan bread stand mixer.
Necessary Equipment: Stand Mixer and Accessories
While hand kneading is traditional, a stand mixer significantly simplifies the process of developing gluten in bread dough, especially for vegan recipes. The consistent power and motion of a stand mixer take the physical strain out of kneading, allowing you to achieve the perfect dough consistency needed for a good rise and texture with less effort.
Beyond the mixer itself, you'll need a few key accessories, most importantly the dough hook. You'll also need measuring cups and spoons, a kitchen scale (recommended for accuracy), mixing bowls for proofing, and baking pans or a baking stone/steel. A bench scraper is also incredibly useful for handling sticky dough.
Choosing the Right Stand Mixer for Bread Dough
Not all stand mixers are created equal when it comes to handling dense bread dough. For regular bread baking, especially larger loaves or stiff doughs, a stand mixer with a powerful motor and sturdy construction is recommended. Mixers with a wattage of 300 watts or higher are generally suitable for bread dough.
KitchenAid mixers, for example, are popular choices. Their tilt-head models are typically rated for single loaves, while bowl-lift models often have more powerful motors and are better suited for double batches or stiffer doughs. Check the manufacturer's guidelines regarding the maximum amount of flour or dough weight your specific model can handle to avoid straining the motor, ensuring your vegan bread stand mixer lasts for years of baking.
Dough Hook vs. Paddle Attachment for Vegan Bread
For mixing and kneading bread dough, the dough hook attachment is essential. Its spiral or C-shape design is specifically engineered to pull, stretch, and fold the dough against the sides of the bowl, mimicking the action of hand kneading to develop the gluten structure. Attempting to knead bread dough with the paddle attachment will not properly develop the gluten and can also strain your mixer's motor.
The paddle attachment is useful for initial mixing of ingredients before kneading begins, especially for wetter doughs or batters, but should be swapped out for the dough hook once the dough starts to come together. Always ensure the correct attachment is securely fastened before turning on your vegan bread stand mixer, especially when working with thick doughs.
Step-by-Step Guide: Making Vegan Bread Dough in a Stand Mixer
Now that you have your ingredients and equipment ready, it's time to put your vegan bread stand mixer to work! This section outlines the key steps for preparing your dough, from activating the yeast to the crucial first rise. Following these steps carefully will set the stage for a successful bake.
Remember that baking times and temperatures can vary slightly based on your environment and ingredients. Pay attention to the dough's look and feel rather than relying solely on strict timings. This hands-on approach, even with a stand mixer doing the kneading, is part of becoming a confident baker.
Step 1: Activating the Yeast (If Required)
If you are using active dry yeast, you must activate or "proof" it before adding it to your dry ingredients. This step confirms that the yeast is alive and active. Combine the yeast with warm liquid (usually water or plant milk between 105-115°F or 40-46°C) and a pinch of sugar in a small bowl. The sugar provides food for the yeast.
Let the mixture sit for 5-10 minutes. If the yeast is active, it will become foamy and bubbly on the surface. If nothing happens, your yeast may be expired or the liquid was too hot or cold, and you'll need to start this step over with fresh yeast. If using instant yeast, you can often skip this step and mix it directly with your dry ingredients, following your specific recipe's instructions for your vegan bread stand mixer.
Step 2: Combining Dry Ingredients in the Stand Mixer Bowl
With your yeast ready (or if using instant yeast), the next step is to combine the dry ingredients in the bowl of your vegan bread stand mixer. This typically includes the flour, salt, and any dry sweeteners like sugar. Salt is crucial for flavor and helps control yeast activity, but avoid placing it directly on top of the yeast initially, as it can hinder activation.
Use a whisk or a fork to gently combine the dry ingredients. This ensures that the salt, sugar, and yeast (if adding instant yeast directly) are evenly distributed throughout the flour. This preliminary mix helps prevent pockets of unmixed ingredients and contributes to a more uniform dough structure once liquids are added and the mixer begins working.
Step 3: Adding Wet Ingredients and Mixing
Once the dry ingredients are combined, it's time to add the wet ingredients to the stand mixer bowl. This usually includes the activated yeast mixture (if using active dry yeast), the remaining liquid (ensure it's at the correct temperature), and any fats like oil or melted vegan butter specified in the recipe.
Attach the paddle attachment to your vegan bread stand mixer for this initial mixing stage. Start the mixer on a low speed (speed 1 or 2) to slowly incorporate the wet and dry ingredients. Mix until a shaggy dough begins to form and most of the flour is hydrated. This usually takes just 1-2 minutes. Scrape down the sides of the bowl with a spatula if needed to ensure everything is incorporated before switching attachments.
Step 4: Kneading the Vegan Bread Dough with the Stand Mixer
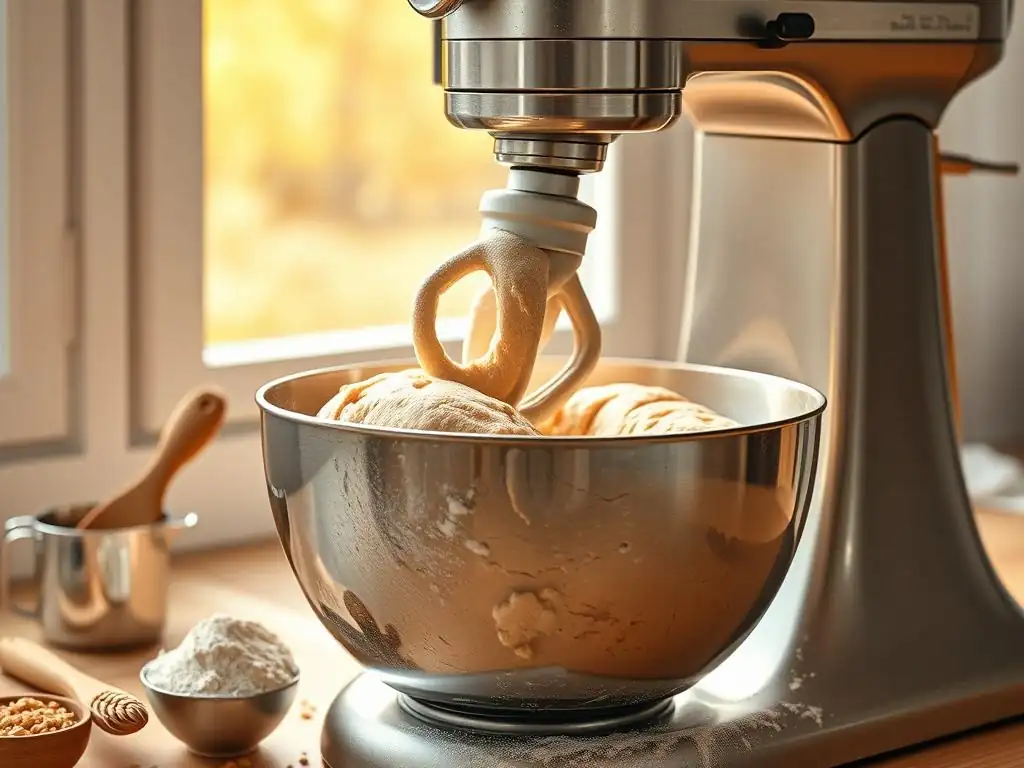
After the ingredients are roughly combined, switch from the paddle attachment to the dough hook. This is where your vegan bread stand mixer truly shines. Start the mixer on a low speed to continue bringing the dough together, then gradually increase the speed to medium-low (speed 2 to 4 on most mixers). The dough hook will begin to pull the dough away from the sides of the bowl.
Kneading with the stand mixer develops the gluten, creating a strong, elastic network that traps the gases produced by the yeast, allowing the bread to rise and hold its shape. Watch the dough as it kneads; it should become smoother and more elastic over time. The process typically takes 6-10 minutes, depending on your mixer speed and the dough's hydration level.
Determining Kneading Time for Perfect Texture
Knowing when your vegan bread dough is sufficiently kneaded is key. While recipes provide time estimates (e.g., "knead for 8 minutes"), the best indicator is the dough itself. After a few minutes of kneading with the vegan bread stand mixer, stop the mixer and perform the "windowpane test."
To do the windowpane test, pinch off a small piece of dough (about the size of a golf ball). Gently stretch it between your fingers. If it stretches thinly enough that you can see light through the center without tearing, like a thin membrane or windowpane, the gluten is well-developed, and the dough is ready. If it tears easily, continue kneading for another minute or two and test again. Over-kneading is possible but less common with a stand mixer than by hand; under-kneading is a more frequent issue, leading to a dense crumb.
Adjusting Dough Consistency
During the kneading process in your vegan bread stand mixer, you might notice the dough is too sticky or too dry. This is common and can be influenced by humidity, flour type, and measurement accuracy. If the dough is very sticky and clinging excessively to the sides of the bowl without pulling away, add flour, one tablespoon at a time, allowing it to incorporate fully before adding more.
Conversely, if the dough appears too dry, stiff, and doesn't come together, add liquid (water or plant milk) one teaspoon at a time. Be patient and add small amounts, as too much liquid can make the dough difficult to handle. Allow the mixer to work for a minute after each addition before assessing the consistency again. The ideal dough should be slightly tacky but pull cleanly away from the sides of the bowl while kneading.
Step 5: First Proofing (Rising) of the Vegan Dough
Once the dough is perfectly kneaded using your vegan bread stand mixer, it's time for the first rise, also known as bulk fermentation. This is where the yeast gets to work, producing carbon dioxide gas that makes the dough expand. Lightly oil a large bowl (big enough for the dough to double in size).
Place the kneaded dough in the oiled bowl, turning it once to coat the surface with oil. Cover the bowl tightly with plastic wrap or a clean kitchen towel to prevent the dough from drying out. Place the covered bowl in a warm, draft-free place. An oven turned off with the light on is a popular spot. The duration of the first rise varies depending on the recipe, yeast type, and ambient temperature, but it typically takes 1 to 2 hours. The dough should roughly double in volume.
Shaping and Baking Your Vegan Bread
After the first proof, your vegan bread dough is ready to be shaped and prepared for its final rise before baking. This stage allows you to give your loaf its desired form, whether it's a classic boule, a sandwich loaf, or rolls. Getting the shaping right helps ensure an even rise and a beautiful final product.
This section guides you through the final steps: shaping, the second proof (or final proof), and baking the bread to perfection in your oven. Even though your vegan bread stand mixer did the heavy lifting, these final steps are crucial for achieving that golden crust and soft interior.
Step 6: Gently Shaping the Vegan Bread Loaf
Once the dough has doubled in size during the first proof, gently punch it down to deflate it. This releases the gases produced during fermentation and helps create a finer crumb structure. Turn the dough out onto a lightly floured surface. Be gentle; you want to maintain some of the gas bubbles.
Shape the dough according to your desired loaf style. For a simple loaf pan, flatten the dough into a rectangle, then roll it up tightly like a jelly roll, pinching the seam closed. For a round boule, gently tuck the edges underneath to create tension on the surface. Avoid using too much flour during shaping, as this can result in a dry crust. The dough should be smooth and hold its shape after being worked in the vegan bread stand mixer and proofed.
Different Shaping Techniques for Various Bread Styles
The way you shape your dough significantly impacts the final loaf.
- Boule (Round Loaf): After gently deflating the dough, form it into a rough ball. Place the dough on a lightly floured surface. Using your hands like claws, gently rotate the dough while pulling it towards you, creating surface tension. Repeat until a smooth, taut ball is formed.
- Batard (Oval Loaf): Flatten the dough into a rectangle. Fold the top third down to the center, then the bottom third up over the top fold. Gently press seams. Turn the dough 90 degrees and roll it up tightly from one end to the other, creating an oval shape. Pinch the final seam closed.
- Sandwich Loaf (Pan Bread): Flatten the dough into a rectangle roughly the width of your loaf pan. Roll the rectangle tightly from one short end to the other, creating a cylinder. Pinch the seam closed along the bottom and tuck the ends under. Place seam-side down in a greased loaf pan.
Practicing these techniques will improve your results when using a vegan bread stand mixer to prepare the dough.
Step 7: Second Proofing (Rising)
After shaping, the dough needs a second rise, also called the final proof. This allows the dough to expand again and become light and airy before baking. Place the shaped dough in its final baking vessel – a greased loaf pan, on a baking sheet lined with parchment paper, or in a proofing basket (banneton).
Cover the dough loosely with plastic wrap or a light kitchen towel. Place it in a warm, draft-free spot. The second rise is usually shorter than the first, typically 30-60 minutes, depending on the temperature. The dough should increase significantly in size, becoming visibly puffy. To test if it's ready, gently press a finger into the dough; if the indentation springs back slowly or only partially, it's ready to bake. If it springs back immediately, it needs more time. If it collapses, it's over-proofed.
Step 8: Baking the Vegan Bread to Golden Perfection
Preheating your oven is crucial for achieving a good oven spring (the final burst of rising that occurs when the dough hits the hot oven). Preheat your oven to the temperature specified in your recipe, usually between 375°F and 425°F (190°C and 220°C). If using a baking stone or steel, place it in the oven before preheating to ensure it gets hot.
Carefully transfer the proofed dough into the hot oven. If baking in a pan, simply place the pan in the oven. If baking on a stone/steel, gently slide the dough onto the hot surface. Bake for the time specified in the recipe, which typically ranges from 25 to 40 minutes for a standard loaf, depending on size and oven temperature.
Oven Temperature and Baking Time Guidelines
Baking temperature and time are critical for achieving a well-baked loaf. A common range for baking vegan bread is 375-400°F (190-200°C) for softer sandwich loaves and 400-425°F (200-220°C) for crustier artisan-style breads. The higher temperature helps create a crispier crust.
A standard 1.5-pound loaf of bread baked at 375-400°F (190-200°C) might take 30-40 minutes. A smaller loaf or rolls will bake faster. The bread is done when the crust is golden brown and, most importantly, when the internal temperature reaches 190-210°F (88-99°C) when measured with an instant-read thermometer. Tapping the bottom of the loaf should also produce a hollow sound. Your effort using the vegan bread stand mixer pays off in this final step!
Achieving a Crispy Crust on Vegan Bread
Getting a crispy crust on vegan bread can be achieved through steam in the oven during the initial baking phase. Steam keeps the surface of the dough moist, allowing it to expand fully before the crust hardens. This promotes better oven spring and a thinner, crisper crust.
There are several ways to create steam:
- Ice Cubes: Place an oven-safe pan (like a cast iron skillet or broiler pan) on the bottom rack of your oven while preheating. Just before loading the bread, carefully pour about 1 cup of hot water or a handful of ice cubes into the hot pan. Close the oven door quickly to trap the steam.
- Spritzing: Lightly mist the surface of the dough with water using a spray bottle just before closing the oven door. Repeat once or twice during the first 5-10 minutes of baking.
- Dutch Oven: Baking the bread inside a preheated Dutch oven traps the dough's own moisture, creating steam. Remove the lid halfway through baking to allow the crust to brown.
Using steam enhances the texture developed by kneading in your vegan bread stand mixer.
Tips and Tricks for Perfect Vegan Bread with a Stand Mixer
Even with the help of a vegan bread stand mixer, baking can sometimes present challenges. Understanding common issues and how to troubleshoot them is part of becoming a confident baker. This section offers practical tips to help you achieve consistently great results.
We'll also touch upon ways to add extra flavor to your loaves and the best practices for storing your delicious homemade vegan bread to keep it fresh for as long as possible.
Troubleshooting Common Vegan Bread Baking Issues
| Issue | Possible Cause | Solution |
|---|---|---|
| Dough not rising | Inactive yeast, liquid too hot/cold, cold environment | Check yeast expiry, ensure liquid temperature is correct, find a warmer spot for proofing. |
| Dense, heavy loaf | Under-kneading, insufficient proofing, too much flour | Knead longer with the vegan bread stand mixer, allow dough to double during proofing, measure flour accurately. |
| Crust too hard/thick | Not enough steam, over-baking, too high temp | Use steam method, check internal temperature for doneness, adjust oven temp. |
| Bread spreads flat | Over-proofing, under-kneading, too much liquid | Reduce proofing time, knead longer for better gluten development, add flour during kneading if dough is too wet. |
Addressing these points will help you improve your results when baking vegan bread in a stand mixer.
Dough Too Sticky?
If your dough remains excessively sticky even after the recommended kneading time in the vegan bread stand mixer, several factors could be at play. High humidity can cause flour to absorb more moisture, leading to a stickier dough. Also, variations in flour type can affect absorption rates.
Avoid the temptation to add large amounts of flour all at once. Instead, add just one tablespoon of flour at a time while the mixer is running on low speed. Allow it to incorporate for about 30-60 seconds before adding more. Continue adding flour until the dough pulls away from the sides of the bowl and is only slightly tacky to the touch. A bench scraper can also help you manage sticky dough when transferring it.
Bread Not Rising Properly?
A lack of proper rise (proofing) is a common issue and usually points to yeast problems or environmental conditions. First, ensure your yeast is fresh and active. If using active dry yeast, did it foam when proofed? If not, the yeast is likely dead. The temperature of your liquid is also critical; water or milk that is too hot (above 120°F/49°C) can kill the yeast, while liquid that is too cold (below 100°F/38°C) won't activate it effectively.
The proofing environment's temperature is also vital. Yeast is most active in warm conditions (around 75-85°F or 24-30°C). If your kitchen is cold, find a warmer spot, like a turned-off oven with the light on, or place the covered bowl on top of your warm vegan bread stand mixer after kneading. Ensure the dough is covered to prevent a dry skin from forming, which inhibits rising.
Enhancing the Flavor of Your Vegan Bread
Basic vegan bread made in a stand mixer is delicious on its own, but you can easily elevate its flavor profile by incorporating additional ingredients into the dough. These additions can be mixed in during the last minute or two of kneading with the dough hook or folded in gently by hand after kneading is complete.
Consider adding herbs like rosemary or thyme, spices such as garlic powder or onion powder, or a touch of nutritional yeast for a cheesy note. A swirl of pesto or sun-dried tomato paste can also add significant flavor. Ensure any wet additions don't significantly alter the dough's hydration; reduce the main liquid slightly if necessary.
Adding Seeds, Nuts, or Herbs
Incorporating seeds, nuts, or herbs adds texture, flavor, and nutritional value to your vegan bread. Seeds like poppy, sesame, sunflower, or pumpkin seeds can be added to the dough or sprinkled on top before baking. Nuts such as walnuts or pecans add richness and crunch.
Add-ins like seeds or nuts are often best mixed in during the final minute or two of kneading on low speed with your vegan bread stand mixer. This distributes them evenly without overworking the dough. For a standard loaf, a good starting point is 1/4 to 1/2 cup of seeds or nuts. Fresh or dried herbs can also be added at this stage; about 1-2 tablespoons of fresh herbs or 1-2 teaspoons of dried herbs per loaf is a good guideline.
Storing Your Freshly Baked Vegan Bread
Once your beautiful vegan bread is baked and has cooled completely (this is important – slicing hot bread can make it gummy), proper storage will help maintain its freshness. Avoid refrigerating homemade bread, as this tends to dry it out quickly.
For short-term storage (1-2 days), store the bread at room temperature in a bread box, a paper bag, or wrapped loosely in a clean kitchen towel. For longer storage, slice the cooled loaf and freeze the slices in a freezer-safe bag or container. Frozen slices can be toasted directly from the freezer, providing fresh-tasting bread whenever you need it. A whole loaf can also be frozen; wrap it tightly in plastic wrap, then in foil, and thaw at room temperature before slicing.
Enjoying Your Homemade Vegan Bread from BakeWithEase
Congratulations! You've successfully baked delicious vegan bread using your stand mixer. There's nothing quite like the aroma of freshly baked bread filling your home and the satisfaction of slicing into a loaf you made yourself.
Now comes the best part: enjoying your creation! Whether you eat it plain, toasted, or as part of a meal, savor the taste and texture that resulted from your efforts and the help of your vegan bread stand mixer.
Serving Suggestions and Recipe Ideas
Your homemade vegan bread is incredibly versatile.
- Enjoy a slice simply with a smear of vegan butter or your favorite plant-based spread.
- Use it to make fantastic sandwiches filled with roasted vegetables, hummus, or vegan deli slices.
- Cube stale bread to make croutons for salads or soup.
- Turn slightly older bread into delicious breadcrumbs for coating dishes or topping casseroles.
- Try making French toast using a plant-based milk and egg substitute mixture.
- Serve slices alongside soups, stews, or pasta dishes to soak up sauces.
The possibilities are endless, making the effort with your vegan bread stand mixer truly worthwhile.
Further Exploration of Vegan Bread Baking at BakeWithEase
This guide provides a solid foundation for baking simple vegan bread in a stand mixer. However, the world of vegan bread is vast and exciting! Once you're comfortable with the basics, you can explore variations.
- Experiment with different flours like rye, spelt, or gluten-free blends.
- Try enriched vegan doughs with added fat and sugar for softer rolls or sweet breads.
- Learn about sourdough starters for a tangy, naturally leavened vegan loaf.
- Explore techniques like no-knead methods (though your vegan bread stand mixer makes kneading so easy! ).
Visit BakeWithEase.com for more vegan bread recipes, tips, and guides to continue expanding your baking skills and making the most of your vegan bread stand mixer. Happy Baking!
Frequently Asked Questions
How can a stand mixer help when baking vegan bread?
A stand mixer simplifies kneading the dough, ensuring a consistent texture and reducing manual labor. This is crucial for developing the gluten in vegan bread recipes.
What ingredients are typically used in vegan bread recipes?
Common ingredients include flour, water, yeast, salt, and oil. Vegan recipes also often incorporate ingredients like plant-based milk or flaxseed meal for binding and moisture.
Can any stand mixer be used for vegan bread dough?
While most stand mixers can handle bread dough, a heavy-duty model is recommended for thicker, denser vegan doughs to prevent strain on the motor.
What's the best way to proof vegan bread dough?
Like traditional bread, vegan bread dough needs a warm, draft-free environment for proofing. Cover the bowl with a damp cloth or plastic wrap and let it rise until doubled in size.
What are some common challenges when baking vegan bread, and how can a stand mixer help overcome them?
Vegan bread can sometimes be drier or denser. A stand mixer ensures thorough incorporation of wet ingredients, which helps to improve the bread's moisture and texture.
Final Reflection: The Joy of Vegan Baking, One Loaf at a Time
The accessibility of vegan baking, particularly with the help of a stand mixer, is revolutionizing home kitchens. No longer is creating delicious, wholesome vegan bread a laborious, intimidating process; it's become surprisingly simple and incredibly rewarding. This guide has aimed to demystify the process, making it achievable for even the most novice bakers.
The shift towards plant-based diets is undeniable, and this extends to our baking habits. More and more people are seeking delicious alternatives that align with their values and dietary needs. Baking vegan bread, once a niche pursuit, is now a mainstream activity, fueled by the desire for healthier, more ethical food choices. The best way to find yourself is to lose yourself in the service of others,
and that includes nourishing ourselves and our communities with compassionate food choices. This simple act of baking can be a powerful statement about our commitment to a more sustainable and ethical future.
Now, I invite you to roll up your sleeves and try it yourself. Don't be afraid to experiment with different flours, seeds, and spices. The journey of baking vegan bread is as much about the process as it is about the result. Embrace the kneading, the rising, the aroma filling your kitchen – it's a sensory experience that connects you to the earth and to the joy of creating something delicious and meaningful. Let this guide be your starting point, and discover the boundless possibilities of vegan baking in your own stand mixer.
Unleash Your Inner Baker: Craft the Perfect Vegan Loaf!
Thanks for joining us on this baking adventure! We hope you've gained the confidence to tackle vegan bread making with ease. Now, it's time to put your newfound skills to the test.
- Bake your first vegan masterpiece! Use this guide as your blueprint and experiment with different flours and flavors. Don't be afraid to get creative!
- Share your baking journey! Post a picture of your finished loaf on social media and tag us – we'd love to see your creations!
- Explore our other vegan recipes: Discover a whole world of delicious, plant-based treats on BakeWithEase. You might find your next favorite recipe!
What unique twist will you add to your next vegan bread creation? Let us know in the comments!