
Unevenly Baked Bread? Calibrate Your Oven (and More)

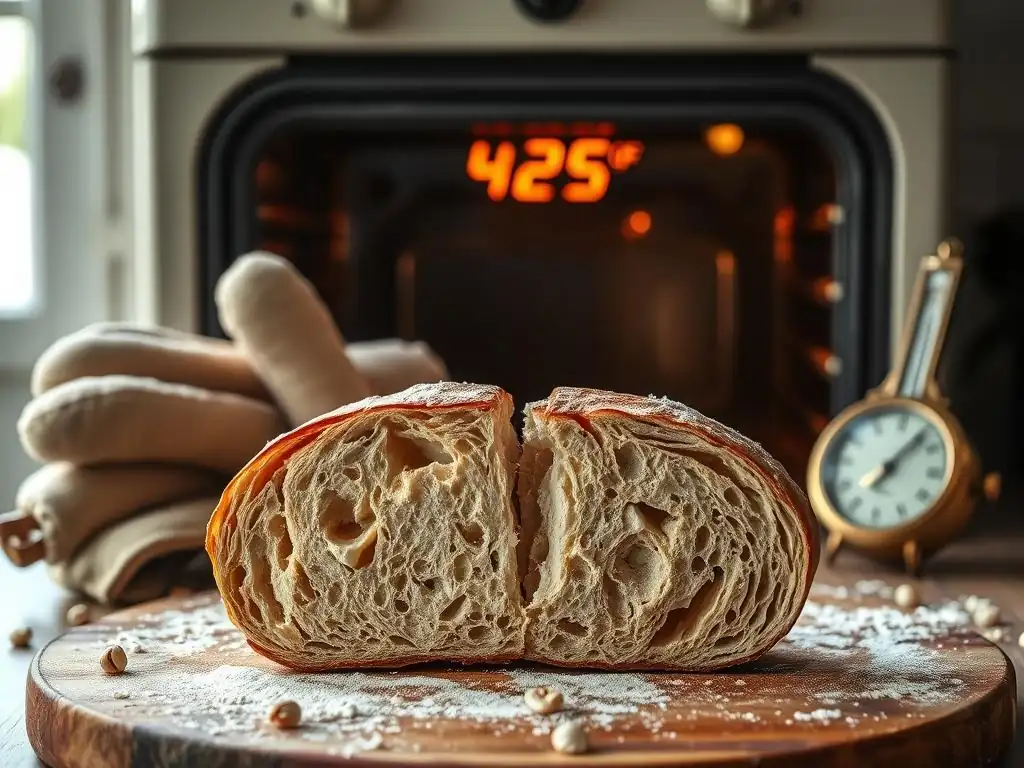
Welcome to BakeWithEase, your guide to perfectly baked creations! Ever wondered why your sourdough bread isn't rising quite right or browning evenly? It might not be your recipe, but your oven! Dive into our latest article where we uncover the secrets of oven calibration for sourdough bread and other crucial techniques to ensure consistent and delicious results every time. Ready to unlock the full potential of your oven and bake bread that's truly exceptional? Let's get started!
- Achieving Baking Perfection: Understanding and Correcting Oven Imbalances
- Introduction: Diagnosing Uneven Bread Baking
- Understanding Oven Temperature's Critical Role in Bread
- Troubleshooting Uneven Baking: Beyond Simple Calibration
- Step-by-Step Guide: Calibrating Your Oven for Bread Baking
- Oven Calibration Alternatives and Professional Assistance
- Techniques for Promoting Even Bread Baking
- Mitigating Hot Spots Within Your Oven
- Baking Environment and Dough Considerations
- Common Baking Errors Contributing to Unevenness
- Conclusion: Mastering Baking Evenness Through Calibration and Technique
- Frequently Asked Questions
- Final Reflection: The Perfect Loaf, A Journey of Calibration
- Unleash Your Inner Baker: Perfect Loaves, Every Time!
Achieving Baking Perfection: Understanding and Correcting Oven Imbalances
Introduction: Diagnosing Uneven Bread Baking
The Disappointment of Inconsistent Baking in Bread Making
There are few things more frustrating in the world of baking than pulling a beautiful loaf of sourdough or a rustic boule from the oven, only to discover that one side is perfectly golden brown while the other remains stubbornly pale, or worse, burnt. This inconsistent result, where parts of your bread are overcooked or undercooked, is a common challenge faced by home bakers. It can turn a triumphant baking session into a moment of culinary disappointment, impacting not just the appearance but also the texture and flavor of your carefully crafted loaf.
Imagine spending hours nurturing a sourdough starter, mixing and proofing dough, only for the final bake to be compromised by an unreliable oven. It's a setback that speaks directly to the core problem: achieving uniform heat distribution is paramount for consistent baking success.
The unevenness often manifests in various ways. You might notice one corner of a sheet pan of rolls browning faster than the others, or the bottom crust of a loaf burning while the top is just right. For sourdough bread, where the crust development is so crucial, this can be particularly vexing.
A proper spring and an even, caramelized crust across the entire surface are hallmarks of a well-baked sourdough. When one side lags behind, it indicates a fundamental issue with how heat is being applied to your bread. This isn't just a minor aesthetic flaw; uneven baking can lead to a gummy interior in undercooked sections or a dry, hard texture in overcooked parts, significantly detracting from the overall quality of your bake.
Oven Calibration: A Foundational Step for Baking Success
Before you blame your recipe, your technique, or even the weather, the first and most critical step in diagnosing and fixing uneven baking is to assess the accuracy of your oven's temperature. Ovens, especially older models, can often be inaccurate, displaying a temperature that is significantly different from the actual temperature inside the baking cavity. This discrepancy is known as oven drift or inaccuracy, and it's a leading cause of inconsistent baking results.
Proper oven calibration, or at least understanding how far off your oven's thermostat is, is the bedrock upon which consistent baking is built. Without a reliable understanding of your oven's true temperature, every bake becomes a guessing game.
Think of oven calibration for sourdough bread, or any bread, as ensuring your primary tool is functioning correctly. Just as a carpenter checks their saw blade or a painter verifies their brush quality, a baker must trust their oven. An oven that is 25°F or even 50°F off the mark can drastically alter baking times and outcomes.
For instance, if your oven is set to 450°F for that crucial initial blast of heat for oven spring, but it's only reaching 400°F, your crust won't develop properly, and your oven spring will be diminished. Conversely, if it's actually reaching 500°F, you risk burning the crust before the interior is fully cooked. Learning how to check and account for your oven's true temperature through a simple calibration process is perhaps the most impactful step you can take towards achieving consistently perfect, evenly baked bread.
Understanding Oven Temperature's Critical Role in Bread
The Necessity of Precise Oven Temperature for Optimal Results
Achieving the correct internal temperature and external crust development in bread hinges almost entirely on the accuracy and consistency of the oven temperature. Bread baking is a complex process involving chemical reactions that are highly sensitive to heat. Enzymes and yeasts are active within specific temperature ranges during the initial stages of baking (oven spring), while later stages involve the Maillard reaction and caramelization, which develop the crust's color, flavor, and aroma.
If the oven temperature is significantly off, these processes are disrupted. For example, if the temperature is too low, the yeast might continue to produce gas for too long, leading to a large, airy crumb but potentially a pale, soft crust. If the temperature is too high, the crust can set too quickly, inhibiting oven spring and potentially burning before the interior is cooked.
Consider the critical phase of oven spring in sourdough bread. This typically occurs in the first 10-15 minutes at high temperatures, often between 450°F and 500°F. During this phase, residual yeast activity and the expansion of gases cause the dough to rapidly increase in volume. A precise, high temperature is needed to quickly set the crust and structure while allowing the interior to expand.
If your oven is running cool, say 425°F instead of 475°F, the rate of heat transfer to the dough is slower. This can result in less dramatic oven spring and a less open crumb structure. Conversely, an oven running too hot might set the crust prematurely, restricting expansion and leading to a dense loaf. The difference of even 15-20°F can be significant, underscoring why accurate oven temperature is non-negotiable for optimal bread baking outcomes.
How Temperature Influences Crust Development, Crumb Structure, and Overall Bread Quality
The temperature profile throughout the baking process dictates the final characteristics of your bread, from the crispy, caramelized crust to the airy, open crumb structure. High initial temperatures, often used for lean doughs like sourdough, promote rapid oven spring and the quick formation of a thin, brittle crust. As the bake progresses and the temperature might be lowered, the crust thickens and darkens through the Maillard reaction (browning of proteins and sugars) and caramelization (browning of sugars).
These reactions occur optimally within specific temperature ranges, typically above 300°F (150°C). If the oven temperature is too low, these reactions are slow or incomplete, resulting in a pale, flavorless crust. If too high, they happen too quickly, leading to a burnt exterior before the interior is properly cooked.
Beyond the crust, oven temperature profoundly impacts the crumb structure. As the dough heats up, water turns to steam, expanding and creating the characteristic holes in the crumb. The gluten network, developed during mixing and fermentation, sets as it reaches temperatures above 160°F (71°C). The final internal temperature for most fully baked bread is between 200°F and 210°F (93-99°C).
Achieving this internal temperature while simultaneously developing the desired crust requires the oven to maintain a consistent and accurate temperature throughout the bake. Uneven temperatures within the oven can lead to areas of the loaf reaching these critical internal and external temperatures at different rates, resulting in a crumb that is dense or gummy in one section and perfect in another, or a crust that is unevenly colored and textured. Understanding and controlling oven temperature is therefore fundamental to mastering the art of bread baking.
Troubleshooting Uneven Baking: Beyond Simple Calibration
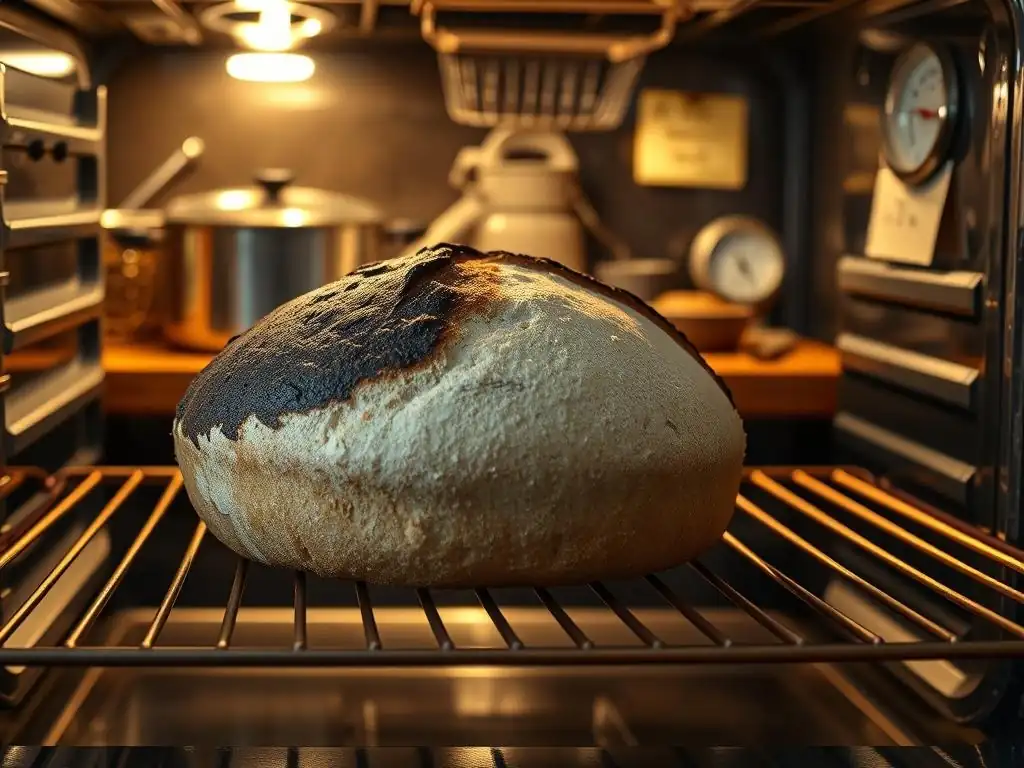
Pinpointing the Underlying Cause of Uneven Baking
While inaccurate oven temperature is a primary suspect when diagnosing uneven bread baking, it's crucial to recognize that it's not the only potential culprit. Uneven results can stem from a combination of factors, some related to the oven itself and others related to your baking practices. Before diving deep into oven calibration for sourdough bread issues, take a moment to observe the pattern of the unevenness. Is it always the same side of the loaf?
Is the top burning while the bottom is pale? Or vice versa? Does it happen regardless of where you place the bread in the oven?
These observations can provide valuable clues. For instance, consistently darker results on one side of the oven might strongly suggest a hot spot or uneven heating element function. If the bottom is always overdone, it could be an issue with the lower heating element or inadequate insulation on the oven floor.
A systematic approach to troubleshooting is key. Start with the most likely issues and work your way through. Is your oven clean? Accumulated spills and debris can absorb heat and create unevenness. Is your oven door sealing properly?
A leaky seal allows heat to escape, potentially creating cooler zones. Are you overcrowding the oven? Too many items can block airflow and lead to inconsistent temperatures. Documenting your bakes – noting the temperature set, the actual temperature (if using a thermometer), the rack position, and the resulting unevenness – can help you identify recurring patterns and isolate the cause. Sometimes, the issue isn't a single problem but a combination, like a slightly inaccurate thermostat and a drafty oven door.
Factors Beyond Temperature Affecting Baking Evenness
Beyond the thermostat's accuracy, several other factors within the oven environment and your baking technique can contribute to uneven heating and thus, uneven baking. Airflow is critical; hot air needs to circulate evenly around your bread to ensure uniform heat transfer. In electric ovens, heating elements (usually one at the bottom and one at the top, sometimes hidden) cycle on and off to maintain the set temperature, and their cycling pattern can sometimes lead to localized hot spots.
Gas ovens often have a single heating element at the bottom, and the heat rises, which can sometimes result in bottoms cooking faster than tops. Convection fans, designed to circulate air and even out temperature, can sometimes create their own hot spots or cause rapid surface drying if not used correctly or if the fan is malfunctioning.
Furthermore, the cookware you use plays a significant role. Dark metal pans absorb and radiate heat more intensely than lighter colored ones, potentially leading to darker bottoms or sides. Baking stones or steels absorb and retain heat, providing a stable, high-temperature surface that ensures a well-cooked bottom crust, but they can also exacerbate top/bottom unevenness if the oven itself is unbalanced.
Even the material and thickness of your baking sheet or pan can influence how heat is transferred to your bread. Understanding these variables – heating element location, airflow patterns, cookware properties, and even the oven's insulation – is essential for a comprehensive approach to tackling uneven baking, complementing the foundational step of oven calibration.
Step-by-Step Guide: Calibrating Your Oven for Bread Baking
Preparation: Assembling Necessary Tools and Materials
Before you begin the process of checking your oven's accuracy, gather the necessary tools. The most important item you will need is a reliable, stand-alone oven thermometer. Do not rely on the thermometer built into your oven's display; the goal here is to check the accuracy of that built-in reading against an independent source.
Look for an oven thermometer designed to hang from a rack or stand on the oven floor. Analog dial thermometers are common and affordable, but digital oven thermometers (often with a probe on a wire) can sometimes offer more precise readings and historical temperature data, though they might be pricier. Ensure your thermometer is rated for the high temperatures you use for bread baking (e.g., up to 500°F or more).
You will also need something to record your observations. A notebook and pen, or a digital note-taking app, will work perfectly. You'll want to record the temperature you set on the oven, the temperature displayed by your independent thermometer, and the time you take the reading. It's also helpful to note the position of the thermometer within the oven (e.g., middle rack, center).
Make sure your oven is clean, as food debris can affect temperature readings. Ensure you have ample time for this test; it's not a quick process, as ovens take time to preheat and stabilize. Having these simple tools ready will make the calibration test straightforward and effective, providing the data you need to understand your oven's true performance.
Executing the Oven Calibration Test: A Detailed Procedure
Performing an oven calibration test requires patience and multiple readings to get an accurate picture of your oven's temperature profile. Start by placing your independent oven thermometer on the middle rack, positioned roughly in the center. Close the oven door. Set your oven to a common baking temperature, perhaps 350°F (175°C), or a temperature you frequently use for bread baking, like 400°F (200°C).
Allow the oven to preheat fully until its indicator light or sound signals it has reached the set temperature. Do not take a reading immediately. Ovens often overshoot or undershoot the target temperature initially and then cycle to maintain it.
Wait at least 20-30 minutes after the preheat cycle is complete for the oven temperature to stabilize. This is crucial for getting a representative reading. Once stabilized, check the temperature on your independent thermometer and compare it to the temperature displayed on your oven's control panel. Record both temperatures and the time. Repeat this process every 15-20 minutes for at least an hour. Note how much the temperature on your independent thermometer fluctuates.
Ovens cycle on and off to maintain temperature, so some fluctuation is normal (perhaps within a 15-25°F range). After an hour or more of readings, calculate the average temperature shown by your independent thermometer. Compare this average to the temperature you set on the oven control. This difference is your oven's temperature offset. For example, if you set the oven to 400°F but your thermometer averaged 375°F, your oven runs about 25°F cool.
Adjusting Oven Settings Based on Calibration Outcomes
Once you have determined your oven's temperature offset through the calibration test, you have a few options. The most direct approach is to simply adjust your desired baking temperature based on the offset. If your oven consistently runs 25°F cool, and a recipe calls for baking at 450°F, you would set your oven to 475°F (450 + 25). If it runs 15°F hot, you'd set it to 435°F (450 - 15). This method requires you to remember the offset for every bake, but it's a simple way to compensate for an inaccurate thermostat without altering the oven itself.
Some modern ovens allow you to adjust the internal thermostat calibration. Consult your oven's manual to see if this feature is available. Typically, this involves accessing a service menu or holding down a specific button combination (e.g., holding the "Bake" button for several seconds) and then entering the temperature offset you measured. For instance, you might be able to tell the oven to permanently adjust its temperature reading up or down by a set number of degrees.
If this option is available and you're comfortable using it, it's a convenient way to make a semi-permanent correction. However, always double-check the results with your independent thermometer after making such an adjustment. Knowing your oven's true temperature is the first giant leap towards achieving consistent results, especially important for dialing in the perfect oven calibration for sourdough bread.
Oven Calibration Alternatives and Professional Assistance
When Professional Oven Service is Recommended
While a simple test with an independent thermometer can tell you if your oven temperature is off and by how much, it doesn't necessarily tell you why. If your calibration test reveals a significant and consistent discrepancy (e.g., more than 50°F off), or if the temperature fluctuates wildly and unpredictably, it might indicate a problem beyond a simple thermostat adjustment.
Issues like a faulty heating element, a malfunctioning temperature sensor (thermocouple or thermistor), or a problem with the oven's control board require professional expertise to diagnose and repair. Attempting to fix these components yourself can be dangerous and may cause further damage.
Signs that you might need a professional service include:
- The oven failing to reach high temperatures required for bread (e.g., maxing out at 350°F).
- The oven getting excessively hot, far beyond the set temperature.
- Error codes appearing on the oven's display.
- The oven shutting off unexpectedly during the bake cycle.
- Visible damage to heating elements.
If your oven is relatively new and under warranty, contact the manufacturer. For older ovens, weigh the cost of repair against the cost of replacement. A professional appliance technician can properly diagnose the underlying issue with the heating system or controls and perform the necessary repairs, ensuring your oven heats accurately and consistently for all your baking needs, including fine-tuning oven calibration for sourdough bread.
Utilizing an Independent Oven Thermometer as a Monitoring Tool
Even if your oven's thermostat is reasonably accurate or you've adjusted its calibration setting, continuing to use an independent oven thermometer is an excellent practice for consistent baking. Treat it as a constant monitoring tool rather than just a one-time calibration device. Oven temperatures can fluctuate slightly over time, and the thermometer provides real-time feedback on the actual temperature inside the oven cavity. This is particularly useful when baking items that require precise temperatures and consistent heat, like delicate pastries or high-hydration sourdough bread.
Keep the thermometer placed in a visible location within the oven, ideally near your baking item but not touching it or obstructing airflow. Before placing your bread in the oven, check the independent thermometer to ensure the oven has reached and stabilized at the correct temperature, accounting for any known offset. During longer bakes, you can periodically check the thermometer to ensure the temperature is being maintained.
This ongoing monitoring helps you react to any unexpected temperature drops or spikes and provides peace of mind, knowing that your oven is performing as expected. It turns the abstract idea of oven calibration into a practical, ongoing process that supports better baking results.
Techniques for Promoting Even Bread Baking
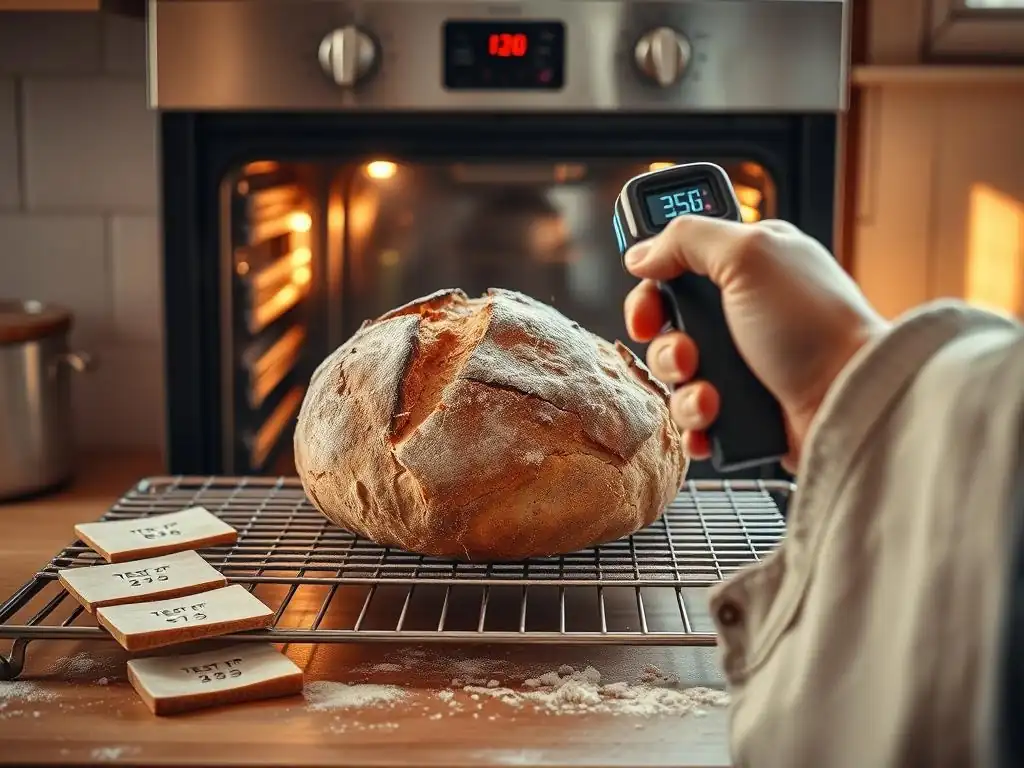
Implementing Bread Rotation During Baking: Rationale and Method
Even in a perfectly calibrated oven, slight variations in heat distribution can exist. One simple yet effective technique to combat this and promote even browning is rotating your bread halfway through the baking time. The rationale is straightforward: if one side or area of the oven is slightly hotter or cooler, rotating the bread exposes all sides equally to these variations, averaging out the heat exposure over the entire bake. This helps ensure the crust develops uniformly around the loaf.
The method is simple: after the initial phase of baking (e.g., after removing the lid of a Dutch oven or about halfway through the total bake time for freeform loaves), carefully open the oven door. Using oven mitts, rotate the baking vessel (like a Dutch oven or baking stone with the bread on it) 180 degrees. If baking multiple loaves on a single sheet pan, you might also consider rearranging their positions or rotating the pan itself. Be quick and decisive to minimize heat loss from the oven.
For sourdough baked in a Dutch oven, this rotation is often done when you remove the lid, typically 20-30 minutes into the bake. For freeform loaves on a stone, it might be around the 25-35 minute mark, depending on the total baking time. This simple action can make a noticeable difference in achieving a beautiful, evenly colored crust.
Employing Baking Stones or Dutch Ovens for Uniform Heat Distribution
Baking stones, steels, and Dutch ovens are invaluable tools for promoting even heat distribution, particularly for bread that requires a strong, initial burst of heat like sourdough. These tools work by absorbing and retaining a significant amount of thermal energy. When the dough is placed onto a preheated stone or steel, or inside a preheated Dutch oven, the stored heat is rapidly transferred to the bread. This contact heat is crucial for achieving excellent oven spring and developing a thick, crispy bottom crust.
- Baking Stone/Steel: Placed on a rack and preheated with the oven, a stone or steel provides a uniformly hot surface. This helps prevent the bottom of the loaf from lagging behind in cooking. Steel generally conducts heat faster than stone.
- Dutch Oven: A preheated Dutch oven (or similar lidded pot like a Challenger Bread Pan) surrounds the loaf with consistent, high heat. The lid traps steam released from the dough, creating a moist environment that delays crust formation initially, allowing for maximum oven spring. Once the lid is removed, the dry heat of the oven finishes the crust development. The heavy cast iron or ceramic material of the Dutch oven ensures heat is radiated evenly around the loaf.
Using these tools provides a more stable and uniform heat environment directly surrounding the bread compared to baking on a simple sheet pan, significantly reducing the likelihood of uneven cooking due to oven hot spots or temperature fluctuations. They are highly recommended for bakers seeking consistently excellent results, especially when working on oven calibration for sourdough bread perfection.
Optimizing Rack Placement for Ideal Baking Conditions
Where you place your bread within the oven can dramatically affect how it bakes, even in a calibrated oven. Heat distribution varies vertically within most ovens. In standard ovens without convection, the top rack tends to be hotter due to rising heat, while the bottom rack receives more radiant heat from the lower element.
The middle rack is often considered the most neutral spot, providing the most even heat distribution. For most bread baking, especially freeform loaves or those on a baking stone, the middle or slightly-below-middle rack is usually recommended to ensure the bottom doesn't burn before the top is golden.
When using a Dutch oven, the placement can be more flexible because the Dutch oven itself creates a controlled micro-environment. However, placing it on the middle or lower-middle rack is still generally advisable to ensure the bottom of the Dutch oven receives sufficient heat from the lower element to drive heat upwards into the pot, while avoiding direct intense heat from the upper element once the lid is removed. If you are baking multiple items, avoid placing them directly above or below each other, as this can block heat circulation.
Experiment with different rack positions based on your oven's quirks and the specific bread you are baking. Observing how your bread bakes at different levels can help you determine the optimal rack placement for your specific oven and recipe.
Mitigating Hot Spots Within Your Oven
Detecting Hot Spots: Analyzing Baking Patterns
Even after addressing overall oven calibration, you might find specific areas within the oven cavity that are consistently hotter than others. These "hot spots" can be a major contributor to uneven baking. Detecting them requires observation and sometimes a simple test. As mentioned earlier, consistently darker crust on one side of the loaf or pan is a strong indicator of a hot spot in that specific area of the oven. Pay attention to which items on a baking sheet brown fastest or which part of a large loaf colors first.
A more deliberate way to map hot spots is using a test involving simple items like slices of bread or cookies. Arrange plain white bread slices or uniform cookies evenly across a large baking sheet that fills most of your oven rack. Bake them at a moderate temperature (e.g., 350°F) until they start to brown.
The areas that brown first and darkest correspond to the hot spots in your oven. Repeat this test on different racks if you suspect variations in vertical heat distribution. Sketching a simple diagram of your oven rack and marking where the items browned fastest can give you a visual map of your oven's hot spots.
Strategies to Reduce Hot Spot Effects: [Example: Utilizing Ceramic Tiles]
Once you've identified your oven's hot spots, you can employ several strategies to mitigate their effect on your baking.
- Rotation: As discussed, rotating your bread or baking sheet halfway through the bake is the simplest way to average out the heat exposure and minimize the impact of hot spots.
- Adjusting Placement: If you know a particular corner or side of your oven is a hot spot, try to avoid placing the most vulnerable parts of your bread directly in that zone. For instance, if the back left corner is hot, position your loaf slightly forward and to the right.
- Using Baking Stones/Steels: These tools help by radiating heat more evenly across their surface, somewhat buffering the direct impact of a hot spot from the oven element or wall.
- Sacrificial Baking Sheets/Tiles: A classic technique to buffer hot spots, particularly on the bottom or sides, is to place empty baking sheets or unglazed ceramic tiles on racks below or around your baking bread. For example, if the bottom of your oven is a significant hot spot, placing a rack with ceramic tiles on it on the lowest rack level can help absorb and diffuse some of that intense radiant heat before it reaches your bread on a higher rack. You can also place tiles along the sides if you have side hot spots. Ensure these items do not block airflow to your baking bread or interfere with heating elements. These thermal mass additions help stabilize the oven temperature and even out the heat radiation.
By understanding where your oven's hot spots are and using techniques like rotation, strategic placement, and thermal mass additions, you can significantly improve the evenness of your bread's crust development, even without perfectly uniform oven calibration.
Baking Environment and Dough Considerations
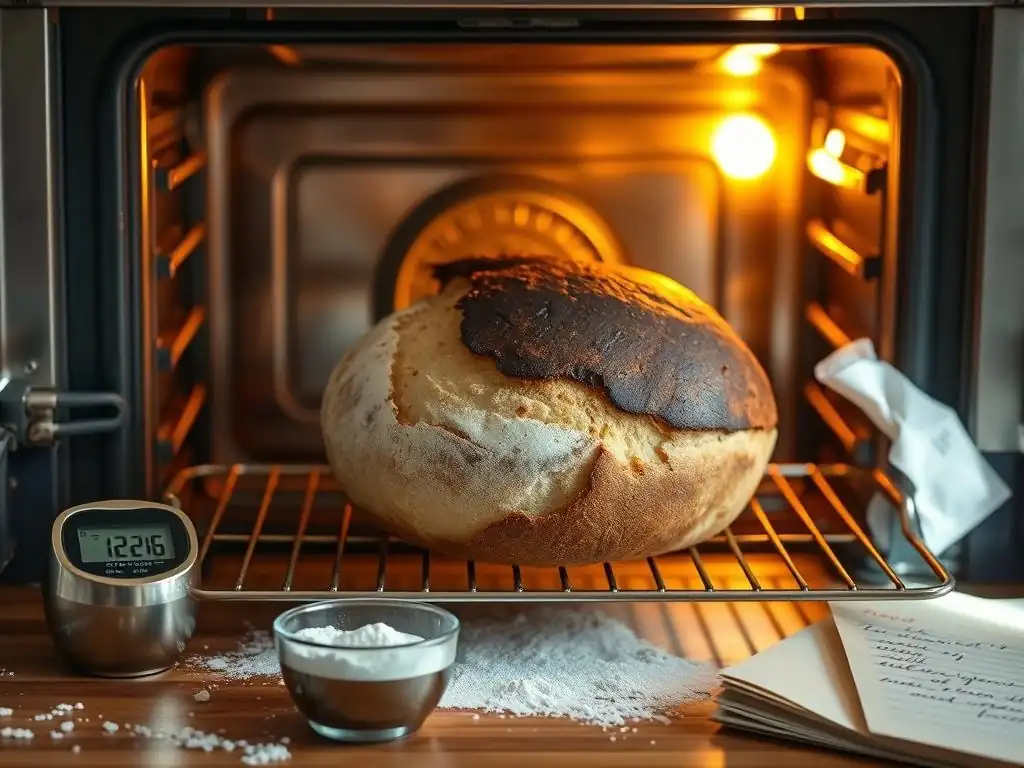
The Influence of Ambient Temperature on Dough Fermentation
While oven temperature is critical for the baking phase, the temperature of your kitchen environment significantly impacts the fermentation phase of bread making. Yeast activity is highly sensitive to temperature. Warmer ambient temperatures accelerate fermentation, while cooler temperatures slow it down. This directly affects how quickly your dough proofs and develops flavor. If one part of your kitchen is significantly warmer or cooler than another, dough proofing in different spots might proceed at different rates, leading to variations in development before the dough even hits the oven.
For example, a sourdough dough proofing near a sunny window might proof much faster than a portion of dough left in a cooler corner of the kitchen. Uneven fermentation can lead to differences in gas production and gluten structure development within the dough itself.
When this unevenly developed dough bakes, it may rise unevenly or develop an inconsistent crumb structure. Maintaining a consistent environment for proofing, perhaps in a dedicated proofing box, a slightly warm (but off) oven, or simply a draft-free spot away from direct heat or cold, is crucial for ensuring uniform dough development across all loaves or within a single large loaf.
Maintaining Consistent Dough Temperature for Uniform Baking
Just as ambient temperature affects fermentation, the internal temperature of your dough going into the oven can influence the start of the baking process. Dough that is too cold might take longer to experience oven spring as it needs to warm up first, potentially leading to a less dramatic rise.
Dough that is too warm might overproof quickly before baking, resulting in less controlled expansion in the oven. Furthermore, if different parts of your dough are at different temperatures (e.g., if shaping took too long and the exterior warmed up significantly more than the interior), they will heat up at different rates in the oven, contributing to uneven baking.
Aim for a consistent dough temperature throughout your batch or loaf as it heads into the oven. For sourdough, the final proofing temperature and time are often carefully controlled to achieve a specific dough temperature before baking, typically around 70-75°F (21-24°C). Using a probe thermometer to check the dough's internal temperature before loading it into the oven can be helpful.
If baking multiple loaves, ensure they have all proofed under similar conditions and are at similar temperatures. This consistency in dough temperature ensures that all parts of the dough start the baking process on equal footing, promoting uniform oven spring and overall even cooking.
Common Baking Errors Contributing to Unevenness
The Impact of Improper Dough Shaping on Baking
The way you shape your dough has a direct impact on how it behaves and bakes in the oven. A poorly shaped loaf might have inconsistencies in tension, thickness, or surface smoothness. These variations can lead to uneven expansion during oven spring and uneven heat penetration during baking.
For example, if one side of a boule is shaped tighter than the other, the tighter side may expand less, resulting in a lopsided loaf. If the dough is significantly thicker in one section, that section will take longer to heat through and cook, potentially leading to an underbaked interior in that area while the rest of the loaf is done.
Proper shaping techniques aim to create uniform tension across the surface of the dough and distribute the mass evenly. This ensures that the loaf rises predictably and receives heat uniformly. For sourdough bread, achieving a smooth, taut surface during the final shaping creates a "skin" that helps control the expansion and provides a good canvas for scoring. Practicing shaping until you can consistently create loaves with uniform structure and tension is essential for promoting even baking and achieving that perfect, symmetrical rise and crust.
The Relationship Between Inadequate Proofing and Uneven Baking
Proofing, the final rise before baking, is a critical stage. Both underproofing and overproofing can contribute to uneven baking. Underproofed dough is dense and hasn't developed enough internal gas. When it hits the hot oven, it experiences rapid, sometimes uncontrolled expansion (explosive oven spring), which can lead to tears and blowouts in weaker spots, resulting in a misshapen, uneven loaf. The rapid, uneven expansion also means different parts of the dough are exposed to heat differently.
Overproofed dough, on the other hand, has used up most of its available sugars, and the gluten structure may have started to collapse. It lacks the strength for a good oven spring. While it might initially appear evenly shaped, an overproofed loaf often collapses slightly upon hitting the oven or expands weakly and unevenly.
The structure is compromised, leading to an inconsistent crumb and potentially uneven cooking as heat penetrates areas with different densities at different rates. Learning to read your dough and determine the optimal proofing time – often judged by the "poke test" – is vital for ensuring the dough enters the oven with the right amount of tension and gas, ready for a controlled, even bake. Correct proofing, alongside proper oven calibration for sourdough bread, forms a powerful duo for baking success.
Conclusion: Mastering Baking Evenness Through Calibration and Technique
Oven Calibration: A Crucial Skill for Bread Bakers
Ultimately, achieving consistently perfect, evenly baked bread requires attention to detail at every stage, but understanding your oven's true temperature profile is perhaps the most foundational skill. Oven calibration isn't just a technical chore; it's an empowering step that removes a major variable from the complex process of bread baking.
By using an independent thermometer to determine if your oven runs hot or cold, and by how much, you gain the knowledge needed to adjust your baking temperatures accordingly. This simple act of checking and compensating for oven inaccuracy can dramatically improve the consistency of your crust color, crumb structure, and overall bake quality.
For those passionate about baking, especially sourdough bread with its specific temperature requirements for oven spring and crust development, mastering oven calibration is indispensable. It allows you to approach recipes with confidence, knowing that when a recipe calls for 475°F, you can set your oven to the temperature that actually achieves 475°F inside.
While modern ovens offer convenience, they are not always perfectly accurate out of the box or over time. Taking the initiative to calibrate your oven ensures that this vital piece of equipment is providing the stable, predictable heat environment your dough needs to transform into a beautiful, evenly baked loaf.
Guidelines for Achieving Consistently Perfect, Evenly Baked Bread
Achieving baking evenness is a multi-faceted endeavor, combining accurate oven calibration with smart baking techniques. Start by calibrating your oven with an independent thermometer and adjusting your set temperatures based on the findings. Regularly monitor your oven's temperature during bakes, especially when experimenting with new recipes or techniques. Beyond temperature accuracy, pay close attention to the physical dynamics of baking:
- Map your oven's hot spots using a simple test and use techniques like rotation or thermal mass (like ceramic tiles or baking stones) to mitigate their effects.
- Optimize your rack placement based on your oven's heat distribution and the type of bread you are baking.
- Ensure consistent dough temperature and even proofing across your loaves or within a single loaf.
- Refine your shaping techniques to create loaves with uniform tension and thickness.
- Learn to recognize properly proofed dough to ensure controlled and even expansion in the oven.
By combining the technical precision of oven calibration with careful attention to dough handling, shaping, and strategic use of baking tools and techniques, you can significantly reduce the likelihood of uneven baking. Embrace the process of learning your oven's unique characteristics and adapting your methods accordingly. With practice and these guidelines, you'll be well on your way to consistently pulling perfectly golden, evenly baked loaves of bread from your oven, transforming potential disappointment into reliable baking success.
Frequently Asked Questions
Why is oven calibration important for baking sourdough bread?
Oven calibration ensures your oven reaches and maintains the correct temperature, crucial for the proper rise and crust development of sourdough. Inaccurate temperatures can lead to uneven baking.
How do I know if my oven needs calibration?
If your sourdough bread is consistently underbaked, overbaked, or unevenly cooked, your oven may be off. Use an oven thermometer to check the actual temperature against the set temperature.
What tools do I need to calibrate my oven?
You'll primarily need an oven thermometer to accurately measure the internal temperature. Some ovens require a screwdriver to access the calibration adjustment screw.
How often should I calibrate my oven?
It's recommended to check your oven's calibration every 6-12 months, or whenever you notice inconsistent baking results, particularly with sensitive recipes like sourdough.
Where can I find instructions on how to calibrate my specific oven model?
Consult your oven's user manual for specific calibration instructions. If the manual is unavailable, search online using your oven's model number and "calibration instructions."
Final Reflection: The Perfect Loaf, A Journey of Calibration
The quest for the perfect sourdough loaf isn't just about achieving a golden-brown crust; it's a metaphor for mastering precision and understanding the nuances of a complex process. In today's fast-paced world, where instant gratification often reigns supreme, the slow fermentation and meticulous attention required for sourdough baking offer a valuable counterpoint. The seemingly simple act of baking bread becomes a profound lesson in patience, observation, and the importance of calibration in achieving excellence.
This journey of oven calibration, as explored in this article, highlights the interconnectedness of seemingly disparate elements – from the precise temperature of your oven to the hydration of your dough. The subtle shifts in outcome, from a dense crumb to an airy masterpiece, underscore the importance of paying attention to detail. The difference between ordinary and extraordinary is that little extra.
This quote, while often attributed to Jimmy Johnson, perfectly encapsulates the essence of sourdough baking and the meticulous calibration necessary to elevate it from good to exceptional. It's a process that mirrors life itself; the small adjustments, the constant learning, and the unwavering dedication to improvement.
Now, consider your own "oven." What aspects of your life require calibration? What seemingly minor adjustments could yield extraordinary results? Perhaps it's your work-life balance, your approach to relationships, or even your personal goals. Take the lessons learned from calibrating your oven – the patience, the attention to detail, the iterative process of refinement – and apply them to other areas of your life. Embrace the journey, celebrate the small victories, and never stop striving for your own perfect loaf, whatever that may look like.
Unleash Your Inner Baker: Perfect Loaves, Every Time!
Thanks for taking the time to explore the world of perfectly baked bread with us! We hope you gained valuable insights into oven calibration and beyond. Ready to elevate your baking game?
- Master your oven's quirks: Start by conducting a simple oven temperature test using an oven thermometer—this is the single most impactful step you can take toward consistent baking!
- Share your baking triumphs (and tribulations!) with our community on social media using #BakeWithEase. Let's learn together!
- Explore our other articles on bread baking techniques for even more tips and tricks.
So, what's your biggest bread-baking challenge, and how are you going to tackle it today?