
Sourdough Inclusions: Mastering Addins Without Sacrificing Structure

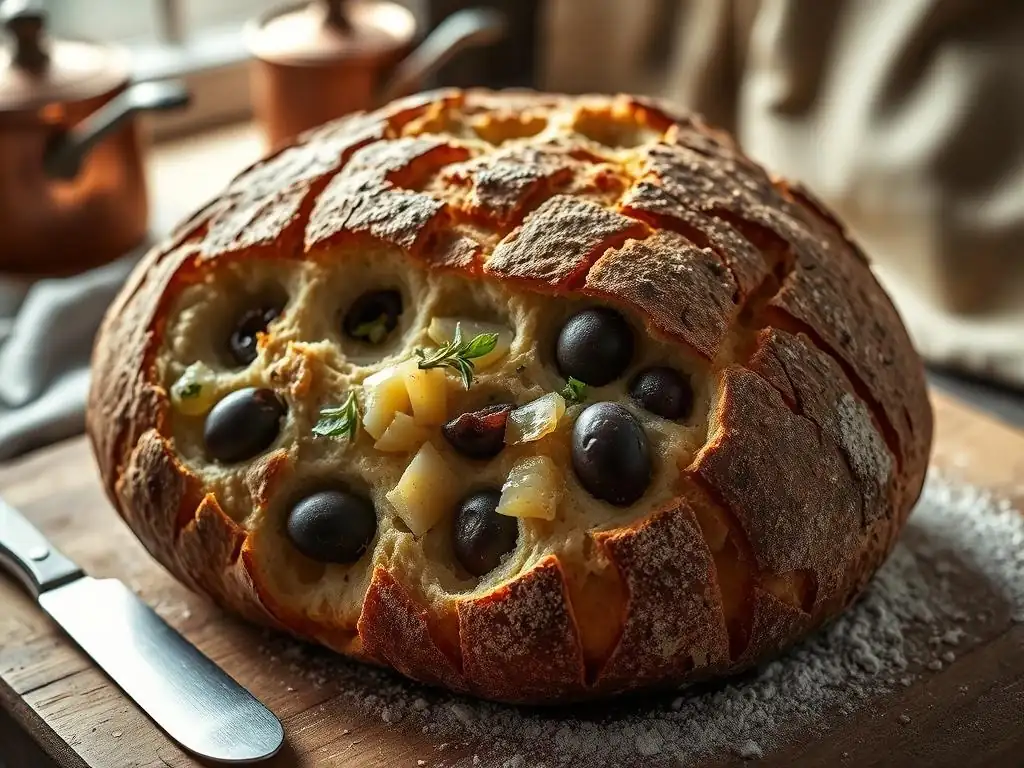
Welcome to BakeWithEase, your sanctuary for all things baking! Are you ready to elevate your sourdough game? Unlock the secrets to crafting exceptional loaves with our guide to sourdough inclusions recipe tips. We'll show you how to perfectly blend flavors and textures without compromising that coveted sourdough structure. Dive in and discover the art of adding irresistible twists to your favorite bread!
- Introduction to Sourdough Inclusions for Enhanced Flavor and Texture
- Understanding the Science Behind Sourdough Dough Strength
-
Selecting the Right Sourdough Inclusions for Optimal Results
- Dried Fruits: Choosing and Preparing for Sourdough Bread
- Nuts and Seeds: Roasting and Incorporating for Best Texture and Flavor
- Cheese: Adding Flavor and Moisture to Sourdough (Considerations and Techniques)
- Herbs and Spices: Enhancing Aroma and Taste in Sourdough
- Chocolate: Incorporating Chocolate Chips, Chunks, or Cocoa Powder
-
Sourdough Inclusions Recipe Tips: A Step-by-Step Guide
- Preparing Your Sourdough Starter for Inclusions
- Mixing and Kneading Techniques for Even Distribution of Add-ins
- Bulk Fermentation: Monitoring and Adjusting for Inclusions
- Shaping Techniques to Prevent Tearing with Sourdough Additions
- Proofing: Ensuring Proper Rise with Added Ingredients
- Baking: Achieving a Perfect Crust and Internal Temperature
- Troubleshooting Common Issues with Sourdough Additions
- Advanced Techniques for Sourdough Inclusions
- Best Practices for Storing Sourdough Bread with Inclusions
- Sourdough Inclusions Recipe Inspiration
- Conclusion: Elevate Your Sourdough Baking with Creative Inclusions
-
Frequently Asked Questions
- What are some common sourdough inclusions and how do they affect the dough?
- How do I prevent sourdough inclusions from sinking to the bottom of my loaf?
- What's the best time to add inclusions to my sourdough?
- How much sourdough inclusion is too much?
- What are some tips for working with wet inclusions, like fresh berries, in sourdough?
- Final Reflection: The Art and Science of Sourdough Inclusions
- Unleash Your Inner Baker: Craft the Perfect Sourdough Loaf!
Introduction to Sourdough Inclusions for Enhanced Flavor and Texture
Adding inclusions to your sourdough bread is a fantastic way to elevate a classic loaf into something truly special. It allows you to infuse the bread with unique flavors, textures, and aromas, moving beyond the traditional tangy crust and airy crumb. Whether you're adding dried fruits for sweetness, nuts for crunch, or cheese for richness, inclusions transform your bake and offer endless creative possibilities. Mastering sourdough inclusions recipe tips is key to consistently producing delicious and beautiful loaves.
However, incorporating these delightful additions into a sourdough dough presents a unique set of challenges compared to conventional yeasted bread. Sourdough relies on a delicate balance of fermentation, gluten development, and hydration to achieve its signature open crumb and structure. Throwing in foreign objects can disrupt this balance, potentially leading to issues like a dense crumb, inclusions sinking, or the dough tearing during handling. Understanding how inclusions interact with the dough matrix is crucial for success.
Why Add Inclusions to Your Sourdough? Exploring Flavor Profiles
The primary reason bakers add inclusions is to enhance the flavor profile of their sourdough. A basic sourdough loaf offers a wonderful tangy depth, but additions can introduce sweet, savory, nutty, or spicy notes that complement or contrast with the inherent sourdough tang. Imagine a loaf studded with sweet cranberries and crunchy walnuts, perfect for breakfast, or a savory bread with olives and sun-dried tomatoes, ideal with a meal. The possibilities are vast, limited only by your imagination and understanding of how different ingredients behave when baked.
Beyond flavor, inclusions significantly impact the texture of the final bread. Nuts and seeds provide crunch, dried fruits offer chewy pockets, and cheese can melt into gooey pockets or create a richer, softer crumb. These textural contrasts make each bite more interesting and satisfying. Experimenting with different combinations allows you to tailor your sourdough to specific uses, whether it's a hearty bread for sandwiches or a delicate loaf to enjoy with cheese. Effective sourdough inclusions recipe tips often focus on how to integrate these elements to achieve both desired flavor and texture without compromising the bread's structure.
The Challenge: Maintaining Sourdough Structure with Add-ins
Integrating inclusions into sourdough dough introduces physical obstacles that can impede gluten development and network formation. Gluten, the protein network formed when flour and water are mixed and kneaded, is what provides the dough with its elasticity and strength, allowing it to trap gases produced during fermentation and rise. Inclusions, especially larger or sharper ones like nuts or chocolate chunks, can physically cut or disrupt this network, weakening the dough. This makes it harder for the dough to hold its shape and achieve a good rise.
Furthermore, inclusions can affect the dough's hydration and fermentation rate. Dried fruits, for instance, absorb moisture from the dough, potentially making it stiffer, while wet ingredients like cheese can add moisture, making it stickier. Some ingredients, like certain spices or acidic fruits, might also slightly alter the fermentation activity of the sourdough starter. Successfully incorporating sourdough inclusions requires careful management of dough handling, hydration, and fermentation timing to ensure the gluten structure remains robust enough to support the added weight and volume while still developing that characteristic open crumb.
Understanding the Science Behind Sourdough Dough Strength
Achieving a well-structured sourdough loaf, especially one laden with inclusions, hinges on a solid understanding of the science behind dough development. It's not just about mixing ingredients; it's about facilitating the formation of a strong, extensible gluten network that can withstand the forces of fermentation, shaping, and baking. This network is the scaffolding of your bread, and maintaining its integrity is paramount when introducing sourdough additions.
Several factors contribute to this dough strength, including the type of flour used, the hydration level, the mixing and kneading techniques, and the rest periods like autolyse and bulk fermentation. A strong foundation is essential before you even think about adding inclusions. Without adequate dough strength, your carefully selected additions might compromise the final result, leading to a flat, dense loaf where the inclusions simply weigh the dough down. Mastering sourdough inclusions recipe tips starts with mastering the basic dough itself.
Gluten Development: The Foundation of Sourdough Structure
Gluten development begins the moment flour meets water. Two proteins in flour, glutenin and gliadin, hydrate and, through mechanical action (mixing/kneading) and time, link together to form the elastic, stretchy network known as gluten. This network is crucial for trapping the carbon dioxide produced by the sourdough starter's yeast and bacteria, causing the dough to rise. The more developed the gluten, the stronger and more extensible the dough, allowing it to expand significantly without collapsing.
When adding inclusions, you are essentially introducing foreign bodies that can interfere with this gluten network. Imagine trying to build a spiderweb (the gluten network) while pebbles (the inclusions) are constantly dropped into it. The network can be broken or weakened. Therefore, ensuring your basic dough has achieved excellent gluten development before adding inclusions is a fundamental sourdough inclusions recipe tip. This provides a resilient structure that is better able to handle the stress of incorporating and supporting the added weight and volume of the inclusions.
Hydration Levels and Their Impact on Dough Handling with Inclusions
Hydration, the ratio of water to flour in your dough, plays a significant role in both gluten development and how well inclusions integrate. Higher hydration levels (e.g., 75-85% water relative to flour weight) generally lead to a more open crumb and a softer texture, but the dough can be stickier and harder to handle. Lower hydration (e.g., 65-70%) results in a stiffer dough that's easier to shape but typically yields a tighter crumb. When working with sourdough inclusions, the ideal hydration level often requires adjustment.
Consider dried fruits like raisins or figs; they will absorb moisture from the dough during mixing and fermentation. If you don't account for this, your dough can become unexpectedly dry and stiff. Conversely, ingredients like cheese or olives can release moisture or oil.
Many sourdough inclusions recipe tips suggest slightly increasing the hydration when adding dry ingredients to compensate for absorption. For instance, if your standard recipe uses 75% hydration, you might increase it to 78-80% when adding a substantial amount of dried fruit to maintain dough consistency and workability. Getting the hydration right ensures the dough remains pliable enough to handle without tearing during the inclusion process and subsequent shaping.
Autolyse and its Role in Strong Gluten Formation for Sourdough Additions
Autolyse is a simple yet powerful technique where you mix just the flour and water from your recipe and let it rest for 20 minutes up to several hours before adding the starter and salt. During this resting period, the flour hydrates fully, and enzymatic activity begins to break down proteins, making gluten formation much easier and more efficient when you eventually mix or knead. It allows the gluten network to start developing without the interference of salt or the activity of the starter.
Implementing an autolyse phase is a highly recommended sourdough inclusions recipe tip because it helps build significant dough strength before the inclusions are introduced. By the time you add the starter, salt, and inclusions, the gluten network is already partially formed and more robust. This stronger initial structure is better equipped to handle the disruption caused by mixing in the inclusions, reducing the risk of tearing and ensuring the dough maintains its integrity throughout fermentation and shaping. A typical autolyse for sourdough might involve mixing flour and water and letting it rest for 30-60 minutes.
Selecting the Right Sourdough Inclusions for Optimal Results
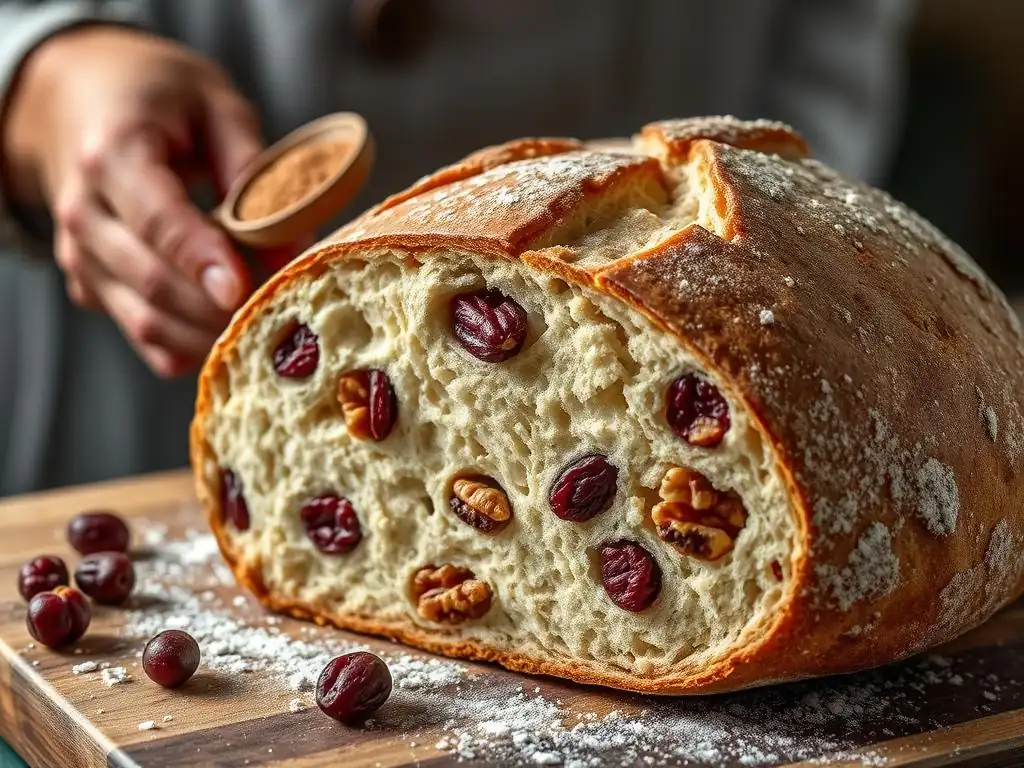
Choosing the right inclusions is about more than just flavor preference; it also involves considering how different ingredients will interact with your dough and affect the final bake. Some ingredients are easier to work with than others, and proper preparation is key to preventing issues like excessive moisture release, dough tearing, or burning. Thinking about the size, moisture content, and shape of your inclusions will help you select and prepare them effectively for your sourdough.
Incorporating a variety of inclusions can add complexity and interest, but it's often wise to start with one or two types until you get a feel for how they affect your specific dough and process. This allows you to troubleshoot more easily. Many sourdough inclusions recipe tips emphasize ingredient preparation as much as dough handling, as poorly prepared inclusions can quickly derail an otherwise perfect bake.
Dried Fruits: Choosing and Preparing for Sourdough Bread
Dried fruits like cranberries, raisins, apricots, or figs are popular sourdough inclusions, offering sweetness and a chewy texture. When selecting dried fruits, look for those that are plump and not excessively hard. Avoid fruits coated heavily in sugar, as this can affect the dough's fermentation. Approximately 10-20% of the total flour weight is a common range for dried fruit additions; for a loaf with 500g of flour, this would be 50-100g of fruit.
Preparation is crucial to prevent dried fruits from absorbing too much moisture from the dough, which can lead to a dry crumb. Rehydrating them slightly before adding is a common technique. You can soak them in warm water, tea, or even a complementary spirit (like rum for raisins) for 20-30 minutes, then drain them thoroughly and pat them dry before adding to the dough. This pre-hydration step ensures they remain soft and chewy in the final bake and don't steal essential moisture from your dough's gluten structure.
Nuts and Seeds: Roasting and Incorporating for Best Texture and Flavor
Nuts and seeds like walnuts, pecans, sunflower seeds, or pumpkin seeds add wonderful crunch and nutty flavor to sourdough. They also contribute healthy fats and nutrients. Similar to dried fruits, a common addition rate is around 10-20% of the total flour weight. Using a mix of nuts and seeds can add complexity; for example, a combination of 50g walnuts and 50g sunflower seeds for a 500g flour loaf.
Roasting nuts and seeds before adding them significantly enhances their flavor and crunch. Simply spread them on a baking sheet and roast in a preheated oven at around 160-175°C (325-350°F) for 8-15 minutes, watching carefully to prevent burning. Let them cool completely before incorporating them into the dough. Adding hot or warm nuts can affect dough temperature and fermentation. Chopping larger nuts like walnuts into smaller pieces (e.g., quartered or roughly chopped) can help with even distribution and prevent them from creating large voids or tearing the dough during shaping.
Cheese: Adding Flavor and Moisture to Sourdough (Considerations and Techniques)
Cheese adds richness, tang, and moisture to sourdough, creating incredibly flavorful loaves. Harder cheeses like cheddar, Gruyère, or Parmesan work well, as do semi-hard cheeses like provolone. Softer cheeses can add too much moisture and grease. Adding cheese at about 15-25% of the flour weight is typical; for a 500g flour loaf, this is 75-125g of cheese.
It's best to use grated or finely diced cheese. Larger chunks can create significant weak points in the dough and lead to uneven baking. Adding cheese towards the end of the mixing process, after the gluten has developed, minimizes its interference with structure. Some sourdough inclusions recipe tips suggest chilling the grated cheese before adding it, which can help it stay separate during mixing and melt more evenly during baking. Be mindful that cheese adds moisture and fat, which can slightly affect dough handling and crust development.
Herbs and Spices: Enhancing Aroma and Taste in Sourdough
Herbs and spices offer a fantastic way to add aromatic depth and subtle or pronounced flavors to sourdough. Fresh herbs like rosemary, thyme, or chives can be chopped and added, while dried herbs and spices like black pepper, caraway seeds, or smoked paprika are also excellent choices. The amount needed is usually much smaller than other inclusions, often ranging from 1-5% of the flour weight, or simply added to taste. For a 500g flour loaf, 5-25g of herbs/spices is a good starting point, though potent spices like chili flakes would be much less.
Fresh herbs should be finely chopped to distribute evenly. Dried herbs and spices can be added directly to the dough. Sometimes, blooming dried spices in a little warm oil or water for a few minutes before adding can enhance their flavor release. Herbs and spices generally pose less of a structural challenge than larger inclusions, but adding excessive amounts, especially dry spices, could slightly affect hydration. They are often added during the final stages of mixing, similar to cheese.
Chocolate: Incorporating Chocolate Chips, Chunks, or Cocoa Powder
Chocolate sourdough is a delightful treat, turning a savory loaf into a sweet indulgence. You can use chocolate chips, chopped chocolate chunks, or even cocoa powder. For chips or chunks, adding 15-25% of the flour weight is common (75-125g for a 500g flour loaf). If using cocoa powder, start with 3-5% of the flour weight (15-25g for a 500g flour loaf) and adjust the liquid slightly as cocoa powder absorbs moisture.
Using good quality chocolate, around 60-70% cacao for chips/chunks, provides a nice balance of sweetness and bitterness. Chop chocolate chunks into roughly chip-sized pieces for even distribution. Cocoa powder is typically whisked into the flour before adding water. Chocolate chips/chunks are best added towards the end of mixing, like cheese or nuts, to avoid overly disrupting the gluten network. Be aware that melted chocolate during baking can create soft spots in the crust.
Sourdough Inclusions Recipe Tips: A Step-by-Step Guide
Successfully incorporating inclusions into your sourdough requires attention to detail at almost every stage of the process, from preparing your starter to the final bake. It's not just about dumping ingredients in; it's about thoughtful integration that respects the dough's structure and fermentation process. Following a structured approach, informed by solid sourdough inclusions recipe tips, will dramatically increase your chances of success.
This section outlines a typical workflow, highlighting key considerations and adjustments needed when working with sourdough additions. Each step builds upon the last, ensuring the dough is strong enough to support the inclusions and that they are evenly distributed for a beautiful and delicious result.
Preparing Your Sourdough Starter for Inclusions
A strong and active sourdough starter is the cornerstone of any good sourdough loaf, and even more critical when adding inclusions. A weak starter may not produce enough gas to lift a dough burdened with extra weight, potentially resulting in a dense loaf. Ensure your starter is vigorous and bubbly, ideally having been fed 4-12 hours before mixing your dough, and has doubled or tripled in size.
Using a starter that is at its peak activity ensures that fermentation begins promptly and proceeds efficiently. This is important because the added inclusions can sometimes slightly slow fermentation or make it harder to judge the dough's progress visually. A robust starter provides the necessary leavening power to achieve a good rise despite the presence of inclusions. Many sourdough inclusions recipe tips emphasize this foundational step.
Mixing and Kneading Techniques for Even Distribution of Add-ins
The best time to add inclusions is typically after the initial gluten development has occurred, but before the dough is fully proofed. This is often during the second or third set of folds in the bulk fermentation period, or sometimes after the initial mixing and a short rest (like after the autolyse and starter/salt addition). Adding them too early can significantly hinder initial gluten development, while adding them too late makes even distribution difficult without overworking the dough.
A gentle method like the "stretch and fold" technique is excellent for incorporating inclusions. After performing a stretch and fold, spread the desired inclusions evenly over the stretched dough surface before folding it over. Repeat this process over several sets of folds.
This gradually incorporates the inclusions without aggressively tearing the gluten network. Avoid traditional vigorous kneading methods once inclusions are added, as this can crush delicate ingredients or tear the dough. For a 500g flour dough, you might add inclusions during the second or third fold, approximately 1.5 to 2 hours into bulk fermentation, performing 2-3 more sets of folds over the next hour to distribute them.
Bulk Fermentation: Monitoring and Adjusting for Inclusions
Bulk fermentation, the first rise of the dough, is where flavor develops and the dough gains strength and volume. When inclusions are present, monitoring the dough's progress becomes slightly more nuanced. The added weight can sometimes make the dough appear less airy, and visual cues like overall volume increase might be slightly different than with a plain loaf. A good sign of sufficient bulk fermentation is when the dough has increased in volume by about 30-50% and feels airy but still has structure.
The presence of inclusions can also affect the speed of fermentation. Sugary inclusions might slightly speed it up, while acidic or fatty ones could slow it down. Pay close attention to the dough's feel and signs of fermentation, such as gas bubbles on the surface and around the edges.
Using a clear container marked with the starting level can help you track volume increase accurately. If adding a significant amount of heavy inclusions, you might need slightly longer bulk fermentation or a warmer environment (e.g., 24-26°C / 75-79°F) to achieve the desired rise compared to a plain loaf in a cooler environment (e.g., 22-24°C / 72-75°F).
Shaping Techniques to Prevent Tearing with Sourdough Additions
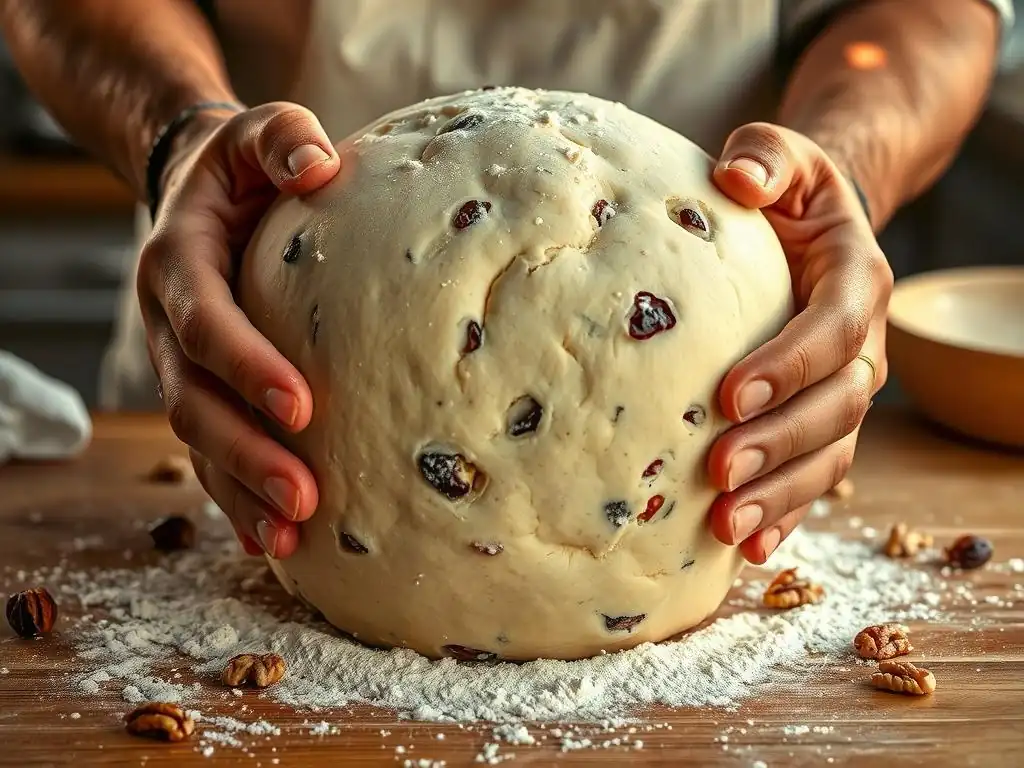
Shaping sourdough with inclusions requires a gentle touch to avoid tearing the dough, which can compromise its ability to hold its shape and achieve oven spring. The inclusions create weak points, so aggressive handling will likely lead to blowouts. Techniques that involve less tensioning and more careful folding are often preferred.
When shaping, try to keep the inclusions contained within the dough's surface layer as much as possible, rather than having them poke through. For a boule (round loaf), gently preshape and let it rest for 20-30 minutes. For the final shape, use minimal flour on your surface and hands. Carefully gather the edges of the dough towards the center, slightly overlapping, to create tension on the surface.
Avoid excessive stretching or pulling. If an inclusion is about to tear the surface, gently push it back into the dough. Many sourdough inclusions recipe tips suggest shaping slightly more loosely than you might a plain loaf to minimize stress on the gluten network around the inclusions.
Proofing: Ensuring Proper Rise with Added Ingredients
Proofing, the final rise before baking, is another stage where inclusions can affect the process. The added weight means the dough might not achieve as dramatic a volume increase during proofing compared to a plain loaf. Over-proofing is a significant risk, as the weakened structure (due to inclusions) is less able to recover if it collapses. Under-proofing, however, will result in a dense crumb.
Monitor the dough carefully. The poke test is a reliable indicator: gently press the dough with a floured finger; if the indentation springs back slowly but not completely, it's likely ready. If it springs back immediately, it needs more time. If it stays completely indented, it's likely over-proofed. Cold proofing in the refrigerator for 8-16 hours is often beneficial when working with inclusions. The cold slows fermentation, allowing flavors to develop while the dough structure firms up, making it easier to handle and score before baking.
Baking: Achieving a Perfect Crust and Internal Temperature
Baking sourdough with inclusions requires ensuring the dough achieves good oven spring and cooks through evenly, despite the presence of potentially moisture-rich or dense additions. A hot oven is crucial for a good crust and spring. Baking in a Dutch oven or with steam is highly recommended, especially for the initial phase (e.g., 20-25 minutes at 230-250°C / 450-480°F with the lid on or steam), as the steam allows the crust to expand fully before hardening.
After the initial steaming period, remove the lid (or vent the steam) and reduce the oven temperature slightly (e.g., to 220-230°C / 425-450°F) for the remainder of the bake (usually another 20-30 minutes). This allows the crust to brown and crisp. For loaves with cheese or sugary fruits, you might need to tent the loaf with foil during the final minutes to prevent the inclusions on the surface from burning.
The bread is done when the crust is deep golden brown and the internal temperature reaches 96-100°C (205-210°F). Using a probe thermometer is the most accurate way to check doneness, especially with inclusions that can affect perceived moistness.
Troubleshooting Common Issues with Sourdough Additions
Even with careful planning and execution, working with sourdough inclusions can present challenges. Understanding why issues occur is the first step to preventing them in future bakes. Many common problems stem from the inclusions interfering with the dough's delicate structure or affecting its fermentation and baking properties.
Here are some frequent issues encountered when adding ingredients to sourdough and practical steps to address them. Mastering these troubleshooting techniques is a vital part of becoming proficient with sourdough inclusions recipe tips.
Inclusions Sinking to the Bottom of the Dough
This is a common problem, especially with heavy inclusions like nuts or chocolate chunks. It indicates that the dough's gluten structure is not strong enough to support the weight of the inclusions during bulk fermentation and proofing.
- Cause: Insufficient gluten development, too-high hydration for the dough strength, adding inclusions too early or too late, or insufficient tension during shaping.
- Fixes:
- Ensure your starter is very active.
- Perform an autolyse.
- Develop gluten well before adding inclusions (e.g., through initial mixing and a few sets of folds).
- Add inclusions during the mid-to-late bulk fermentation period (e.g., after 1.5-2 hours and several folds).
- Slightly reduce hydration if you consistently have this issue with heavy inclusions and high hydration doughs.
- Ensure you build adequate surface tension during shaping.
- Consider using smaller pieces of heavy inclusions.
Dough Tearing During Shaping
Tearing during shaping often happens when the gluten network is weak or compromised by the inclusions, or when the dough is handled too aggressively.
- Cause: Weak gluten structure, inclusions cutting the gluten strands, insufficient rest after preshaping, or aggressive shaping techniques.
- Fixes:
- Ensure good initial gluten development.
- Be gentle when mixing in inclusions; use stretch and folds.
- Allow adequate rest time (20-30 minutes) after preshaping to let the gluten relax before final shaping.
- Use minimal flour on your work surface.
- Employ gentle shaping techniques, focusing on folding and tucking rather than aggressive stretching or pulling.
- Push inclusions back into the dough if they are poking through the surface during shaping.
Uneven Baking Due to Inclusions
Sometimes parts of the loaf with inclusions might be undercooked or overcooked compared to areas without them. This is particularly common with cheese or large fruit pieces.
- Cause: Inclusions affecting heat distribution, moisture release/absorption, or burning on the surface.
- Fixes:
- Ensure inclusions are evenly distributed throughout the dough.
- Chop larger inclusions into smaller, more uniform pieces.
- If using cheese or sugary fruits, add them towards the end of mixing and try to keep them from clustering heavily on the surface during shaping.
- Tent the loaf loosely with foil during the last 10-15 minutes of baking if surface inclusions are browning too quickly.
- Ensure the oven temperature is accurate and consistent.
- Always check the internal temperature with a thermometer (aim for 96-100°C / 205-210°F) to confirm doneness throughout the loaf.
Dense Crumb Structure with Add-ins
A dense crumb (lack of open, airy holes) can occur if the dough doesn't rise sufficiently during bulk fermentation or proofing, often due to the weight and interference of inclusions.
- Cause: Weak starter, insufficient bulk fermentation or proofing, weak gluten structure unable to support inclusions, or over-proofing leading to collapse.
- Fixes:
- Start with a very active, strong starter.
- Focus on developing a strong gluten network before adding inclusions.
- Ensure inclusions are incorporated gently.
- Allow adequate bulk fermentation time, monitoring the dough's increase in volume (aim for 30-50%).
- Be careful not to over-proof, especially with inclusions weighing the dough down. Cold proofing can help manage this.
- Ensure sufficient oven spring by baking in a hot oven with steam.
Advanced Techniques for Sourdough Inclusions
Once you're comfortable with basic sourdough inclusions recipe tips and techniques, you might want to explore more advanced methods to create visually stunning loaves or achieve unique textures. These techniques often involve manipulating the dough and inclusions in more intricate ways.
These methods can add complexity and beauty to your sourdough, showcasing the inclusions as a feature of the bread's structure and appearance. They require a dough with good extensibility and careful handling.
Laminating Dough with Inclusions: A Delicate Approach
Lamination is a technique typically used in pastry making (like croissants) that involves folding dough multiple times with butter layers. In sourdough, it can be adapted to incorporate inclusions. After the initial bulk fermentation (often when the dough has increased by about 20-30%), the dough is gently stretched or rolled into a thin rectangle. The inclusions are then spread evenly over the surface, and the dough is folded into thirds, like a letter. This process can be repeated once or twice more after a short rest, creating layers of dough and inclusions.
Laminating offers exceptional distribution of inclusions throughout the dough, leading to a more uniform crumb with inclusions interspersed throughout. However, it requires a dough that is extensible enough to be stretched thin without tearing excessively, especially with inclusions present. It's a more delicate process than simple stretch and folds and can significantly improve the visual appeal of the final loaf by showcasing the inclusions in layers within the crumb. This technique works particularly well with smaller inclusions like seeds, dried fruit, or herbs.
Swirling and Folding Inclusions for Visual Appeal
Instead of aiming for perfectly even distribution, you can use techniques that create swirls or pockets of inclusions, adding a beautiful visual element to the sliced loaf. After incorporating the inclusions during stretch and folds, you might perform a final, more deliberate fold or roll during shaping to create a swirl pattern.
One method is to gently flatten the dough after its final set of folds in bulk fermentation. Sprinkle more inclusions (if desired) or simply work with those already incorporated. Then, starting from one edge, gently roll the dough into a log. You can then shape this log into a batard (oval) or coil it into a boule shape. This creates a distinct swirl pattern of dough and inclusions visible when the bread is sliced. This technique is effective with ingredients like cinnamon sugar, pesto, or even different colored doughs alongside standard inclusions.
Scoring Techniques for Sourdough with Inclusions
Scoring, the cuts made on the surface of the dough before baking, allows the bread to expand in a controlled manner during oven spring. When working with inclusions, scoring requires extra care. Large inclusions just under the surface can snag your blade and cause messy tears rather than clean cuts.
Use a very sharp blade (like a razor blade or 'lame'). Plan your scores to ideally avoid areas where you see large inclusions bulging just under the surface. Make confident, swift cuts. For dough heavily laden with inclusions, simpler scoring patterns (like a single deep slash or a cross) might be easier and less likely to tear than intricate patterns. Sometimes, a slightly shallower score is necessary if inclusions are very close to the surface. Observing where inclusions lie just beneath the dough surface after shaping can help you plan the best places to make your cuts.
Best Practices for Storing Sourdough Bread with Inclusions
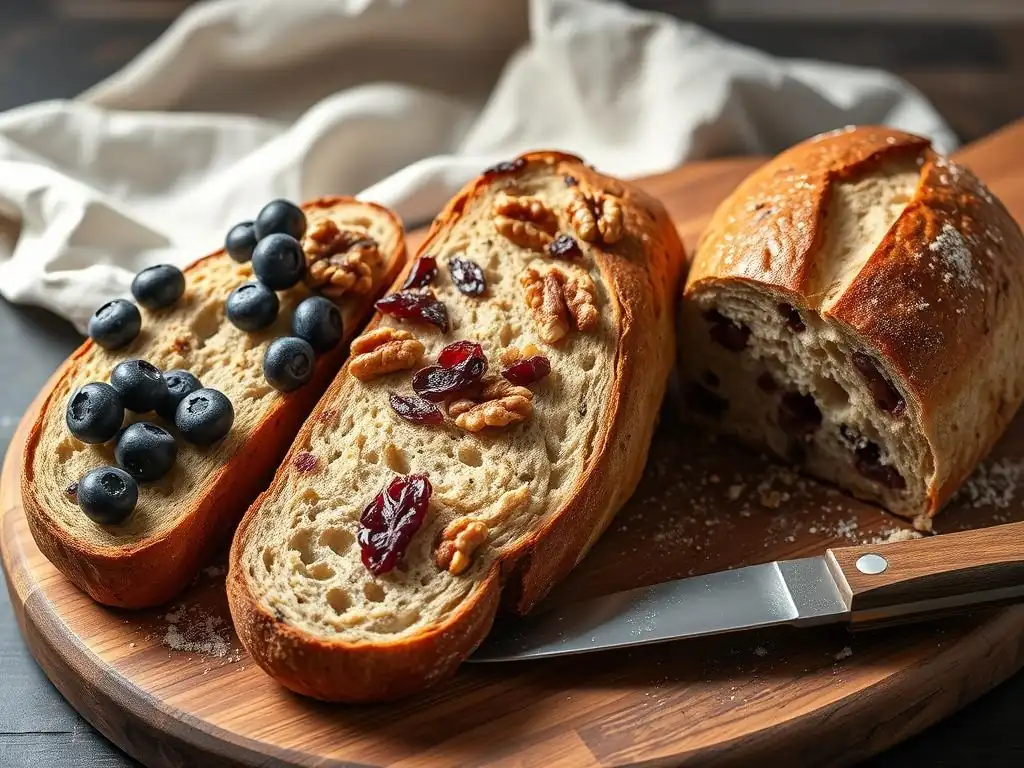
Proper storage is essential to keep your beautiful sourdough inclusion loaf fresh and delicious. The presence of inclusions can sometimes affect the bread's shelf life or how it dries out compared to a plain loaf. Sugary fruits can potentially make the bread more prone to mold in humid conditions, while fatty inclusions like cheese might affect texture over time.
Following simple storage guidelines will help maintain the quality of your sourdough with inclusions, ensuring you can enjoy every slice.
Maintaining Freshness and Preventing Mold
Once completely cooled, sourdough bread with inclusions is best stored at room temperature. Avoid refrigerating sourdough, as this can actually accelerate staling.
- Storage Options:
- Bread Box: An ideal environment that allows some airflow while preventing drying.
- Linen or Cotton Bag: Good for crust preservation, but the interior might dry out faster.
- Paper Bag: Similar to cloth, good for crust, less ideal for moisture retention.
- Plastic Bag or Airtight Container: Best for keeping the interior moist, but can soften the crust and potentially encourage mold growth, especially in humid climates or with high-moisture inclusions like cheese.
For loaves with high moisture inclusions (like cheese or fresh herbs), or in very humid environments, storing at room temperature for 1-2 days is fine, but for longer storage, consider slicing and freezing portions. Ensure the bread is fully cooled before storing in any method to prevent condensation, which leads to a soggy crust and mold. For a typical loaf, storing in a bread box or bag is sufficient for 3-4 days.
Slicing and Serving Suggestions
Wait until your sourdough loaf with inclusions is completely cool before slicing. Slicing too early can compress the warm crumb, affecting its texture. A serrated knife is best for cutting through the crust and the soft interior, easily navigating around the inclusions.
Sourdough with inclusions can be enjoyed in countless ways. Sweet loaves with fruit and nuts are fantastic toasted with butter, alongside coffee, or even as a base for bread pudding. Savory loaves with cheese, herbs, or olives are perfect alongside soups, salads, or as part of a cheese board. Consider the flavor profile of your inclusions when deciding how to serve your bread. For example, a rosemary and olive loaf is excellent dipped in olive oil, while a chocolate cherry loaf is wonderful simply sliced and enjoyed.
Sourdough Inclusions Recipe Inspiration
Ready to try adding inclusions to your sourdough? Here are a few classic and inspiring combinations to get you started. These examples demonstrate how different ingredients can create unique flavor profiles and textures. Remember to apply the sourdough inclusions recipe tips discussed earlier when preparing and adding these ingredients.
- Caramelized Onion and Rosemary Sourdough: Sweet, savory caramelized onions paired with aromatic fresh rosemary.
- Fig and Anise Sourdough: Chewy dried figs and the subtle, licorice-like flavor of anise seeds.
- Olive and Thyme Sourdough: Salty, briny olives complemented by earthy fresh or dried thyme.
These are just starting points; feel free to experiment with combinations you love! Consider using approximately 15-20% total inclusions relative to your flour weight for a balanced loaf.
Conclusion: Elevate Your Sourdough Baking with Creative Inclusions
Adding inclusions to your sourdough is a rewarding way to expand your baking repertoire and create truly unique and flavorful loaves. It moves beyond the basics, challenging you to understand and work with your dough on a deeper level. While it introduces potential complexities, armed with the right knowledge and sourdough inclusions recipe tips, you can confidently incorporate a wide variety of ingredients without sacrificing the structure or quality of your bread.
From sweet dried fruits and nuts to savory cheese and herbs, the world of sourdough additions is vast and exciting. Each inclusion presents its own considerations regarding preparation, timing, and handling. By focusing on building a strong dough structure, gently incorporating your chosen additions, and carefully monitoring fermentation and baking, you can achieve delicious results that showcase both the tangy depth of sourdough and the wonderful flavors of your inclusions.
Mastering the Art of Sourdough Add-ins for Unique Breads
Becoming proficient in using sourdough inclusions is an ongoing journey of experimentation and learning. Each type of inclusion and combination will behave slightly differently, and your specific starter and baking environment will also play a role. Don't be discouraged by initial challenges; view them as opportunities to refine your technique.
By consistently applying the sourdough inclusions recipe tips outlined here – ensuring a strong starter, developing robust gluten, preparing inclusions properly, incorporating them gently, and managing fermentation and baking with care – you will gain the confidence to create an endless array of unique and delicious sourdough breads. So, grab your favorite ingredients and start experimenting; your next favorite loaf is waiting to be baked!
Frequently Asked Questions
What are some common sourdough inclusions and how do they affect the dough?
Common inclusions include fruits, nuts, seeds, and spices. They add flavor and texture but can weaken the dough structure if not properly managed.
How do I prevent sourdough inclusions from sinking to the bottom of my loaf?
Even distribution is key. Try laminating the dough after the bulk ferment to evenly spread the inclusions. Additionally, ensure the inclusions are dry and not too heavy.
What's the best time to add inclusions to my sourdough?
Adding inclusions during the lamination stage after the bulk ferment is generally recommended. This allows for even distribution without overworking the dough and impacting gluten development.
How much sourdough inclusion is too much?
It depends on the inclusion, but generally, aim for about 10-20% of the flour weight. Too much can significantly weaken the dough's structure and prevent a good rise.
What are some tips for working with wet inclusions, like fresh berries, in sourdough?
Pat wet inclusions dry before adding them. Consider coating them lightly in flour. Baking at a slightly lower temperature can also help prevent burning before the inside is cooked.
Final Reflection: The Art and Science of Sourdough Inclusions
The perfect sourdough loaf isn't just about a tangy crumb; it's about a harmonious balance of flavor, texture, and the delightful surprise of perfectly incorporated inclusions. This delicate dance between the sourdough's inherent structure and the added ingredients remains a challenge for many bakers, but mastering this art unlocks a world of culinary creativity. The quest for the ideal sourdough inclusion isn't just about following a recipe; it's about understanding the fundamental principles that govern the process.
The journey of exploring sourdough inclusions has been a deeply rewarding one, revealing not only the technical aspects of baking but also the profound connection between ingredients, process, and the final product. The subtle shifts in texture, the unexpected bursts of flavor – these are the moments that make sourdough baking so captivating. As I've experimented, I've been reminded of the words of renowned baker, Chad Robertson: Baking is a conversation between the baker and the ingredients.
This conversation, filled with careful consideration and mindful adjustments, is what truly elevates a simple loaf into a masterpiece.
Now, it's your turn to embark on this journey. Don't be afraid to experiment, to push boundaries, and to discover your own unique signature sourdough creations. Remember the lessons learned here – about hydration, timing, and the importance of respecting the delicate sourdough ecosystem. Each loaf you bake is an opportunity for growth, a testament to your dedication, and a delicious reward for your efforts. So, gather your ingredients, preheat your oven, and let the creative baking begin!
Unleash Your Inner Baker: Craft the Perfect Sourdough Loaf!
Thanks for taking the time to explore the world of sourdough inclusions with us! We hope you now feel empowered to experiment and create truly unique loaves. Ready to put your new knowledge into practice?
- Bake your dream sourdough: Start with your favorite sourdough recipe and incorporate your newfound inclusion knowledge. Don't be afraid to experiment with different textures and flavors!
- Share your creation: Show us your stunning sourdough masterpieces on social media using #BakeWithEaseInclusions! Let's inspire each other.
- Challenge yourself: Try a completely new inclusion combination – think beyond the usual nuts and seeds! What unexpected flavors can you discover?
What surprising ingredient will you incorporate into your next sourdough bake? Let us know in the comments below!