
The Art of Lamination: Creating Layers in Sourdough Dough

Welcome to BakeWithEase, your haven for baking brilliance!
Ever wondered how to achieve those perfectly flaky, airy layers in your sourdough pastries? Prepare to unlock the secrets! This article delves into the fascinating world of sourdough lamination techniques, demystifying the process and empowering you to create stunningly layered breads and pastries. Discover the step-by-step methods, essential tips, and common pitfalls to avoid. Are you ready to elevate your sourdough game? Let's get laminating!
- The Art of Lamination: Enhancing Sourdough Structure and Flavor
- Understanding Sourdough Lamination
- Essential Tools and Ingredients
- A Step-by-Step Guide to Lamination
- Troubleshooting
- Baking Laminated Sourdough
- Sourdough Lamination Recipes
- Advanced Techniques
- Future Trends
- Frequently Asked Questions
- Final Reflection: The Ever-Evolving Layers of Sourdough
- Unleash Your Inner Baker: Mastering Sourdough Lamination
The Art of Lamination: Enhancing Sourdough Structure and Flavor
Understanding Sourdough Lamination
What is Sourdough Lamination and Why is it Important?
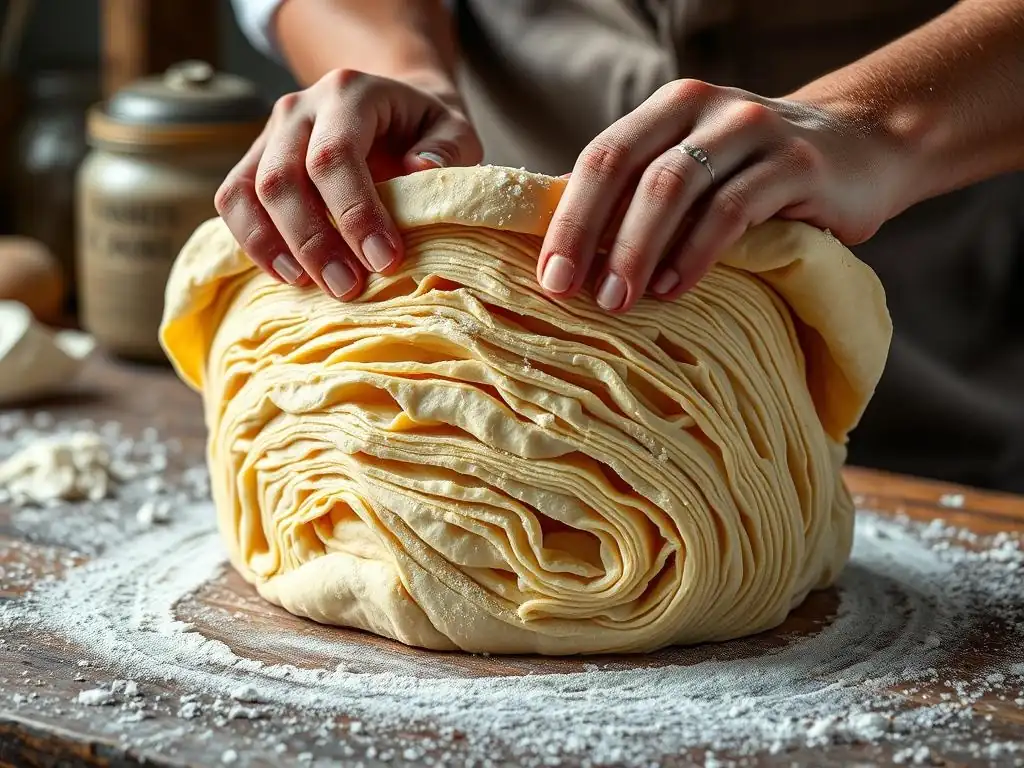
Sourdough lamination is a technique borrowed from pastry making, adapted for bread dough. It involves gently stretching the dough into a thin, often rectangular sheet, and then folding it onto itself multiple times. This process differs significantly from standard stretch and folds or coil folds, as it aims to create very distinct, thin layers within the dough before the final shaping.
Think of it like folding a piece of paper repeatedly – each fold multiplies the layers. When applied to sourdough, this intricate folding builds significant internal structure and uniformity throughout the dough mass, preparing it for an impressive oven spring and a desirable crumb.
The importance of mastering sourdough lamination techniques explained lies in their ability to transform the final loaf. While traditional folding methods are crucial for initial gluten development and strength, lamination takes it a step further by organizing the gluten network into defined sheets. This layered structure helps trap fermentation gases more effectively during baking. Without proper lamination, a high-hydration sourdough might spread out excessively or have an uneven crumb. By incorporating lamination, bakers can achieve a loftier loaf with a more consistent and open interior texture, which is often the hallmark of artisan sourdough.
The Benefits of Laminated Sourdough: Improved Open Crumb and Strength
One of the most sought-after benefits of incorporating lamination into your sourdough routine is the potential for a dramatically improved open crumb structure. As the dough is stretched and folded, air pockets are gently incorporated and layered between the sheets of dough. During fermentation and baking, these layered air pockets expand, leading to larger, more uniform alveoli (the holes in the crumb) throughout the loaf. This results in that beautiful, airy interior that is so characteristic of well-made artisan bread. It's not just about big holes; it's about a balanced distribution of openness.
Beyond the aesthetic appeal of an open crumb, lamination also significantly contributes to the overall strength and stability of the sourdough dough. By aligning the gluten strands into defined layers, the dough gains resilience and elasticity. This increased strength is particularly beneficial for high-hydration doughs, which can otherwise be challenging to handle and shape. A well-laminated dough holds its shape better during bulk fermentation and proofing, resulting in a loaf with excellent height and structure post-baking. The layered structure also helps prevent the dough from collapsing in the oven before the crust sets, ensuring maximum oven spring.
Lamination vs. Traditional Sourdough Folding
Understanding the distinction between lamination and traditional sourdough folding is key to applying these sourdough lamination techniques explained effectively. Traditional methods like stretch and folds or coil folds are typically performed earlier in the bulk fermentation process. Stretch and folds involve wetting your hands and gently stretching a portion of the dough up and over itself within the bowl, usually done four times around the dough's perimeter. Coil folds, often used for higher hydration doughs, involve lifting the dough from the center and letting the edges fold underneath themselves. These methods primarily build initial gluten strength and tension.
Lamination, on the other hand, is a more advanced technique usually performed after the initial phase of bulk fermentation, when the dough has developed some strength but is still extensible. It involves removing the dough from the bowl and working it on a flat surface. The goal isn't just to build general strength but to create specific layers by stretching the dough very thinly and folding it like a business letter or envelope.
This process is more about organizing the gluten network into distinct planes rather than simply strengthening it overall. While both folding and lamination contribute to dough structure, lamination provides a unique internal architecture that is particularly effective for achieving a very open and uniform crumb.
Essential Tools and Ingredients
Must-Have Tools: Bench Scraper, Dough Knife, and Work Surface
To execute sourdough lamination techniques explained properly, having the right tools makes a significant difference. A sturdy bench scraper is indispensable. It's used for gently lifting and manipulating the dough as you stretch and fold, helping to prevent sticking to your work surface and allowing for precise movements. Look for one with a comfortable grip and a relatively sharp edge for clean cuts if needed.
A dough knife or bench knife is also incredibly useful, especially if you plan to divide the dough or scrape up any stubborn bits. A smooth, non-porous work surface is absolutely crucial. Options include a clean countertop (granite, marble, or laminate work well), a large cutting board, or even a designated pastry mat. The surface needs to be large enough to stretch your dough thinly, often requiring space measuring at least 2x3 feet or more for a standard loaf-sized batch.
Flour Selection: Protein Content and Gluten Development
The type of flour you choose significantly impacts the outcome of your laminated sourdough. For successful lamination, you need flour with sufficient protein content to develop a strong, elastic gluten network. All-purpose flour typically has a protein content ranging from 10-12%, which can work, but bread flour, with a protein content usually between 12-14%, is often preferred. The higher protein in bread flour allows for better gluten development, enabling the dough to be stretched very thin without tearing excessively, which is essential for creating those distinct layers.
When selecting flour, consider its source and how it's milled, as these factors can influence its absorption rate and gluten potential. Some bakers even experiment with adding a small percentage of high-gluten flour (often 14% protein or higher) to boost strength, especially when working with very high hydration doughs or incorporating heavy add-ins. However, finding the right balance is key; too much high-gluten flour can make the dough tough. A good starting point for practicing sourdough lamination techniques explained is a reliable unbleached bread flour.
Water Temperature: Impact on Dough Elasticity
Water temperature plays a subtle but important role in sourdough lamination. While the primary goal of using warm water (typically between 75°F and 85°F or 24°C and 30°C) in sourdough is to regulate the dough's temperature for optimal starter activity and fermentation speed, it also influences dough elasticity. Warmer water helps the flour hydrate more quickly and promotes initial gluten relaxation, making the dough more pliable and easier to work with during the initial mixing and autolyse phases.
However, for the lamination step itself, which often occurs after several hours of bulk fermentation, the dough temperature is more critical than the initial water temperature. Aim for a dough temperature in the ideal fermentation range, roughly 75°F to 80°F (24°C to 27°C). Dough that is too cold can be stiff and resistant to stretching, leading to tearing. Dough that is too warm might be overly relaxed and sticky, making it difficult to handle and laminate cleanly. Maintaining a consistent dough temperature throughout bulk fermentation is key to successful sourdough lamination techniques explained.
A Step-by-Step Guide to Lamination

Step 1: Preparing the Dough
Autolysing: Enhancing Water Absorption
The autolyse step is a simple yet powerful technique that significantly prepares your dough for subsequent handling, including lamination. It involves mixing just the flour and water from your recipe and letting it rest for a period, typically 30 minutes to an hour. During this rest, the flour hydrates fully, and enzymatic activity begins to break down proteins, leading to the initial development of gluten without any mechanical work. This passive development makes the dough more extensible and less sticky.
For sourdough, the autolyse is often done before adding the starter and salt. By giving the flour time to absorb the water, the dough becomes smoother, more pliable, and easier to stretch later during lamination. This initial hydration is crucial for building a strong yet extensible dough structure, a fundamental requirement for successful sourdough lamination techniques explained. It sets the stage for the gluten network to be efficiently organized into layers.
Initial Mix: Achieving Moderate Gluten Development
After the autolyse period, the sourdough starter and salt are added, and the dough is mixed. The goal at this stage is to fully incorporate all ingredients and begin building moderate gluten development. This can be done by hand, using a stand mixer, or a combination of methods. Mixing should continue until the dough comes together, feels somewhat cohesive, and passes a basic windowpane test (a small piece of dough can be stretched thin enough to see light through without tearing).
Over-mixing at this stage is not necessary, as further strength will be built during bulk fermentation through folds and lamination. The aim is to create a dough that is hydrated and has enough initial structure to hold its shape somewhat but is still extensible enough to be stretched thinly during the lamination process. A dough that is too tight from excessive initial mixing will be difficult to laminate effectively.
Step 2: The First Lamination
Stretching Dough Thinly on a Clean Surface
Once the dough has completed its initial mixing and perhaps one or two sets of early folds (like coil folds or stretch and folds) and has rested for maybe 2-3 hours into bulk fermentation, it's ready for its first lamination. This is typically the most significant lamination step. Gently turn the dough out onto a lightly floured or wet surface (depending on your preference and dough hydration). The key is to work carefully to avoid degassing the dough too much.
Begin gently stretching the dough outwards from the center using your hands, working your way around the perimeter. Think of stretching pizza dough, but horizontally. The goal is to stretch the dough into a large, thin rectangle, ideally thin enough to be semi-transparent in some areas without tearing. For a standard 500g flour loaf, you might aim for a rectangle roughly 2x3 feet in size. This stretching action aligns the gluten network and prepares it for layering.
Incorporating Add-ins: Seeds, Herbs, or Cheese
The lamination stage is an excellent opportunity to evenly distribute any add-ins throughout your sourdough loaf. Once the dough is stretched into its thin rectangle, you can sprinkle seeds (like sesame, poppy, or flax), dried herbs (rosemary, thyme), spices, or even grated cheese evenly over the entire surface of the dough.
By spreading the add-ins across the large, thin sheet before folding, you ensure they are dispersed throughout the final loaf rather than clumped in one area. This method is far more effective for even distribution than simply kneading them into the dough at the beginning. Gently press the add-ins into the dough surface before proceeding with the folds to help them adhere.
Performing the First Fold: Creating Defined Layers
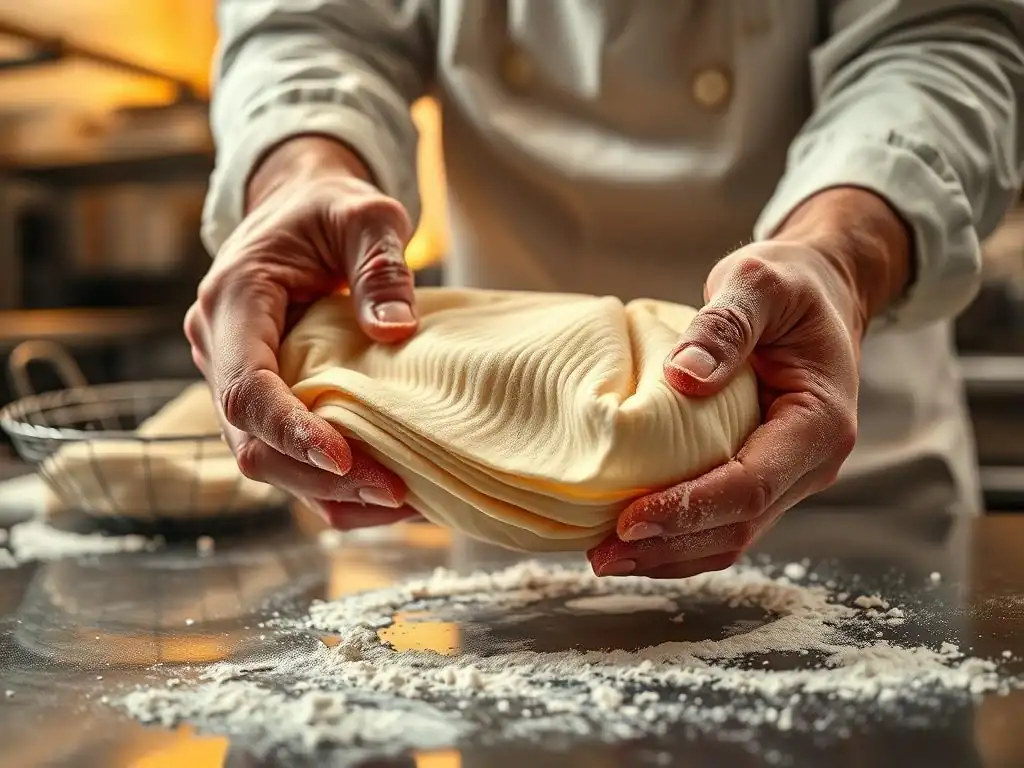
After stretching the dough and adding any inclusions, it's time to perform the folds that create the layers. Imagine your large, thin rectangle of dough. There are several folding patterns, but a common one is the "business letter" fold. First, fold one-third of the dough from one short end towards the center. Then, fold the opposite short end over the first fold. This creates three layers.
Next, you can fold the resulting rectangle in half lengthwise, or fold the long ends towards the center like another business letter fold. The exact number of folds depends on the dough's extensibility and your preference, but the goal is to create multiple distinct layers. For a standard lamination, you might aim for 6-8 layers after the first significant fold. Handle the dough gently throughout this process to maintain the structure you're building.
Step 3: Subsequent Laminations
Timing and Frequency: Optimizing Dough Strength
Subsequent laminations, if performed, are usually done less aggressively than the first. The timing depends on your recipe and the dough's development. Some bakers perform a second, less intense lamination about an hour or two after the first. Others might follow the initial lamination with a series of gentle coil folds. The frequency is key to optimizing dough strength without making it too tight.
Typically, one significant lamination early-to-mid bulk fermentation is sufficient to establish the layered structure. If you choose to do more, space them out by at least 60-90 minutes to allow the dough to relax between handling. Over-laminating can make the dough too strong and difficult to shape, potentially leading to a dense crumb rather than an open one. Pay attention to the dough's feel – it should become progressively stronger and more elastic with each fold/lamination.
Gentle Handling: Minimizing Dough Stress
Throughout the lamination process, especially in subsequent steps, gentle handling is paramount. Unlike initial mixing which can be more vigorous, lamination relies on coaxing the dough into shape. Avoid tearing or forcing the dough. If it resists stretching, give it a few minutes to rest and relax before continuing.
When folding, do so carefully, sealing the edges if necessary to maintain tension. The aim is to align the gluten network and trap air, not to knead or degas the dough forcefully. Minimizing stress on the dough helps preserve the delicate structure you are building and ensures a more even rise and crumb in the final baked loaf.
Folding Techniques: Single, Double, or Coil Folds
While the initial major lamination involves stretching and folding into a rectangle (often a type of double or triple fold), subsequent folds can vary. After the first lamination, some bakers return the dough to the bowl and continue with gentle coil folds every hour or so. Coil folds are less disruptive to the layered structure created by lamination but continue to build strength and tension.
Alternatively, you could perform a second, less aggressive lamination, perhaps stretching the dough only halfway as thin as the first time, and doing a simple single or double fold. The choice of subsequent folding techniques depends on the dough's hydration, strength development, and the desired final crumb. Experimenting with different sourdough lamination techniques explained will help you discover what works best for your specific dough and baking goals.
Step 4: Bulk Fermentation
Monitoring Dough Rise and Activity
After completing the lamination and any subsequent folds, the dough returns to its container for the remainder of bulk fermentation. This is the period where the sourdough starter works its magic, producing carbon dioxide gas that causes the dough to rise and developing complex flavors. Monitoring the dough's rise is critical. It shouldn't just look bigger; its texture should change, becoming more airy and often showing small bubbles on the surface.
The duration of bulk fermentation is highly variable, depending on the ambient temperature, the strength of your starter, and the hydration of your dough. It could range from 4 to 12 hours or even longer in a cool environment. A common indicator of readiness is when the dough has increased in volume by about 50-75% from its original size after mixing. Pay attention to visual cues and the dough's feel – it should feel lively and aerated.
Determining Readiness for Shaping
Knowing when bulk fermentation is complete and the dough is ready for shaping is crucial, especially after applying sourdough lamination techniques explained. An under-fermented dough will be dense and lack structure, while an over-fermented dough can become sticky, lose tension, and collapse. Beyond the volume increase (50-75%), look for signs like a domed surface, visible air bubbles, and a jiggle when the container is gently shaken.
A simple test is the "poke test" (though less reliable than volume/feel). Gently poke the dough with a wet finger; if the indentation slowly springs back halfway, it's likely ready. If it springs back immediately, it needs more time. If it doesn't spring back at all and stays indented, it might be slightly over-fermented but potentially salvageable. Developing an intuition for your dough's readiness comes with practice.
Troubleshooting
Sticky Dough: Managing High Hydration
Working with high-hydration sourdough dough (typically 75% hydration or higher) can be challenging, often resulting in sticky dough during lamination. Managing this stickiness is key to successful sourdough lamination techniques explained. Ensure your work surface is either lightly floured or, preferably for very wet doughs, slightly damp with water. Avoid using too much dry flour, as this can create dry pockets in your dough.
Keep your hands wet or lightly oiled. Use a bench scraper frequently to help lift and manipulate the dough. If the dough is exceptionally sticky and difficult to stretch, consider reducing the hydration slightly in your next bake or incorporating a small percentage of whole wheat flour, which absorbs more water. Also, ensure the dough is properly developed during initial mixing and has had sufficient rest time (like autolyse) to fully hydrate the flour.
Tearing Dough: Prevention and Repair Strategies
Tearing during lamination is a common issue, often indicating that the dough is either not extensible enough or is being stretched too aggressively. Prevention starts with proper dough development: ensure sufficient gluten development during mixing and allow adequate autolyse time. Don't rush the bulk fermentation; the dough needs time to relax and become extensible.
During lamination, stretch the dough gently and evenly. If you encounter resistance, stop stretching in that area and work on another part, or let the dough rest for 5-10 minutes to relax before resuming. If a tear does occur, don't panic. Gently pinch the torn edges back together. While a large tear might compromise the perfect layered structure in that specific spot, the rest of the dough will still benefit from the lamination. Small tears are often unavoidable and don't significantly impact the final loaf.
Uneven Layers: Achieving Consistent Dough Thickness
Uneven layers in the final crumb can sometimes result from inconsistent dough thickness during the lamination stretch. The goal is to stretch the dough as evenly as possible across the entire rectangle. Focus on working from the center outwards, applying even pressure. Pay attention to the edges and corners, which can sometimes remain thicker than the center.
If you notice thick spots, gently stretch those areas a bit more. Practice improves your ability to feel the dough's thickness. While perfect uniformity is challenging, aiming for a relatively consistent thin sheet will lead to more even layering and a more uniform open crumb throughout the loaf.
Slow Rise: Addressing Fermentation Issues
A slow rise after lamination can be frustrating and indicates fermentation issues. Sourdough lamination techniques explained rely on active fermentation to create gas and expand the layers. Ensure your sourdough starter is active and healthy (doubling within 4-8 hours after feeding). The ambient temperature of your bulk fermentation environment is also crucial; cooler temperatures slow down fermentation significantly.
If your dough is rising too slowly, move it to a warmer spot. An ideal temperature range for bulk fermentation is typically 75°F to 80°F (24°C to 27°C). You can use a proofing box, an oven with the light on, or place the dough near a warm appliance. Ensure you are giving the dough enough time. Some doughs, especially those with a higher percentage of whole grains or in cooler conditions, simply require a longer bulk fermentation period.
Baking Laminated Sourdough
Oven Preheating: Achieving Optimal Oven Spring
Proper oven preheating is absolutely critical for achieving maximum oven spring in laminated sourdough. A hot oven provides the initial burst of heat needed for the dough to rapidly expand before the crust sets, allowing those carefully created layers to puff up. Preheat your oven, along with your baking vessel (like a Dutch oven or baking stone), to a high temperature, typically between 450°F and 500°F (230°C and 260°C), for at least 30-60 minutes.
Using a Dutch oven or baking stone helps transfer heat efficiently to the dough. The enclosed environment of a Dutch oven also traps steam released by the dough, keeping the crust soft initially and allowing for greater expansion. Without adequate preheating, the dough won't experience sufficient thermal shock, resulting in less oven spring and potentially a denser loaf despite successful sourdough lamination techniques explained.
Scoring: Controlling Expansion and Aesthetics
Scoring the surface of your laminated sourdough loaf just before it goes into the oven is essential. Scoring serves a functional purpose: it provides controlled points of expansion for the dough as it rises rapidly in the hot oven. Without scoring, the dough might burst unpredictably along weaker points, resulting in an uneven shape.
Scoring also allows for artistic expression. You can create simple slashes, geometric patterns, or intricate designs. For laminated dough aiming for maximum oven spring and ear development, a deep, single score along the side or across the top is common. The score should be made with a sharp blade (like a razor blade or lame) at a slight angle (about 30 degrees) to create a flap that lifts and forms an "ear" during baking. The depth and angle of the score influence how the dough expands.
Baking Time and Temperature: Developing a Golden Crust
Baking time and temperature need to be carefully managed to ensure the laminated sourdough develops a beautiful golden crust and is cooked through. A common approach is to start baking at a high temperature (e.g., 475°F or 245°C) for the first 15-20 minutes, often with steam (if not using a Dutch oven) or inside a covered Dutch oven. This initial high heat promotes oven spring and crust development while keeping the crust pliable.
After this initial phase, the temperature is typically reduced to around 425°F - 450°F (220°C - 230°C), and the loaf is uncovered (if using a Dutch oven) to allow the crust to brown and crisp up. Total baking time for a standard size loaf is usually between 30-45 minutes. The loaf is done when the crust is a deep golden brown and the internal temperature reaches around 205°F - 210°F (96°C - 99°C).
Cooling and Slicing: Maintaining Crumb Structure
Once baked, it's crucial to resist the urge to slice into your beautiful laminated sourdough immediately. The loaf needs to cool completely on a wire rack. This cooling process is vital for several reasons. Internally, residual heat continues to cook the crumb, and moisture migrates and redistributes throughout the loaf.
Slicing a hot loaf can result in a gummy, dense crumb because the starches haven't fully set. Allow the loaf to cool for at least 2-3 hours, or ideally longer, before slicing. While it's hard to wait, this patience ensures that the open, airy structure created by your sourdough lamination techniques explained is preserved, resulting in the best possible texture and flavor.
Sourdough Lamination Recipes
Basic Laminated Sourdough Boule
A basic laminated sourdough boule recipe typically involves a relatively straightforward sourdough formula (flour, water, salt, starter) followed by the lamination technique during bulk fermentation. A common hydration level for practicing this might be around 70-75%. After the initial mix and perhaps one or two sets of folds, the dough is laminated as described in the step-by-step guide.
The dough is then allowed to finish bulk fermentation, shaped into a boule, proofed (either at room temperature or cold in the refrigerator), and baked in a Dutch oven. The lamination helps ensure that even a simple boule recipe yields a loaf with a more uniform and potentially more open crumb than traditional folding alone might provide. It's an excellent starting point for mastering sourdough lamination techniques explained.
Laminated Sourdough Focaccia
Lamination can also be applied to other sourdough forms, such as focaccia. While focaccia is typically a flatbread, laminating the dough can introduce interesting layers and texture. For laminated focaccia, the dough (often at higher hydration, perhaps 80% or more) is laminated early in bulk fermentation.
After lamination, the dough is allowed to finish bulk fermentation, then gently transferred to an oiled baking pan, preserving the layered structure. It's dimpled generously before baking. The lamination process helps create internal air pockets and a lighter texture within the focaccia, complementing the crisp exterior and soft interior.
Flavor Variations: Olives, Rosemary, and Garlic
The lamination stage is perfect for incorporating a variety of flavorings directly into the dough layers. As mentioned in Step 2, sprinkling ingredients over the stretched dough before folding ensures even distribution. Popular additions include chopped olives, fresh or dried rosemary, roasted garlic cloves, sun-dried tomatoes, or even cheese.
For a savory twist, try finely chopped fresh rosemary and flaky sea salt sprinkled over the dough before folding. For a Mediterranean feel, add chopped Kalamata olives and sun-dried tomatoes. Roasted garlic mashed into a paste can also be spread thinly over the dough before folding for a pervasive garlic flavor. These additions not only enhance taste but also add visual appeal to the laminated crumb.
Advanced Techniques
High Hydration Lamination
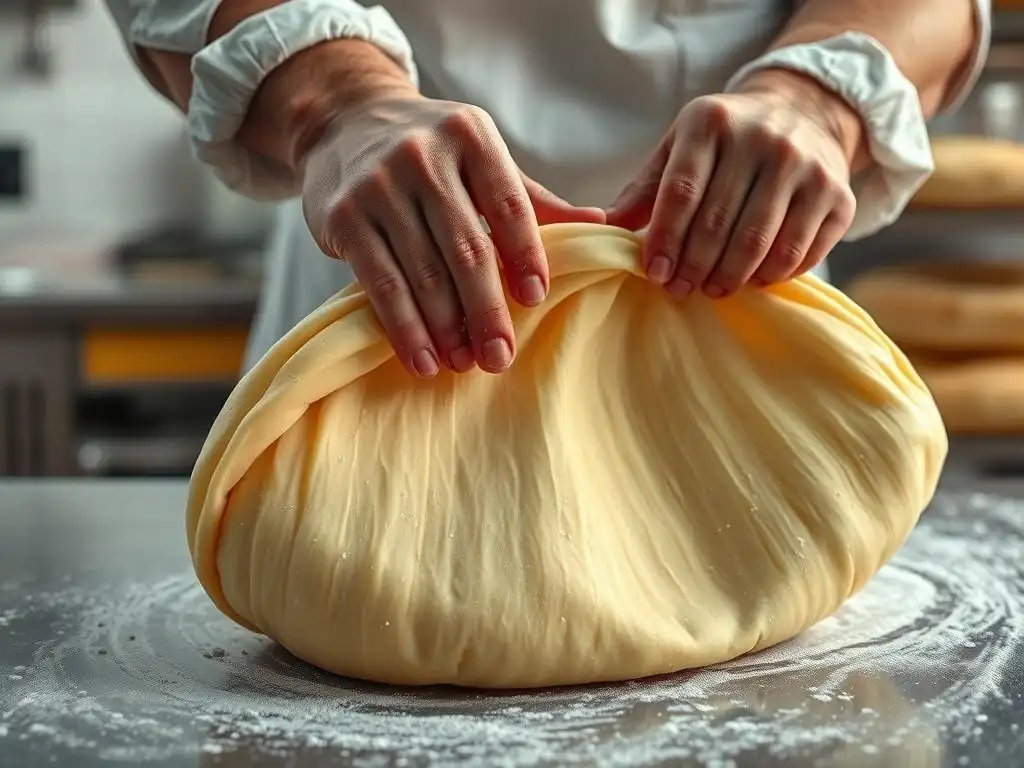
Once you've mastered sourdough lamination techniques explained with standard hydration doughs, you can explore high hydration lamination (80% hydration and above). This requires careful handling, as the dough will be stickier and more extensible. Using a wet surface instead of a floured one is often preferred to prevent incorporating too much dry flour.
High hydration doughs tend to relax more quickly, so the lamination might need to be done swiftly and confidently. The benefit is the potential for an even more open and airy crumb structure. Success with high hydration lamination comes with practice and learning to work with the dough's looseness rather than fighting it.
Lamination with Whole Wheat Flour
Laminating dough with a significant percentage of whole wheat flour (e.g., 50% or more) presents its own challenges. Whole wheat flour absorbs more water but the bran particles can interfere with gluten development, making the dough less extensible and more prone to tearing.
When laminating whole wheat sourdough, be extra gentle during the stretching phase. The dough might not stretch as thin as white flour dough. Ensure adequate autolyse time to help soften the bran. Incorporating a small amount of vital wheat gluten can also help improve the dough's strength and extensibility for lamination. While the crumb might not be as dramatically open as a white loaf, lamination can still significantly improve the structure of whole wheat sourdough.
Incorporating Pre-Ferments
Beyond the standard sourdough starter, incorporating other pre-ferments like a stiff levain (levain dur) or a poolish alongside the main starter can influence dough characteristics relevant to lamination. A stiff levain, with lower hydration, can contribute strength and structure, potentially making the dough easier to laminate.
A poolish, a liquid pre-ferment, adds extensibility and flavor. Experimenting with different pre-ferments in your formula can alter the dough's handling properties and the final crumb structure achieved with sourdough lamination techniques explained. For example, a dough with a stiff levain might be more robust for aggressive stretching, while a dough with a poolish might require gentler handling.
Future Trends
Novel Ingredients and Flavors
As bakers continue to experiment, future trends in sourdough lamination are likely to include the incorporation of novel ingredients and flavor combinations. This could range from using ancient grains like Einkorn or Spelt in laminated loaves to adding unconventional inclusions like fruit pieces, chocolate, or even savory elements like roasted vegetables or cured meats within the layers.
Exploring how different flours with varying gluten structures respond to lamination and how unique inclusions affect the dough's integrity and the final crumb will be an area of innovation. Imagine a laminated sourdough with layers of pesto or a sweet version with cinnamon and sugar folded in. The possibilities for applying sourdough lamination techniques explained to creative new recipes are vast.
Adapting Lamination for Different Sourdough Styles
Lamination, traditionally associated with boules and batards, is increasingly being adapted for other sourdough styles. We already see it used in focaccia and ciabatta-like doughs. Future trends might involve refining lamination techniques for very high-hydration, no-knead sourdoughs, or adapting it for enriched doughs like brioche or challah made with sourdough.
This could involve developing specialized tools or slightly modified folding patterns to suit the unique properties of different dough types. As more bakers explore the nuances of sourdough lamination techniques explained, we may see it become a standard step in recipes for a wider variety of bread types, pushing the boundaries of what's possible with sourdough structure and texture.
Frequently Asked Questions
What exactly is lamination in sourdough baking?
Lamination is a dough handling technique where you stretch the sourdough dough very thin on a lightly oiled surface. This creates layers that contribute to a more open and airy crumb.
Why is lamination important for sourdough bread?
Lamination helps to strengthen the gluten structure of the dough. It also evenly distributes inclusions like seeds or herbs, leading to a more consistent and visually appealing final product.
When is the best time to perform lamination on sourdough dough?
Lamination is typically performed during the bulk fermentation stage. It's often done after the initial autolyse and before the dough has risen significantly.
How thin should I stretch the sourdough dough during lamination?
You should aim to stretch the dough until it is almost translucent. Avoid tearing the dough, but a few small tears are acceptable. Practice makes perfect!
What if my sourdough dough is too sticky to laminate?
If the dough is too sticky, use a light coating of oil on your work surface and hands. Also, ensure your flour has sufficient protein content for good gluten development.
Final Reflection: The Ever-Evolving Layers of Sourdough
The art of sourdough lamination, once a niche technique, is rapidly becoming a cornerstone of advanced bread baking. Its ability to create incredibly light and airy loaves, with a delicate crumb structure and intensely flavorful crust, is captivating home bakers and professionals alike. This isn't just a trend; it's a testament to the enduring power of experimentation and the pursuit of perfection within the seemingly simple act of bread making.
The impact of lamination techniques extends beyond the purely culinary. It represents a fascinating intersection of science and artistry, where precise measurements and careful folding create a visual and textural masterpiece. The process itself is meditative, demanding patience and attention to detail. This mindful approach to baking resonates deeply with the current cultural emphasis on slow living and the appreciation of handcrafted goods. The best things in life are worth waiting for,
and this couldn't be truer for the richly rewarding experience of creating a laminated sourdough loaf.
Now, it's your turn. Consider the layers in your own life – the experiences, relationships, and challenges that have shaped you. Just as careful lamination creates a superior loaf, mindful attention to the elements of your life can yield equally rewarding results. Experiment, be patient, and don't be afraid to fold in new experiences. The journey of self-discovery, much like the art of sourdough lamination, is a process of continuous growth and refinement, leading to a richer, more fulfilling life.
Unleash Your Inner Baker: Mastering Sourdough Lamination
Thanks for diving into the world of sourdough lamination! We hope you gained valuable insights into creating those beautiful, layered loaves. Ready to put your new knowledge into practice?
- Bake your dream loaf: Try the lamination techniques discussed in the article with your favorite sourdough starter. Experiment with different folds and resting times to discover what works best for you.
- Share your creations: Show off your perfectly layered sourdough on social media using #BakeWithEaseLamination – we'd love to see your results!
- Join our community: Connect with other passionate bakers in our online forum (link to forum) and share tips, tricks, and your baking adventures.
What unique flavor combination will you try in your next laminated sourdough masterpiece?