
From Starter to Slice: An Advanced Sourdough Baking Schedule

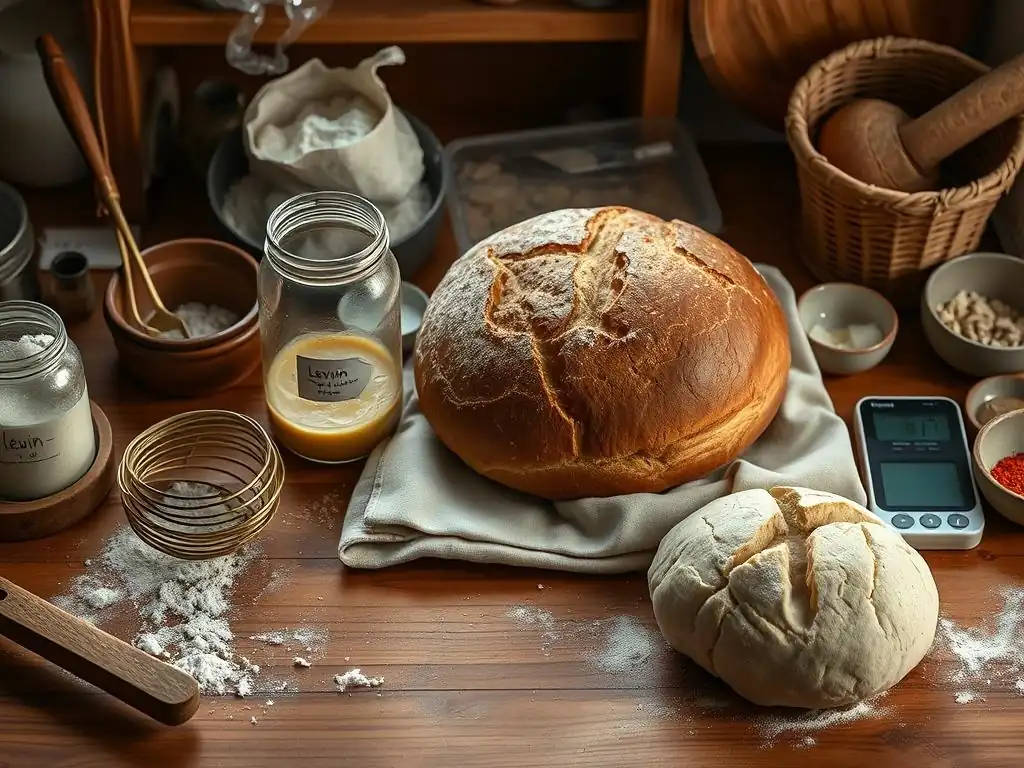
Welcome to BakeWithEase, your companion in the delightful world of baking! Ready to elevate your sourdough game? Dive into 'From Starter to Slice: An Advanced Sourdough Baking Schedule' and unlock the secrets to crafting exceptional loaves. This isn't your average recipe; we're delving deep into timing and technique. Discover how to master your schedule and consistently achieve sourdough perfection. Curious about the optimal fermentation times? Let's get started...
- Mastering the Art of Sourdough: An Advanced Baking Timeline
- Understanding the Advanced Sourdough Baking Process
- Detailed Sourdough Baking Schedule: Step-by-Step
- Troubleshooting Your Advanced Sourdough Schedule
- Tips for Perfecting Your Advanced Sourdough Baking
- Advanced Sourdough Baking: Beyond the Basics
- Achieving Sourdough Success: A Summary of the Advanced Schedule
-
Frequently Asked Questions
- What is an advanced sourdough baking schedule, and who is it for?
- How does an advanced schedule differ from a beginner's guide to sourdough?
- Why is a schedule so important for advanced sourdough baking?
- What are some key elements included in an advanced sourdough baking schedule?
- Can I adapt an advanced schedule to fit my own schedule and preferences?
- Final Reflection: The Ever-Evolving Art of Sourdough
- Unleash Your Inner Sourdough Master!
Mastering the Art of Sourdough: An Advanced Baking Timeline
This guide provides an in-depth sourdough baking schedule for experienced bakers looking to elevate their skills and consistently bake exceptional loaves. Moving beyond the basics requires a deeper understanding of time, temperature, and dough behavior. This advanced sourdough baking schedule is designed to help you optimize each stage, from the initial levain build to the final bake, ensuring maximum flavor development and superior crumb structure. We'll walk through a multi-day process that allows for extended fermentation and cold proofing, hallmarks of truly artisan sourdough.
Understanding the Advanced Sourdough Baking Process
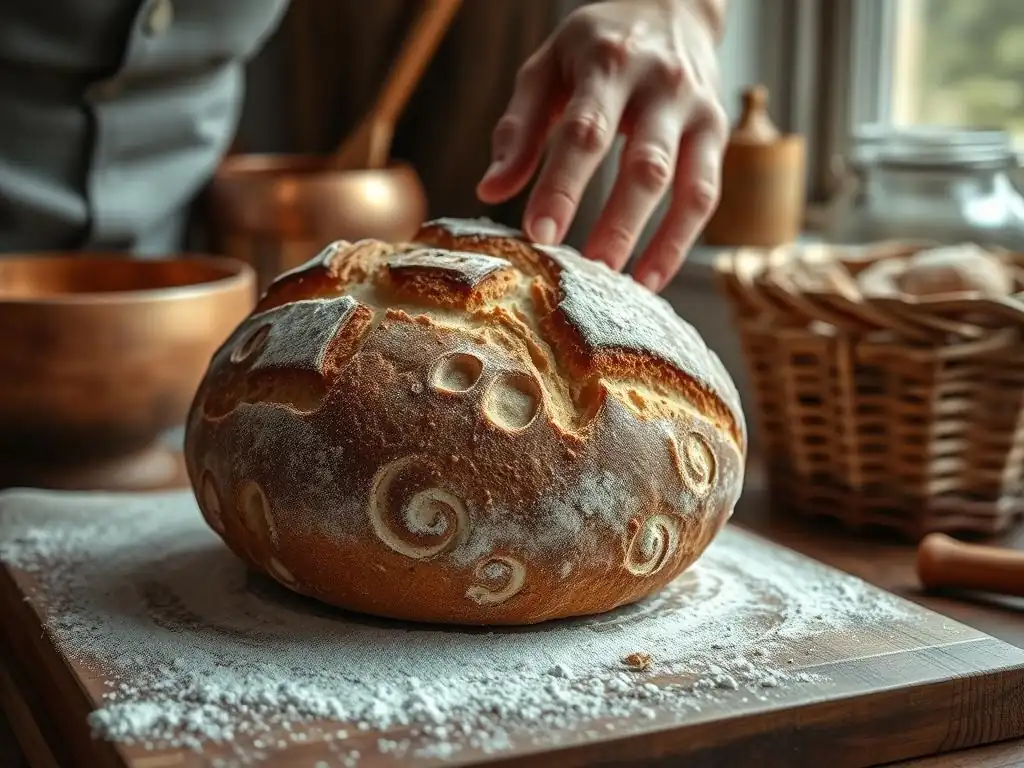
Achieving mastery in sourdough baking hinges on control and observation. Unlike conventional baking, where commercial yeast provides predictable leavening, sourdough relies on a complex ecosystem of wild yeast and bacteria. An advanced sourdough baking schedule leverages this ecosystem through precise timing and temperature management.
Key aspects include developing a strong, active starter, understanding the nuances of bulk fermentation and proofing, and mastering baking techniques for optimal oven spring and crust development. This process isn't just about following steps; it's about learning to read your dough and adapt based on environmental factors like ambient temperature and humidity, which are crucial for executing an effective sourdough baking advanced schedule.
Key Elements for Successful Advanced Sourdough Baking
Successful advanced sourdough baking depends on several interconnected factors working in harmony. Firstly, the health and activity of your sourdough starter are paramount; a vigorous starter provides the necessary leavening power and contributes significantly to the loaf's flavor profile. Secondly, precise hydration levels and flour choices play a critical role in dough handling and final texture.
High hydration doughs, for instance, often yield a more open crumb but require more skillful handling. Thirdly, temperature control throughout the process is non-negotiable. Small variations in ambient temperature can dramatically alter fermentation rates, meaning a baker must be attentive to their environment and adjust the advanced sourdough schedule accordingly.
Furthermore, understanding dough development through techniques like autolyse and stretch and folds is vital for building a strong gluten network capable of trapping gases and creating a beautiful rise. Finally, effective shaping and controlled proofing (especially cold proofing) are essential for developing tension for oven spring and deepening the complex flavors unique to sourdough. Mastering these elements allows for consistent results and the ability to troubleshoot when things don't go exactly as planned, making your sourdough baking advanced schedule a flexible blueprint rather than a rigid rulebook.
The Importance of Timing in Advanced Sourdough
Timing is arguably the most critical factor in an advanced sourdough baking schedule. Sourdough fermentation is a biological process driven by living organisms, and its pace is dictated by time and temperature. Rushing any stage, particularly bulk fermentation or cold proofing, can lead to underdeveloped flavor, poor structure, or a dense crumb. Conversely, extending certain phases, like a long cold proof, allows enzymes to break down starches into sugars, resulting in a sweeter, more complex flavor and a better crust color.
An advanced baker learns to use time strategically. For example, adjusting the duration of bulk fermentation based on dough activity and temperature is key to hitting the 'sweet spot' before the dough becomes over-fermented. Similarly, a cold proof, typically lasting 12-48 hours in a refrigerator maintained at around 38-40°F (3-4°C), not only slows fermentation but also allows organic acids to develop, contributing that characteristic sourdough tang. Precise timing, guided by observation rather than just the clock, is what elevates a good sourdough loaf to a truly exceptional one within an advanced sourdough baking schedule.
Detailed Sourdough Baking Schedule: Step-by-Step
This detailed schedule outlines a typical multi-day advanced sourdough process.
Day 1: Levain Build for Peak Flavor
The journey to an exceptional loaf begins with a vibrant, active levain. The levain, essentially a fed portion of your starter, acts as the primary leavening agent and sets the stage for flavor development.
Building the levain the day before mixing the main dough allows it ample time to reach its peak activity, typically doubling or tripling in volume and showing lots of bubbly activity. Using a specific ratio of starter, water, and flour for the levain build ensures you have the right amount of leavening power for your dough size, a fundamental step in any effective sourdough baking advanced schedule.
The temperature at which the levain is built also impacts its activity. A warmer environment (around 75-80°F or 24-27°C) will accelerate fermentation, potentially leading to a peak in 4-6 hours, while a cooler temperature will slow it down, taking 8-12 hours or even longer. Many advanced bakers prefer a slightly longer, cooler levain build for more complex flavor development. Observing the levain's behavior – watching for the tell-tale signs of peak ripeness like a domed top just starting to recede – is crucial before incorporating it into the dough.
Step 1: Refreshing Your Sourdough Starter for Optimal Activity
Before building your levain, ensure your main sourdough starter is healthy and active. This usually involves feeding your starter 4-12 hours prior to building the levain, allowing it to become vigorous and bubbly. A well-maintained starter, fed regularly with a consistent ratio of flour and water, provides the strong microbial population needed for a successful bake. Aim for a starter that has recently doubled or tripled in size and passes the float test (a small dollop floats in water).
For this advanced sourdough baking schedule, consistency is key. Use filtered water and good quality flour for feeding your starter. Keep it in a consistent environment, ideally around 70-75°F (21-24°C) if not storing it in the fridge. A starter that hasn't been fed in a while or is sluggish will result in a weak levain, leading to a dense loaf with poor oven spring. Prioritizing a healthy starter is the absolute foundation for any advanced sourdough technique.
Step 2: Creating the Levain – The Flavor Foundation
To create the levain, take a small portion of your active starter and mix it with fresh flour and water according to your recipe's specifications. A common ratio is 1:2:2 (starter:water:flour) by weight, meaning 20g starter, 40g water, and 40g flour, yielding 100g of levain. This ratio can be adjusted based on desired fermentation speed and flavor profile; a higher starter ratio will ripen faster, while a lower one develops flavor more slowly.
Mix the ingredients thoroughly in a clean jar, ensuring no dry bits of flour remain. Mark the level of the mixture on the jar so you can easily track its rise. Place the jar in a warm spot (75-80°F / 24-27°C is typical for an overnight build) and let it ferment until it has roughly tripled in volume and is full of bubbles. This typically takes 8-12 hours overnight, but times will vary based on temperature and starter vigor. The levain is ready when it appears very active and smells pleasantly acidic, not overly vinegary.
Day 2: Dough Mixing and Bulk Fermentation
Day 2 is where the main dough comes together and undergoes the crucial process of bulk fermentation. This stage is where significant flavor development occurs and the gluten network is built. The dough will increase in volume, become airy, and gain strength. Monitoring the dough's progress, rather than strictly adhering to a clock time, is essential during bulk fermentation as environmental conditions heavily influence its speed. This stage is a cornerstone of the sourdough baking advanced schedule, requiring keen observation and feel.
The duration of bulk fermentation can range significantly, often from 4 to 8 hours at room temperature, depending on temperature and dough hydration. Some advanced schedules incorporate a portion of the bulk fermentation at room temperature followed by a period in a cooler environment to slow things down and build complexity. The goal is to stop bulk fermentation when the dough has increased in volume by a specific percentage (often 50-80%) and shows signs of significant gas production and strength.
Step 3: Autolyse – Hydrating the Flour for a Better Dough
Autolyse is a simple yet powerful technique involving mixing only the flour and water from the recipe and letting it rest before adding the levain and salt. This resting period, typically 20 minutes to an hour (or even longer for whole grains), allows the flour to fully hydrate and enzymes within the flour to begin breaking down proteins. This process makes the dough easier to mix, improves gluten development with less effort, and results in a smoother, more extensible dough.
To perform an autolyse, combine the total amount of flour and water specified in your recipe in a large mixing bowl. Mix just until no dry flour remains – it will look shaggy and rough. Cover the bowl and let it rest at room temperature. This step is particularly beneficial when working with higher hydration doughs or a significant percentage of whole wheat flour, as it gives the bran time to soften, contributing to a better texture in the final loaf baked within your advanced sourdough schedule.
Step 4: Mixing the Dough: Incorporating the Levain and Salt
After the autolyse period, it's time to incorporate the ripe levain and salt. Add the levain to the autolysed dough and mix until it is fully integrated. This can be done by hand using a 'pincer' method or a dough whisk, or using a stand mixer on a low speed. Once the levain is mixed in, add the salt. Salt is often added after the levain because it can tighten the gluten network too early if added during the autolyse, potentially counteracting its benefits.
Continue mixing for a few minutes until the salt is evenly distributed and the dough starts to show some initial signs of strength. The dough will likely still be quite sticky, especially at higher hydration levels. This mixing phase isn't about developing full gluten strength yet; that will happen during the subsequent bulk fermentation and stretch and folds. The goal here is simply to create a homogenous mixture ready for the main fermentation phase of your sourdough baking advanced schedule.
Step 5: Bulk Fermentation: Developing Strength and Flavor
Bulk fermentation, also known as the first rise, is the longest and most critical phase of sourdough development. During this time, the yeast produces carbon dioxide gas, causing the dough to rise, while the bacteria produce organic acids that contribute to flavor. The dough also develops strength through enzymatic activity and manual manipulation (stretch and folds). The duration and temperature of bulk fermentation are key variables an advanced baker controls.
A typical bulk fermentation might occur at room temperature (around 72-78°F / 22-26°C) for 4-6 hours, or it could be shorter in warmer conditions or significantly longer in cooler conditions. The dough should increase in volume by 50-80%, feel airy and soft, and show visible bubbles on the surface. Learning to judge the endpoint of bulk fermentation based on these visual and tactile cues is paramount – under-fermented dough will be dense, while over-fermented dough will be difficult to shape and may collapse.
Performing Stretch and Folds for Dough Strength
Stretch and folds are a technique used during bulk fermentation to build structure and strength in the dough without vigorous kneading. Typically performed every 30-60 minutes for the first 2-3 hours of bulk fermentation, this involves gently stretching a portion of the dough up and folding it over the rest. Rotate the bowl and repeat this process 3-4 times per set, effectively folding the dough onto itself from different sides.
This action aligns the gluten strands, creating a stronger network capable of holding gas and supporting the loaf's structure. It also helps to equalize the temperature throughout the dough mass. The number of stretch and fold sets needed depends on the dough's hydration and the flour used; a higher hydration dough might benefit from more sets than a lower hydration one. Perform these gently to avoid tearing the gluten network you are trying to build within this advanced sourdough schedule.
Monitoring Dough Temperature During Bulk Fermentation
Controlling and monitoring dough temperature is crucial during bulk fermentation. Yeast and bacterial activity are highly sensitive to temperature; even a few degrees difference can significantly alter fermentation speed. Aiming for a consistent dough temperature, often between 75-80°F (24-27°C), allows for more predictable fermentation times within your advanced sourdough baking schedule.
Use a probe thermometer to check the internal temperature of your dough periodically. If the dough is too cold, find a warmer spot (like a proofing box, oven with the light on, or near a warm appliance). If it's too warm, move it to a cooler location. Maintaining the target temperature helps ensure that the bulk fermentation proceeds at the expected pace, giving you better control over the development of both structure and flavor in your sourdough.
Day 3: Shaping, Proofing, and Baking
Day 3 is when the dough transitions from a fermenting mass to a shaped loaf ready for the oven. This involves dividing (if making multiple loaves), pre-shaping, final shaping, and the final proofing stage. For an advanced sourdough baking schedule, this often includes a long, cold proof in the refrigerator, which significantly enhances flavor and makes the dough easier to handle and score.
The baking itself is the culmination, requiring high heat and steam to achieve maximum oven spring and a beautiful crust. Each step on Day 3 requires careful handling to preserve the gas developed during bulk fermentation and build the necessary tension for a well-structured loaf. Precision in shaping and understanding the signs of proper proofing are key to success.
Step 6: Pre-Shaping: Preparing the Dough for its Final Form
After bulk fermentation is complete, gently turn the dough out onto a lightly floured surface. If making multiple loaves, divide the dough using a bench scraper or knife, being careful not to degas it excessively. Allow the dough to rest for 15-20 minutes uncovered. This resting period, called the bench rest, allows the gluten to relax after the handling during bulk fermentation, making the dough easier to shape in the next step.
During the bench rest, the dough pieces are typically pre-shaped into loose rounds or logs. This initial shaping helps to build some surface tension and creates a more manageable shape for the final shaping. Work gently to avoid pushing out all the precious gas bubbles. The dough should feel slightly more relaxed after the rest, indicating it's ready for final shaping within your sourdough baking advanced schedule.
Step 7: Final Shaping: Creating Tightly Formed Loaves
Final shaping is about creating significant surface tension and giving the loaf its final structure. This tension is crucial for helping the loaf hold its shape during proofing and providing the 'spring' in the oven. The specific technique depends on the desired loaf shape (bâtard, boule, etc. ), but the principle is the same: fold the dough onto itself repeatedly to create a taut surface.
For a boule (round), gentle folds from the outside towards the center, followed by tucking and rotating on a surface with slight friction, helps create a smooth, tight skin. For a bâtard (oval), folding the top down, the sides in, and then rolling from the top down creates a log shape with good tension. Work quickly and confidently to minimize sticking and degassing. Place the shaped loaf seam-side up in a well-floured proofing basket (banneton) for proofing as part of your advanced sourdough schedule.
Step 8: Cold Proofing: Developing Flavor and Structure
Cold proofing in the refrigerator is a hallmark of advanced sourdough baking schedules. Placing the shaped loaf in a proofing basket directly into a cold refrigerator (38-40°F / 3-4°C) for 12-48 hours (or even longer) significantly slows down fermentation. This extended cold period allows complex flavors to develop as enzymes and bacteria continue their work at a reduced pace.
Beyond flavor, cold proofing firm's up the dough, making it much easier to handle, score, and transfer to a hot oven. The cold temperature also helps the loaf hold its shape initially in the oven before oven spring kicks in. While a short room-temperature proof is possible, the depth of flavor and ease of handling offered by a long cold proof are why it's favored in advanced techniques.
Step 9: Baking: Achieving a Perfect Crust and Crumb
Baking is the moment of truth. A hot oven and initial burst of steam are essential for achieving maximum oven spring before the crust sets. Many advanced bakers use a Dutch oven or baking stone with a steam source to mimic the conditions of professional deck ovens. Preheat your oven, with your baking vessel inside, to a high temperature, typically 450-500°F (230-260°C), for at least 30-60 minutes.
Carefully transfer the cold-proofed dough to the hot baking surface or Dutch oven. Scoring the dough just before baking allows for controlled expansion. Bake covered (if using a Dutch oven) or with steam (if using a stone) for the first 15-20 minutes, then uncover or remove the steam source and continue baking at a slightly lower temperature (around 425-450°F / 220-230°C) for another 20-30 minutes until the crust is deeply golden brown and the internal temperature reaches 205-210°F (96-99°C).
Scoring the Dough for Optimal Oven Spring
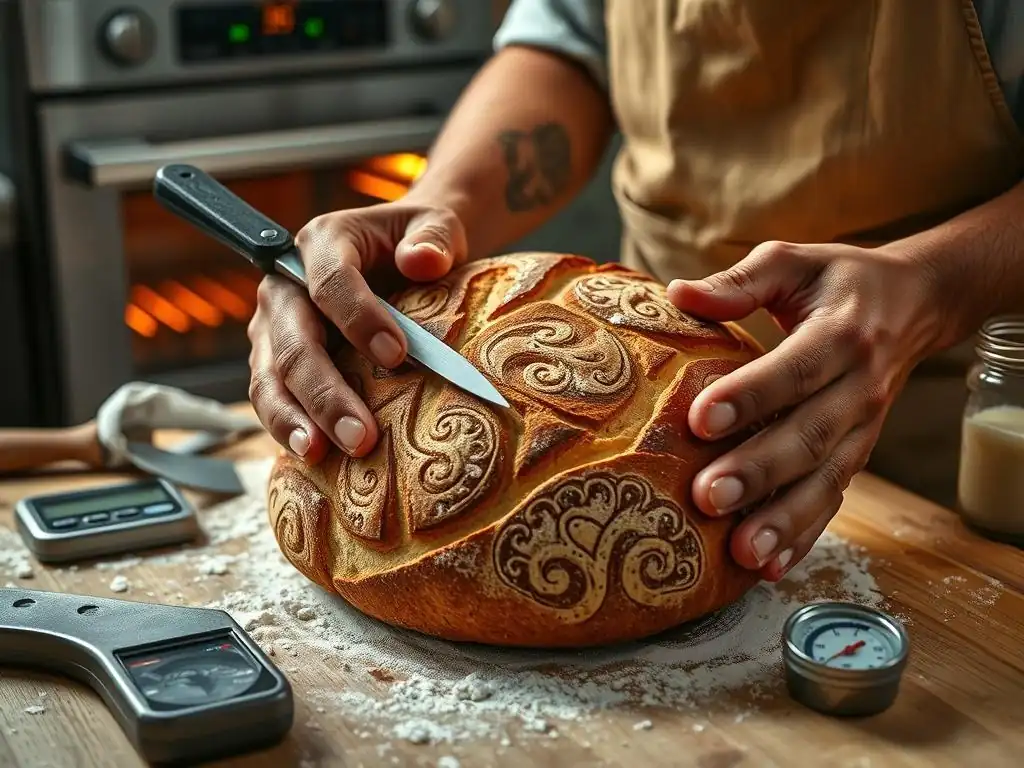
Scoring, or making incisions on the surface of the shaped loaf just before baking, is both functional and artistic. Functionally, it provides a weak point for the dough to expand predictably in the hot oven, preventing blowouts and allowing for maximum oven spring. Without scoring, the crust would set too quickly, restricting the dough's expansion.
Artistically, scoring allows bakers to create unique patterns. Use a sharp blade (like a razor blade or lame) and make quick, confident cuts about 1/4 to 1/2 inch deep. The angle and depth of the score will influence how the loaf opens up. For a classic ear, score at a shallow angle (around 30 degrees) along one side. Practice is key to mastering this technique within your sourdough baking advanced schedule.
Baking Temperatures and Times for Sourdough
Achieving the perfect crust and crumb requires precise temperature and timing during the bake. Sourdough is typically baked at high temperatures, starting around 450-500°F (230-260°C). This initial high heat provides the necessary thermal shock for rapid expansion (oven spring).
After the initial phase with steam (usually 15-20 minutes), the temperature is often reduced slightly to 425-450°F (220-230°C) to allow the interior to cook through and the crust to develop its color without burning. The total baking time for a standard 500-700g loaf is typically 35-50 minutes. The loaf is done when it has a deep, rich brown crust and sounds hollow when tapped on the bottom. Using a thermometer to check for an internal temperature of 205-210°F is the most reliable indicator of doneness.
Day 4: Cooling and Enjoying
The baking is complete, but the process isn't quite finished. Proper cooling is just as important as the baking itself for achieving the desired crumb texture and allowing flavors to fully develop. Cutting into a hot loaf too soon can result in a gummy interior. Patience is required for this final step in your advanced sourdough baking schedule.
Once cooled, the reward is a beautifully crafted loaf with a crisp crust and complex, tangy interior. Sharing and enjoying your homemade sourdough is the satisfying conclusion to the multi-day process.
Step 10: Cooling the Loaf Properly
Immediately after removing the loaf from the oven, transfer it to a wire cooling rack. It is crucial that air can circulate freely around the entire loaf to prevent the bottom crust from becoming soggy from trapped steam. Resist the urge to cut into the loaf right away!
Allow the loaf to cool completely, which can take 2-4 hours for a standard-sized loaf. During this time, residual heat continues to cook the interior, moisture redistributes throughout the crumb, and flavors deepen. Cutting too early will release steam prematurely, leading to a less desirable texture. A fully cooled loaf will slice cleanly and have a more stable crumb structure.
Step 11: Enjoying Your Homemade Sourdough
Once your beautifully baked loaf has cooled completely, it's time to slice and enjoy the fruits of your labor. Appreciate the crisp crust, the intricate crumb structure, and the complex, tangy flavor that developed over days following your advanced sourdough baking schedule.
Serve it simply with good butter, use it for sandwiches, make toast, or share it with friends and family. The satisfaction of baking a truly exceptional loaf from scratch is immense. Reflect on the process and note what worked well and what you might adjust for your next bake, continuing your journey in advanced sourdough baking.
Troubleshooting Your Advanced Sourdough Schedule
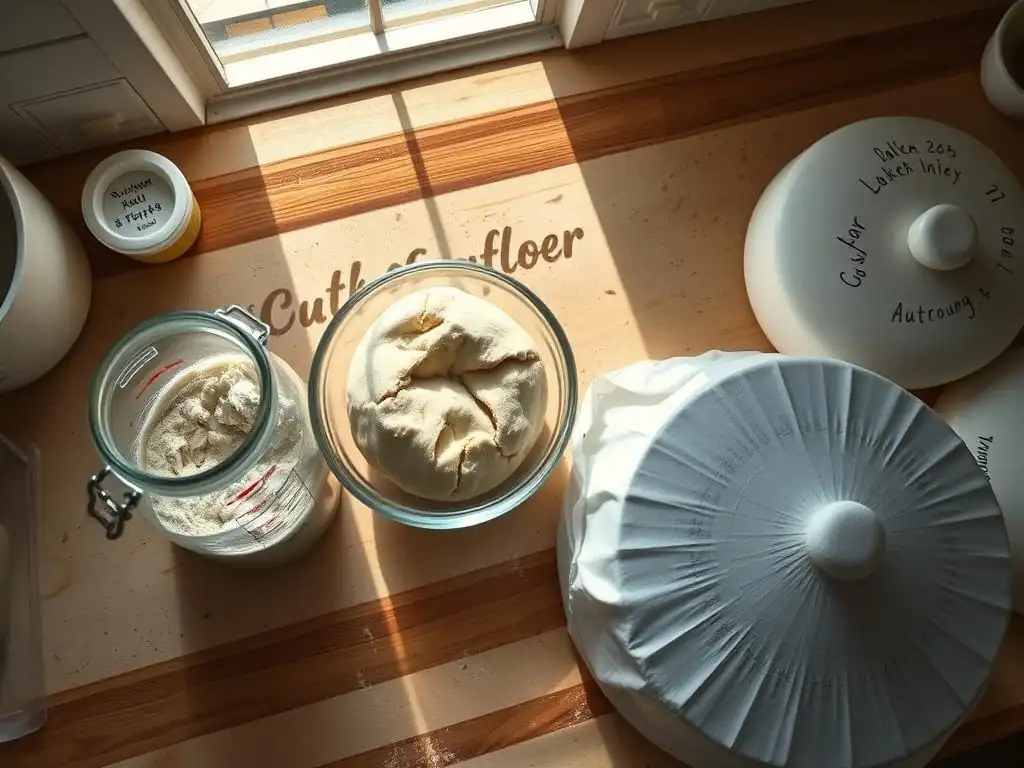
Even with a detailed advanced sourdough baking schedule, challenges can arise. Sourdough is a dynamic process, and environmental factors, starter variability, and dough handling can all impact the outcome. Learning to identify common issues and knowing how to address them is a key skill for any advanced baker. Don't be discouraged by loaves that aren't perfect; each bake is a learning opportunity.
This section covers some frequent problems encountered in advanced sourdough baking and provides practical solutions. Understanding why something went wrong is the first step to preventing it in the future and refining your personal sourdough baking advanced schedule.
Common Issues and Solutions in Advanced Sourdough Baking
Troubleshooting is an integral part of mastering sourdough. Issues like poor oven spring, a dense or gummy crumb, or a pale crust are common, even for experienced bakers. These problems can often be traced back to issues during bulk fermentation, proofing, or baking temperature and steam. For example, a loaf that spreads flat on the baking surface might be over-proofed or lack sufficient surface tension from shaping.
Another common issue is a lack of tang or flavor complexity. This can often be improved by extending the cold proofing period, using a slightly warmer bulk fermentation temperature, or ensuring your starter is very active and healthy. Keeping a baking journal to track variables like temperatures, times, and dough behavior can be incredibly helpful in diagnosing issues and making adjustments to your sourdough baking advanced schedule for future bakes.
Dealing with Over-Proofed Dough
Over-proofed dough is a common problem that results in a loaf that spreads excessively, lacks oven spring, and has a dense, often gummy crumb. This happens when the dough has fermented for too long or at too high a temperature during bulk fermentation or final proofing, exhausting the yeast's ability to produce gas in the oven. The dough may feel very airy and fragile, sometimes even starting to collapse.
If you suspect your dough is slightly over-proofed before baking, you might try reducing the proofing time or lowering the proofing temperature in the future. For the current loaf, handle it extremely gently during shaping and transfer. Baking immediately at a high temperature is crucial. While it won't achieve the same oven spring as perfectly proofed dough, you can still salvage a decent loaf. In extreme cases, over-proofed dough can be repurposed into flatbreads or focaccia.
Addressing Under-Proofed Dough
Under-proofed dough, conversely, hasn't fermented long enough. This often results in a loaf with explosive, uncontrolled oven spring (sometimes called a 'blowout') or a very dense, tight crumb with large, irregular tunnels (sometimes called 'caverns'). The dough will feel heavy and less airy after bulk fermentation or proofing.
If you realize your dough is under-proofed during bulk fermentation, simply allow it to ferment longer, monitoring its volume and feel. If it's under-proofed after shaping and cold proofing, you have limited options. You can try letting it sit at room temperature for a short period before baking, but be cautious not to over-proof. In the future, extend your bulk fermentation time, ensure a warmer dough temperature, or lengthen your cold proofing period to ensure adequate fermentation according to your sourdough baking advanced schedule.
Managing a Sticky or Slack Dough
A dough that is excessively sticky or slack (lacking tension) can be challenging to handle and shape, often leading to loaves that spread rather than hold their form. High hydration doughs are naturally stickier, but excessive stickiness can also indicate insufficient gluten development or fermentation issues. Slack dough might mean the gluten network hasn't been adequately built or is breaking down from over-fermentation.
To manage sticky dough, use minimal flour on your work surface and hands during shaping. A bench scraper is your best friend for handling sticky dough. Ensure you are performing enough stretch and folds during bulk fermentation to build strength. If the dough is slack due to suspected over-fermentation, handle it very gently and shape it quickly. For future bakes, consider slightly reducing hydration, ensuring optimal bulk fermentation time and temperature, and focusing on proper stretch and fold technique to build a stronger gluten network within your advanced sourdough schedule.
Tips for Perfecting Your Advanced Sourdough Baking
Moving from intermediate to advanced sourdough baking involves continuously refining your process and understanding. Small adjustments can have significant impacts on the final loaf. These tips focus on optimizing key variables to achieve consistent, high-quality results every time you follow your sourdough baking advanced schedule.
Perfection in sourdough is an ongoing journey of learning and adaptation. Pay close attention to the subtle cues your dough provides – its smell, feel, and appearance – as these are the best indicators of its progress. Don't be afraid to experiment with minor changes in timing, temperature, or technique to see how they affect your results.
Optimizing Your Starter for Consistent Results
The health and activity of your sourdough starter are foundational to consistent baking success. A strong starter ensures reliable leavening and contributes robust flavor. To optimize your starter, maintain a regular feeding schedule, ideally daily if kept at room temperature, using good quality flour (a mix of white and whole wheat often works well) and filtered water.
Observe your starter's behavior after feeding – how quickly it rises, how much it rises, and how long it stays active before falling. This tells you about its vigor. If your starter seems sluggish, try feeding it more frequently or keeping it in a slightly warmer spot for a few days. Using a consistent feeding ratio (e.g., 1:1:1 or 1:2:2 starter:water:flour) by weight helps maintain its balance. A consistently active starter is the bedrock of any reliable sourdough baking advanced schedule.
Mastering Dough Handling Techniques
Skilled dough handling is crucial for developing structure and preserving the delicate gas network created during fermentation. Techniques like gentle stretch and folds, careful pre-shaping, and deliberate final shaping are essential. Avoid aggressive kneading or degassing the dough unnecessarily.
Practice makes perfect when it comes to handling sticky, high-hydration doughs. Use minimal flour on your hands and surface, relying on a bench scraper to manage the dough. Focus on creating surface tension during shaping – this is what helps the loaf hold its form and achieve good oven spring. Watch videos from experienced bakers to see different techniques in action and practice them until they feel natural within your sourdough baking advanced schedule routine.
Fine-Tuning Your Baking Environment
Your baking environment plays a significant role in sourdough success. Ambient temperature and humidity directly affect fermentation rates. A few degrees difference in room temperature can shave hours off or add hours to your bulk fermentation time. Learn to adjust your schedule based on your environment.
Consider using tools to control temperature, such as a proofing box, an oven with the light on, or simply finding the warmest or coolest spot in your home. For baking, ensuring your oven is accurately calibrated and consistently reaching high temperatures is vital. Using a baking stone or steel and generating sufficient steam (via a Dutch oven, steam tray, or ice cubes) are key to achieving a great crust and maximizing oven spring. Controlling these environmental factors allows for more predictable results within your advanced sourdough baking schedule.
Advanced Sourdough Baking: Beyond the Basics
Once you've mastered the core advanced sourdough baking schedule, you can begin to explore variations and push the boundaries of your skills. This involves experimenting with different ingredients, techniques, and understanding the science behind sourdough more deeply.
Exploring beyond the basic white loaf opens up a world of possibilities in terms of flavor, texture, and appearance. These explorations will deepen your understanding of how different factors interact within the sourdough process.
Experimenting with Different Flours and Hydration Levels
Varying the types of flour used significantly impacts the dough's behavior, flavor, and final texture. Incorporating whole wheat, rye, spelt, or other specialty flours adds nutritional value and introduces unique flavor profiles. Whole grain flours absorb more water and have different gluten structures than white flour, requiring adjustments to hydration levels and handling techniques.
Experimenting with higher hydration levels (above 80%) can lead to a more open, airy crumb but requires more advanced dough handling skills. Conversely, lower hydration loaves (below 70%) are easier to handle and shape but may result in a denser crumb. Gradually adjust hydration and flour types in small increments to understand their impact and find what you enjoy baking and eating most within your sourdough baking advanced schedule.
Incorporating Add-Ins for Unique Flavors
Adding ingredients like seeds, nuts, dried fruits, herbs, cheese, or olives can transform a basic sourdough loaf into something truly special. These add-ins not only contribute flavor and texture but can also affect dough handling and fermentation. Seeds, for instance, absorb moisture, potentially requiring a slight increase in hydration.
Add-ins are typically incorporated during the mixing phase after the autolyse or during the first set of stretch and folds. Distribute them evenly throughout the dough. Be mindful that large or heavy add-ins can sometimes inhibit oven spring. Experiment with different combinations and incorporation methods to discover new favorites within your sourdough baking advanced schedule.
Understanding Sourdough Acidity and its Impact
The characteristic tang of sourdough comes from the lactic and acetic acids produced by the bacteria in the starter. An advanced baker learns to influence the balance and intensity of these acids. Lactic acid provides a milder, yogurt-like tang, while acetic acid contributes a sharper, vinegary note.
Factors influencing acidity include fermentation temperature (warmer temperatures favor lactic acid, cooler temperatures favor acetic acid), hydration level, and the feeding ratio of your starter. A longer, cooler bulk fermentation and cold proofing period will generally result in a tangier loaf. Understanding this relationship allows you to manipulate your sourdough baking advanced schedule to achieve your preferred level of sourness.
Achieving Sourdough Success: A Summary of the Advanced Schedule
Mastering sourdough baking through an advanced schedule is a rewarding endeavor that yields loaves with complex flavors and superior texture. It involves a multi-day process demanding attention to detail, timing, and dough behavior. Starting with an active levain built the day before sets the stage. Day two focuses on mixing the dough, incorporating an autolyse period, and conducting a controlled bulk fermentation with stretch and folds, monitoring dough temperature carefully.
Day three is dedicated to shaping the dough, typically followed by a long cold proof in the refrigerator to develop flavor and firm the dough for easier handling and scoring. The final step on Day three is baking in a hot oven with steam for maximum oven spring and a perfect crust. Finally, Day four involves patiently cooling the loaf before slicing and enjoying.
Troubleshooting common issues like over or under-proofing and managing dough stickiness are skills developed over time. By optimizing your starter, mastering dough handling, fine-tuning your environment, and experimenting with ingredients, you can consistently bake exceptional loaves by following and adapting this advanced sourdough baking schedule.
Frequently Asked Questions
What is an advanced sourdough baking schedule, and who is it for?
An advanced schedule is a detailed plan for sourdough baking, going beyond basic recipes. It's ideal for bakers with some experience looking to refine their sourdough techniques and control fermentation.
How does an advanced schedule differ from a beginner's guide to sourdough?
A beginner's guide focuses on foundational skills. An advanced schedule dives into precise timing, temperature control, and adjustments for optimal flavor development and crumb structure.
Why is a schedule so important for advanced sourdough baking?
A schedule allows for predictability and consistency in your bakes. It helps manage the long fermentation process, ensuring a perfect rise and flavor profile every time.
What are some key elements included in an advanced sourdough baking schedule?
Key elements include detailed timelines for starter feeding, autolyse, bulk fermentation, shaping, proofing (both room temperature and cold), and baking. It also considers temperature variations and adjustments.
Can I adapt an advanced schedule to fit my own schedule and preferences?
Absolutely! While a schedule provides a framework, you can adjust timing and temperatures to suit your lifestyle and environment. The goal is to understand the principles so you can customize your baking.
Final Reflection: The Ever-Evolving Art of Sourdough
Mastering sourdough isn't just about following a schedule; it's about understanding the living organism at the heart of the process. The advanced schedule detailed in this article provides a framework, a roadmap to navigate the complexities of sourdough baking, but the true journey lies in the nuanced observations and adjustments you'll make along the way. This isn't a destination, but a continuous exploration of flavor, texture, and the fascinating interplay between flour, water, and time.
The impact of sourdough baking extends far beyond the kitchen; it's a connection to a centuries-old tradition, a mindful practice that encourages patience and observation. It's a journey of discovery, where each loaf reveals new insights into the subtle dance of fermentation. The best bread is made with love and patience,
a wise baker once said, and this sentiment perfectly encapsulates the essence of advanced sourdough baking. The schedule provides structure, but the true magic lies in the intuitive understanding you cultivate through experience, learning to read the subtle cues of your starter and adapting to the ever-changing conditions of your environment.
Now, consider your own baking journey. What adjustments will you make to this schedule? What experiments will you undertake? Don't be afraid to deviate, to explore, to make mistakes – for it is through these imperfections that true mastery is born. Embrace the unpredictable nature of sourdough, and let the process become a meditation, a testament to your dedication and a source of immense satisfaction with each perfectly risen loaf. The journey from starter to slice is a lifelong adventure, and I invite you to embark on it with passion and curiosity.
Unleash Your Inner Sourdough Master!
Thanks for joining us on this sourdough journey! We hope you gained valuable insights into crafting the perfect loaf. Now it's time to put your new knowledge into practice.
- Bake your own masterpiece! Try the advanced sourdough schedule from the article – you’ll be amazed by the results. Remember to meticulously track your observations.
- Share your sourdough success! Post a picture of your loaf on social media and tag us – we’d love to see your creation!
- Explore other BakeWithEase recipes: Expand your baking repertoire with our collection of easy-to-follow recipes, from beginner-friendly cookies to impressive cakes!
Ready to take your sourdough skills to the next level? What unique twist will you add to your next loaf?