
Retarding Sourdough Dough: Benefits and Best Practices

Welcome to BakeWithEase!
Unlock the secrets to perfectly tangy and flavorful sourdough with our guide to sourdough dough retarding techniques. Discover how mastering this crucial step can transform your bakes, enhancing both flavor and texture. Ready to elevate your sourdough game? Dive in and learn the best practices for retarding your dough, and prepare to be amazed by the results!
- Understanding Sourdough Dough Retarding Techniques
- Benefits of Retarding Sourdough Dough
- Best Practices for Retarding Sourdough Dough
- Step-by-Step Guide to Retarding Sourdough Dough
- Troubleshooting Common Sourdough Dough Retarding Issues
- Recipes Using Retarded Sourdough Dough
- Advanced Sourdough Retarding Techniques
- Mastering Sourdough: Retarding for Consistent Results
- Frequently Asked Questions
- Final Reflection: The Art and Science of Patience in Sourdough Baking
- Unlock Your Sourdough's Potential: Mastering the Art of Retarding
Understanding Sourdough Dough Retarding Techniques
What is Sourdough Dough Retarding? A Definition
Sourdough dough retarding refers to the practice of slowing down the fermentation process by placing the dough in a cool environment, typically a refrigerator. This technique is a cornerstone for many advanced sourdough bakers looking to enhance the quality and manageability of their dough. By significantly dropping the temperature, the activity of the wild yeast and bacteria in the sourdough starter is dramatically reduced, allowing for a much slower, controlled fermentation compared to room temperature.
This controlled cooling period, often called cold fermentation or cold proofing, allows for biochemical changes in the dough that wouldn't occur during a rapid, warm proof. It's not simply pausing fermentation; it's shifting it into a lower gear where different enzymatic actions can take place over an extended period, often ranging from 12 to 48 hours, or even longer in some cases. Mastering sourdough dough retarding techniques can transform a good loaf into a truly exceptional one.
The Role of Cold Fermentation in Sourdough Baking
Cold fermentation plays a critical role in developing complex flavors and improving the physical structure of sourdough dough. At cooler temperatures, enzymes like proteases break down proteins (gluten) more slowly, while amylases continue to break down starches into simpler sugars. This slow breakdown provides a sustained food source for the microbes over a longer duration, contributing to deeper, more nuanced flavors and aromas that are characteristic of well-fermented sourdough.
Furthermore, this extended cold period allows the gluten structure to relax and develop without collapsing. The slower fermentation produces gas more gradually, giving the gluten network time to strengthen and become more extensible. This leads to dough that is easier to handle, shape, and ultimately, results in a better oven spring and crumb structure in the final baked loaf. Understanding and implementing effective sourdough dough retarding techniques is key to unlocking these benefits.
Benefits of Retarding Sourdough Dough
Enhanced Flavor Development Through Retardation
One of the most compelling reasons to use sourdough dough retarding techniques is the significant enhancement of flavor. The long, slow fermentation in a cold environment allows for the proliferation of beneficial bacteria, particularly lactic acid bacteria (LAB), relative to the yeast activity. LAB produce organic acids, primarily lactic and acetic acids, which are responsible for the characteristic tangy flavor of sourdough.
During a cold proof, the balance often shifts towards higher production of acetic acid compared to a warm proof. Acetic acid contributes a sharper, more vinegary tang, while lactic acid provides a smoother, milky sourness.
The specific ratio and concentration of these acids developed during retarding can vary based on temperature, time, and starter characteristics, but the result is almost always a more complex and satisfying flavor profile than dough proofed solely at room temperature. For instance, a dough retarded at 4°C (around 39°F) for 24 hours might develop a tangier profile than one retarded at 8°C (around 46°F) for the same duration.
Improved Dough Strength and Structure with Cold Fermentation
Retarding sourdough dough significantly contributes to the development of a robust gluten structure. While the dough rests in the cold, enzymatic activity continues to break down proteins, but at a much slower pace than at room temperature. Simultaneously, the yeast and bacteria produce gas very slowly. This gentle, prolonged gas production allows the gluten network, which was developed through mixing and folding, to relax and become more organized and stronger without being overstretched by rapid expansion.
This improved structure makes the dough more resilient and easier to handle during shaping. It can hold its shape better, which is crucial for achieving good loft and structure in the baked loaf.
A dough that has been properly retarded often exhibits a smooth, almost satiny texture and passes the "windowpane test" more readily after its cold rest than it did before. For example, a 70% hydration dough might feel slack and slightly sticky after bulk fermentation at 24°C (75°F), but after 18 hours at 5°C (41°F), it will likely feel firmer, less sticky, and much more cohesive, ready for shaping.
Convenient Baking Schedule: Retarding for Flexibility
Beyond the technical benefits, one of the most practical advantages of incorporating sourdough dough retarding techniques into your routine is the flexibility it offers to your baking schedule. Sourdough baking, with its long fermentation times, can often feel demanding, requiring precise timing to catch the dough at its peak. Retarding allows you to put the fermentation "on hold" for a significant period.
This means you can mix your dough one day, perform bulk fermentation, and then pop it in the fridge for the final proof. You are no longer tied to baking within a narrow window after bulk fermentation. You can bake the dough directly from the fridge the next morning, or even the day after. This flexibility makes it much easier to fit sourdough baking into a busy week. For example, you could mix dough on a Saturday afternoon, retard overnight, and bake fresh loaves for Sunday brunch without needing to wake up at dawn.
Better Crust and Oven Spring: Retarding's Impact
Sourdough dough retarding techniques also contribute significantly to the final appearance and texture of the baked loaf, particularly the crust and oven spring. Dough that has been cold-proofed tends to hold its shape better when transferred to a hot oven. The cold temperature of the dough causes a slight delay in yeast activity when first exposed to heat, allowing the crust to set slightly before the most vigorous gas expansion occurs.
This phenomenon, combined with the improved dough structure from the slow cold fermentation, results in a more powerful "oven spring"—the final dramatic rise of the dough in the oven. A strong oven spring often leads to a taller loaf with a more open crumb structure. Furthermore, the prolonged fermentation and development of complex sugars during retarding can contribute to better caramelization of the crust during baking, resulting in a deeper color and a crispier texture. Many bakers find that dough retarded for 18-24 hours at refrigerator temperature consistently yields a superior crust compared to shorter, warmer proofing methods.
Best Practices for Retarding Sourdough Dough
Choosing the Right Container for Cold Proofing
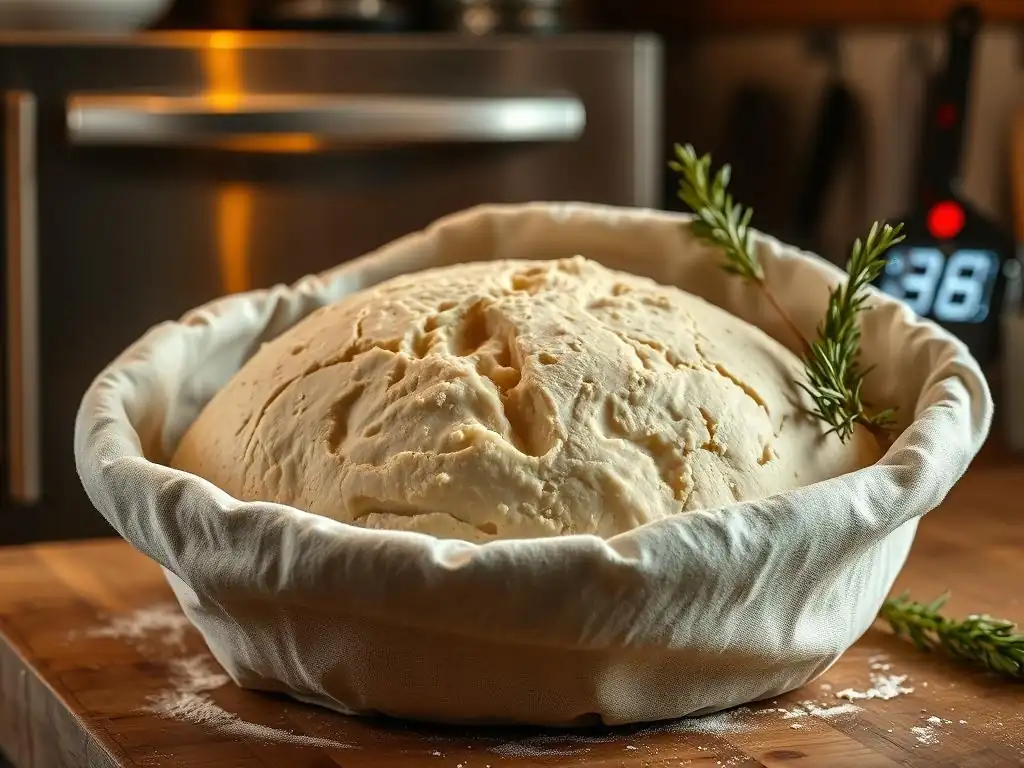
Selecting the appropriate container is crucial when applying sourdough dough retarding techniques. The container should be large enough to accommodate the dough's volume, keeping in mind that it will still expand somewhat in the cold, albeit slowly. It's also essential that the container can be sealed or tightly covered to prevent the dough from drying out and to protect it from absorbing odors from the refrigerator.
Common choices include plastic dough buckets with airtight lids, glass bowls covered tightly with plastic wrap or a lid, or proofing baskets (bannetons) placed inside a plastic bag or covered with a shower cap dedicated to baking. For proofing baskets, using a bag or cover is especially important as they are porous. A common 2-quart (approx. 2 liter) round container is typically sufficient for a standard 1kg (approx. 2.2 lb) loaf of dough, providing enough headspace for expansion without being excessively large. Ensuring a tight seal is paramount; dryness is a common issue with improper cold storage.
Optimal Temperature for Sourdough Dough Retarding
The ideal temperature for sourdough dough retarding is typically between 3°C and 5°C (approximately 37°F to 41°F). This range is cold enough to significantly slow down fermentation but not so cold as to halt it completely. Temperatures much below 3°C can shock the yeast and bacteria, potentially inhibiting their activity even after warming, while temperatures above 5°C may allow fermentation to proceed too quickly, risking over-proofing if retarded for extended periods.
Maintaining a consistent temperature is also important. Refrigerator temperatures can fluctuate, especially if the door is opened frequently. Placing the dough towards the back of the fridge, away from the door, can help ensure a more stable cold environment. While some bakers experiment with slightly warmer temperatures (up to 8°C or 46°F) for shorter retards (e.g., 8-12 hours), the 3-5°C range is widely considered optimal for longer cold proofs (12-48+ hours) to maximize flavor development and structural benefits without over-proofing.
Retarding Time: How Long to Cold Proof Your Sourdough
Determining the optimal retarding time is a balance between flavor development, dough structure, and scheduling convenience. There's no single perfect duration, as it depends on your specific recipe, starter activity, refrigerator temperature, and desired outcome. However, most recipes utilizing sourdough dough retarding techniques call for a cold proof ranging from 12 to 48 hours.
A minimum of 8-12 hours is often recommended to start seeing the benefits of cold fermentation, particularly improved handling and a touch more flavor. Retarding for 24-36 hours often yields significantly deeper flavor complexity and excellent dough structure. Some bakers successfully retard dough for 48-72 hours or even longer, though this requires careful monitoring to avoid over-proofing and can sometimes lead to excessive sourness or degradation of the gluten structure. It's best to start with a 12-18 hour retard and gradually experiment with longer times to find what works best for your specific process and taste preferences.
Adjusting Your Sourdough Recipe for Retarding
When planning to use sourdough dough retarding techniques, you may need to make slight adjustments to your base recipe or process. One common adjustment is related to the initial bulk fermentation time at room temperature. Since the dough will continue to ferment in the cold, you typically want to stop the room temperature bulk fermentation slightly before it reaches its full expansion (e.g., aiming for a 30-50% increase in volume rather than the 75-100% you might target for a purely room-temperature proof).
Another consideration is the amount of starter used. Some recipes designed specifically for long cold fermentation might use a slightly lower percentage of starter (e.g., 15-20% of the total flour weight) compared to recipes intended for same-day baking (which might use 20-25% or more). This helps prevent the dough from over-proofing during the extended cold period. Hydration levels can also play a role; higher hydration doughs (above 75%) may benefit more significantly from the structure development during cold fermentation, while lower hydration doughs (below 65%) might not require as long a retard to achieve desired structure.
Step-by-Step Guide to Retarding Sourdough Dough
Preparing Your Sourdough Dough for the Fridge
Once your sourdough dough has completed its initial bulk fermentation at room temperature – meaning it has developed strength through folds and increased noticeably in volume (typically 30-50% depending on the intended retard duration) – it's ready for the cold. The first step in applying sourdough dough retarding techniques is to prepare the dough correctly. Gently degas the dough slightly if it has expanded considerably, then shape it lightly into a boule or batard, or divide and pre-shape if making multiple loaves.
Transfer the dough into your chosen container for cold proofing. If using a proofing basket (banneton), dust it generously with rice flour (which is less likely to be absorbed by the dough than wheat flour) to prevent sticking. Place the shaped dough seam-side up in the floured banneton. If using a bowl or bucket, you can place the dough seam-side down. Crucially, cover the container tightly. Plastic wrap, a dedicated lid, or a large plastic bag works well to create a seal and prevent the dough surface from drying out and forming a skin in the cold refrigerator environment.
Monitoring Dough Rise During Retardation
Even in the cold, your sourdough dough will continue to ferment and rise, albeit very slowly. While you won't see the dramatic doubling you might expect at room temperature, monitoring its progress is still important when using sourdough dough retarding techniques, especially when trying a new recipe or duration. The dough will typically increase in volume by another 20-50% during the cold proof, depending on the time, temperature, and starter activity.
Checking on the dough every 8-12 hours, particularly during longer retards (24+ hours), allows you to gauge its progress. You can gently press the dough surface with a floured finger; if it springs back very slowly or leaves a slight indentation, it's likely nearing peak fermentation or is ready for baking. If it springs back quickly, it may need more time. If it doesn't spring back at all and feels very soft, it might be starting to over-proof. Visual cues, like how much it has expanded within the container, are also helpful indicators.
Bringing Retarded Dough to Room Temperature
Whether or not to bring retarded dough to room temperature before baking is a point of preference and depends on the desired outcome and the dough's state. Baking directly from the fridge is a common practice when using sourdough dough retarding techniques, as the cold dough holds its shape well for scoring and benefits from the initial slow expansion in the oven. However, some bakers prefer to let the dough sit at room temperature for 30-90 minutes after coming out of the fridge.
This "warm-up" period allows the dough to soften slightly, making it easier to score cleanly, and can give the yeast a little boost before hitting the oven, potentially contributing to a slightly stronger oven spring. The duration of this warm-up depends on your room temperature and how cold your dough is. If the dough seems very stiff and difficult to score, a short warm-up is advisable. If it feels supple and ready, baking directly from the cold is perfectly fine and often preferred for achieving a great crust and crumb.
Shaping and Baking Retarded Sourdough
After the cold proof, the dough is ready for its final steps before baking. If the dough was cold-proofed in a banneton, it's typically inverted directly onto a piece of parchment paper or a peel dusted with semolina. If it was proofed in a bowl or bucket, it will need a final gentle shaping before being placed in a banneton or directly onto parchment. Handle the cold dough gently to preserve the gas built up during fermentation.
Scoring the dough with a sharp razor or lame is crucial for controlling oven spring and achieving an attractive crust. The cold, firm surface of retarded dough makes it particularly easy to score cleanly.
Bake the dough in a preheated oven, often starting with steam (e.g., in a Dutch oven or with a steam tray) for the first 15-20 minutes at a high temperature (around 230-250°C or 450-480°F) to maximize oven spring and crust development. Then, reduce the temperature (to around 220°C or 430°F) and continue baking without steam until the crust is deep golden brown and the internal temperature reaches around 96-99°C (205-210°F).
Troubleshooting Common Sourdough Dough Retarding Issues
Over-Proofing in the Refrigerator: Prevention and Solutions
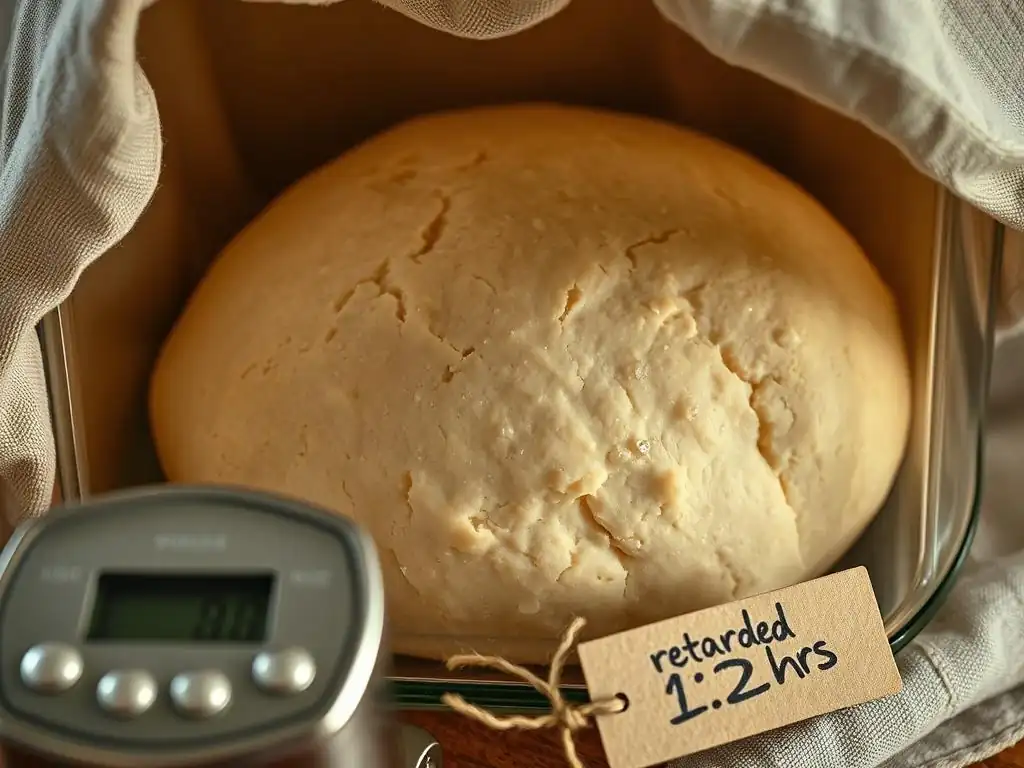
Even in the cold, it's possible for sourdough dough to over-proof during an extended retardation period. Signs of over-proofing in the fridge include dough that has expanded significantly beyond its initial cold volume, feels very soft and fragile, may start to flatten out, and potentially smells strongly acidic or alcoholic. Prevention is key when using sourdough dough retarding techniques for long durations. This involves using a healthy but not excessively vigorous starter, potentially reducing the starter percentage slightly, and ensuring your refrigerator is consistently at the lower end of the optimal range (3-4°C).
If you discover your dough is over-proofed after retarding, it can be challenging to salvage for a classic loaf with strong oven spring. However, you can still use the dough. Options include gently reshaping it and baking immediately, accepting that the oven spring will be limited and the crumb denser. Alternatively, over-proofed dough is often excellent for making flatbreads, pizza dough, or even crackers, where the structure is less critical. Gently deflate it, reshape, and use it in a recipe that doesn't rely on significant oven spring.
Under-Proofing in the Refrigerator: Signs and Remedies
Under-proofing during sourdough dough retarding means the dough hasn't fully developed in the cold. Signs include dough that hasn't increased much in volume, feels dense and tight, and tears easily when handled. Baking under-proofed dough typically results in a loaf with poor oven spring, a dense crumb, and potentially a gummy texture. If you suspect under-proofing upon removing the dough from the fridge, you have a few options.
One remedy is to let the dough sit at room temperature for an extended period (1-3 hours or more) to finish its proofing before baking. Monitor it closely using the poke test until it shows signs of being adequately proofed (springing back slowly). Ensure it's covered to prevent drying. Another approach is to slightly increase the amount of starter in your next batch when planning a similar retard duration, or ensure your starter is particularly active before mixing the dough. Adjusting the initial bulk fermentation time at room temperature to be slightly longer before retarding can also help compensate.
Sticky Dough After Retarding: Causes and Fixes
Sometimes, despite the benefits of sourdough dough retarding techniques, you might encounter dough that feels excessively sticky after spending time in the refrigerator. This can make shaping and scoring difficult. Several factors can contribute to sticky dough: using a very high hydration recipe (above 80%), insufficient gluten development during the initial mixing and bulk fermentation, or placing the dough in a container that wasn't properly floured or covered, leading to condensation on the surface.
If your dough is sticky, ensure your hands and work surface are generously floured (rice flour is excellent for stickiness). Handle the dough gently and confidently during shaping. If the stickiness seems related to underdeveloped gluten, ensure you are performing adequate stretching and folding during bulk fermentation in future bakes. If condensation is the issue, ensure your container is tightly sealed. For high hydration doughs, a certain level of stickiness is normal; using sufficient flour on your hands and surfaces, or slightly reducing hydration in your next attempt, can help manage it.
Flavor Issues with Retarded Sourdough: Adjusting Your Process
While retarding sourdough dough is intended to enhance flavor, sometimes the results might not be what you expected – perhaps too sour, not sour enough, or lacking complexity. Flavor development during cold fermentation is influenced by time, temperature, and the microbial balance in your starter. If your bread is too sour, you might be retarding for too long, or your starter might be particularly acetic acid dominant. Try reducing the cold proofing time (e.g., from 48 hours to 24 hours) or increasing the refrigerator temperature slightly (e.g., from 3°C to 5°C) to encourage relatively more lactic acid production.
If your bread isn't sour enough, you might need a longer retard (e.g., extending from 12 hours to 24 or 36 hours) or a slightly cooler temperature (e.g., dropping from 5°C to 3°C) to favor acetic acid production. The health and age of your starter also play a role; a very young starter might not have developed the microbial population needed for complex flavor. Experimenting with these variables and keeping notes on your sourdough dough retarding techniques will help you dial in the flavor profile you prefer.
Recipes Using Retarded Sourdough Dough
Overnight Country Sourdough
This classic recipe is a prime example of how sourdough dough retarding techniques are used to create a staple loaf. Typically, it involves mixing the dough in the late afternoon, performing a few sets of folds over 2-3 hours at room temperature (bulk fermentation), and then placing the dough in the refrigerator for a long, slow proof overnight or for up to 24 hours.
The long cold rest allows the relatively high hydration dough (often 75-80%) to develop excellent structure and a balanced tangy flavor. Baking it cold from the fridge facilitates easy scoring and maximum oven spring. This method simplifies the baking day, allowing you to mix and shape one day and bake the next morning with minimal fuss, yielding a beautiful loaf with a crisp crust and open crumb.
Saturday White Bread
Inspired by popular online recipes, the "Saturday White Bread" often utilizes sourdough dough retarding techniques for convenience and quality. The dough, primarily made with white flour and typically around 70-75% hydration, is mixed and bulk fermented for several hours on a Friday.
After bulk fermentation and shaping, the dough is placed in the refrigerator for a cold proof, often for 12-15 hours. This allows the baker to enjoy their Saturday morning and bake fresh bread whenever convenient. The shorter cold proof compared to some country loaves still imparts improved structure and flavor compared to a purely room-temperature proof, making it a perfect recipe for those new to retarding techniques.
Retarded Sourdough Pizza Dough
Sourdough dough retarding techniques aren't just for loaves! Cold fermentation is particularly beneficial for pizza dough, contributing to a chewier crust with excellent flavor and those desirable large air pockets (cornicione). A typical recipe involves mixing the dough, performing a bulk fermentation at room temperature for 2-4 hours, and then dividing and placing the dough balls in individual containers in the refrigerator.
These dough balls can be retarded for 24 to 72 hours. The long cold rest develops elasticity and flavor. When ready to bake, the cold dough balls are removed, allowed to warm up for 1-2 hours, and then stretched gently into pizza rounds. The resulting crust is significantly more flavorful and has better texture than a same-day sourdough pizza dough.
Advanced Sourdough Retarding Techniques
Bulk Fermentation vs. Proofing Retarding
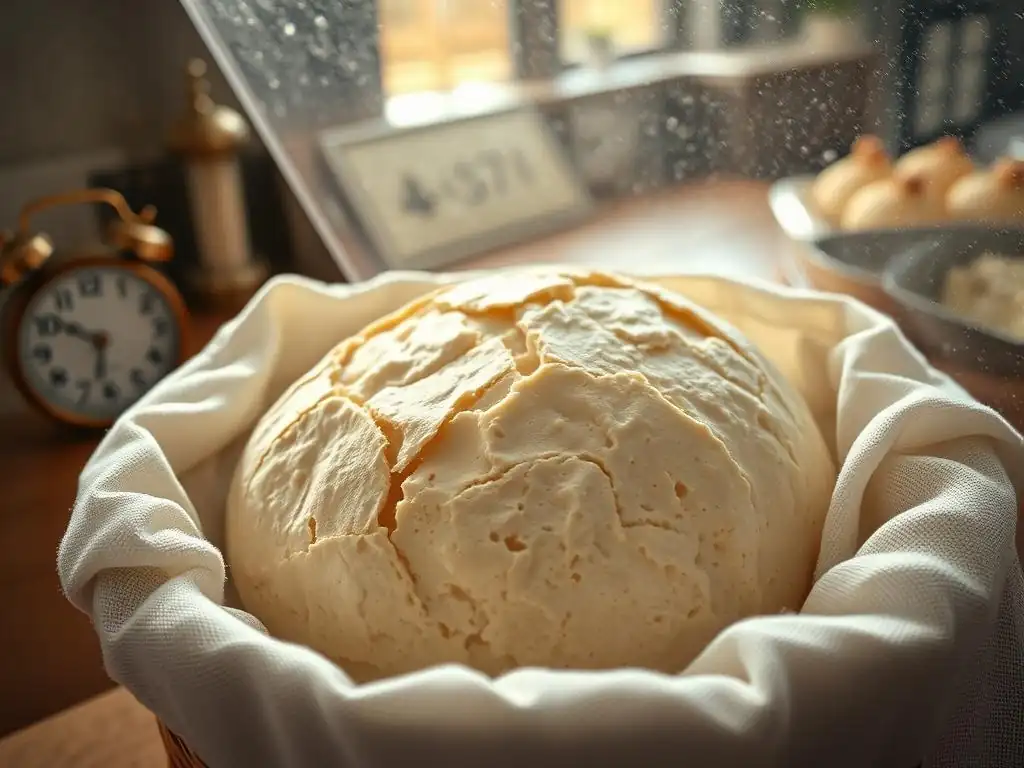
Sourdough dough retarding techniques can be applied at different stages of the fermentation process. The most common approach is proofing retarding, where the dough undergoes its bulk fermentation at room temperature, is then shaped, and the final proof occurs in the refrigerator. This is the method used in the "Overnight Country Sourdough" example.
An alternative is bulk fermentation retarding. In this method, after initial mixing and perhaps a few folds, the entire bulk fermentation takes place in the refrigerator over a much longer period (potentially 2-4 days). The dough is then removed, allowed to warm up slightly, shaped, and proofed at room temperature for a shorter time before baking. Both methods leverage cold fermentation for flavor and structure, but they impact scheduling and dough handling differently. Experimenting with both approaches can help you find which suits your process and desired outcome best.
Using a Wine Cooler for Retarding Sourdough
For bakers serious about controlling fermentation temperature precisely, using a dedicated temperature-controlled environment like a wine cooler or beverage fridge can be an advanced application of sourdough dough retarding techniques. Standard refrigerators often fluctuate in temperature and can be too cold or inconsistent for optimal long-term fermentation (especially if you want temperatures slightly above 4°C).
A wine cooler allows you to set and maintain a specific temperature, often anywhere from 8°C to 18°C (46°F to 64°F). Retarding at slightly warmer temperatures (e.g., 8-12°C) for extended periods (24-72+ hours) can result in different flavor profiles (potentially less acetic acid tang) and dough characteristics compared to a standard cold fridge proof. This level of control allows for fine-tuning sourdough dough retarding techniques to achieve highly consistent and specific results.
Retarding Sourdough at Different Stages of Fermentation
Exploring sourdough dough retarding techniques can involve placing the dough in the cold at various points during its fermentation. Most bakers retard after bulk fermentation is partially or fully complete, for the final proof. However, some advanced techniques involve chilling the dough during bulk fermentation. For example, after a few hours of room temperature bulk fermentation and folds, the dough might be placed in the fridge for several hours (a "cold break") before returning to room temperature to finish bulk fermentation.
Another variation is retarding shaped dough that has already had a short warm proof. This combination of warm and cold proofing can influence the final crumb structure and crust. The key is understanding how temperature affects the rate of fermentation and enzymatic activity at each stage and using the cold strategically to manipulate these processes for desired outcomes in flavor, structure, and schedule.
Mastering Sourdough: Retarding for Consistent Results
Achieving Consistent Flavor and Texture Through Retarding
Implementing sourdough dough retarding techniques is a powerful way to achieve more consistent results in your baking. By controlling the temperature and time of a significant portion of the fermentation, you reduce variability compared to relying solely on fluctuating room temperatures. This leads to more predictable flavor development, as the production of organic acids occurs at a controlled rate over a longer period.
The consistent development of gluten structure in the cold also contributes to predictable dough handling and oven spring. Once you've dialed in the optimal retarding temperature and time for your specific recipe and starter, you can reliably reproduce loaves with similar tang levels, crust characteristics, and crumb structures batch after batch. This consistency is highly valued by experienced sourdough bakers.
Experimenting with Retarding to Fine-Tune Your Sourdough
While consistency is a goal, sourdough dough retarding techniques also offer ample opportunity for experimentation and fine-tuning. By varying the duration of the cold proof (from 12 to 72+ hours), the temperature of the cold environment (within refrigerator limits or using a wine cooler), or the stage at which you introduce the cold (bulk vs. proofing), you can significantly alter the final characteristics of your bread.
Keep detailed notes on your experiments: starter hydration and activity, initial room temperature bulk fermentation time and dough development, retarding temperature and duration, and observations about dough handling, oven spring, crumb, and flavor. This systematic approach allows you to understand cause and effect, helping you manipulate sourdough dough retarding techniques to achieve specific outcomes, whether that's a tangier loaf, a more open crumb, or a schedule that perfectly fits your life.
Sourdough Dough Retarding: A Key to Baking Success
Ultimately, mastering sourdough dough retarding techniques is one of the most impactful steps you can take to elevate your sourdough baking. It moves beyond simply getting a loaf baked and into the realm of controlling and optimizing the fermentation process for superior results. The benefits extend from enhanced flavor and improved dough structure to practical scheduling advantages and the ability to achieve greater consistency.
Incorporating cold fermentation into your routine allows you to unlock deeper complexity in your loaves and produce bread that is not only delicious but also a joy to make. Whether you're aiming for that perfect open crumb, a deeply caramelized crust, or simply a reliable way to bake fresh bread on your schedule, understanding and applying effective sourdough dough retarding techniques is a key step on the path to sourdough success.
Frequently Asked Questions
What exactly is sourdough dough retarding?
Sourdough dough retarding is the process of slowing down the fermentation of your sourdough by placing it in a cold environment, typically a refrigerator. This extends the fermentation time, impacting flavor and texture.
Why would I want to retard my sourdough dough?
Retarding allows for flavor development over a longer period, leading to a more complex and nuanced taste in your bread. It also helps to control the acidity and improve the crumb structure.
When is the best time to retard sourdough dough?
The optimal time to retard depends on your recipe and desired results, but generally, it's best to retard after bulk fermentation and shaping, before the final proof. This provides the most benefit for flavor.
How long can I retard sourdough dough in the refrigerator?
Most sourdough doughs can be safely and effectively retarded in the refrigerator for 12-24 hours. Some recipes can handle longer, even up to 48 hours, but it requires careful monitoring.
What temperature should my refrigerator be for retarding sourdough?
Your refrigerator should be at a temperature of around 35-40°F (2-4°C) for effective sourdough retarding. This temperature range will significantly slow down fermentation without stopping it completely.
Final Reflection: The Art and Science of Patience in Sourdough Baking
The meticulous practice of retarding sourdough dough isn't merely a technical step; it's the cornerstone of achieving exceptional flavor and texture. Understanding and mastering this technique elevates sourdough baking from a simple recipe to a true craft, impacting everything from the final crumb to the depth of the flavor profile. In a world increasingly focused on instant gratification, the deliberate slowness of retarding offers a powerful counterpoint.
The journey of retarding sourdough dough mirrors the journey of life itself – a process of slow, deliberate growth that yields profound rewards. The subtle changes in the dough's structure and flavor development during this period are a testament to the power of patience. As the renowned baker, Chad Robertson, once said, Bread baking is a meditation on time. It's about understanding the rhythm of fermentation and allowing the dough to develop its full potential.
This quote perfectly encapsulates the essence of retarding and its impact on the final product, but also speaks to a larger appreciation for the process itself.
Now, consider your own baking journey. What aspects of your life could benefit from the deliberate slowness and careful attention that retarding demands? Perhaps it's a project you've been rushing, a relationship needing nurturing, or even simply carving out more time for self-reflection. Embrace the art of patience, not just in your sourdough baking, but in all aspects of your life. The rewards, like the perfectly risen loaf, will be well worth the wait.
Unlock Your Sourdough's Potential: Mastering the Art of Retarding
Thanks for taking the time to explore the world of retarding sourdough dough with us! We hope you gained valuable insights into how this technique can elevate your baking. Now it's time to put your new knowledge into practice.
- Plan your next sourdough bake incorporating a retard: Choose your favorite recipe and schedule a slow fermentation to experience the improved flavor and texture firsthand. This is your primary goal!
- Share your retarding experience: Post a picture of your perfectly proofed loaf on social media and tag #BakeWithEaseRetard – we’d love to see your results!
- Explore different retard methods: Experiment with cold proofing in the fridge, or try a longer, room temperature retard. Note the differences in your bread’s final outcome.
Ready to transform your sourdough game? What unique flavor profile will you create with your next retarded dough?