
The Beginner's Guide to Chilling SliceandBake Dough Perfectly


Welcome to BakeWithEase, your friendly guide to the wonderful world of baking! Ever wondered why your slice and bake cookies spread too thin or your pastry isn't quite flaky? The secret often lies in the chilling process. Get ready to unlock the secrets to chilling slice and bake dough perfectly in our beginner-friendly guide, and transform your baking from frustrating to fabulous. Curious to know how long is too long (or not long enough)? Let's get started!
- Introduction to Chilling Slice and Bake Dough for Beginners
- Understanding the Science Behind Chilling Slice and Bake Dough
- Step-by-Step Guide to Chilling Slice and Bake Dough Perfectly
- How to Know When Your Slice and Bake Dough is Ready to Bake
- Troubleshooting Common Issues in Chilling Slice and Bake Dough
- Advanced Tips for Enhancing Your Slice and Bake Cookie Dough Chilling Process
- Conclusion: Mastering the Art of Chilling Slice and Bake Dough for Perfect Cookies Every Time
- Frequently Asked Questions
- Final Reflection: The Art of the Perfectly Chilled Dough
- Unlock Your Inner Pastry Chef: Perfect Slice-and-Bake Dough Every Time!
Introduction to Chilling Slice and Bake Dough for Beginners
Baking delicious cookies from scratch can seem daunting, but slice and bake dough simplifies the process wonderfully. It's a fantastic entry point for new bakers, allowing you to prepare cookie dough ahead of time and bake fresh cookies whenever the craving strikes. However, simply mixing ingredients isn't enough; a critical step that often gets overlooked, especially by beginners, is properly chilling slice and bake dough.
This crucial period in the refrigerator isn't just about convenience; it profoundly impacts the texture, spread, and flavor of your final cookie. Mastering the art of chilling is key to achieving consistently excellent results with your slice and bake creations.
This guide will walk you through everything you need to know about chilling slice and bake dough, from understanding the science behind it to perfecting the technique. We'll cover why chilling is essential, the benefits it brings, and provide a step-by-step process to ensure your dough is perfectly prepared for baking. Whether you're making classic chocolate chip or something more adventurous, proper chilling will elevate your cookies from good to truly great.
What is Slice and Bake Dough and Why Chilling is Essential
Slice and bake dough refers to cookie dough that is shaped into a log or rectangle and then refrigerated or frozen until firm. When you're ready to bake, you simply slice off portions of the chilled dough log and place them directly onto a baking sheet. This method is incredibly convenient, allowing for fresh-baked cookies on demand without the mess of mixing each time. Popular examples include shortbread, sugar cookies, and certain types of chocolate chip cookies designed for this method.
Chilling slice and bake dough is not merely an optional step; it's fundamental to the structural integrity and flavor development of the cookie. Without adequate chilling, the dough will be too soft and sticky to slice cleanly, and the cookies will spread excessively in the oven, resulting in thin, flat, and potentially greasy discs rather than the intended shape. Think of it as letting the ingredients get to know each other and settle down before facing the heat.
One of the most significant benefits of chilling slice and bake dough is its impact on the cookie's texture. When dough is chilled, the fats within it solidify, and the moisture content becomes more evenly distributed. This leads to cookies that hold their shape better during baking, with edges that crisp up nicely and centers that remain slightly chewy or tender, depending on the recipe. A well-chilled dough results in less spread, giving you thicker, more substantial cookies.
Beyond texture, chilling allows flavors to deepen and meld together. Ingredients like flour, sugar, and spices hydrate more fully over time in the cold environment. This process, often referred to as "flavor development," results in a more complex and nuanced taste profile in the baked cookie. For instance, the vanilla extract, salt, and sugar flavors will become more pronounced and harmonious after a proper chilling period, enhancing the overall deliciousness of your slice and bake creations.
Understanding the Science Behind Chilling Slice and Bake Dough
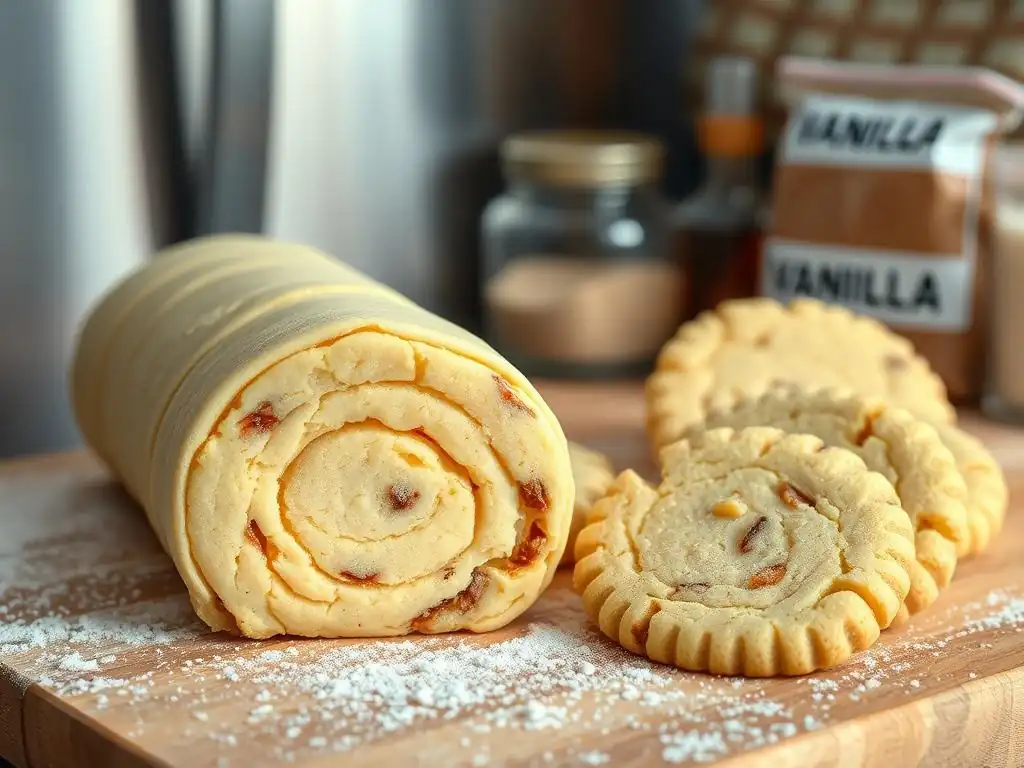
Delving into the science behind chilling slice and bake dough reveals why this step is so transformative. It's not magic, but rather a fascinating interplay of ingredients responding to temperature changes. Understanding these principles helps bakers appreciate the process and troubleshoot potential issues. The primary players in this scientific drama are fats, moisture, and time.
When you mix cookie dough, the ingredients are initially at room temperature, and the fats (like butter) are relatively soft. Chilling introduces a period where these components interact and stabilize in a cold environment, typically between 35°F and 40°F (about 2°C to 4°C) in a standard refrigerator. This controlled cooling allows for physical and chemical changes that are essential for the desired outcome of a slice and bake cookie.
How Chilling Affects Dough Texture and Flavor Development
Chilling significantly alters the texture of cookie dough primarily by firming up the fats. Soft, warm dough tends to spread rapidly when it hits the heat of the oven because the butter melts quickly. Chilled dough, however, contains solid fat particles. As the cookies bake, these solid fat pieces melt more slowly, creating steam pockets that contribute to leavening and structure, resulting in a thicker cookie with a chewier interior and crisper edge. This controlled melt is crucial for maintaining the shape of slice-and-bake cookies.
Furthermore, chilling allows time for the flour to fully hydrate with the liquid ingredients (like eggs and extracts). This hydration process helps to relax the gluten developed during mixing, which can lead to a more tender cookie. Simultaneously, the cold environment slows down any chemical reactions, such as those involving baking soda or powder, ensuring they activate optimally when exposed to the oven's heat. The extended contact time between ingredients also allows flavors to deepen and become more integrated, contributing to a richer taste profile than dough baked immediately.
The Role of Butter and Fat Solidification in Dough Chilling
Butter is a key ingredient in most slice and bake cookie recipes, and its state is paramount to the success of chilling slice and bake dough. At room temperature, butter is soft or melted, but when refrigerated, it solidifies. This solidification is vital because it provides structure to the dough log, making it firm enough to slice cleanly without distorting its shape. Imagine trying to slice a log of soft clay versus a log of cold, firm clay – the difference in precision is immense.
As the butter chills and hardens, it encases the sugar and flour particles. When the dough goes into the hot oven, the butter around the edges melts first, creating a barrier that prevents the cookie from spreading too quickly. The butter and other fats within the cookie then melt more gradually, contributing to the texture and browning. This slow, controlled melting process, enabled by initial chilling, is what gives slice-and-bake cookies their characteristic thickness and delightful chewiness.
Impact of Temperature and Time on Dough Consistency
Both temperature and time play critical roles when chilling slice and bake dough. The ideal temperature for chilling is typically just above freezing, around 35°F to 40°F (2°C to 4°C), which is the standard range for a refrigerator. Temperatures significantly higher won't firm the dough adequately, while temperatures too low risk freezing the dough solid (unless intentional, which we'll discuss later). Consistency in temperature is important; avoid placing the dough log in a spot where the temperature fluctuates wildly.
The duration of chilling is equally important. While many recipes specify a minimum chilling time, often 2-3 hours, this is usually the minimum needed for the dough to become sliceable. For optimal flavor development and texture, chilling for 24 to 72 hours can yield superior results.
During this extended period, the flavors deepen, and the dough becomes even more stable. However, chilling for too long (say, over a week in the fridge) can sometimes lead to dryness or off-flavors, so it's a balance. A common guideline is chilling for at least 2 hours, but ideally 24 hours for enhanced results.
Step-by-Step Guide to Chilling Slice and Bake Dough Perfectly
Mastering the process of chilling slice and bake dough is simple once you know the steps. It involves more than just tossing the mixed dough into the fridge; proper preparation and storage techniques are key to achieving that perfect, sliceable consistency. Follow these steps to ensure your dough is ready to bake into beautiful, uniform cookies.
From shaping the dough log to wrapping it correctly, each step contributes to how well the dough chills and maintains its form. Paying attention to these details will make slicing easier and lead to better baking results. It's a small investment of time upfront that pays dividends in the final cookie quality.
Preparing Your Slice and Bake Dough for Chilling
Once your cookie dough is mixed according to the recipe, the first step in chilling slice and bake dough is shaping it into the desired form, typically a log or logs. For standard round cookies, divide the dough into portions and roll each portion into a log about 1.5 to 2 inches (around 4-5 cm) in diameter. Aim for an even thickness along the entire log to ensure uniform cookie sizes when sliced. If you prefer square or rectangular cookies, press the dough into a loaf pan or a rectangular container lined with parchment paper.
Work quickly but gently during this shaping phase. Overworking the dough can develop too much gluten, leading to tough cookies. If the dough is very soft, you might find it helpful to slightly chill it for 15-20 minutes before attempting to roll the logs. This initial brief chill firms it up just enough to make handling easier without committing to the full chilling process yet. Ensure the ends of the log are neat, as these will be the first slices you cut.
Choosing the Right Container and Wrapping Techniques for Dough Storage
Proper wrapping is crucial when chilling slice and bake dough to prevent it from drying out or absorbing odors from the refrigerator. The most common method is to wrap the shaped dough log tightly in plastic wrap. Use at least two layers of plastic wrap, ensuring there are no gaps where air can reach the dough. Twist the ends of the plastic wrap like a candy wrapper to seal them securely against the dough log.
For added protection and to help the dough maintain its shape, you can then wrap the plastic-covered log in a layer of aluminum foil or place it inside a resealable plastic bag or an airtight container. This double layer of protection is particularly important if you plan on chilling the dough for more than a few hours or storing it near strong-smelling foods. If using a rectangular shape, ensure the container is airtight or cover it tightly with plastic wrap and then a lid or foil.
Recommended Chilling Timeframes for Optimal Slice and Bake Dough
The minimum recommended time for chilling slice and bake dough varies by recipe, but a general guideline is at least 2 to 3 hours. This duration is usually sufficient for the butter to solidify and the dough to become firm enough for clean slicing. You'll know it's ready for slicing when the log feels firm to the touch and doesn't easily indent when gently pressed.
For enhanced flavor and texture, chilling the dough for a longer period is often beneficial. Many bakers recommend chilling for 24 hours, and some recipes even suggest up to 72 hours. During these longer chilling times, the ingredients meld more thoroughly, leading to richer, more complex flavors. However, avoid chilling in the refrigerator for more than 4-5 days, as the dough can start to dry out or develop off-flavors. If you need to store it longer, freezing is a better option.
One common mistake when chilling slice and bake dough is not chilling it for long enough. This results in dough that is too soft, difficult to slice evenly, and cookies that spread too much during baking. Always adhere to the minimum time specified in the recipe, and if possible, extend the chilling period for better results. A log that feels slightly pliable instead of firm needs more time in the cold.
Another error is improper wrapping. If the dough isn't wrapped tightly or is left exposed, it will dry out, particularly on the surface. This dry exterior can lead to uneven baking and a less pleasant texture. Ensure a snug, airtight seal using plastic wrap and potentially a secondary layer of foil or a container. Also, avoid chilling dough that is too warm initially; if your kitchen is very hot, the butter might be too soft to roll properly, making effective chilling harder. Slightly cooling the dough before shaping can help.
How to Know When Your Slice and Bake Dough is Ready to Bake
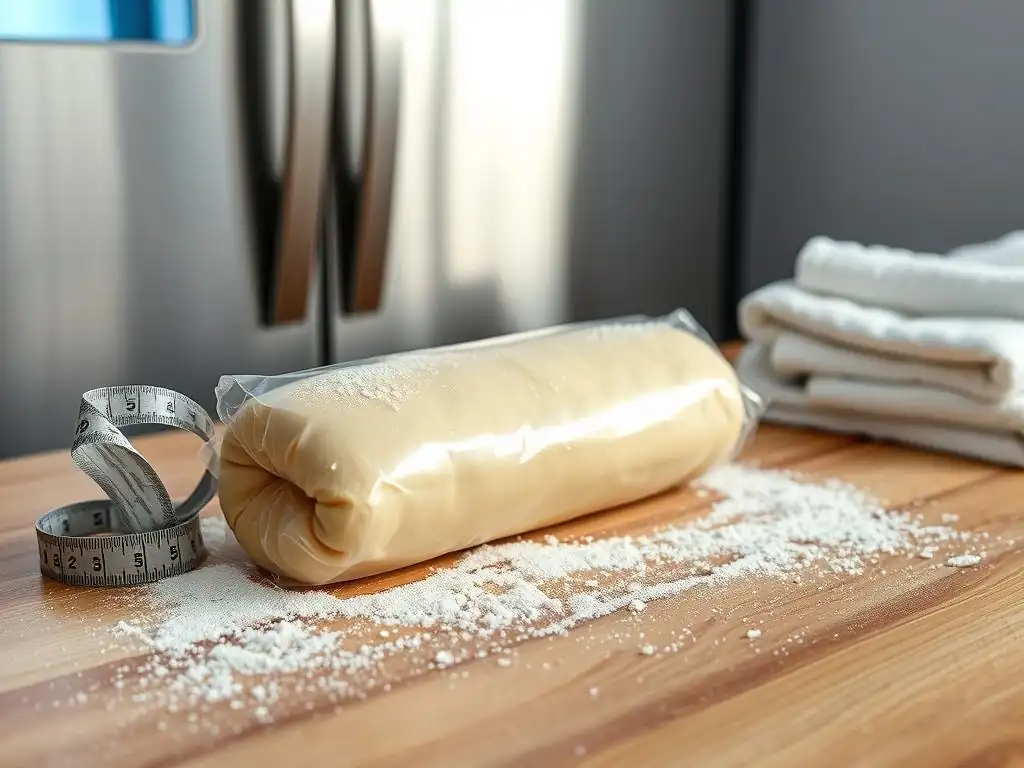
Knowing precisely when your chilling slice and bake dough has reached its optimal state is key to baking success. It’s not just about hitting a minimum time; the dough should exhibit certain characteristics that indicate it's perfectly firm and ready to be transformed into cookies. Learning to recognize these signs will help you achieve consistently great results every time you bake.
While a recipe's stated chilling time is a good starting point, factors like your refrigerator's temperature, the dough's initial temperature, and the specific ingredients used can influence the actual time needed. Developing an eye (and touch!) for ready dough is a valuable skill for any baker using the slice and bake method.
Signs of Perfectly Chilled Dough for Slicing and Baking
The most obvious sign that your chilling slice and bake dough is ready is its firmness. The log should feel solid and resistant to gentle pressure, similar to a firm stick of butter straight from the fridge. You should be able to pick up the log without it bending or deforming. If it still feels soft or squishy in places, it needs more chilling time.
Another indicator is how cleanly it slices. When you attempt to cut a slice with a sharp knife, the dough should cut through smoothly, leaving a clean, distinct edge without crumbling excessively or sticking to the knife blade. A ragged or sticky slice suggests the dough isn't quite firm enough. The color and texture should also appear uniform throughout the log, without any overly soft or hard spots.
Testing Dough Firmness and Handling After Chilling
To test the firmness of your chilling slice and bake dough, gently press on the log with your finger. It should feel hard and cold, with minimal give. If your finger leaves a significant indentation, the dough requires more time in the refrigerator. You can also try carefully slicing off the very end of the log; if the slice holds its shape and the cut is clean, the dough is likely ready.
Once the dough is properly chilled and firm, handle it as little as possible before slicing. Excessive handling can warm the dough, causing the butter to soften prematurely, which will affect the slicing and baking process. Keep the remaining log chilled while you slice and bake batches, returning it to the refrigerator between uses if needed, especially if you are baking multiple trays over time.
Adjusting Chilling Time Based on Recipe Variations and Environmental Factors
The ideal chilling time for slice and bake dough can vary based on the specific recipe ingredients. Doughs with a higher fat content (like shortbread) might firm up faster than those with more liquid. Recipes using alternative flours or sweeteners might also behave differently. Always check the recipe's recommendation first, but be prepared to adjust based on the dough's feel.
Environmental factors, particularly the temperature of your refrigerator and kitchen, play a significant role. A colder fridge will chill the dough faster than a warmer one. If your kitchen is very warm when you mix the dough, it will take longer to cool down in the fridge. Pay attention to the dough's firmness rather than relying solely on the clock, especially if you suspect your conditions differ from standard. If after the recommended time the dough isn't firm, give it another hour or two and re-test.
Troubleshooting Common Issues in Chilling Slice and Bake Dough
Even with careful preparation, you might encounter a few bumps in the road when chilling slice and bake dough. Issues like dough that's too soft, cookies that spread too much, or even moisture problems can frustrate beginner bakers. Fortunately, most common problems related to chilling have straightforward solutions or explanations.
Understanding why these issues occur is the first step to fixing them. Often, they relate back to the core principles of temperature, time, and proper handling discussed earlier. Don't get discouraged; troubleshooting is a normal part of the baking learning curve!
What to Do if Dough is Too Soft or Too Hard After Chilling
If your slice and bake dough is too soft after the recommended chilling time, the most likely culprit is insufficient chilling. Ensure your refrigerator is set to the correct temperature range (35-40°F or 2-4°C). Return the dough to the fridge and allow it to chill for several more hours, or even overnight. Make sure it's wrapped tightly to prevent drying while it continues to firm up. If the dough was very warm when you started, it will naturally take longer to chill through to the center.
Conversely, if the dough is too hard – perhaps rock solid – it might be over-chilled or even partially frozen. If it's just very hard but not frozen, let it sit at room temperature for 10-15 minutes before attempting to slice. This brief period will allow the outer layer to soften slightly, making it easier to cut without crumbling. If it's frozen solid, you'll need to follow thawing procedures, which typically involve transferring it to the refrigerator for several hours until it's firm but sliceable.
Fixing Dough That Spreads Too Much or Not Enough When Baked
Excessive spreading when baking slice and bake cookies is a classic sign that the dough was not adequately chilled before slicing. Soft, warm dough melts too quickly in the oven. The solution is to ensure your dough is properly firm before slicing and baking. If you notice excessive spreading on the first batch, return the remaining dough log to the refrigerator or even pop it in the freezer for 15-20 minutes to firm it up further before baking the rest.
If the cookies aren't spreading enough, resulting in thick, puck-like cookies, several factors could be at play, but it's less commonly a chilling issue unless the dough was frozen and not properly thawed to a sliceable, firm consistency. More often, insufficient spread is due to using too much flour in the recipe, the dough being too cold (if frozen or chilled for an extended period), or oven temperature issues.
Ensure your oven is accurately calibrated. If the dough was very cold, letting the sliced cookies sit at room temperature for 5-10 minutes before baking can encourage slight softening and better spread.
Avoiding Ice Crystals and Moisture Problems During Dough Chilling
Ice crystals forming on your chilling slice and bake dough usually indicate that moisture is escaping the dough and freezing on the surface, or that the dough has been exposed to freezing temperatures unintentionally. This is typically caused by improper wrapping. If the dough log isn't sealed tightly with plastic wrap, moisture will evaporate and condense as ice.
To avoid this, always wrap your dough logs snugly and completely in plastic wrap, ensuring no air pockets. Adding a second layer of protection, like foil or an airtight container, further helps prevent moisture loss and ice formation, especially for longer chilling periods. If you find ice crystals, gently brush them off before slicing. However, significant ice formation can impact texture, making proper wrapping the best preventative measure. Ensure your refrigerator isn't set too cold, close to freezing, unless you intend to freeze the dough.
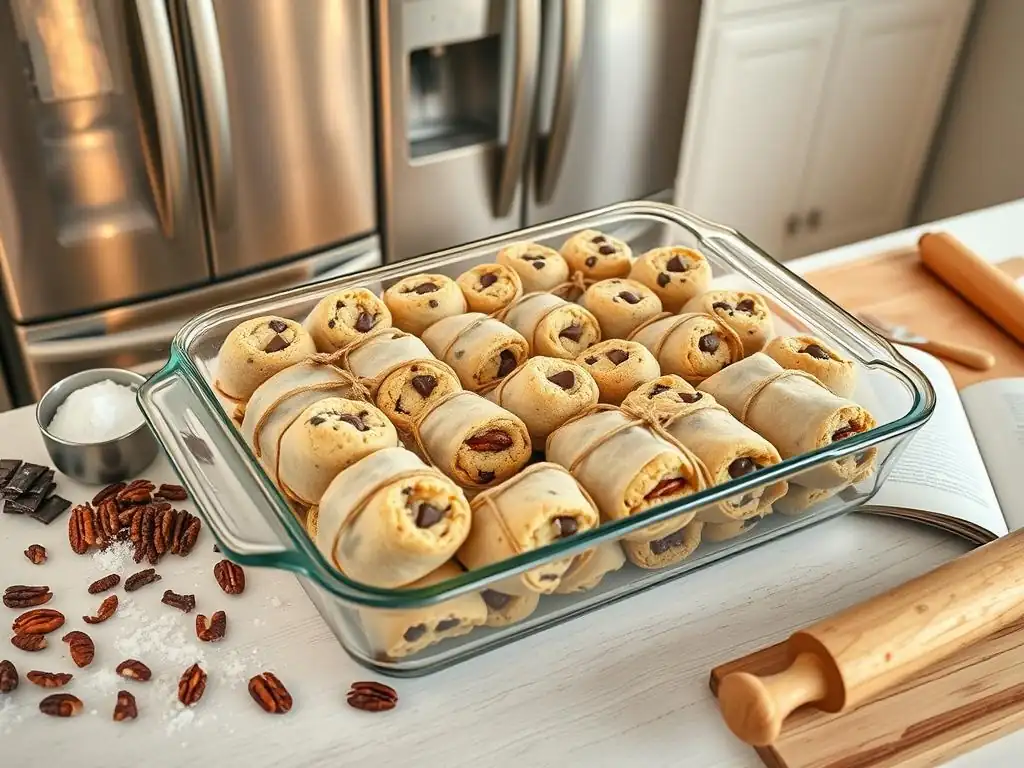
Once you've mastered the basics of chilling slice and bake dough, you might want to explore techniques that offer even greater flexibility and potential improvements. Thinking beyond the standard 24-hour fridge chill can open up new possibilities for make-ahead baking and even subtle flavor enhancements.
These advanced tips involve leveraging colder temperatures and incorporating flavor elements that benefit from extended rest periods. They are particularly useful if you like to prepare dough well in advance or want to experiment with deeper flavor profiles in your cookies.
Using Freezing Techniques to Extend Dough Shelf Life
One of the biggest advantages of slice and bake dough is its suitability for freezing, which drastically extends its shelf life. After shaping and properly chilling the dough log in the refrigerator until firm (at least 2-3 hours), you can transfer it to the freezer. For freezing, ensure the dough is wrapped exceptionally well – start with a tight layer of plastic wrap, then wrap securely in aluminum foil, and finally, place the foil-wrapped log in a freezer-safe bag or container. This triple protection prevents freezer burn.
Frozen slice and bake dough can typically be stored for up to 3-4 months. This allows you to have homemade cookie dough ready to slice and bake on a whim for unexpected guests or late-night cravings. Remember to label the package with the type of cookie and the date it was frozen.
When you're ready to bake from frozen, you can often slice the log directly from the freezer (it will be very firm, so use a sturdy, sharp knife) and place the slices on a baking sheet, adding an extra minute or two to the baking time. Alternatively, you can thaw the log in the refrigerator overnight until it's firm but sliceable.
How to Incorporate Flavor Enhancers During the Chilling Stage
The extended chilling period for slice and bake dough provides an excellent opportunity to let certain flavors develop and intensify. Ingredients like citrus zest, spices (cinnamon, nutmeg, ginger), extracts (vanilla, almond), and even finely chopped herbs (like rosemary in a savory cookie) benefit greatly from resting in the dough. As the dough chills, the oils from zests and spices infuse more deeply into the fats and liquids, resulting in a more integrated and potent flavor in the final cookie.
Consider adding a bit more extract or zest than you might for a dough baked immediately, as the flavors will mature during chilling. If using spices, ensure they are fresh for maximum impact. Some bakers like to add a pinch of ground spices like nutmeg or cardamom to sugar cookie dough before chilling to give it an extra layer of warmth that becomes more prominent after a day or two in the fridge. Just ensure any additions are finely distributed throughout the dough during mixing.
Best Practices for Thawing and Handling Frozen Slice and Bake Dough
When retrieving frozen slice and bake dough, the best practice for thawing is typically to transfer the well-wrapped log from the freezer to the refrigerator. Allow it to thaw slowly in the fridge for at least 12-24 hours, depending on the thickness of the log. The goal is to get it back to that perfectly firm-but-sliceable consistency you achieve with standard chilling, around 35-40°F (2-4°C). Avoid thawing at room temperature, as this can cause the exterior to become too soft while the interior remains frozen, leading to uneven texture and difficulty slicing.
Once thawed in the refrigerator, handle the dough log gently. If it's still too hard to slice easily, let it sit at room temperature for just 5-10 minutes. If it becomes too soft while you are slicing, pop the log back into the fridge for a few minutes to re-firm. Slice the dough using a sharp, un-serrated knife for the cleanest cuts. Bake the sliced cookies according to the recipe directions for chilled dough, adjusting the time slightly if baking directly from a very cold state.
Properly chilling slice and bake dough is arguably the most critical step in this convenient baking method. It's the secret handshake between preparation and perfection, ensuring that your cookies not only hold their shape beautifully but also boast the best possible texture and flavor. While it requires patience, the time spent chilling is an investment in superior cookie quality.
By understanding how chilling affects ingredients, especially the solidification of fats and the development of flavors, you gain control over your baking results. From the initial shaping and airtight wrapping to allowing sufficient time in the cold, each part of the chilling process contributes significantly to the final delicious outcome.
Recap of Key Chilling Techniques for Slice and Bake Dough
Let's quickly recap the essential techniques for successful chilling slice and bake dough:
- Shape the dough into an even log or rectangle after mixing.
- Wrap the dough tightly in at least two layers of plastic wrap, sealing the ends securely.
- For longer chilling or freezing, add a layer of foil or place in an airtight container.
- Chill in the refrigerator for a minimum of 2-3 hours, but ideally 24-72 hours for best flavor and texture.
- Ensure the dough is firm and sliceable before cutting.
- If freezing, wrap extra securely and store for up to 3-4 months. Thaw in the refrigerator before slicing.
- Troubleshoot issues like soft dough by extending chilling time and ensuring proper wrapping.
Encouragement for Beginners to Experiment and Perfect Their Chilling Process
Don't be intimidated by the chilling requirement; embrace it as an essential step that elevates your baking. As a beginner, practicing the technique of chilling slice and bake dough will build your confidence and skill. Try baking a few cookies after the minimum chilling time, then bake more from the same batch after 24 hours, and notice the difference in spread, texture, and flavor. This hands-on comparison is a fantastic way to learn.
Every oven and refrigerator is slightly different, and even kitchen humidity can play a small role. Be patient with yourself as you learn how your dough behaves in your environment. With a little practice and attention to the signs of properly chilled dough, you'll consistently bake perfect slice and bake cookies that are a joy to share (or keep all to yourself!). Happy baking!
Frequently Asked Questions
What is the main reason for chilling slice and bake dough?
Chilling slice and bake dough is primarily done to firm up the butter and other fats. This prevents the cookies from spreading too thin during baking and helps maintain their desired shape and texture.
How long should I typically chill slice and bake dough?
The ideal chilling time varies, but generally, at least 30 minutes is recommended. However, for optimal results, chilling for 1-2 hours often produces a better outcome.
Can I chill slice and bake dough overnight?
Yes, you can chill slice and bake dough overnight. In fact, chilling the dough overnight allows the flavors to meld together and the dough to become even more firm, which is usually ideal.
What happens if I don't chill slice and bake dough?
If you skip chilling, the butter in the dough will melt too quickly in the oven. This will result in cookies that spread excessively, becoming thin, flat, and potentially lacking the desired chewy or crispy texture.
How do I know if my slice and bake dough is chilled enough?
The dough should be firm to the touch but still sliceable. If it's too soft, it needs more chilling; if it's rock-hard, let it sit at room temperature for a few minutes until it's slightly pliable.
Final Reflection: The Art of the Perfectly Chilled Dough
The seemingly simple act of chilling slice-and-bake dough is, in reality, the cornerstone of achieving perfectly textured, evenly baked cookies. Mastering this technique elevates your baking from good to exceptional, transforming ordinary cookies into delightful, melt-in-your-mouth treats. The subtle nuances of chilling time and temperature directly impact the final product, proving that even the smallest details matter in the kitchen.
The influence of this seemingly minor step extends far beyond the individual cookie. It speaks to a broader appreciation for precision and patience in cooking, a mindful approach that elevates the entire baking process. The difference between ordinary and extraordinary is that little extra.
This quote, while often applied to many aspects of life, perfectly encapsulates the impact of proper chilling on your slice-and-bake cookies. It's a testament to the power of attention to detail and the rewarding results that come from taking the time to do things right.
Now, I invite you to consider your own baking practices. Think about the times you've rushed the chilling process, perhaps sacrificing texture for speed. Remember the frustration of unevenly baked cookies or a dough that spread too thin. The next time you embark on the delightful task of making slice-and-bake cookies, remember the lessons learned here. Take your time, embrace the process, and savor the reward of perfectly chilled dough, resulting in cookies that are truly extraordinary. Let the art of chilling transform your baking experience.
Unlock Your Inner Pastry Chef: Perfect Slice-and-Bake Dough Every Time!
Thanks for taking the time to explore the world of perfectly chilled slice-and-bake dough! We hope you gained valuable insights and confidence in your baking abilities. Now it's time to put your new knowledge into practice.
Here's what you can do next:
- Bake your dream cookies: Use this newfound expertise to whip up a batch of your favorite slice-and-bake cookies. Remember the key is that perfectly chilled dough!
- Experiment with flavors: Try adding unique spices or extracts to your dough to create your signature cookie flavor profile. What unexpected combination will you discover?
- Share your baking triumphs (or even your learning process!): Post a picture of your cookies on social media and tag us! Let's inspire each other to bake amazing cookies together.
Ready to chill your dough and create cookie magic? What unique flavor combination will you experiment with first?